
A couple weeks ago a friend of mine gave me a chicken feed bag, thinking I might want to do something with it. So I looked around on the internet and, apparently, making tote bags from animal feed bags is a thing.
And because I don’t do anything half-assed, I put out the call on Facebook that I was looking for empty feed bags and my friends really came through in droves. I think I must have at least 40 feed bags in my garage — horses, chickens, pigs, goats, sheep, and more chickens and more horses. Some really fun and colorful designs.
A Facebook friend even mailed me some all the way from Maryland! And tonight I decided that I was ready to dig in and make a bag. And I actually ended up making two!

The feed bags are made from a synthetic plastic coated fabric that has strong thread running through it. So it’s really strong, but it’s a little stiff. I knew that it would be very different than sewing on quilting cotton.
There are a lot of tutorials out there for making these totes. I kind of got ideas from several different ones and applied them to these bags.
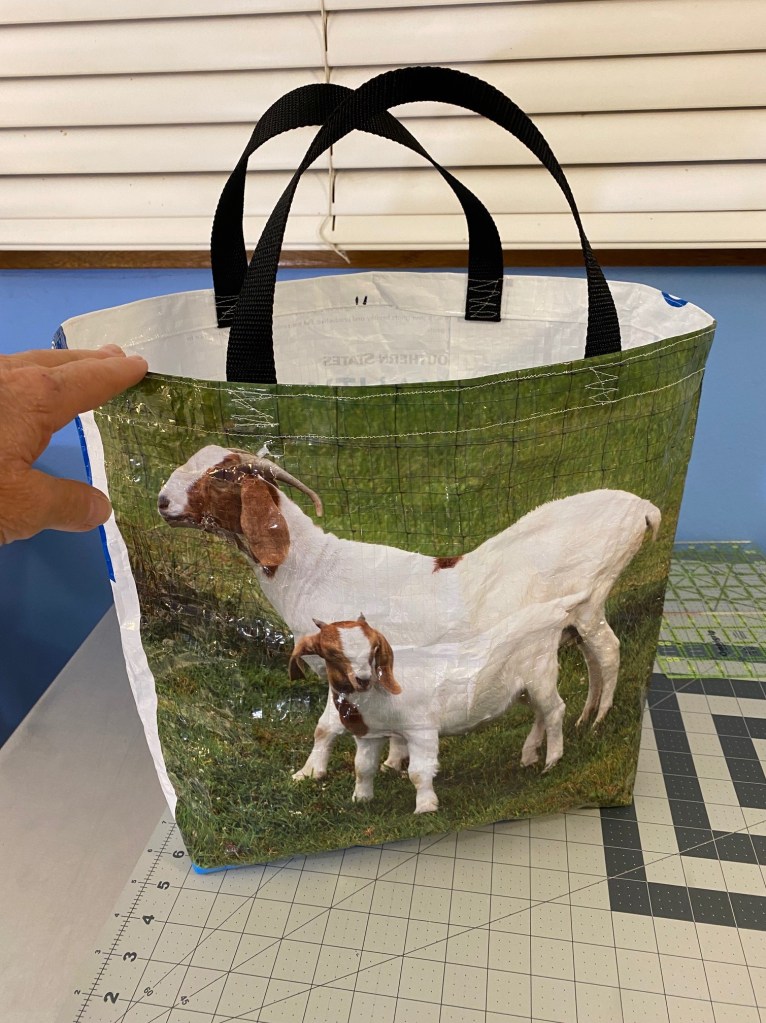
I made the sheep bag first and learned a few things that made the chicken bag so much easier and quicker.

First, on the sheep bag, after trimming the bag square, I sewed the bottom seam first, cut squares out of the corners to make gussets, and then sewed the gussets. Once this was all done I finished the top.
On the second bag I trimmed the bag top and bottom square, and then finished the top and added the handles first.

This meant that I was doing all of this manipulation of the bag when it was a tube.

And that made it all much easier to manipulate. The top on the chicken bag was so much easier and quicker to sew and the finish was much nicer.
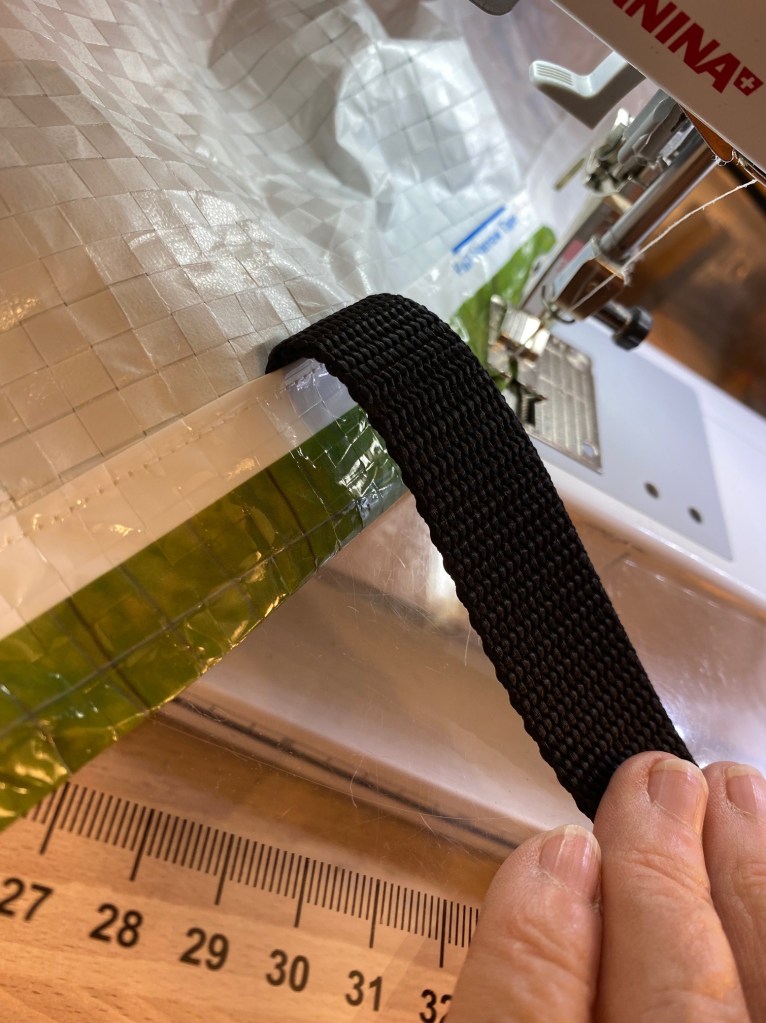
To finish the top I turned down about one inch at the top of the bag and then turned it over again. Then I marked where I wanted the handles, slipped the handle ends up under the fold and clipped them in place.

Then I ran a line of stitching along the bottom edge of the folded piece, enclosing the handle ends in the fold.
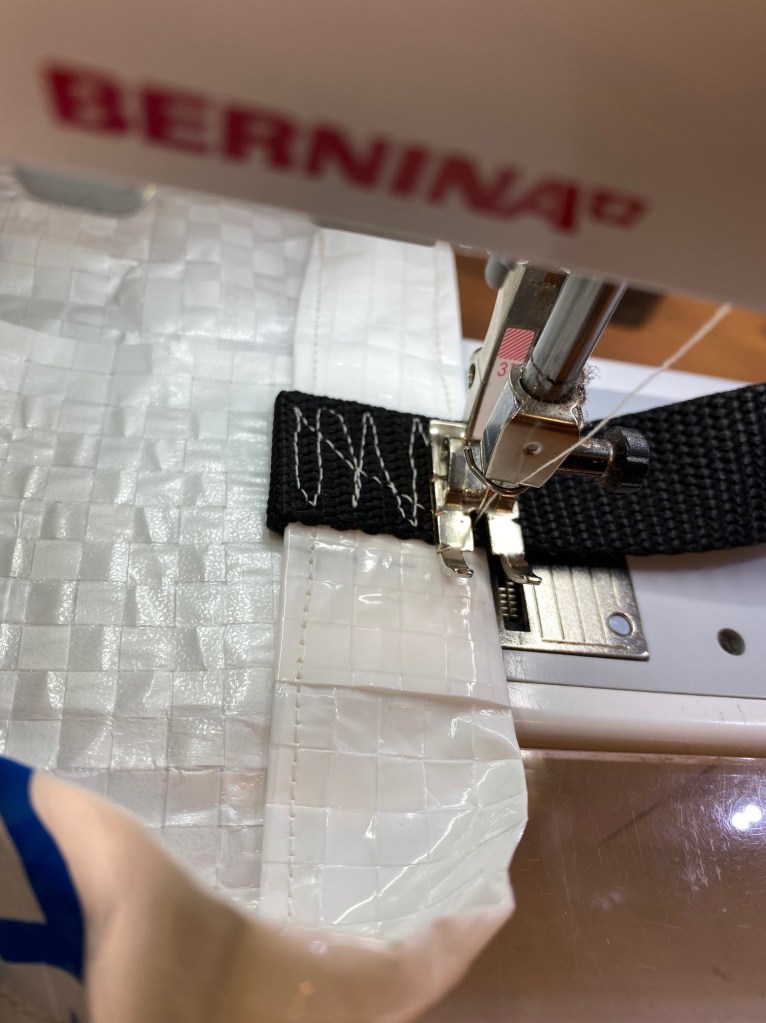
Then I ran another line of stitching about 1/8 inch from the very top of the bag, folded the handles up to catch them in this line of stitching and adding some reinforcing stitching across the handles where they overlapped the folded edge.
Here’s the reinforcing stitching.
To finish the gussets on the second bag I simply did it with the folding and flattening method and then stitched a line across the folded corner.

I did two lines of stitching to reinforce the gussets and then trimmed away the excess fabric.

The gussets were faster and easier with this method.
I also made the gussets on the fist bag a little do deep so I made them an inch smaller on the second bag and the proportions are better.

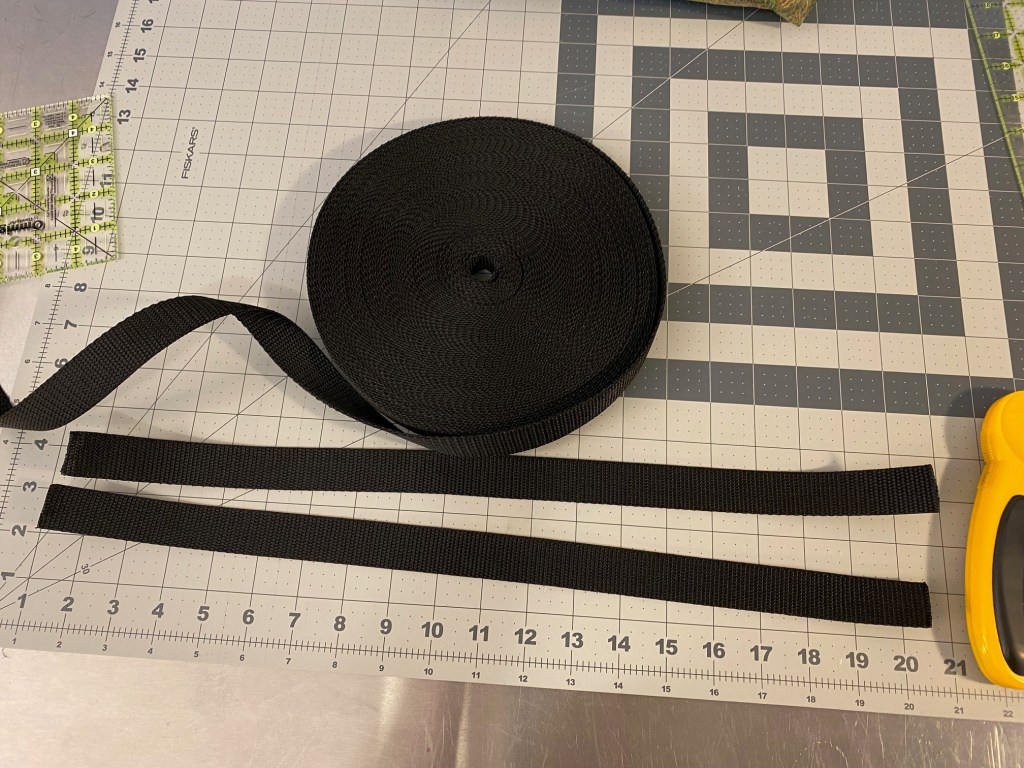
Most of the tutorials I looked at made the handles from strips of the bag fabric. But I decided to purchase some nylon webbing instead. I’m glad I didn’t spend time making the handles. I like the feel of the nylon handles much better. And they took a lot less time.
I’m guessing the second bag took half the time of the first bag. I just love figuring out quicker and more efficient ways to make things.
Here’s more photos of these fun little bags. Even the backs are fun!


A couple of the tutorials show people lining the bags, but I think it’s overkill for the purpose. I see these as very utilitarian… like for groceries or packing stuff to toss in the trunk of the car for the beach.
Big thanks to Judy Jaudon for sending me these fun feed bags!
I’ve gotten a few photos of Frankenbags in the last week to share with you.
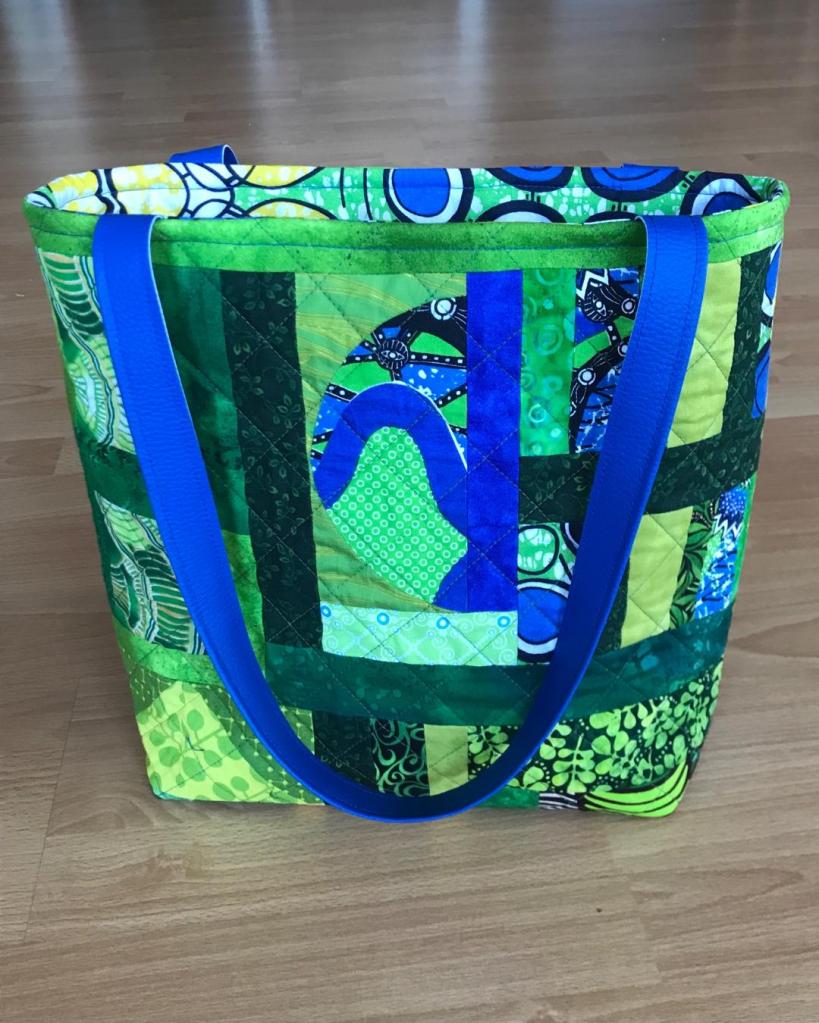
First up is this bag from Sabine Müller-Rückriem from Germany. I just love these bright blues and greens together. She’s also included some cool curved piecing. And I love the peek at what looks like a really good lining!
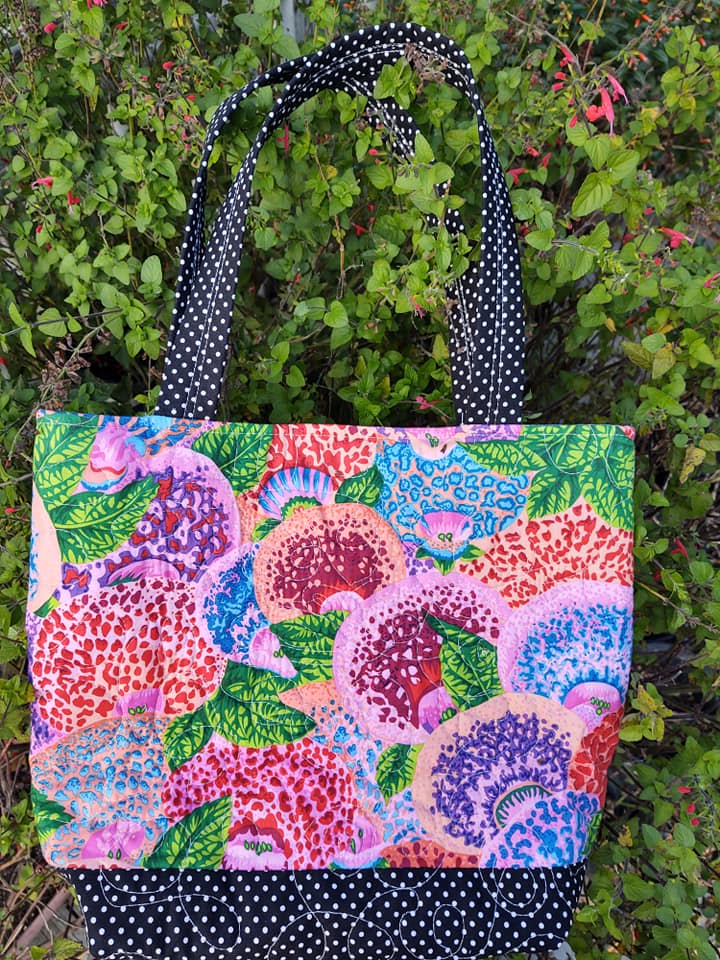
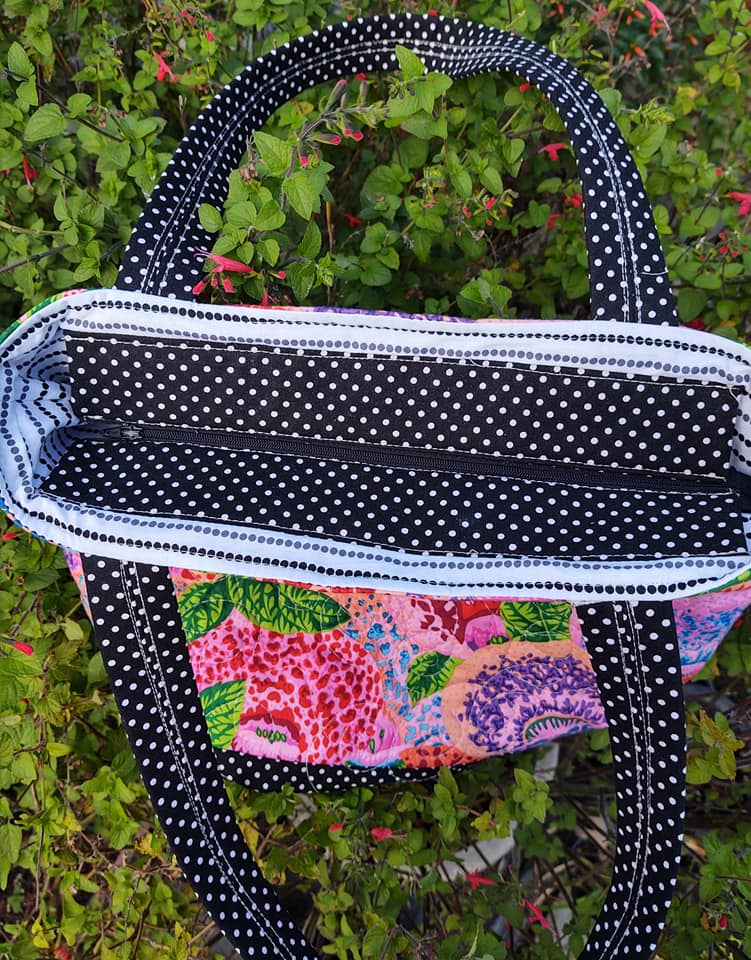
Next up is this bag made by Anita Goodson. She made her bag from a solid piece of fabric with a contrasting fabric on the bottom. And I love that she added a zipper placket. The inside of this bag with all the black and white is so cool! Love it!

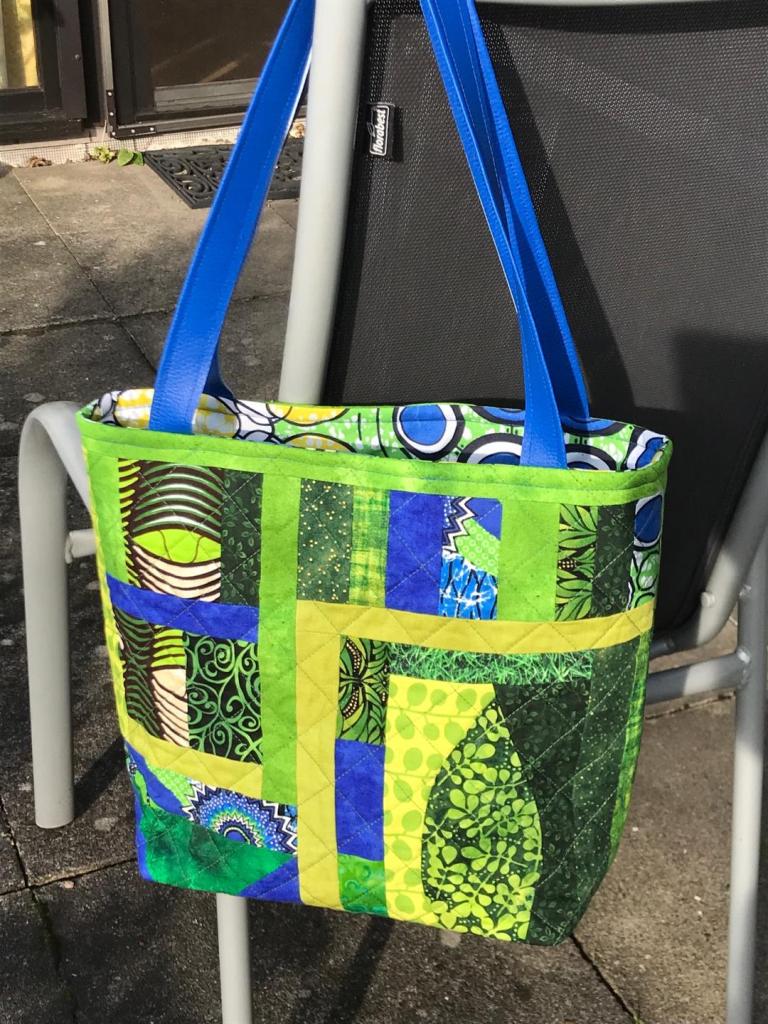
Last up tonight is this bag made by Cookie Little. I love her saturated blues with the pops of green and the sunbursts are always so good! And she used one of my favorite fabrics for her lining! The last photo shows the key fob she added. It’s a great way to secure your wallet or keys.


Thanks to everyone who sent photos!

Great idea!! Just FYI- those are goats not sheep. 🤣
LikeLiked by 1 person
Hahaha! Of course they are!!! I have a sheep bag that I want to make. I must have had that on my mind!
Anne
LikeLike
I’ve made a few feed bag totes and they are quite sturdy. I learned it is better if I thoroughly wash them ASAP with soapy water to avoid critters. Dog food bags can be greasy and grain bags can attract mice and bugs. Thank you for posting such wonderful instructions and inspirations.
LikeLiked by 1 person
Someone recommended to me that I cut off the bottom of the bags, turn them inside out and run them through the washing machine. I was going to try that. Some of them I got from friends are quite dirty.
Anne
LikeLike
Cute and purposeful idea with the feedbags! I think it is so fun how your always on to some new and different project ! Your a great inspiration for others! Oh, and I have confused goats for sheep when I know better , they are all cute ! Niki
LikeLiked by 1 person
Hahaha! these are clearly goats! I was thinking of a sheep bag that I had looked at earlier in the evening… it’s not ready to used because it’s dirty. I do have a fascination with sheep!
I get bored if I don’t do new things. I’ve been in a bit of a creative slump lately. I needed something simple and easy to jump start me!!! This was the perfect project.
Anne
LikeLike
Oh my gosh – these feed bag totes are brilliant! And the frankenbags … well, this post was just full of smiles for me. Now I can’t wait for the end of the semester to get some sewing time back.
LikeLiked by 1 person
These tote bags are really fun! I hope you get some time to sew soon!
Anne
LikeLike
Those really turned out cute and useful! I assume you washed them with sudsy water/sponge or something….no smell? Just curious! Just lovely!
LikeLike
All the bags I’ve used so far came to me cleaned. I have some really dirty ones in the garage. Someone suggested that you cut the bottoms out of the bags, turn them inside out and run them through the washing machine. That’s probably what I’m going to do.
Some of the feed is dry and dusty, and some is more sticky. So some bags need more cleaning than others.
Anne
LikeLike
Fantastic idea on the washing machine….didn’t think of that! Thank you!! Now I need to find some of these bags! 🙂
LikeLiked by 1 person
I hope you have as good of luck finding bags as I did! I have so many, and sources for a lot more!
Anne
LikeLike
I love the totes from the feed bags. You did a Marvelous job.. too fun..
And the ladies bags are beautiful.. enjoying your post today from Arizona.. 🌈🌻
LikeLiked by 1 person
Thanks! I’m having fun with these upcycle bags!
LikeLike
What size needle are you using and what thread? Do you need anything stronger than what you use on cottons? I’m using grocery bags that I purchased at Food Lion many moons ago as I can’t stand plastic bags. More handmade grocery bags are in my future!
LikeLiked by 1 person
I’m using a denim needle and some Gutterman cotton/poly thread. It’s working well. The bags aren’t terribly thick and the needle seems to go through easily. They can feed oddly, so you need to sort of help it through.
Anne
LikeLike
The bags look great!
LikeLiked by 2 people
Thanks! They’re pretty fun to make!
Anne
LikeLike
Girl, I have to tell you that those are goats, not sheep. It’s a rookie city-girl mistake, but I believe my ranch girl creds are correct. I suppose they could be some fancy kind of sheep, but I’m pretty sure they’re goats.
Marjorie.
LikeLiked by 1 person
Hahaha! I spend time with sheep on a regular basis! AND, I grew up in the country and spend a good deal of time in the country now. You’d think I could identify a goat!
In reality, I have a feed bag with a sheep on it and I’ve been thinking about that bag. I think I had sheep on the brain!
Anne
LikeLiked by 1 person
I really enjoy your posts. The best of all. I discovered them just in time to ward off complete lockdown sanity breakdown!! Thanks for all your interesting stuff. Love the doggies too. They are so smart! My best to you, Linda
>
LikeLiked by 1 person
I’m glad you found us! My sewing and creating has helped keep me sane during the pandemic. I’ve been really productive and have made some of my best stuff ever. I don’t know what I would do with myself without all my fabric fun!
Thanks for reading!
Anne
LikeLike
I’ve tried sewing the bags but stitches won’t hold. Uneven and lose. I notice you are using a Bernina. I tried my bernina and my Babyloc. Any advice you can give me is appreciated. Tx, Genie
LikeLiked by 1 person
It’s been so long since I’ve made these it’s hard to remember. I do recall others saying that sewing on the plastic makes the stitches uneven. It may have something to do with how the plastic feeds through your machine. Might be too slick. I wonder if you could adjust your foot pressure to make it work better.
My stitches are a little uneven but they hold. I have a bag that I’ve used for a couple years and it’s holding up nicely.
Sorry I’m not more help on this.
Anne
LikeLike
Thank you! I’ll give it a try. I love your posts, keep them coming!
LikeLike
Thank you. I haven’t thought of that. I’ll give it a try.
LikeLiked by 1 person
Just found this post and enjoyed it so much . Thank you!
I did make a couple of these feed bags but did not like making the handles. too much work and, like you, I would like to use the nylon webbing. I now have 2 or 3 rolls of webbing I can’t use, some too thin and one too thick. Can you tell me what you used and where you got it? I would greatly appreciate it, as I now have about 10 dog and cat food bags in the closet and need to get rid of them! I have been making Franken bags too, but they are not good enough to post, unfortunately. I am going to keep trying, though. So love your posts, Anne.
LikeLike
This is what I used. It has worked well for me.https://www.amazon.com/gp/product/B01KTVEDGG/ref=ppx_yo_dt_b_search_asin_title?ie=UTF8&th=1&psc=1
Thanks for reading!
Anne
LikeLike