Day Four of a Four-Day Weekend

I really dislike the Sunday of a four-day weekend. There’s something a little melancholy to me about the last day before heading back to work. The more the day passes, the more I feel it. So I’m savoring my last few hours before it’s back to the grind.

I wasn’t terribly productive in my sewing room this weekend. I was VERY productive today outside my sewing room.

After a leisurely breakfast I took the boys out for a nice four-mile walk. It was good for all of us!

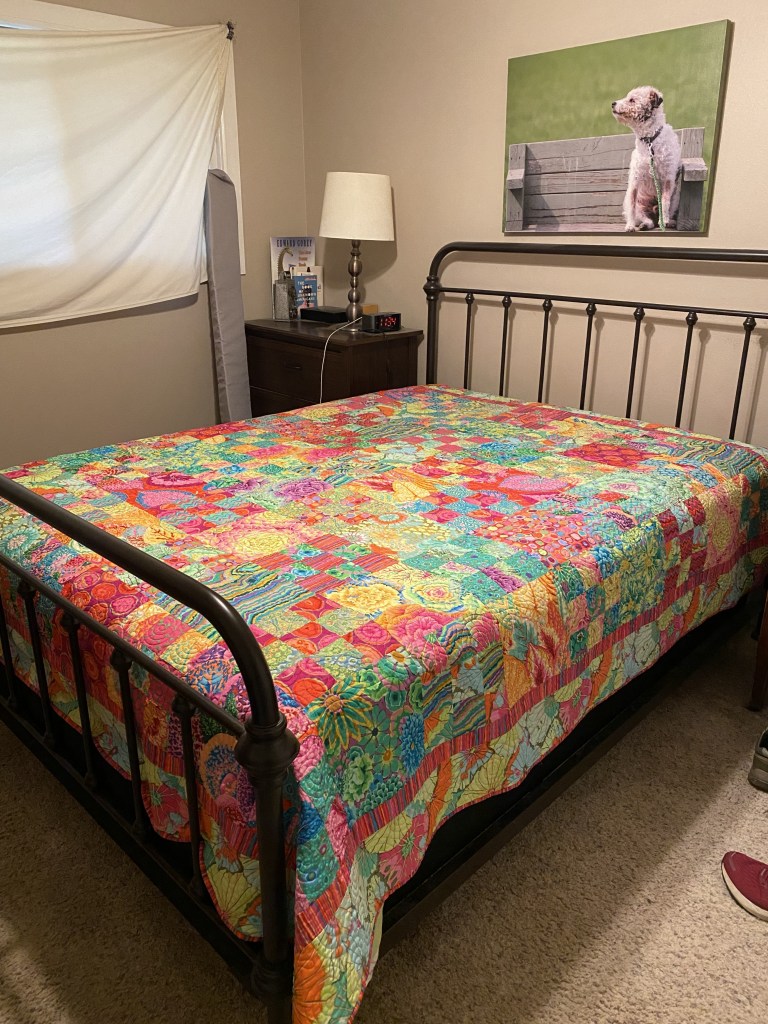
When I got home I started stripping beds and washing bedding. I washed four loads of bedding. I washed the sheets on my bed and on the guest bed. Then I had an extra set of sheets from the guest room to wash after having two sets of company a couple weeks ago. The last load was a new set of flannel sheets I bought last spring that I wanted to put on my bed.

Here’s the new sheets. They are Christmas dogs!!!

I love climbing into a bed at night that has fresh sheets on it! And flannel sheets when it’s cold are extra special. I might actually have to go to bed early tonight!

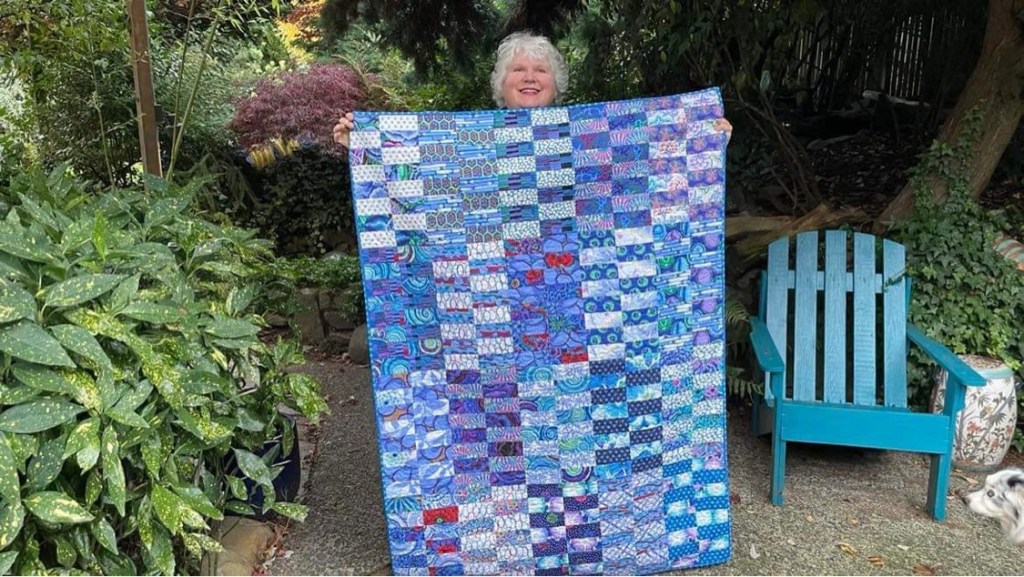
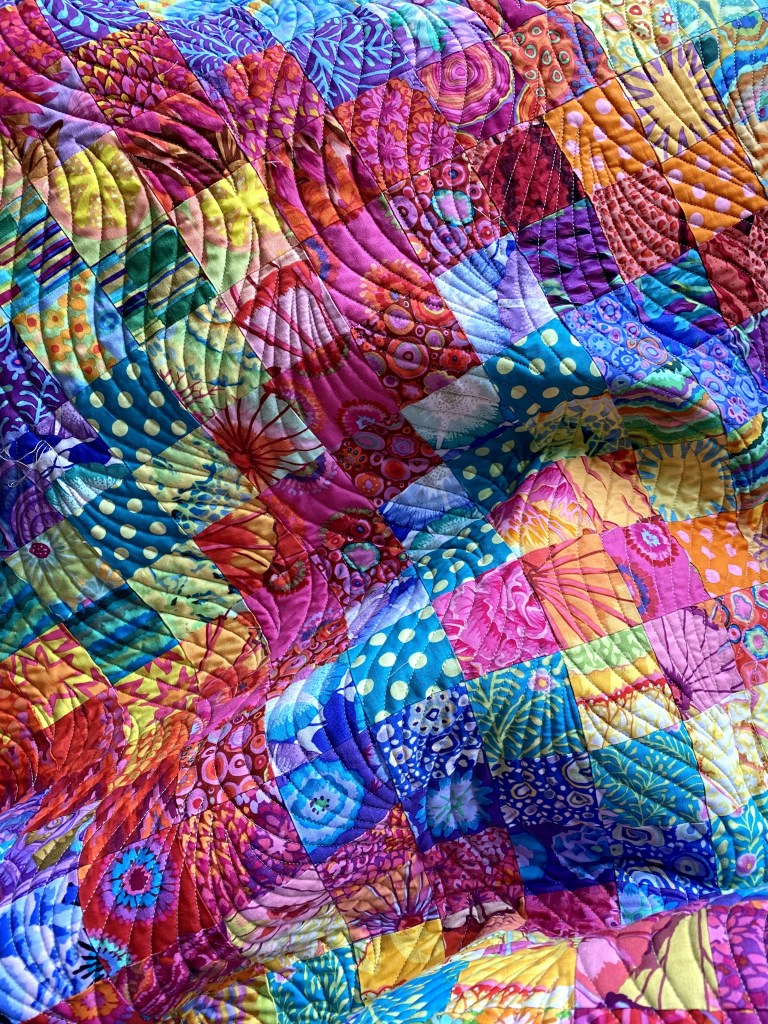
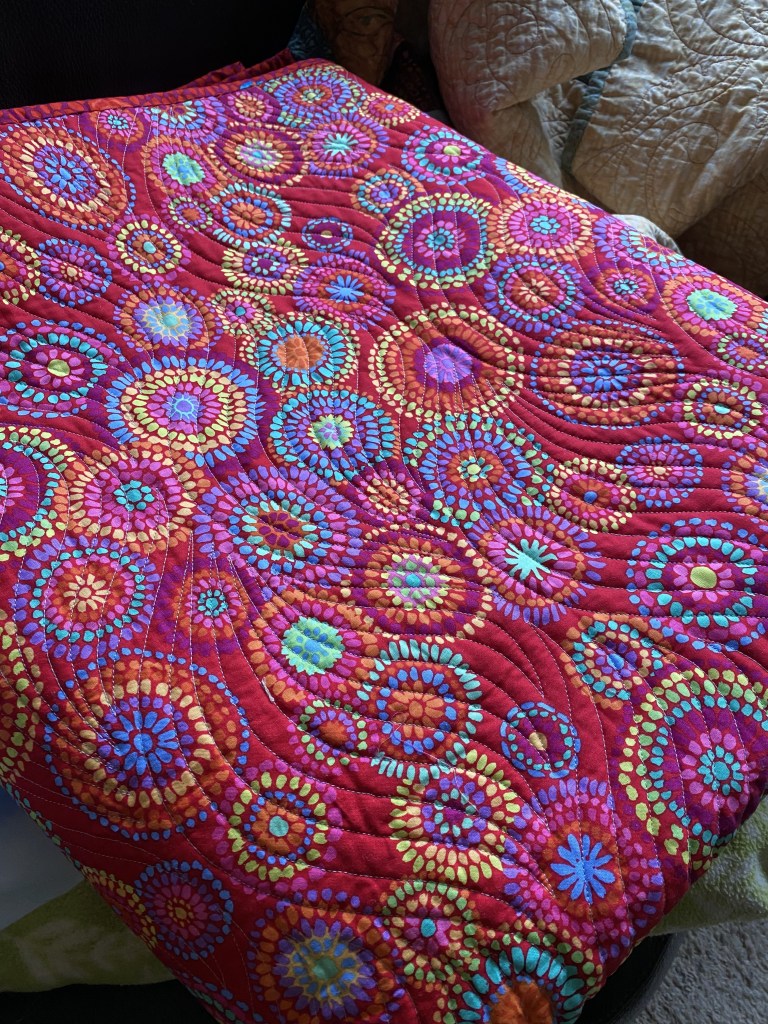
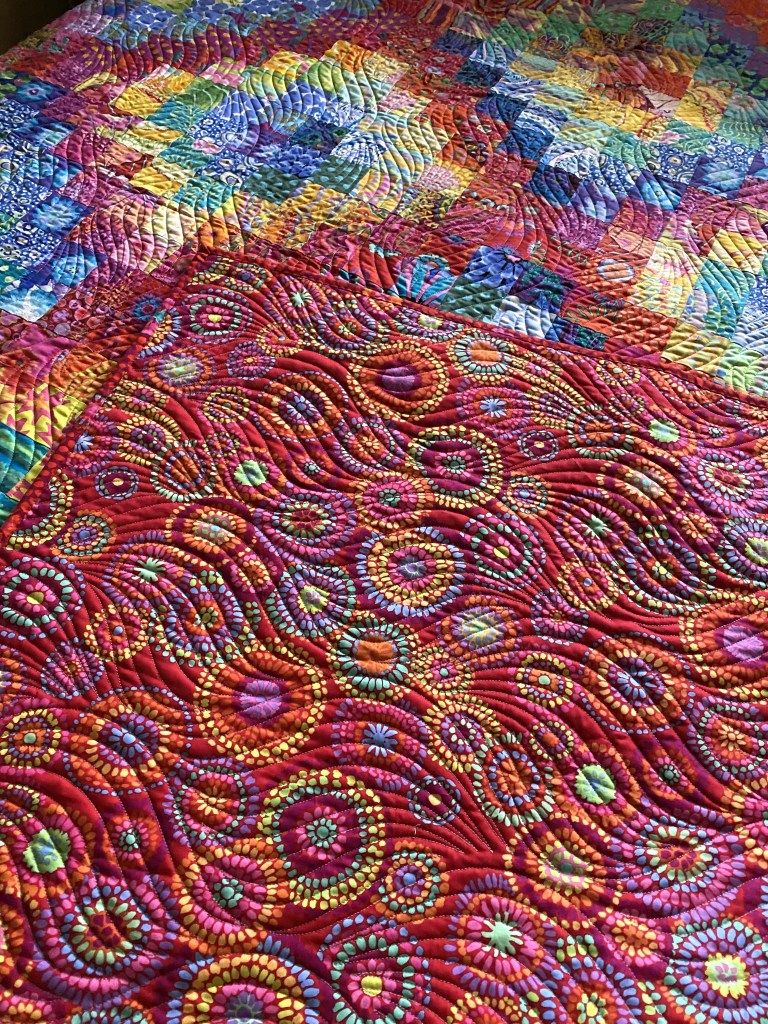
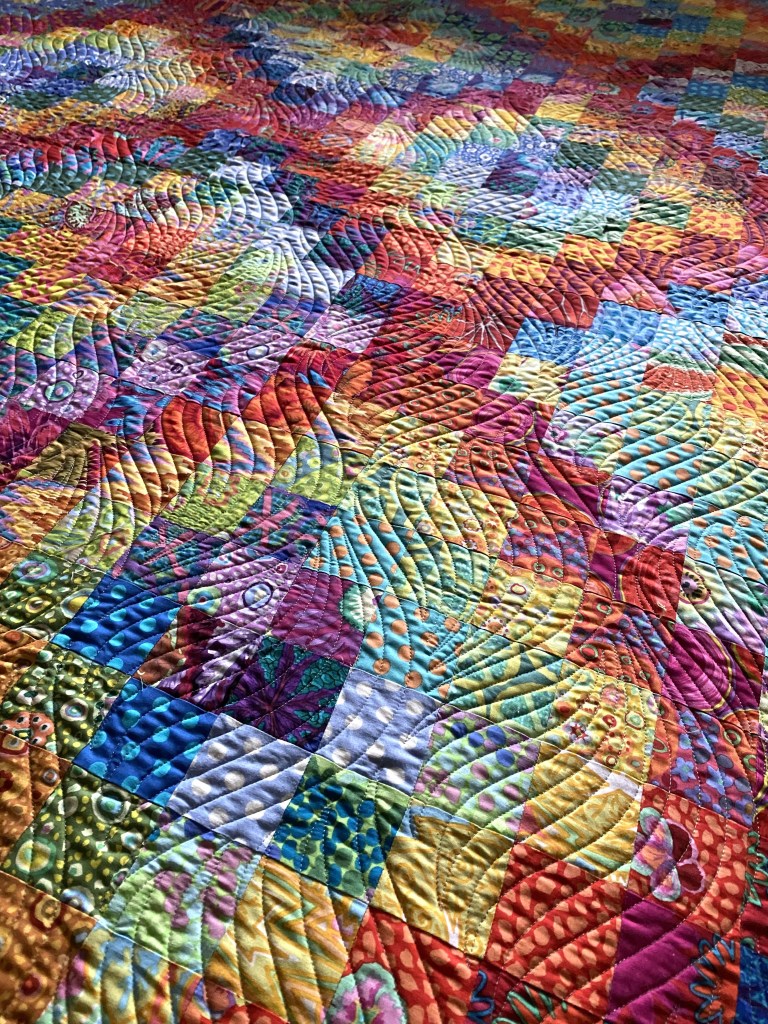
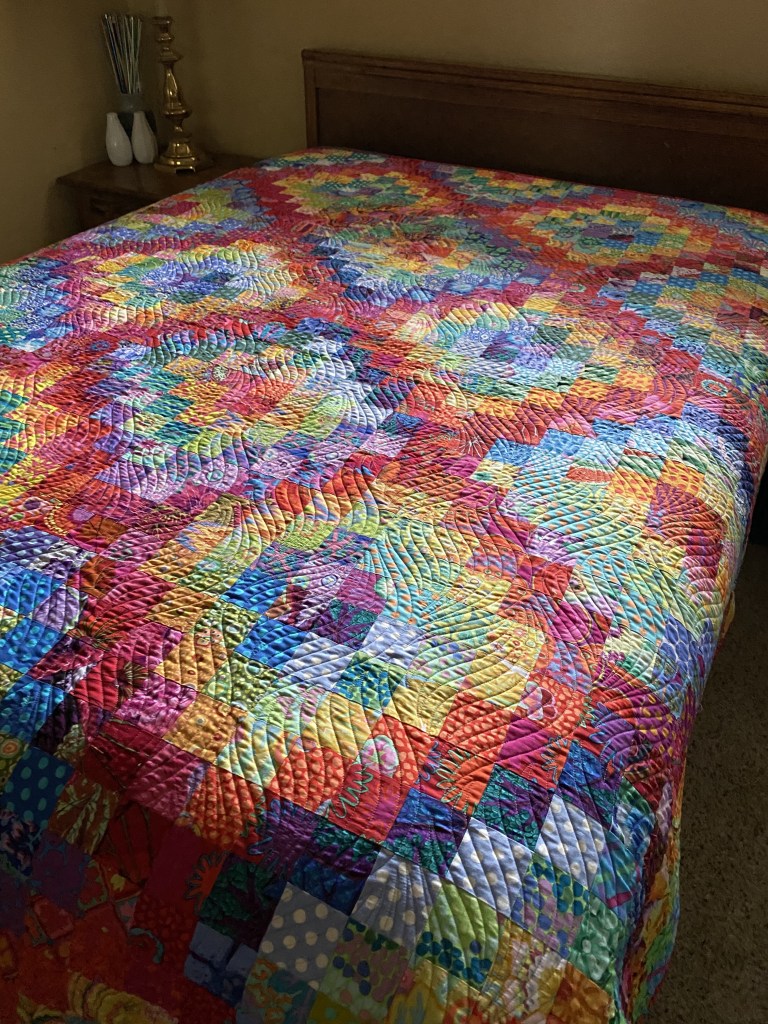
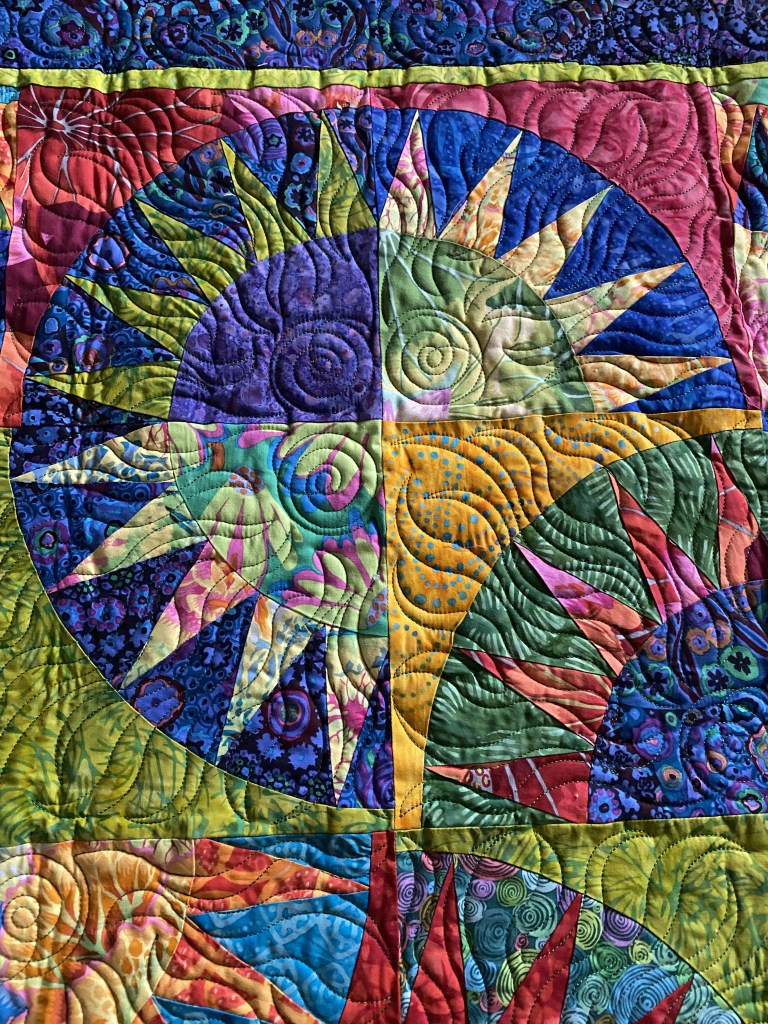
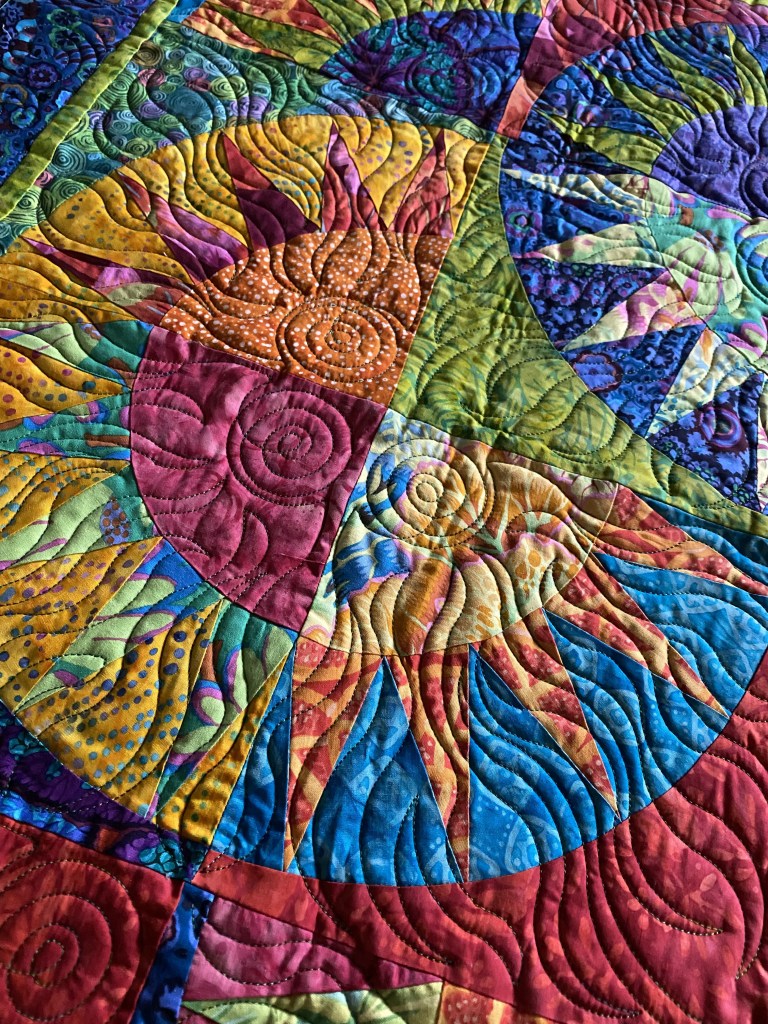
And… I put my newly finished quilt on my bed.

Now I need to make some pillow cases and some curtains!

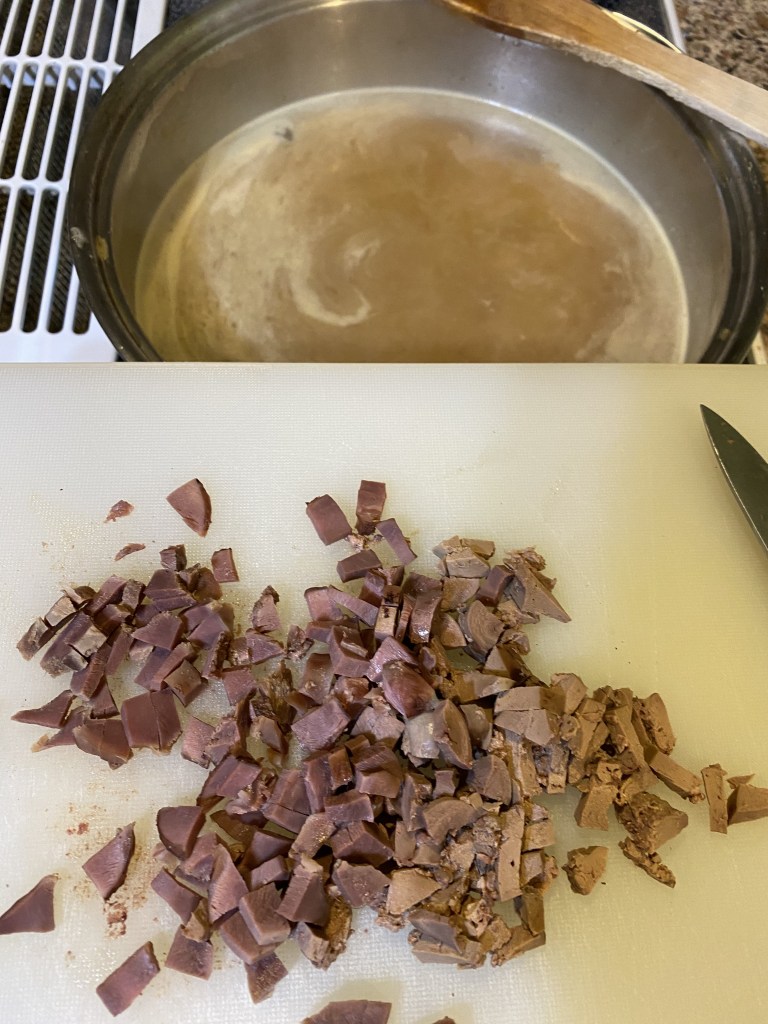
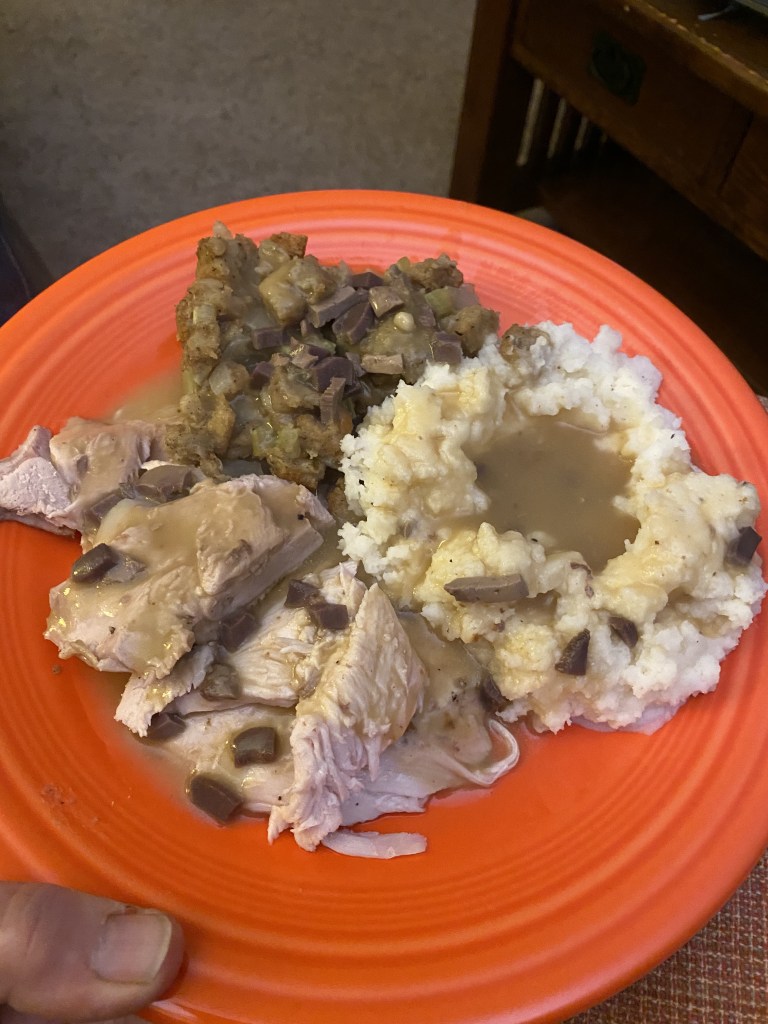
Once I had laundry going I pulled my turkey out of the fridge and pulled all the meat off the bones and got my stock going for turkey soup.

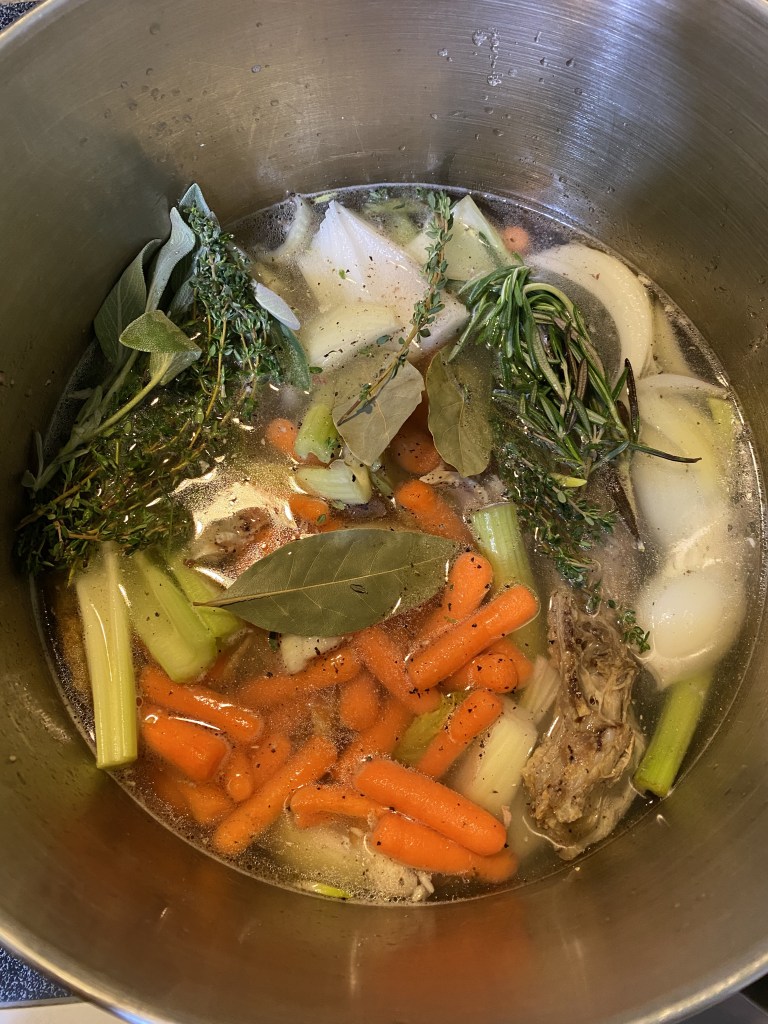
Turkey soup is one of my favorite things about Thanksgiving leftovers. This smelled so good as it simmered for a few hours. Then I strained it all and put in some noodles and left over turkey scraps.

I got four containers filled and in the freezer and there was a bowl leftover for my evening snack! Mmmm.

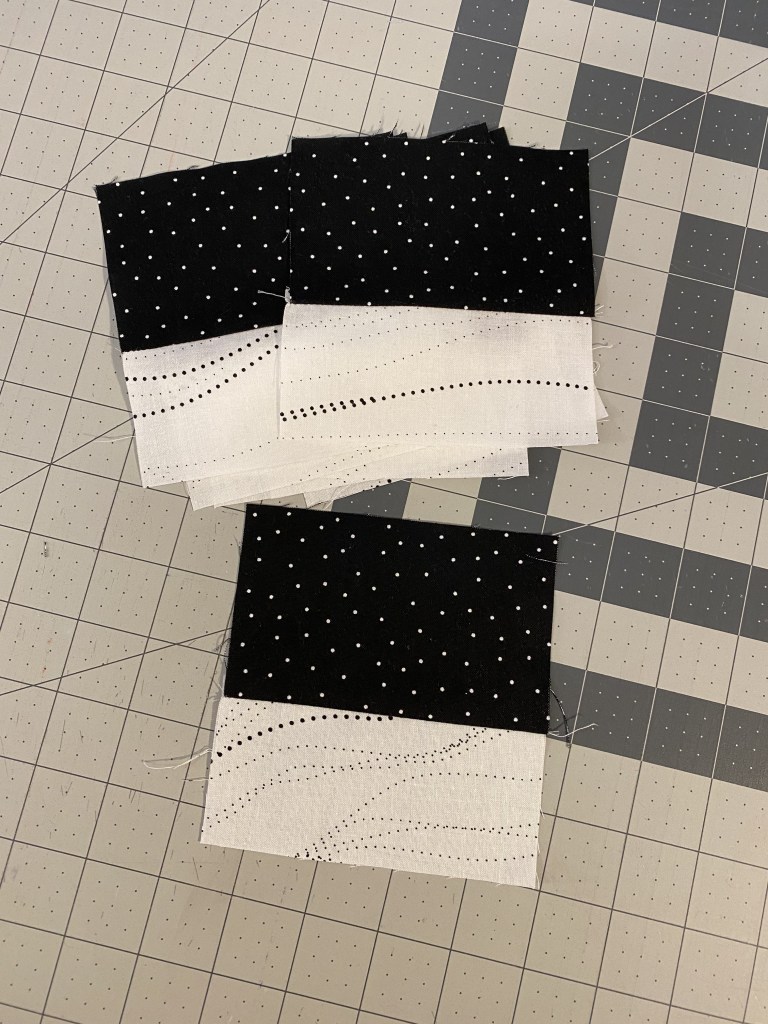
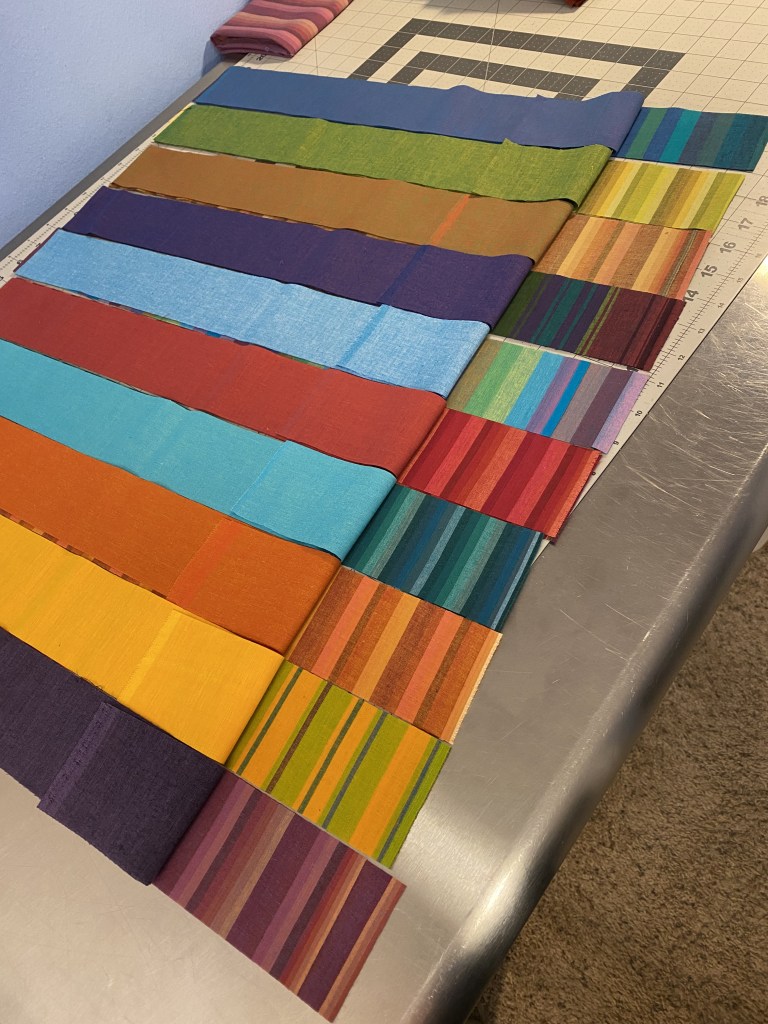
I did get into my sewing room at around 8:30 tonight and I pressed and cut the fabrics for six more sets of strips for my woven stripes and shot cottons quilt.

It takes a good amount of time to press and prep these strips. I felt like this little bit of work was quite an accomplishment. I still have a few more shot cottons on their way to me so I’ll wait until I get them to cut more strips. I may start sewing on these later this week.

I am cutting two of each shot cotton as I go.

I have a total of 16 sets of fabrics cut so far.

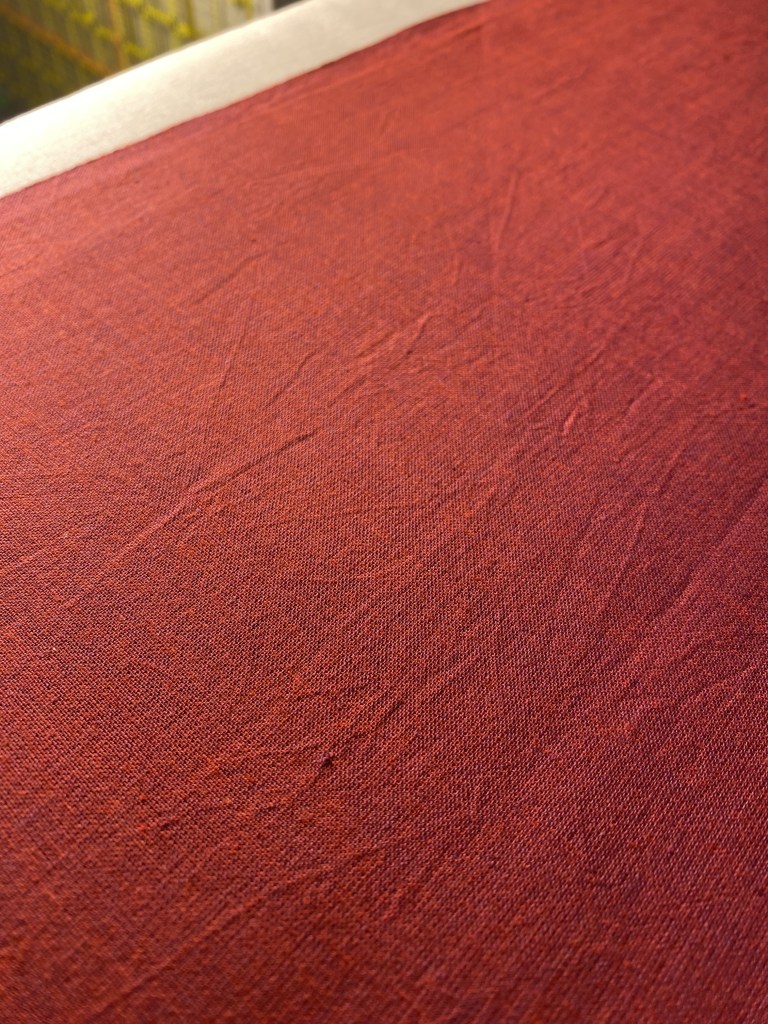
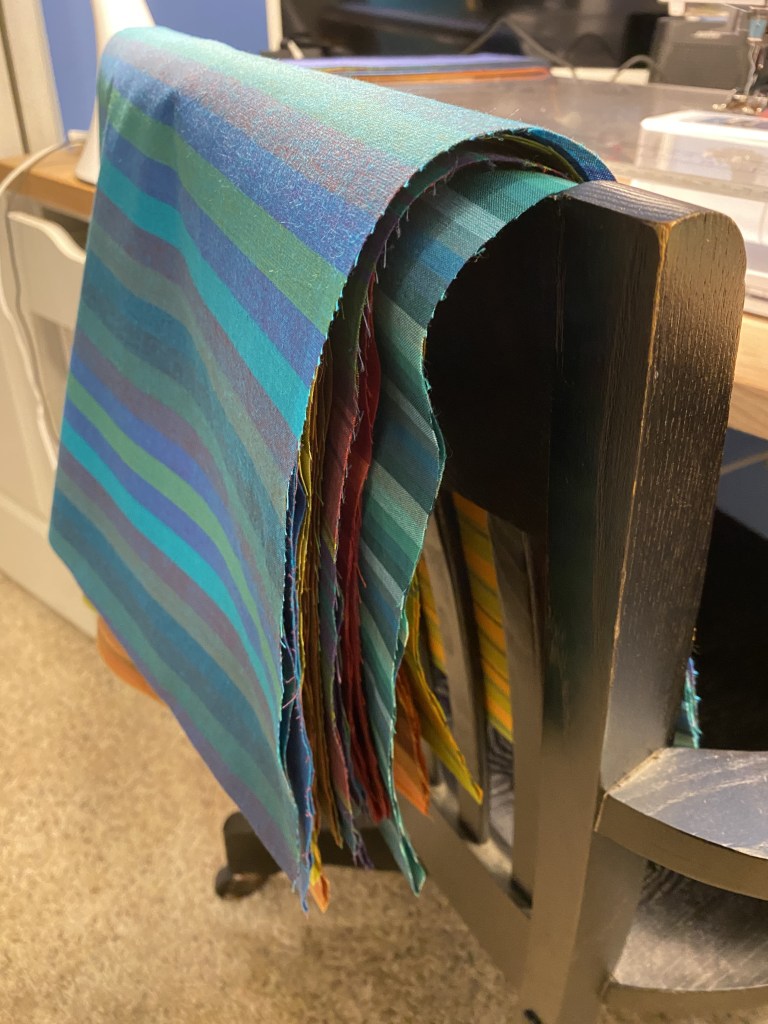
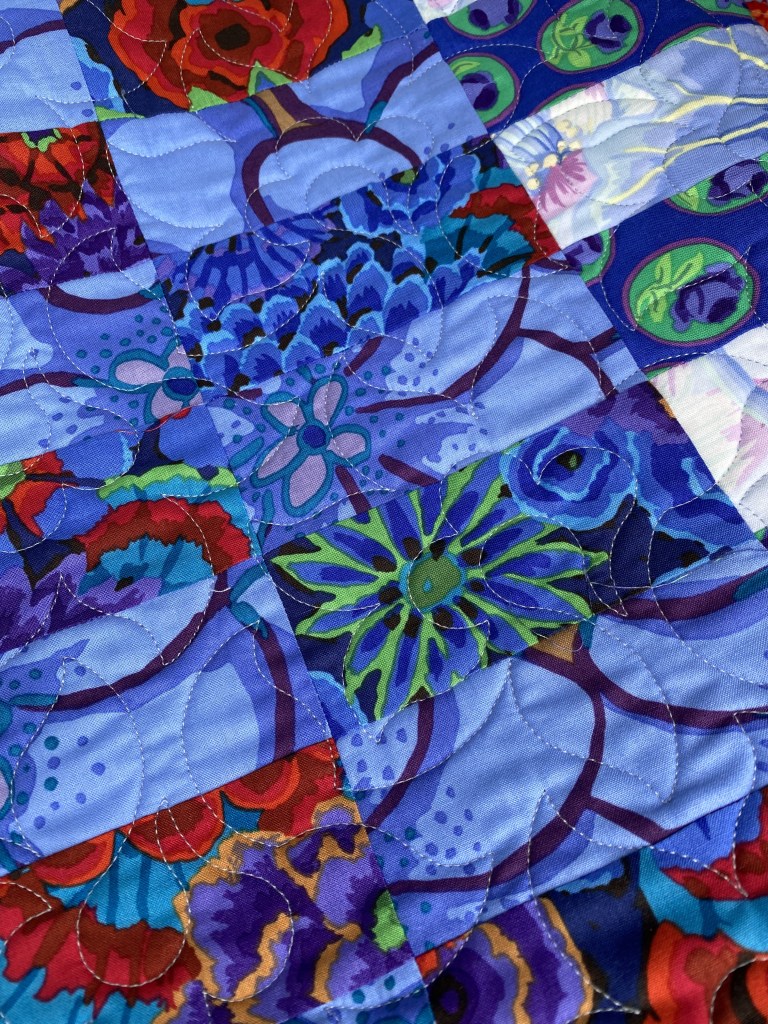
One thing I love about pressing these fabrics is getting a really good, close look at each one. They are so gorgeous. Look at the colors in this one… and the color variation in each stripe. It’s just so amazing!

While I was up in Battleground, WA, yesterday for Rico’s sheep herding lesson, I met a friend for a field romp with the dogs. I got to meet her teeny tiny puppy, Robbie. He’s a Phalene breed. Basically, a floppy eared Papillon.

I just loved him! He’s crazy tiny… only about 7 lbs at 7 months old. He won’t get much bigger. He is really spirited and a little pistol! It will be fun to watch him grow up and take on some exciting dog sports!

A lot of this goes on when it’s rainy. They want some action!

It’s a good thing they’re always game for a nice cool walk.

Lazy Rainy Day and Some Quick Crumby Gift Tags

I almost always take the day after Thanksgiving off of work. And I made sure of it this year because today is my birthday! I’m going to dinner at a friend’s house later this evening. Here’s some pretty flowers a friend of mine sent me.

She sends me flowers every year and they’re always beautiful and last forever!

I had hoped to take the boys out for a nice long forest walk today, but it’s been raining all day. So I ran a bunch of errands first (dropped a package at the P.O., picked up some dog food, went to the bank, filled up with gas, and ran to JoAnn’s to pick up a purchase) and found myself with some free time to play with some crumb pieces that I’ve had in a bin in my sewing room.

I needed the product I picked up at JoAnn’s for my afternoon project.

Is it odd that I’ve been sewing as long as I have and have never had a pair of pinking shears? You would think that I would have had a use for them before now.

Well, today’s project called for them. Here’s today’s project. Read on to see how I landed on this.

I ran across this tutorial for some fabric tree ornaments a week or so ago. I thought they were cute so I printed out the template and dug in. Well, It was a little too fiddly for me. Hand quilting, although I love the look of it, is not something I’m going to do. It also turned out really small.

It was a bit of a mess and I didn’t enjoy making it. Definite indications that I won’t be making another one!

So I started thinking about how I could accomplish the same basic thing but make it easier and less fiddly. Here’s what I landed on.

I pulled out my bin of left over crumb pieces. I picked out the smallest and oddest shaped ones.

Then I used the template from the tutorial I linked to above and cut these crumb pieces into tree shapes.

I used a ruler to cut the long sides of the tree and used some small scissors to cut the bottom and trunk.

Then I took the little trees I cut out and lined them up on a scrap of fusible fleece (glue side up).

Using my teflon sheet over the top, I hit this with the iron to adhere the crumb trees to the fleece.

Then I cut the fleece to be the same size as the trees.

Next, I lined up all the trees with the fleece facing up and hit it with some spray basting.

Then I arranged this sticky little trees on some scraps of fabric, wrong side to wrong side. I cut 7 inch pieces of thin red ribbon and tucked the ends between the backing and the crumb tree making sure that the ends were about 1/2 inch below the top of the tree — I wanted to be sure I would catch both sides of the ribbon with the topstitching to come.

Then I used my walking foot to topstitch around each tree, leaving enough beyond the topstitching that I could pink the edges. I made sure that I was catching both ends of the ribbon at the top in my topstitching.

Once the top stitching was done I used my new pinking shears to trim away the edges of the fabric and fleece.

I pushed the ribbons to the side as I trimmed each side of the top point of the tree. I was very careful to not cut the ribbon. I was successful almost every time.

Just to prove I’m human, here’s a picture of one I messed up. I cut through the ribbon on one side and almost completely pinked through the trunk!

Oops.

Here’s a few close up photos.

They turned out much better than the one I made from the tutorial. But rather than ornaments, I think they’d make great little gift tags! If you use a backing that is lighter and not too busy, you could easily use a sharpie to write someone’s name on the back.

I hope everyone had a nice Thanksgiving. I found that my plans changed at the last minute and I ended up having Thanksgiving by myself. And I actually enjoyed it! I played pickleball for four hours in the morning in the fog! I was a little surprised there were so many people there! I had a blast. I took the dogs with me and tossed the ball in the park for them before we headed home.

When we got home I rested with a few icepacks for a while then started cooking. I bought a 13 lb turkey and spatchcocked it to cook it. Basically, you remove the back bone and press the down on the turkey to flatten it (have to break some bones) and you cook it flat. I cooked it at 450 degrees for about 1.5 hours, and that was it! The dark and light meat cook evenly so your don’t dry out your breast meat trying to get your thighs and legs up to temperature.

Here’s a terrible picture of the turkey when it came out of the oven. There’s a reason I don’t write a food blog!

One of the things that had me most excited about cooking a turkey is the giblet gravy.

My mom always made giblet gravy. I’ve made the gravy for my potluck thanksgiving with friends for years, but I’ve never made giblet gravy because most people don’t like giblets. This giblet gravy made me so happy.

I made a limited meal… only the things there are the most important to me on Thanksgiving: Turkey, dressing, mashed potatoes and giblet gravy.

It was a very brown meal but it was very good!

Happy day after Thanksgiving! It’s time to get ready to head off to dinner with friends to celebrate my birthday!

Scrappy Night Time Tree Ornament Tutorial

I made a bunch of these ornaments last year and decided to write up a quick tutorial for them. They’re a quick, fun and easy make. They make great gifts, or are even fun tied to the top of a package. It’s great to have some on hand to give to people who visit during the holidays.

I made these using some of my Kaffe Fassett Collective scraps but you could use any scraps you have on hand. For me, the more colorful and bold the better!

Materials:

  1. You’ll need two different fabrics for the front. One for the top/sky section and one for the bottom/snow section. (more on the fabrics I used below)
  2. Some fun fabric scraps for the trees. I used Kaffe Fassett Collective Fabrics. You can go crazy here!
  3. Some light Heat and Bond, used to adhere the trees to the background.
  4. Some thin ribbon or cord to hang the ornament by
  5. Poly-fil stuffing, or other stuffing you like.

I used this polkadot fabric for the top/sky…

And this fabric for the bottom.

I used the same white fabric for the back of the ornament.

You can really use any fabrics you want. You can make it a daytime scene by using a white on white dot, or a light batik dot, or even a snowflake batik or white on white. You could use solid white for the bottom or white with black swirls, or a batik that has different shades to it, or even something with some silver in it.

Here are a couple batik options that would work for the sky.

I wanted to have a night time scene with snow on the ground. I like the fabrics I used because the polka dot makes it look like it’s snowing in the dark. I thought the bottom fabrics made it look like hills, but several people have commented that it looks like animal tracks in the snow.

Cutting and assembling the ornament body:

Cut your top/sky fabric 4.5 inches wide and 3 inches high.

Cut your bottom/snow fabric 4.5 inches wide by 2 – 1/4 inches high.

Sew these two pieces together along the long sides using a 1/4 inch seam allowance and press the seam allowances to the dark fabric.

This piece ends up being 4.5″ wide by 4-3/4″ high. I leave an extra 1/4 inch for the seam allowance at the bottom. The larger 1/2″ seam allowance at the bottom makes it easier to close the opening.

Cut a 4.5″ x 4-3/4″ piece of fabric for the back of the ornament. I used the white fabric.

Making and applying the trees

I fuse heat and bond to the back of my scrap fabric first. Then use this template to cut the three different size trees needed for the ornament (I round the corners a little when I cut them). Download the PDF file and print it at 100%. Make sure that it’s the correct size once printed. I made a 1 inch mark on the template to help you verify it’s printed at the correct size.

From the scraps left over from cutting the trees (with heat and bond on the back), cut three 1/4 inch by about 1 inch pieces for the tree trunks. I cut the trees and trunks from the same fabric. You could use a contrasting or brown fabric if you like.

Peel the Heat and Bond paper from your trees and trunks and arrange your trees on your pieced front piece. Tuck your trunks up under the bottom of each tree leaving about 1/2 inch sticking out at the bottom. Using your iron, carefully fuse the trees and trunks to the front of the ornament according to the Heat and Bond instructions.

Make sure you leave enough room at the bottom for the 1/2 inch seam allowance!

Stitch around the edge of the trees and trunks. I used my regular foot, but you could do this with free motion quilting if you like. This photo shows the stitching well.

Cut a length of thin ribbon or cord 6 or 7 inches long and sew the ends to the right side of the center top of the front of the ornament. Here’s an example.

Finishing the ornament

Next, with right sides together, sew the front and back of the ornament together with a 1/4 inch seam allowance on the top and sides, and a 1/2 inch seam allowance on the bottom, leaving an opening at the bottom. This larger seam allowance makes it easier to close the ornament once it’s stuffed.

Here’s an illustration of how I sew these pieces together. Note the blue lines of stitching. These lines of stitching make closing an opening so much easier! I use this trick on any opening I have to close.

Trim off the corners making sure you don’t cut through the stitching, then turn your ornament right side out. Gently push out the corners and press the piece.

Stuff it with the Poly-fil to the puffiness you like, gently pushing stuffing into the corners. Hand-sew the opening closed with a thread that matches your fabric, and you’re done!

Feel free to share this tutorial with friends.

Pressing and Cutting and Pressing and Cutting

I didn’t get much of anything done this weekend. I played pickleball Saturday night with one of the clubs I belong to. They rented an indoor pickleball facility in Portland and only club members could take part… at no cost. I played from 6 pm to 9 pm!!! I don’t think I sat down for more than 60 seconds or took a break longer than the time it takes to get a few sips of water. I had a blast and slept so soundly last night.

Which was a good thing because I got up this morning and played pickleball again! I played for nearly four hours! It was really cold when I got to the park at around 9:30. I played for the first two hours with my gloves on! Luckily they have some grippy patches on the palms and fingers. Although it was cold to start, it was nearly perfect by the time we were done! And I’m exhausted! I think I’ll have another good night sleep tonight.

I took the dogs with me to the park and tossed the ball for them before we headed home. They had a great time and the enthusiastic run was so good for them.

Then, after a little bit of rest after getting home, we all headed out for a three mile walk before it got dark.

After a dinner of left over roasted chicken, potatoes and carrots, I hit my sewing room to start pressing and cutting the woven stripes and shot cottons.

I ended up with 40 different stripes that I’m going to use in this next quilt.

That will give me a really nice variety of fabrics. I have 16 different colors of the Kaffe shot cottons. I went online to Missouri Star again Friday and ordered seven more colors that I don’t have. I wanted to have a little more variety in the solid colors.

So once these fabrics arrive I’ll have 23 or so colors. I’ll use two of almost all the solid colors in the final quilt. That will give a nice variety.

So I selected a group of stripes/shot combos that use one of each color of the shots. I don’t want to make any further pairs until I have the additional colors. Here’s the first set of stripes/shots combos.

Then I started pressing and cutting.

I decided not to prewash these fabrics. I thought about it for a couple days, even posted a question on the Kaffe Fassett Collective Facebook page. I got advice from a good number of people… pretty much evenly split on whether or not I should prewash these fabrics. Let me just say that I never prewash fabrics.

A couple of people whose advice I respect and trust advised that there was no need to prewash. One of those people was Liza Roos Lucy. She works with the Kaffe Fassett Collective designing and making quilts that appear in Kaffe’s books, and has more knowledge and experience with these fabrics than anyone else you’ll find. So with her advice my decision was made.

It takes a good deal of time to press these fabrics. They are a bit wrinkly and crinkly, even after pressing them.

But I think that’s one of the things that makes them so wonderful. They are so earthy and natural! All the crinkles and irregularities are part of what makes them so appealing.

I’m using Best Press when ironing these fabrics to add a little stability and make them easier to work with.

I typically use a mask while working with Best Press because it gets into my lungs and makes me cough. And I had to order more Best Press. I’m not sure I have enough to finish pressing and prepping the fabrics for this quilt.

I got ten stripes/shots 2.5 inch wide pairs prepped and cut tonight…. and it took a long time!

Those colors remind me of this photo of stones in a lake in Glacier National Park. The colors are rich and vibrant, but they feel very natural… definitely colors you would find in nature.

While I was cutting I cut two strips from each of the shot cottons, knowing that I’ll need those two strips for this quilt. Might as well save some time and trouble.

After pressing and cutting my fabrics they still felt a little damp so I draped them all over the back of my sewing chair to dry before they get stowed away again.

And it made me wonder if there’s a way and a place I could store these without folding them so I won’t have to press them all again. Maybe a flat cardboard box under my guest bed. Hmmm. I might actually have the perfect box in my garage. It should sure save a lot of time the next time I cut!

I’ve decided that I’m going too use this layout for these fabrics.

And now I just have to decide if I’ll set these blocks on point. I think this quilt will be infinitely more interesting if I set them on point. I’ll decide once I have some blocks done and on the design wall.

A short work week coming up. I will enjoy it as work will be really hectic until the end of December.

A Long Weekend and Shot Cotton Planning

I took a quick weekend trip up to Seattle to see my 95-year-old aunt with my brother and sister in law. My brother and SIL arrived at my place on Friday afternoon. We got up Saturday morning and were on the road to Seattle by 9:30. If traffic is good, it’s about a three hour trip. We made good time and were there early in the afternoon.

My aunt is 95. She is the only remaining sibling of my mom’s. She is in amazing shape. Sharp as a tack and in great physical shape. She still lives alone in the house that she raised her kids in. She goes up and down her stairs five or six times a day!

It was so much fun to get to see her. She was always very light hearted and fun, and it’s no different now. And she’s teeny tiny! She’s going to be 96 in a couple weeks!

After my brother and SIL went to bed Friday night I sat in the living room and asked my aunt all kinds of questions about my mom. One that I’ve wanted answered for a long time is why my. mom didn’t wear a white wedding dress. She wore a beautiful teal suit instead.

She told me it was because my dad hadn’t committed to converting to Catholicism until it was too late to plan a white dress and wedding mass. My aunt was married a week later. She said they would have had a double wedding if my dad had committed sooner.

I was pretty sure I still had my mom’s wedding suit So when we got home on. Sunday I dug into my cedar chest, and I was right. There it was, and I was horrified to see that is was moth eaten.

My SIL modeled the suit. It’s such a beautiful color, and my mom’s waist was tiny! She’s not actually IN that skirt. She’s holding it up at her waist.

While I was digging around in my cedar chest I found my dad’s army dress coat from WWII.

I took the granny photos with me to deliver to my cousin and my aunt gazed at them all weekend long. My nephew was even going to leave them at her house for a few days because she was enjoying having them.

On Sunday evening three of my cousins and their spouses came for dinner. My SIL, my brother and I made some traditional family food — polenta and beef with brown gravy, served with some tasty pecorino cheese and a gorgeous green salad. It was accompanied by wine from my cousin’s winery. It was really fun to see everyone. It’s been a long time since we were all together.

We hit the road for home Monday morning and were on the road by 10 am. We made really good time and were back at my house in time for lunch and a nice walk with my boys. Oh, and Ernie came with us!

I took some pictures of photos my aunt had displayed in her house. They brought back such strong memories from my childhood.

This is my grandfather… my mom’s and aunt’s father. He immigrated to the US from Northern Italy around 1918 (my grand mother traveled alone and joined him in Wyoming ten years later). The second image of him as an older man was blown up from a photo of him on the sofa with me and my siblings. I was a baby at the time. I have a photo that was taken at the same time somewhere.

Haha! I found it!!! that’s me on my sister’s lap at the far left. My brother that lives in Oregon is the one sitting at my grandpa’s left.

Here’s photos of my grandfather and grandmother. My grandfather died when I was five. He was the only grandparent I ever knew. My grandmother died when my mom was pregnant with me.

And this last photo is of my mom and her siblings. That’s my mom in the dark dress in the center on the chair. My aunt that I visited is the baby on the far right. Her twin is the big boy on the far left.

My mom was the middle of five children. I just love this photo. It was probably taken around 1927 or 1928.

While I was gone my shot cottons arrived in my mail box. I pulled them out tonight and refolded them. Amazingly, the cuts are really generous. I bought half yards and most of these measured a full 21 inches! I can cut a 2.5 inch strip and still have a half yard of each piece.

That pictures shows why these shot cottons are so special! Look at all that color and texture. You can see the depth of color in each piece. GAH! Their so amazing!

So I had to see what they look like with my woven stripes…

They’re so rich and earthy. I can’t wait to see this all come together!

Here’s a little more eye candy…

And a little closer view…

Gorgeous! I think I’m going to make a 16 patch from these fabrics first. Then I’ll think about other ideas for these gorgeous stripes!

It’s clear and cold out there tonight. It’s the first night this season that required a parka on our walk!

I love walking in cool weather! So do my boys. But I have to say, I’m already a little tired of the darkness. Today it was pitch dark before 5 pm. By December 21 when the days start getting longer, it will be completely dark at 4 pm. I can’t wait until the days start getting longer.

We have a few cool and sunny days coming up, and then the rain comes back on Monday. I will enjoy the sun while we have it. I’m happy to take cold weather if it means we get some sun!

More Quilt Love From My Long-Armer

I had today off for Veterans Day. So after hearing from my long arm quilter a few days ago that three of my quilts were ready to pick up, I made arrangements to stop by this morning.

The first quilt I picked up was the blue lap quilt I made for my friend Barb who gifted me her mom’s featherweight. Barb met me after I left my long armer and before Bender’s neurologist appointment to get her new quilt. She loves it! She was so excited that I made it on her mom’s machine!

Here’s Barb with her quilt in her garden… she’s an amazing gardener. She wanted a lap quilt to sit under when she drinks her morning coffee.

Here’s the front and back of the quilt.

She loved the bird fabric on the back.

And I love this photo with her trusty dog right there with her!

Here’s a close up of the quilting. It’s a floral design. I actually let my long armer choose the design for this one. I just told her I wanted something floral and loose.

The next quilt I picked up is my scrappy KFC trip quilt… and I’m so gobsmacked with this!!!

I can’t stop looking at that photo! All that color… it gives me a physical reaction! And I just love the quilting design. I was a little iffy about it and even waffled a bit. But it’s just so perfect!!! The quilting design is called Fusion. It might be an Urban Elements design.

Here’s a picture that shows more of the quilt.

Here’s a snippet of the backing that shows the quilting really well.

And here’s a lot of eye candy.

The last quilt I picked up is the NY beauty that will eventually hang on the wall of my sewing room. I will need to bind this one and figure out how I’m going to hang it.

Here’s a close up that shows you the quilting really well on the blocks.

And four blocks together…

And some more eye candy.

My brother and his wife arrived this afternoon. I made a really yummy dinner of roasted chicken with potatoes, carrots and onions cooked in the same pan. My sister in law brought some gorgeous salad greens from her garden and made a delicious vinaigrette. It was a yummy and comforting dinner.

Tomorrow we’re off for a bit of an adventure. My friend who owns Ernie and Bogart, who were my visitors a few weeks ago, will be staying at my place for a couple days and taking care of my boys.

A Stressful Work Week is Over

I can’t put my finger on why but it’s been a stressful work week. Several people commented on it. Tomorrow is the Veterans Day holiday so I have the day off.

I’ve also been busy this week getting my house in order for some company this week. I’ve had a list I’ve been chunking away at. I really like having my ouse in good shape but I don’t love housekeeping.

So with the week I’ve had, I haven’t spent any time in my sewing room and I’ve been waiting for the shot cottons I ordered to arrive. So I started a small project that I saw on Instagram a few weeks ago and it looked like it might be quick to do.

So I got online and ordered some products I needed first. Little wooden embroidery hoops.

Once they arrived I dug into my linens and selected this beige variety and dug out my embroidery threads.

A couple of nights ago I went online and found some drawings of snowflakes, selected one I liked, printed it out in the size I need, and started figuring out how to transfer it as a pattern onto a piece of linen.

I used one of my computer monitors as a light table and used a pen to trace the design onto the linen.

Then I slipped the fabric into one of the hoops, selected some embroidery floss and started stitching.

I have two of those containers of embroidery floss. I used to do counted cross stitch when I was in my 30s. I used to really enjoy it, but moved onto different projects. I’ve kept all my blogs because it comes in handy and I do actually use it every now and again. I was relieved the I found it pretty easily.

Here’s the first one I embroidered. I would consider this a half assed attempt. It’s not very good. It makes me feel a little sad.

It looks like my hands were shaking uncrontrollably as I stitched this.

So tonight I used my sliding glass door as a light table and traced another snowflake onto a piece of linen.

Are you surprised to see the bight green paint in my kitchen/dining room? I LOVE that green!!!

Here’s the linen with the design on it, all ready to get stitching.

I approached this second different in how I stitched it. Instead of making each arm of the snowflake one continuous line of stitching I took larger stitches by section… basically going from intersection to intersection. and it looks so much better than the first one.

It’s ok. It’s a little simple but I’m not sure I could successfully pull off something more complicated. And I’m pretty sure I don’t want to.

Here’s the two pieces next to each other so you can see a good comparison.

The bottom one is definitely better.

But, one thing I could fix easily is these drab colors. I also want to s stain the hoop. I think it will look much nicer if it’s darker wood.

I also have some really nice colors of linen that would be more interesting.

I’ll have to decide if I want to cut chunks out of these.

We’ve had some gorgeous weather this week. It’s cleared up and the sun has come out. it’s so gorgeous here in the fall… well, it can be!

And this beautiful Sequoia…

We’ve spend much less time walking in the rain this week.

the next ten days looks really nice.

I’m going to have a bit of an adventure this weekend. I’ve been looking forward to it. More on that later.

Yesterday Was About Fun… Today Was About Getting It Done

Since I played yesterday, I really hunkered down today to get my house in order for company next weekend.

After breakfast this morning I took the boys for a nice 4.25 mile walk. The weather report called for drizzle, but it was really more like an occasional mist. It was about 45 degrees. Really perfect weather for a walk!

These boys thought it was a great way to start our Sunday.

As I was walking I thought it felt like a soup day. I love having a pot of soup simmering away on the stove on a cold and wet day. So I went through my pantry and freezer in my head as I walked and I realized I had everything I needed to make a pot of split pea soup. So when I got home I got it done.

I rarely use recipes for the soups I make in the winter. My split pea has yellow split peas, onions, carrots, celery, bay leaves, salt and pepper and a nice meaty pork hock. I simmer it all until the peas are tender. Then I remove the ham, take out the bay leaves (I always make a mental note of how many bay leaves I put in so I can make sure I have them all removed). then I use my immersion blender to puree the soup.

This gives the soup the most amazing creamy texture! Next, I cut up the ham and put it back in the soup. Then I have a nice big bowl!

While my soup was simmering I decided to whip up a jar of pickled onions.

I love having pickled onions on hand. They are really good in tacos, a salad, or a sandwich. I use them all the time and try to always have a jar in the fridge. There are lots of recipes online for pickled onions. If you’ve never made them, you should find a recipe that sounds good and give them a try.

With my soup simmering I got busy on the list I made last night of the things I wanted to get done today. I got three bathrooms cleaned. I changed the sheets in my guest room and got that room all cleaned up and ready for company. I washed and changed the sheets in my room.

With all that done and feeling energized by a nice bowl of soup, I hit my sewing room and finished up the bag I cut out last night.

I just love that fabric.

And some detail love…

Several people asked me about that fabric. I recently purchased a piece at a local quilt store called Pioneer Quilts in Milwaukie, Oregon. They have a website and the fabric is on their site. It’s available in quite a few places online.

Here’s the fabric:

With all that done I had one more thing to get done tonight.

Oregon is completely vote-by-mail and it’s fantastic! I don’t know why all states don’t do it. I love living in a state that actually works to make it easier for its citizens to vote!

I didn’t get this filled out in time to mail it — it has to be received on Tuesday, not mailed on Tuesday. So I’ll drop it off at the drop box near me tomorrow afternoon.

I’m exhausted!!!

Today I Chose Fun Over Responsibility

I slept late today. It was nearly 10:30 when I finally dragged myself out of bed. It felt pretty wonderful!

After a hot shower and “breakfast” at the time when most people eat lunch, I took the boys out for a nice four mile walk. It was sort of perfect weather for a walk. The sun came and went as we walked, there was a lovely smell of fall leaves in the air, and the temperature at 54 was perfect for walking.

When we got home from our walk I checked my phone and saw that a group of pickleball players were putting together some open play and were looking for players. So I changed clothes, grabbed my paddle and an apple and hit the road. I played for almost two hours and had an absolute blast.

I had intended to get more done around the house to prepare for company next weekend. I didn’t get done as much as I had wanted but I managed to change and launder the sheets in my guest room and get the room all cleaned and ready to go. I also cleaned out my utility room, folded a bunch of clean laundry and cleaned off the dining table and kitchen counter. So I did get some stuff done.

It’s supposed to rain all day tomorrow so I’ll have plenty of opportunity to do house work.

After dinner I hit my sewing room again and finished up another bucket bag that I had cut out and prepped a few weeks ago. When these are all cut and fused it doesn’t take very long to get them all sewn together and finished.

I just love that denim with the gorgeous batik lining. I used some interfacing on this lining so the bag is a little more substantial than the one I finished last night.

And the obligatory photo of my tag… just because I love the details!

Since I got this done so quickly I decided to prep the next bag I had planned to make. So I pressed the fabrics, cut them to size, cut the interfacing and got it adhered to the fabric.

This will be all ready to sew together at some point in the day tomorrow

Look at how cute that fabric is!

I’m all ready for the time change tonight, but that doesn’t mean I like it. I really do HATE the time change I the fall. In the dead of winter her in Portland it’s dark at 4:00 in the afternoon. I always tell myself that If I an just hang on until Dec 21, I can make it the rest of the winter as we get a little more light as the days go by.

Only four months until we get that extra hour of evening light back!

Welcoming the Weekend Soaking Wet

It rained today. I mean, it RAINED today. All day long. And it’s still raining.

It was such a dark and gloomy day. A day when we didn’t get a walk in. And my poor boys… they’re so bored and want some action. They had to settle for a little bit of Rico’s birthday cake.

Did I mention that Rico turned six on Tuesday?

He’s such a good kid. I can’t believe he’s six already. It seems like just yesterday that I flew to Utah to bring him home.

There are so many things I love about that photo! Look how tiny and cute he was! And look at those gorgeous snow covered mountains that I miss so much.

And look at these huge feet at 8 weeks! I should have known he would turn out to be a beefcake!

It was clear pretty early that these two were destined to be buddies.

Look at that smile on Bender’s face!

I’ve been busy this week and after my whirlwind of productivity over the last few weeks I didn’t get any sewing done… until tonight. I decided to finish up a quick project while I’m waiting for my Kaffe shot cottons to arrive.

So I whipped up this gray denim bag that I cut out a few weeks ago. It’s lined with a pretty green batik that a friend gifted me.

This is another of the bucket bags I’ve been making. You can find the SotakHandmade tutorial for it linked in this blog post.

I didn’t use any interfacing on the lining because it had a stiffness to it that I thought would be sufficient. But it softened up as I worked with it and I’m wishing I’d faced it.

I’ll definitely use interfacing on the next one that includes the same fabric in a different color.

I love the little details!

Oh! I just noticed I missed trimming a thread on that tag! And speaking of tags… I’m loving how they look and how easy it is to sew them on using my machine rather than by hand.

And speaking to things I’m loving… this awl! It makes getting the snaps applied so much easier and neater!

That was a really good investment. And voila!

This is the first time I’ve sewn on my Bernina since I set up my Featherweight. I anticipated that it would feel much different to be back on this fancy machine after my little gem. But it felt perfectly natural. It’s nice that both my Bernina and the Featherweight tuck nicely in the space between my sewing table and the wall for storage while I’m using the other machine.

We have more days of rain coming but It looks like we’ll have enough breaks tomorrow that I can get myself and my boys out for a nice walk. We all need it.

I don’t have a herding lesson tomorrow and am probably going to be home most of the weekend. I have a few errands to run and need to get some housekeeping done. I have a deadline of next weekend to have my house in order. I’m going to finally get the trip to visit my aunt that I missed last spring. A friend will be here to take care of my boys.

There’s actually some decent weather coming up over the next week. It will be nice to have some days where we can get our outside time.