Turquoise Algorithm Finished

I just got this quilt back from my long arm quilter and I’m really happy with it. It’s not as exciting as the red and yellow version. It’s more calm and sedate, but it’s still pretty.

It’s all Kaffe Fassett Collective fabrics except for the white strips, which are a white on white batik.

turqa

This was the algorithm quilt that started it all. I had seen it posted on the Kaffe Fassett Collective Facebook group and wanted to make it from the moment I saw it. I had most of the fabrics in my stash, but added a couple to make it a little bigger.

Here’s my original blog post on this quilt.

turqc

The backing is the citrus color way of Kaffe’s lotus leaf fabric. This is one of my favorite Kaffe fabrics and I’ve wanted to use this color way for a backing since it came out a couple years ago. I just love it with this quilt… it’s bright and vibrant and ads a nice pop of color to the monochromatic front. It also appears in the front of the quilt.

turqb

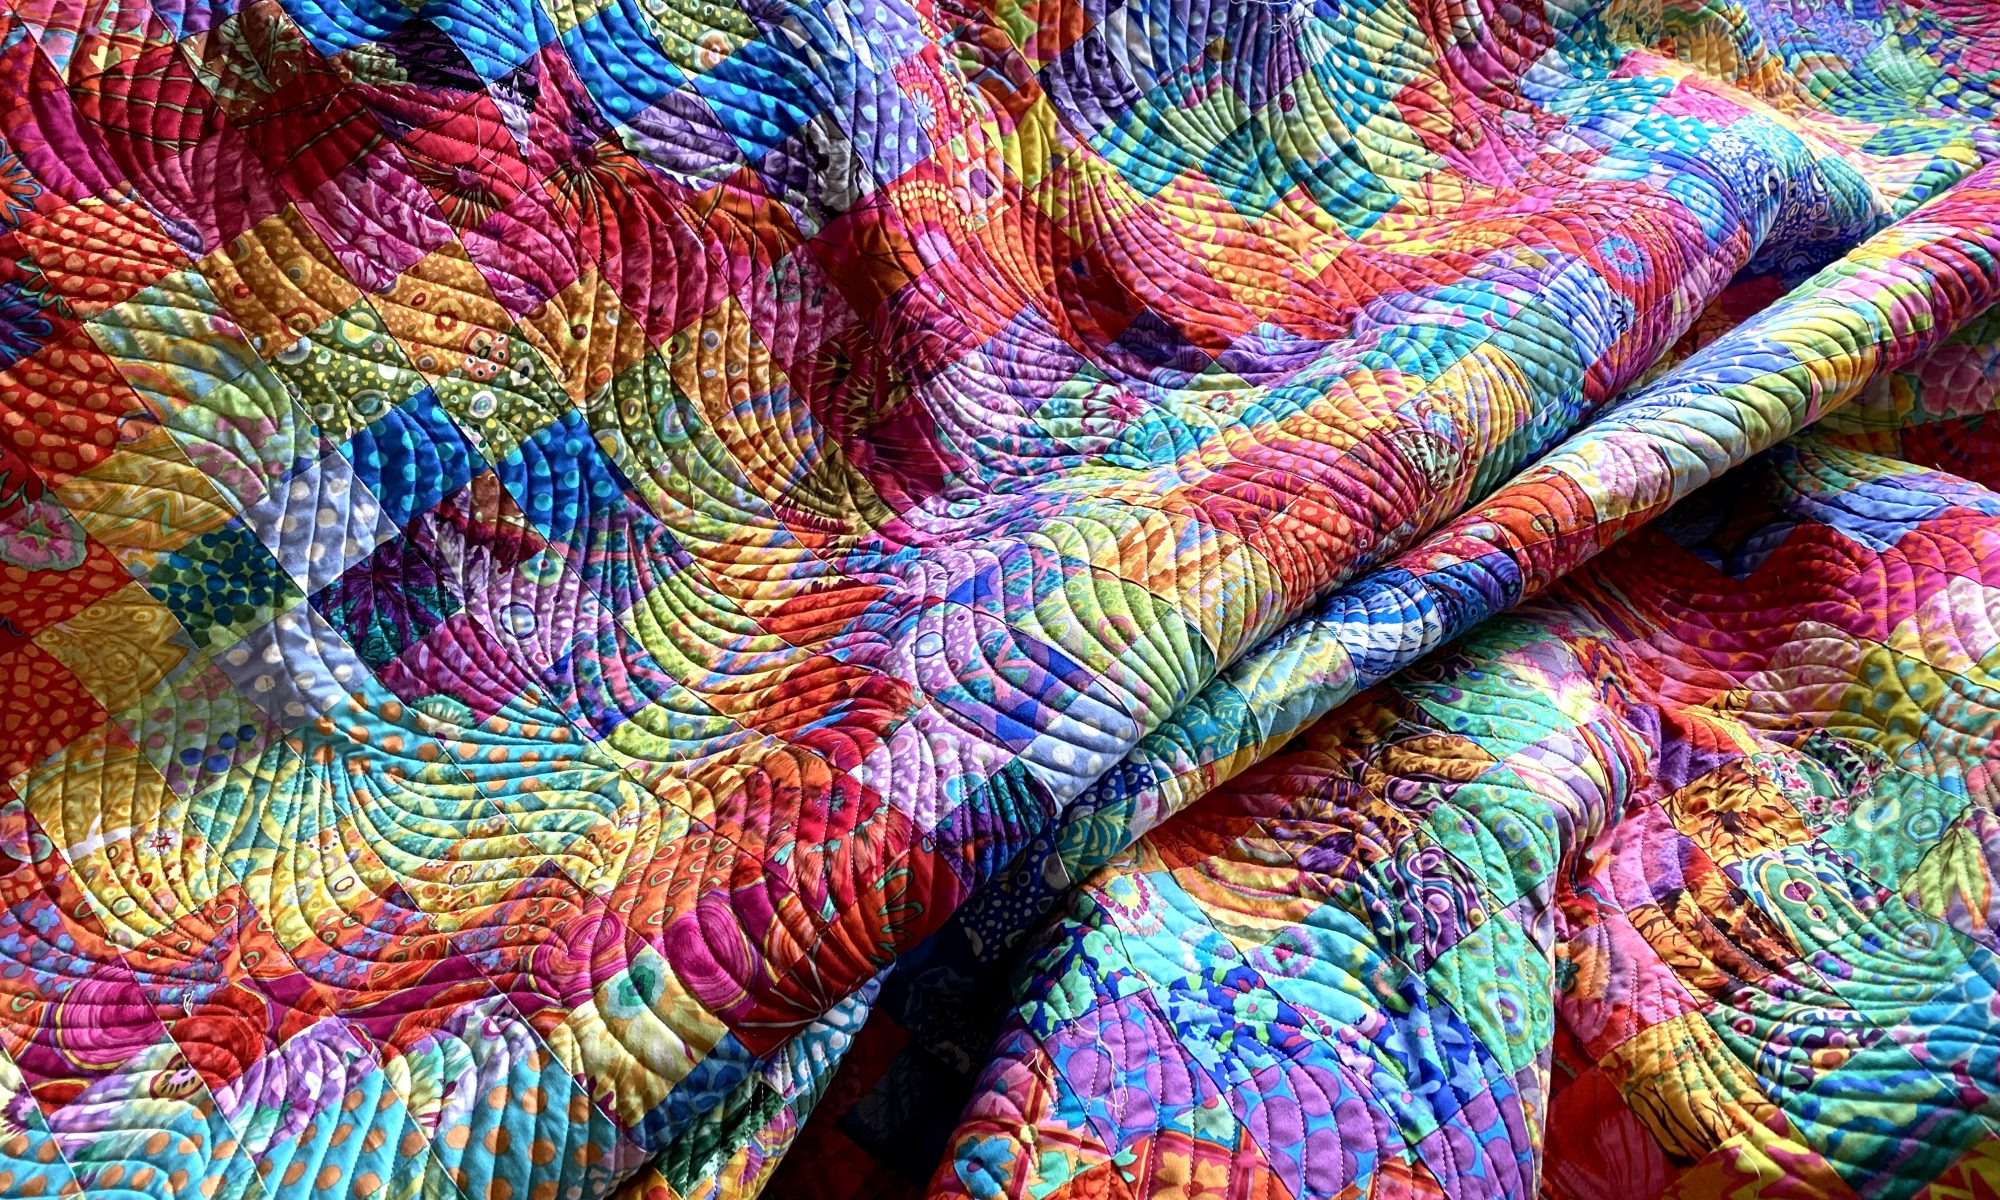
The quilting design is Urban Elements Bohemian Beaded Shade. I love the way the curved lines and circles break up the angular attitude of the blocks. It’s quilted with a light turquoise thread.

bohemian-beaded-curtain (1)

It’s very similar to the design I used on the red and yellow algorithm quilt, but it’s oriented vertically rather than horizontally and it’s more dense and has more circles.

turqd

Here’s the back of the quilt. I used the turquoise ferns to make the backing fit the front and to avoid having to match the print. I like the way the strip adds interest and it makes a great place for the label.

turqf

This quilt will be a house warming gift for my sister and her husband. It’s only the second quilt I’ve made where I included a label. My friend Carol embroidered the label for me on her machine.

label turq

I’m going to wait until after the holidays to ship it. I hate the idea of it getting lost in the rush of the holidays.

Wonky Batik Log Cabin Complete!

I finished this quilt top a number of months ago. I didn’t really have a plan for who the quilt would go to, so wasn’t in a hurry to get it quilted. So now it’s done, and I love it!

IMG_4198

This is the quilt that is on the header to my blog. It was made from batik scraps that I had saved over several months. I make a lot of batik scraps! And I just love using these beautiful, bright fabrics to make up a fun and exciting quilt.

I just love graphic black and white fabrics with bright batiks. They work so well together. I had originally purchased some zebra print fabric for this sashing after searching for the right fabric for several months.  But after putting it next to the batik blocks, it was just too black.

I had purchased this sashing fabric during that zebra search… thinking that I could use it if I didn’t find zebra fabric. So funny that I ended up using it anyway!

IMG_4199

I took the time to cut the sashing in two different directions so the waves would be going in the same direction across this quilt. I think it was worth doing. I really like the effect it gives the sashing.

I used a quilting pattern called Sticky Buns and the thread is a light gray. I’ve used this pattern on several quilts and I really like it. I love a curvy quilting design with the straight lines of blocks.

Sticky20Buns

I just LOVE the cow-ish print fabric on the back. It’s so fun and unexpected… and incredibly graphic. It’s a really fun touch to a really fun quilt. And the best part is that I got it on sale for $4 a yard when I was on vacation in the summer of 2018. I bought a lot of it! I had enough for this backing, and I still have a few yards left. It will surely appear in a lot of other projects.

These blocks are pieced free form. I don’t use paper or fabric foundation. Here’s a video I put together for a friend so she could see how I make these blocks.

Wonky Batik Video Tutorial

Here’s some photos of the quilt top before I took it to my long armer, showing some of the detail on the border. I had fun putting all the different black and white fabrics together.

IMG_8363

I just LOVE using left over pieces of fabric to come up with something so fun!!!

Hexagon Finished

I got my Kaffe Fassett Collective hexagon quilt back from my long arm quilter a couple of months ago and I’m really happy with it.

IMG_3570

I based this off of a quilt I saw on the KFC page on Facebook. It’s basically the My Fair Lady quilt pattern in one of Kaffe’s books. Can’t remember off hand which one.

IMG_0127

I wish it photographed better. it’s much softer looking in person. These photos look pretty harsh.

IMG_3577

I made this out of strip sets. It was a lot of fun to make. I love the gray background fabrics.

The backing is made from Kaffe’s Paisley Jungle in tangerine. I added the strips of guinea flower because I knew matching the fabric would be a huge job and completely out of my skill set!  I just LOVE that backing!

IMG_3588

Here’s an earlier post on this quilt.

It’s quilted with a pattern called Bubbles Everywhere. It it even better than I imagined it would be.

bubbles everywhere 002-500x500

I think I’m going to keep this one for myself.


Lucky Stars Quilt Top Checked Off

What a fun quilt to make! And it went together really quickly. Here’s the original post on this quilt.

IMG_4780 2

That’s Bender in the photo. He thinks quilting is really boring. So many things he’d rather be doing!

A friend of mine just made this quilt and even gave me her scraps to use in my quilt. So our quilts are almost the same quilt! I did add a bunch of batik scraps I had left over from making pouches.

I really love this little quilt. I just love the wonderful variety of batiks. There are some fabrics that only appear in one piece! It really is scrappy. I should count them, but I’m pretty sure there are more than 40 different fabrics in this quilt.

My friend struggled with her blocks on the design wall. She had sewn the 15 inch blocks together, and then moved the entire block to arrange the colors.

I decided to go about it differently to see if it was easier to arrange all the colors. I sewed all the stars first and tossed them up on the design wall and moved them around until they were arranged the way I wanted them.  I left enough space to add the larger strips to the design wall.

IMG_4659

Then I added the larger strips to two ends of each block, on the top and bottom of one block, then on the sides of the next block, which is how they would be arranged in the final lay out. Once I had the colors arranged the way I wanted, I sewed the strips to either end of the stars, and put them back on my design wall in the same place.

A friend commented that at this stage, they look like a collection of flags from around the world.

IMG_4661

The next step was to sew all the smaller strips together in sets of two. Then I added these pieces to the design wall.

And I was right… this method made the layout much easier. Rather than having to move an entire block and try to get the colors to work, I could simply take one of the two-strip pieces and move it to another location.

IMG_4699

Once I had all the strips placed on the design wall, I shared a photo with my friends and even sent it to my long arm quilter. She immediately noticed something that needed to be moved. This is the photo she texted back to me.

IMG_4722

She said that those two vertical yellow strips really stood out to her.

So to fix them, all I had to do was rotate the center portion of that block and it took care of the issue… and it didn’t create any additional issues.

I will definitely put additional quilts on this pattern together the same way. And I already have another one in the planning stage.

Here’s the backing I’m going to use on this quilt. I saw it in a really fun little store in Bountiful, Utah, that has a really amazing selection of batiks. Every time I go there I buy way too many pieces of fabric. And when I saw this fabric, I immediately wanted it for the back of this quilt.

IMG_4726

Boy… that’s a terrible photo!

Now I need to decide what I’ll use for the binding. I’m thinking something that plays with the oranges and reds in the quilt backing. Pretty sure there isn’t anything in my stash so I’m just going to have to go shopping!

Fabric Greeting Cards

I had been thinking about making these fabric greeting cards for a while now and a couple of weeks ago found some of these cards in my local craft store. The cards are made for 4×6 photos. You just slip the photos in. The image shows through the die cut opening on the front of the card,  and the inside of the card is nicely finished and the back of the photo is covered with the quality card stock.

IMG_4556

So I bought some 4×6 index cards, cut some scraps of Kaffe Fassett Collective fabrics to 4×6 inches and used a glue stick to affix the fabric to the cards. Then I trimmed the cards about 1/8 inch all the way around in an effort to make them slip more easily into the cards.

And in just a few minutes, I had some really gorgeous blank greeting cards that will be perfect for gifts during the holidays.

The first cards I bought were around $15 for 10 cards. I found some on Amazon for about $20 for 40 cards. I made 40 cards in a matter of minutes!  The cards and envelopes are really nice quality. I’ve already bought another box of 20 to make some more cards for gifts.

img_4551.jpg

These are all so pretty! Click on each photo for a more detailed view.

Once they were done, I sorted them into sets of four cards and packaged them with envelopes in a cellophane packet. They look really high-end and they’re really pretty and cheerful. These large print KFC fabrics really work well for this project.

IMG_4567