Scrappy Mountains Pouch

Finally finished up this paper piecing project that I started back in April, and I’m really happy with how it turned out.

After I made and posted the first panel, a friend of mine told me that she wanted the pouch I was making for her mother… who in her 80s continues to buy season ski passes each winter and dearly loves the mountains.

IMG_2586

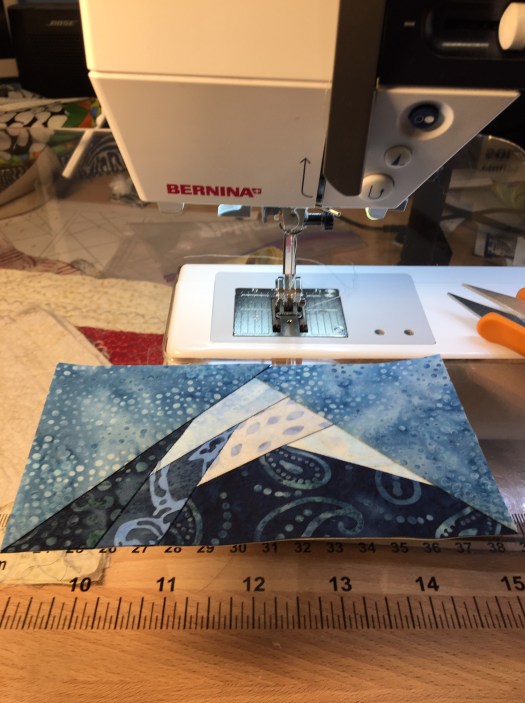
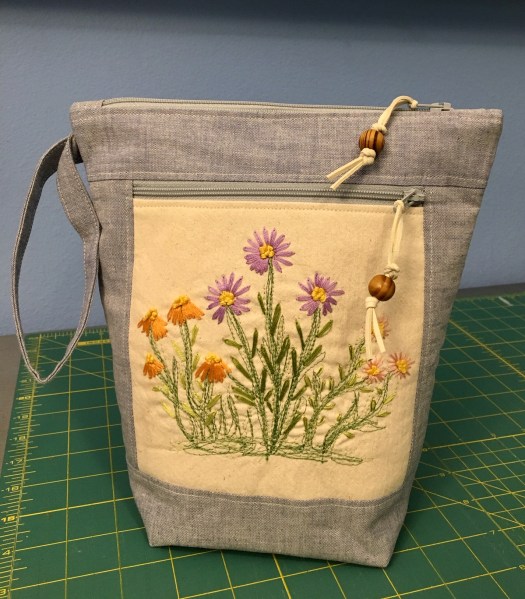
I let my friend pick out the fabric for the body of the pouch. I really wasn’t sure I liked the light blue, but now that it’s done I’m really happy with it. It feels like a really cold winter afternoon. . . almost dark. It feels crisp and clean to me, and I can almost smell the mountains that I miss so much.

The mountains are based of off the Scrappy Mountains paper piecing templates that I purchased a few months ago. They include a lot of variations of mountain designs, with several different sizes. I’ve seen some really fun fabric combos used on these by different people.

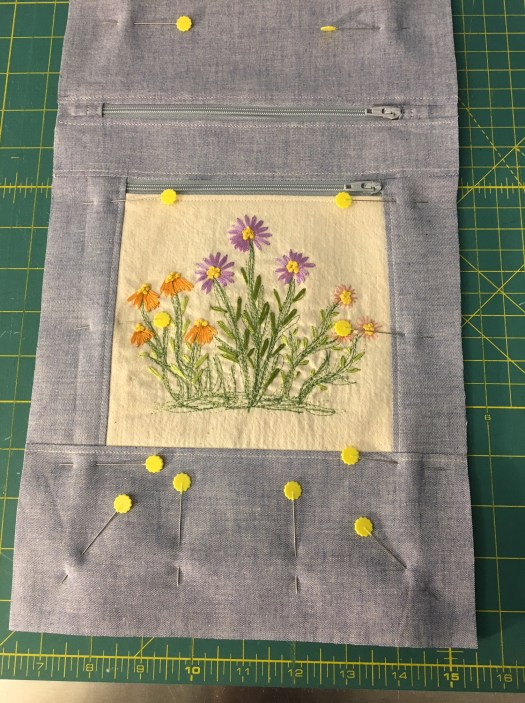
I made each pouch panel from two different templates. I put them together with more of the darker blue sky fabric, and did some improv piecing at the bottom with a dark green batik to give the effect of foot hills.

One of the things I love about this pouch is that all four mountains are different. There are a lot of options with these templates.

IMG_2576

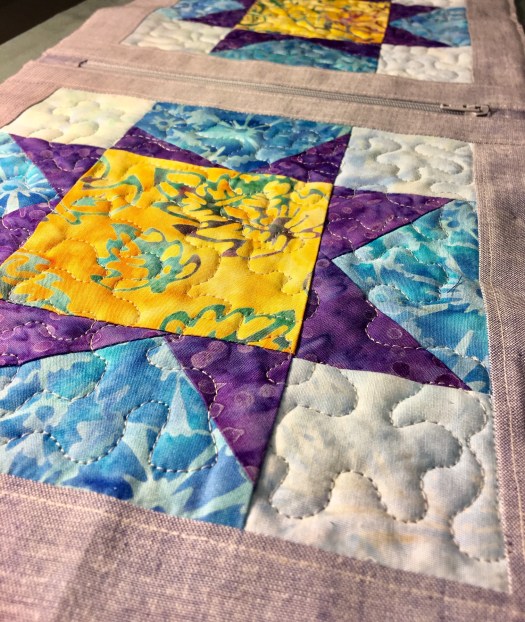
I debated about how to quilt this pouch. I wanted to quilt it because I feared that once washed, the paper piecing would be a mess. I wanted quilting to keep it all in place and manage all those seam allowances. I finally landed on straight line quilting, and I’m really glad I decided to go that way.

IMG_2583

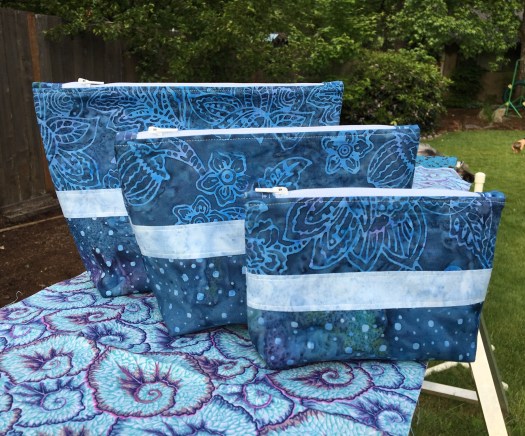
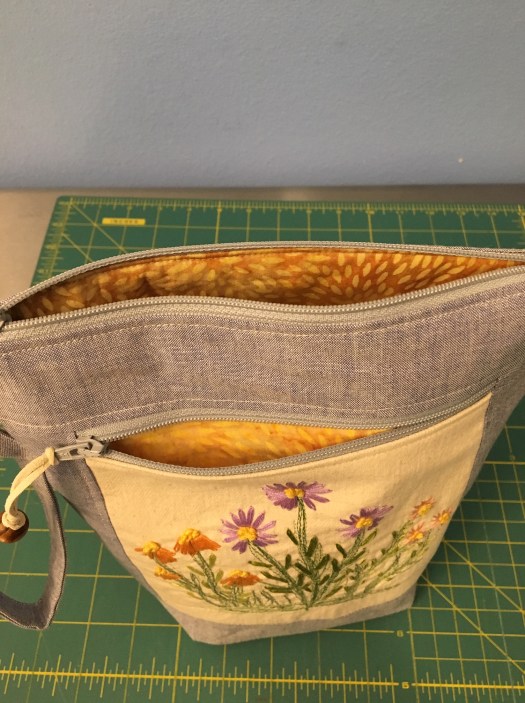
Someone recently was surprised that one of my pouches had a pieced panel on both sides of the pouch. I was so surprised by this! I just assumed that everyone did the same thing. I love having both sides complete with the design. It just makes it a nicer product.

IMG_2578

I’m having so much fun with the little paper piecing I’ve done. There are some really amazing things out there that far exceed my skill level. But I’m getting better. I have plans to incorporate more paper pieced panels in future pouches.

IMG_2572

Wonky Star Pouch

I’ve been making this pouch in my head for a couple of weeks now… wondering how to go about making the star block. I’ve been looking at lots of pictures of star blocks, but didn’t actually look at any patterns or tutorials. I love looking at things and figuring out how to make them — that’s the really fun part for me.

IMG_2458

I’ve wanted to make some wonky star blocks for a long time. I just like the crooked, freelance look to them.  So I dug into my batik scraps and selected some fabrics. I just LOVE that yellow fabric in the center. I chose the aqua and purple to go with the color of the leaves in the yellow batik.

I free motion quilted a simple stipple design across the star panel. I used a light gray thread to blend in a little.

IMG_2457

IMG_2453

I just bought a selection of 25 different colors of micro fiber lacing for my zipper pulls. I auditioned several different colors with this pouch, but the purple was the obvious choice. I bought 300 wooden beads for the pulls. I’m wondering how long they’ll last.

IMG_2459

I totally made up the measurements for the block elements. I drew it all out on paper before I started cutting fabric. here’s how it all went together.

IMG_2447

I started by determining the approximate size I wanted the block to be — about 8 inches square finished. So taking seam allowances into account, I started with a 4 inch block in the center. The aqua star point rectangles were cut to 4 x 2.5 inches and the light colored corners were cut 2.5 inches square.

I want to make more of these. I’m looking forward to playing with different combinations and arrangements for color!


In the Pouch Groove

I’m chunking along getting all my unfinished pouches done. One more set to go. And now I want to cut some more — I want to take some on vacation with me later in the summer.

Here are the latest few to be completed.

IMG_2412 2IMG_2415 2IMG_2418IMG_2426IMG_2429IMG_2414 2

I’m itching to do something different for awhile. I might do some paper piecing to put in pouches. Or I’m thinking of some wonky stars.

I have more ideas than I have time!

Reducing the Pile

I’ve been working on finishing up the seven batik zipper pouch sets that have been cut out for months.

Two down, five to go.

I just LOVE this yellow set! The fabrics are so pretty. So cheerful. I love the pops of purple and aqua at the top. I just love this!

IMG_2367

This set is much prettier in person. I took the photo late at night, so the colors didn’t come out well. IMG_2322

Here’s some detail from the pink set… (click for a bigger photo)

I’ll make another set tonight. Better get up and get started before I lose my umph.

Hand Embroidered Pouch

IMG_2379

I’ve been wanting to try embroidering a panel for a zipper pouch, so sat down today with a piece of canvas that I washed and added some stabilizer to the back.

I’m well aware that I don’t have the patience to do a lot of hand work, so I started by doing some free motion embroidery of the flower stems on my sewing machine. Then I sat down and hand embroidered the flowers and leaves.

I just LOVE this blue chambray — I love the way it looks, I love sewing on it, and I love how the piece turns out… it looks so structured and tailored.

I used the same pocket method as in the other pouches I’ve recently made. it’s a really quick and easy way to put in a zipper pocket.

IMG_2374

I used a simple yellow batik for the pouch lining and for the lining of the pocket. It’s really cheerful and pretty. And it’s just lovely with the blue chambray.

IMG_2380

Look at how amazing the zipper installation looks on this chambray. So crisp and precise. I just love it!


This picture gives you an idea of how the pocket goes together.

First, sew the zipper to the top of the panel and pocket lining. Then fold up the lining (the pocket lining is essentially twice tie size of the panel) and sew it to the top edge of the zipper. Then sew on the side pieces and top stitch. Then sew on the bottom piece and top stitch. Then sew on the top strip and top stitch. That’s it. The sewing and top stitching on the sides seals the zipper pocket in place. Now you’re ready to put the pouch zipper in and finish the pouch.

IMG_2376

I just love the little zipper pulls. I made them from some micro fibre swede and little wooden beads. I just love them!

IMG_2387

UFO Zipper Pouches

I’m going to do it! I’m going to finish these seven batik zipper pouch sets that have been all cut out and ready for assembly, sitting in my sewing room for literally months.

IMG_2153

I sat down for a couple evenings last week and sewed the front and backs of all seven sets and selected the zippers for each set. The sewing went really fast because I did production line sewing and chain pieced each set.

Next step is to add the zippers.

IMG_2152

The zippers are the most time consuming part. But it’s worth taking the time to get them sewn in well. The details make all the difference!

IMG_2151

I just love working with these batiks. Picking out the fabric combos for each set is my favorite part of making them. I have probably made more than fifty of these batik pouch sets over the last few years, in addition to all of the sets I’ve made from border collie/batiks and from other fabrics.

These assemble basically like the pouches in my zipper pouch tutorial. It’s just that the front and back of the bag have three sections of fabric, finished with top stitching on the narrow center piece.

I start out with three third yard pieces of fabric and have enough to do the pouch fronts and linings, with some small scraps left over plus one piece about 12×12.

IMG_2197

Here’s the dimensions of the pieces for the pouch fronts and linings. Don’t forget the six pieces at 1×4 inches for the zipper tabs. These can be cut from the smaller scraps.

IMG_2198

The dimensions next to the pouch size are the measurements for the lining and the finished size of the pouch fronts.

Here’s a good representation of the batik pouch sets I’ve made. But it’s not all of them!

(click on each photo to get a bigger view)

Annie’s Hand Embroidered Pouch

On Easter weekend, a friend of mine flew into town and we drove down to Coquille, OR, to spend the weekend with my brother and his wife, Ann. This is the third year we’ve made this trip over Easter weekend. We usually just stick around the house, with a daily trip to the ocean and a quick stop for rockfish tacos at the Edgewater in Bandon.

Annie has recently gotten into making crazy quilt blocks with hand embroidery. She had made the embroidered panel below and gave it to me. I decided immediately that I’d sew it into a pouch.

IMG_2187

I thought about it for a few weeks, and decided that one of my blue chambrays, which I LOVE, would be nice with it.

Then I saw a video of someone sewing a pocket like this into the front of a zipper pouch, so I sat down with pen and paper and sketched out the dimensions.

I practiced on two pouches with this zipper pocket treatment first, so felt confident that I could pull this off and have it come out well with the embroidered panel.

The little woodland creature fabric is so cute! I saw it in the store and had to buy a yard. I had no idea what I would do with it. The paw print fabric is really fun too. The paws are sort of in a mandala print. A lot of fun detail and color.

Here’s the flat front of the embroidered pouch before the top zipper was sewn in.

IMG_2186

You first sew the zipper and pocket lining to the pocket front, fold up the pocket lining and sew it to the top side of the zipper, then add the sides, then the bottom, then you add the top strip and sew the top of the pocket zipper at the same time. All seams get a quick top stitch. It all goes together so easily and nicely.

Here’s the pocket lining.

IMG_2188

And the pouch lining.

IMG_2190

And I just love how the zippers go in with this more structured chambray fabric.

IMG_2192

IMG_2191

I’m going to try some improv machine embroidery on some canvas panels. I’m also going to keep an eye out at estate and yard sales for embroidered linens to see if there’s something I could use in a pouch. I love estate sales and they almost always have some kind of embroidered linens.

I do know that hand embroidery is NOT in my future.

I’m planning on sending this to Annie for a project bag for her hand embroidery projects.