I started making blocks for this quilt in the spring of 2018. That’s eight years ago!!!
Today, I picked up the finished quilt from my long arm quilter, Happy Rock Quilting.
I made this for my guest room. It feels good to have it in there after all these years.
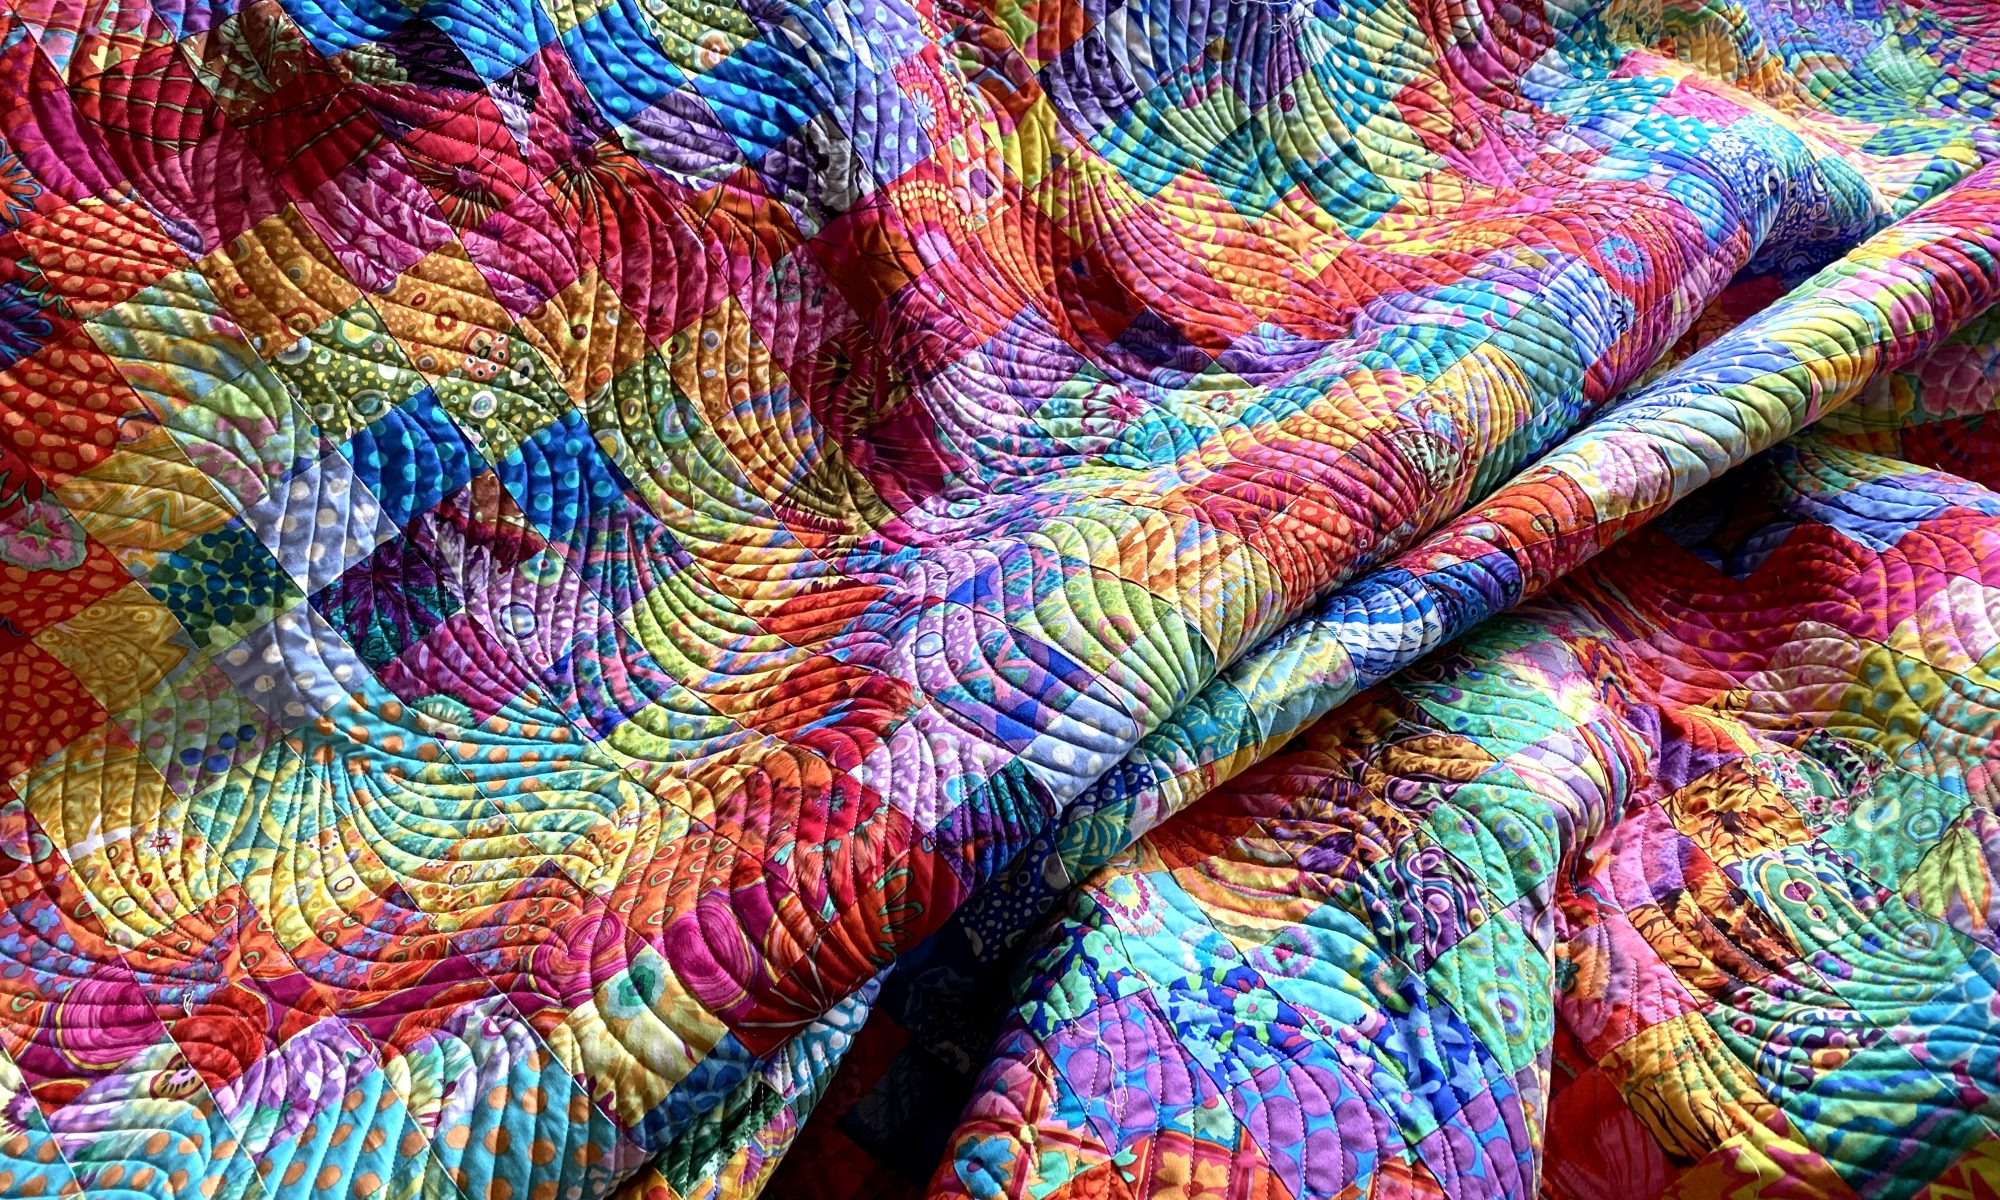
It’s made from all Kaffe Fassett Collective fabrics. A lot of them are now out of print and hard to find.
I absolutely LOVE that green polka dot fabric (Pond Spot). I think it absolutely makes this quilt. It would be quite blah without it.
I used a quilting design that is sort of a combo of a spiral and a Baptist fan. I prefer a dense quilting pattern and can tend to use the same design over and over. This is very similar to other designs I’ve used in the past.
I just LOVE the binding. It’s a Kaffe design that is printed with a diagonal stripe that shifts direction every few inches. So you can cut it straight and get a fun diagonal effect.
This next photo shows it with a bit of the front and the back of the quilt so ou can see how well it works with both.
Love it!
Here’s a photo that shows a better view of the quilting design.
And a little eye candy…
It feels really good to have it done and on that bed. And it sort of makes me feel like I want to start something new!
I spent a few hours at Trudy’s place on Tuesday to get in on some lambing action. There were no new lambs while I was there, but there had been a set of triplets born the night before.
It was enough for me to get my lamb fix. I just love spring lambs!
Rico got to move some sheep from pens to pasture in the morning. And before I headed out for home Bruno got to meet a day-old lamb. Here’s a video of that encounter,
My knee is better and better every day. I had a pickleball practice this morning with some friends and a coach we’re working with. Then I played with some friends this afternoon. It feels so good to re out there again!
Can’t believe tomorrow is Friday already. I guess I have enough going on if the days fly by.
I left the second black and white leftover quilt blocks on my design wall for a few days and decided that I wasn’t loving what I had done because it felt chaotic and didn’t make any sense. I played with a different layout of alternating black and white zig zags and I like it so much better. So I sewed it all together and added the borders.
This ended up about 56 x 65 or so. A bit of a modest throw size quilt but it would be good to snuggle under while watching a movie.
Yesterday afternoon I started sewing together the blocks for the first black and white quilt top. My sewing time was cut short when Bruno threw up a whole spool of thread he had found on the floor under my sewing machine and eaten, along with all of his dinner. I won’t share the photo of the aftermath here. It’s a bit hard to believe that he could actually swallow a spool of thread. It’s possible he got it into his throat and it gagged him. At any rate, he will not have free roaming access in the sewing room . There are just too many things for him to get into… the scrap basket, two garbage cans, blocks on the design wall. I’m actually keeping that door closed during the day as well. Puppies. Geez. It’s really a good thing that he threw it up!
I made a trip to my long arm quilter last week to pick up my friend’s Australian Aboriginal economy block quilt. I absolutely love this one!!!
You really do need to see it close up to see all the gorgeous detail of the fabrics.
And the backing is just brilliant!!!
Here’s a closer look of the back and binding. That binding fabric is one of my favorite of these fabrics.
I just love all those gorgeous jewel tone fabrics! And the Aboriginal fabrics sparkle! My former co-worker that I gifted the bag to said the fabric reminded her of the night sky.
I tried really hard to convince my friend that she should just give that quilt to me. She didn’t seem to get the hint. I’m holding out hope that it will arrive back here around my birthday or the holidays.
Bruno continues to grow way too fast! I grabbed this photo of him with Rico a few days ago to mark his 16-week birthday and to celebrate spring with my forsythia.
My mom absolutely loved her forsythia. The yellow blooms were her indication every year tat spring and arrived. I have so many Easter photos from my childhood in front of our forsythia.
This video just makes me laugh! Bruno absolutely loves going for our walks and thinks I’m very slow to get moving!
Bruno got to go on his first off leash run on the edge of the forest last week. I did have a long line on him in case I needed it, which I didn’t. He was so good! He stuck around, checked in often and came when called. He had such a great time!
We were all happy to get out on a beautiful day! Here’s a video of Bruno and Rico running together.
Bruno had a visit with some former co-workers last week. They had been wanting to meet him. He got completely loved up!
He definitely loved all the attention.
Lambing season has started and I’ll be heading down to Molalla, Oregon, tomorrow to spend the day in my happy place. I’m keeping my fingers crossed for some fresh lambs in the morning.
I just love all the schedule flexibility and luxury of time I’m finding in retirement!
My knee is so much better! I’m back to playing pickleball and am nearly at 100%. It feels so good to be out there moving my body again after a few weeks of inactivity. The dogs are happy to have me back and active again too!
I started this Frankenbag back in November to be a gift for a co-worker that I hired back in 2013 and worked with ever since. She had taken a job with a large internationally known non-profit organization and was leaving mid November.
I had all the pieces stuck to my portable design wall since November. We had a time set aside for happy hour last evening so I decided to take advantage of our wet weather last weekend to finish it up.
I gave it to her yesterday and she loves it! She is a frequent traveler and thought it would be perfect for that purpose.
I was really happy with how it turned out. She loved the fabrics. Said they reminded her of a night sky!
Once I got all my diagonal black and white blocks up on the design wall I realized that I had quite a few blocks left over. So I decided to continue with my original plan with these blocks. So I finished them up to make an Algorithm quilt. Just the blocks would make a small quilt, so I ordered 1.5 yards of the strip fabric so I can add a substantial border to bring this up to a good size. I didn’t want to make more blocks.
Here’s all the bocks for reference.
I’ll do more tweaking of these blocks before I declare it ready for final assembly.
Rico and Bruno have continued to play raucously on a daily basis. I’m so happy to Rico adapting and realizing how much fun puppies are!
Here they are running out at the sheep coop on. Saturday. This is the first time they’ve run together like this. It’s a very common border collie activity and so much fun to see! Poor Rico finally gave in… against his will and better judgment.
A very special order arrived yesterday. Bruno is very excited because he LOOOOOOVES this!!!
It’s good in dog training to have high value treats that the dog loves more than other things. And now I can rest assured that I have stock on hand in case of puppy emergency.
Bruno is sprouting some ridiculously long legs! And his ears are trying to keep up! He will be in the awkward and goofy stage soon.
My knee is feeling so much better! I played pickleball this morning for the first time in 2.5 weeks. My knee isn’t back to normal yet but it held up quite well. I felt a little limited in my mobility and agility, but my shots were really good! It felt so good to be out here moving my body again.
I also took the boys for a walk this afternoon. I felt the urge to get out and take advantage of the dry weather.
Tomorrow morning is my last sheep herding lesson before lambing season begins. I’ll be spending some time with my trainer during lambing season. It will be nice to do it at my leisure rather than having to schedule time off! It’s very possible I’ll see lambs tomorrow morning!
We are in the midst of another atmospheric river in northwest Oregon. I’ve gotten a couple inches of rain so far this week and will likely get a couple more by the time it moves out early Saturday morning. We’re all stuck in the house and I haven’t played pickleball for nearly two weeks, and probably not for at least another week.
About 10 days ago I was feeding sheep at a sheep herding coop that I bought into, and I got my right foot tangled up in bailing twine and went down HARD and slammed my left knee into the concrete. My knee is much better than it was, but it’s still not ready for pickleball or for walking dogs.
I’m trying to keep dogs entertained in the house. And I’m trying to keep ME entertained in the house.
So I’ve been doing some sewing over the last couple weeks.
The new project I’ve been working on is made from leftovers of my black/white/pink Interweave quilt. I decided to use those black and white fabrics, add a few from my stash, and play around a little. Initially I thought I would make another Algorithm quilt so started off in that direction.
The colored fabric on the right is a piece of Kaffe fabric I bought online and I ordered the wrong color way. It seemed perfect for this project and I had enough of it.
So I cut the black and whites into 10 inch squares, cut them in half and added in the colored strips. As I made blocks I threw them up on the design wall and liked what I saw and started thinking…
What if, rather than continuing down the Algorithm path, I just leave these blocks as they are and play with the arrangement.
I drew out some design ideas on graph paper and realized that I was limited by geometry in my layout options.
There’s no way to make the lines not intersect in odd ways if I added more than one diamond pattern. So one diamond pattern it is!
I had originally planned to make this quilt top 8 x 10 blocks, but the blocks will finish at 9.5 inches so it would have been a bit big. So I chose to go with 7×8 blocks. That means I have 24 blocks left over. I might save them to use in a backing, might make a bold baby quilt or might cut them up to make bags.
Some eye candy.
I’ve always wanted to make a black and white quilt. And now I’ve made two! I do still have a lot of black and white fabrics in my stash so I’m hoping for more ideas to come.
I also made four quilt backs last week.
The fourth backing is for the quilt that has been unfinished for far too long… the yellow/brown/purple Japanese X and + quilt for my guest room. I’m pretty sure I started this quilt in November of 2020!
This quilt is big, so the backing is essentially three full widths of fabric sewn in horizontal strips. Nothing fancy. Three different fabrics combined. I forced myself to get it done and deliver it to my long armer.
That photo doesn’t show much. I’ll take better photos once it’s back from my long arm quilter.
I had two sets of visitors last week, both from my old home of Salt Lake City. I went to lunch with the first set. The second visitor arrived that afternoon. I met her at the light rail station. We went to dinner that night and I drove her up the Columbia River Gorge the next day to her friend’s place. She was flying out to Africa a couple days later. She promises to bring me some bold African prints on her return.
The trip up the gorge was a great day trip. We stopped at Cascade Locks to have fish tacos that a friend had recommended. They were soooo good!
We also had a nice walk on a small island in the Columbia.
That’s the Bridge of the Gods in the background.
Rico has really been warming up to Bruno! They have been playing a lot and he seems to be a lot less irritated with the puppy. I was in my sewing room the other night when it seemed terribly quiet. I found this in the living room.
Bruno is getting so big! I weighed him at around 21 lbs the other day.
Here he is the other day, compared to the day I got him!
I was looking for some paperwork in my guest room this morning when Bruno discovered the mirror in the dresser.
His little howl just kills me!
If you’re not able to view the video in email, click here to go directly to my blog online to see it. You can also browse blog posts, search for topics, and find all kinds of fun there.
A lot has been going on since I last posted on December 17. That’s almost three months ago!
First, I have dived head first into retirement and absolutely love it! I have been amazed that there wasn’t more adjustment time needed to move from work to retirement. I slipped into my new life easily and enthusiastically!
Before I lost Bender in December, I had let a border collie breeder in northern Utah know that I was interested in a puppy from a litter she was expecting. The mother is a half sister to Rico and she is a very talented sheep dog. They have the same mother. Rico and the mother are grand niece and nephew of Bender. I had wanted a puppy from this same mother a few years ago but there was only one puppy so I was out of luck. But this one worked out and the litter was born on December 6.
My friend Linda flew up to Portland in January and we planned to drive to Utah to pick up the puppy, and then drive home. But luck would have it that the breeder had a friend who could drive the puppy and one of his litter mates to Eastern Oregon where we could pick him up… saving a lot of driving and time. This friend shortened our trip even more and had us meet her in Hermiston, Oregon, on January 25. That’s a a three hour drive one way, compared to what would have been about 12 hours one way!
And in no time I had this guy in my arms! This was the moment Bruno and I met!
I named him Bruno after my uncle who loomed large in my childhood. He was my mom’s only brother. I asked my uncle’s twin sister, now nearly 100, if she was ok if I named a puppy Bruno and she LOVED it! Of course, she had named a cat Zeke, after her father/my grandfather.
He was so scared! Imagine what he had been through over the previous 24 hours: He left his mom and litter mates to travel with one litter mate for 8 hours with a stranger. Then his littermate was handed off to his new owner. He spent the night in a strange place with no siblings. Then the next day he was back in the car and handed off, yet again, to total strangers.
But within a few seconds of introducing myself and telling him how wonderful he was, he seemed to know that I was his! He nestled into his crate in the back of the car and didn’t make a peep on the three-hour ride back to Portland.
By the time we got home, he seemed perfectly happy to be where he was.
He was only 7 weeks old when I got him and so tiny! He came to me a week earlier than what is typical because that’s when his ride was available. And he never looked back!
Since my friend was here visiting and we didn’t have to make that long drive to Utah, we had time on our hands to have some adventures. Bruno hadn’t had all his vaccines so he was a bit limited in his exposure to the environment.
Knowing that we would want to make a trip to the coast and knowing that Bruno would not be able to be on the ground because of his unvaccinated state, I whipped up a sling bag so I could carry him comfortably. We took it for a spin on a walk around my neighborhood.
He was so good! Once we got him in the bag he rode along happily and didn’t make a fuss at all. Several days later we all shared Bruno’s first trip to the Oregon Coast.
He rode in that bag and soaked up everything he saw, smelled and felt. And he was such a good puppy! It will be so much fun when he’s fully vaccinated and can join Rico in a rousing beach run.
Rico has been adjusting well. He was not in love with the puppy in the beginning. He seemed a bit horrified that this little whirlwind was so intent on convincing him to play. But he has been very tolerant and has corrected the puppy appropriately occasionally. I call him “Rico the Saint.” This video shows how patient Rico is with Bruno.
Rico has warmed up to Bruno more and more over the last couple weeks. They even wrestle and tug on toys together. Rico and I will both be very happy when Bruno’s puppy teeth are gone!
I’ve been training some little behaviors with Bruno, but mostly I want him to have fun being a puppy. It’s amazing how much they learn from play. But he is learning all the time, whether I want him to or not, so I am being mindful of what he’s learning!
Here’s a cute thing the breeder taught the puppies. They learned to sit nicely to get what they want. Bruno learned quickly that he got his meals in the puppy pen in the dining room. He was only eight weeks old in this video!
Oh, did I mention that he LOVES food? I’ve never had a puppy who is food crazy like this puppy is!!! You should see how enthusiastic he is about ice cream!
Bruno has continued to grow and turned 13 weeks old yesterday. I weighed him with me on the bathroom scale yesterday and he is around 21 lbs! He’s beefy! And he’s so handsome. This is him taken yesterday. He will be a looker when he’s fully grown. His breeder says he looks like his mom at this age, but more masculine.
Here’s some photos showing how much he’s grown. They are in chronological order. (you can click on each photo to enlarge.)
And his ears… I just LOVE natural prick ears on a border collie and am so happy that his are up and staying that way!
Now that he’s fully vaccinated he has been joining us on our daily walks. He is very impressed with himself and is happy to join Rico in this activity. I love this video.
It feels right to be walking two dogs again.
I’ve been trying to give Bruno lots of new experiences… new places to see… new people to meet… new things to experience. His breeding should bring a solid temperament but good socialization is important too. So he’s been having visitors, has visited friends, and has met and played with a lot of new dogs.
His breeding also means that he should have great potential in sheep herding. His parents are both quite accomplished. He won’t have the chance to work sheep for some time now. I did carry him out into the sheep field with me a couple weeks ago and he was very keen to meet the sheep! It will be fun to see how he does once the time comes.
I haven’t had a puppy for nine years. I had forgotten how much work they are! But for now, I’m just enjoying him being a puppy and doing what I can to make sure he’s a good dog.
I’ll close with this video of Bruno playing with a box a few weeks ago. This is just pure joy!
It’s official. As of Friday at 5 pm, I am no longer among the working. So far, it feels damned good! I’m sitting here Sunday evening and I don’t feel that dread about the impending work week. It’s a good feeling.
Friday night I put a pizza in the oven, took Rico for a walk after dinner, then snuggled in and watched a couple movies. I got up early Saturday and played pickleball with 12 other women and it was so much fun! I had organized it and it was well worth the effort. I hand picked all the women and we were all at about the same skill level so the games were so much fun. And I played like an animal! I was so relaxed. So focused. And everyone commented on how much fun I seemed to be having! The same thing happened during pickleball today. And I swear, I’m actually playing a lot better! So retirement seems to have had a good effect on my pickleball!
I decided to take some time on Saturday and finish up the black, white and pink Interweave quilt I had been working on. It only took a couple of hours, and it’s done!
All I had to do was finish sewing one row of blocks together. Then sewed all the rows togethe and sewed the borders on the sides. You can see the side borders in this photo.
I sewed the victory lap in pieces before the quilt top was all in one piece: top and bottom row, and the side borders. it was so much easier to do it this way rather than dragging all that bulk through the machine.
This quilt top seemed to go together really quickly. Maybe because this is the third time I’ve made it.
Here’s some close ups to see the beautiful fabrics better.
It’s now several days later and I am snuggled up on the sofa with Rico sleeping soundly at my side at the end of day-three of retirement. So far I’m enjoying it! I’m getting a lot done and have been tired at the end of each day. A retired friend said I was going to need to pace myself. It’s unhealthy to keep up that mad pace in retirement.
We’ve been having some warm winter storms the last week. Lots of rain but crazy warm temps in the high 50s. We haven’t gotten the same flooding that they’ve gotten up in Washington, but it’s all part of the same storm system and we’ve gotten plenty of rain. I was awakened at 1 am last night as my neighbor’s brand new generator kicked in when the power went out. It was soooo loud! It sounded like a semi truck was idling in my bedroom! There were some significant wind storms that have parts of town still without power.
The neighbor sent me a text this morning apologizing for how loud his generator is. He assured me that they will be looking into ways to abate the noise. When I looked outside at 1 am there were people standing in the street videotaping the noisy generator. I’m wondering if he got complaints from other neighbors.
I got ready for my 7:30 am pickleball session in the dark and my power was back on when I got home.
One thing on my check off list yesterday was to run by the vet and pick up Bender’s ashes. He is now in my living room next to Billie and my beloved Forrest.
It always makes me sad when I feel the heft of a pet’s ashes in my hands.
I impulsively started a new quilt top using the black and white fabric scraps. More on that next time.
For now I’m busy being retired, playing pickleball, and getting my house ready for guests on Christmas Eve.
I said my final farewell to Bender on Tuesday afternoon. The house is terribly quiet. Rico and I are sad.
Redsky Bender 4/9/13 – 12/9/25
He had gone downhill so quickly since his 12th birthday in April. He was almost totally deaf and blind. He had increasing dementia that was so puzzling to watch. He was more and more wobbly and fell down several times a day. I had to help him stand up pretty regularly.
Bender was the happiest dog I’ve ever owned. Absolutely nothing phased him. Throughout his life with epilepsy, he never let it bother him. He never let it negatively affect him. I was the one who carried that burden. But his refusal to be affected by it helped me deal with it as well.
He was also the most photogenic dog on earth. He really never took a bad photo.
I knew this time was coming. When my friends saw him at Thanksgiving after not seeing him for 8 months, all three of them said, “Anne, it’s time to let him go.”
On Tuesday he told me it was time. I called the vet with tears in my eyes and asked if they could get him in. They had an opening. We had a couple hours to cuddle on the sofa, eat lots of cheese and some ice cream, and just enjoy hour last moments together.
He loved al the attention he got at the vet. And the staff there was so amazing. I think that letting a pet go is a generous gift we can give them… a peaceful, dignified, quiet passing with their favorite people helping them on their journey.
It’s such a difficult deicision to make. But I know it was the right one.
I haven’t done too much sewing this week. I did manage to sew all but one of the A block rows on my black, white and pink Interweave quilt. Tonight I hit my sewing room and sewed together the first row of the B blocks and got it all pressed.
Then I got ready to sew this row to the A row that comes next to it in the quilt top.
So the first two rows of the quilt are now done. I think there is a total of nine rows.
I love it when blocks come together. They are always a little chaotic on the design wall. But when they are sewn together they start to sing!
And you know, I’m not someone who really enjoys quilting with a lot of pieces that require significant precision. But I do like it when my corners match nicely!
Here’s the Interweave pattern I’m using, since a few people have asked me for it. You can find it with a google search.
That’s it for sewing tonight. But before I called it quits I wound five bobbins for my Featherweight.
I always wind a few bobbins at a time. i like being able to just drop in a new bobbin and keep sewing. These will keep me sewing for quite a while.
I’m down to 20 days to go until I’m retired. I can’t believe it’s finally here! I’m so glad I will be retired when Christmas rolls around this week. My birthday is Tuesday, and that will be the big milestone that makes retirement a reality!
I’m going to spend Thanksgiving with a group of friends that I’ve had Thanksgiving with for the last ten years or so. I’m always responsible for mashed potatoes and cranberries, and then I make the gravy once the turkey comes out of the oven. I make really good turkey gravy!
I’m playing pickleball after work tomorrow night and will stop and do my grocery shopping on the way home. It’s a short list!
I finally had some time yesterday to run out and pick up my Bernina from the service shop. They replaced the tension mechanism and put in a new bobbin case. They happily told me that all the tension issues they were concerned about when I had it in a couple weeks ago have been alleviated. That news makes me happy.
However, it didn’t arrive home until it was too late to finish my bag for a party on Friday afternoon. So I thought about what I could do instead and thought… if anyone in the world deserves a quilt as a gift it’s my co-worker who has now left. I hired her nearly 13 years ago and we’ve worked together that entire time.
So I dug into my closet and selected a quilt to give to her. I was a little worried because, as you know, the stuff I make can be pretty bold. But I took a chance and selected a really bold one for her.
I will still finish the bag and gift it to her, but now I don’t have to be in an insane hurry.
With that pressure off, I spent some time a couple evenings last week and started cutting the fabrics for my black and white Interweave quilt. I managed to get all the main fabrics cut on Friday night.
Yesterday I dug into my white on white fabric bins and seleced the only piece that was big enough, but I would have selected it anyway even if I had more choices. It’s white on white with a lovely delicate leaf and vine pattern.
I’m not a huge fan of stark white background fabric in quilts. The color of this is certainly white, but the white on white design gives it some interest and texture. That makes me like it better.
Several years ago I did some small project where I used some white on white as a background, and thought I would do a lot more of that project so went online and bought 10 or so one yard pieces of different white on white fabrics. I’m not sure I’ve every used any of it beyond that first project! This is the story of my life!
I managed to make the strip sets that are needed for the blocks and got them all sub cut after breakfast. (I was supposed to play pickleball this morning but it was quite rainy so hunkered down at home all day instead.).
After lunch I dove in and started putting all the pieces up on my design wall. There are basically two types of blocks in this quilt, and each type makes up one of two horizontal rows that make up the quilt. But it’s important to me to have it all up on the design wall before I start sewing it all together because I want to make sure I have all the fabrics in the right order and everything in the right place.
I have seen a few of these quilts online that have mistakes in them that mess up the weave pattern. It would make me nuts if I had a mistake in this quilt top!
I had all my different pieces organized on the ironing board and cutting table, and with pattern instructions handy…
… I did get it all up on the design wall in two different sessions.
Of course, it’s always fun to get a little closer look at the fabrics.
And even closer!
I’ll start doing some sewing on this if I have some time this week.
Back to work tomorrow. I now officially have less than a month to go! It’s so hard to believe I’m this close!
I finished the Australian Aboriginal fabric string blocks last week. I had them all up on my portable design wall just to see what they looked like.
the main part of the quilt top will be six blocks 7 blocks. then I’ll add a couple of borders to get it up to size. I tried a few fabrics and landed on this combo… a smaller inner border of the yellow that is used in the center of each block with this purplish fabric that is one of my absolute favorites.
Love the way it plays with the yellow center strips! It feels pretty perfect!
I felt the urge to start something new and didn’t want to force myself to finish the strings top first. So I pulled all the locks off the wall and packed them up with the border fabrics and I’ll deal with it all later.
A co-worker of mine, a woman I hired almost 13 years ago and has been in the trenches with me all that time, is leaving the organization for an amazing job. It really makes me sad that she’s leaving, but I’m really happy for her and this opportunity for such a large and well known organization.
I wanted to make her a Frankenbag as a going away gift. I selected a group of fabrics that are similar to one of my favorite bags I’ve ever made.
I got cutting and had a plan in mind. I was nearly done with the first panel and started having all kinds of tension issues with my Bernini. I changed my needle. I retreaded the machine several times. I took the bobbin out and put it back in the case several times.
I got my machine back a week or so ago. I hadn’t sewn on it until this weekend. the tech told me that he was seeing some tension issues in the stitch and said it might be necessary to replace th tension assembly and the bobbin case. So I called him and had the machine back in the shop in a couple hours. He called me today to let me know that with the new parts the machine is making gorgeous stitches with absolutely no tension issues.
So that meant that my plans to finish up this bag this weekend were scuttled. I did finish both panels on my Featherweight yesterday.
then this afternoon I made the quilt sandwiches for the panels so they are ready to quilt once I have my machine back.
I also cut all the lining, pocket and zipper placket pieces and got them fused to the interfacing.
Not sure when I’m going to have time to go and pick up my machine. I have to deal with some traffic to get there and back.
Since I had a bit of an urge to do something in my sewing room I decided on the accent fabrics I’m going to use for my Interweave quilt with all the black and white fabrics and got them all pressed and cut today.
I still need to press and cut all the black and white fabrics and I need to dig into my stash decide on a white background fabric.
I took Thursday and Friday off work since I still have some vacation days that I’ve decided to use up before retirement on December 12. Holy cow!!! As of Wednesday, that’s just a month away!!! I can hardly believe it.
I played a lot of pickleball while I’ve been off. Had some really good sessions and it was a great way to spend some days off.
I finally got my butt out and bought a new car almost a month ago. It’s just a newer version of the car I had. I really like it so far but I’m not quite used to it yet.
If it was just me I wouldn’t ned this much car. But with the dogs I need a sufficient cargo space. My old car worked really well for me and I’m sure this one will too.
It’s been a really beautiful fall her in Portland. The colors have been fantastic! Here’s my yard a couple weeks ago.
And my favorite little October Glory red maple has nearly lost all its leaves.
These little Japanese maple leaves are so gorgeous! I have two of these trees in pots on my patio. I picked them up a few summers ago in front of a neighbor’s house. I’m planning on planting them in the spring.
the dogs are doing well. Rico had a sheep herding lesson on Saturday. the first he’s had in over a month. He was so happy to be out there again!
Bender is getting harder and harder to wake up and to come in from the yard. His sight has gotten bad and he can’t hear much. But he’s still out there and still wants to go for our walks. And his appetite is intact.
He did manage to get himself completely stuck in a barstool while I was playing pickleball today. He was in this position when I got home. I have not idea how long he was like this.
I’m having to lift him onto the bed every night. It’s been a month or so since he could jump up there himself. But he usually sleeps nicely trough the night.
These boys are usually good about leaving me enough space on the bed. Rico rarely sleeps on the bed at night. He gets up for a snuggle every morning.
I’m getting more and more antsy about retiring! It’s so hard to believe that it’s so close!