We had another absolutely gorgeous fall day here today. And now we have ten days of rain on tap. So I made sure I got a lot of time outside to enjoy it.
I took the boys down to Canby, Oregon, this morning to spend an hour doing some agility training in our club barn. It was a great way to start the day. Rico sure did enjoy himself!
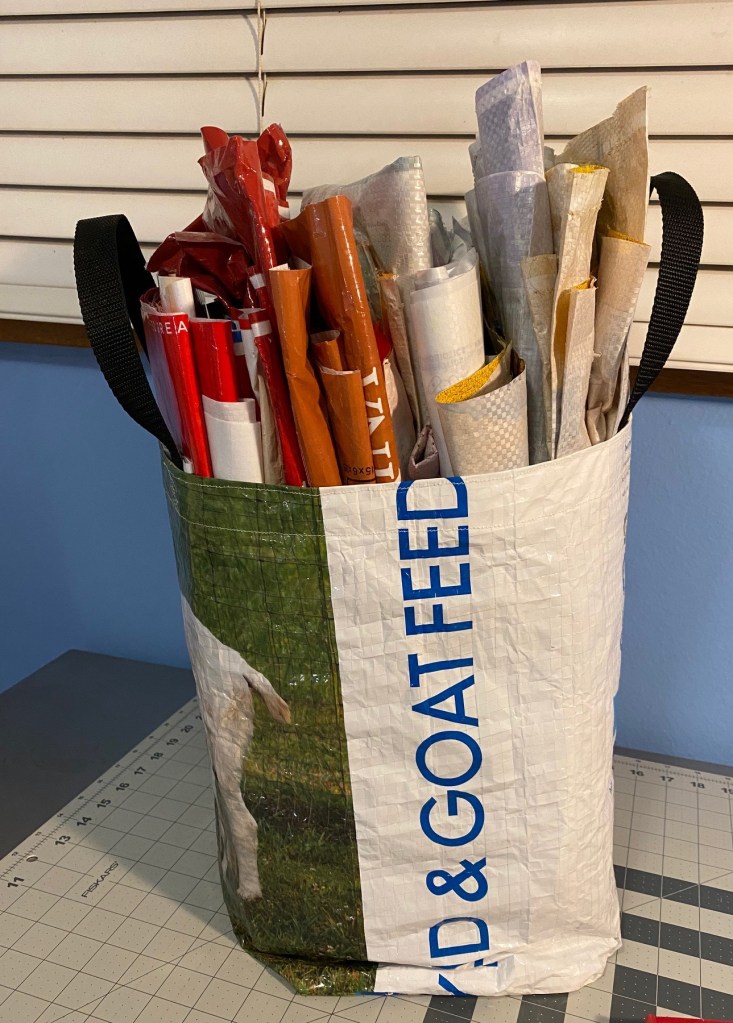
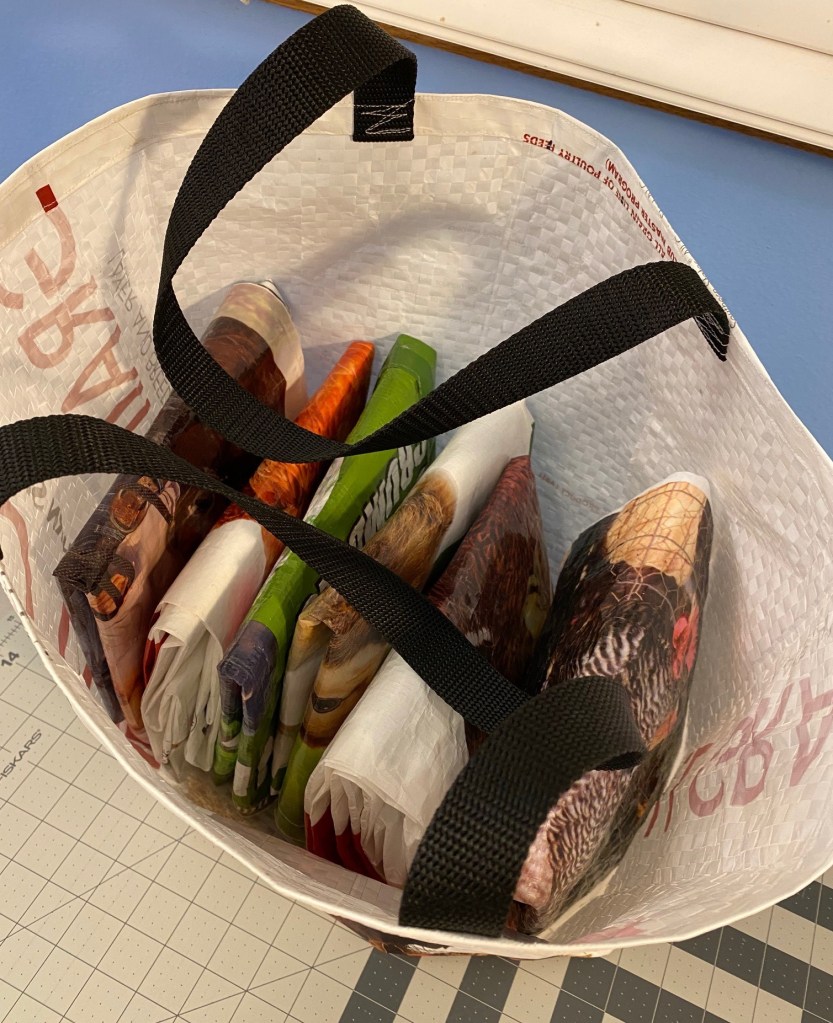
Once we got home I took advantage of the beautiful sunshine and took all the feed bags from the garage to the patio and sorted out what was clean and what needed to be washed. I think I had around 20 bags to go through and only seven of them needed a trip through the washing machine.
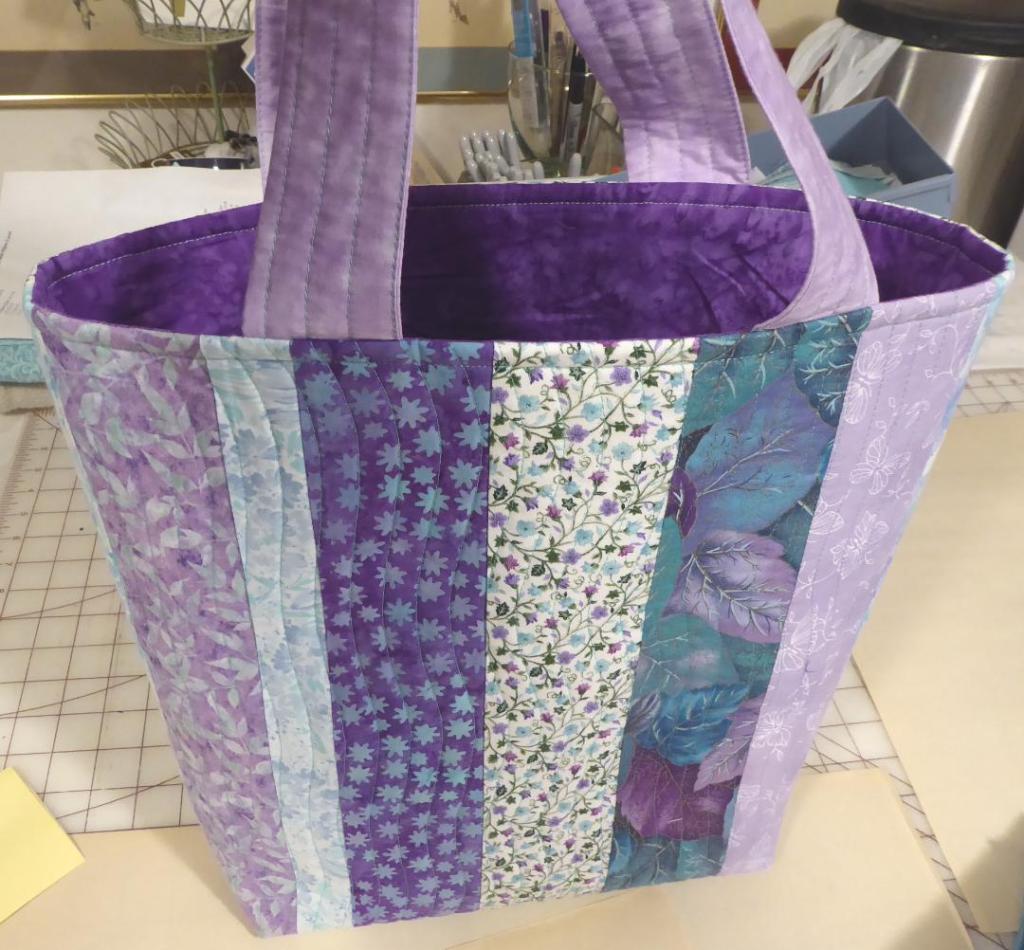
I folded all the clean ones and stuffed them into one of the totes I made earlier this week. So these are all ready to trim up and start constructing.
Once I finished up with the bags, the boys and I headed out for a nice five mile walk. There were a lot of people out walking! I think everyone wanted to get some sun before the rain sets in.
When we got home I cleaned up the kitchen and made some nectar for the hummingbirds.
After dinner I took the boys for a quick walk through the neighborhood in the dark to see what was going on with trick-or- treaters. And there were quite a few out and about.
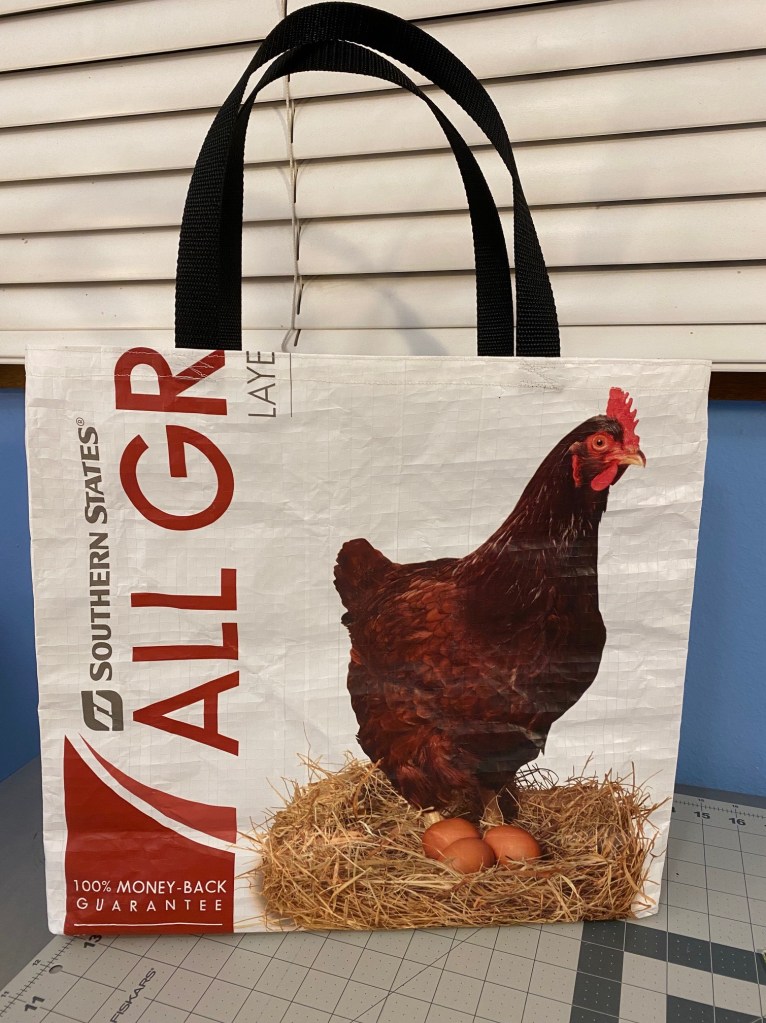
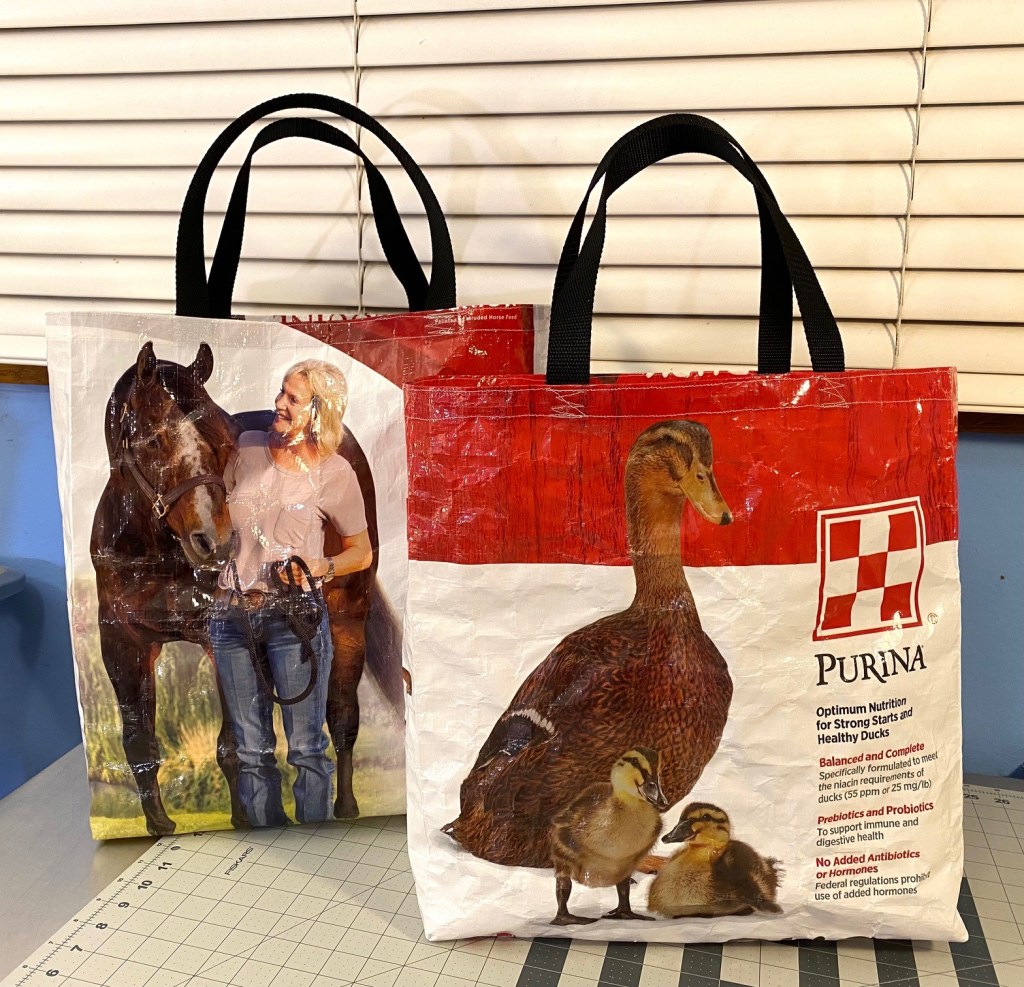
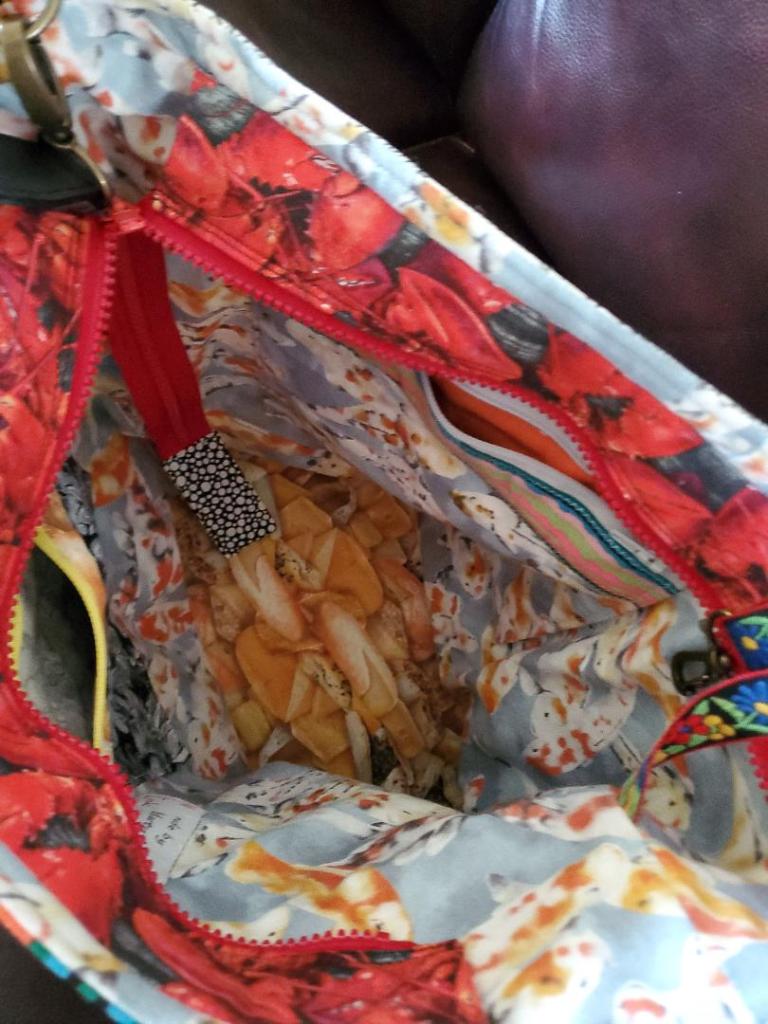
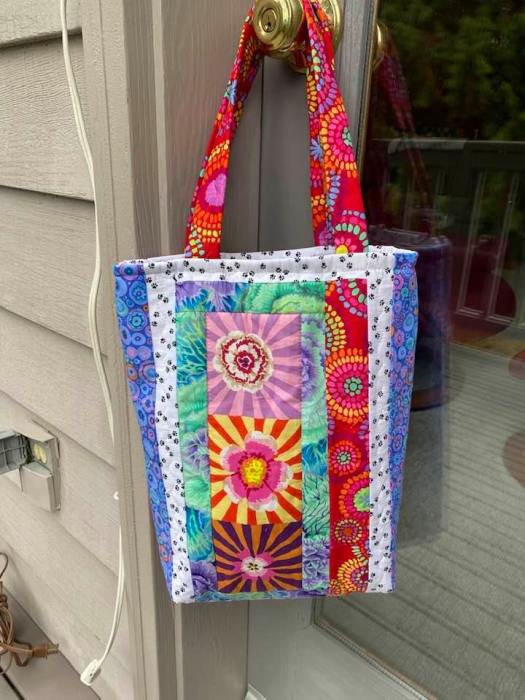
When we got home I dug in on some more feed bag totes. I finished up four this evening. This first one came to me in a nearly-done state. All I had to do was add the handles and finish the top. Doesn’t this chicken look like it’s wearing little boots?
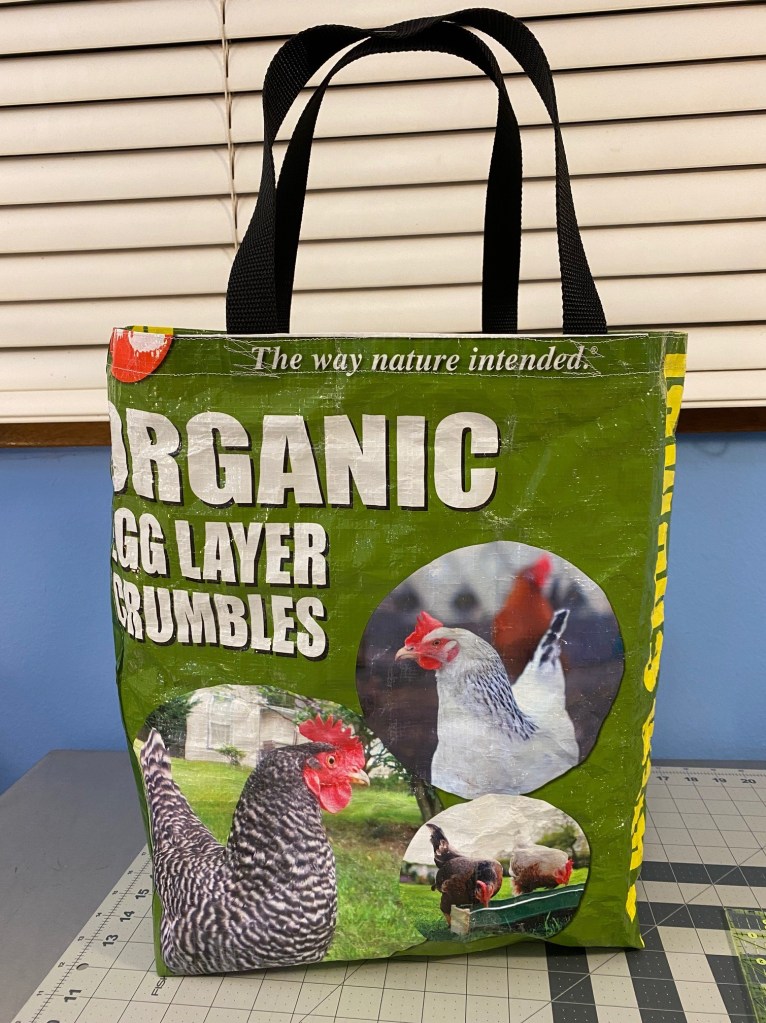
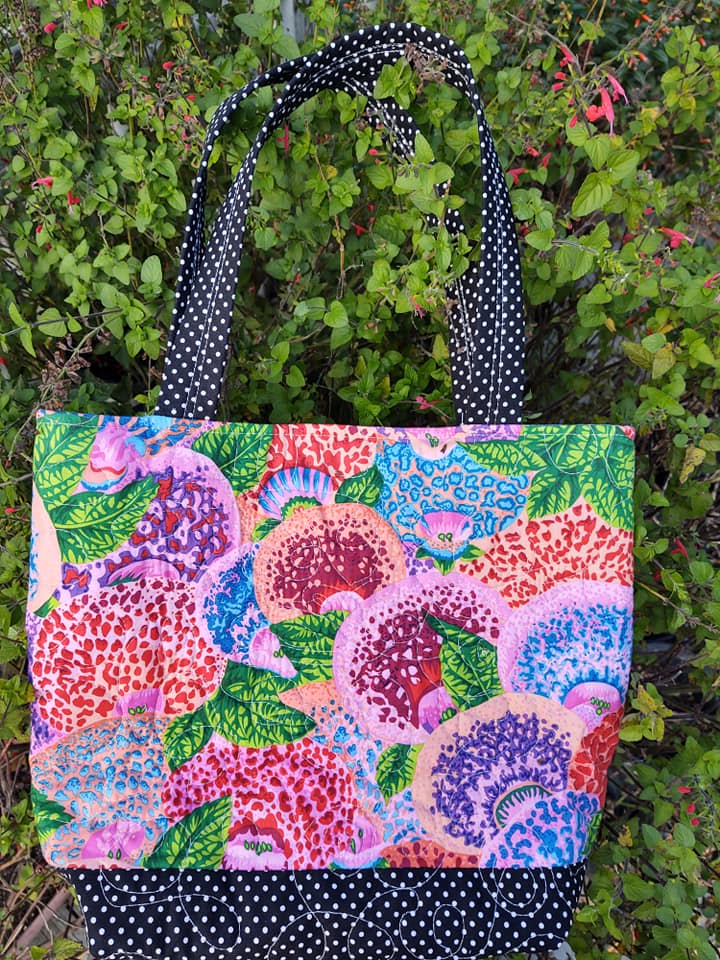
I love this next one. The colors are so fun. I would love to find more bags with this kind of color!
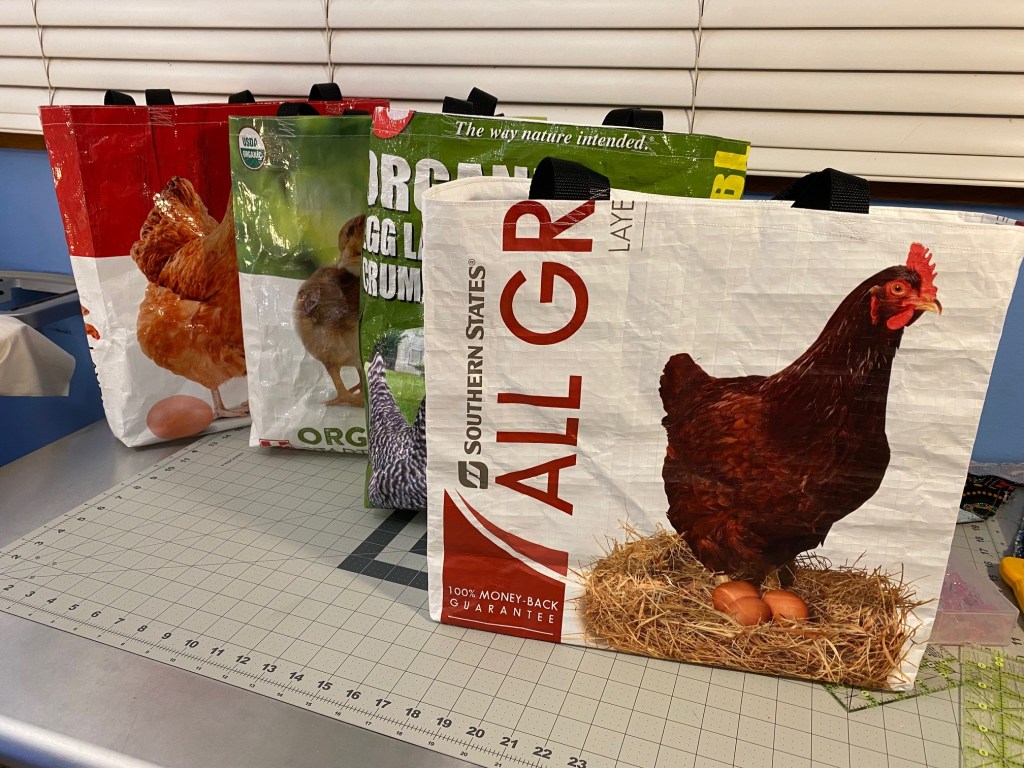
These next two are really big! I love the images on the bags.
I wish this picture showed the size differences in the bags a little better. They do vary quite a bit in size.
I think I’m going to keep one of the really big ones and put it in my car to hold my muddy rubber boots after sheep herding. That would be a perfect use for it.
Once I had those four bags finished, I folded up all my finished totes and put them into one of the bags I finished tonight.
Damn. Why are weekends so short? I would love a few more days off.
After about ten days of rain we’re having a gorgeous and sunny fall weekend. So I decided to head out this morning and drive south to Scio, Oregon, to watch a sheep dog trial. And I’m so glad I did! What a perfect way to spend such a beautiful day.
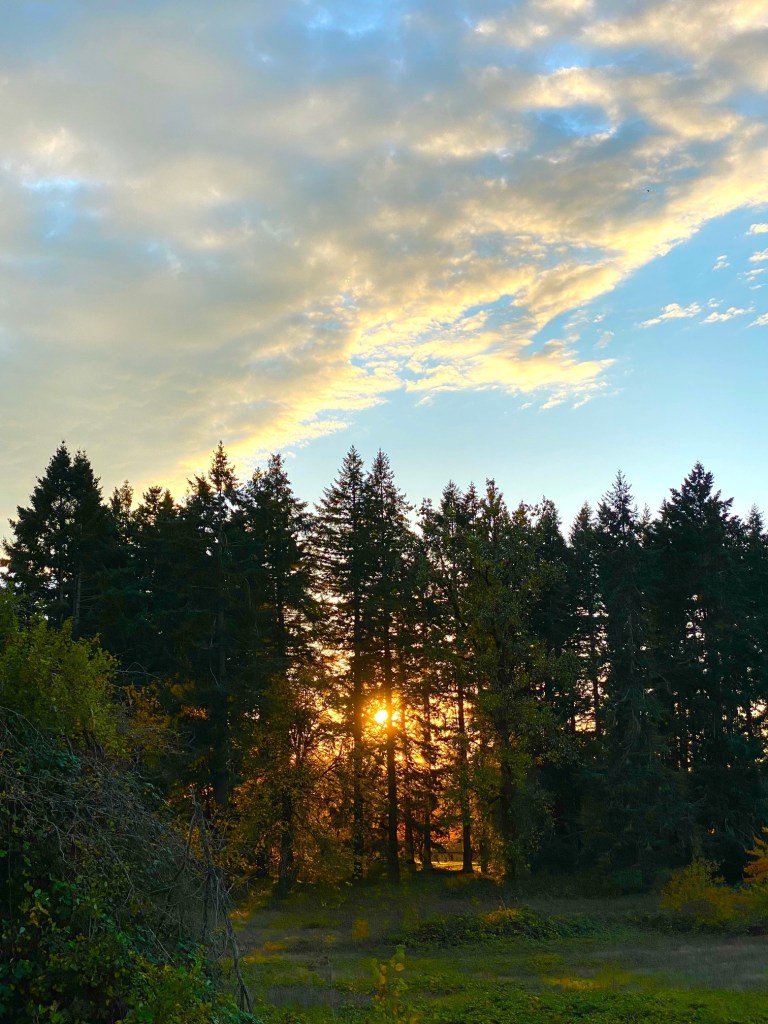
I even got to see a few friends there. And on the way home, I stopped by another friend’s place and picked up a few more feed bags, let the dogs have a nice run in her field, and had dinner on the patio. It got a little cool after the sun went down.
We saw this gorgeous sunset when we were on our way to pick up our dinner.
We didn’t get home until after 7 pm. So I fed the dogs and then we headed out for a quick evening walk as they spent quite a few hours in the car today.
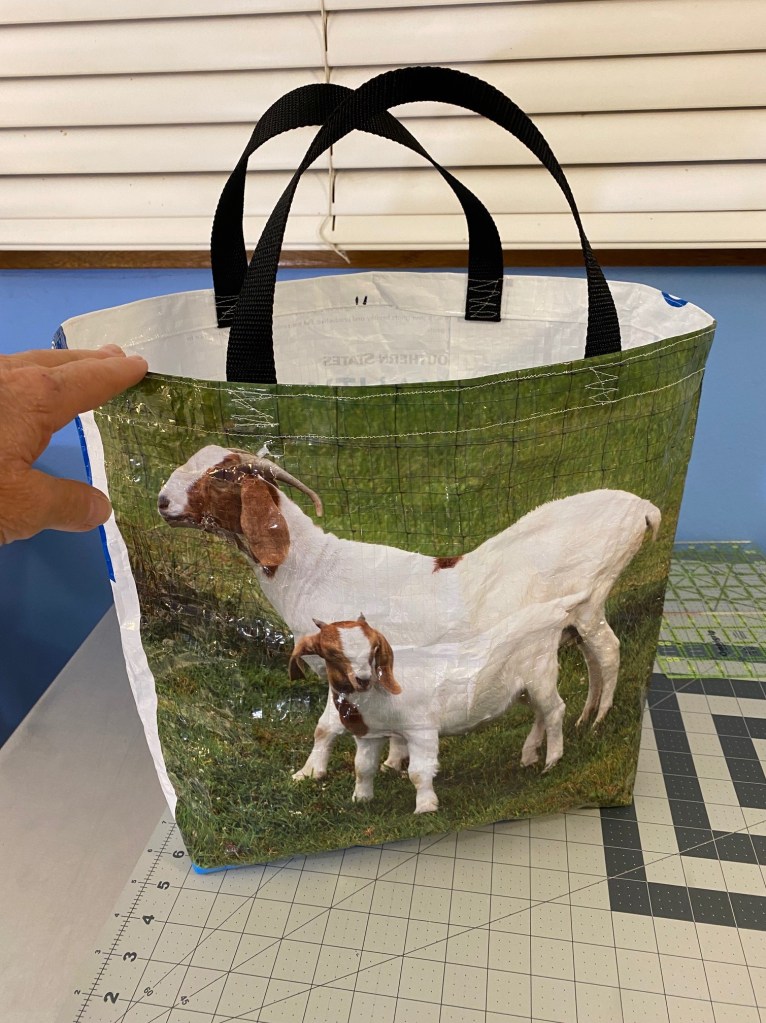
I want to thank the people who pointed out to me that the little white animals on the bag I made last night are not in fact sheep, but actually goats. I knew they were goats. I just hink I had sheep on the brain! I do spend some time around sheep and should be able to recognize one. But maybe not!
Once I got home this evening I hit the sewing room and whipped up two more feed bag totes. They went together really fast!
I just love those little ducks. And this bag is bigger than the ones I made last night. It’s all dependent on how big the feed bag is since you don’t sew any side seams. And the size of the bags can vary quite a bit.
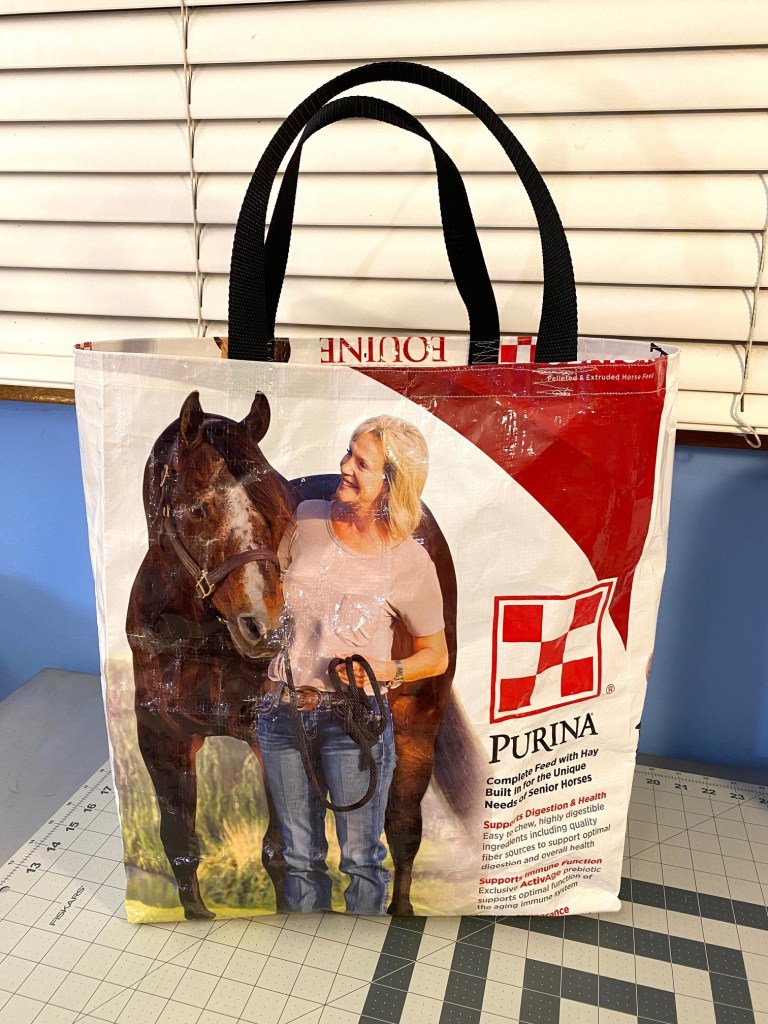
I also made this horse bag tonight. And it’s enormous!
I also realized tonight, although I think I actually did this last night… you need to make the gusset the same size as the side of the bag. These bags have a sort of accordion fold on the side of the bag. The size of the fold varies from bag to bag. So some bags are deeper from front to back than other bags. I guess it keeps it all interesting.
Here’s tonight’s too bags. The horse one is bigger than the duck bag.
I also prepped some bags by cutting of the tops and bottoms. They’ll be ready to start sewing on tomorrow.
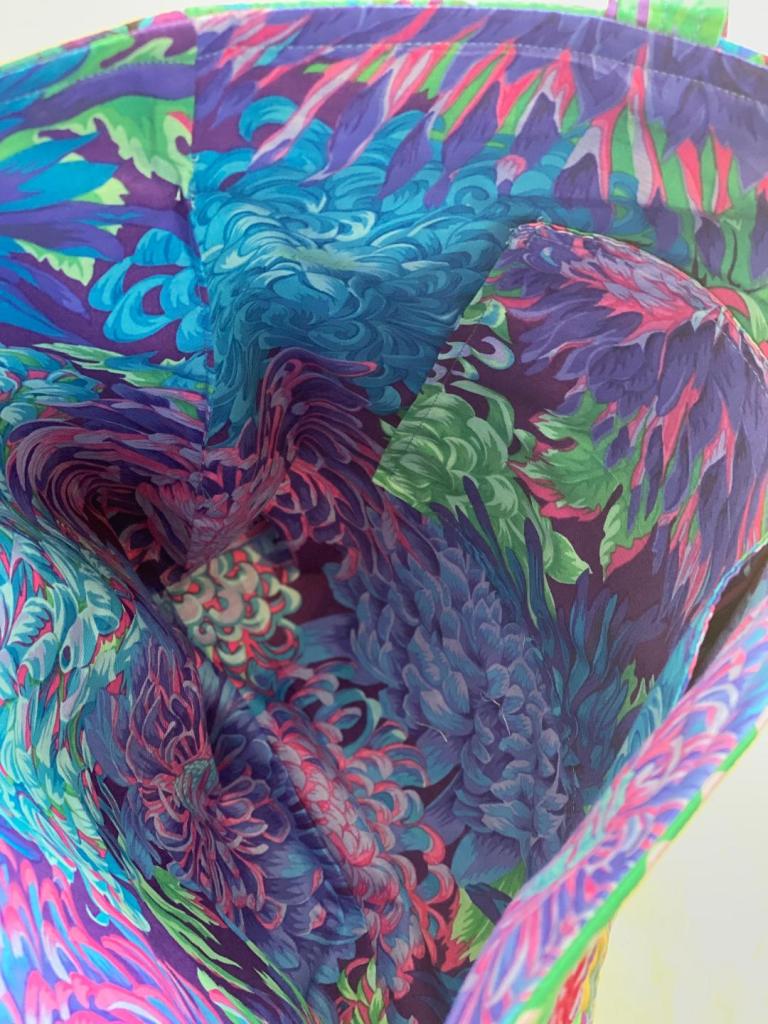
I just love this next green bag. The colors are so fun. But it has some odd flanges of material on the side folds that will stick out oddly on the finished bag. I’m thinking I’ll stitch the flanges down before making the bag. I’ll take a look at it tomorrow and see if it will work.
You can see the flange on the left side of this bag.
Tomorrow is supposed to be another gorgeous day. I’m planning on heading out and doing some dog agility training in the morning and then hanging around home for the rest of the day.
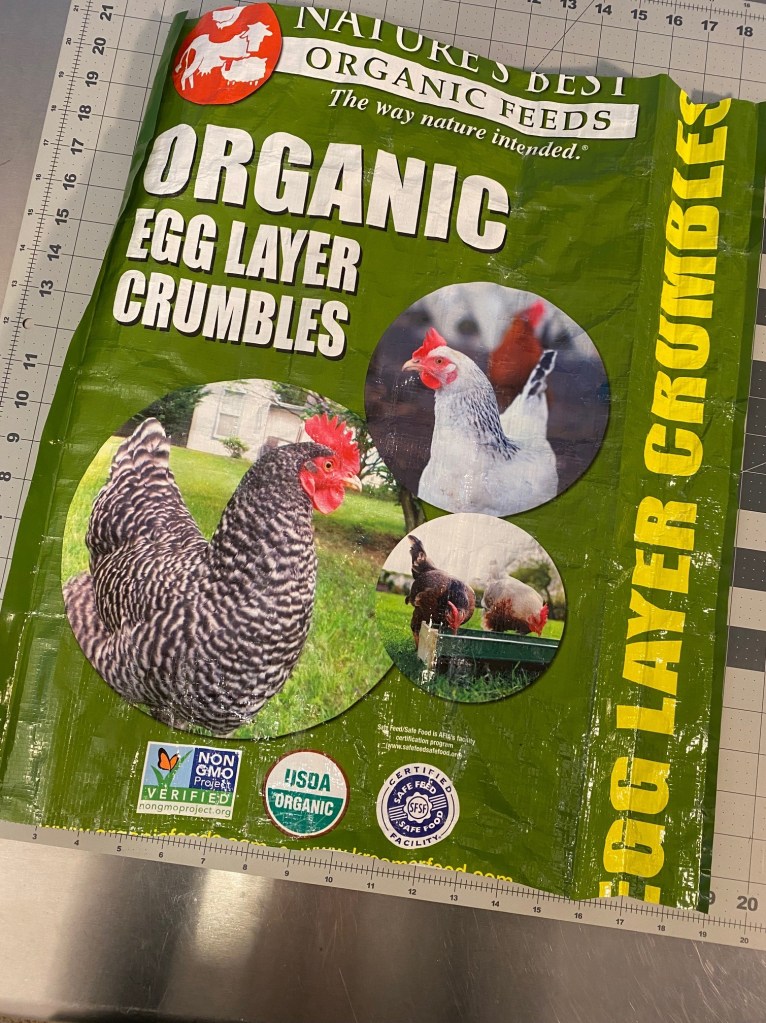
A couple weeks ago a friend of mine gave me a chicken feed bag, thinking I might want to do something with it. So I looked around on the internet and, apparently, making tote bags from animal feed bags is a thing.
And because I don’t do anything half-assed, I put out the call on Facebook that I was looking for empty feed bags and my friends really came through in droves. I think I must have at least 40 feed bags in my garage — horses, chickens, pigs, goats, sheep, and more chickens and more horses. Some really fun and colorful designs.
A Facebook friend even mailed me some all the way from Maryland! And tonight I decided that I was ready to dig in and make a bag. And I actually ended up making two!
The feed bags are made from a synthetic plastic coated fabric that has strong thread running through it. So it’s really strong, but it’s a little stiff. I knew that it would be very different than sewing on quilting cotton.
There are a lot of tutorials out there for making these totes. I kind of got ideas from several different ones and applied them to these bags.
I made the sheep bag first and learned a few things that made the chicken bag so much easier and quicker.
First, on the sheep bag, after trimming the bag square, I sewed the bottom seam first, cut squares out of the corners to make gussets, and then sewed the gussets. Once this was all done I finished the top.
On the second bag I trimmed the bag top and bottom square, and then finished the top and added the handles first.
This meant that I was doing all of this manipulation of the bag when it was a tube.
And that made it all much easier to manipulate. The top on the chicken bag was so much easier and quicker to sew and the finish was much nicer.
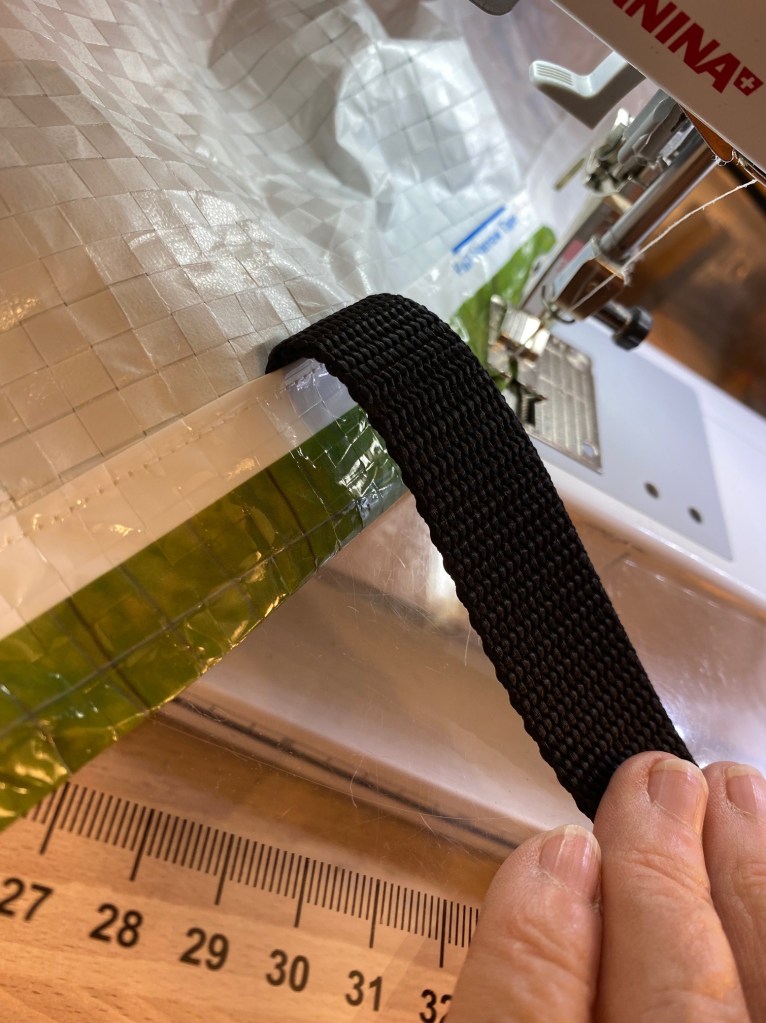
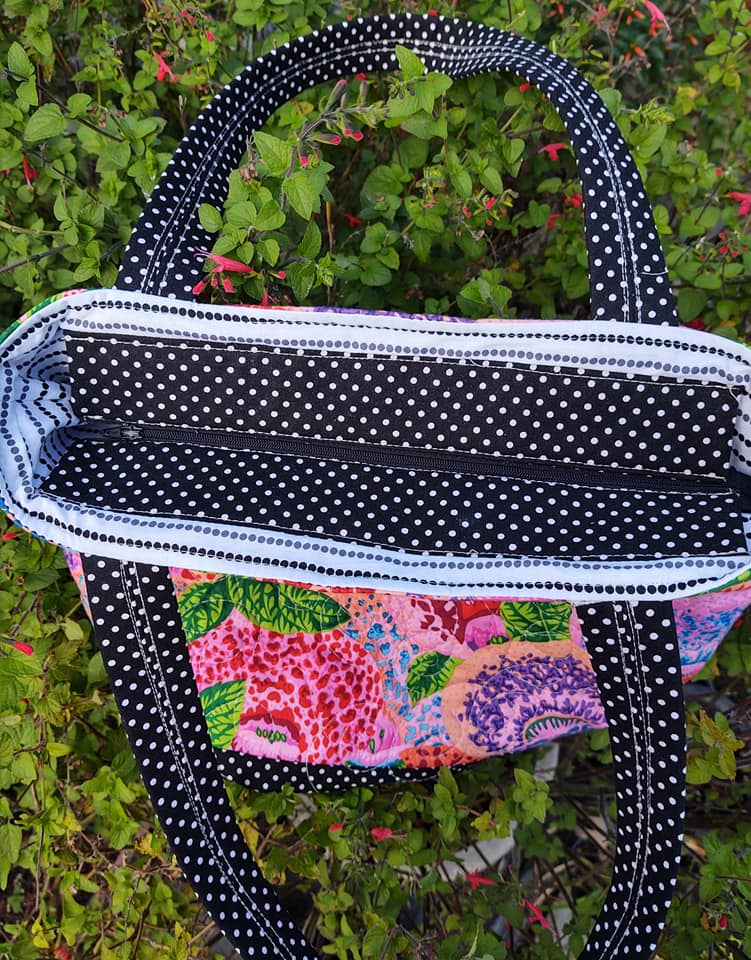
To finish the top I turned down about one inch at the top of the bag and then turned it over again. Then I marked where I wanted the handles, slipped the handle ends up under the fold and clipped them in place.
Then I ran a line of stitching along the bottom edge of the folded piece, enclosing the handle ends in the fold.
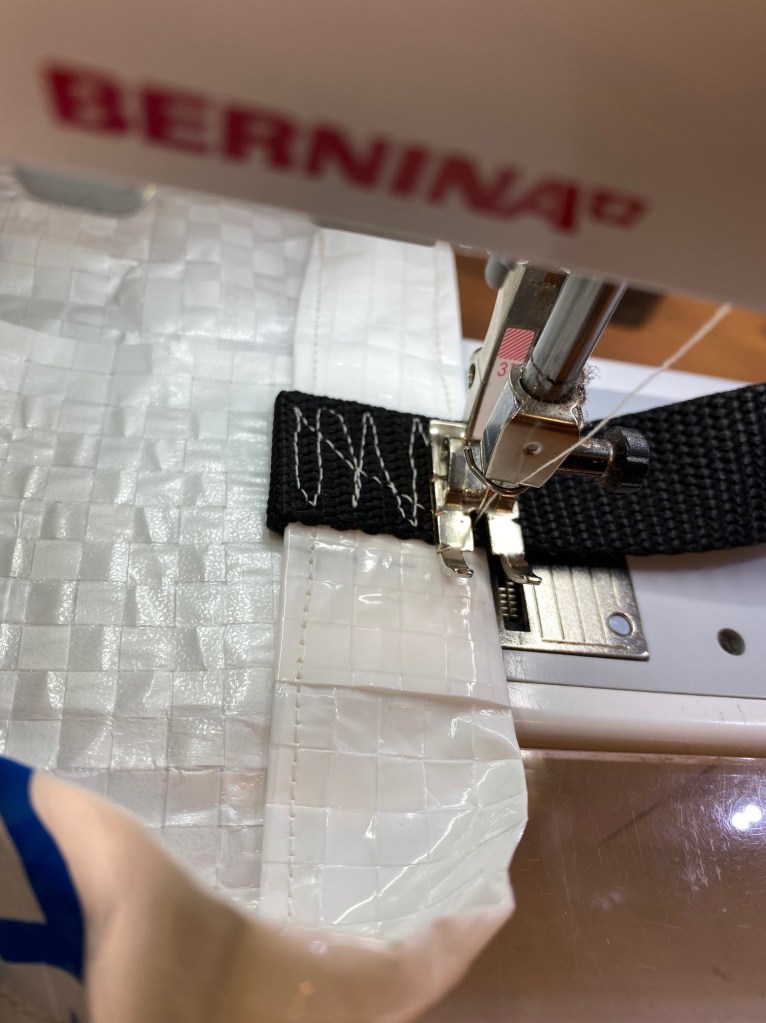
Then I ran another line of stitching about 1/8 inch from the very top of the bag, folded the handles up to catch them in this line of stitching and adding some reinforcing stitching across the handles where they overlapped the folded edge.
Here’s the reinforcing stitching.
To finish the gussets on the second bag I simply did it with the folding and flattening method and then stitched a line across the folded corner.
I did two lines of stitching to reinforce the gussets and then trimmed away the excess fabric.
The gussets were faster and easier with this method.
I also made the gussets on the fist bag a little do deep so I made them an inch smaller on the second bag and the proportions are better.
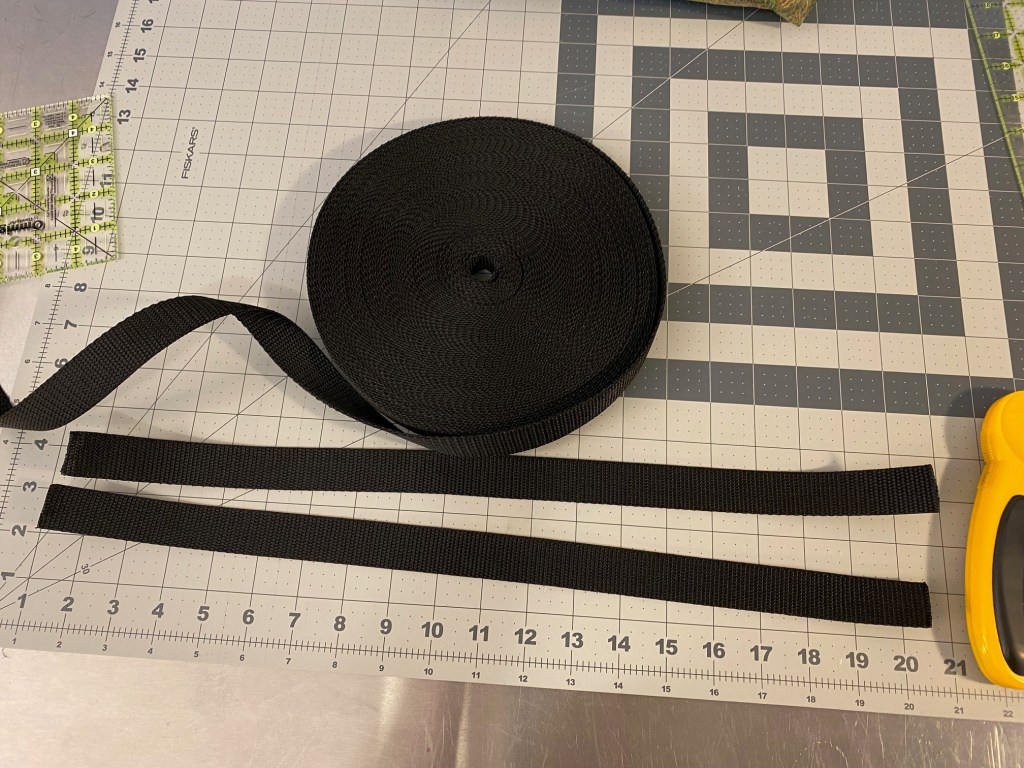
Most of the tutorials I looked at made the handles from strips of the bag fabric. But I decided to purchase some nylon webbing instead. I’m glad I didn’t spend time making the handles. I like the feel of the nylon handles much better. And they took a lot less time.
I’m guessing the second bag took half the time of the first bag. I just love figuring out quicker and more efficient ways to make things.
Here’s more photos of these fun little bags. Even the backs are fun!
A couple of the tutorials show people lining the bags, but I think it’s overkill for the purpose. I see these as very utilitarian… like for groceries or packing stuff to toss in the trunk of the car for the beach.
Big thanks to Judy Jaudon for sending me these fun feed bags!
I’ve gotten a few photos of Frankenbags in the last week to share with you.
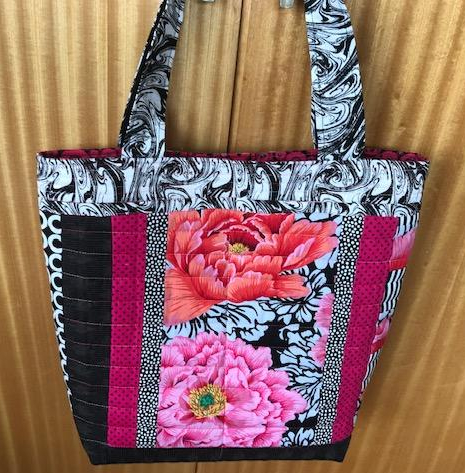
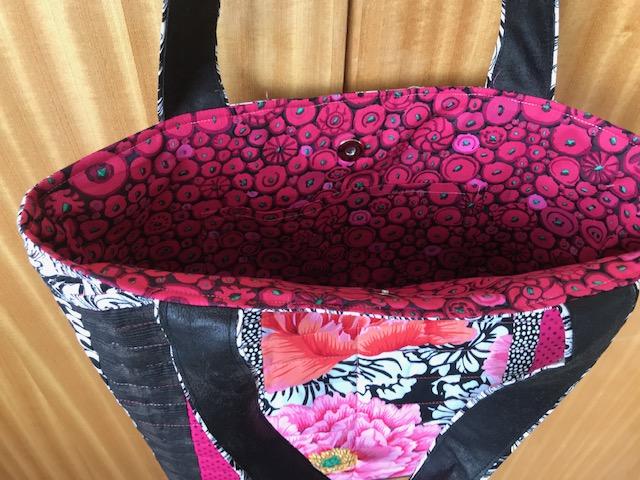
First up is this bag from Sabine Müller-Rückriem from Germany. I just love these bright blues and greens together. She’s also included some cool curved piecing. And I love the peek at what looks like a really good lining!
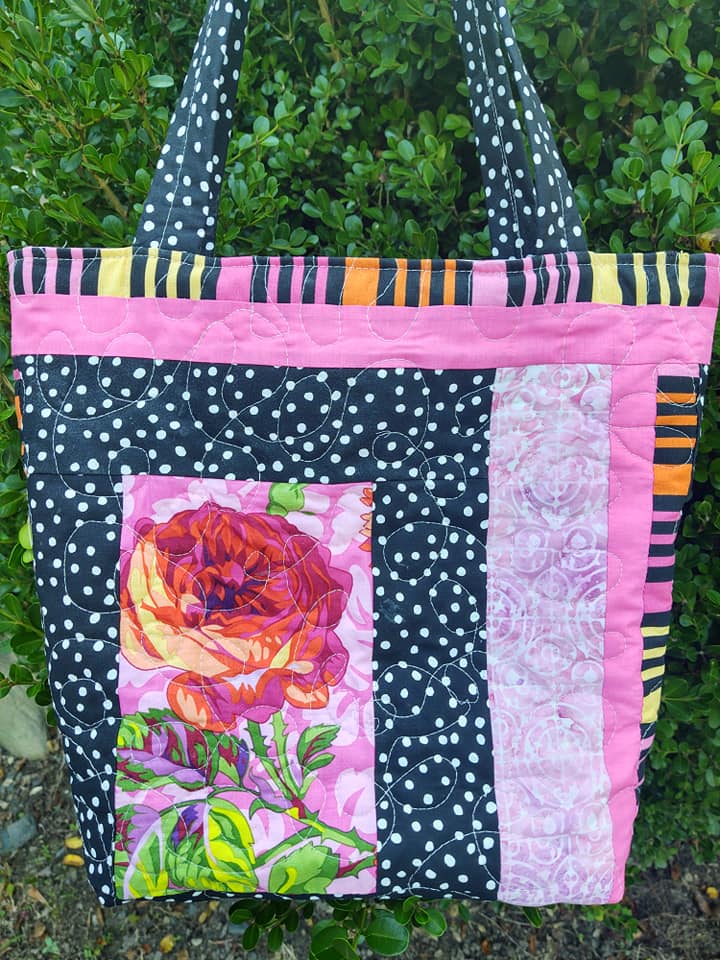
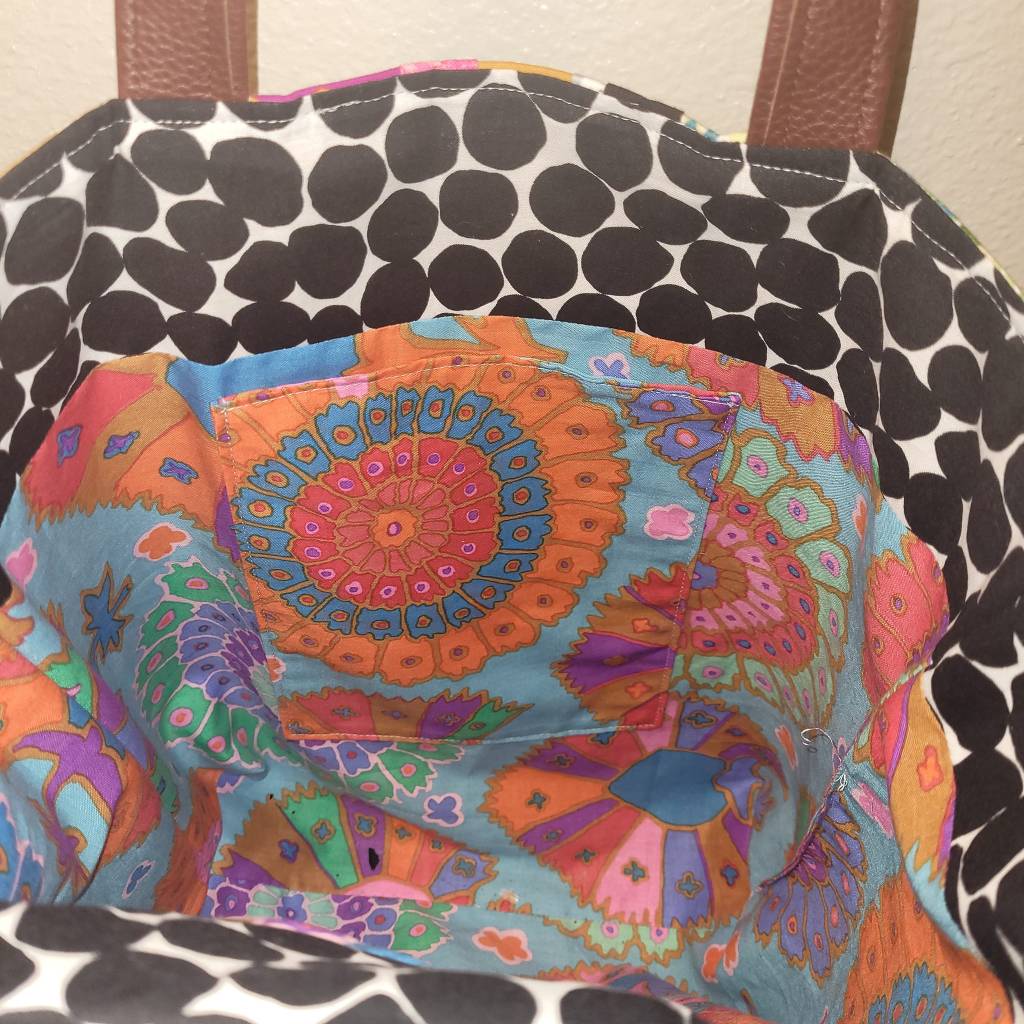
Next up is this bag made by Anita Goodson. She made her bag from a solid piece of fabric with a contrasting fabric on the bottom. And I love that she added a zipper placket. The inside of this bag with all the black and white is so cool! Love it!
Last up tonight is this bag made by Cookie Little. I love her saturated blues with the pops of green and the sunbursts are always so good! And she used one of my favorite fabrics for her lining! The last photo shows the key fob she added. It’s a great way to secure your wallet or keys.
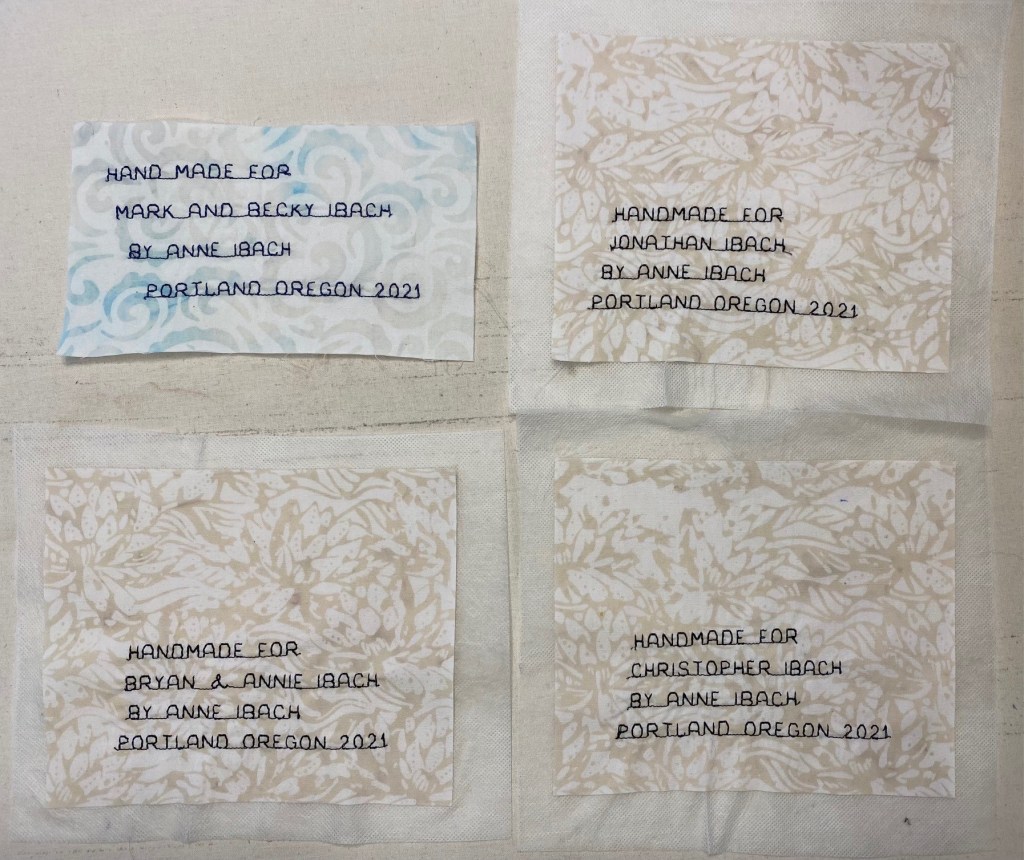
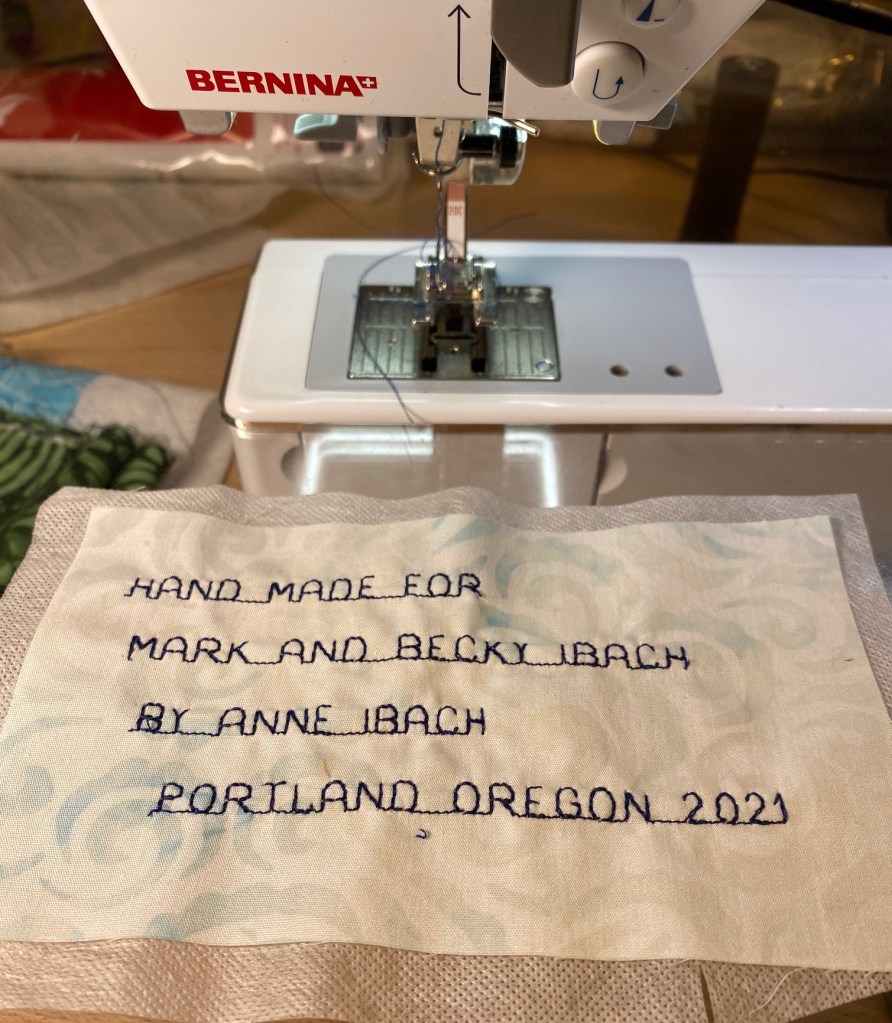
I was talking to a friend as I was walking the boys tonight and remembered that I needed to make labels for the five quilts I got back from my long arm quilter a few weeks ago. I’ve been thinking about this a little bit and had an idea of how I was going to approach this.
Here’s four of the labels.
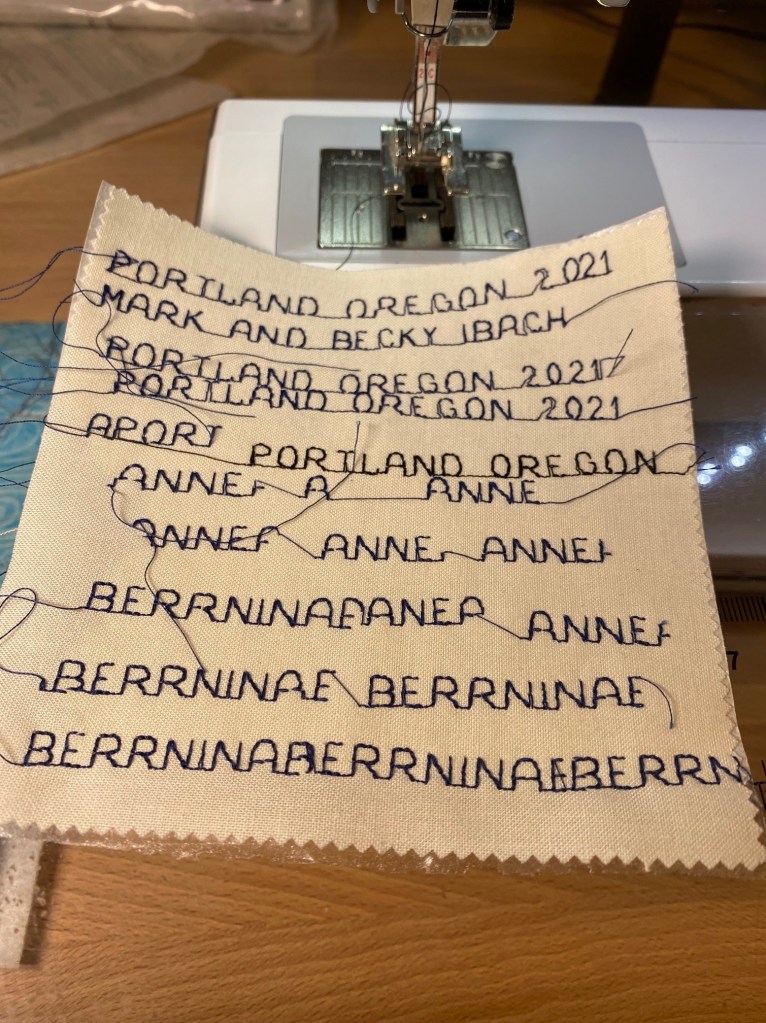
My plan was to use my sewing machine’s memory function to make labels using a basic alphabet.
So after our walk, I hit the sewing room and started playing around. I made a label for the quilt I gave to my nephew and his wife for their wedding last summer. That label turned out waaaay too stiff and I wasn’t happy with it.
So I had been thinking that I had a couple of options for stabilizing these labels for stitching, and a couple of options for attaching them to the back of the quilts. You really do need to use stabilizer when stitching these labels. Without it you’ll have a puckered mess!
I thought maybe I could use a light heat and bond to both stabilize and attach the labels. FAIL! The paper was too stiff to pull away from the stitching. So I tried using some water soluble stabilizer that I’ve had for a few months. And then I though I could use some fusible webbing to attach this to the quilt. And I liked how it worked.
I used some practice labels to test out these different stabilizing and adhesive options and bonded them to a quilt sandwich I use while setting up my machine for free motion quilting.
The stop one was done with the fusible webbing. It’s soft and more smooth. The bottom one is using the light Heat and Bond. it’s too stiff and it doesn’t look as good. So, I will use the fusible webbing once the labels are done. Then I’ll do a simple blanket stitch to finish the edges of the labels.
It took me a little bit of time to remember how to set up strings of words in the memory of my machine. So there was a lot of stitching!
And then, once I figured out the memory part, it took some time to figure out how to make the machine stop once it finished the text in memory, rather than repeating the same text over again.
After about an hour, I had it all figured out and I made the first label on the light blue batik. I thought it was great until a friend pointed out that I had misspelled handmade. So, I will remake this one.
I made the three beige labels assembly line style. I started with the bottom line on each label and sewed that line onto all three labels. Then I moved up line by line until I was done.
Oh, and something to remember for the next time I make labels. Batik fabric works much better! It has a higher thread count and helps keep the fabric flat with all that stitching. I was using some Kona cotton for my test piece and it was pretty puckered.
Later this week I’ll finish up the labels and get them attached to the quilts. I want to get them shipped in plenty of time for the holidays. And that’s getting closer every day!
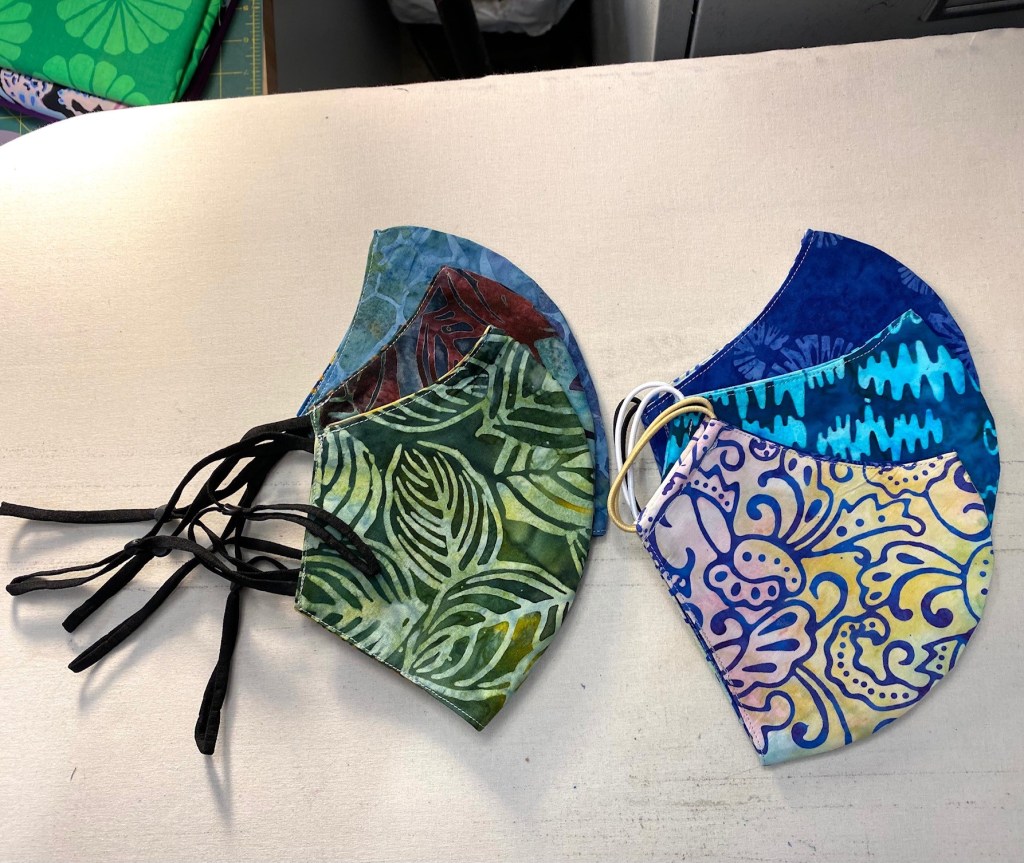
I did do a little sewing over the weekend. I made six masks for some friends who had asked for more. I have made them masks since the pandemic hit and they love the fit of these.
The husband wears hearing aids so has trouble with some masks. He really likes the adjustable ear straps on the masks at the left. All of these masks are made with two layers of batik with one layer of fusible nonwoven interfacing. You can find the pattern for my masks in this blog post. If you make masks, you should give this pattern a try. I’ve made a LOT of different mask patterns and this one fits the best, is really comfy and is really easy to make. Everyone I’ve made them for absolutely love them.
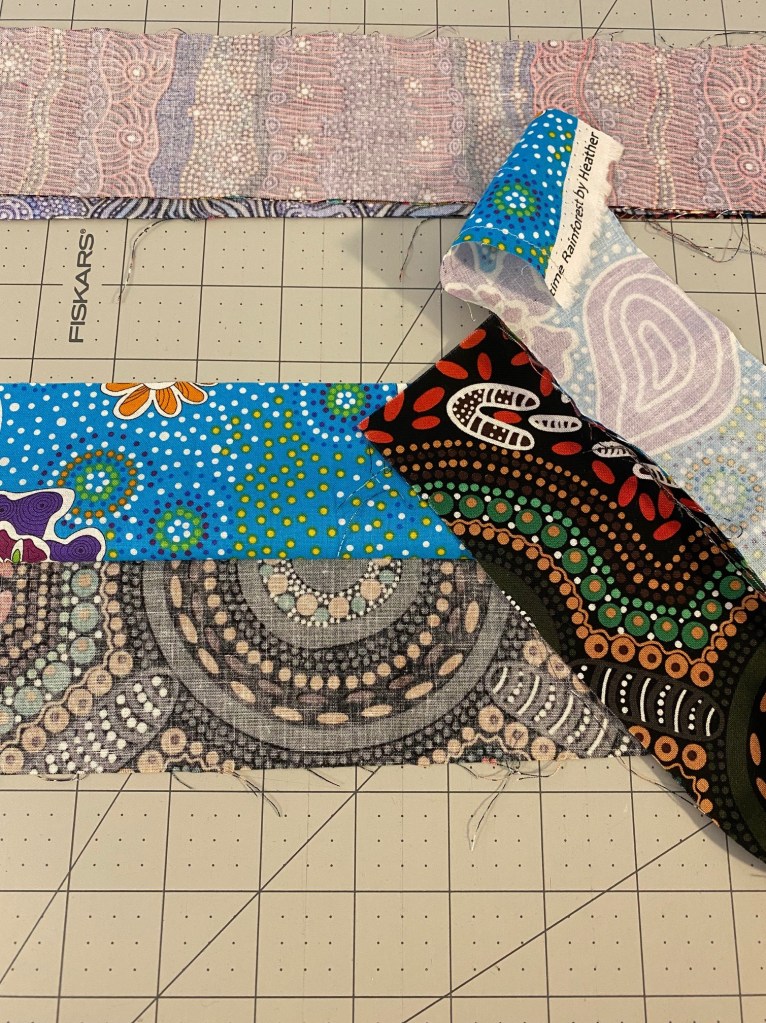
I also made a few strip sets for my Aboriginal fabric trip quilt.
I quit sewing after I sewed two strips together with the wrong and write sides facing each other. I haven’t yet been able to make myself pick this seam out and start over.
Luckily, one of those fabrics is nice and dark so it will be easy to see the stitches. Damn.
Some significant rain and wind storms were predicted for my area over the weekend, but they never really materialized. So it was a pretty nice weekend and the boys and I got some good walks in.
This is such a gorgeous time of year here in Portland.
On our mid day walk in the rain this afternoon I saw the biggest mushrooms I’ve ever seen!
The weather is looking pretty dreary here in Portland. It looks like the rainy season has definitely arrived.
I worked pretty late last night and had to be on a Zoom meeting this morning at 8 am, so I made a point of stepping away from my desk this afternoon for a full hour-long walk with the boys. There would be no evening walk with all this rain.
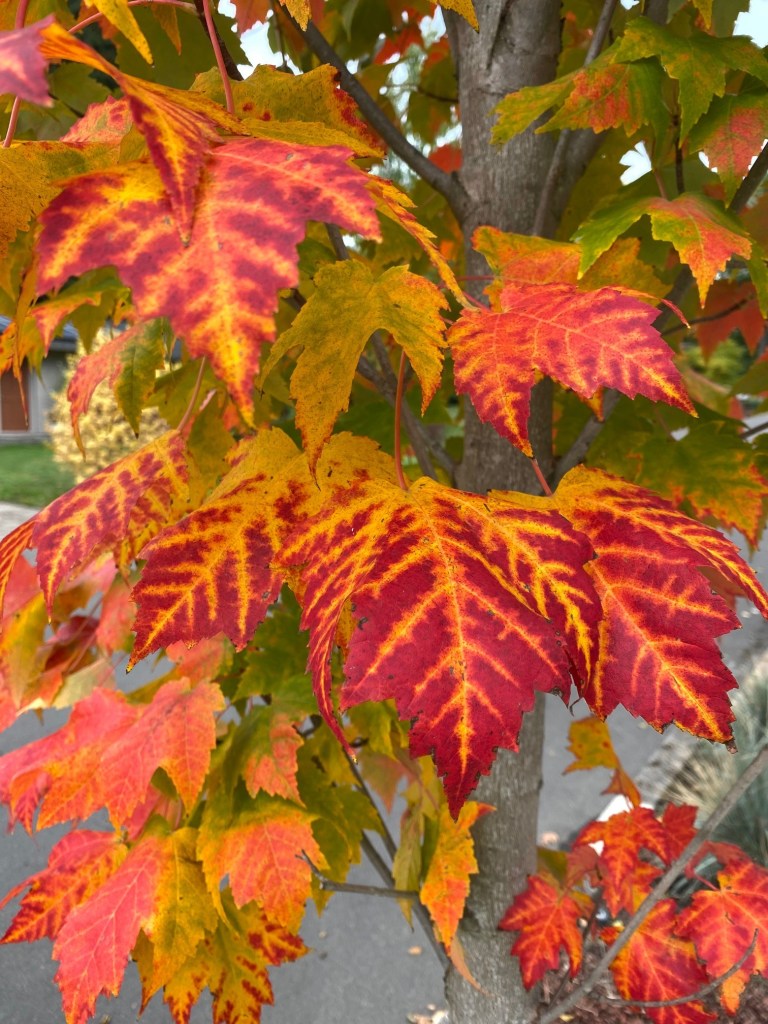
I ran across the prettiest little maple tree on our walk. Just look at these gorgeous colors!!!
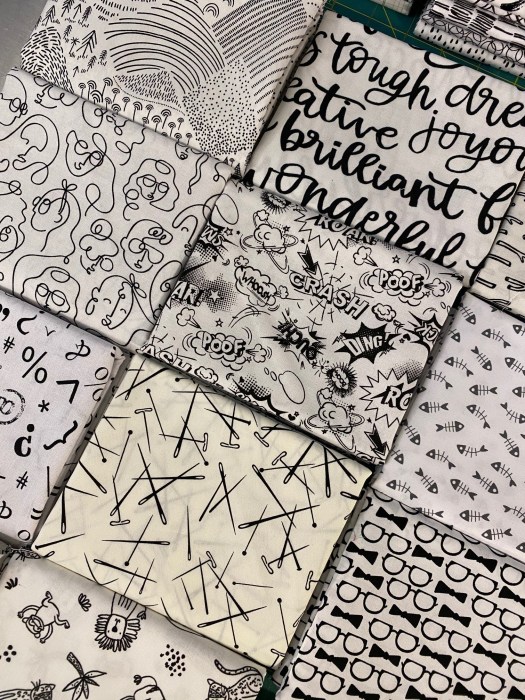
Since I was going to be in the house all evening, I decided to sit in on the monthly meeting of the Portland Modern Quilt Guild. I had the meeting running on my laptop while I did some stuff in my sewing room. I straightened up a few things, cleaned off my cutting table, and put together some fabrics for the KFC and low volume white fabrics quilt I’m thinking about.
It’s all bundled nicely in a big zip lock bag and has been put away in the closet in my sewing room. I’m going to force myself to finish at least one other quilt top before I start this one.
Here’s some of the Kaffe Fassett Collective fabrics in this bag.
There are 12 different KFC fabrics and 12 different white with black fabrics. it’s entirely possible that some of those fabrics will change before I actually start cutting.
I did sew three strip tube sets for my Aborginal trip around the world quilt while I listened to a presentation by a quilt historian in the guild meeting.
I’m a little anxious to see what this quilt will look like when I get more blocks done. It’s definitely going to be chaotic. I’m hoping it will actually calm down just a little once there are more blocks and the patterns made by the diagonal lines is more apparent. It will probably look totally different!
Those fabrics are so gorgeous! Here’s another strip set.
And here’s the third one I made tonight.
I might make a few more strip sets before I start cutting the ones I made tonight. Then I’ll be able to have a good stack to pin to keep my hand busy during long Zoom calls.
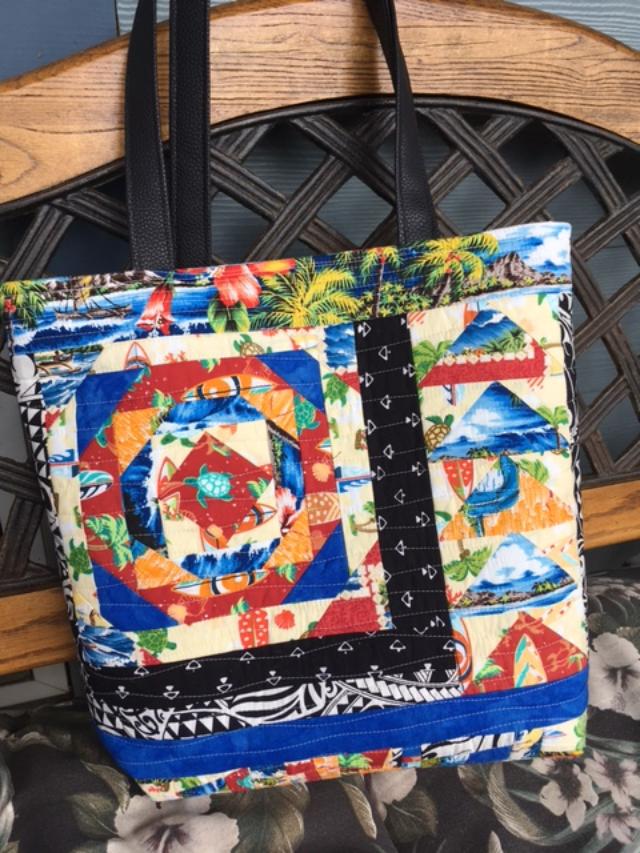
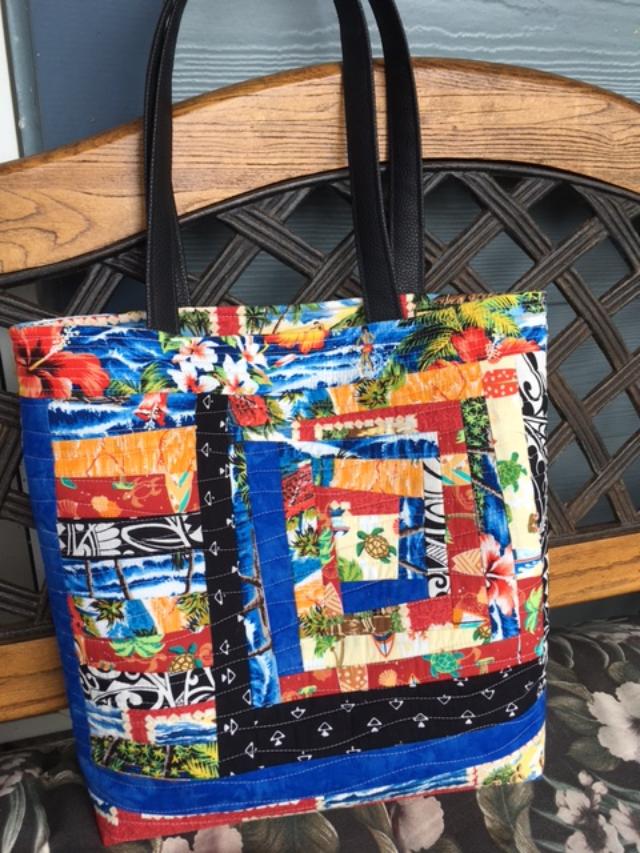
I’ve had a little flurry of Frankenbags appear in my email box and social media feeds over the last few days. So here’s the latest collection.
This first one was made by Jan Ballentyne in New Zealand. Jan made this bag from fabrics that were left to her by her dear friend who passed away. She said it took her some time to get to where she could work with the fabrics. She will gift this bag to her granddaughter Lily when they are able to visit each other again.
This story just makes my heart feel like it’s getting too big for my chest! What a wonderful and loving gift to make.
This next bag was made by Marty Link. She did a lot of customization to this bag, which I love. She made the handle just a single strap attached at the side seams of the bag… which I’ve actually been thinking about doing, and now I think I have to do it!!! I do have some hardware that I purchased a couple of years ago.
She also added lots of pockets and some foam to make the bottom more rigid. I love it that I get so many ideas from all these photos that my readers submit!
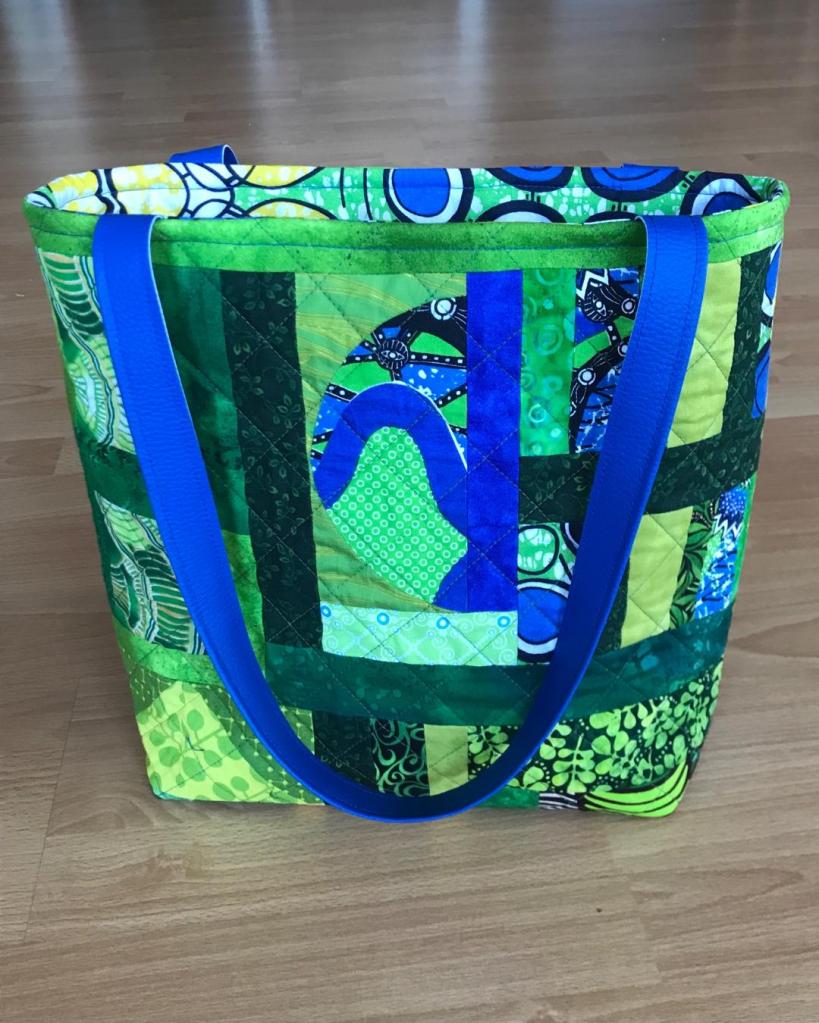
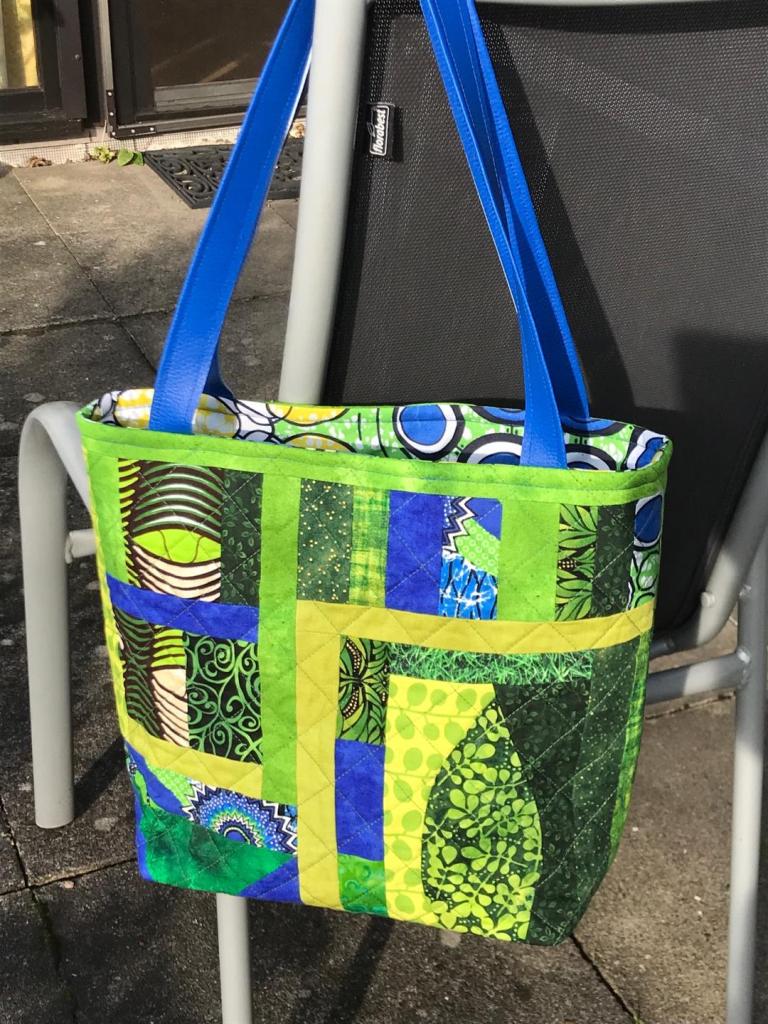
Next up is this bag from Laura Fitzgerald. She used Kaffe Fassett Collective fabrics that were left over from a quilt she made. I just love all these cool greens with the blues! I love the way she did her piecing. There little bits of organization, then all kinds of wonderful chaos! And hey… y’all are knocking me out with your linings! No beige linings here!!!
This next bag was made by Judy O’Connor. For her handles, she used some cork that she had laying around that she knew would be perfect for a project some day. And the bag is made from really lovely batiks. I love the simple horizontal strips with the little dragon flies. And those diagonal lines are fantastic!!! I just love batiks and this bag looks so squishy and comfy!
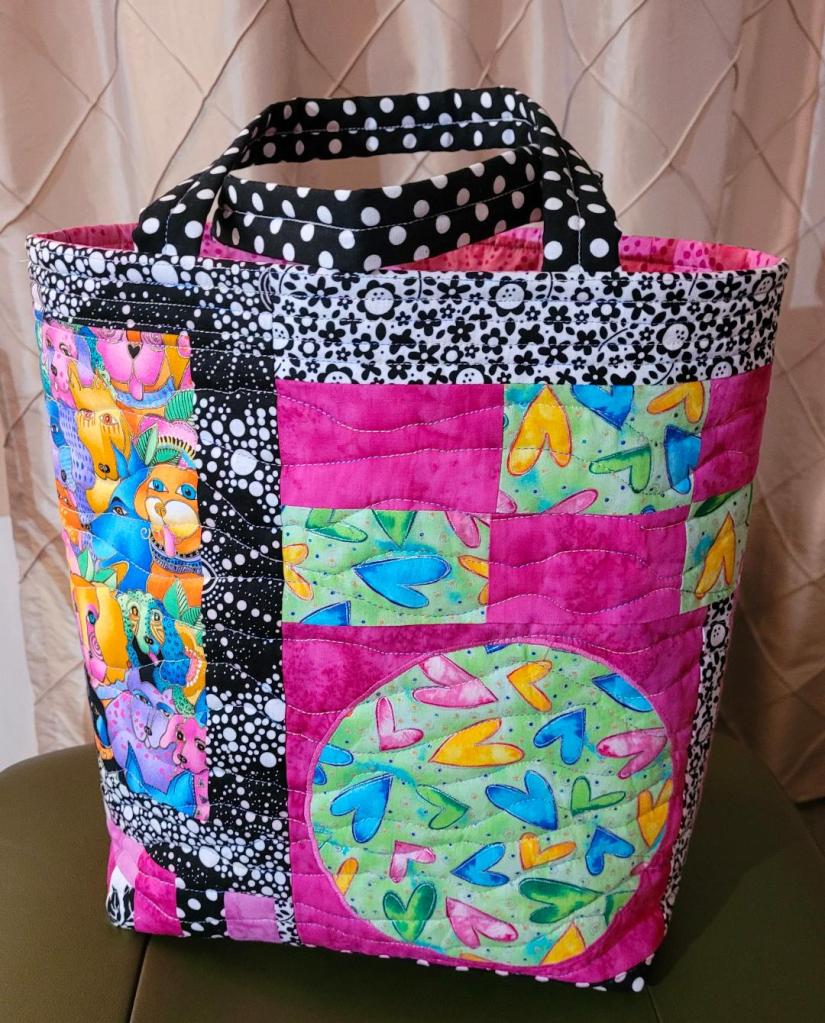
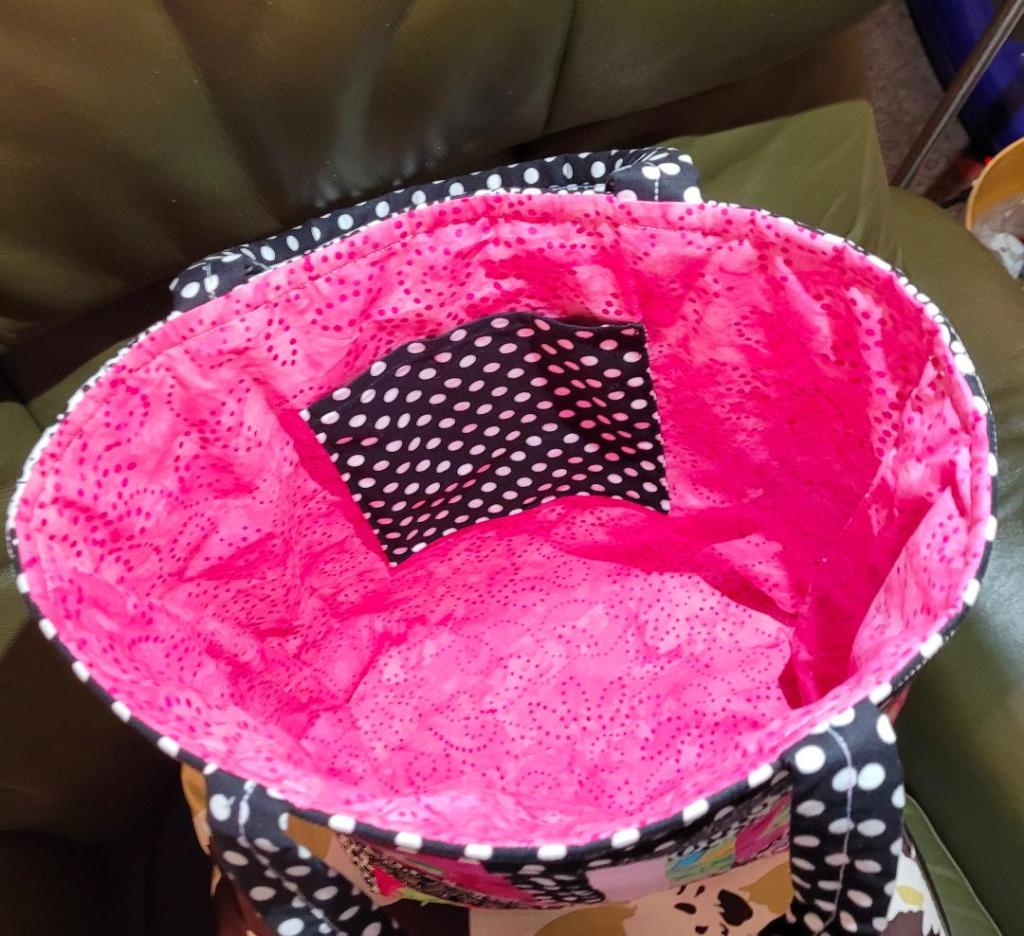
Next up is this bag made by Niki Sager… it’s pretty freaking amazing! First off… I love the black and white crumb piecing. And the way she combined it with those little cat panels… so good! And that fun panel on the other side with all the strong black and whites and the little touches of pink… well, it just all works so well! And look at that lining. Bazinga!!! Love it!
Last up tonight is this bag from Anita Goodson. first off… I just love the print on the front. I know I have some of that in my stash, but I can’t think of the name. I love those big floral blocks with the graphic black and whites. And those stripes across the top and sides play so well with the blooms. Very nice!
Thanks to everyone who sent photos. This was a really good batch of bags. And now I’m feeling a little of that inspiration I’ve been looking for!
I feel like I’ve hit a bit of a dry spell in my creativity. I keep trying to find a project that is what I’m looking for. But no luck so far.
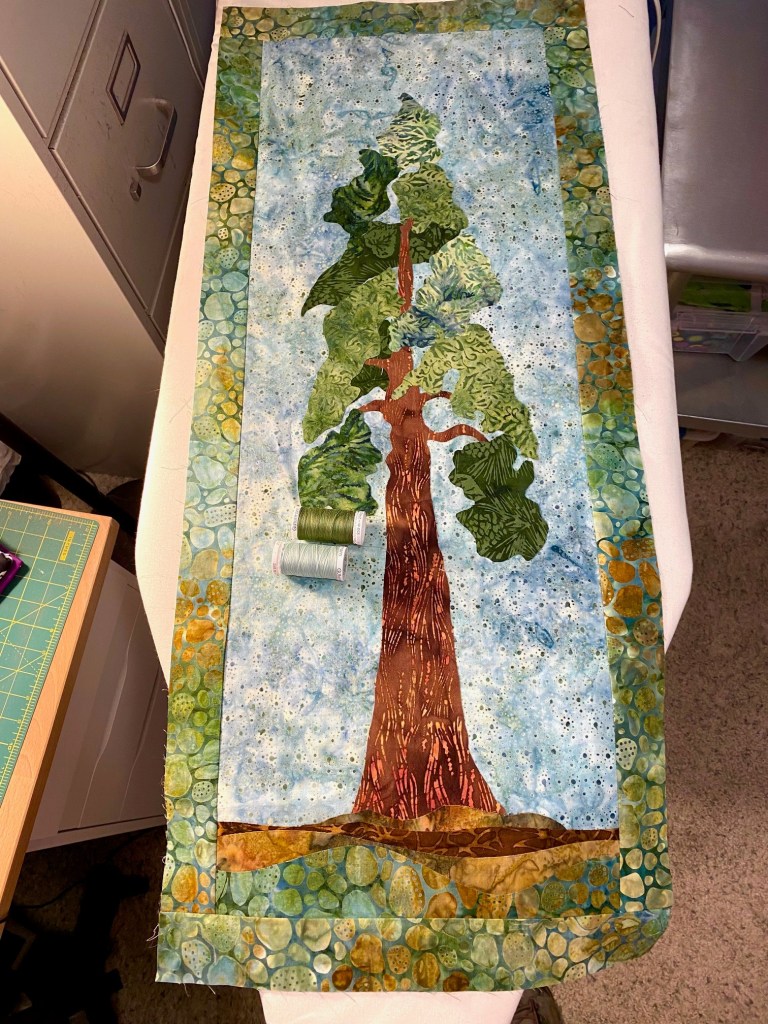
Thinking I might dive in and finish this wall hanging.
This was a Row-By-Row pattern from a local quilt store several years ago. I only gathered a few Row-By-Row patterns over several years, and this is only the second one I’ve ever made. And I have to say, it’s my favorite.
The local store that gave away this pattern has a stand of amazing sequoia trees on the property. They had originally done this pattern in wool applique. I translated it into batiks.
It was really fun to make and it was my first ever try at applique. It’s just raw edge applique using Heat and Bond.
I stopped by the big box fabric store last week to buy some interfacing and took a few minutes to look at the thread and saw these two greens that will be perfect for the quilting on this. I haven’t decided on the quilting pattern yet, but I have a few ideas.
My friend gave me the batik for the tree trunk. It’s so perfect! I only have a few small pieces of it and will save it for the perfect tree project in my future.
My friend and I each made one at the same time one summer while she was visiting. Remember when people used to come and visit? Yeah. I miss that.
She made hers with a clouded sky background. I went with this batik background because it feels like a cold and rainy Portland winter sky.
It shouldn’t take very long to get this quilted once I decide to just do it. I think I’ll hang it in my living room. The colors are just perfect for that.
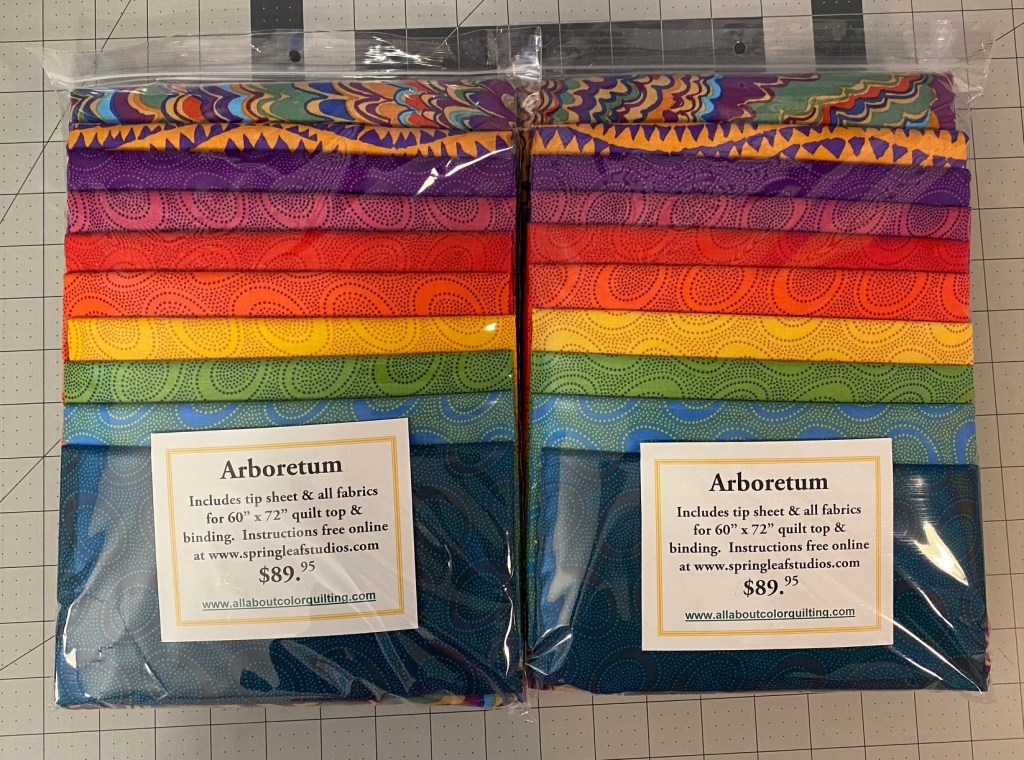
I think I originally saw this quilt three or four years ago. And it was recently made available as a kit by a woman who I see often on the Kaffe Fassett Collective page on Facebook. If you like KFC fabrics and are on Facebook, you should follow that page. There’s a lot of inspiration there.
I’ve never purchased a quilt kit. I did make one that a friend of mine gave me as a birthday gift a number of years ago. But this kit includes 99 different fabrics cut to size. The pattern really relies on all that amazing variation in making it really sparkle and I hated the idea of pressing and cutting all those blocks from 99 different fabrics.
So I bought two kits… one for me and one as a holiday gift for a friend.
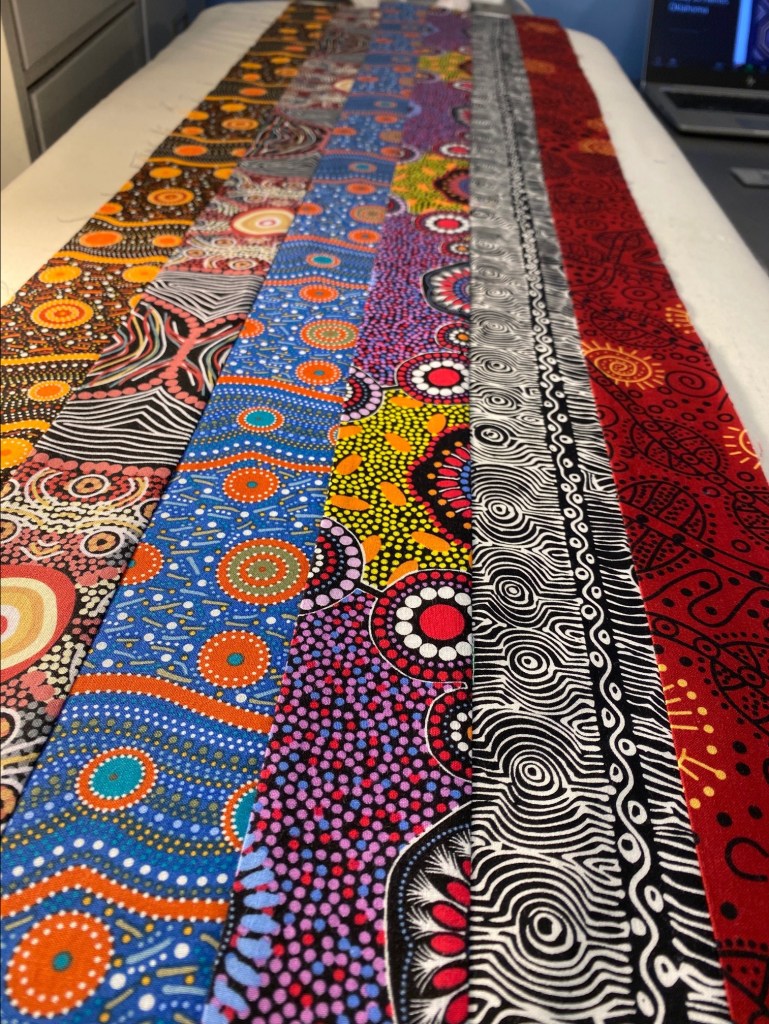
The kit includes the 99 different rectangles, along with these various Aboriginal Dots to be used for the trees. There is also fabric for the binding.
The kit includes a few of the new Kaffe Fassett Collective Fabrics.
I just love it when you purchase fabric and the seller presents it in such a pretty way!
I have no idea when I’ll start on this quilt. I keep telling myself that I should finish us some of the many quilts I have in progress.
My friend knows that I have purchased this kit for her. And she has purchased the backing fabric for me as her holiday gift to me.
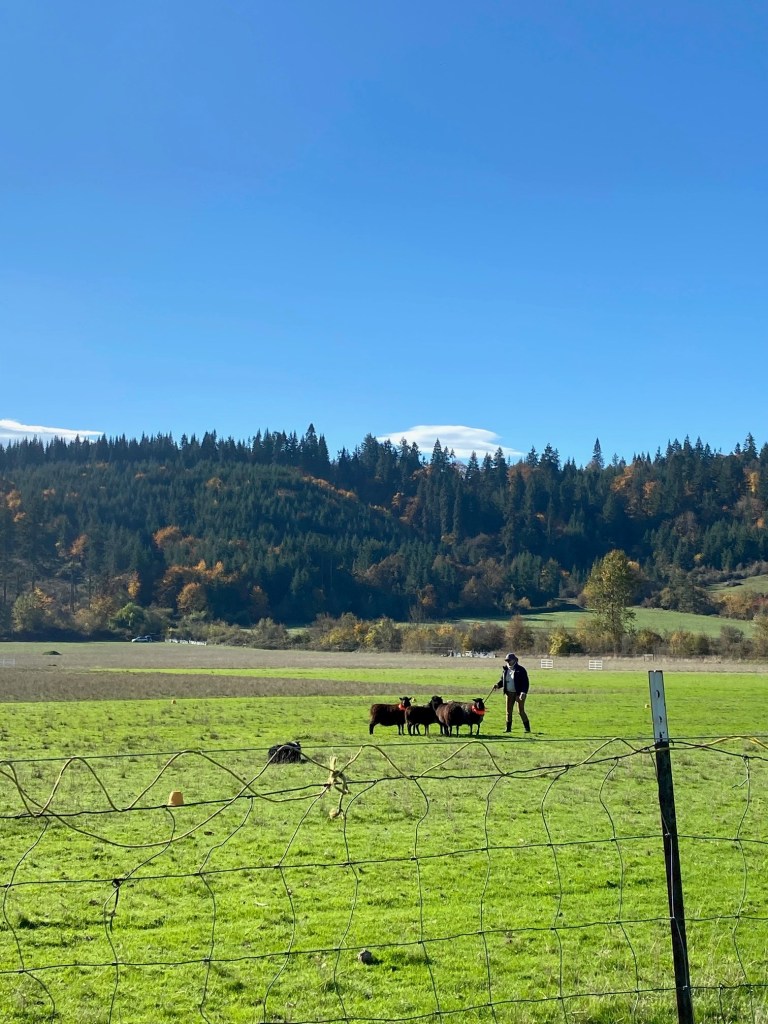
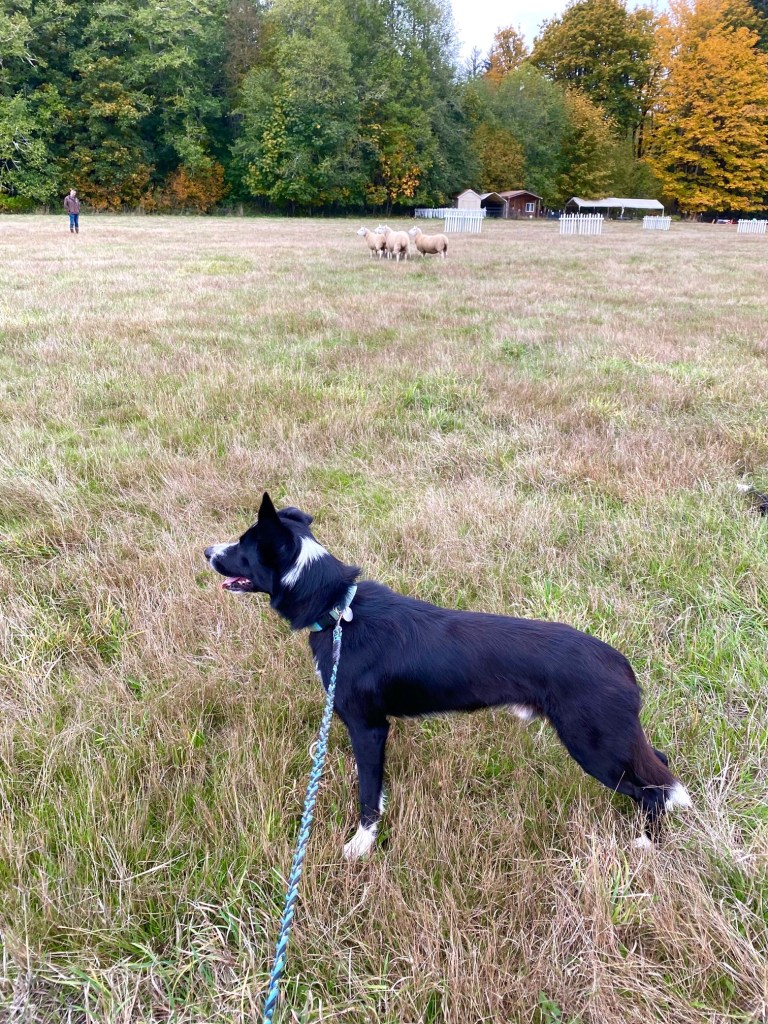
I had another weekend of sheep. Saturday was our regular sheep herding lesson, and on Sunday a friend and I went up to Olympia, Washington, for a day of working our sheep on some more advanced skills.
We were all happy to be out there and it was a gorgeous fall day. There was about a 50% chance of rain but it stayed dry while we were out in the field.
As we were finishing up I looked down at a pile of dirt pushed up by a mole and saw this:
It was only about an inch long and I don’t know how I even saw it! It looked exactly like the dirt and if it hadn’t moved at just the right time I never would have seen it.
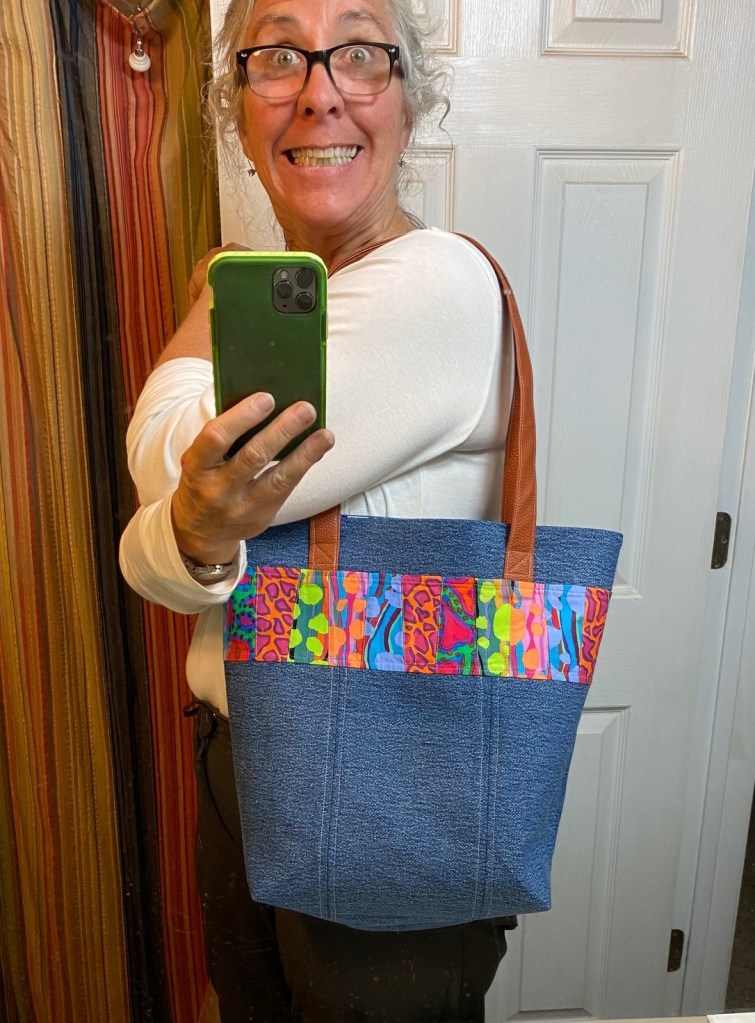
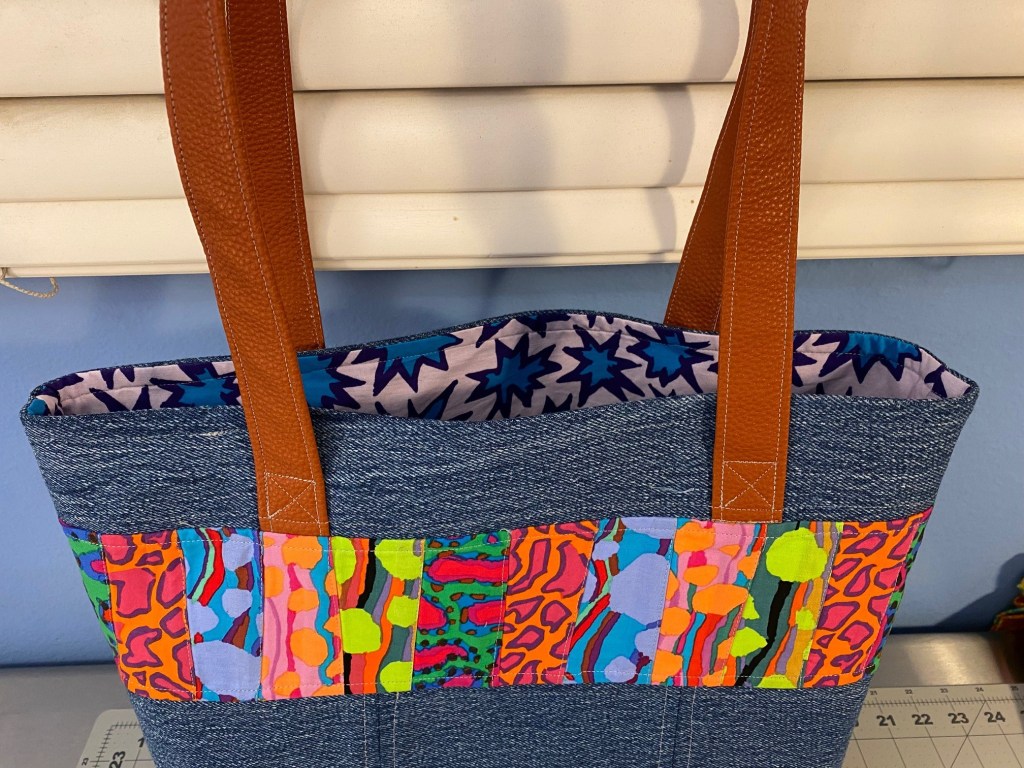
I didn’t have much to do to finish this denim bag with some fun Brandon Mably fabrics so I dug in after dinner and our evening walk and finished it up.
I’m pretty happy with how it turned out, but I was right about the proportion of that pieced strip… it needs to be wider.
I like the way I put the handles in, but I think I might make the top section of denim above the handles just a little taller in future bags. It just seems a little off to me.
So here’s what I like about it. I love the heft of the denim and it feels really cool with the fusible interfacing. It’s plenty to give the bag heft and structure without making it too thick. I also really like the fusible interfacing in the lining. I will probably add this to all my upcoming bags, but may use a little lighter interfacing. I also added a piece of interfacing to the pocket and that was a really good move. I’ll also do that in future bags.
I also did the construction of this bag in a different sequence than I usually do. I typically finish the outside of the bag, then finish the lining (leaving an opening in one side), and then I sew the final top seam.
With this bag I wanted to try sewing the top of the lining pieces to the top of the bag pieces first.
My thinking was that this would simplify the final finishing at the top of the bag… which is usually a wresting match with the nearly complete and bulky bag.
Starting with the top of the bag made it really easy to press that top part and make sure it was done nicely. Nice finishing on the top of the bag is really important to me. If the rest of the bag is well made and you screw up the top, it ruins the bag.
I sewed and pressed the top seams. Then I sewed and pressed the side seams. I left an opening in one side of the lining. Then I sewed the bottom seams of the bag and the lining. Finally, I sewed the gussets.
Here’s the learning part.
Through all of this I wrestled with all the bulk of entire bag. What I had hoped would be easier was actually a colossal pain in the ass! I don’t think the ease of constructing and finishing the top of the bag is worth all the other frustration it caused. So I doubt I’ll go with this method on future bags.
But I’m glad I tried it. Now I can just walk away from that idea.
Here’s some more pictures.
I will definitely make another denim bag because I want to make the changes I think will make it better. I also have some dark denim with a pinstripe running through it that I plan to combine with a piece of Brandon Mably’s black octopus fabric. So stay tuned for that.
I was looking through some photos on my computer last night and I’m pretty sure there are a few Frankenbags that I saved that never actually made it to my blog. My apologies to these makers!
The first one is this bag made by Antoinette Todd. Her tropical prints are really fun and this looks like a bag that’s been loved and used for years, which I love. And I love the random and free form approach to the piecing. It looks easy and casual.
This next one was made by Margot Pritchard. I love the way she used that Queen of Hearts panel and mixed it with a great eclectic group of fabrics. See that green fabric at the top of the first photo? That’s Kaffe’s kite tails design. It’s out of print and nearly impossible to find. How I’d love to have a few yards of that.
The last bag tonight was made by Linda Allen. I love that she included a printed panel of her pupper! What a happy little dog! And I love the combo of the little paw print fabric with the bright prints! And the lining is perfect.
Thanks to Antoinette, Margot and Linda for sending photos and for your patience with me!
Another stressful and busy week at work has left me tired and uninspired in the evenings. Bender was trying his best to lighten my work day yesterday during zoom call.
But today was an especially stressful day and I decided to get out and take the boys for our evening walk before it got dark and before the rain settled in for the evening. I just couldn’t stand the thought of sitting around the house for hours with nothing to do. A friend called me part way through our walk and that was nice to have that conversation. We were so occupied that I walked 3.5 miles. Which made six miles today!
Once I got back I did a little more work and then decided to get into my sewing room and get a little bit done. I got the panels done for the denim bag that I started a couple weeks ago.
First, I attached the handles to the upper section of the bag body and topstitched on the handles to reinforce their attachment to the bag, and I topstitched along both sides of the seams joining the denim to the pieced panel.
Then I added the large bottom panels to each side of the bag. Then I fused an interfacing over the entire bag panel to give it structure and body since there is no batting. I also got the lining cut and got some light interfacing fused to the back of it. I’ve been wanting to try interfacing on a bag lining to give it some oomph. I thought this was a good bag to try that on.
I really like this stage of making a new idea into an actual item. It’s a learning process and I find things along the way that I want to change. Here’s what I’ve learned on making this so far.
the proportion of the pieced panel is off. I won’t know for sure until I get the gussets in the bottom and get the side seams sewn, but I’m thinking it needs to be at least 1.5 inches taller. I’ll adjust that with future bags.
I’ve been constructing this with 1/4 inch seams, which just isn’t enough with the thickness of the denim. So on future bags I’ll adjust to allow for 1/2 inch seams. However, I WILL use 1/2 inch seams on the sides and bottom of this bag.
I’ve fused interfacing to the back of the pieced panel and to the entire bag panel once it was finished. I may put the interfacing on the bag pieces prior to sewing them together next time. I got some distortion in sewing and pressing and I’m wondering if the interfacing fused to each piece will help keep it all true.
the pieced panel seems like it needs more dimension. So I may actually use some batting on just this section in future bags in a quilt as you go fashion to give this more texture and interest. Might add some different quilting. All up in the air, but it needs something.
I think that’s all I’ve thought of for now, but I’m sure I’ll have more adjustments as I go on. I am planning on putting the panels and lining together in a different sequence than I usually do to see if it’s easier than the way I’ve been doing it. I’ll share more of that once I give it a try.
I took last Friday off to recover from some overtime at work and got up at oh-dark-thirty and met some friends at 7:30 am for a hike along the Molalla River. I walked 4.5 miles with my friends, and when they left, I continued on and walked a total of 9 miles!
Here’s a video of part of our walk. It lets you see the kind of country we were walking through. There were three of us with a total of nine dogs, all border collies. They all had a wonderful time.
It was a gorgeous day. I just love it when the early morning sun comes shining through the trees.
And in the 9 miles I walked, I only saw one other person that wasn’t with my group. I just love being out there and having the trail all to myself… except for these two kiddos!
What a gorgeous morning…
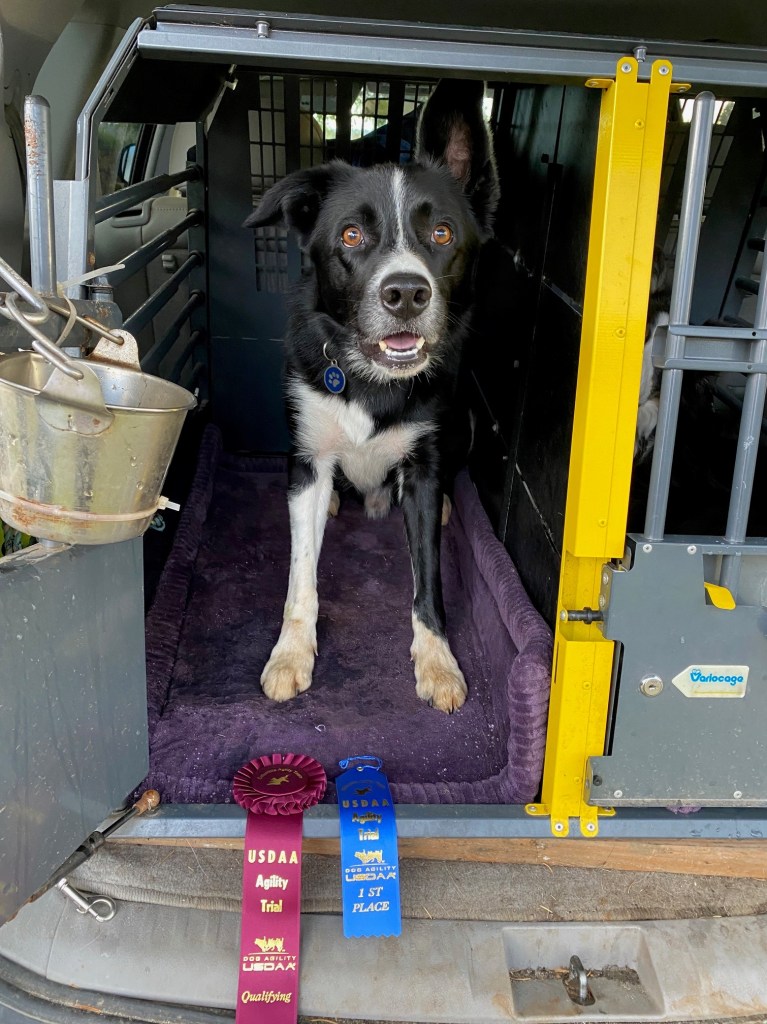
I entered Rico in an agility competition this weekend and he did an excellent job! with the pandemic, he hasn’t done much in the way of competitions. We were just starting out when the pandemic hit. So this is just his second competition since January of 2020!
He earned his first ever qualifying score! And he took first place!
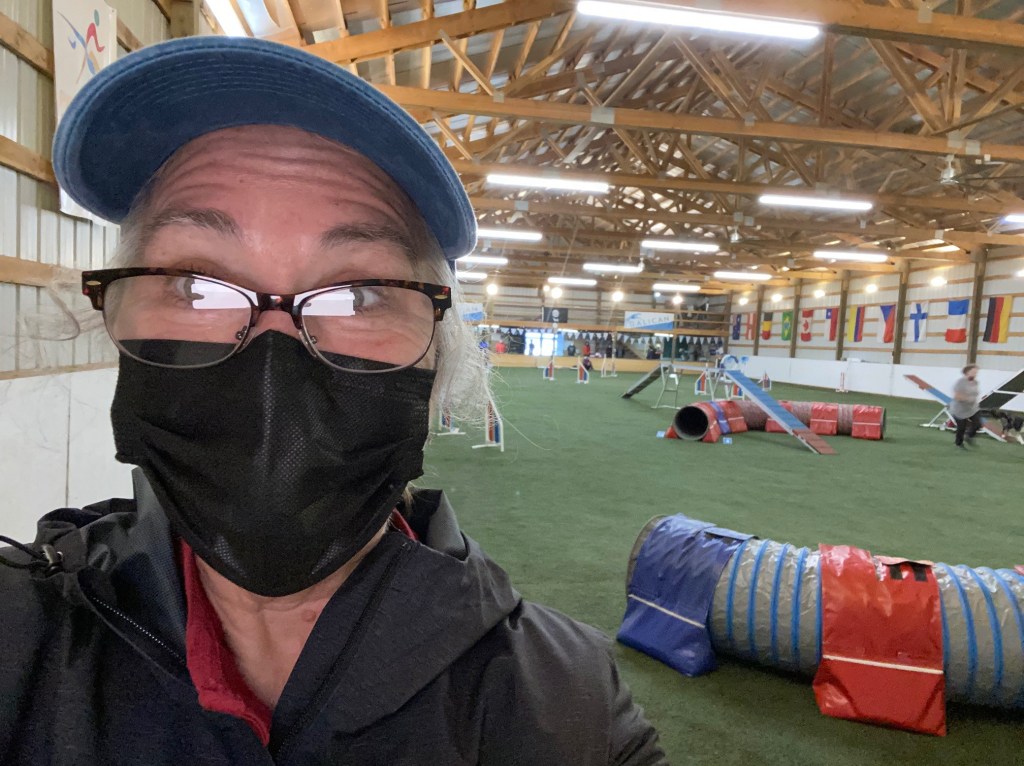
This was the first agility competition in our area that required either proof of vaccination or a recent negative COVID test for you to enter. Masks were required on the property, even outdoors when you were around other people. We were allowed to remove our masks when it was our turn in the competition ring.
It was fun to see so many people that I haven’t seen in such a long time. I was amazed how easy it was to recognize people with their masks on.
I’ve had a little flurry of Frankenbag photos sent in by my blog readers over the last week.
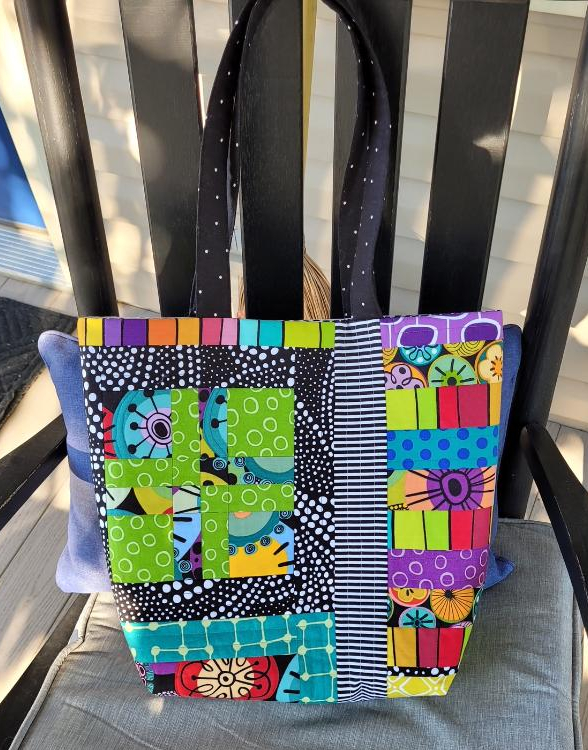
This first one is from Rebecca Caisse. The fabrics are really fun and I like those various pops of blue. This looks like a great vacation bag!
Next up is this bag made by Pam Herrick. Of course, I’m a big sucker for all that crumb piecing, and I love the way she did those black strips on the front. I love the batik panel on the other side, and the lining is pretty wild!
This next bag is from Judy Perkins. I just love the saturated reds and oranges in this one. And there’s something fantastic about the little pops of green in this bag. Yummy!
Next up is this bag from Sarah Nelson. Sarah said her daughter embroidered the cat pillow probably 30 years ago and frequent display caused wear and tear so the linen background began to disintegrate relegating it to a drawer. Inspiration struck and she appliqued it to a background to create her bag. What a great way to use something her daughter made that was so well loved and well use.
This next bag was made by Sharon Pepping. She said she couldn’t decide what color way to use for her bag, so she made each side a different color! It’s like having two bags!!! You can carry it and show which ever side makes you happy! I love her fabric choices and I love all that saturated color!
Next is this bag made by Rayna Lusby. I love the way she used those big blooms, and that black and white swirly fabric at the top of the bag and on the handles is so wild! I love it! And I have to say, I really appreciate it that everyone is really going for it with their linings! Look at how this one just makes this pretty bag sing!
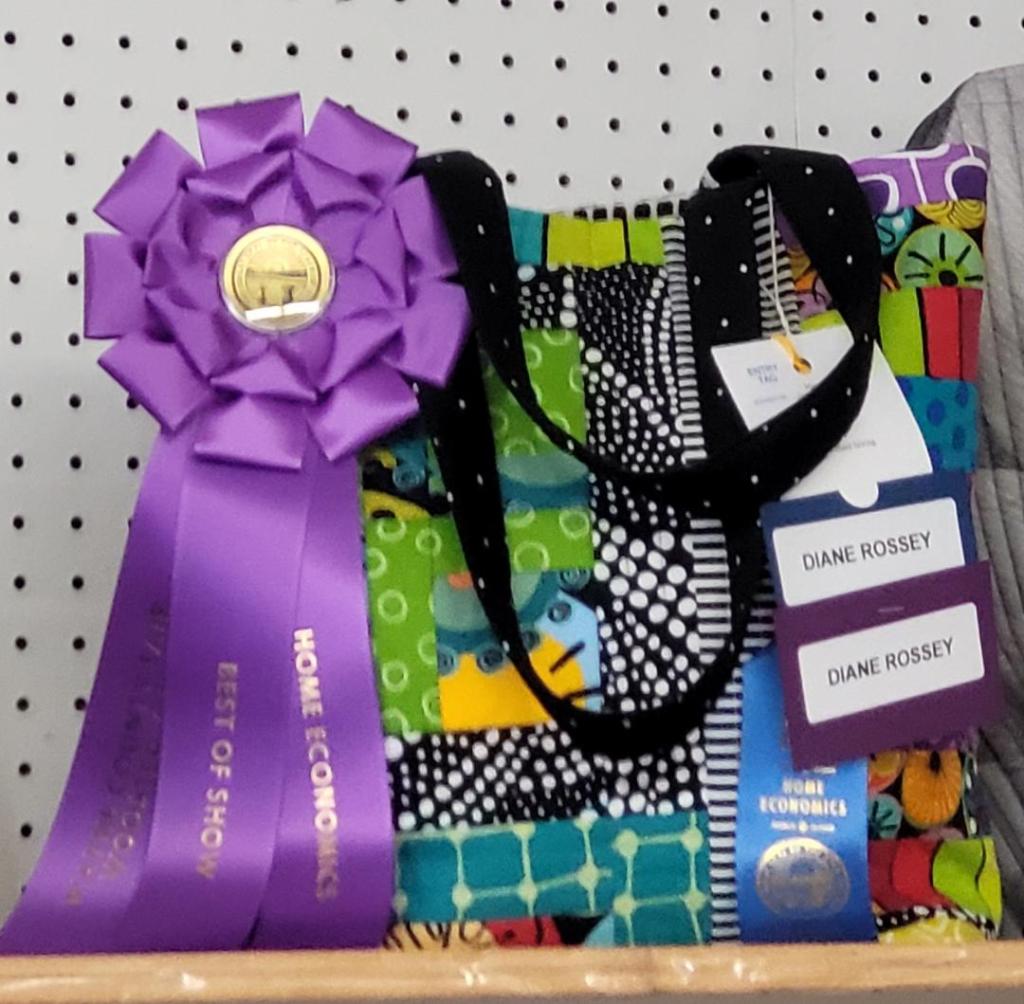
This next bag was made by Diane Rossy. She entered it in the fair and took first place!!! How cool is that? I just love her fun and vibrant fabrics! And you know I love that graphic black and white fabric! what a fun, really fun award winning bag!
Next is this bag from Valerie Wootton that came in just under the wire for me to get it in this post! She said she didn’t put a pocket in her lining. Instead, she used a purse organizer that fits perfectly in the bottom of the bag. What a great way to reuse something! I love Valerie’s soft purples in this bag. The little geese make me so happy. I also love how the two sides of her bag are different… but they are perfect together.
Thanks to everyone who has sent photos of their Frankenbags. If you’ve sent me a photo and I haven’t posted it here, please let me know. It’s been a little tough to keep track of what I’ve posted and what I haven’t.
Work has been crazy busy the last week as we had a fundraising drive running on our radio station. We wrapped that up last night and I feel like I can take a breath.
I haven’t done any sewing at all in the last week or so. Just too busy and too tired at night to focus. But I have been thinking about a new project that I’m getting pretty excited about.
Over the last year I’ve purchased a good number of low volume white/black fabrics and haven’t used any except for a couple of small projects.
They are really fun fabrics and I’ve just loved a lot of the quilts I’ve seen using them.
I’ve seen some really cool quilts recently that combine these low value fabrics and bright Kaffe Fassett Collective fabrics. The low volume fabrics tend to brighten and lighten up the KFC fabrics in a really cool way.
So I pulled out some of my low volume fabrics the other day and mixed them up with a selection of Philip Jacobs’ brassica color ways that I had sitting on the dresser in my sewing room.
I have to say, I really love this combo! I would add more fabric designs for variation, but I think this is a good start!
So once I saw these fabrics together, I started thinking about a design. I’m kind of riffing off of one that I saw online, but is more complicated than I want to make.
So after thinking about this for a few days, I sat down with some graph paper and drew out my idea. I’m thinking I’ll combine some big quarter square triangle blocks made from KFC fabrics with 16 patches made from KFC fabrics and low volume fabrics.
Here’s what I came up with. This first one is with the blocks set in straight rows.
And then I thought it might be more interesting if the blocks were set on point.
I might actually like it better set in straight rows, but I’m not sure. I’ll have to play with that once I have the blocks done. I do like the secondary stars and squares that appear when you put the blocks together.
I’ll use a good number of different fabrics in this to give it a really scrappy feel. No idea when I’ll start this. I already have a good number of quilts in progress! Just what I need… one more unfinished project!!!
The heat has finally gone away here in Portland and fall has definitely arrived. We’ve had some rainy days and some really gorgeous fall days. It’s really nice to have cooler weather. I actually had to turn my furnace on the other day.
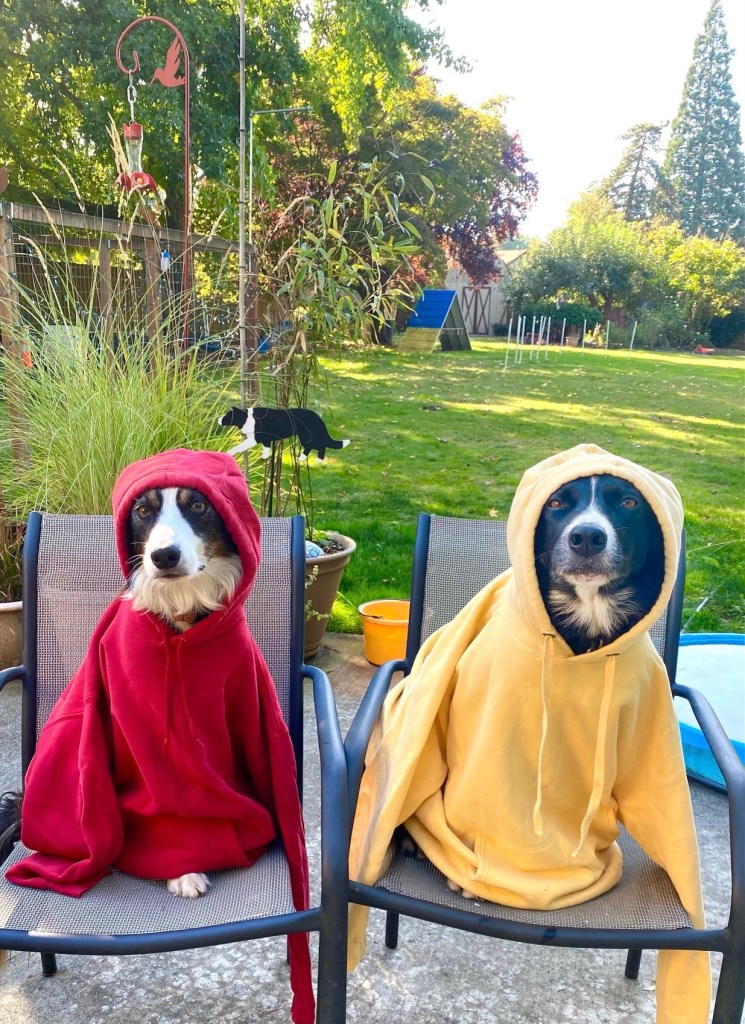
And of course I took advantage of a cool day to torture my dogs a little.
I found this gorgeous bloom on my Rose of Sharon on the patio yesterday morning.
This plant was given to me by a friend earlier this summer. She said it probably wouldn’t bloom this year, but this is the second bloom so far and there’s another bud that should open in the next few days. It should be covered with blooms next year.
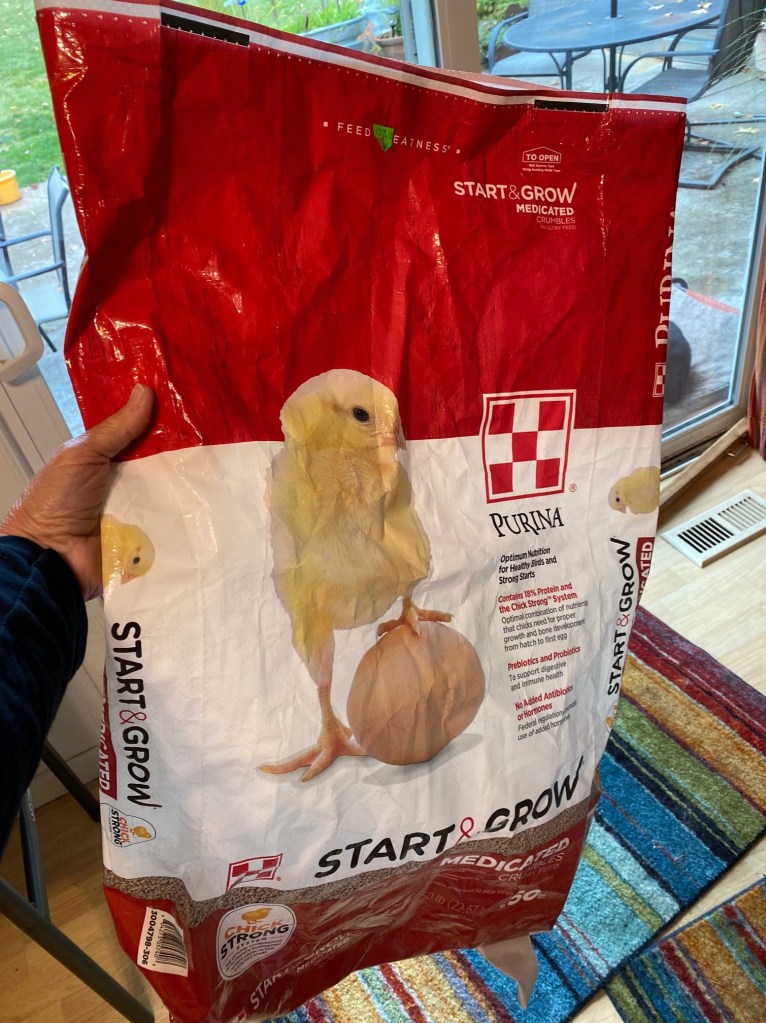
A friend of mine recently bought a property down in Canby, Oregon, and she’s got a newfound obsession with fancy chickens. This means she’s going to have a lot of chicken feed bags. These are sturdy plastic bags that have nylon thread running through the fabric for strength.
I’ve seen some really fun and simple tote bags made from these feed bags. So my friend gave me the one she had that was empty and my plan is to make a bag to develop a simple pattern. I’ll want to cut it to take advantage of the cute little chick picture, and I’ll have plenty of fabric left over to make handles and maybe an inside pocket. I won’t line these bags in the beginning since they will be utilitarian. But I may change the design over time.
I’m taking Friday off to recover from a crazy work week. I’m hoping to get the dogs out for a nice hike and will probably actually spend some time in my sewing room!