Kaffe Lotus Leaf Six Pack

It was a really wet and rainy weekend in Portland, so I got a lot of sewing done. . . continuing my obsession with pouches in general, and lotus leaf pouches in specific.

I cranked out five pouches on Saturday and Sunday, even after watching a couple of movies, taking Rico to his sheep herding lesson, and our weekly post herding field romp with Rico and Bender, making a big batch of beef stew, going shopping for some fabric (because I just don’t have enough!) and doing some research on the local initiatives so I can fill out my ballot this week.

IMG_9044

So, yeah, I got a lot done, and still had time to relax.

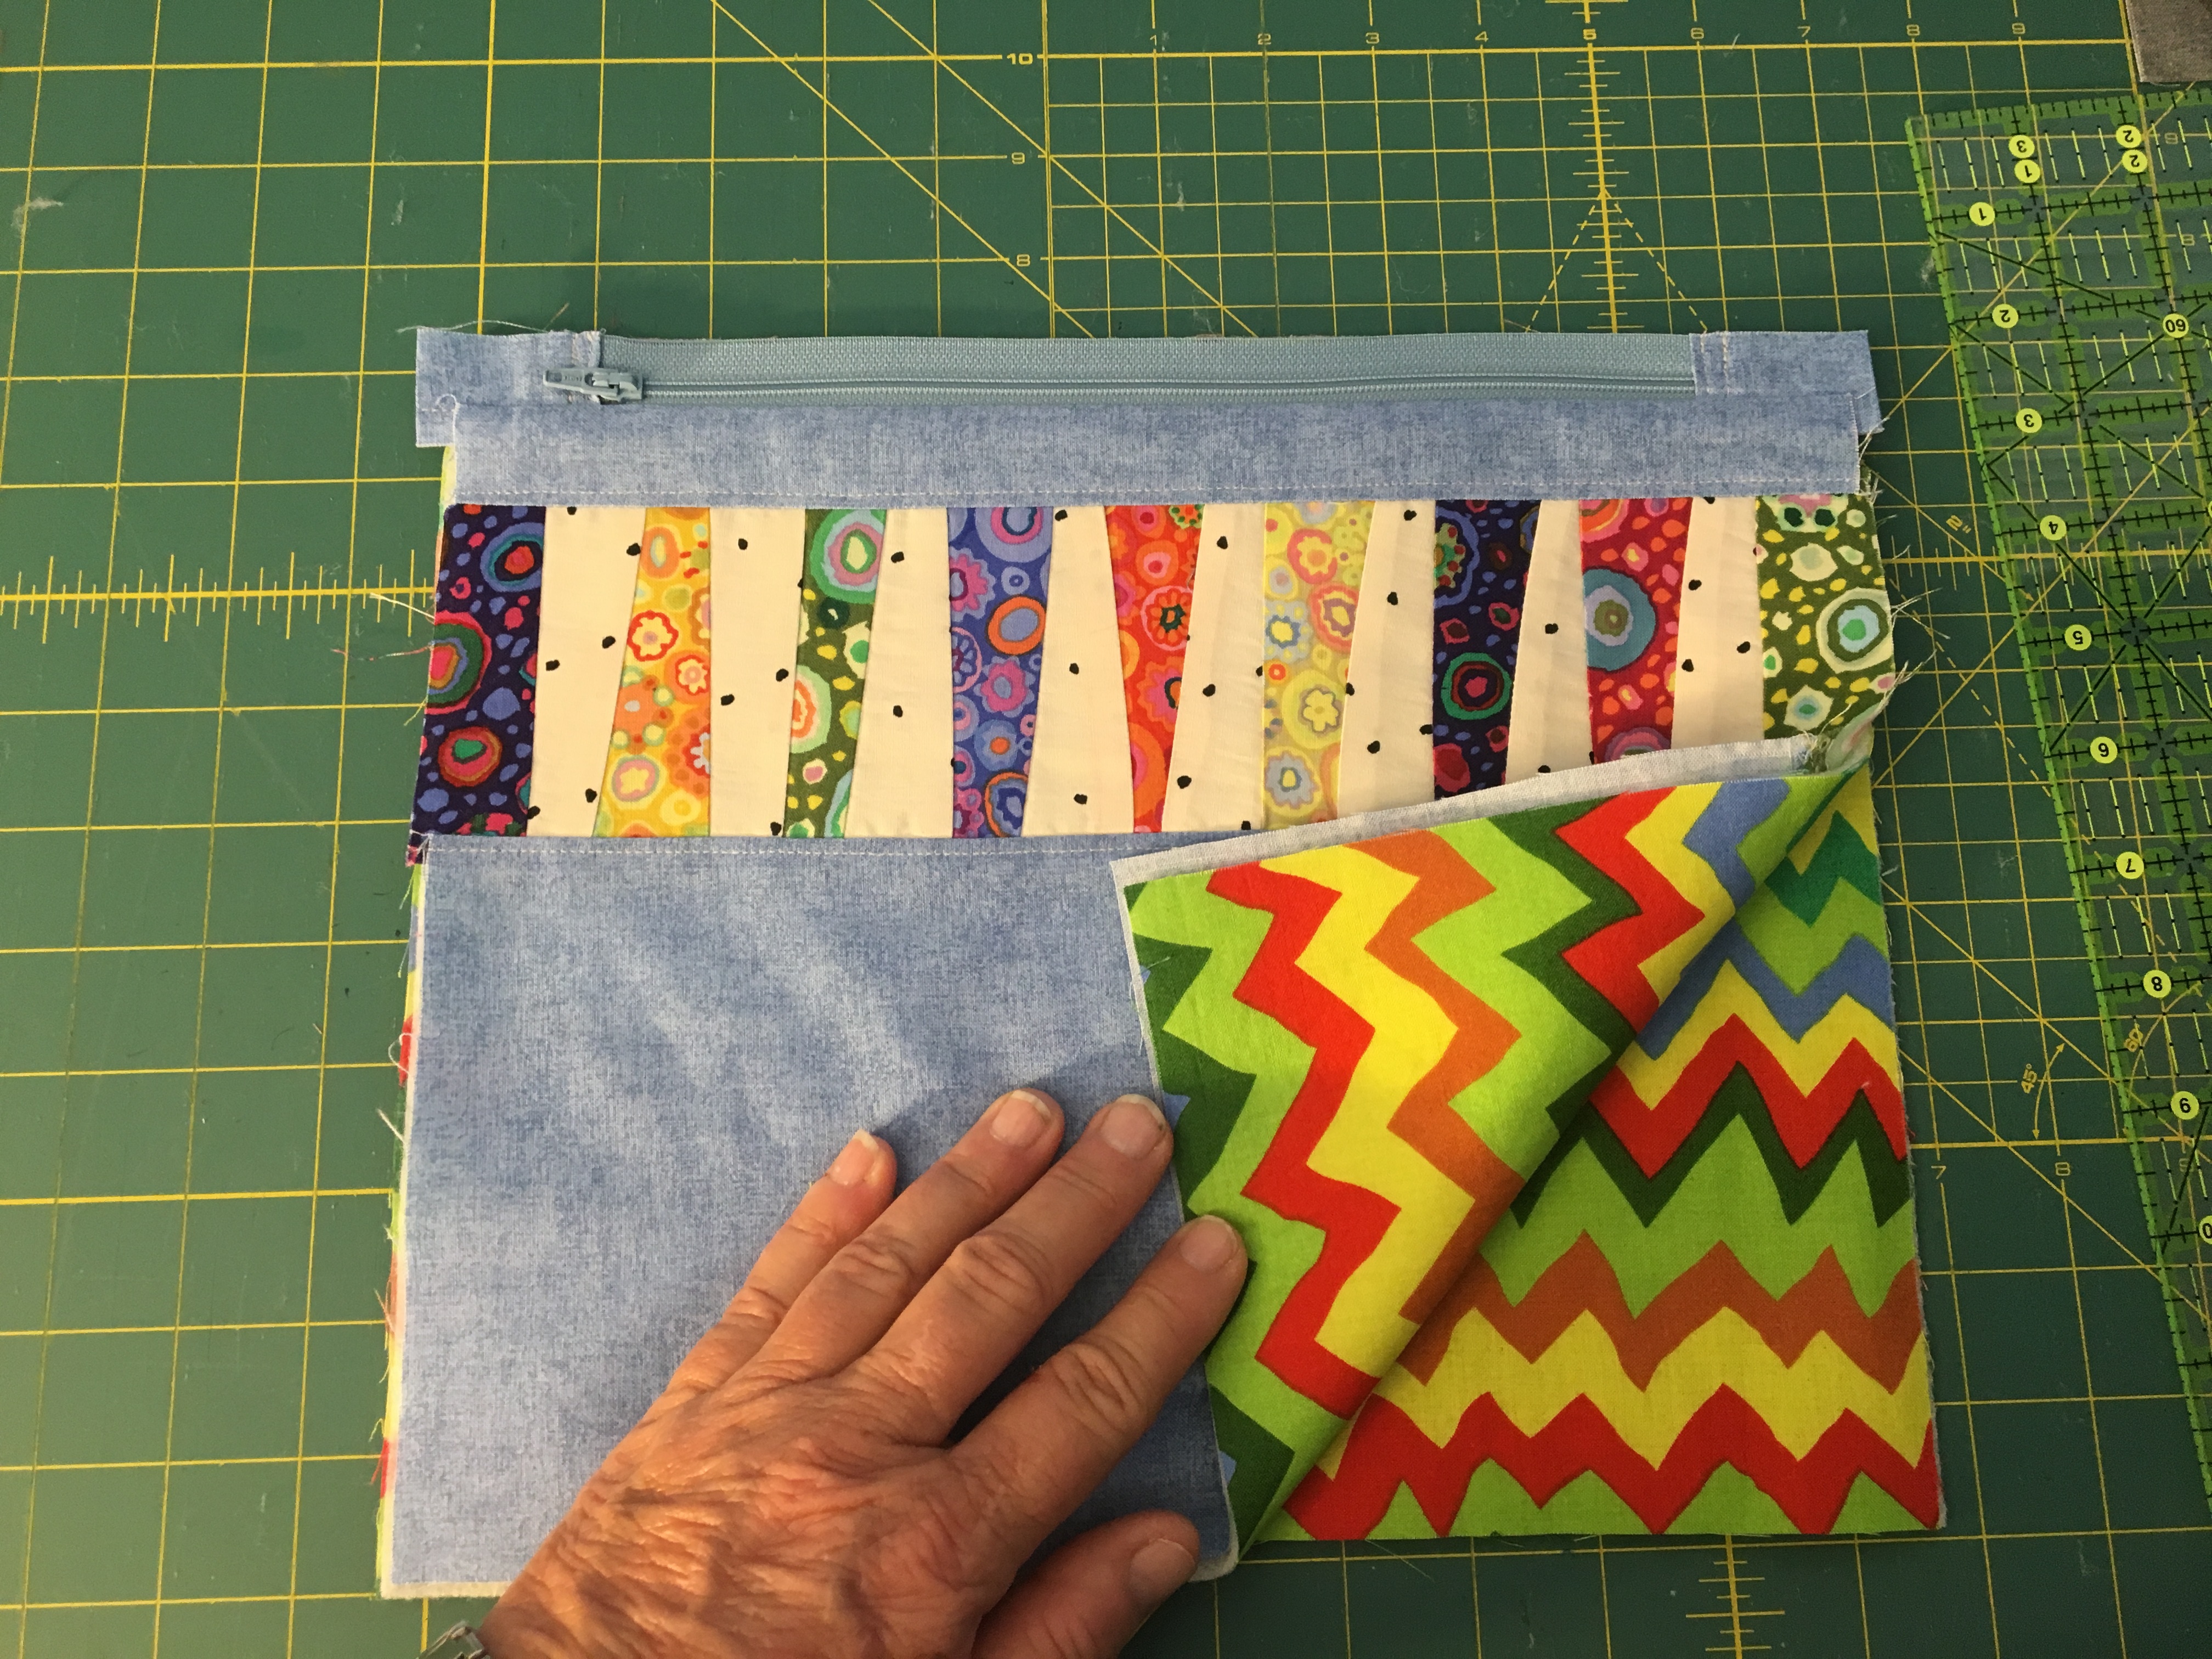
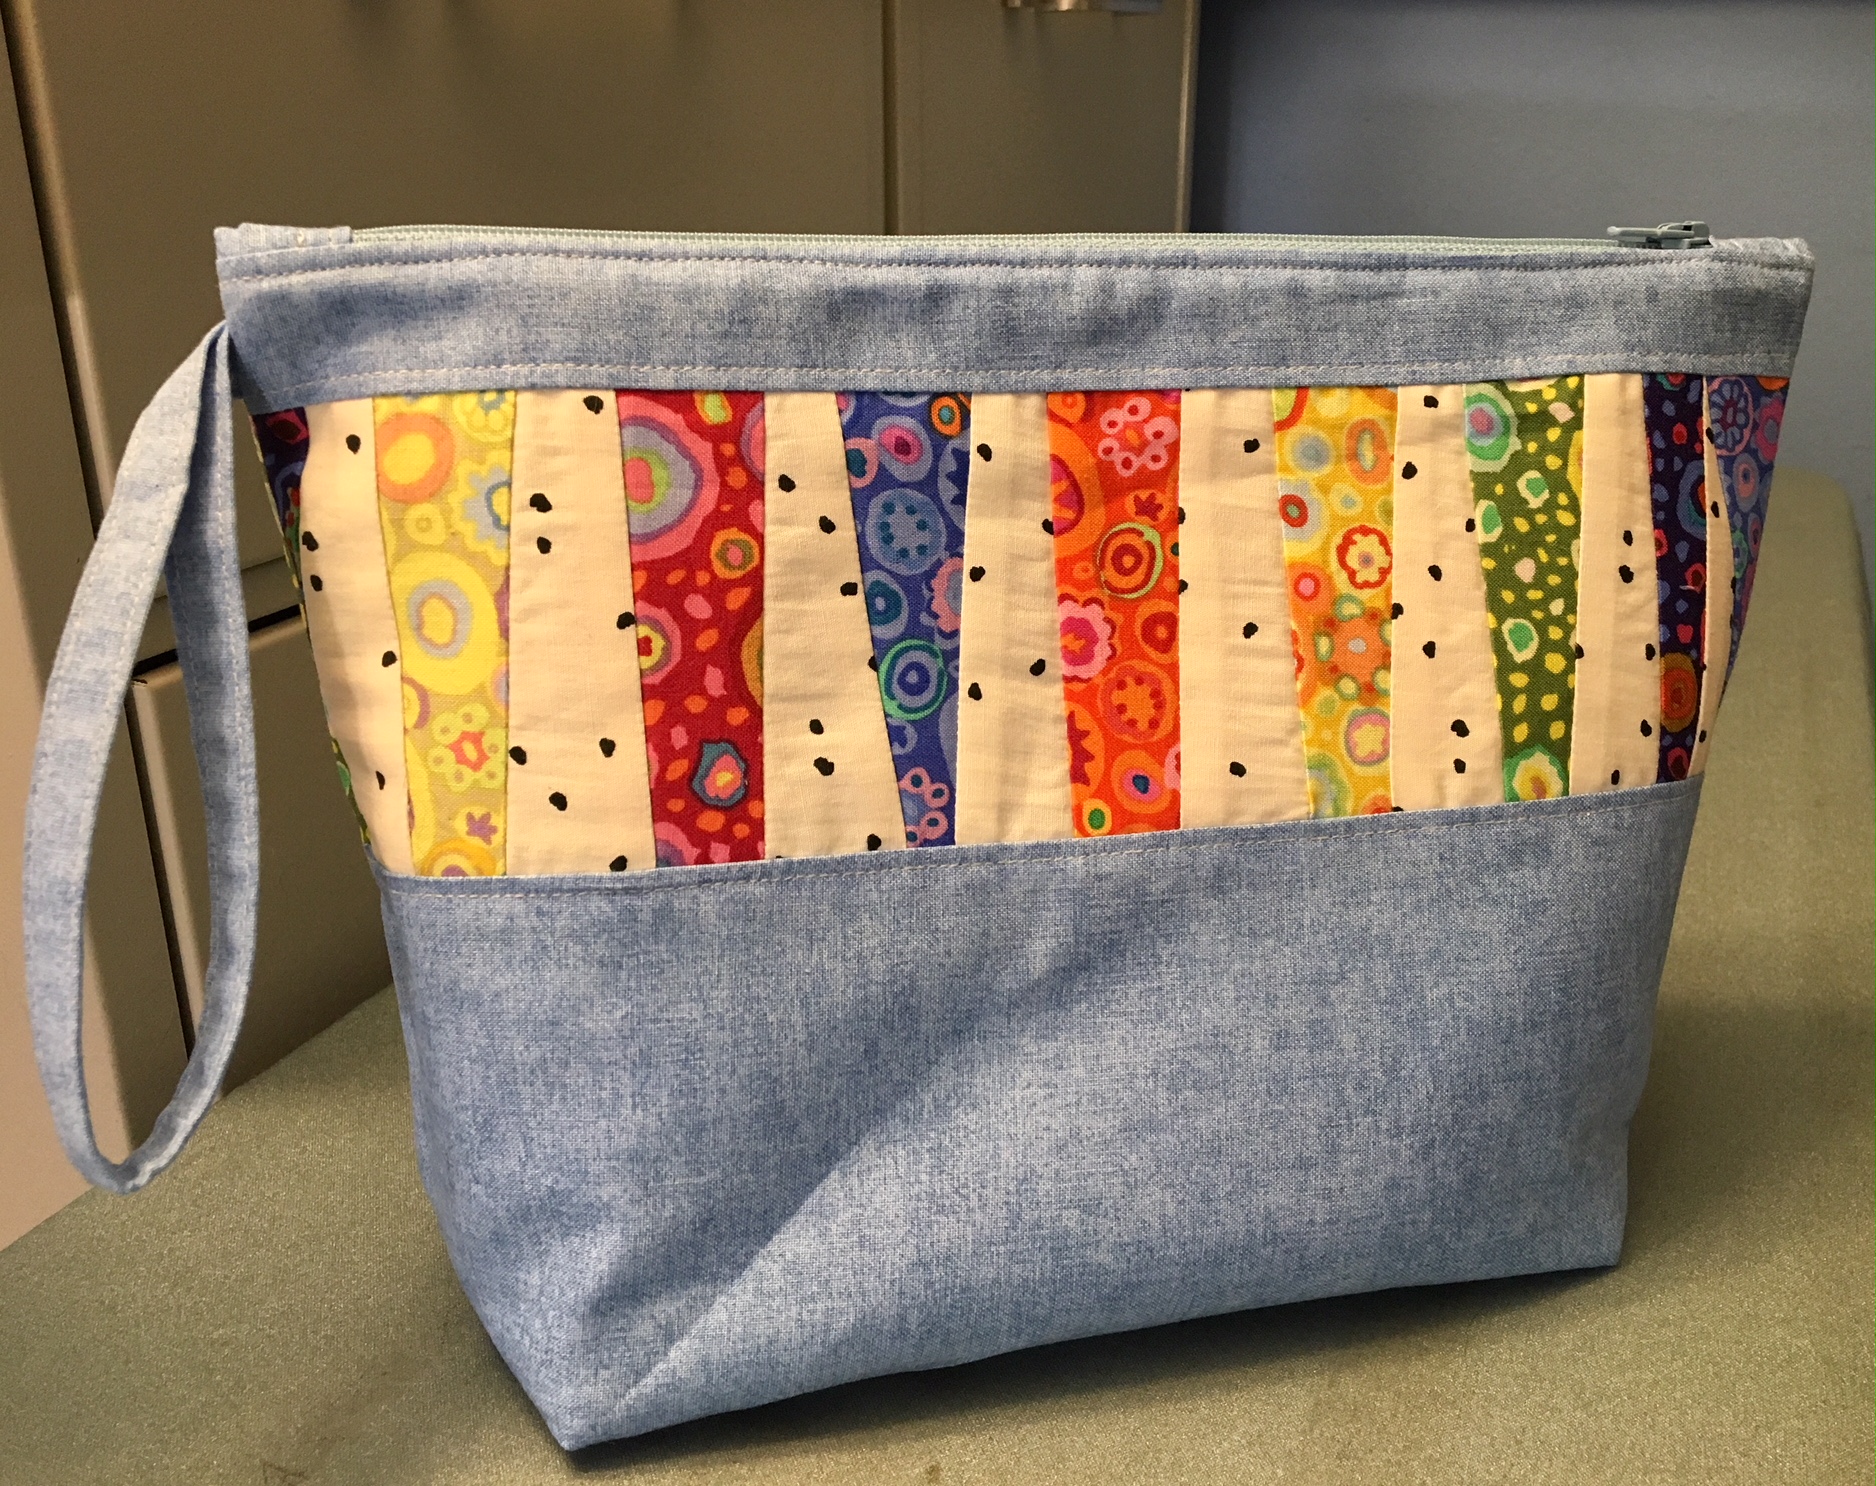
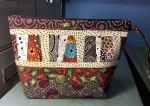
So, here are my weekend pouches, all made with the Kaffe Lotus Leaf in various color ways.

(Find the tutorial for my pouches here. And find a blog post about how these Lotus Leaf pouches are different from the tutorial here.)

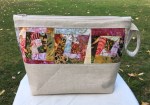
These two might be my favorite. There’s just something about the subtlety of the lighter prints and the neutral background fabric. I just love these!

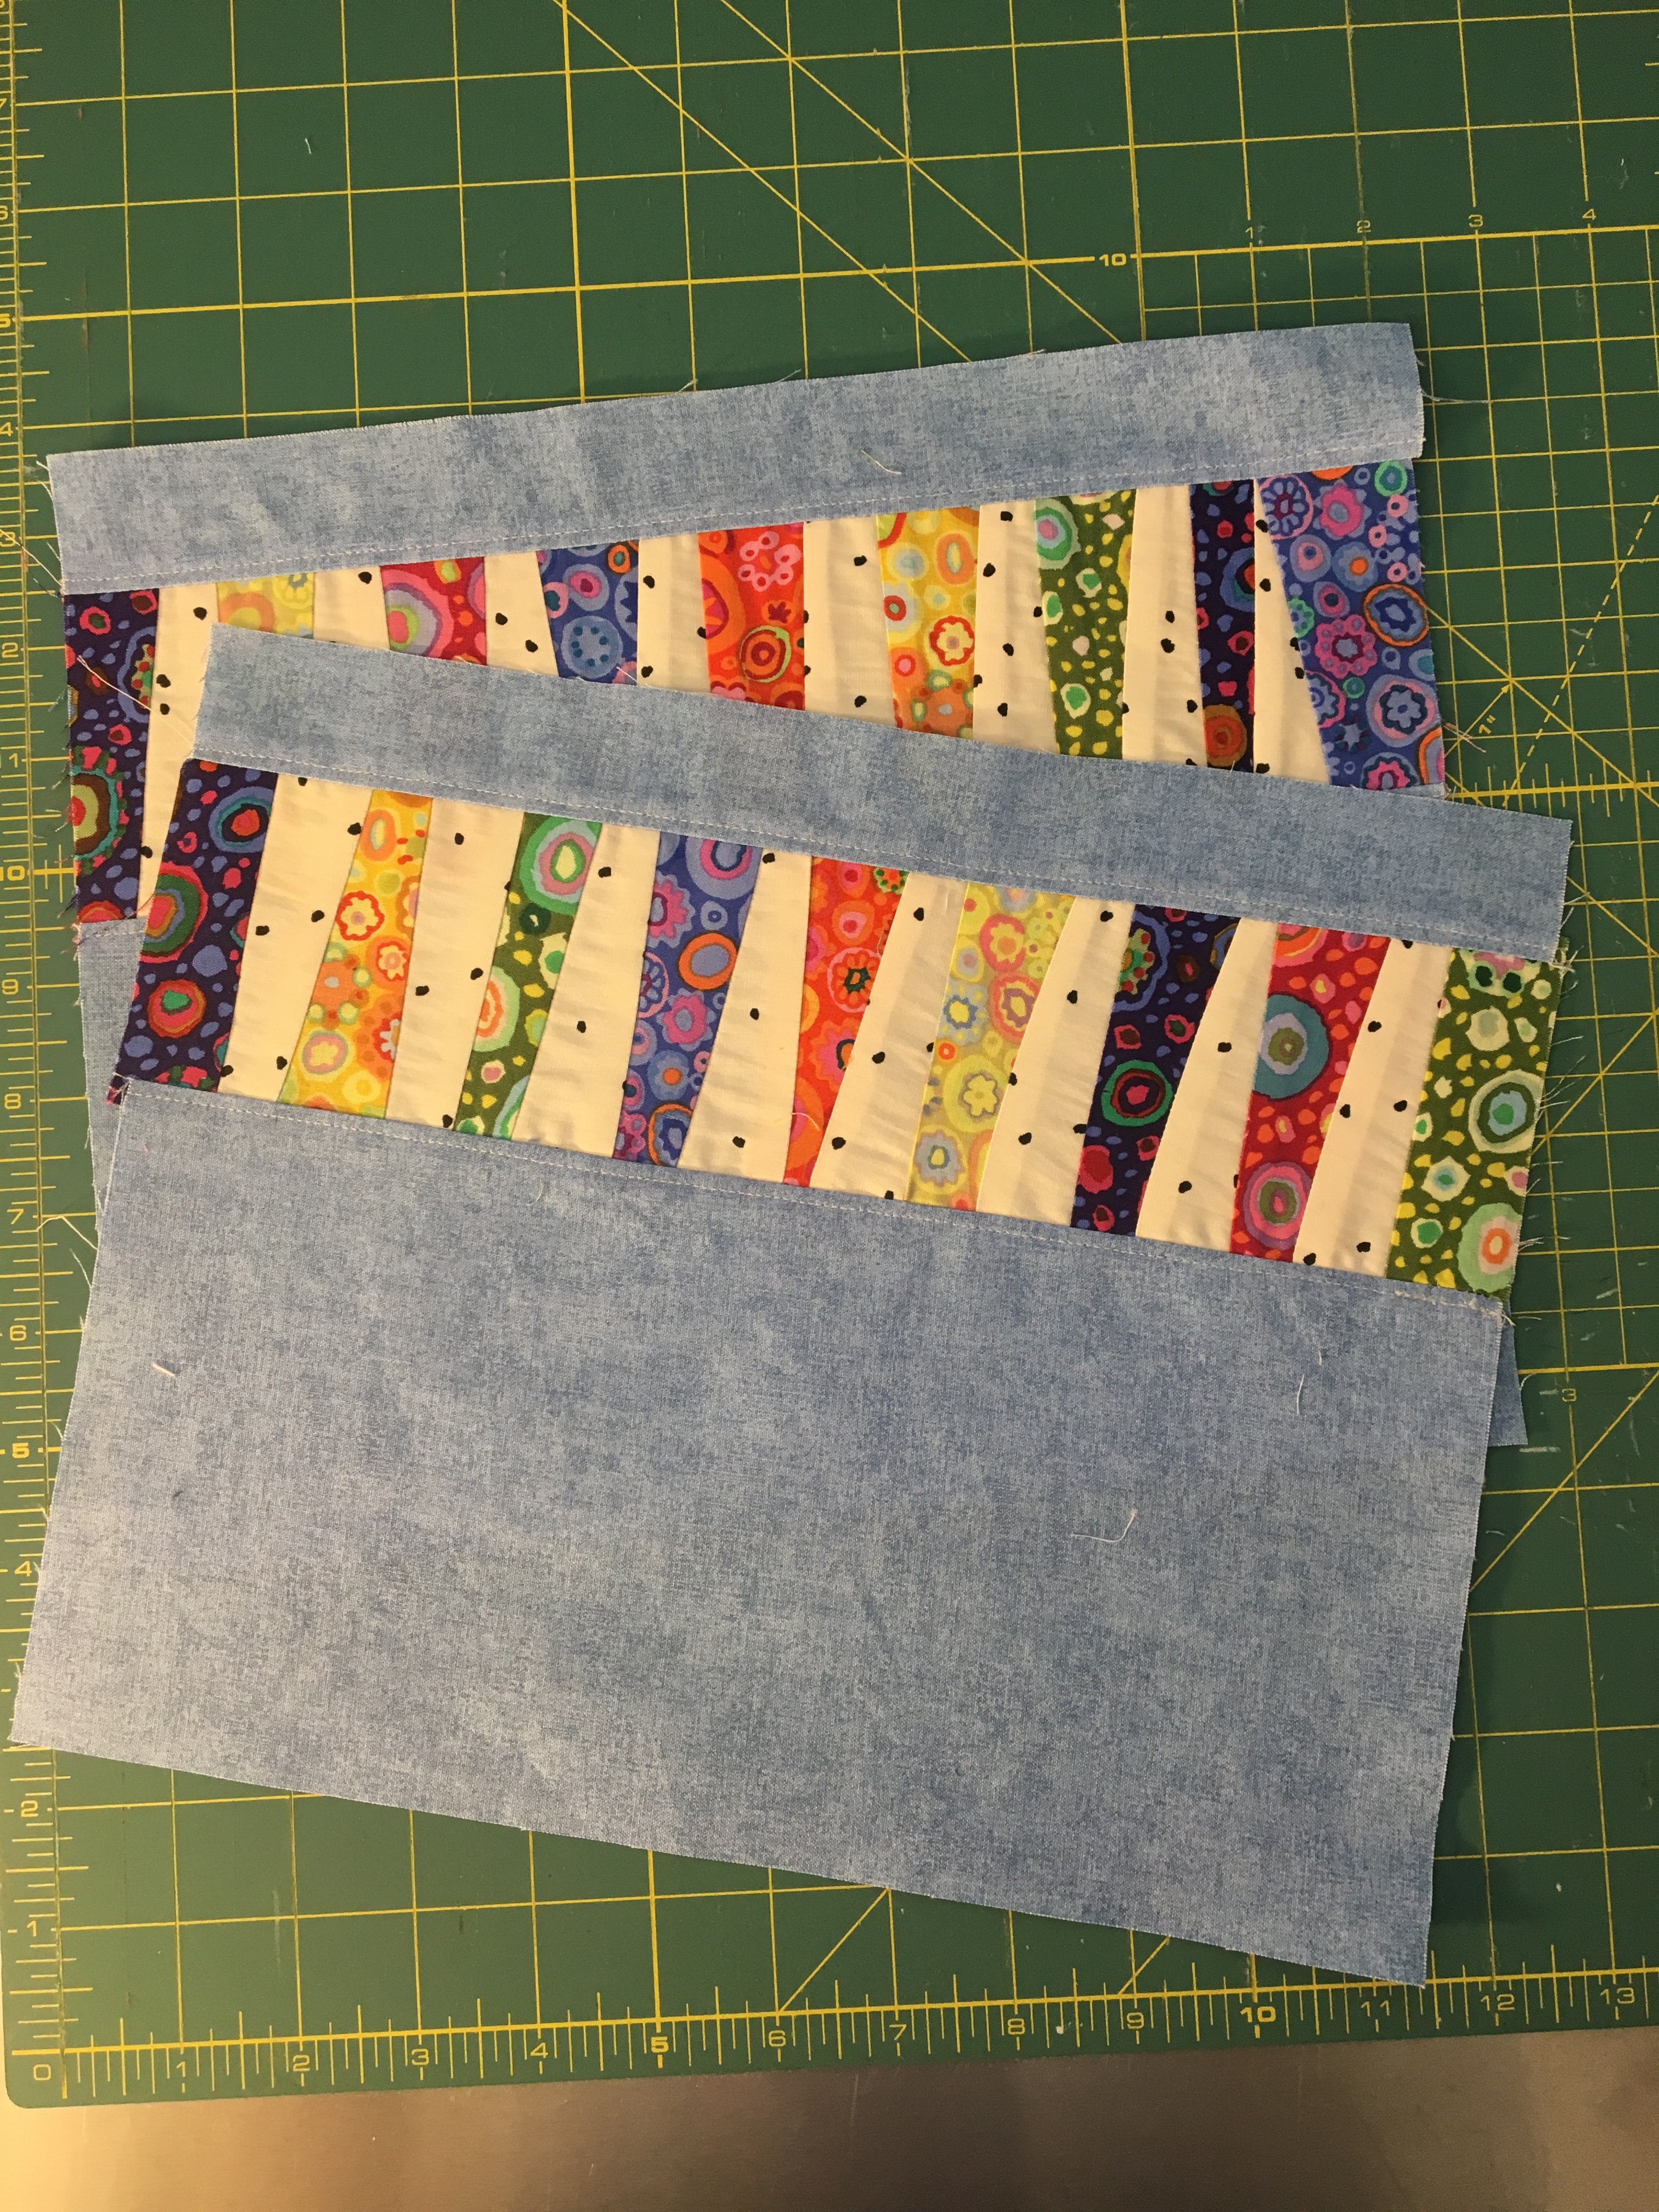
I love these bright ones too. The one on the left is better in person. There is blue in the lotus leaf that just pops with the chambray! The body fabric on the purple one is like a shot cotton, but heavier. It’s almost iridescent.

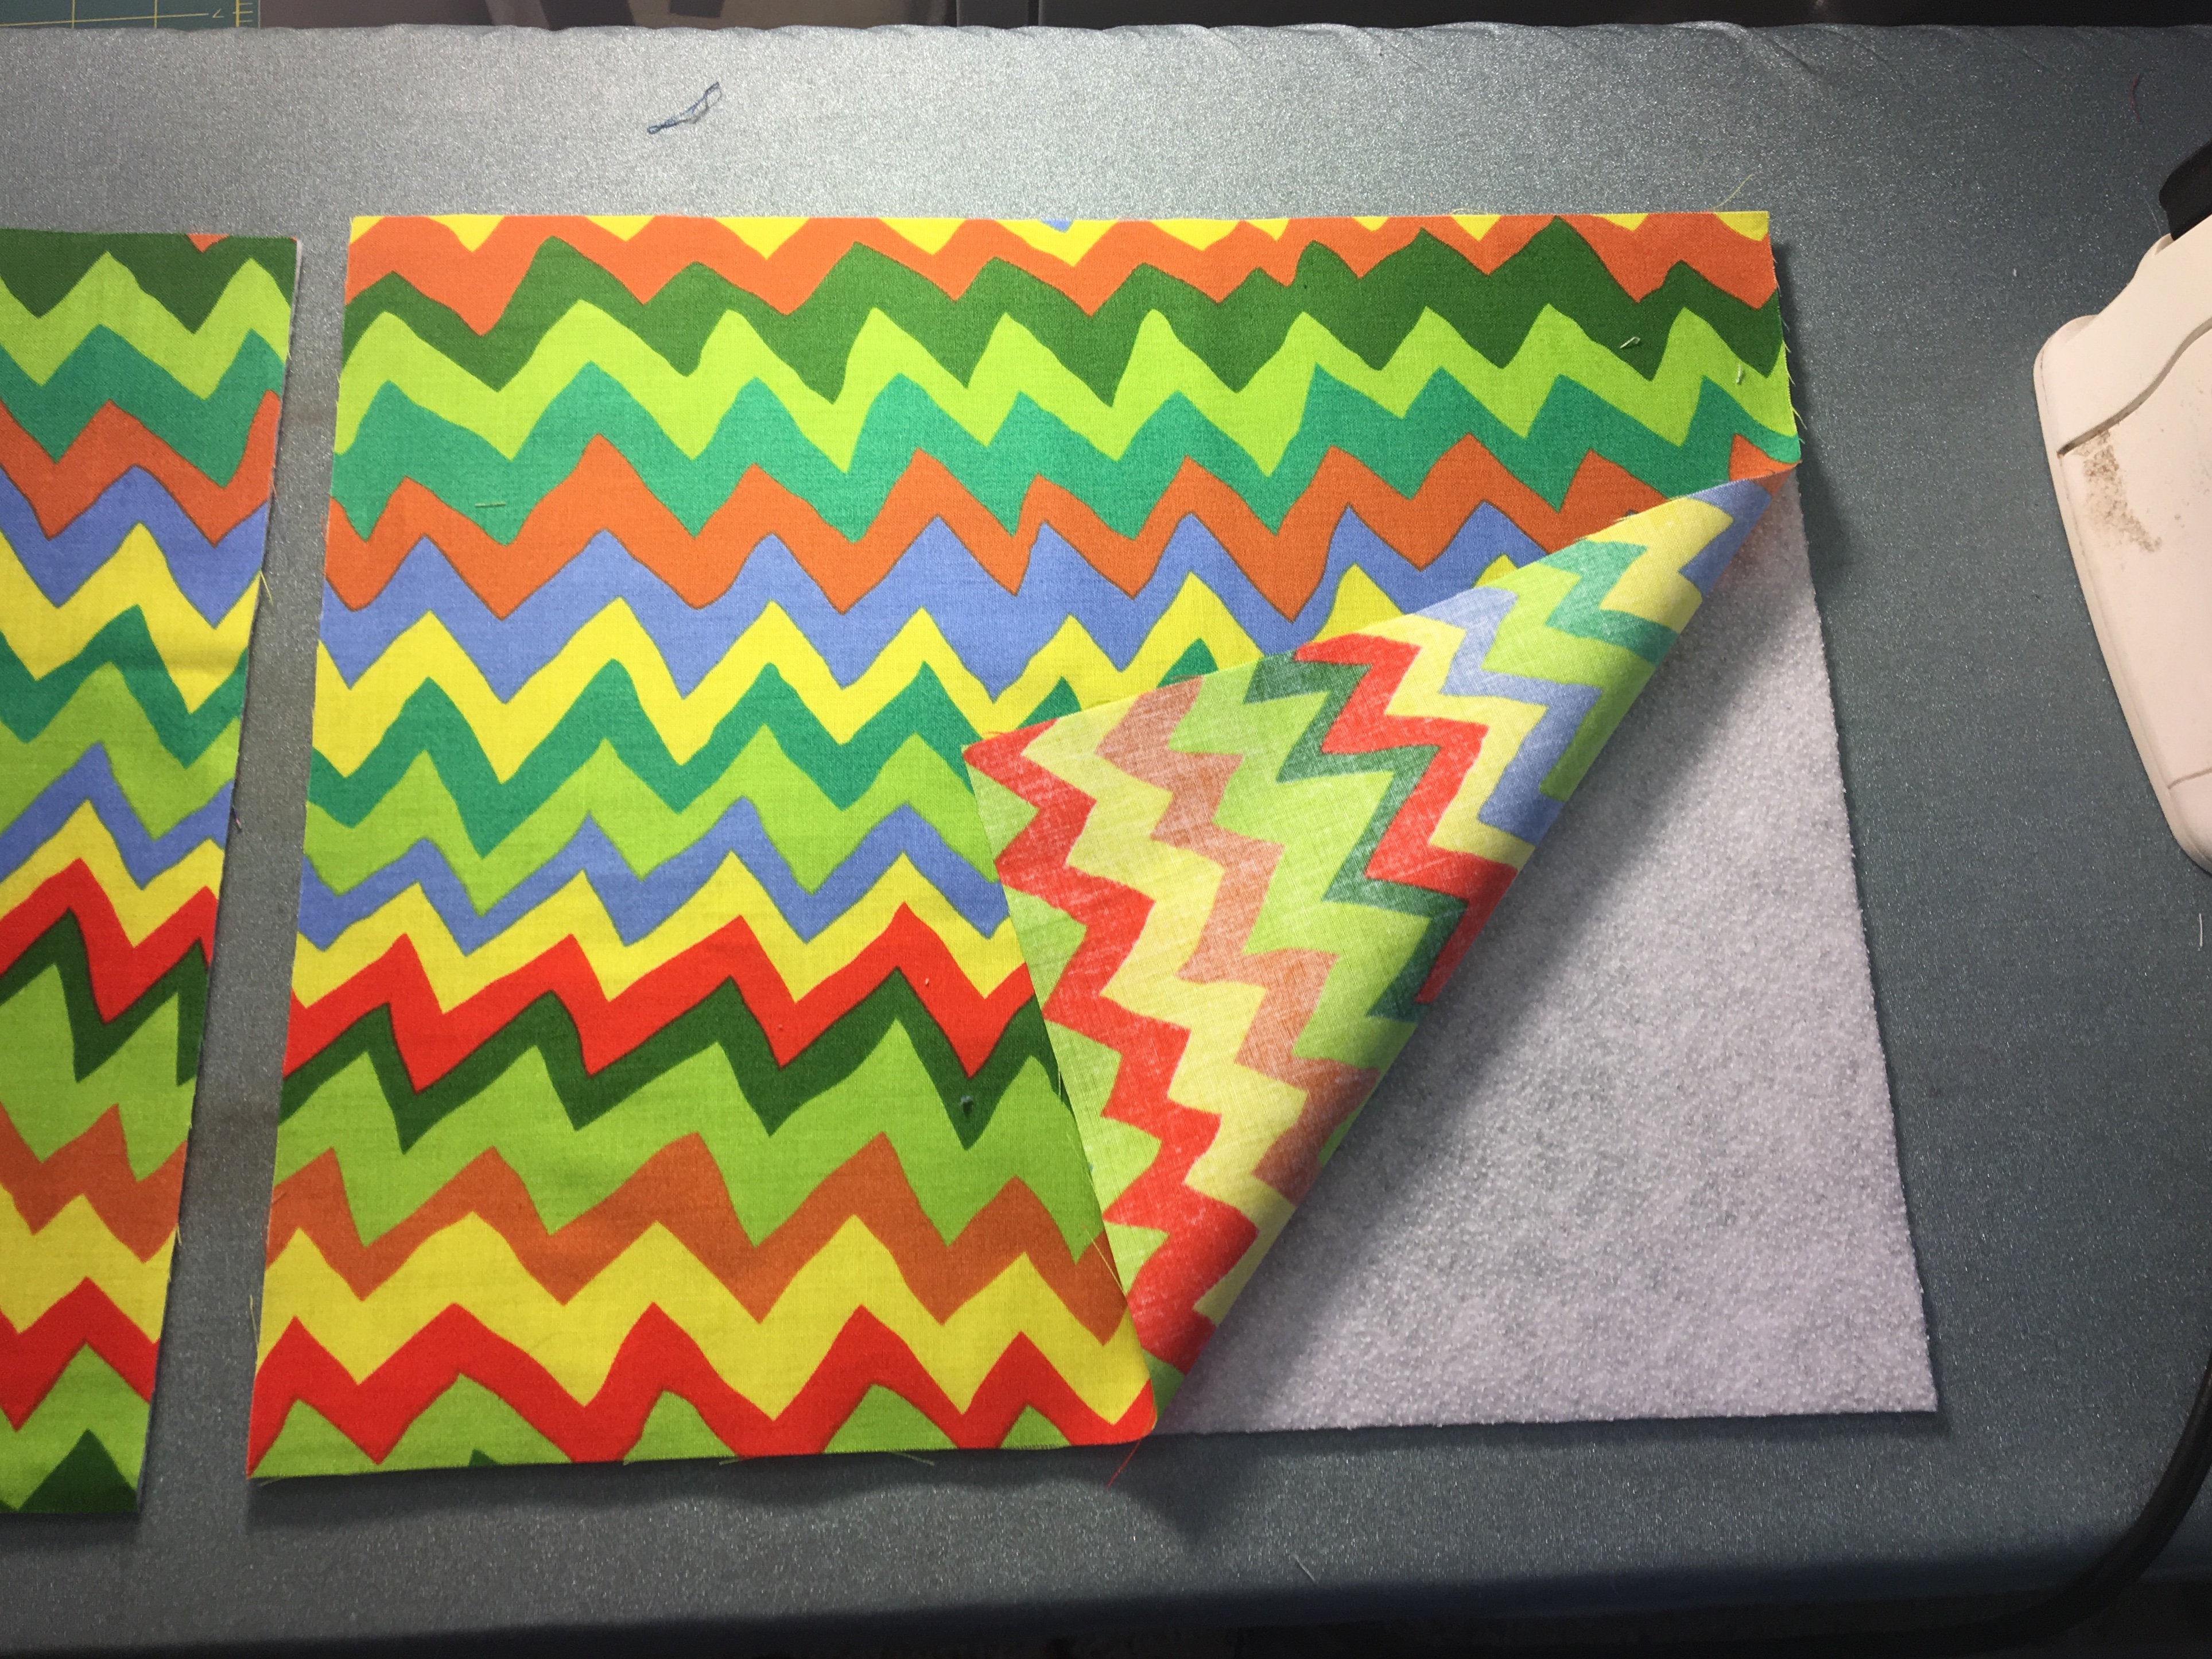
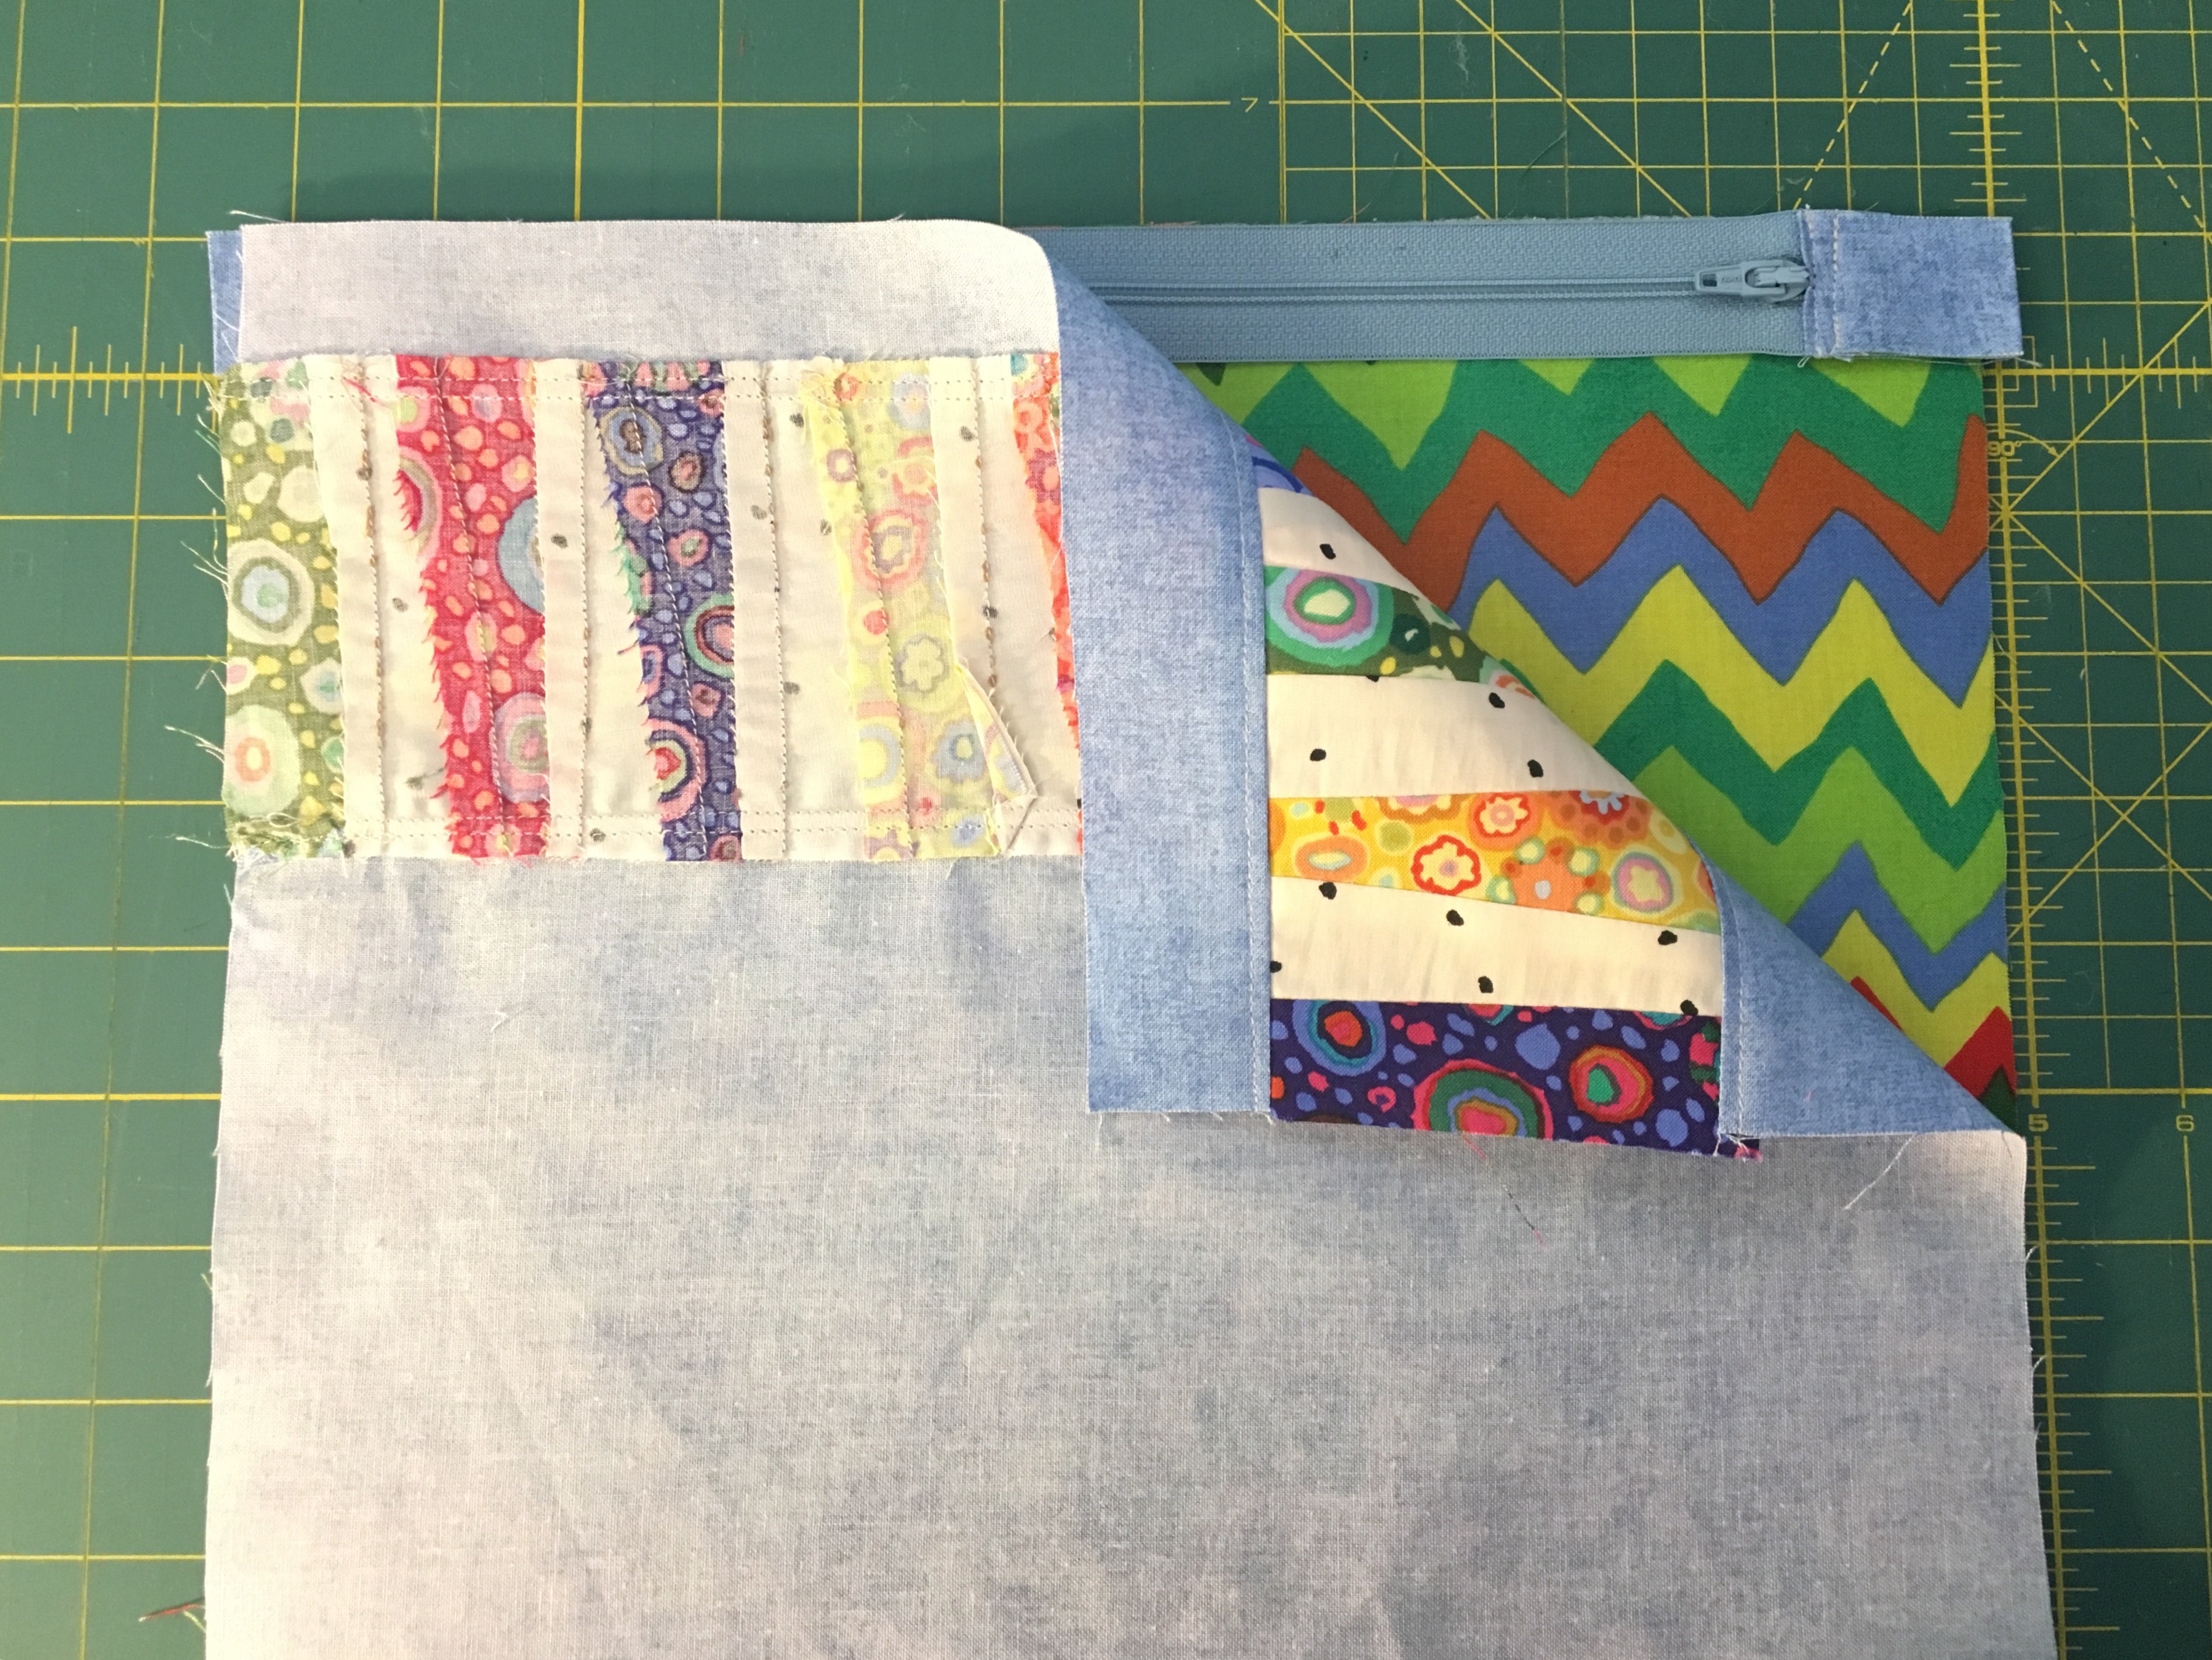
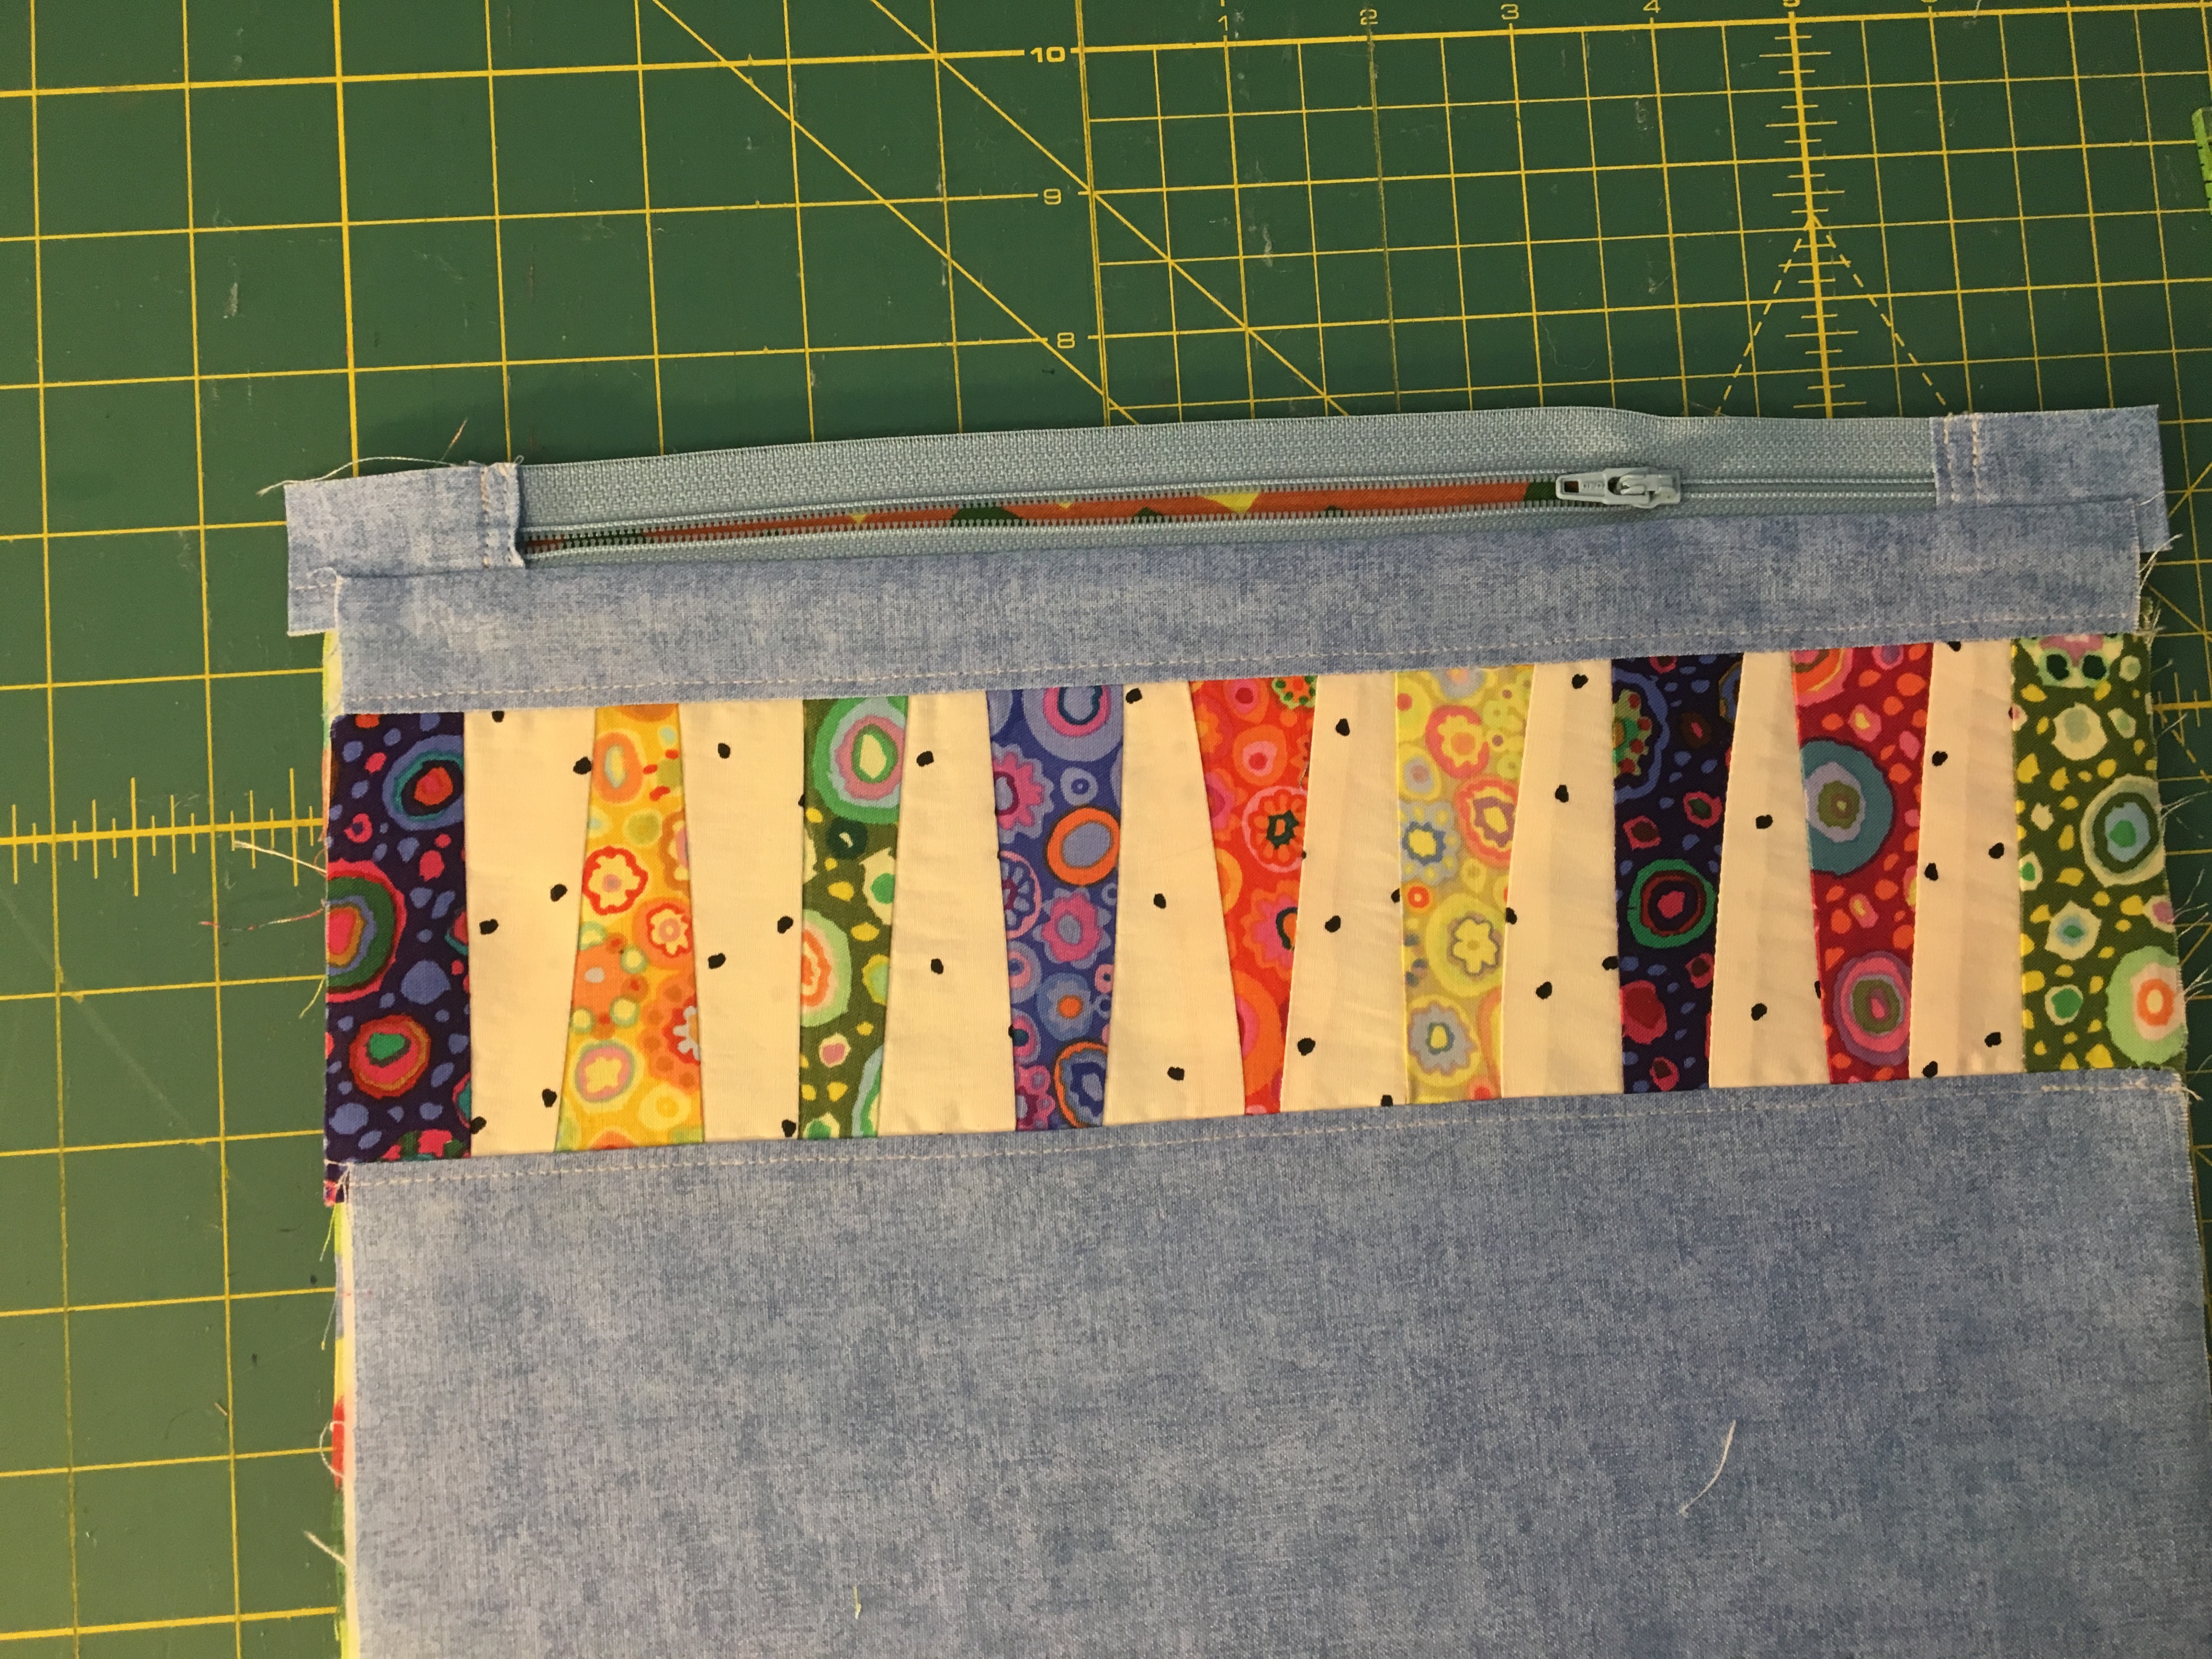
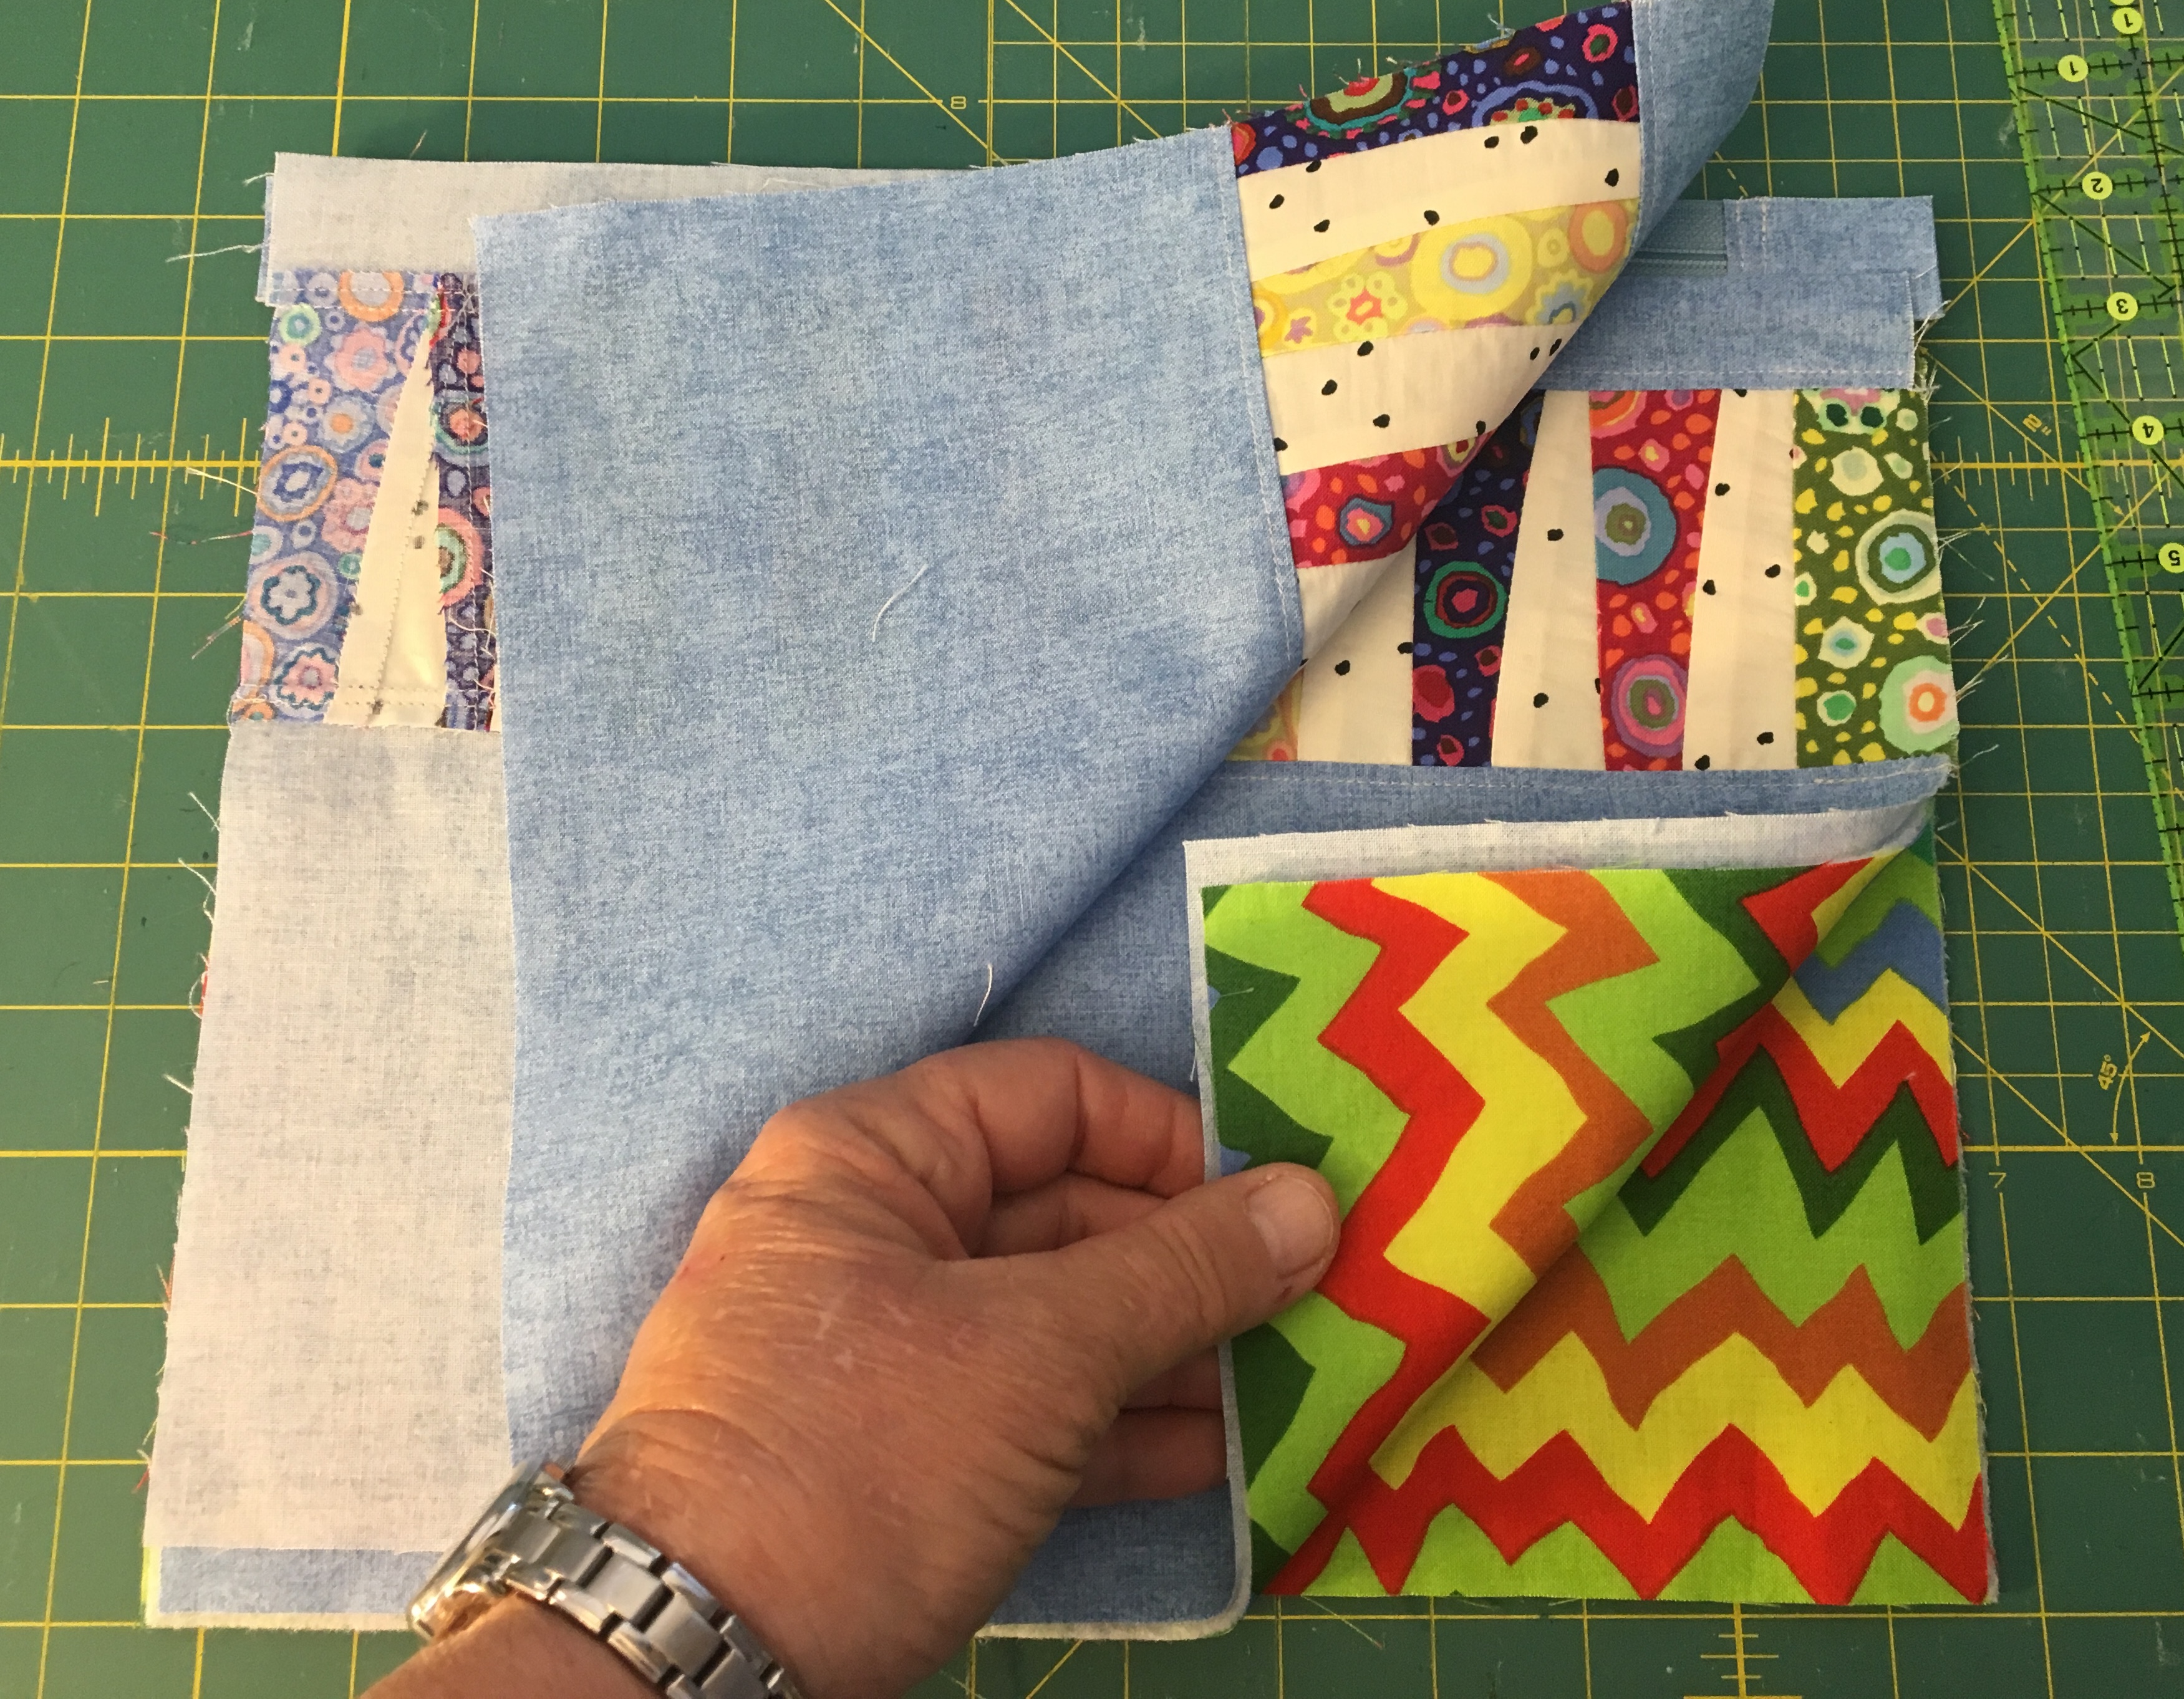
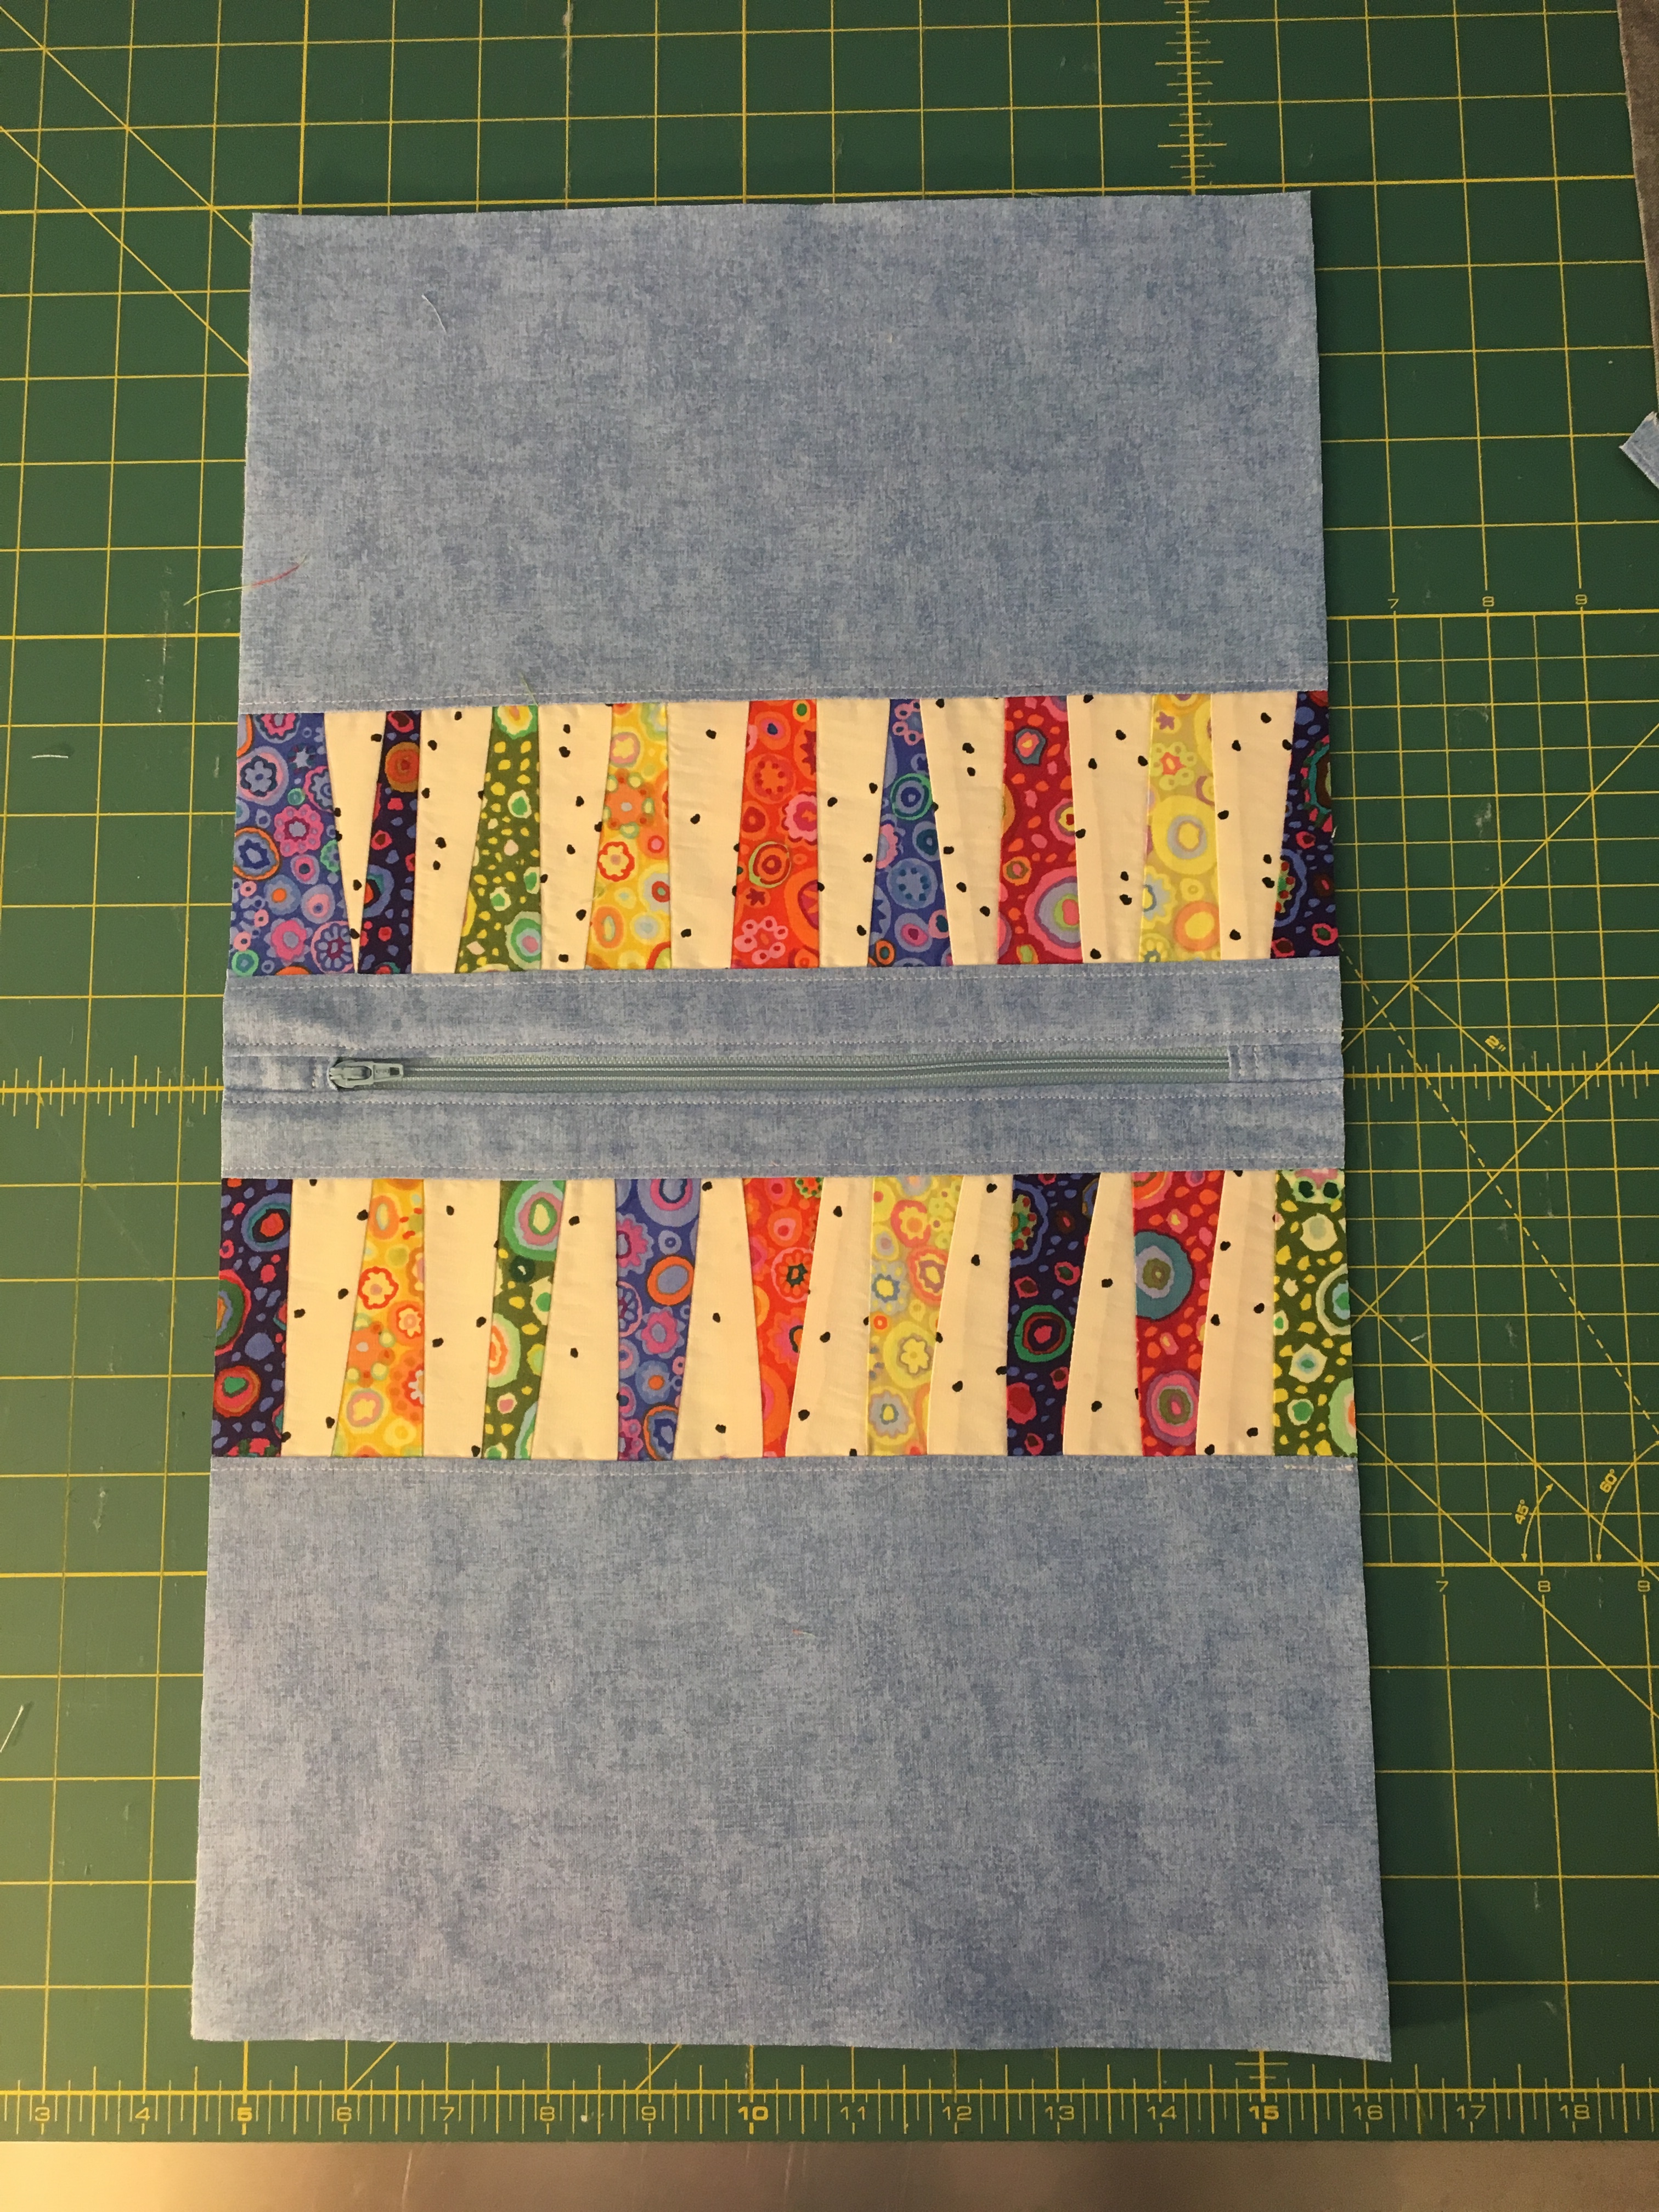
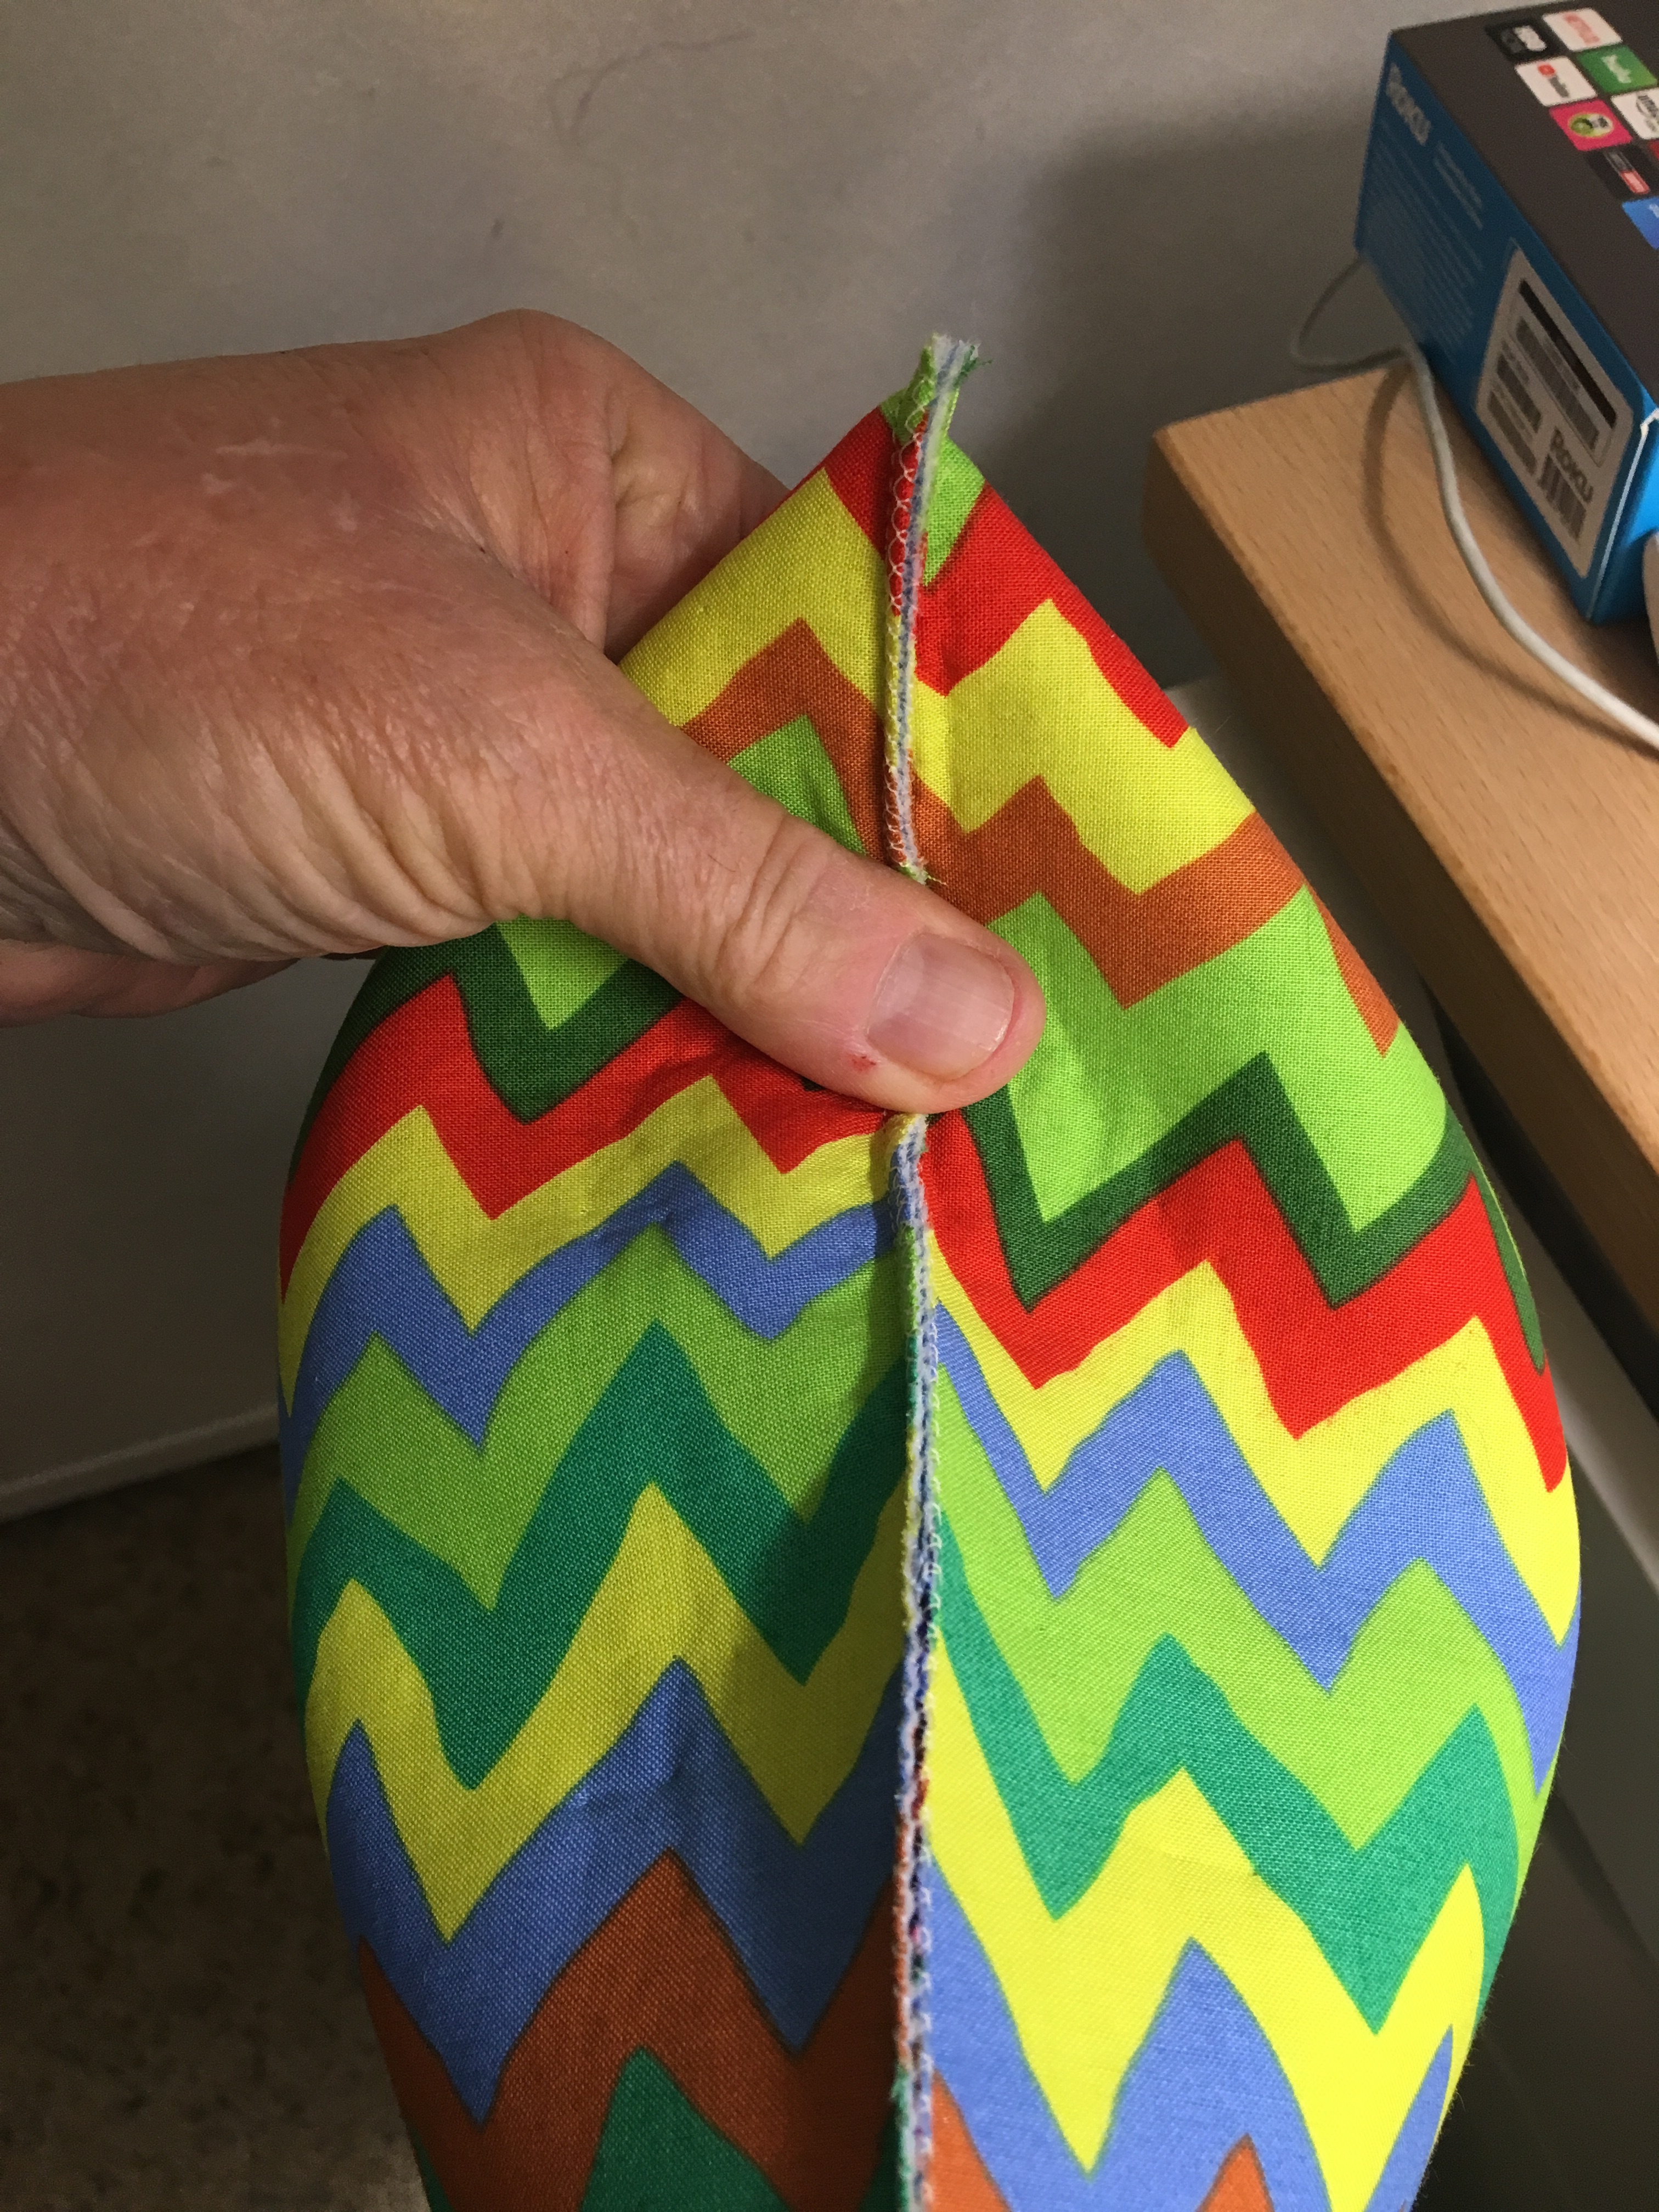
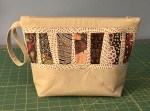
Front and back views of this next one because the lotus leaf fabric is so different on each side.

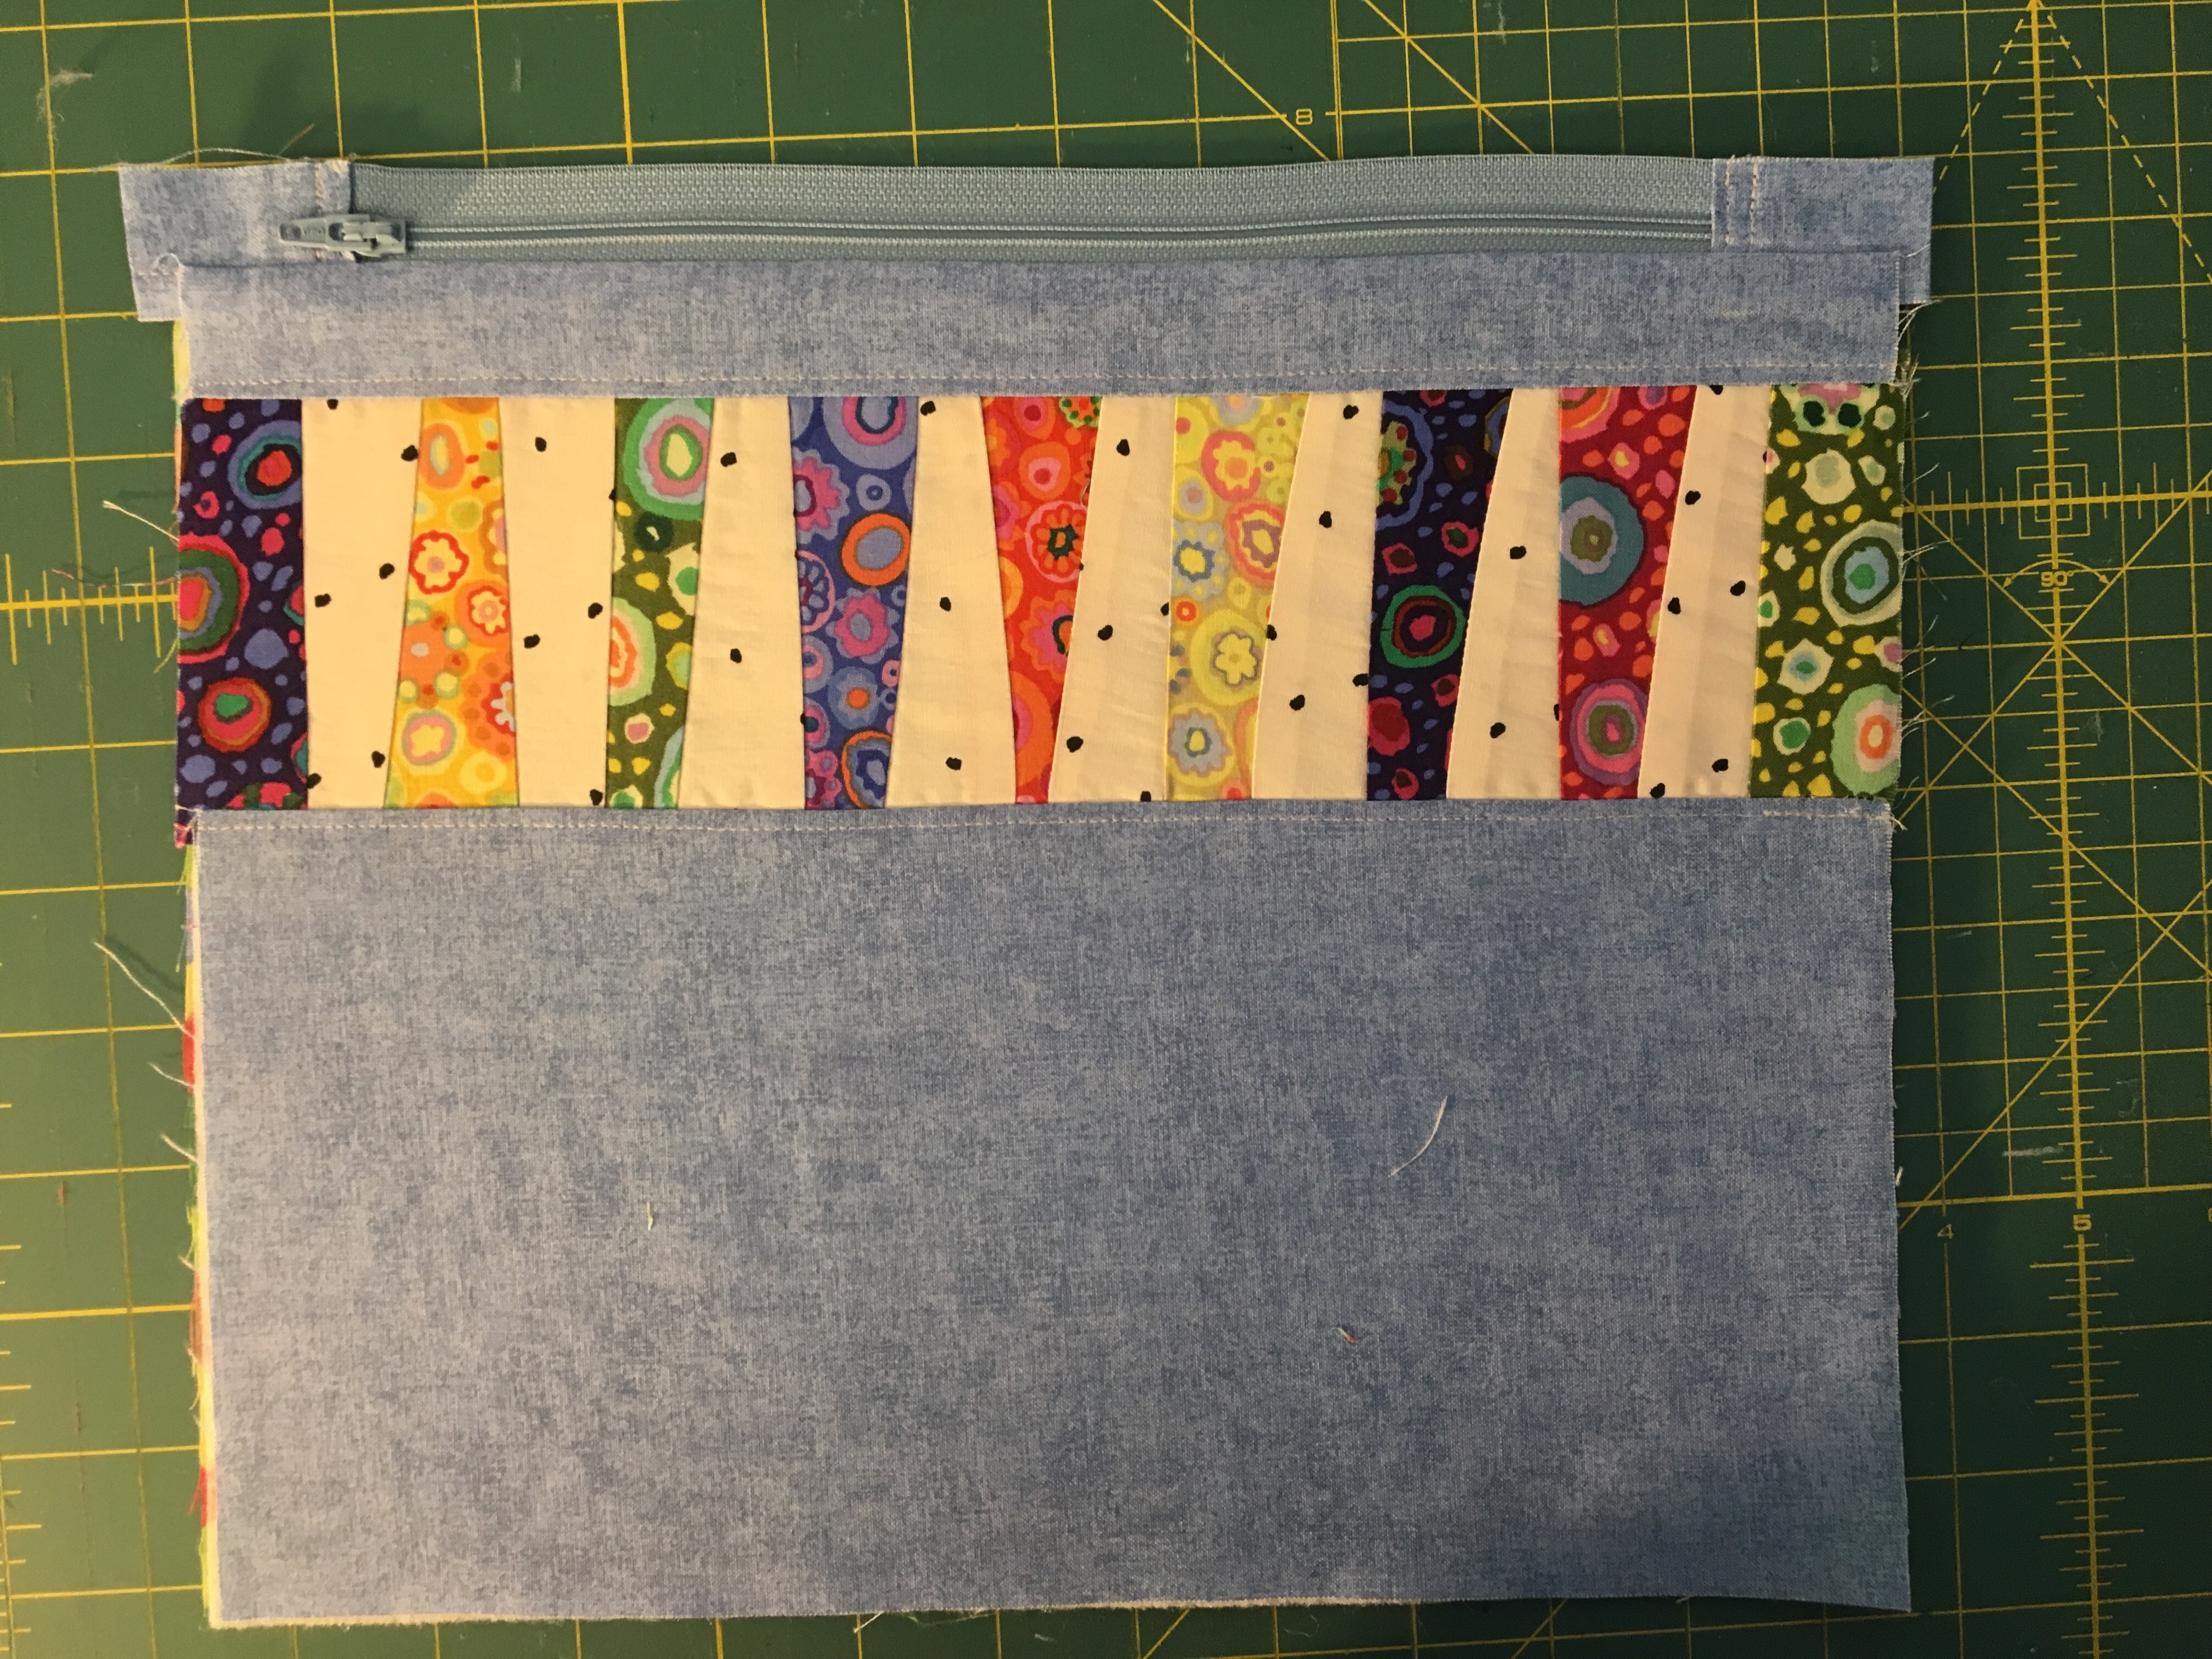
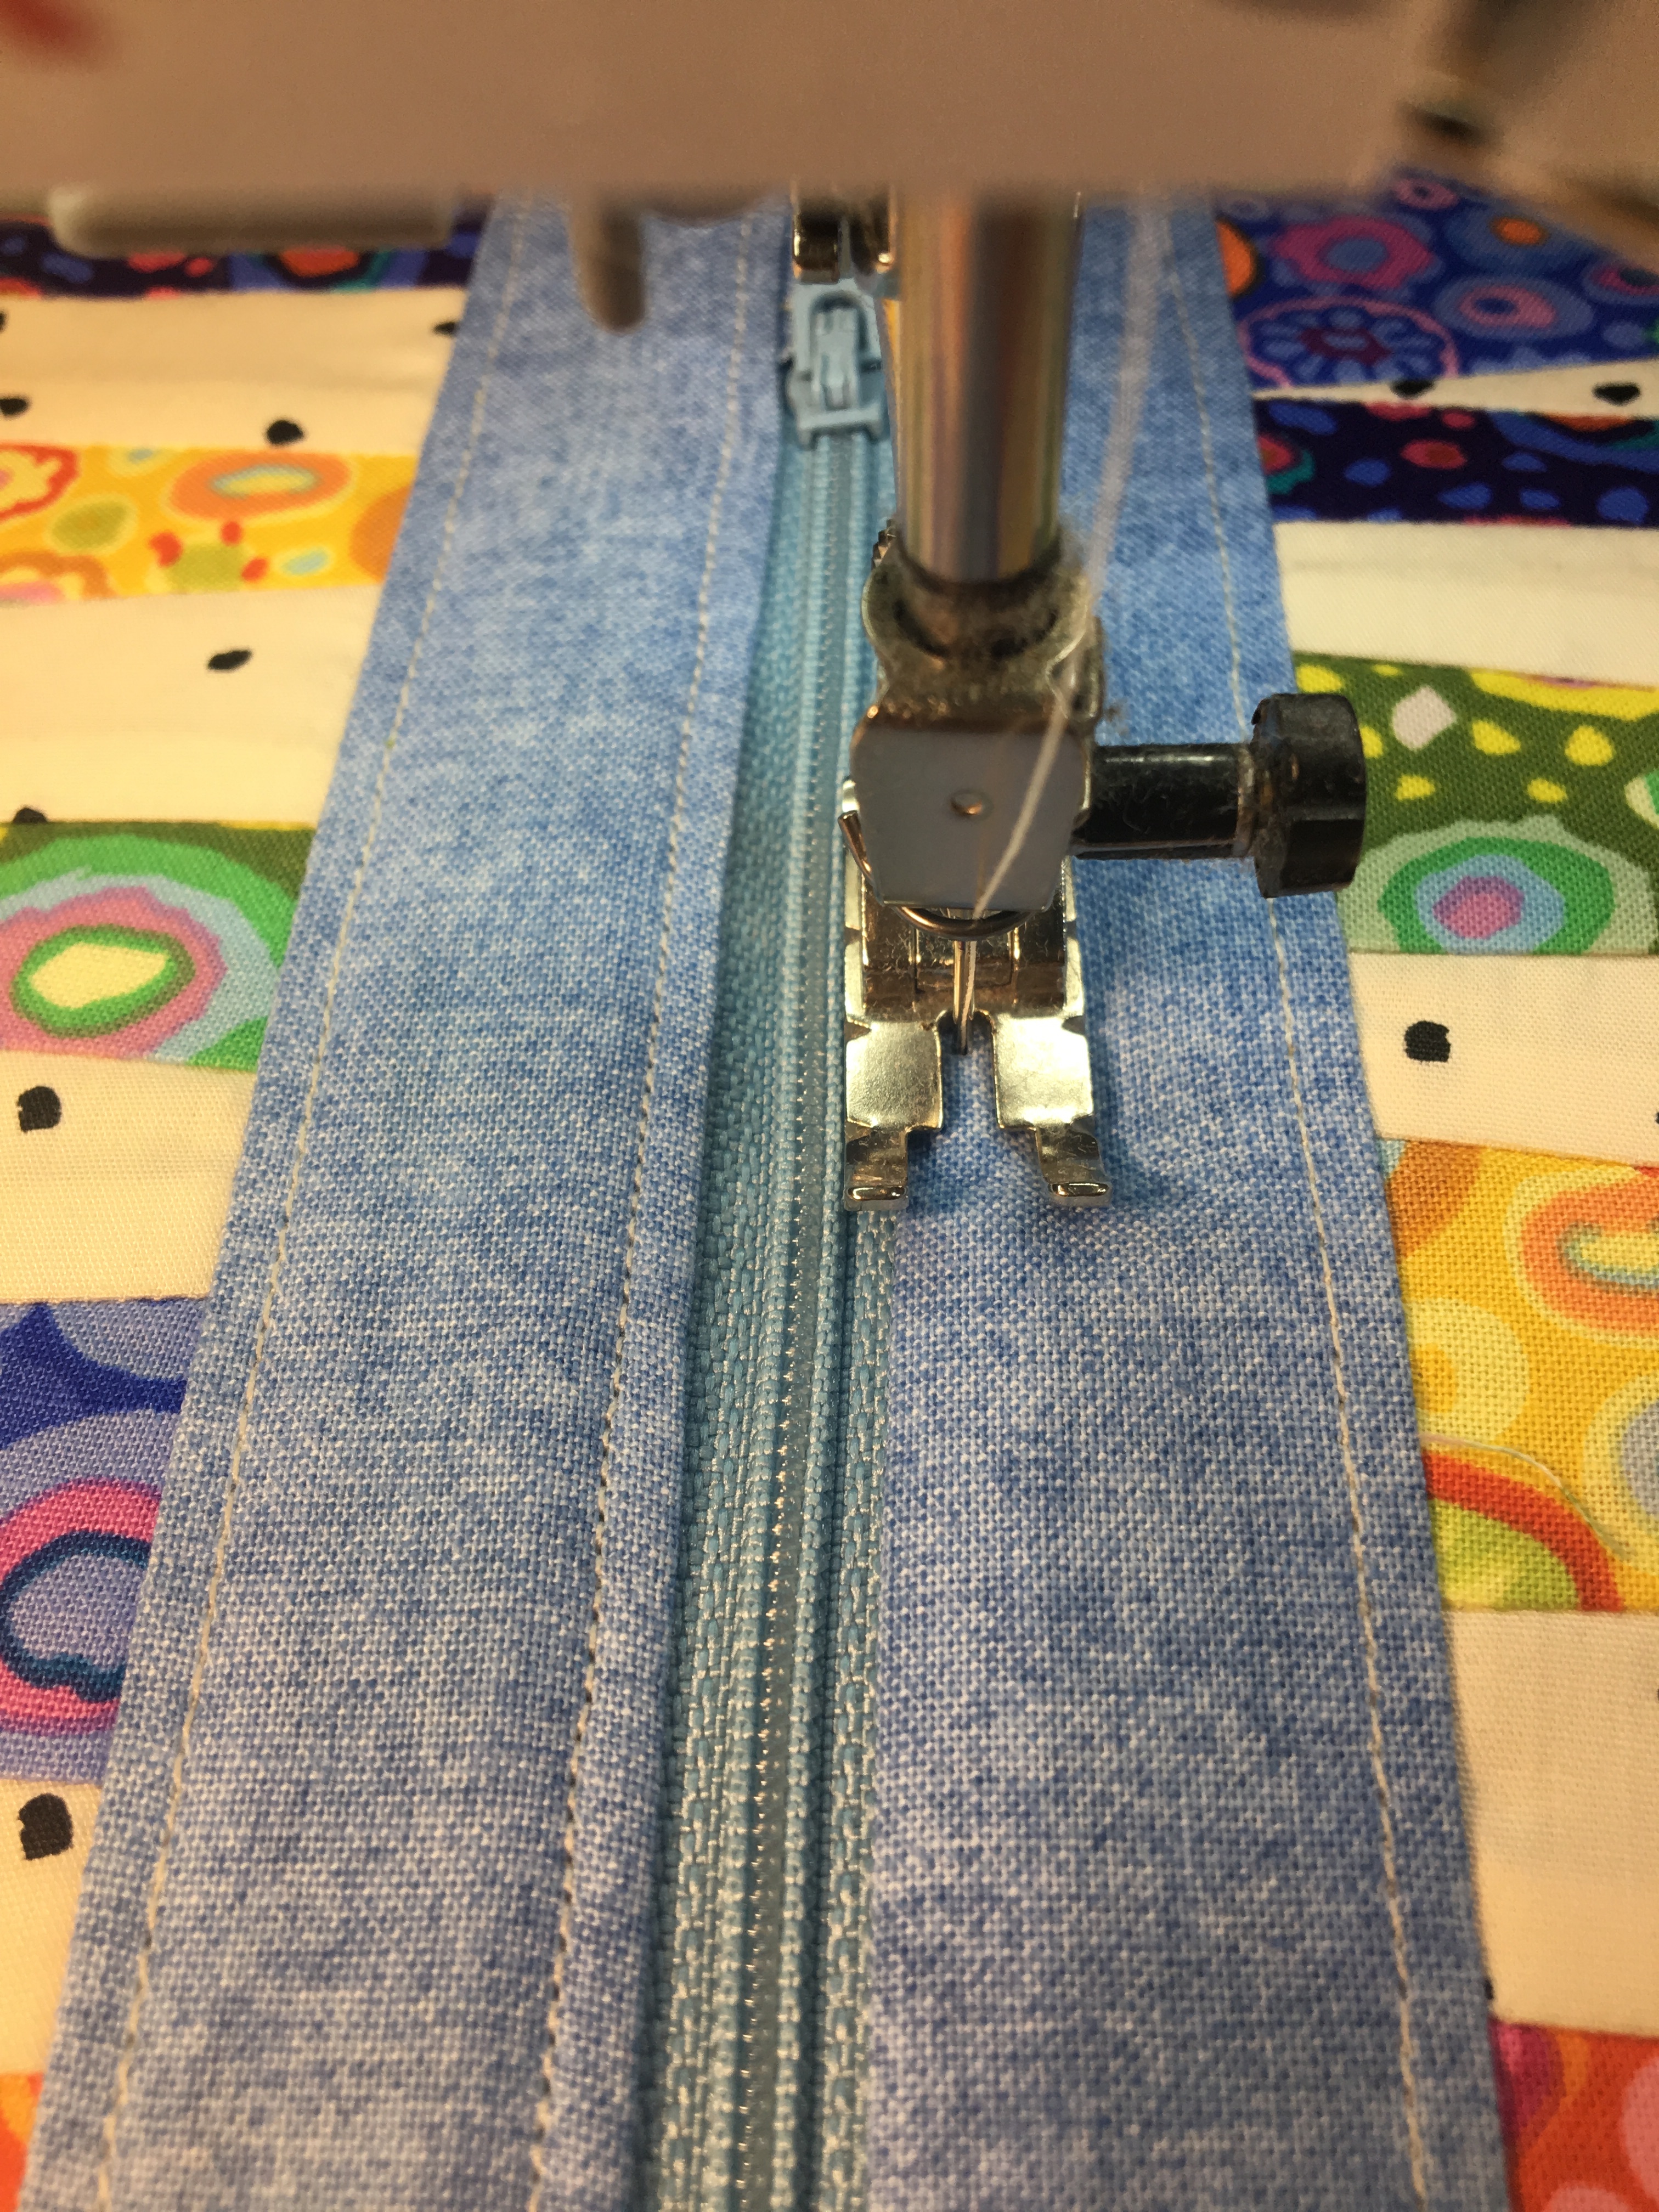
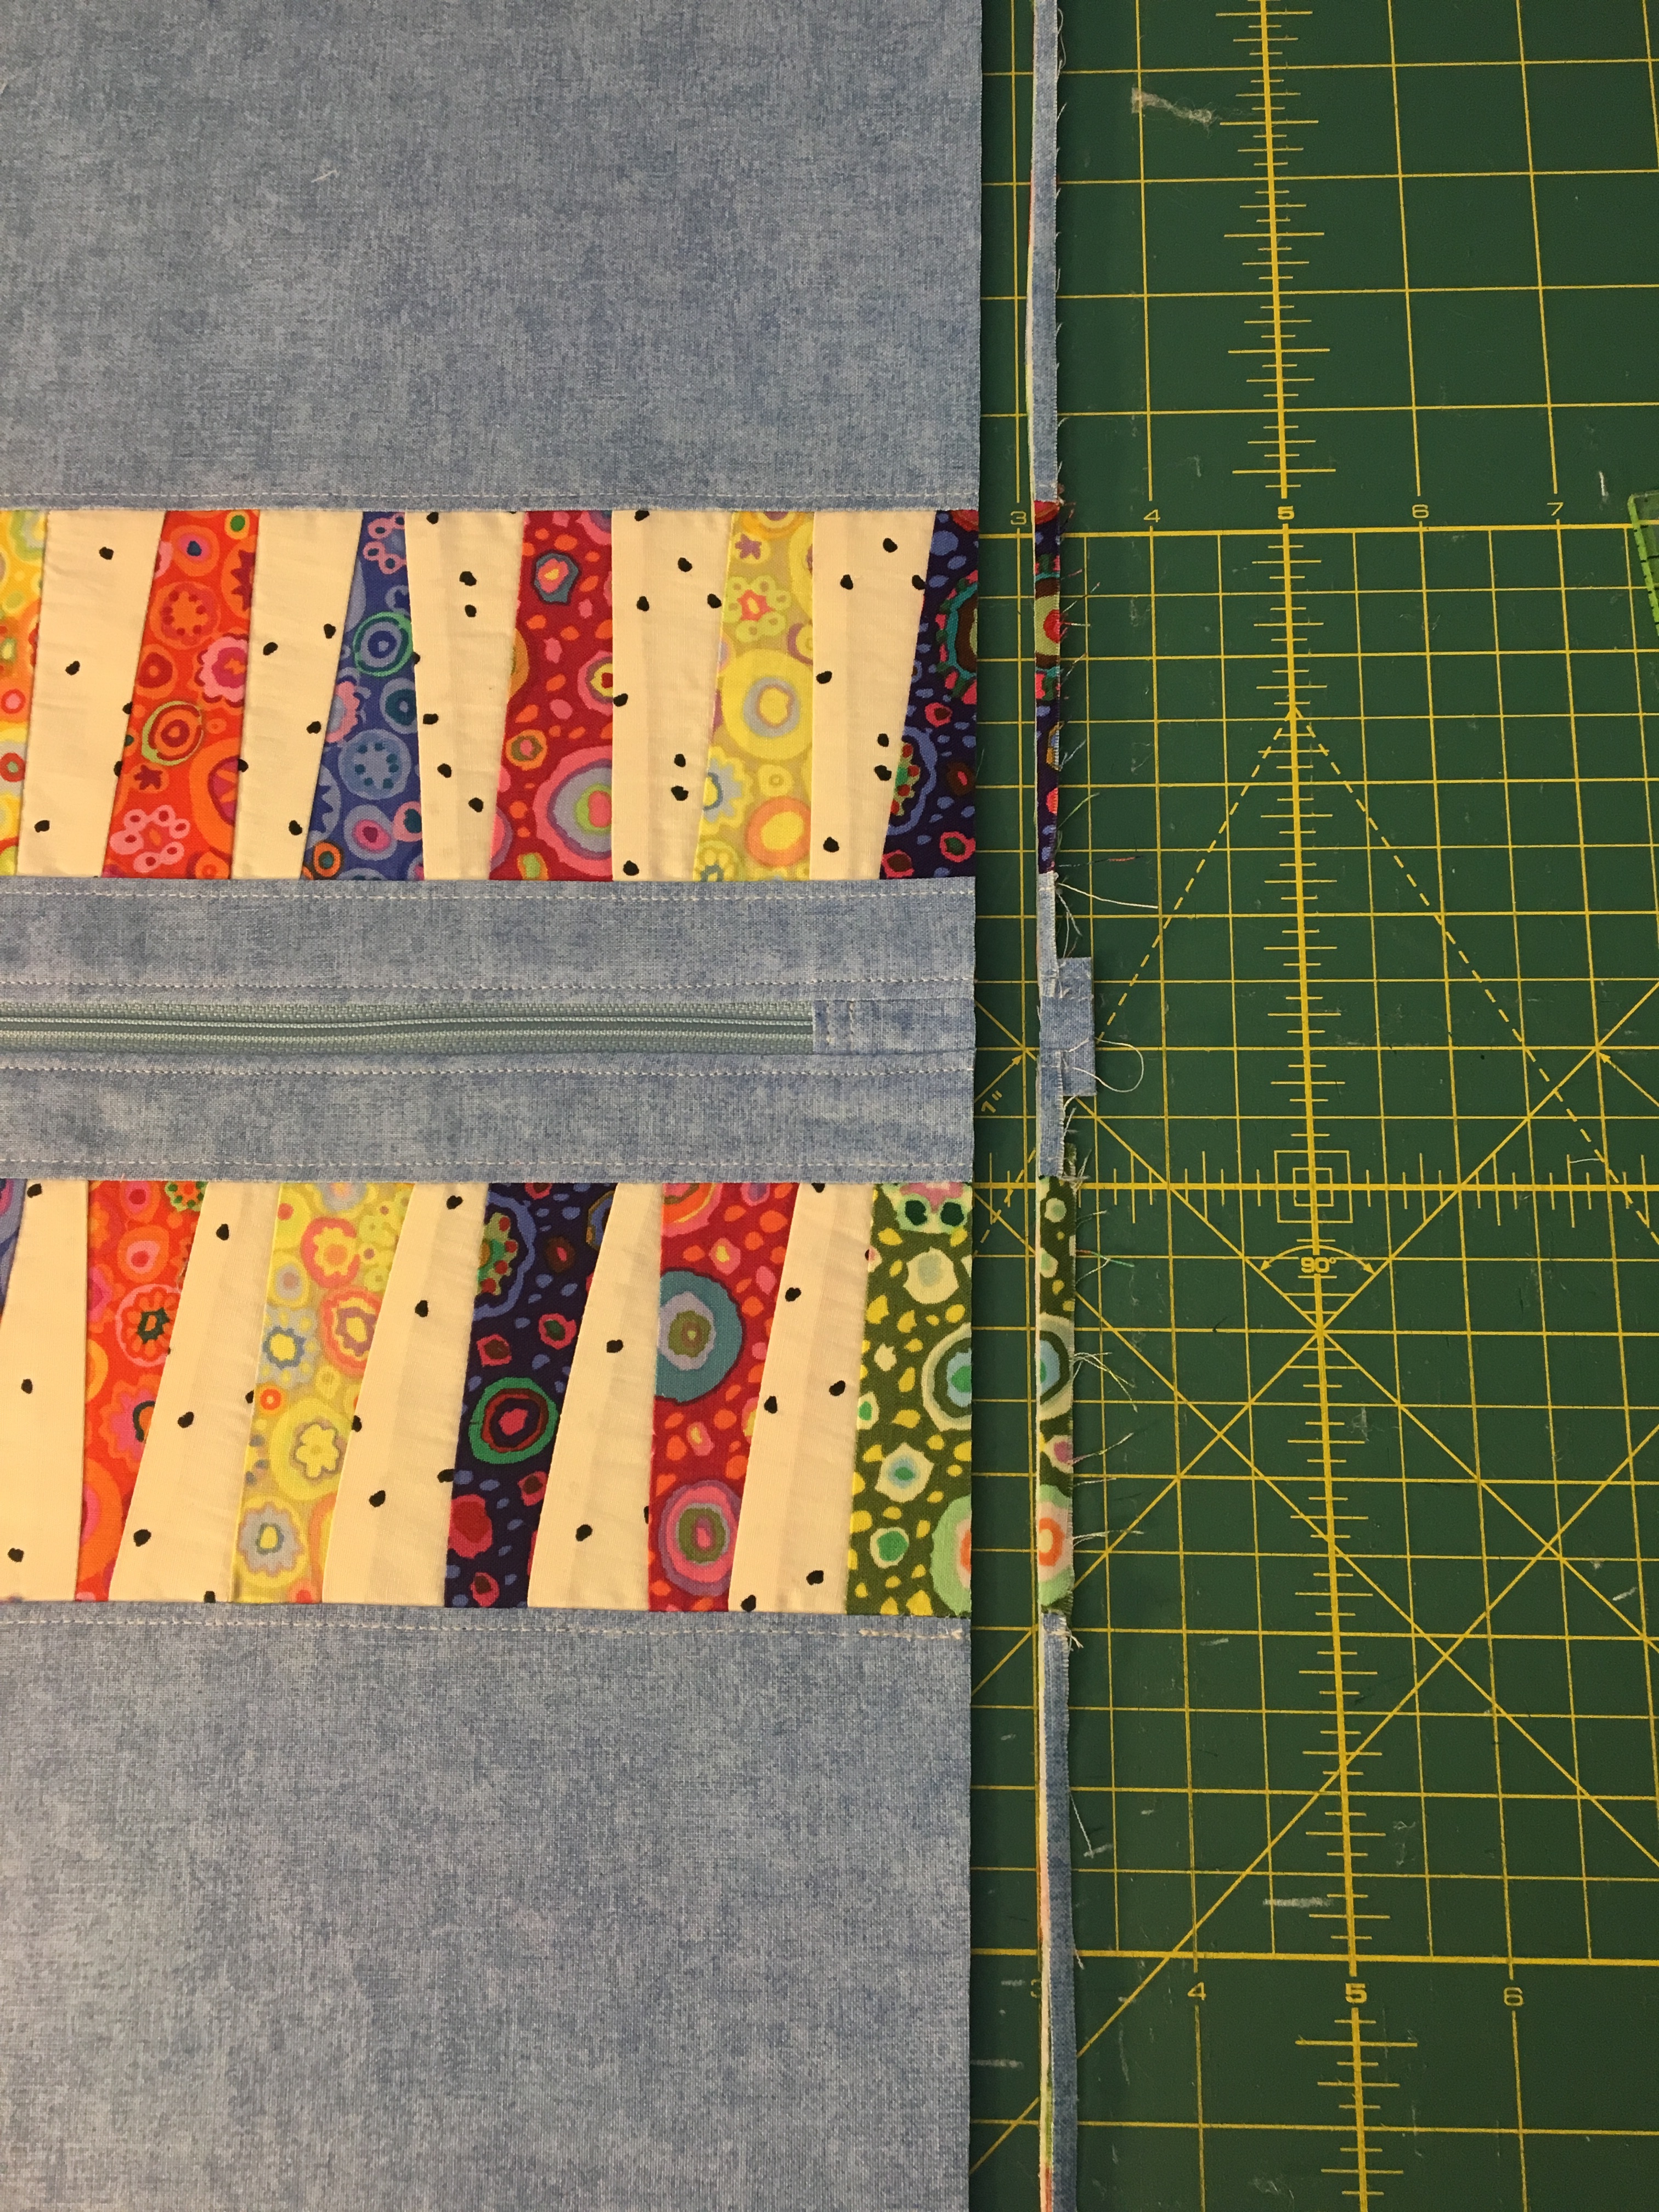
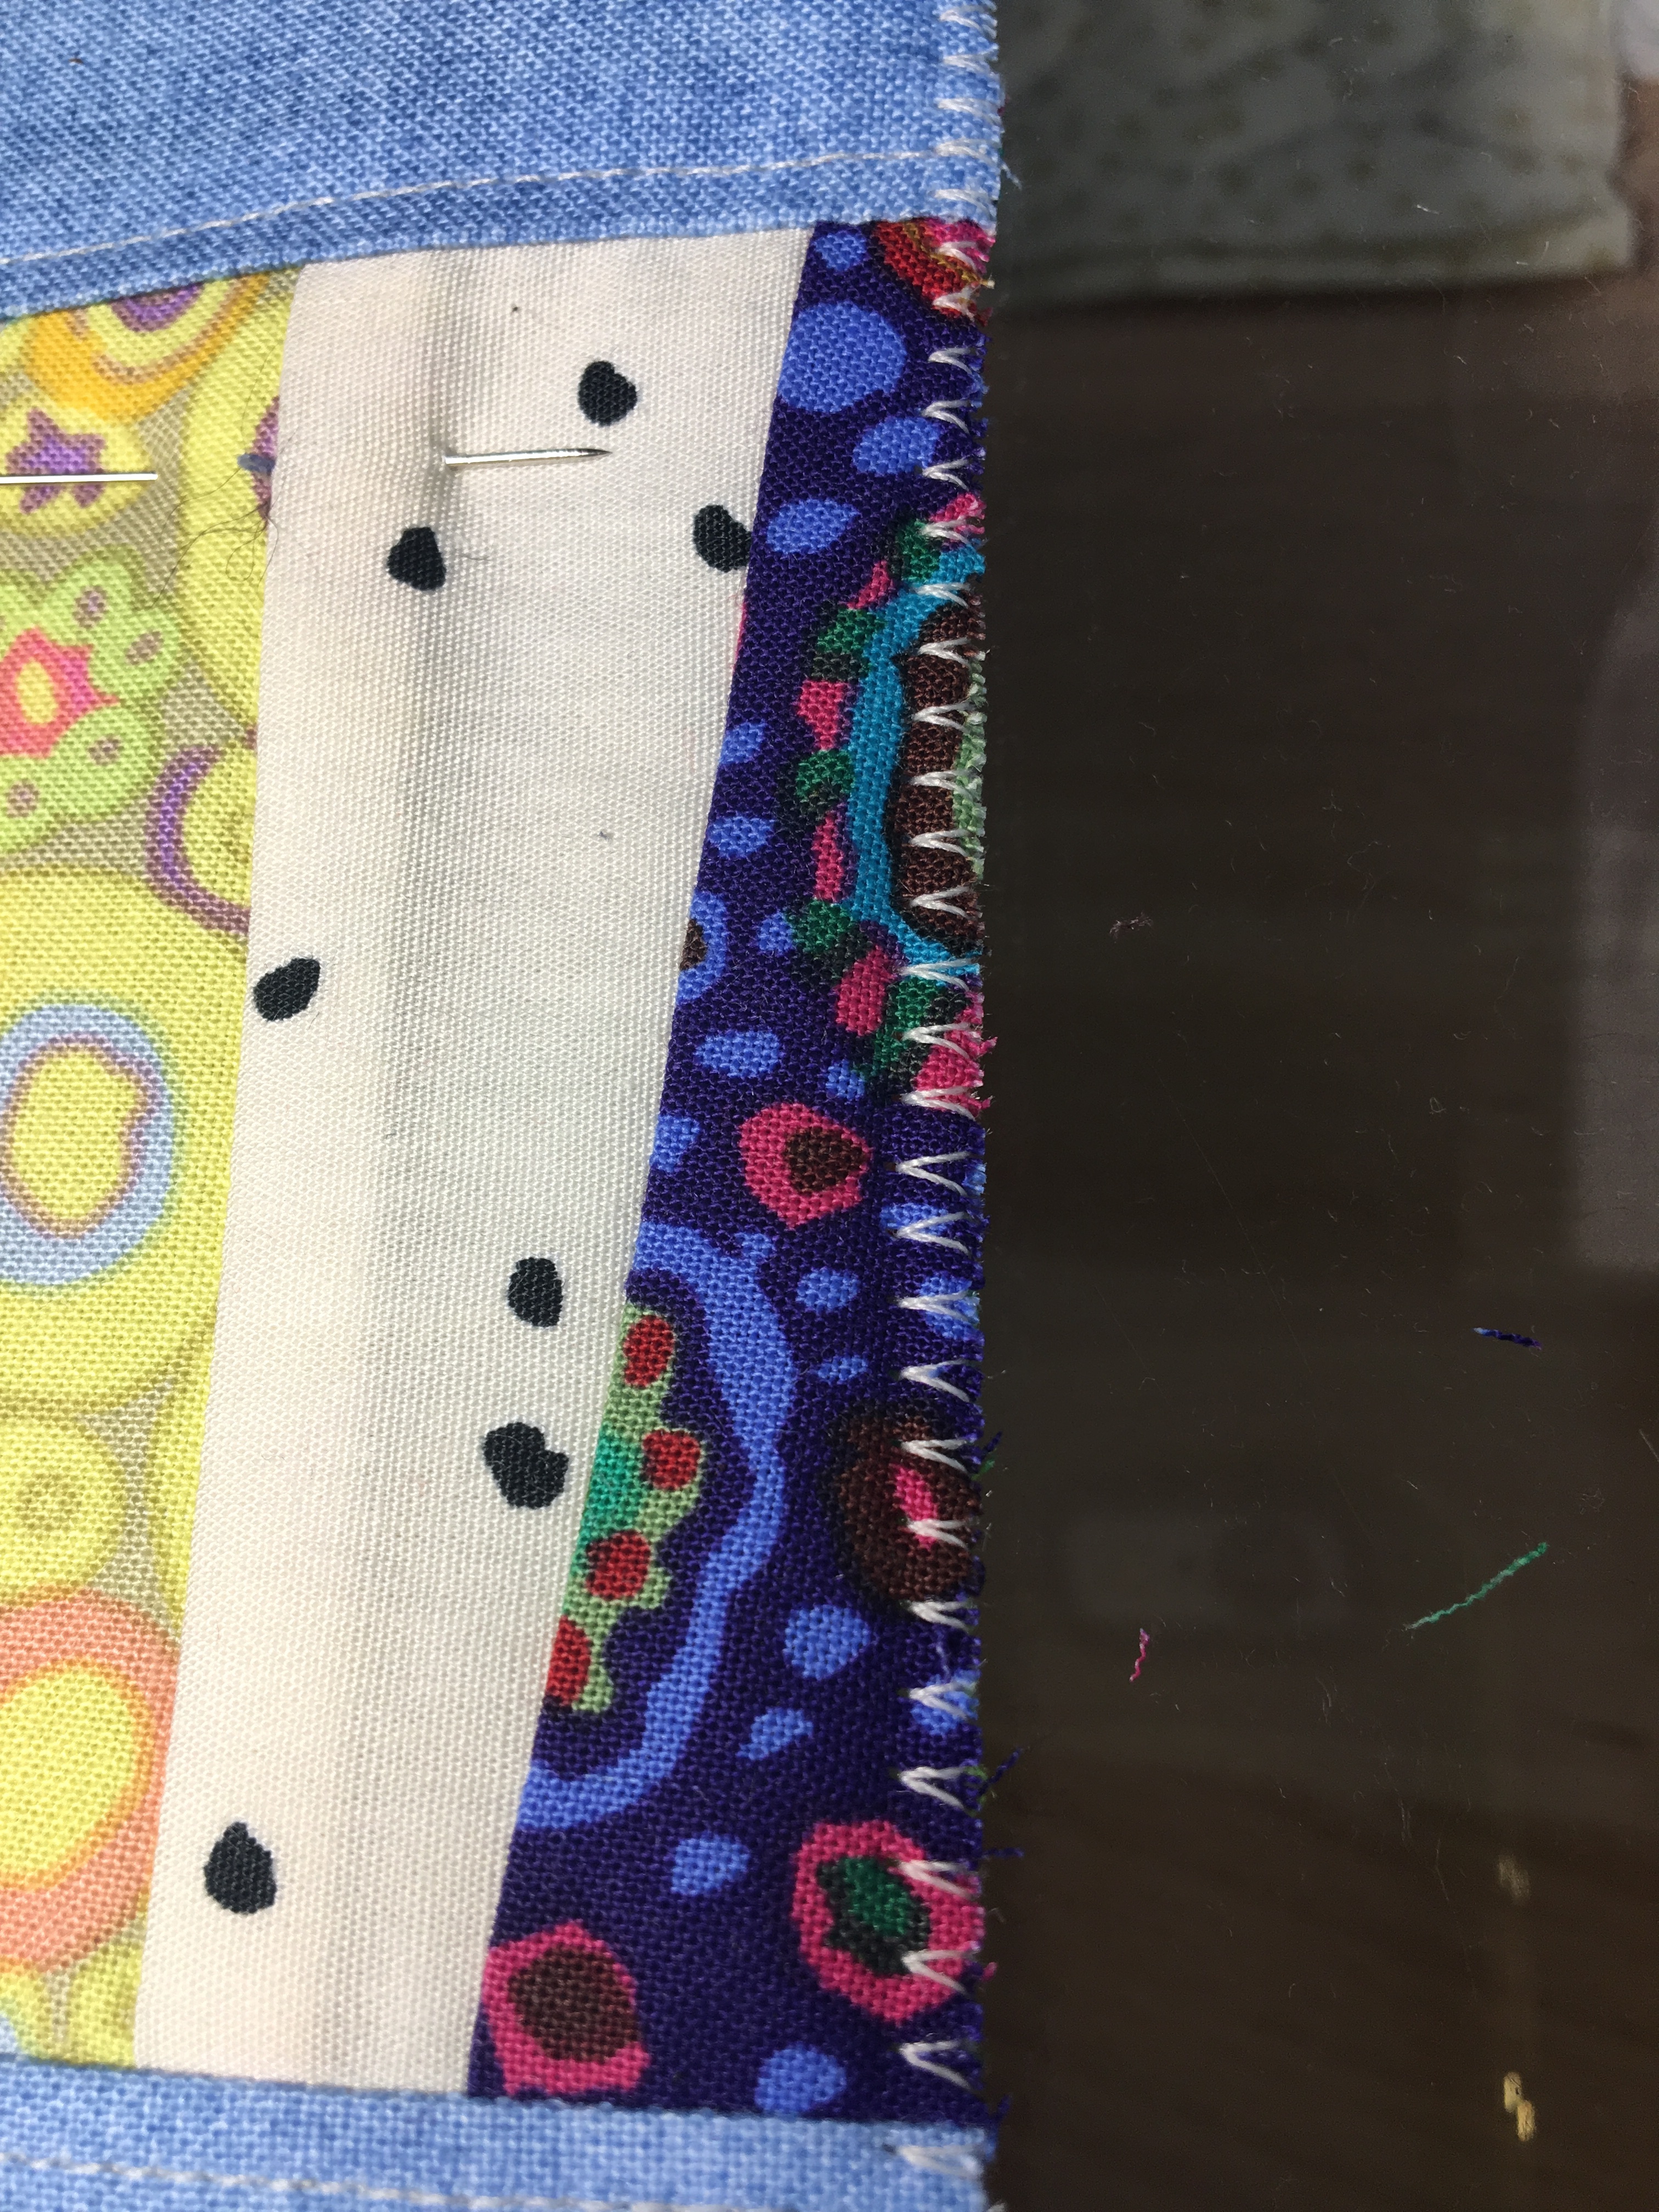
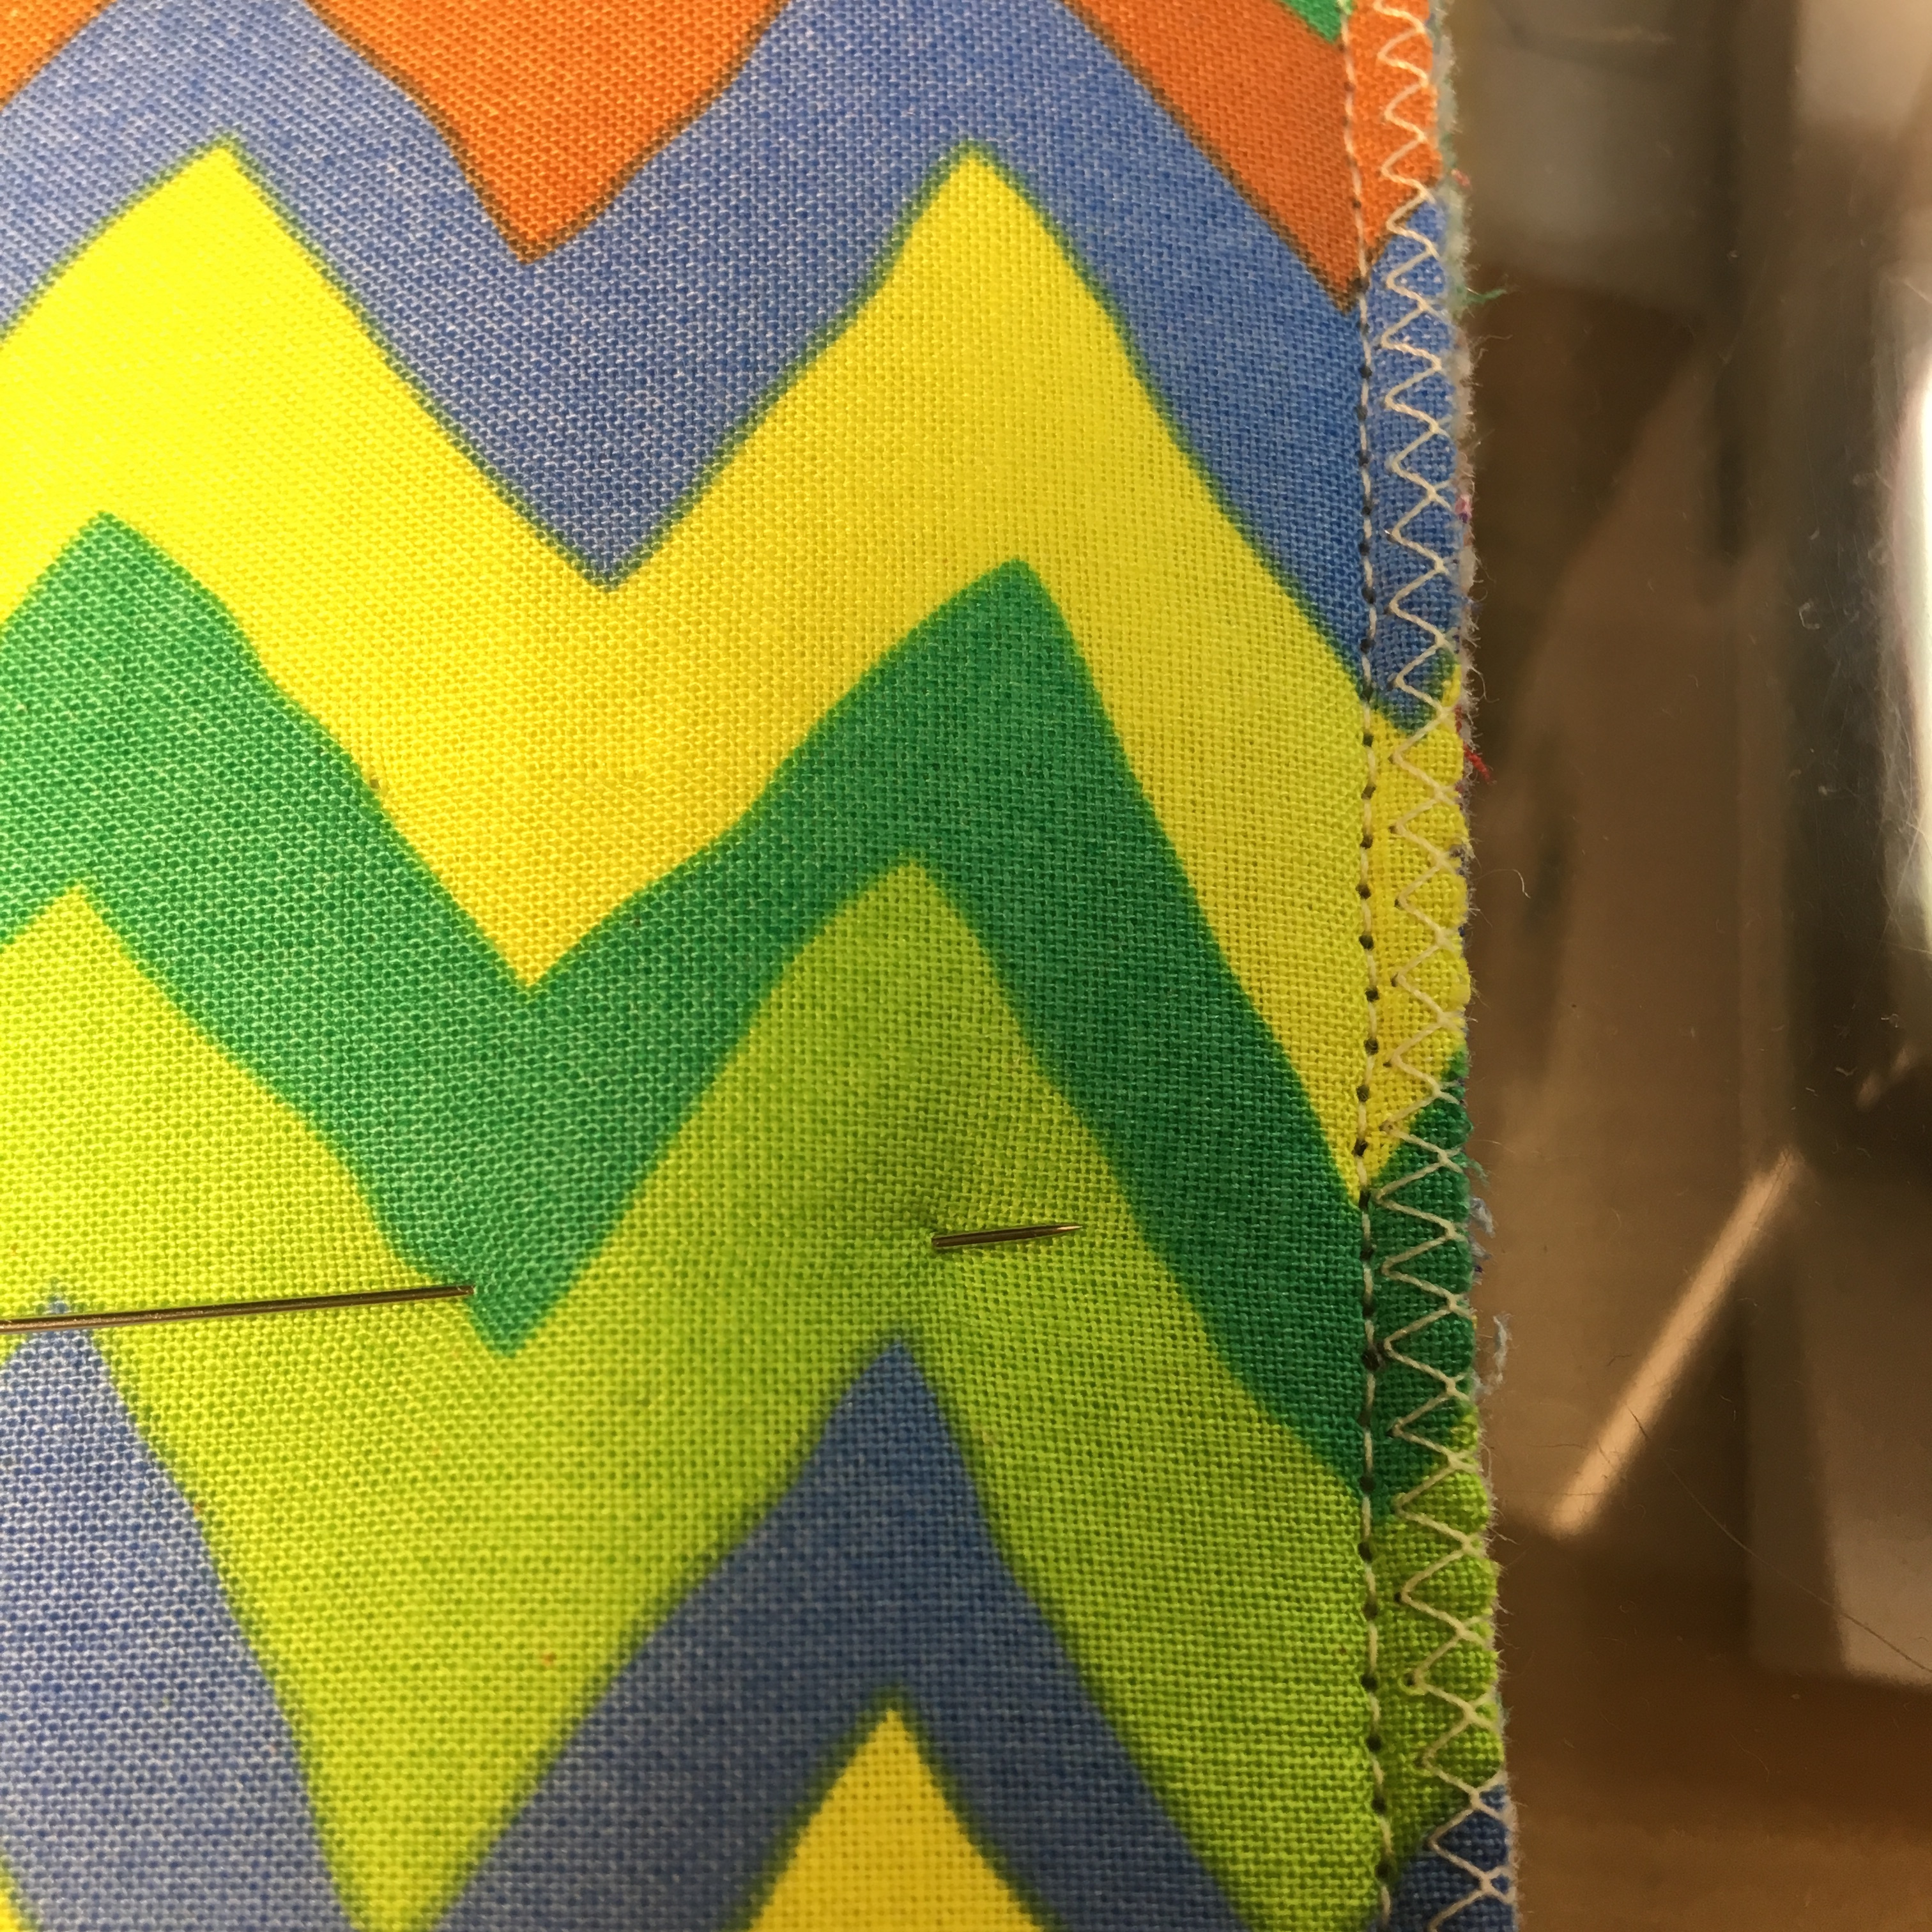
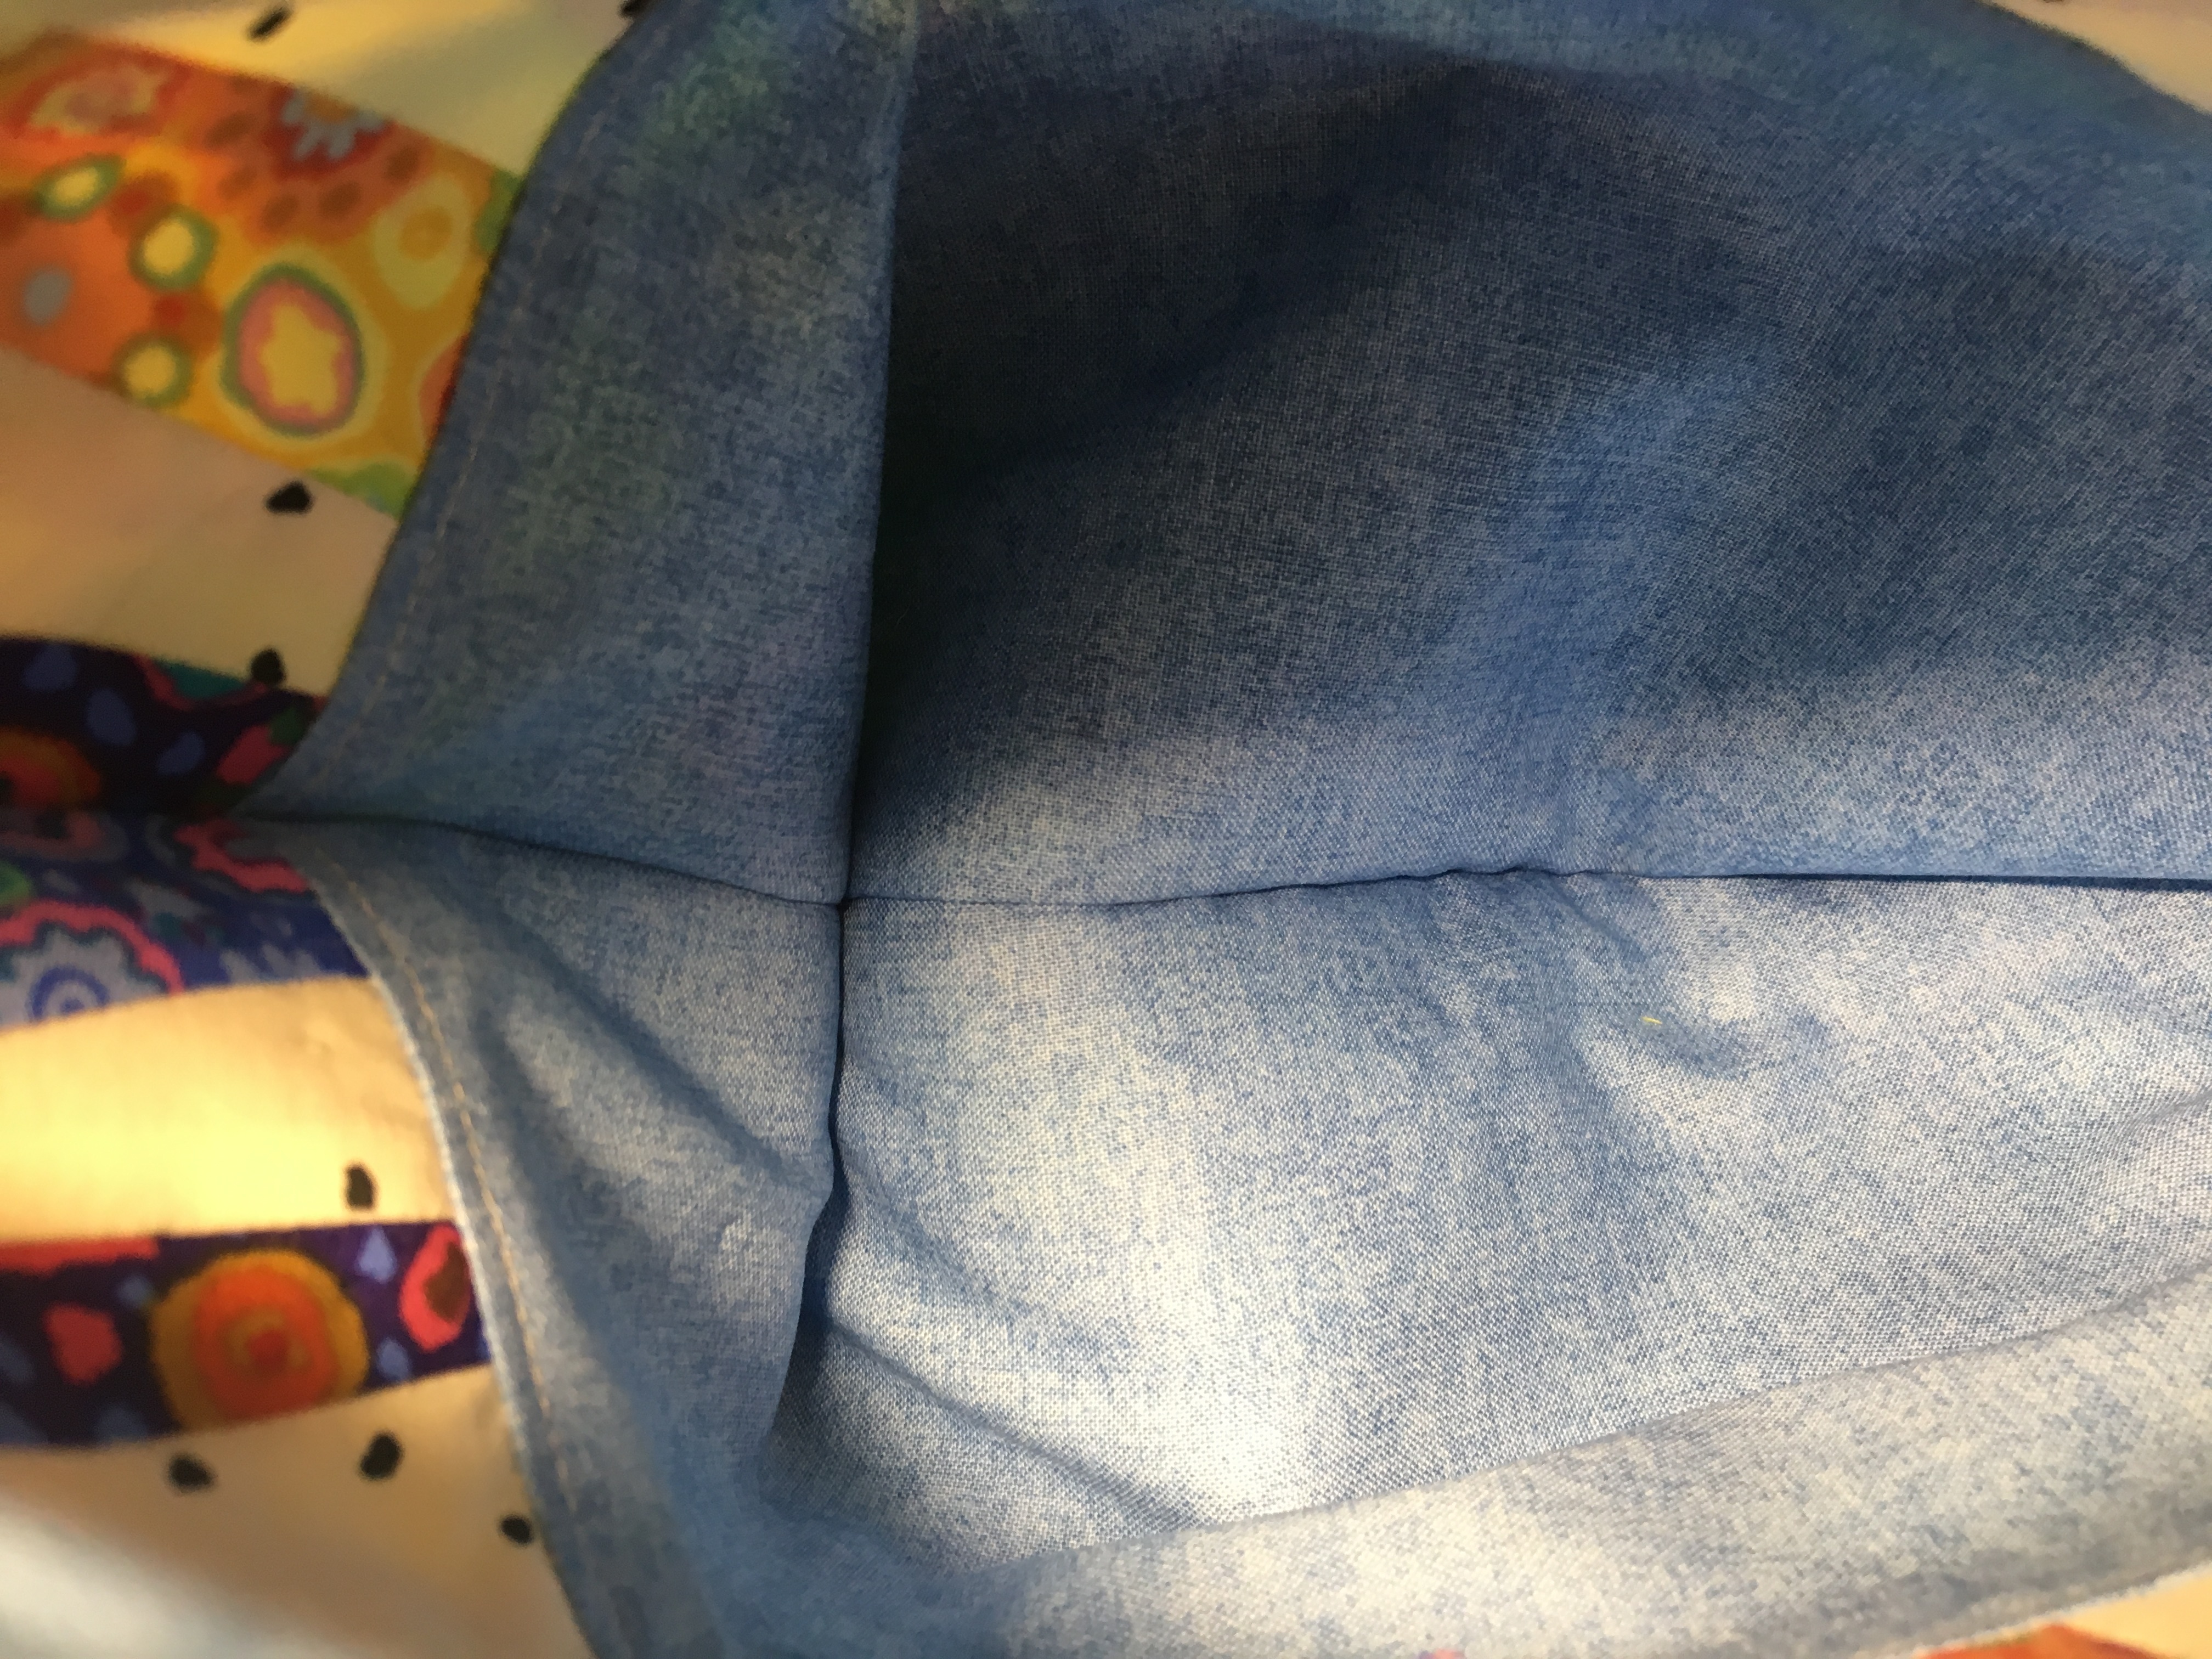
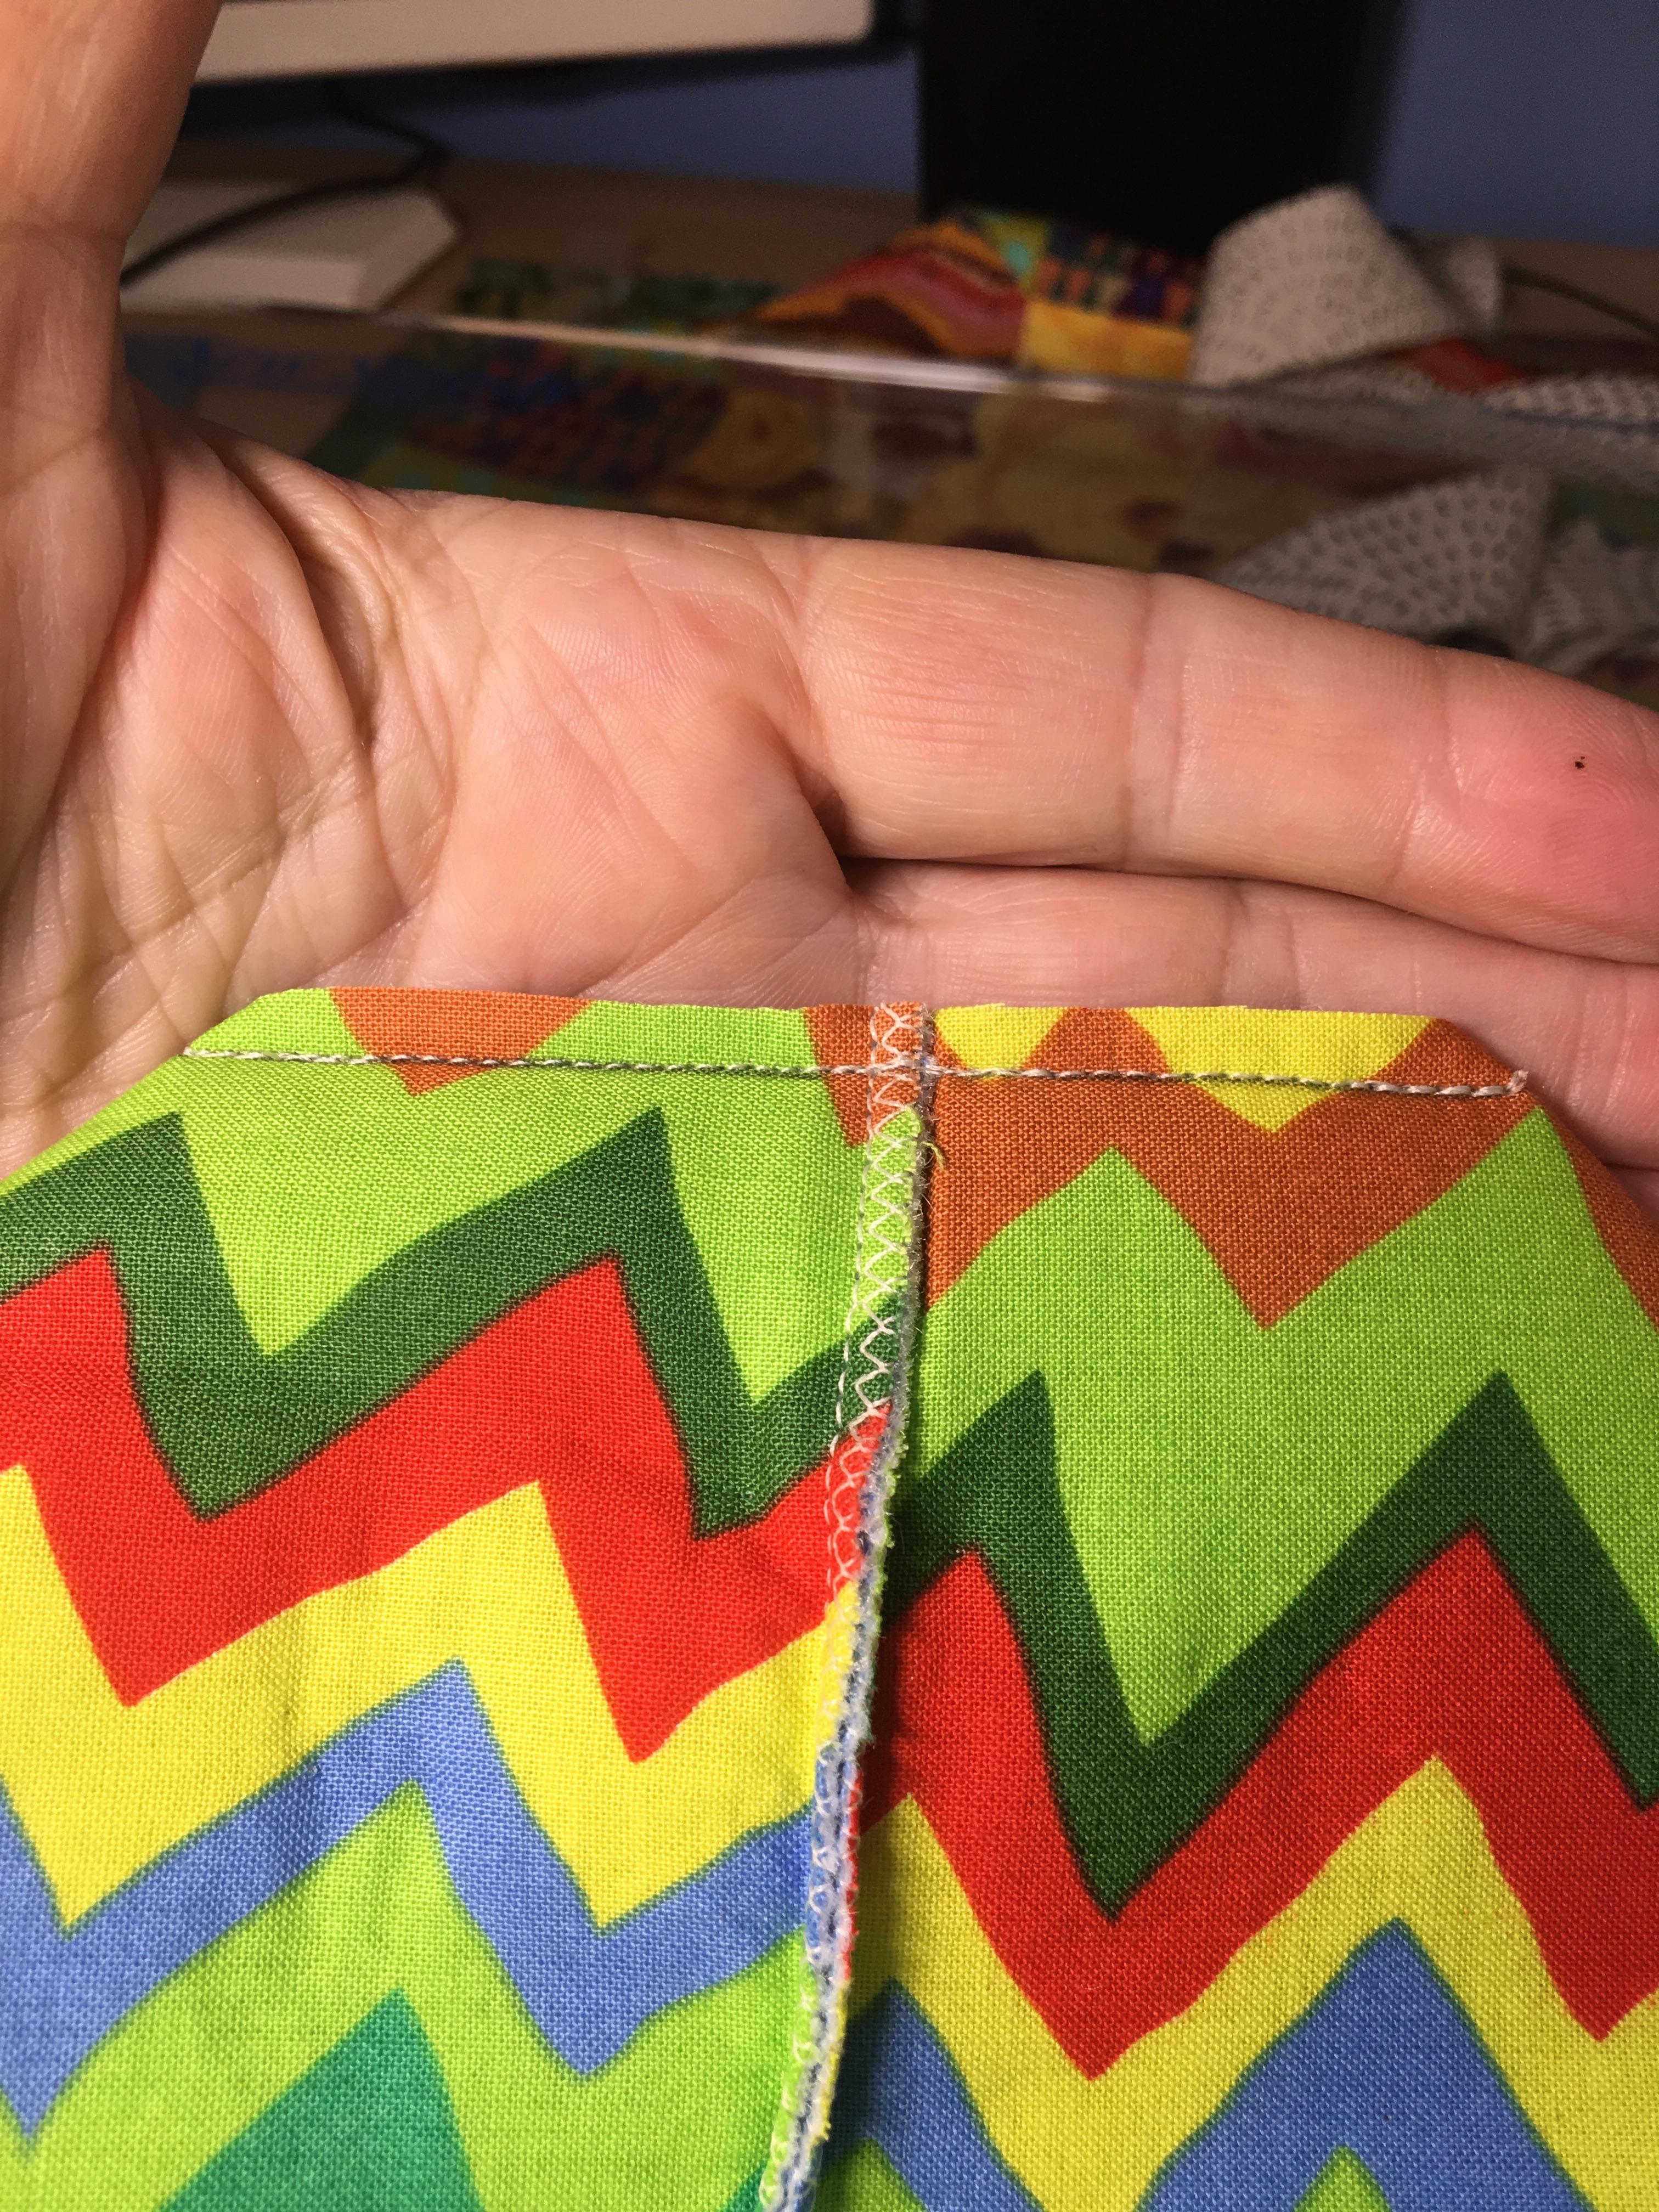
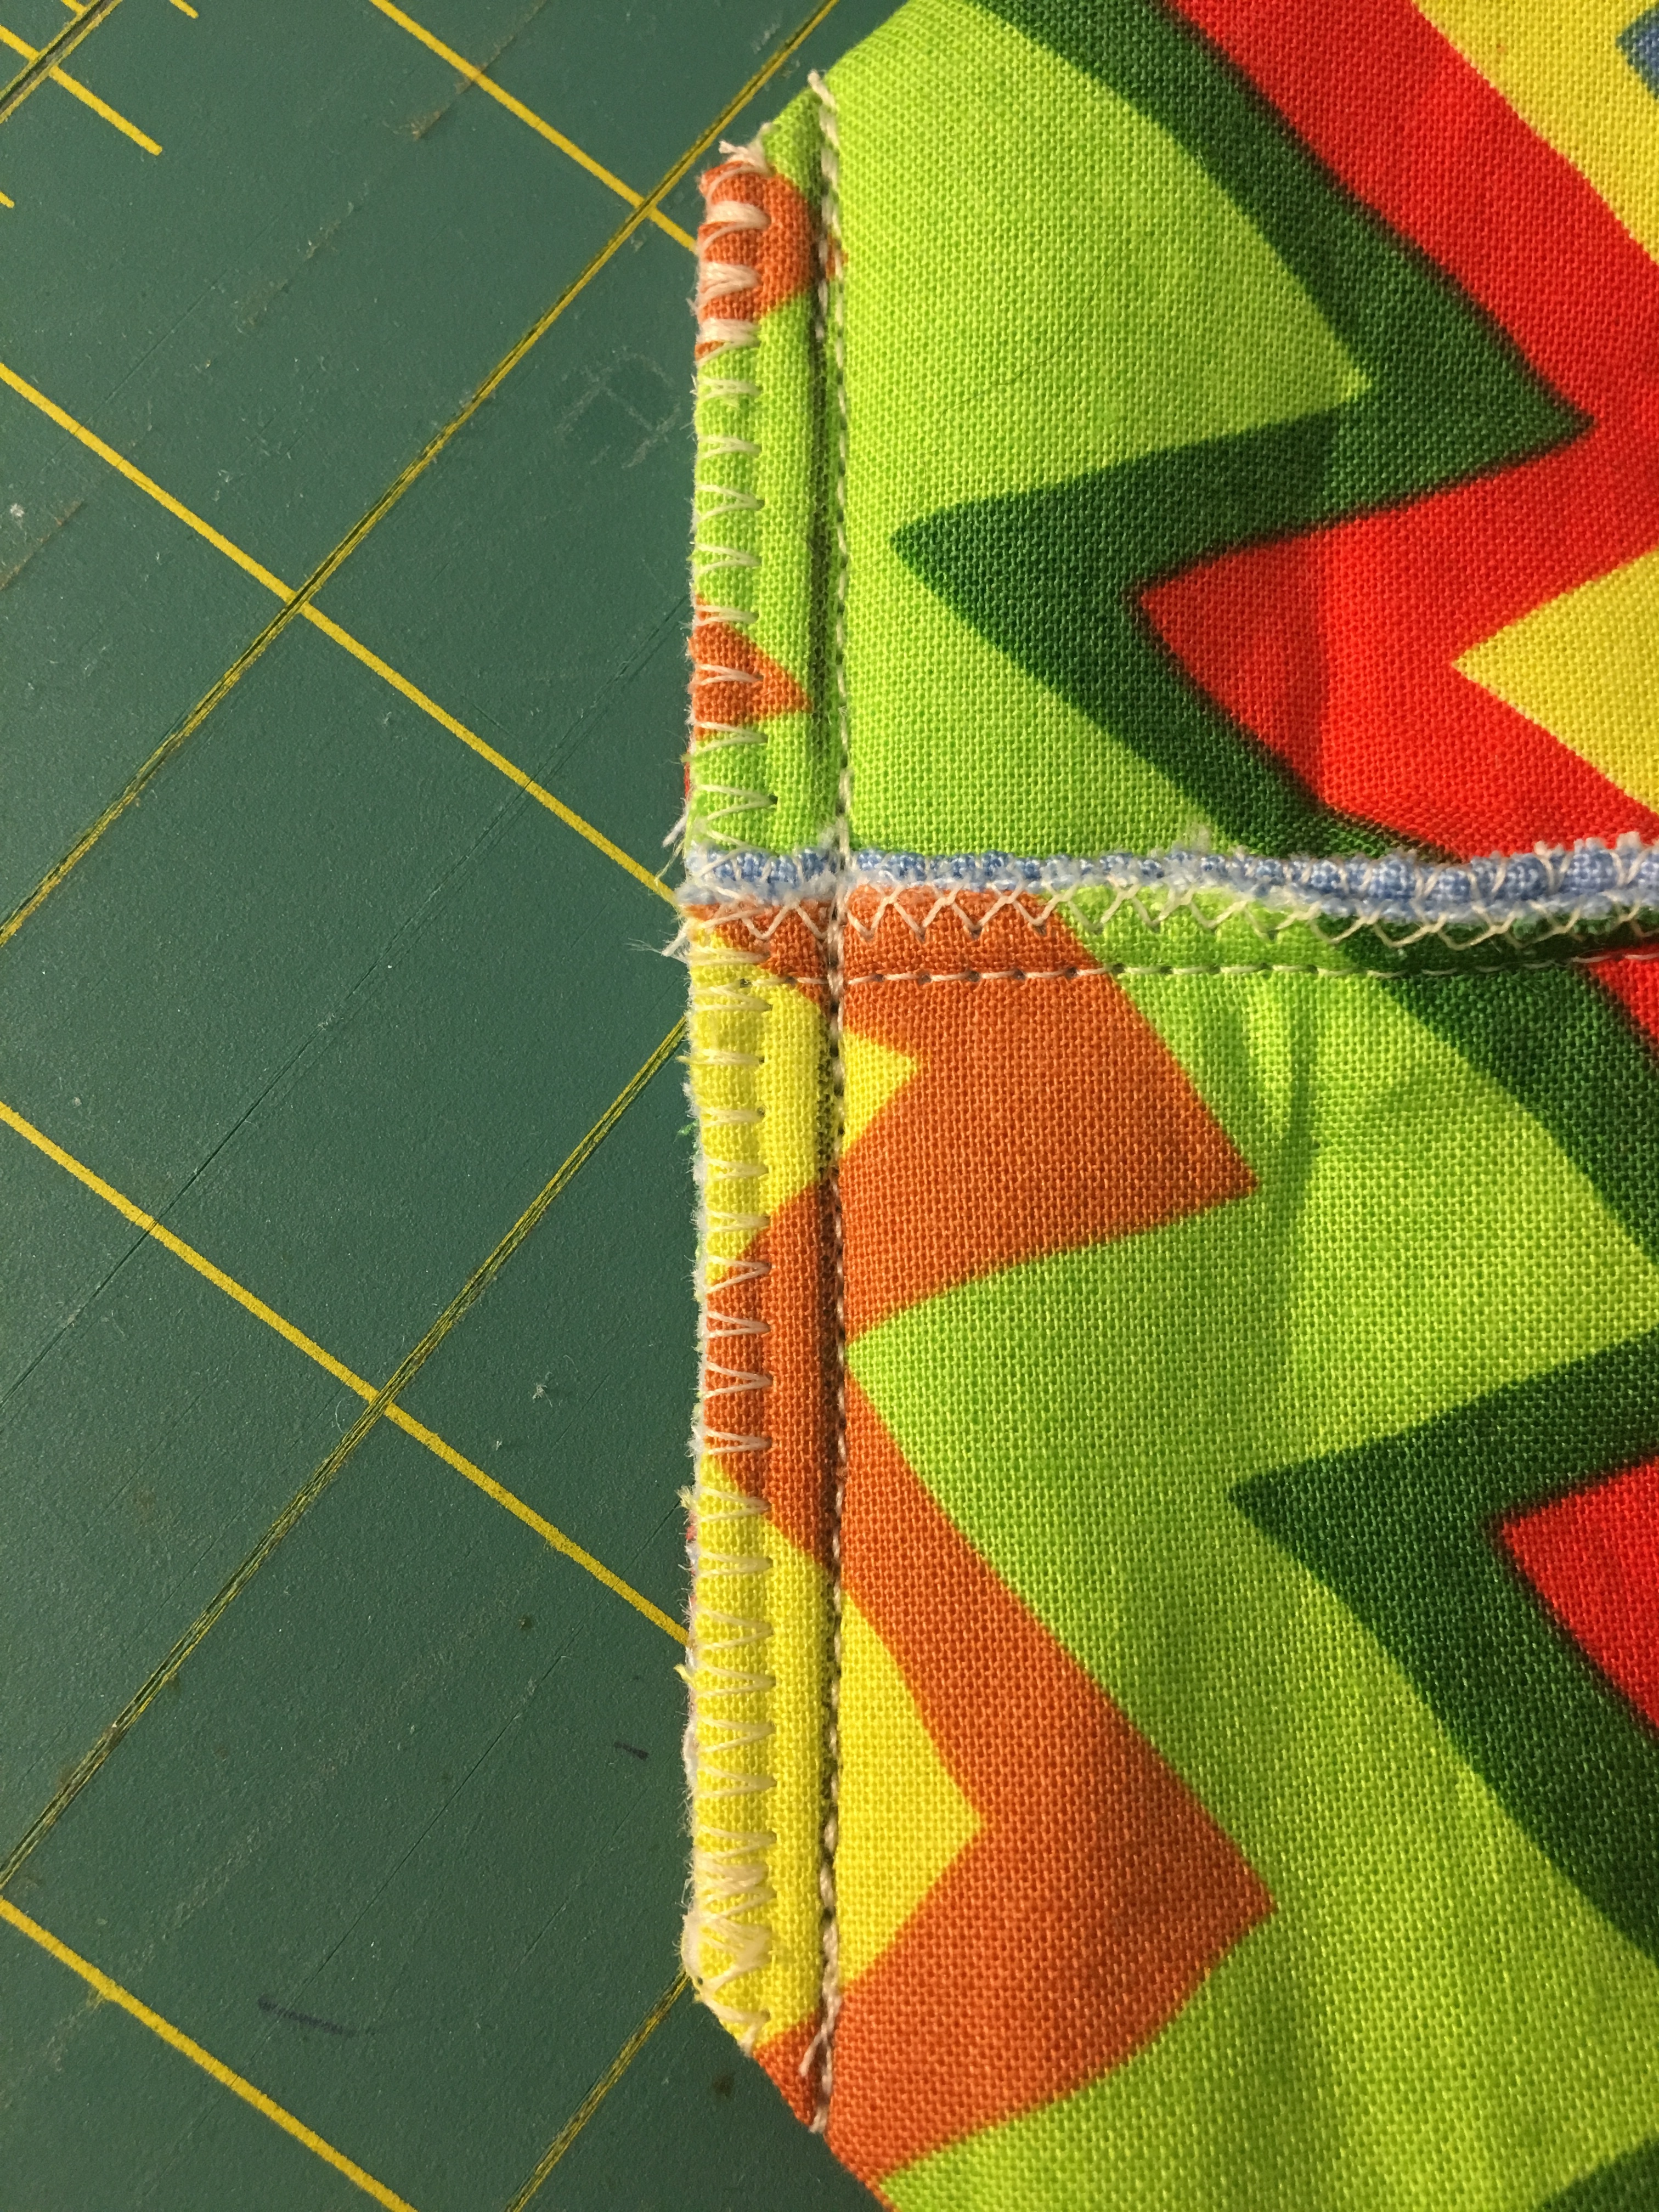
And now some close ups of the quilting.

I still have several color ways of the lotus leaf that I haven’t used yet. Gotta decide what I’m gonna work on next!

Linen and Kaffe Lotus Leaf Pouch

IMG_9486
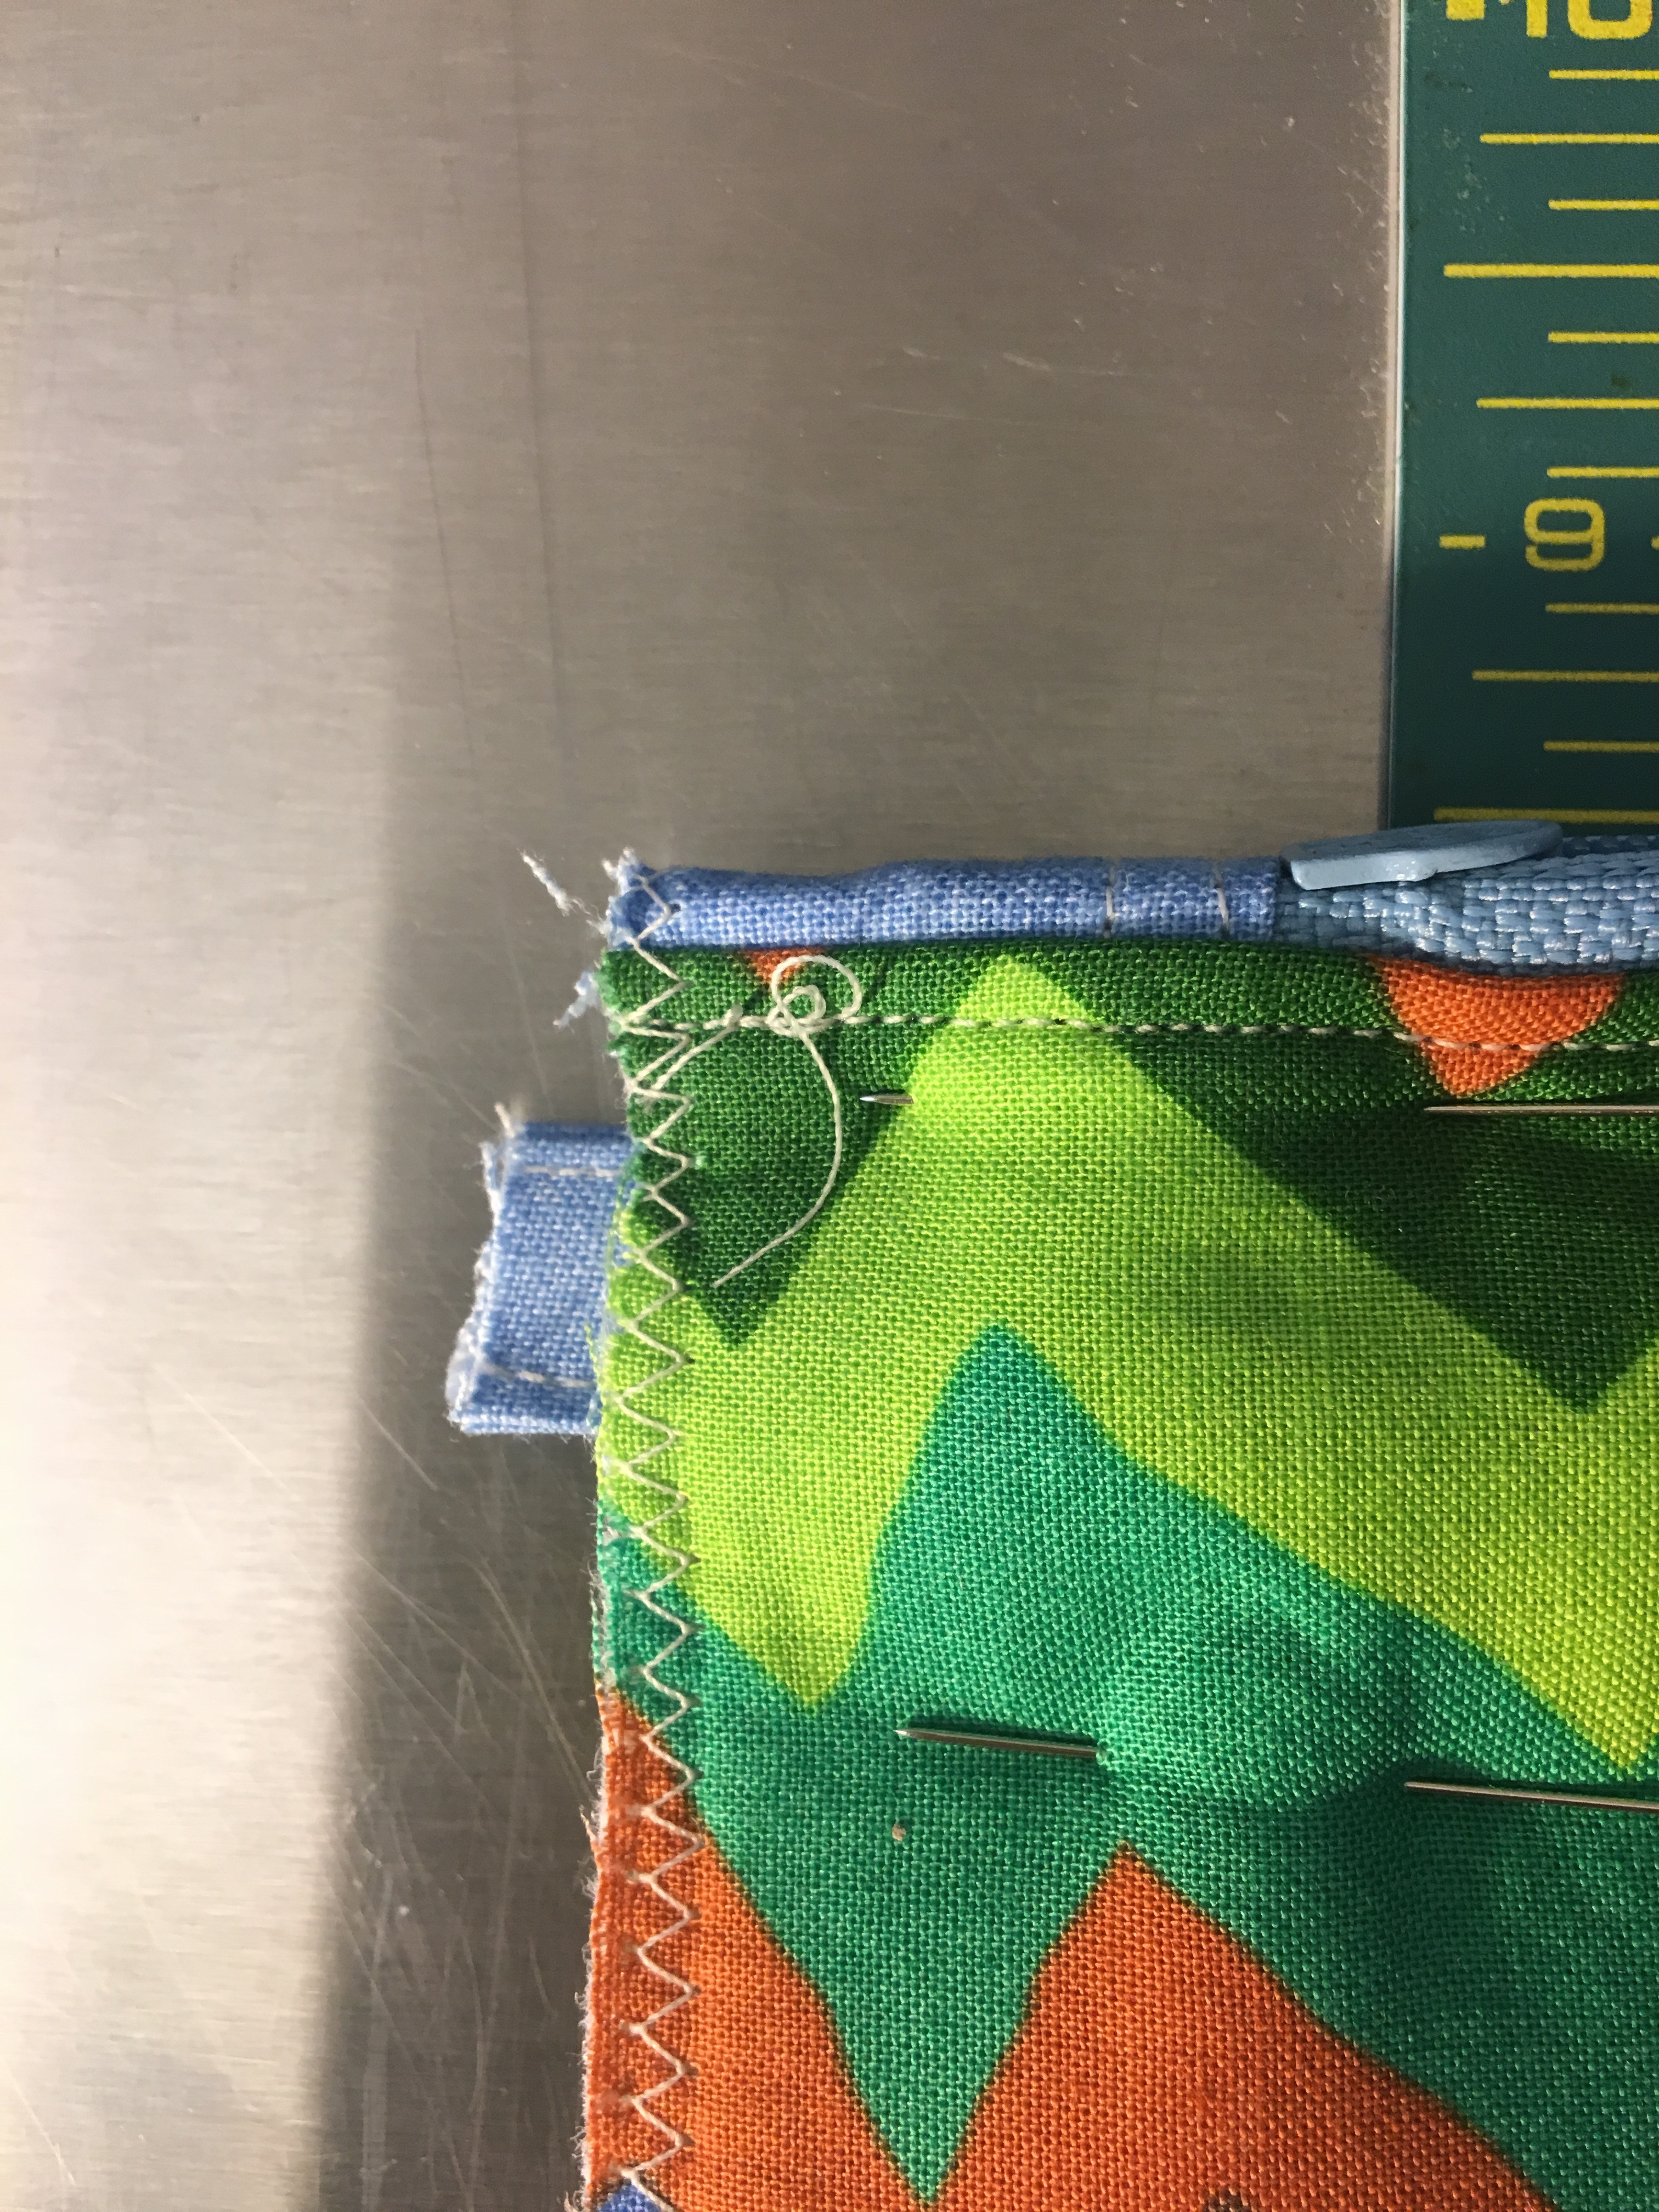
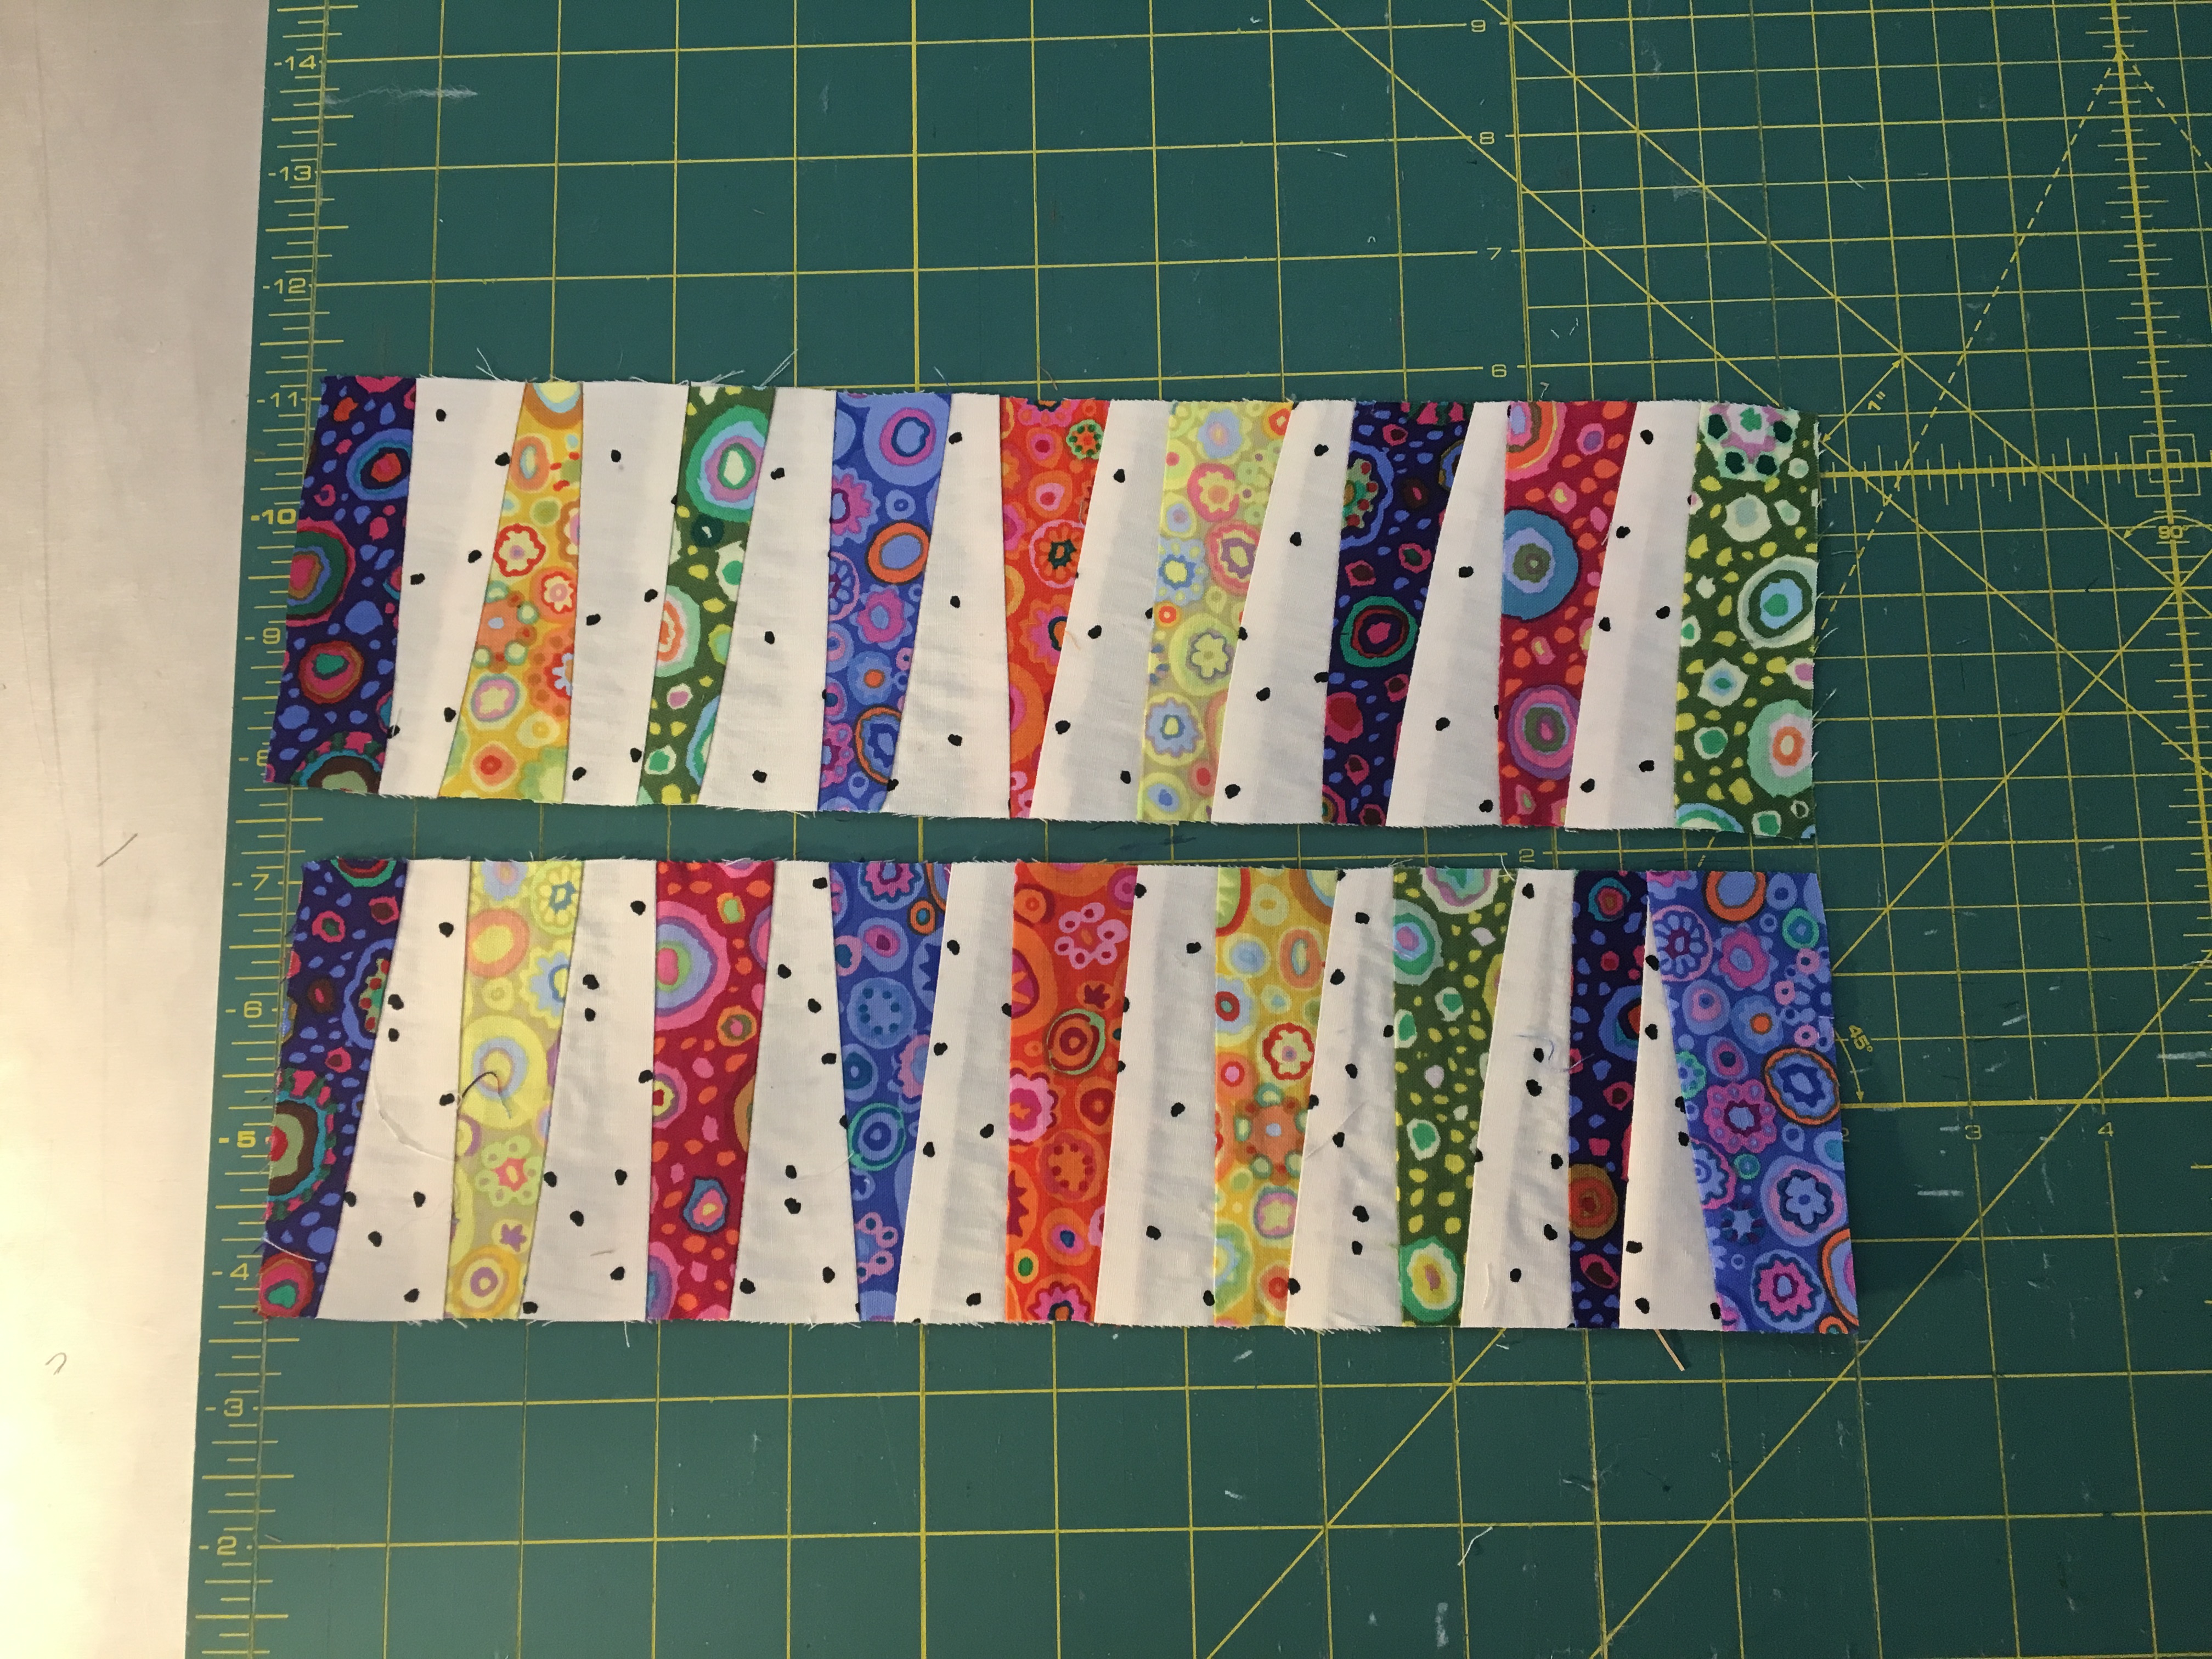
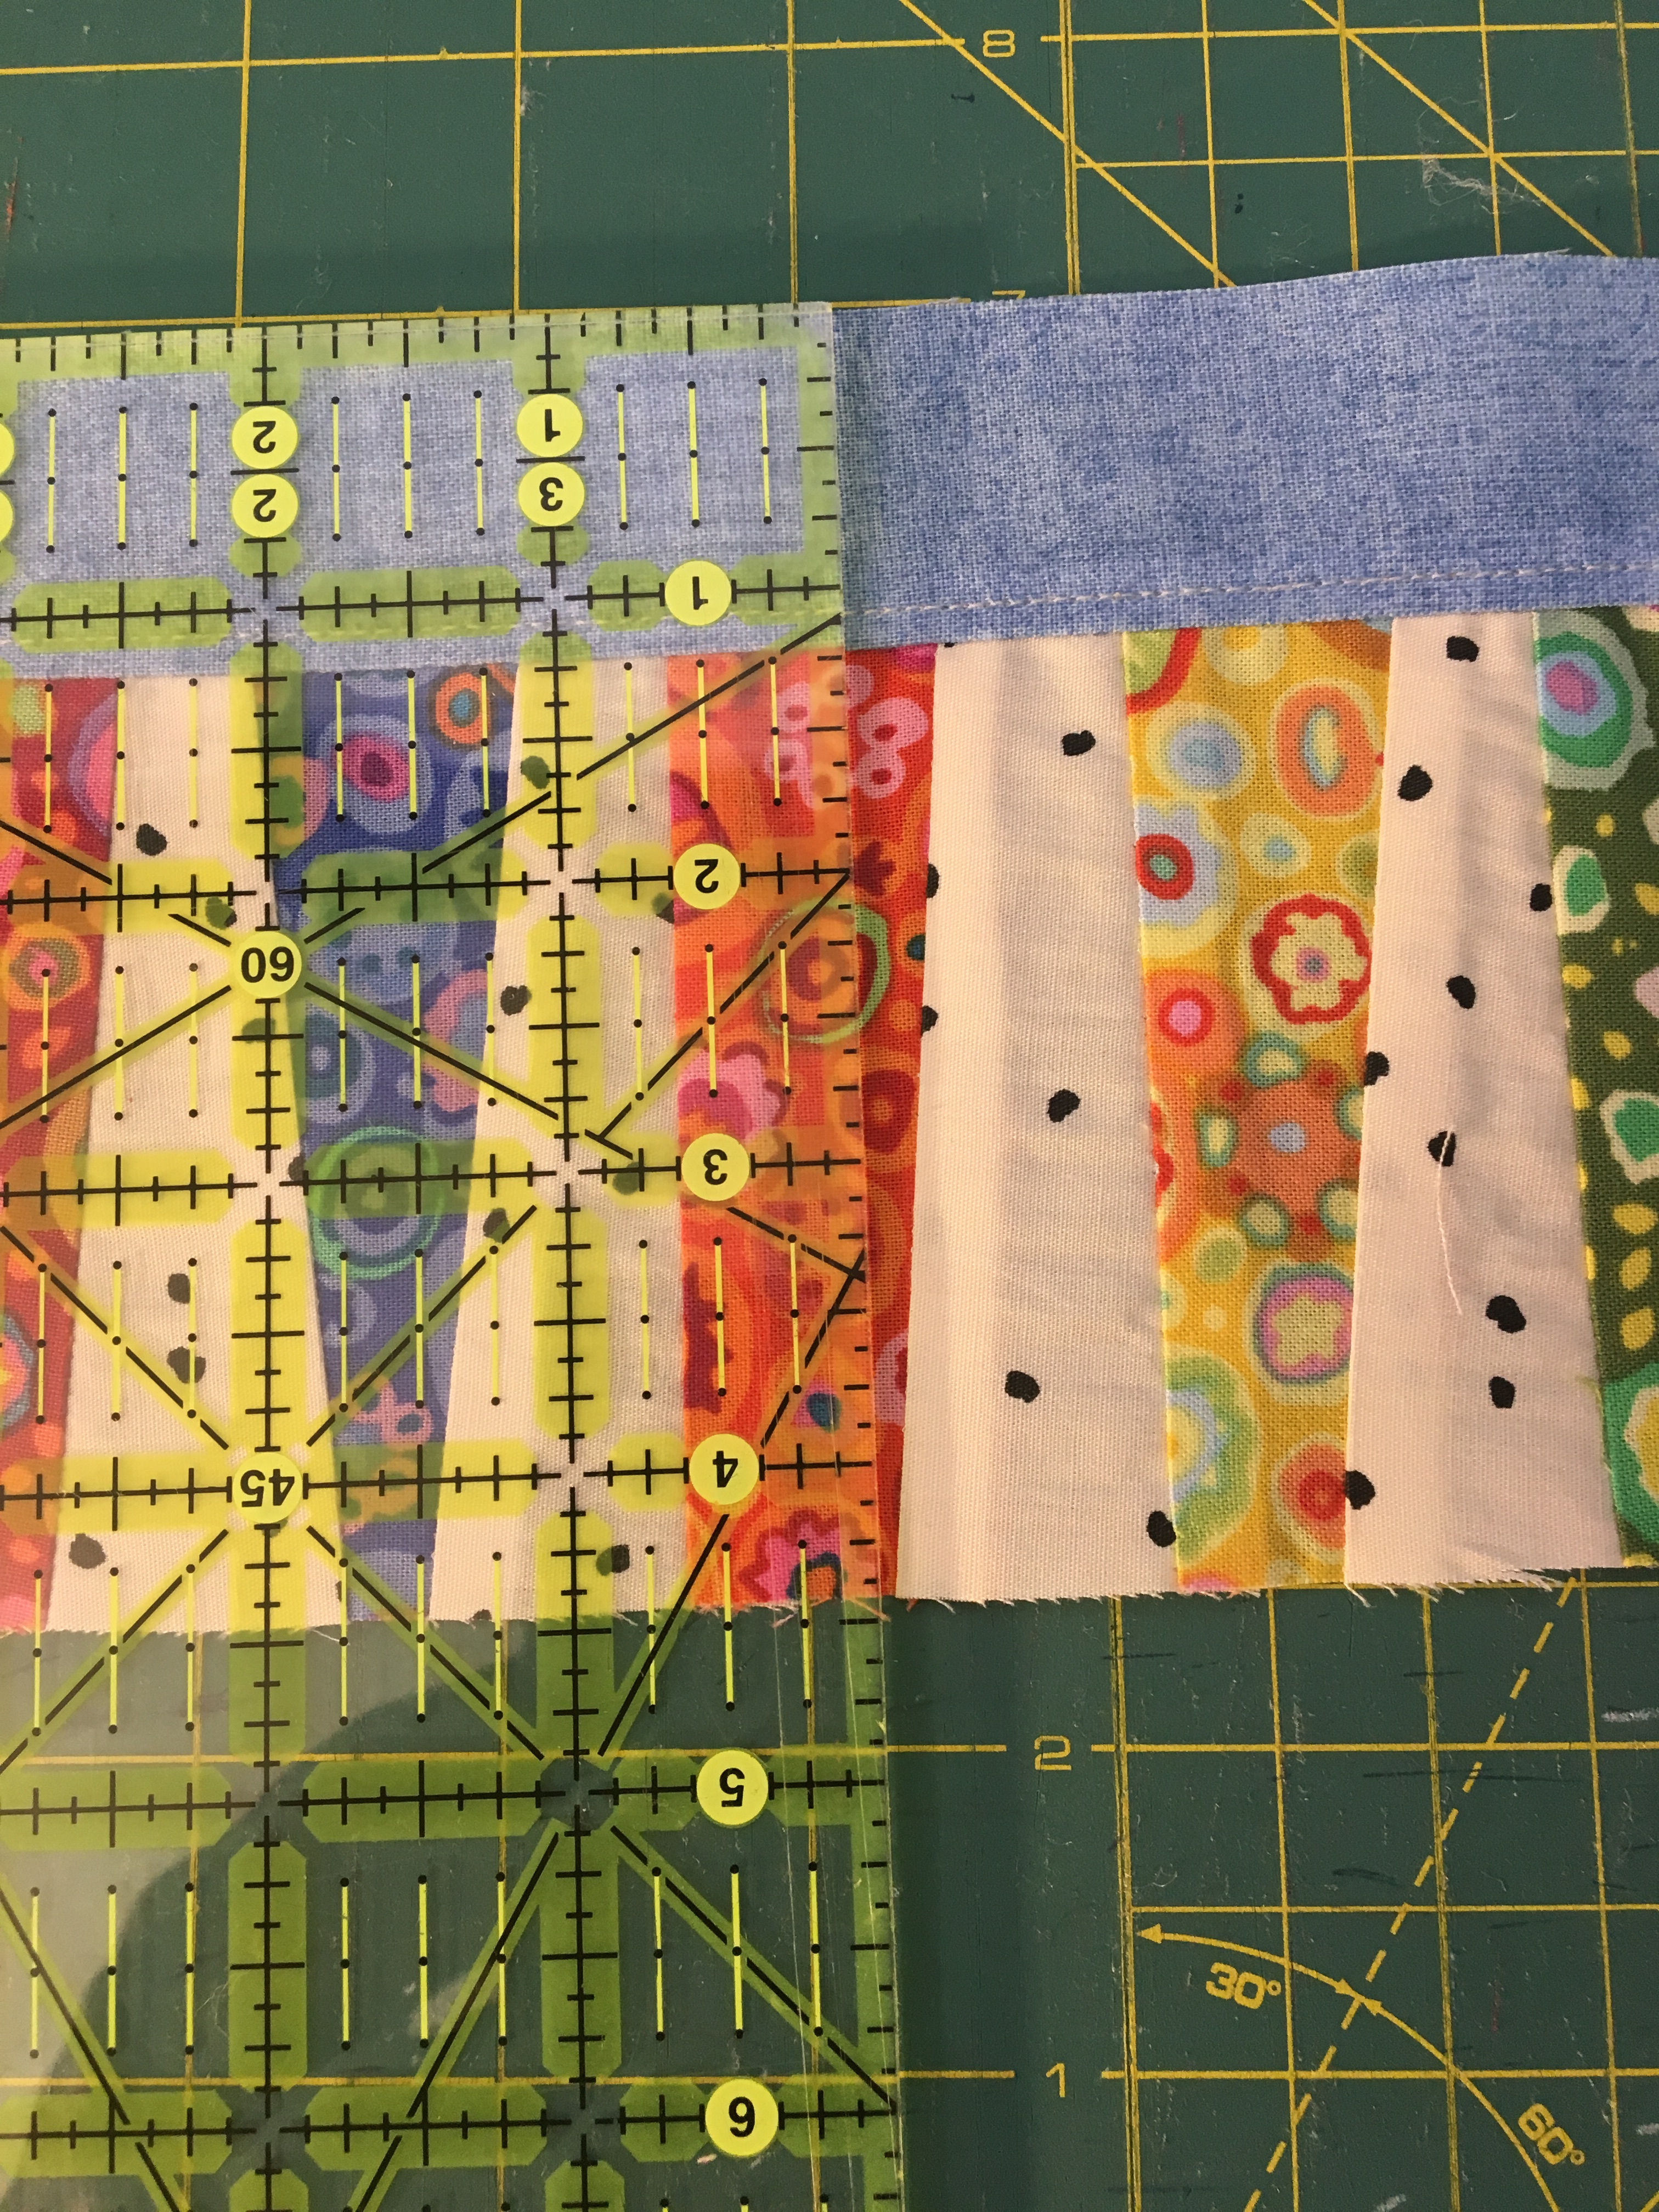
I sat down the other night to make some paper pieced pennant blocks for a pouch, and ran into troubles right away. I was tired, so figured I wasn’t in the right condition to keep trying to figure it out.

So I decided to make a new pouch design that I’d been thinking about… the pouch pictured above.

I love Kaffe Fassett Collective fabrics. The colors are amazing, the designs are so gorgeous, and the fabrics are luscious to sew on. And Kaffe’s lotus leaf is one of my favorites… and the new color ways are so fantastic.

So i gave it a little bit of thought, and started cutting fabric.

I basically used the same 12×10 measurement that I use for most of my pieced pouches, but it turned it on it’s side, so the pouch is taller than it is wide.

I followed the same construction as other pouches as in my zipper pouch tutorial, with the pieced panel replaced with a 4×10 panel of the Lotus Leaf fabric.

The difference started after the zipper was put in, at this stage in the process:

IMG_9327

That’s what the pouch looked when I did the quilting.

I had fused the lining to the batting, and to do the quilting, I used a basting spray that I’ve had luck with in the past to fuse the front of the bag to the lining pieces. That way, everything stayed together so nicely as I did the quilting.

I used two types of quilting in this pouch: straight line quilting on the bottom, and free motion quilting on the top. I used my walking foot for the straight quilting on the bottom of the pouch, and used my quilting stitch regulator for the FMQ on the panel portion.

I used the edge of my walking foot to space the straight line quilting evenly. I love the way it turned out, but I think the proportions are off a little. In future pouches like this that I make, I’ll only do four rows of the straight line quilting. I think that will make the bag feel lighter, and the straight line quilting will stand out more.

IMG_9484

I wasn’t sure how I was going to quilt the panel section, but decided to quilt along the different parts of the design. I was thinking it was going to be complicated, but it was really easy and it went very well.

IMG_9483

IMG_9482

I used a pink thread that blended in fairly well with the colors of the fabric, but in the future,  think I’ll just use a light grey thread.

Once the quilting was done, I started with trimming the flat fabric pieces before I zig zagged and sewed the seams. I then followed the tutorial.

I’m so happy with how this quilting turned out. In future pouches like this, I’ll probably do a little more quilting around the design. I think the fabric can take it!

I’m so anxious to make more of these that I’ve already put together combos of Lotus Leaf in different color ways with different body fabric. I have several other color ways in this Kaffe fabric. It’s one of my absolute favorites, and the colors are inspirational! Can’t wait to get started!

IMG_9491    IMG_9493 2

IMG_9492    IMG_9490

I’d love to know what you think!

Anne’s Zipper Pouch Tutorial

Copyright Anne Ibach 2018

IMG_9373

I’ve developed my own pattern over time by taking tricks and techniques from different video and print tutorials I’ve seen, and by adding my own tricks and techniques.

This tutorial is for the single larger pouch that features an inset panel of some kind of piecing or patchwork. I’m not going to go into how I make that panel. That’s the part where you get to be creative!

(Stay tuned for a future tutorial on how I make the pieced panels for the pouch.)

Let’s get started!

Materials:

  1. Your completed pieced panel. I make mine from fabric scraps (Kaffe Fassett Collective scraps, batik scraps, etc…). 12 inches wide by any height. Mine are typically around 3 or 4 inches tall.
  2. Fabric for outside of the bag:  1/3 yard will make at least two pouches of this size.
  3. Lining Fabric: 1/3 yard of something fun! I LOVE a surprising and bold lining! 1/3 yards is enough to make 2 pouches.
  4. One zipper: at least 12 inches wide. Match it to the bag body, or pick a color from the pieced panel.
  5. Thread: either blend in or contrast for sewing and top stitching. I typically use grey or off white.
  6. Fusible batting: 1/3 yard is enough to make two pouches. I use Pelon brand poly variety. But you can use their cotton variety as well.

Fabric cutting/measurements:

Lining: For each pouch, you’ll need two pieces that measure 12×10 inches. Cut your 1/3-yard fabric to a precise 12 inches wide, width of fabric. Turn it on its side, trim off the selvedge, and cut two 10-inch sections.

Fusible batting: Cut just like you cut the lining fabric. 2 pieces at 12×10 inches.

Pieced panel: Your pieced panel will need to be 12 inches wide. (I plan on doing a tutorial on how I piece these panels, but be creative!) Mine are usually around 3 to 4 inches high, sometimes more.

IMG_9281

Bag Body Fabric: I cut a precise 12-inch strip, width of fabric, from my 1/3 yard piece, and then cut each piece for the body of the pouch from that 12 inch strip. I leave the piece folded and cut two at a time of each body piece.

Top strip, above pieced panel and sewn to zipper: From 12-inch strip of body fabric, cut a 1 ½ inch strip. This will give you two pieces, one for each side of the bag.

Zipper tabs: Cut a 1-inch strip across the 12-inch piece. This gives you two pieces that will then be cut into 4-inch lengths. You need two 4-inch pieces for the zipper for one pouch. These two strips will do four pouches.

Bottom panel: I usually wait to cut this until I have the top strip and pieced panel sewn together. I measure that top piece, add ½ inch of height for the seam allowance, and cut the bottom piece so the entire piece will measure 10 inches tall when sewn. So, if the top piece measures 12 inches by 5 inches, I cut the bottom piece 12x 5 -½ inches (5 inches plus ½ inch for seam allowance). If the top piece measures 4 inches, I cut the bottom piece 6.5 inches (six inches, plus ½ inch for seam allowance). You can always just cut this piece taller than you think you’ll need, and then trim the entire pouch side to 12/10 when it’s all sewn together.

This particular piece measured 4.5 inches, so I added 5.5 inches to make 10 inches, plus 1/2 inch for the seam allowance — I cut the bottom piece to 6 inches.  4.5 + 5.5 = 10, plus 1/2 inch seam allowance.IMG_9287.jpg

Handle: from the 12 inch strip of body fabric, I cut strips 2 inches wide. This make handles for two pouches.

IMG_E9283     
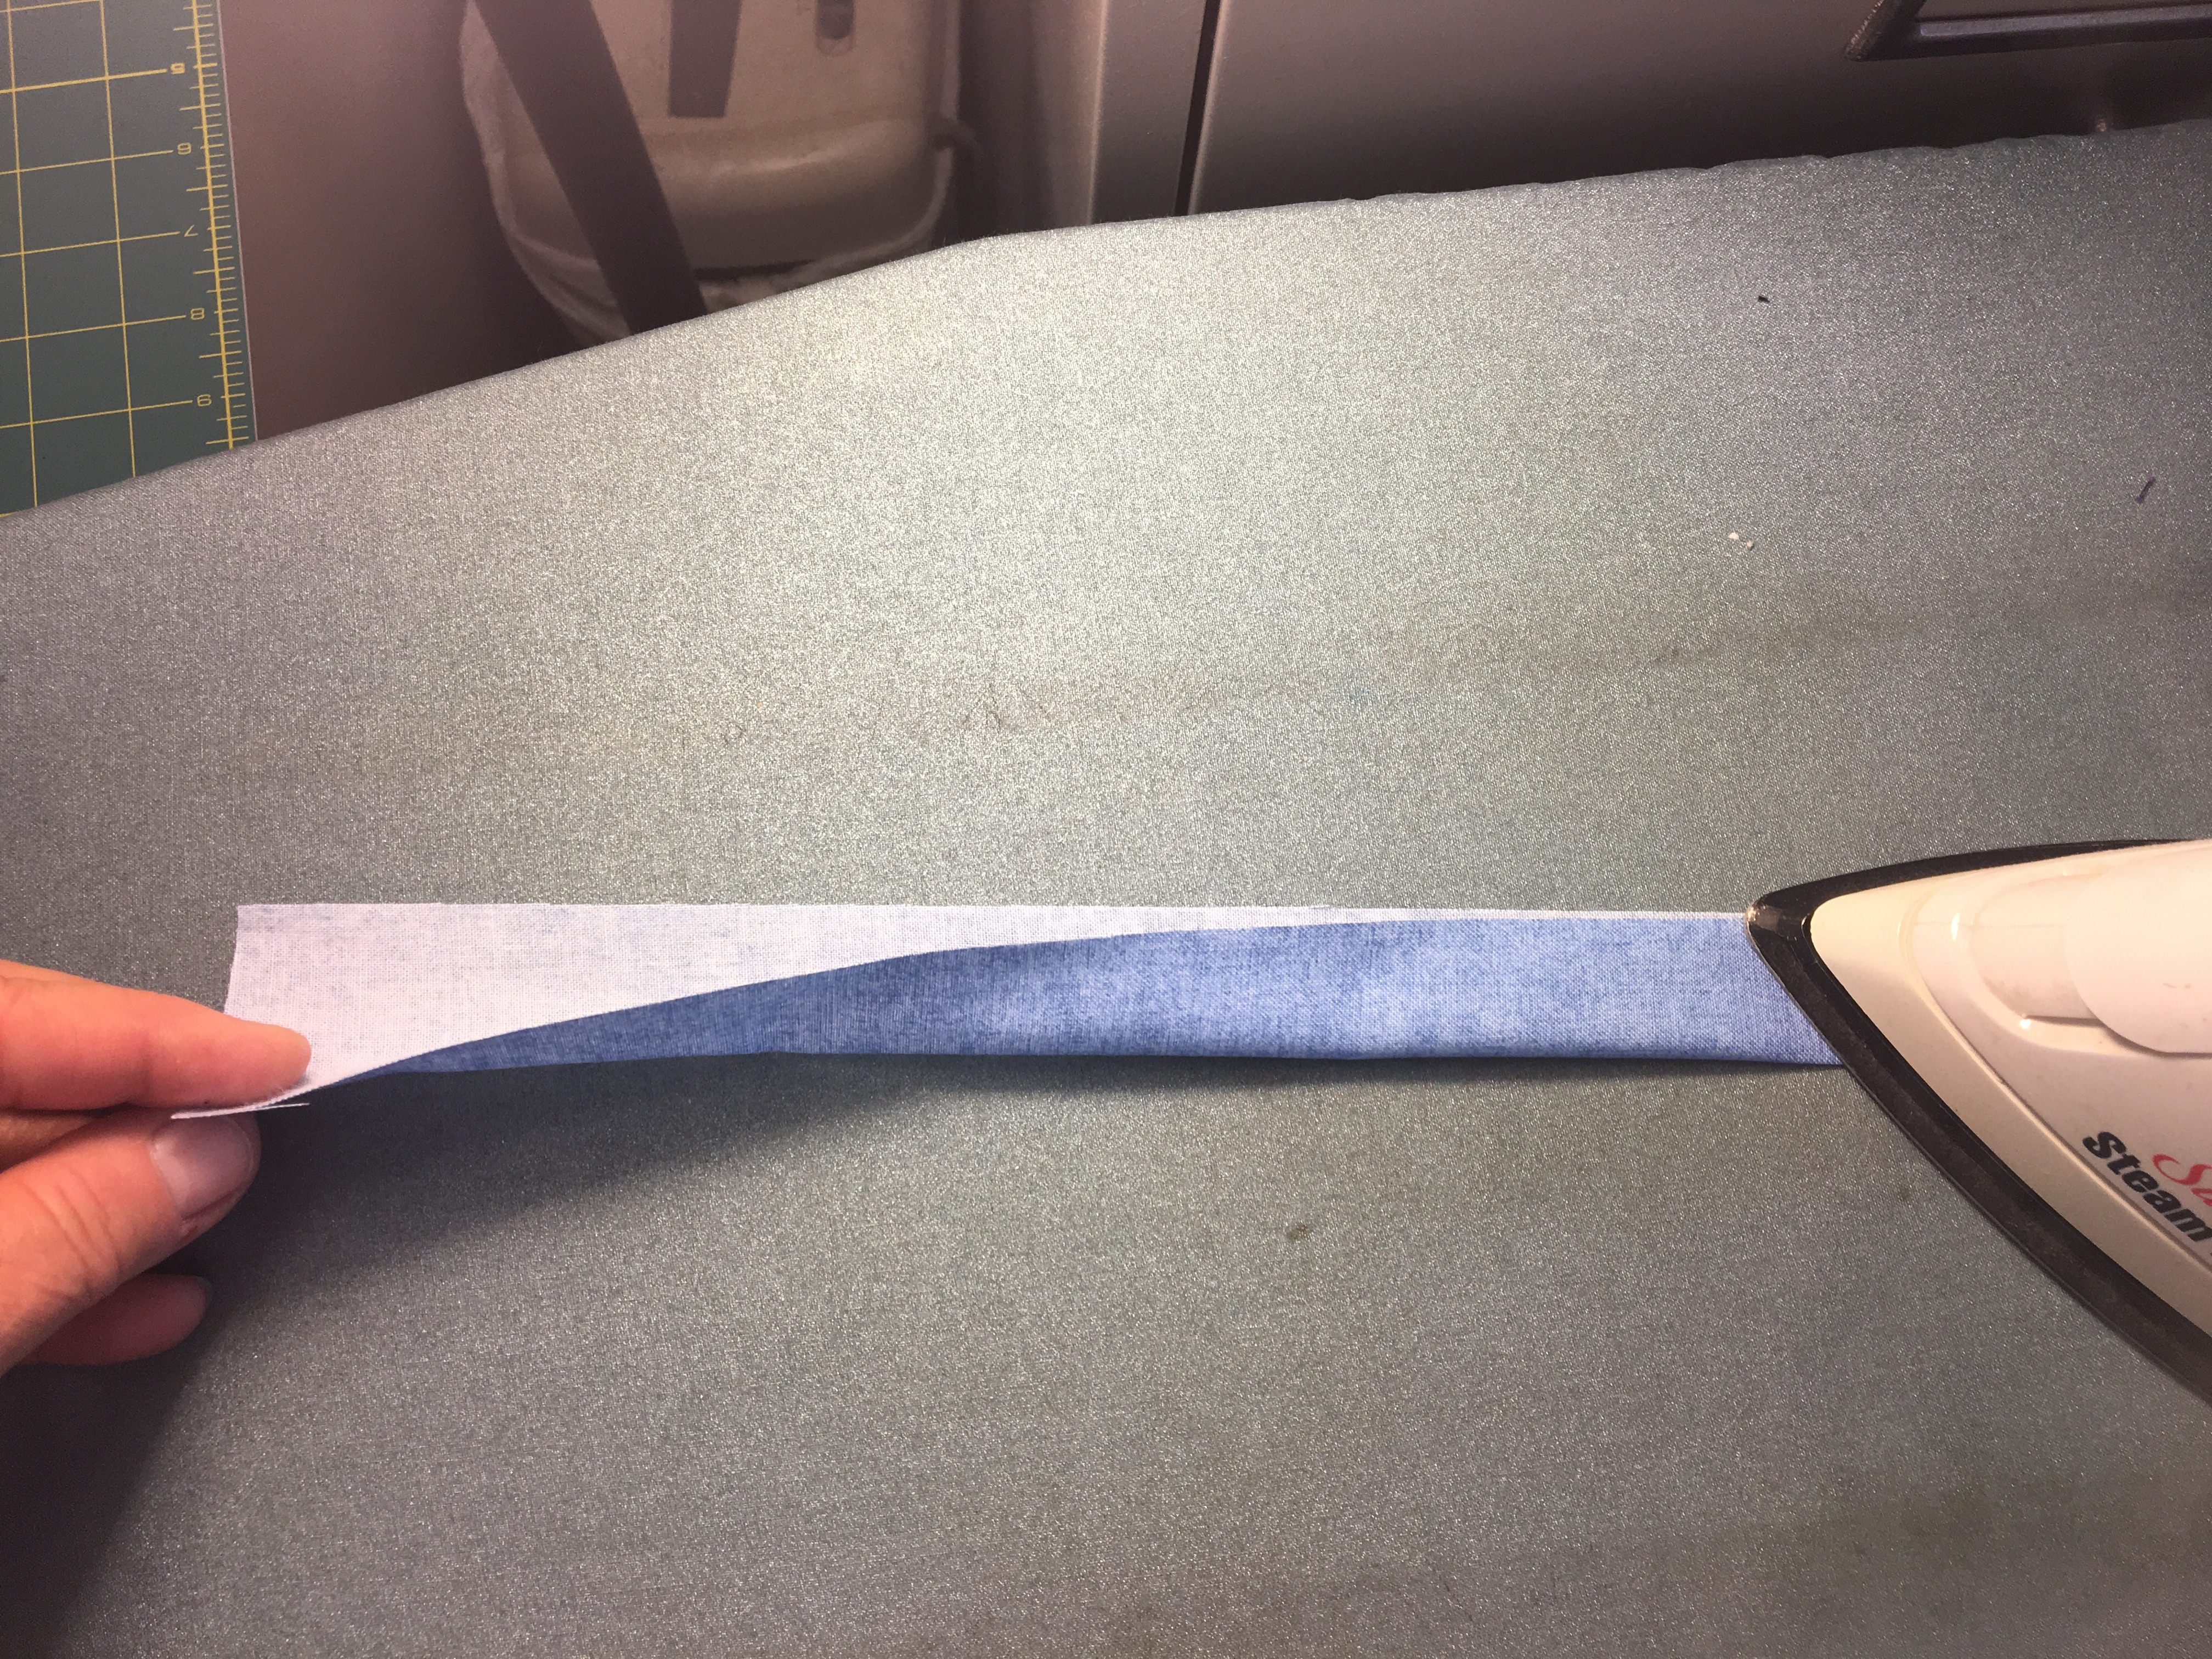
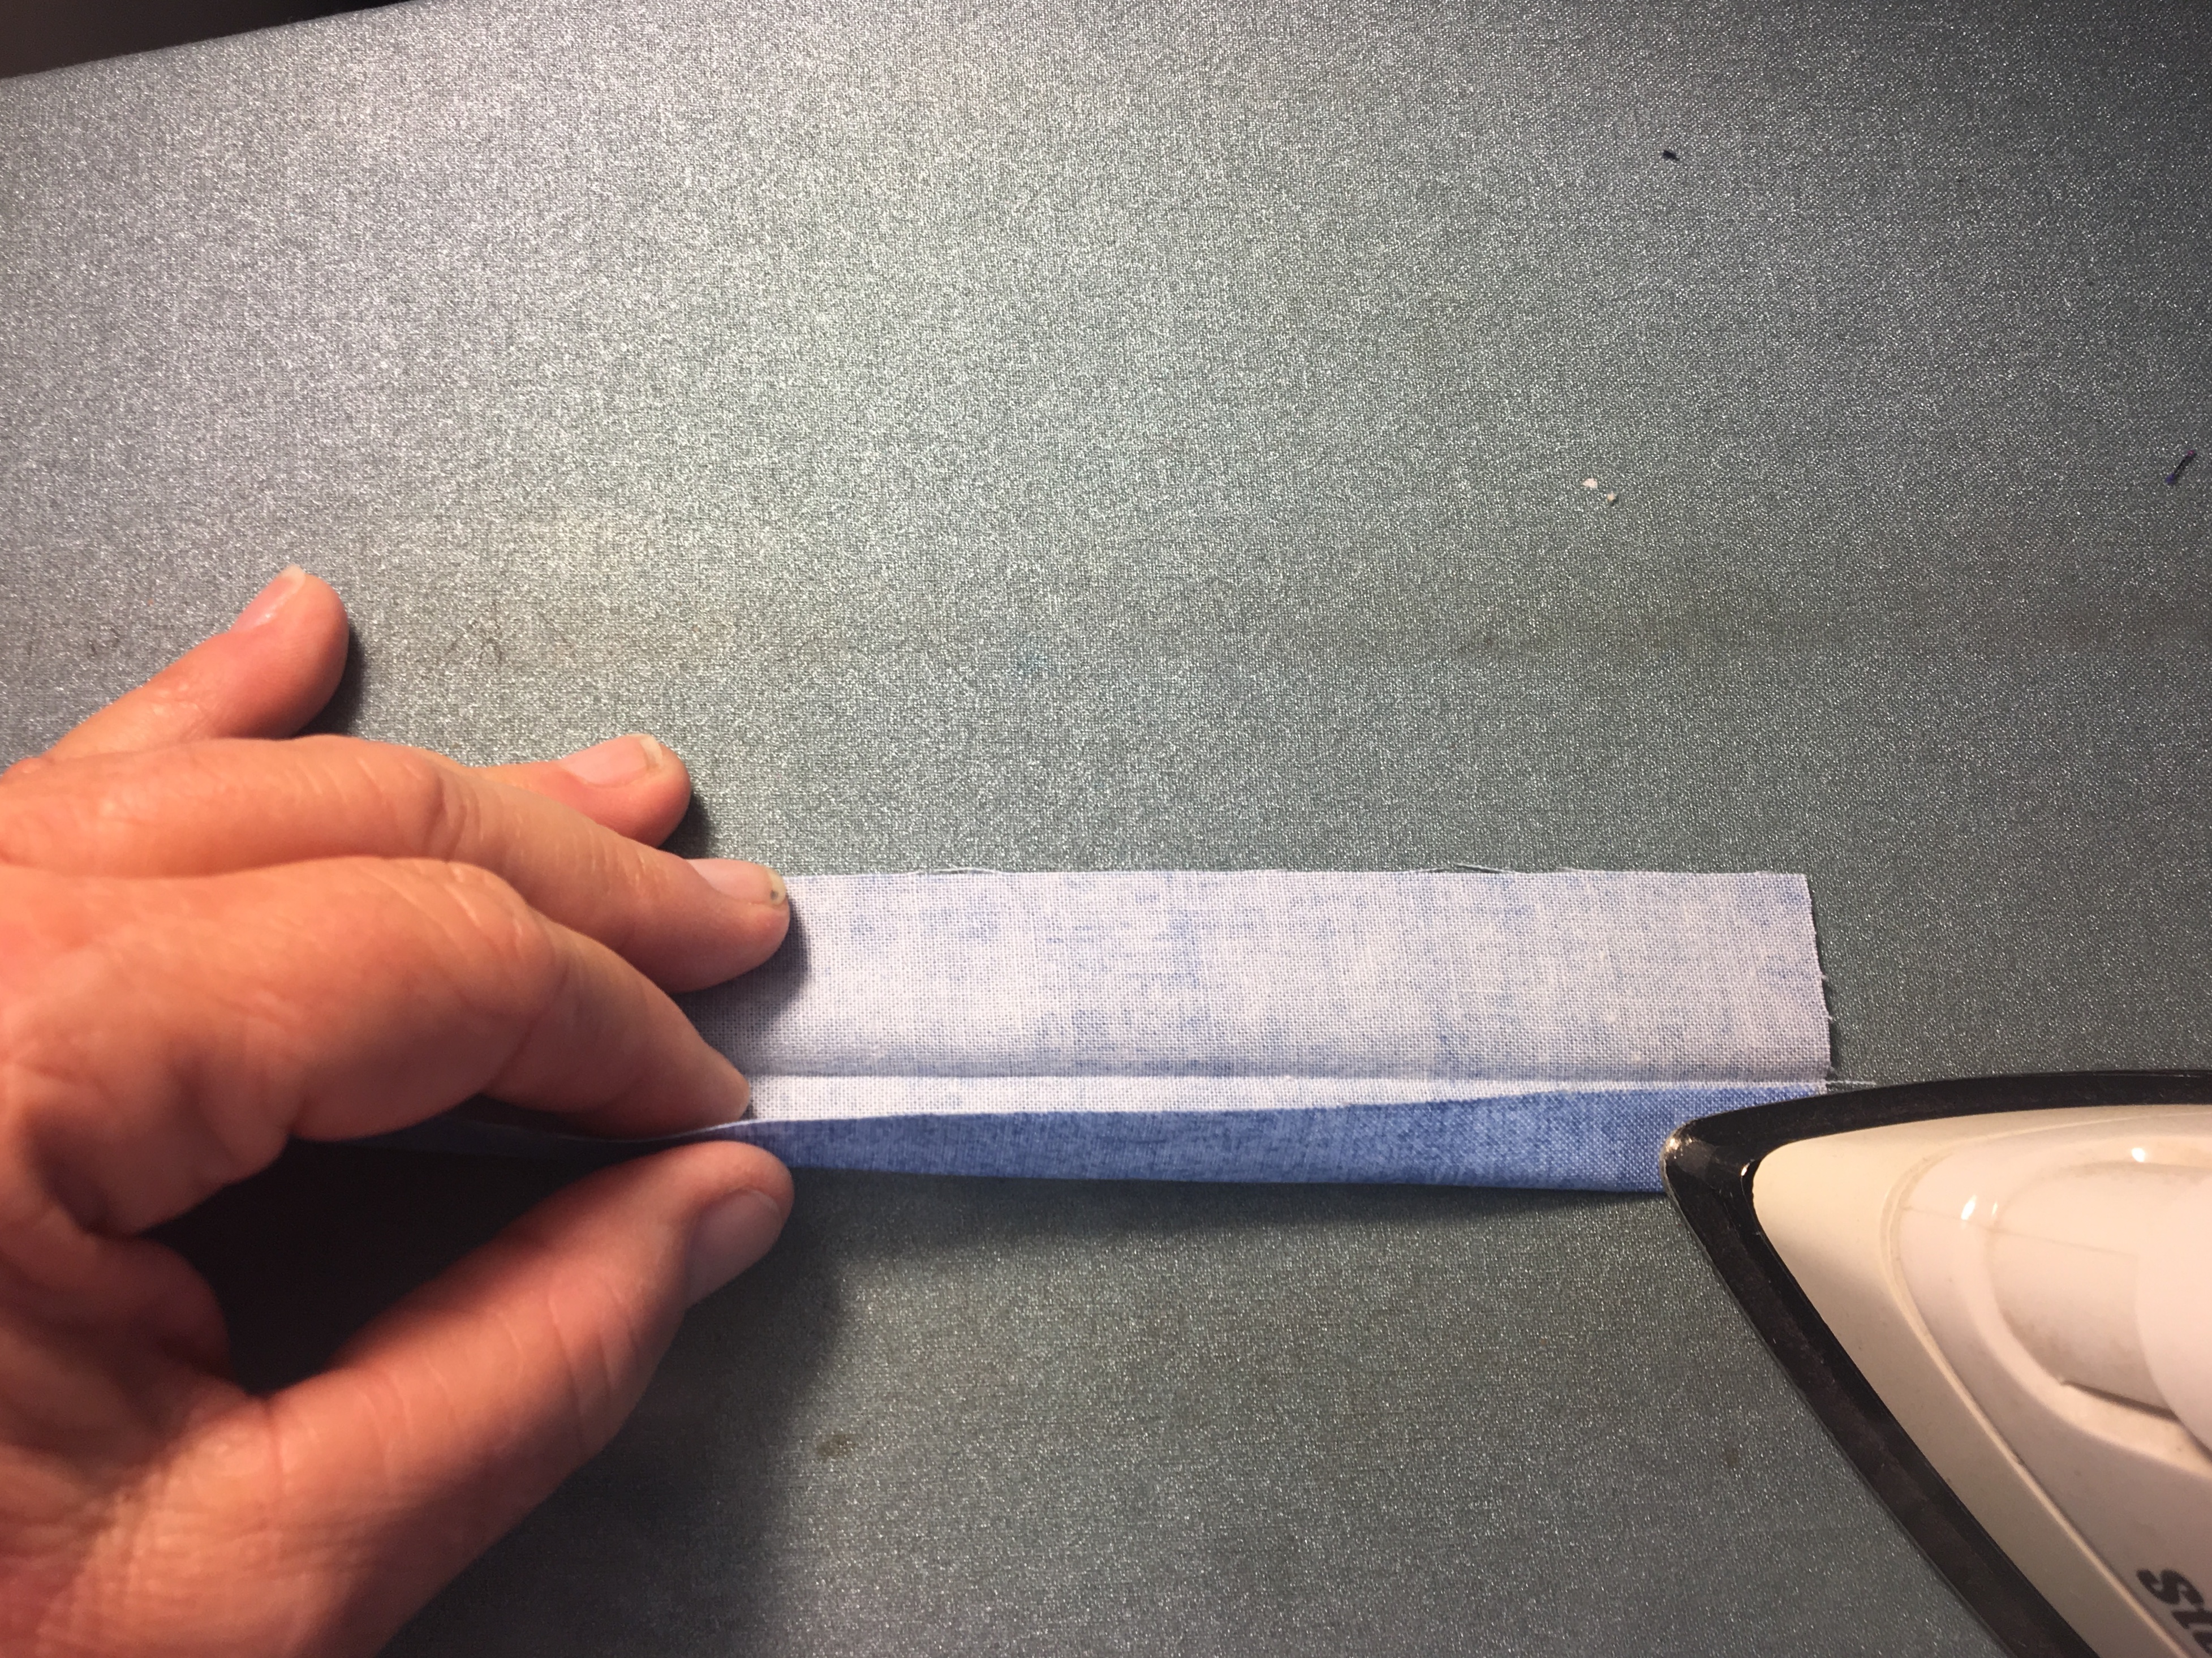
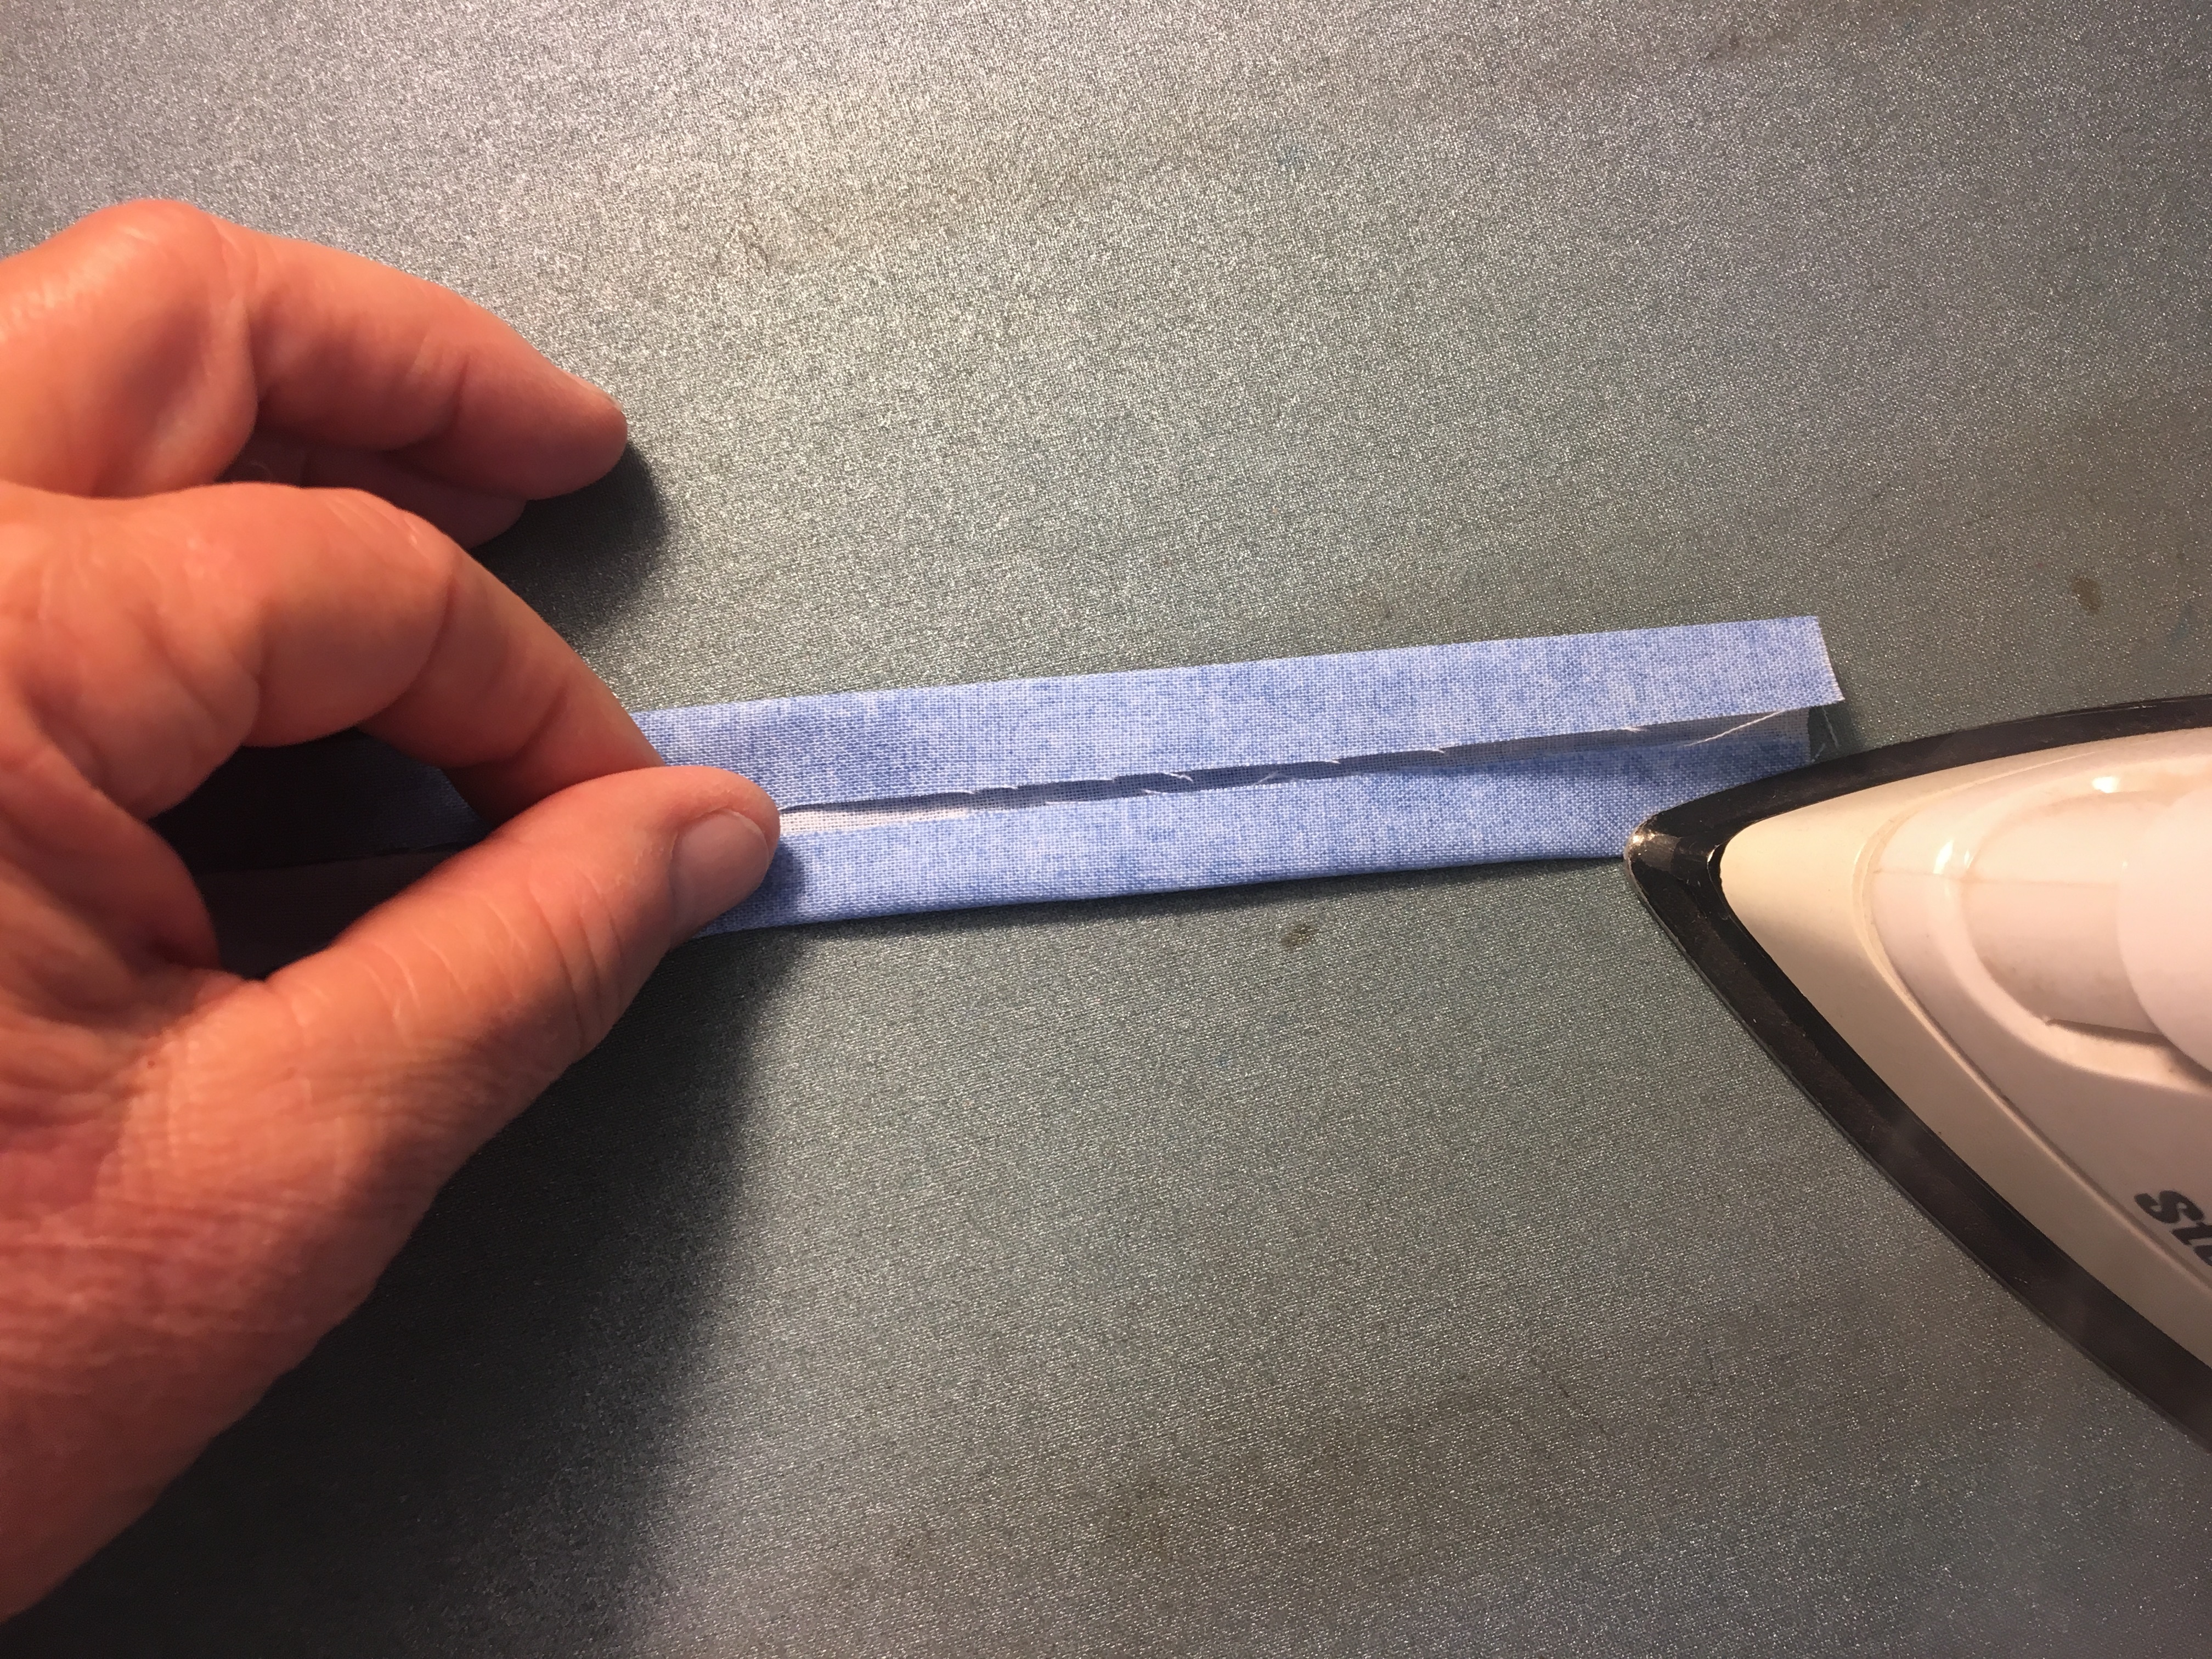
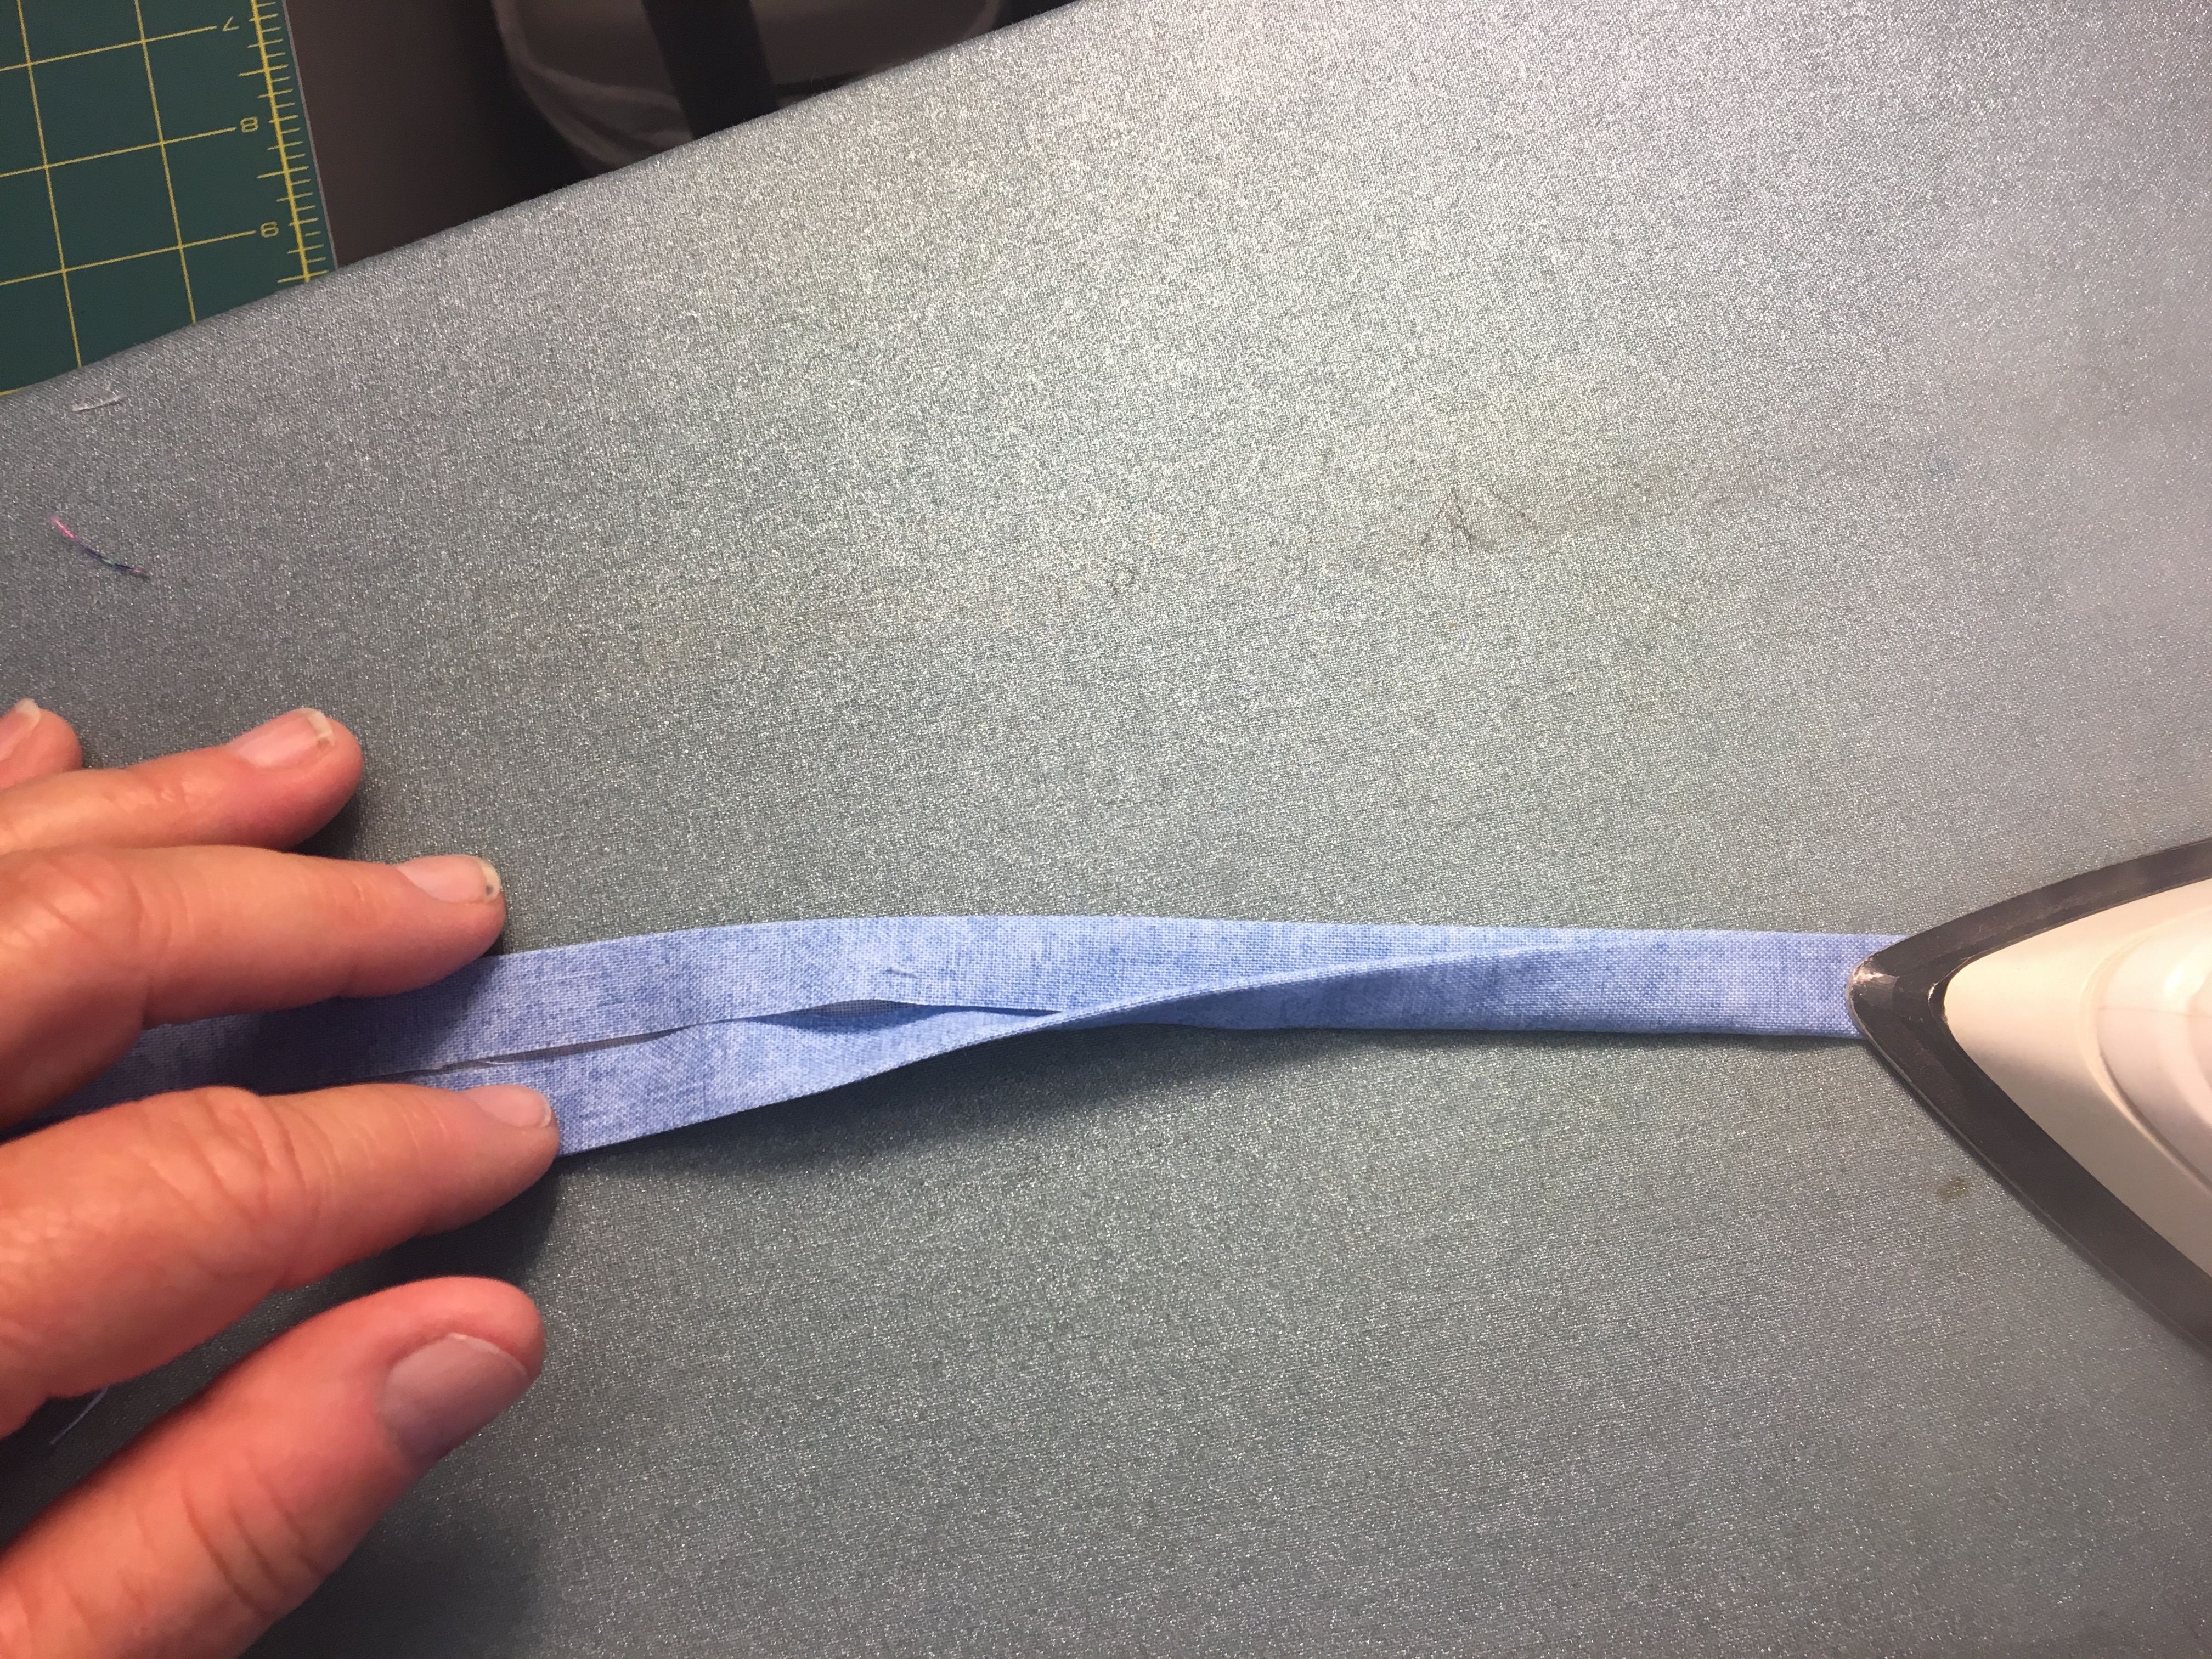
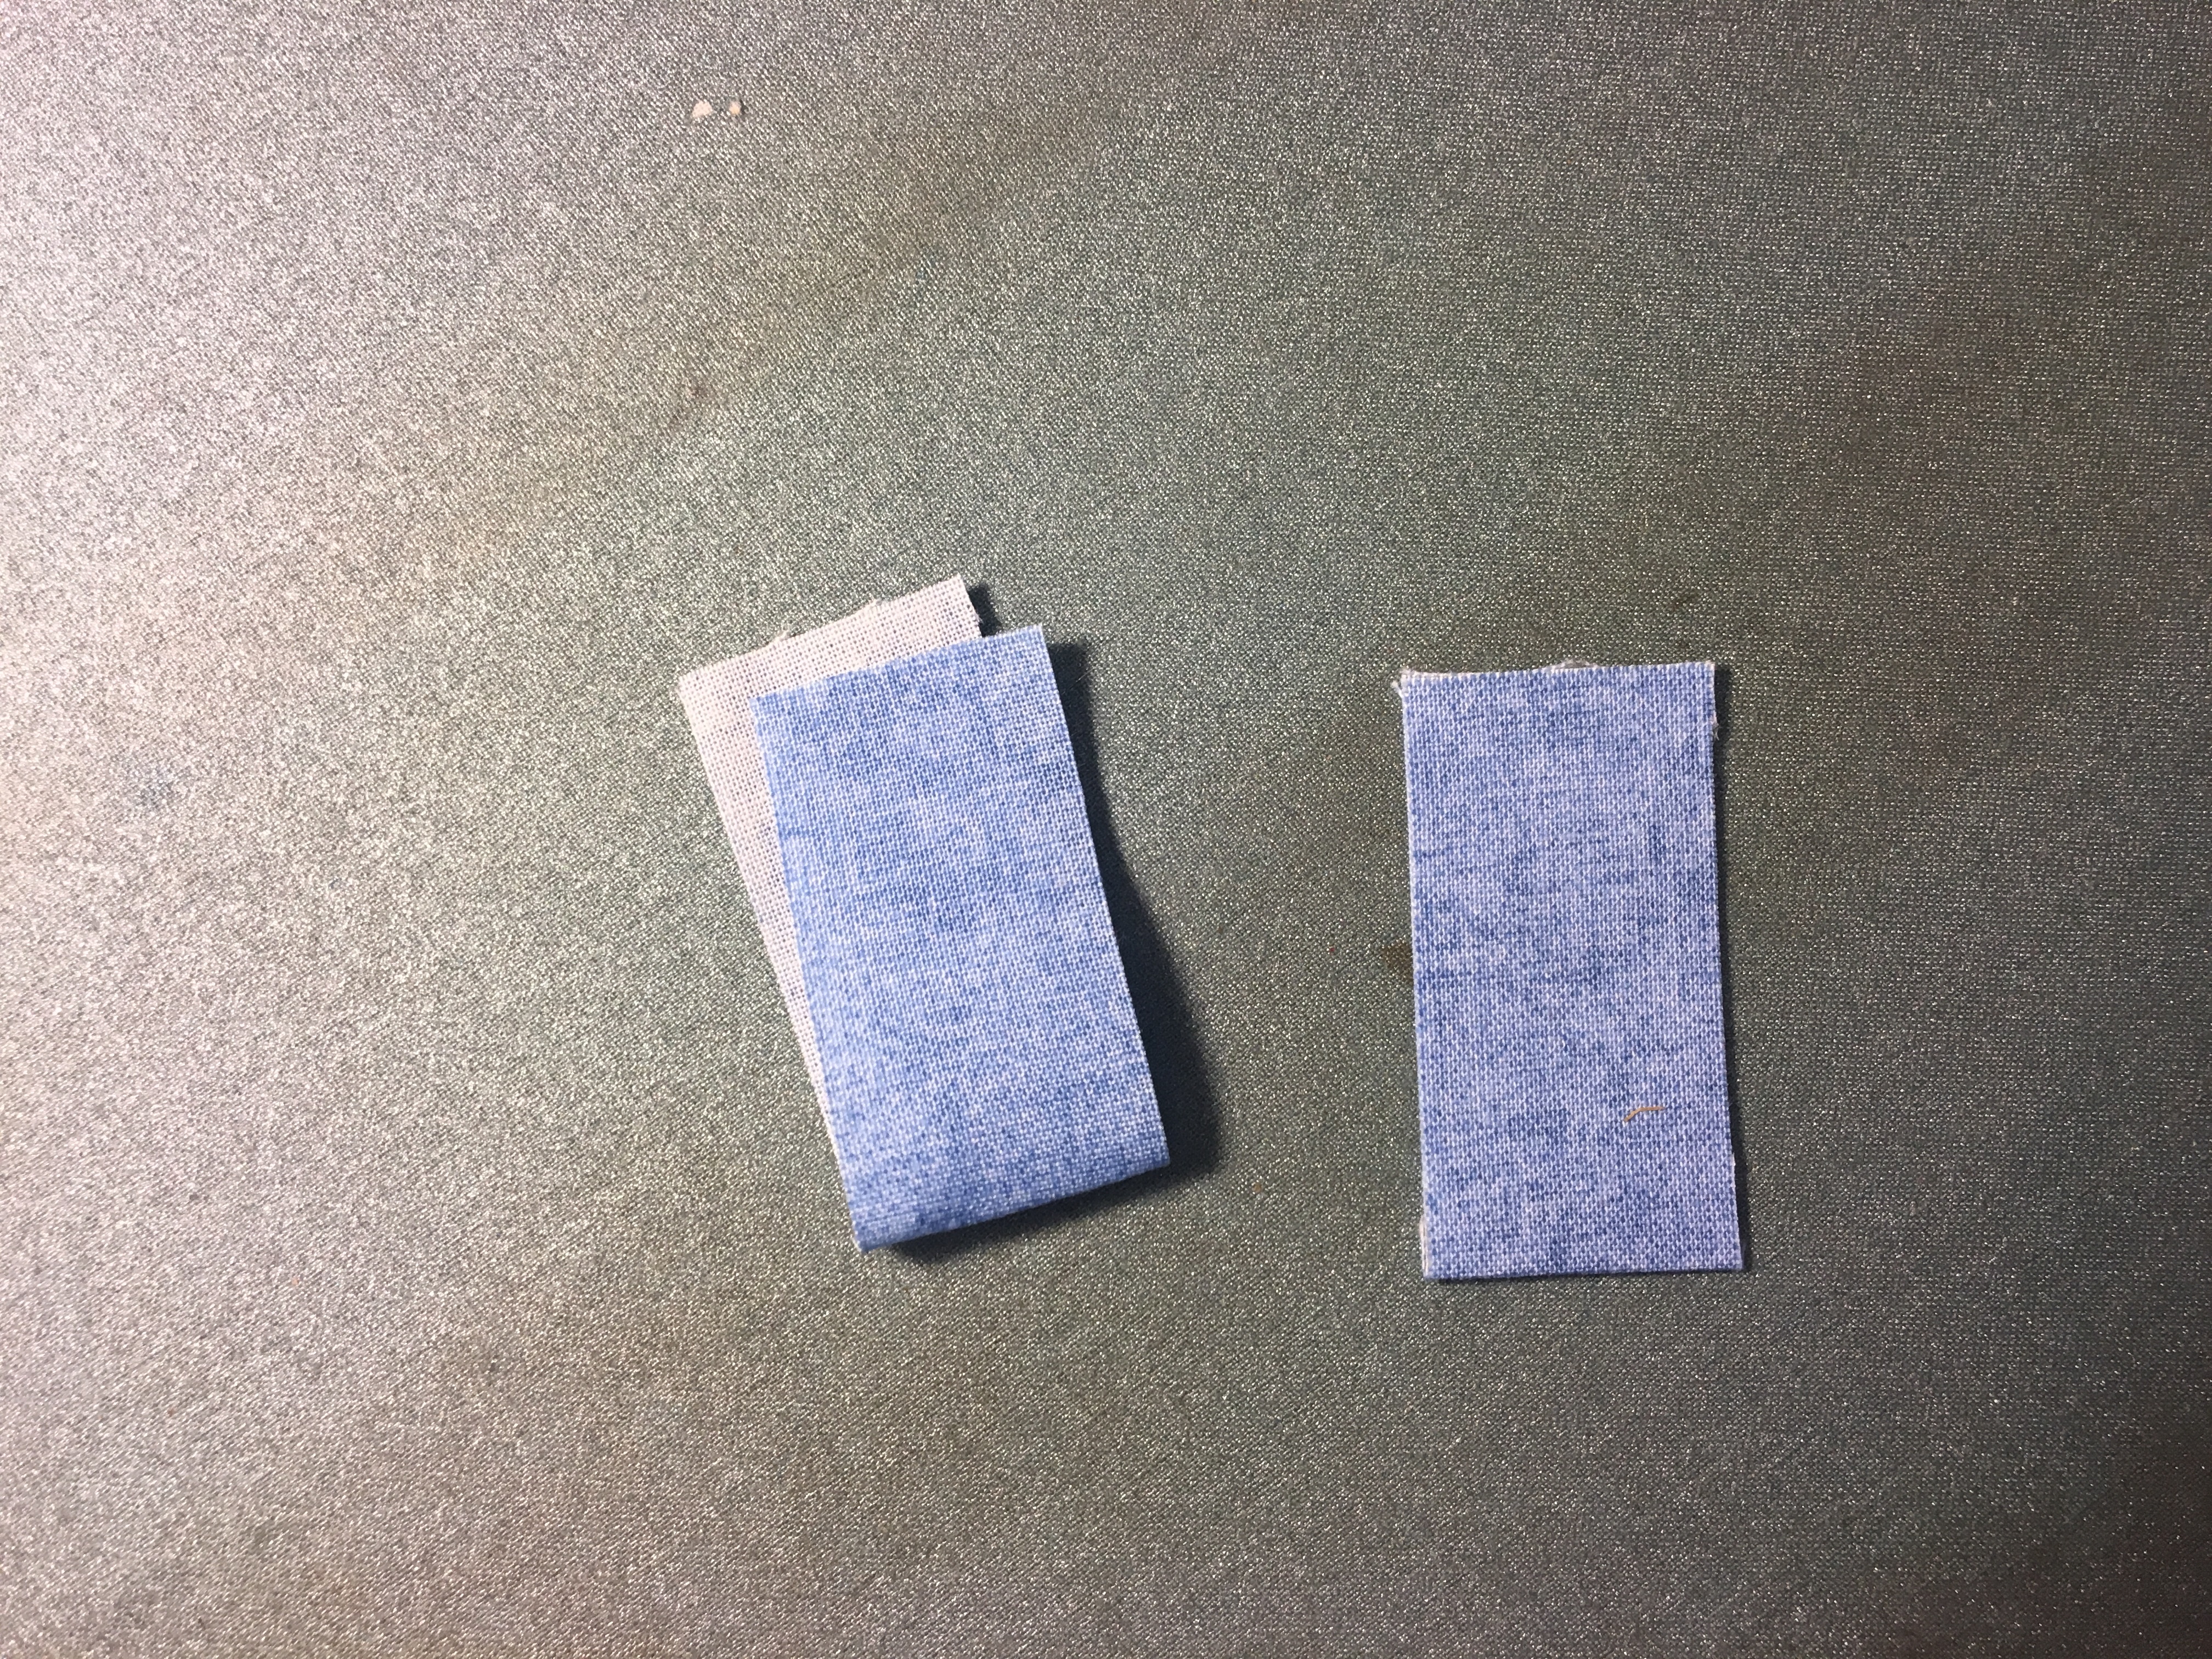
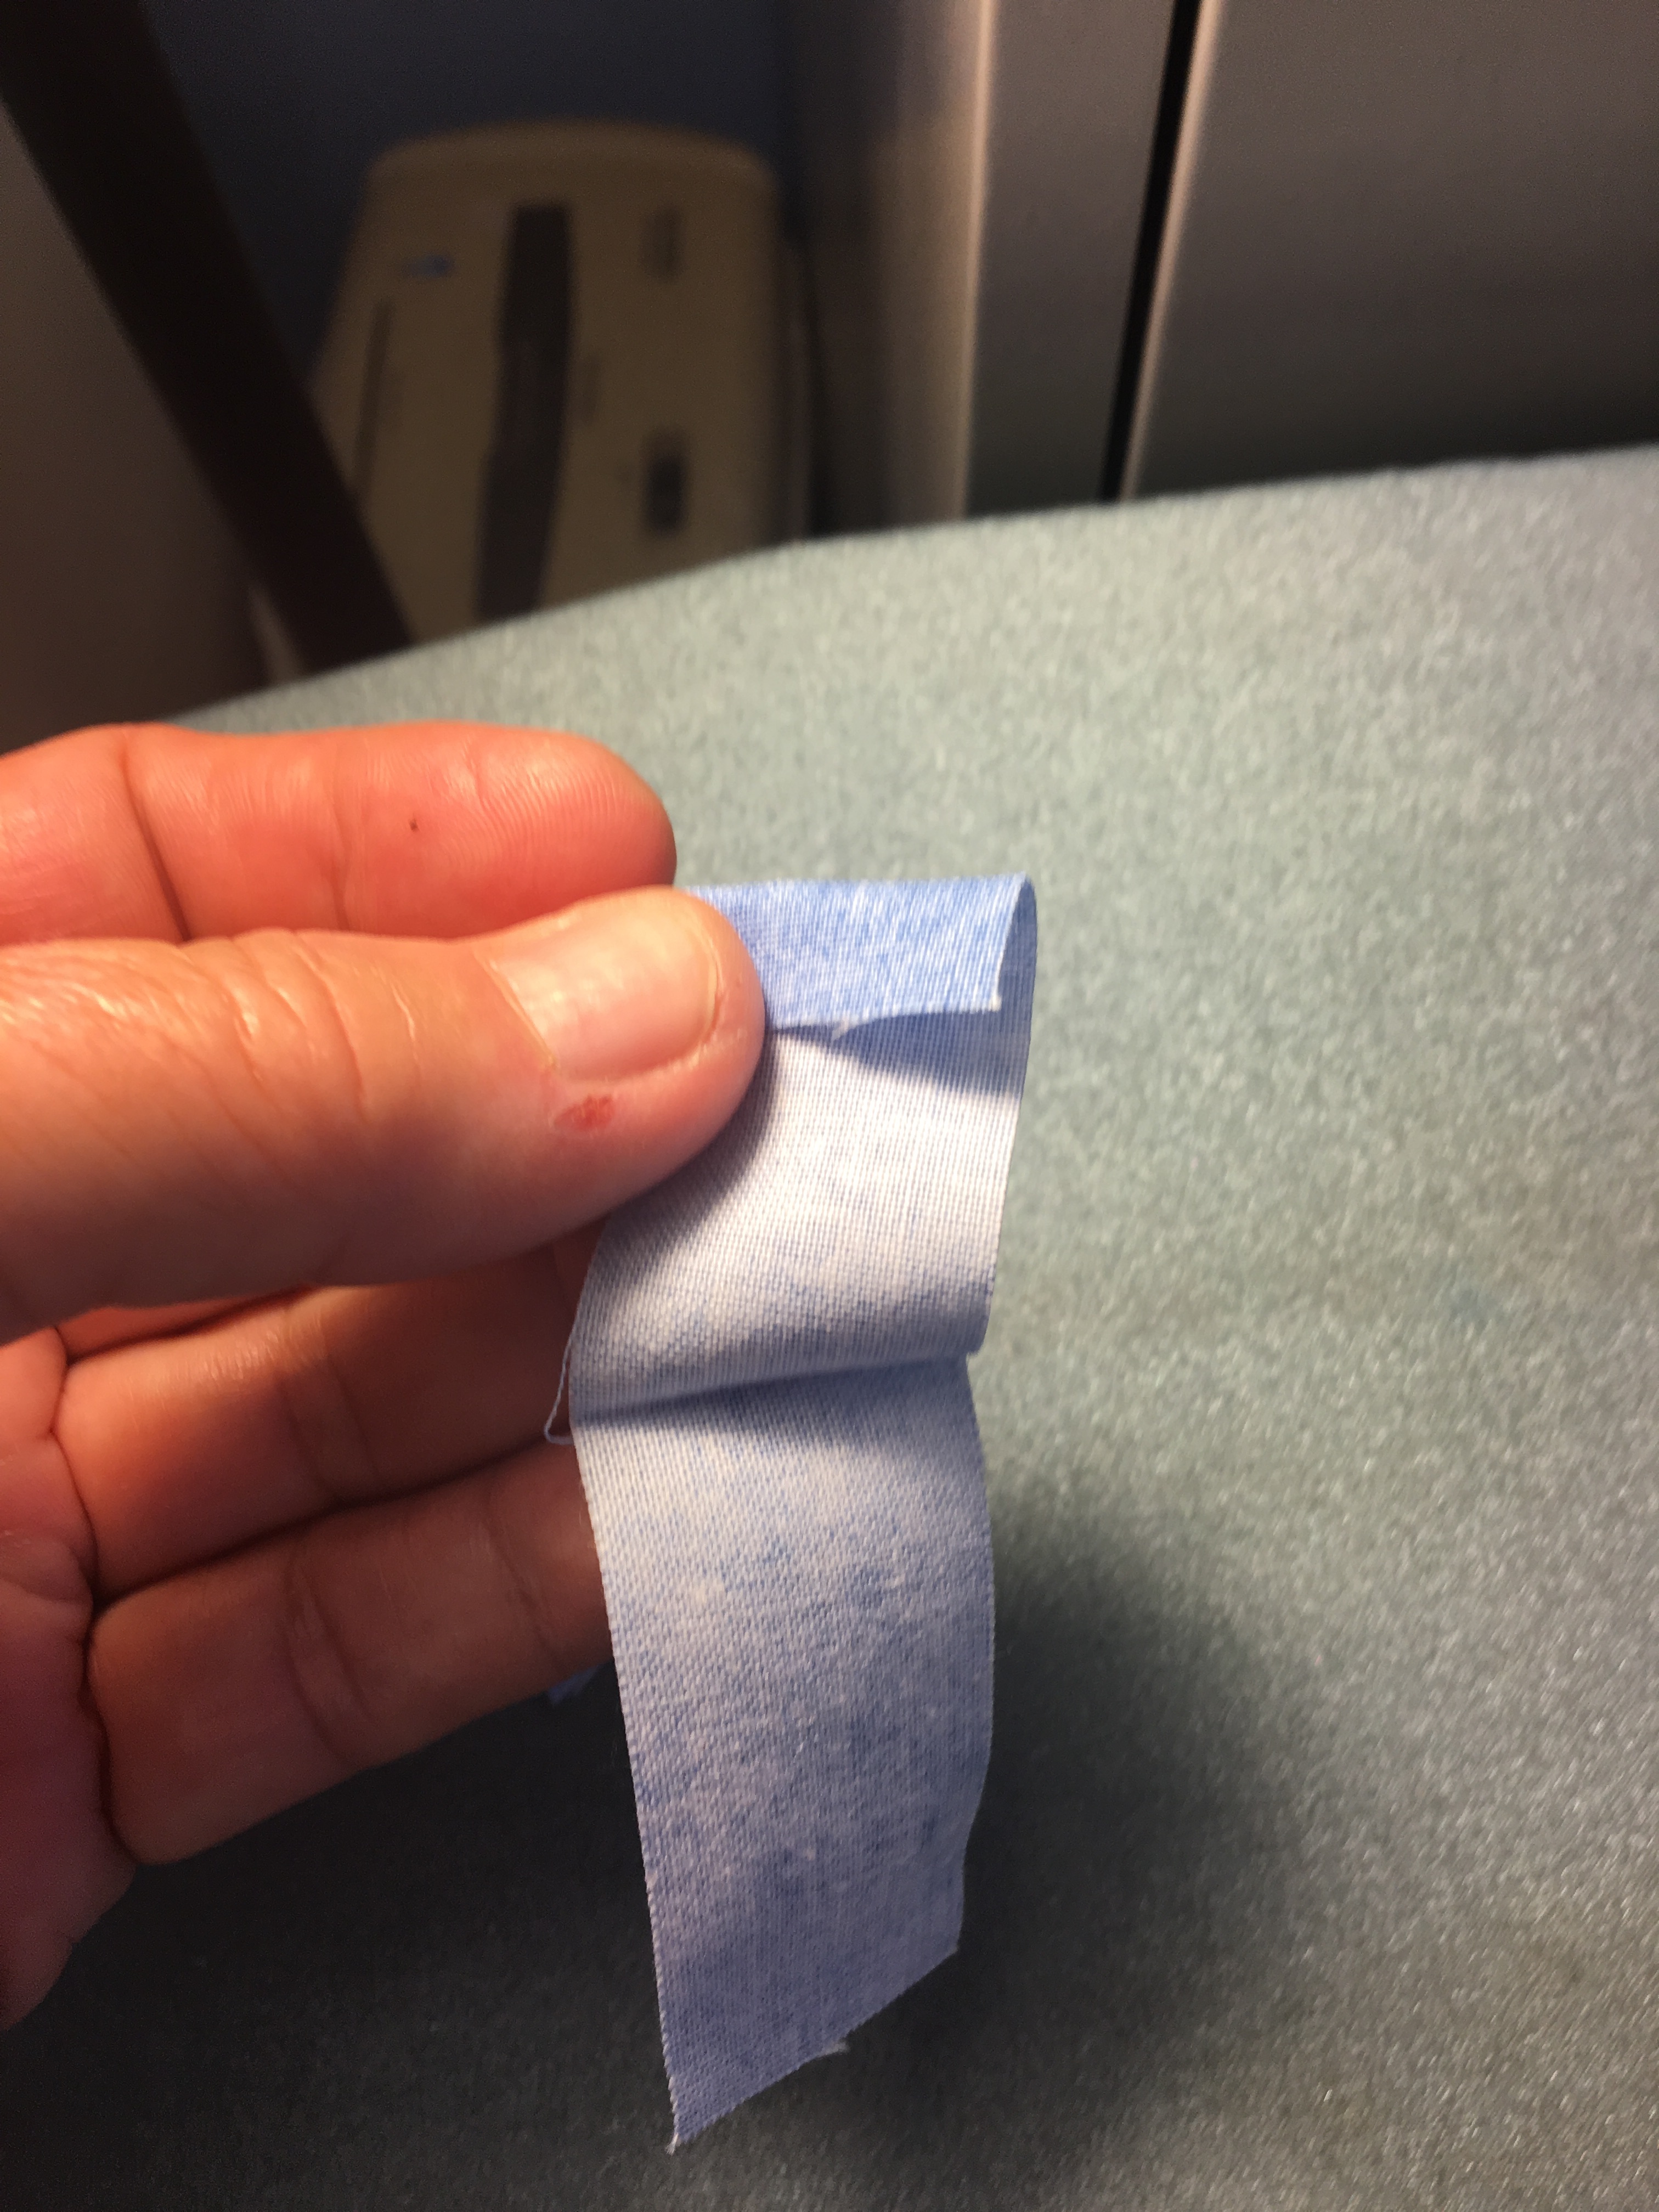
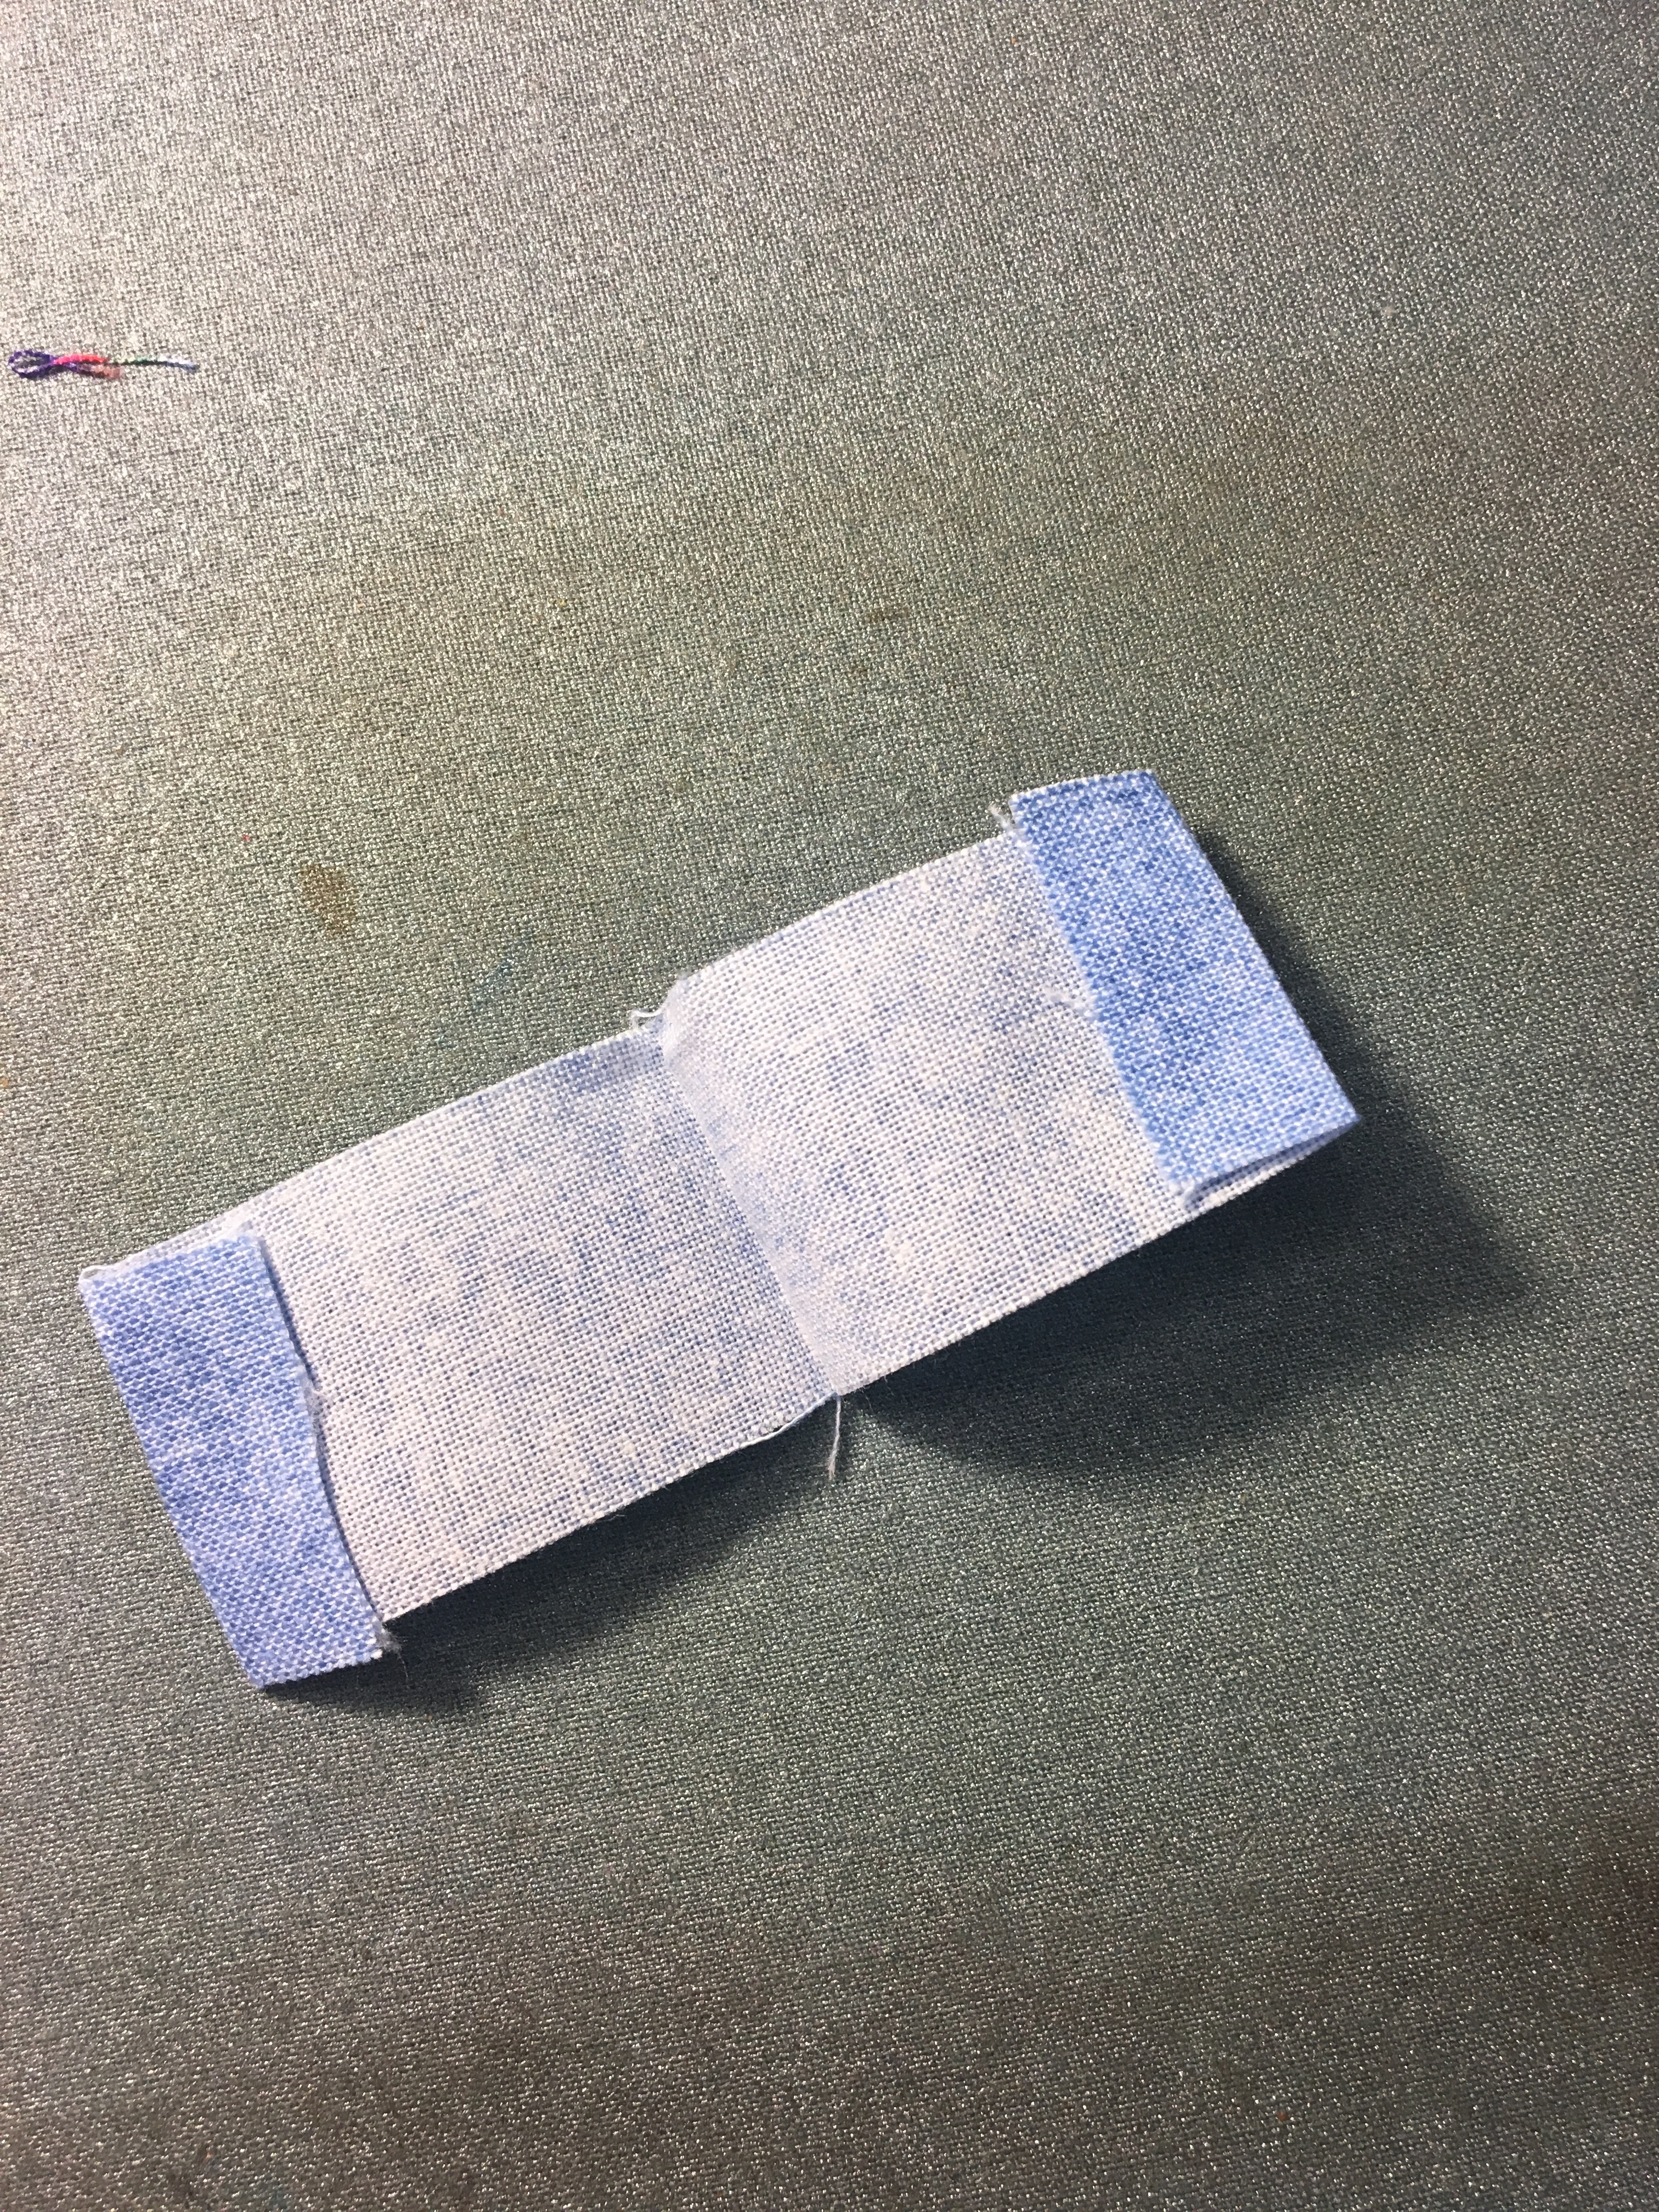
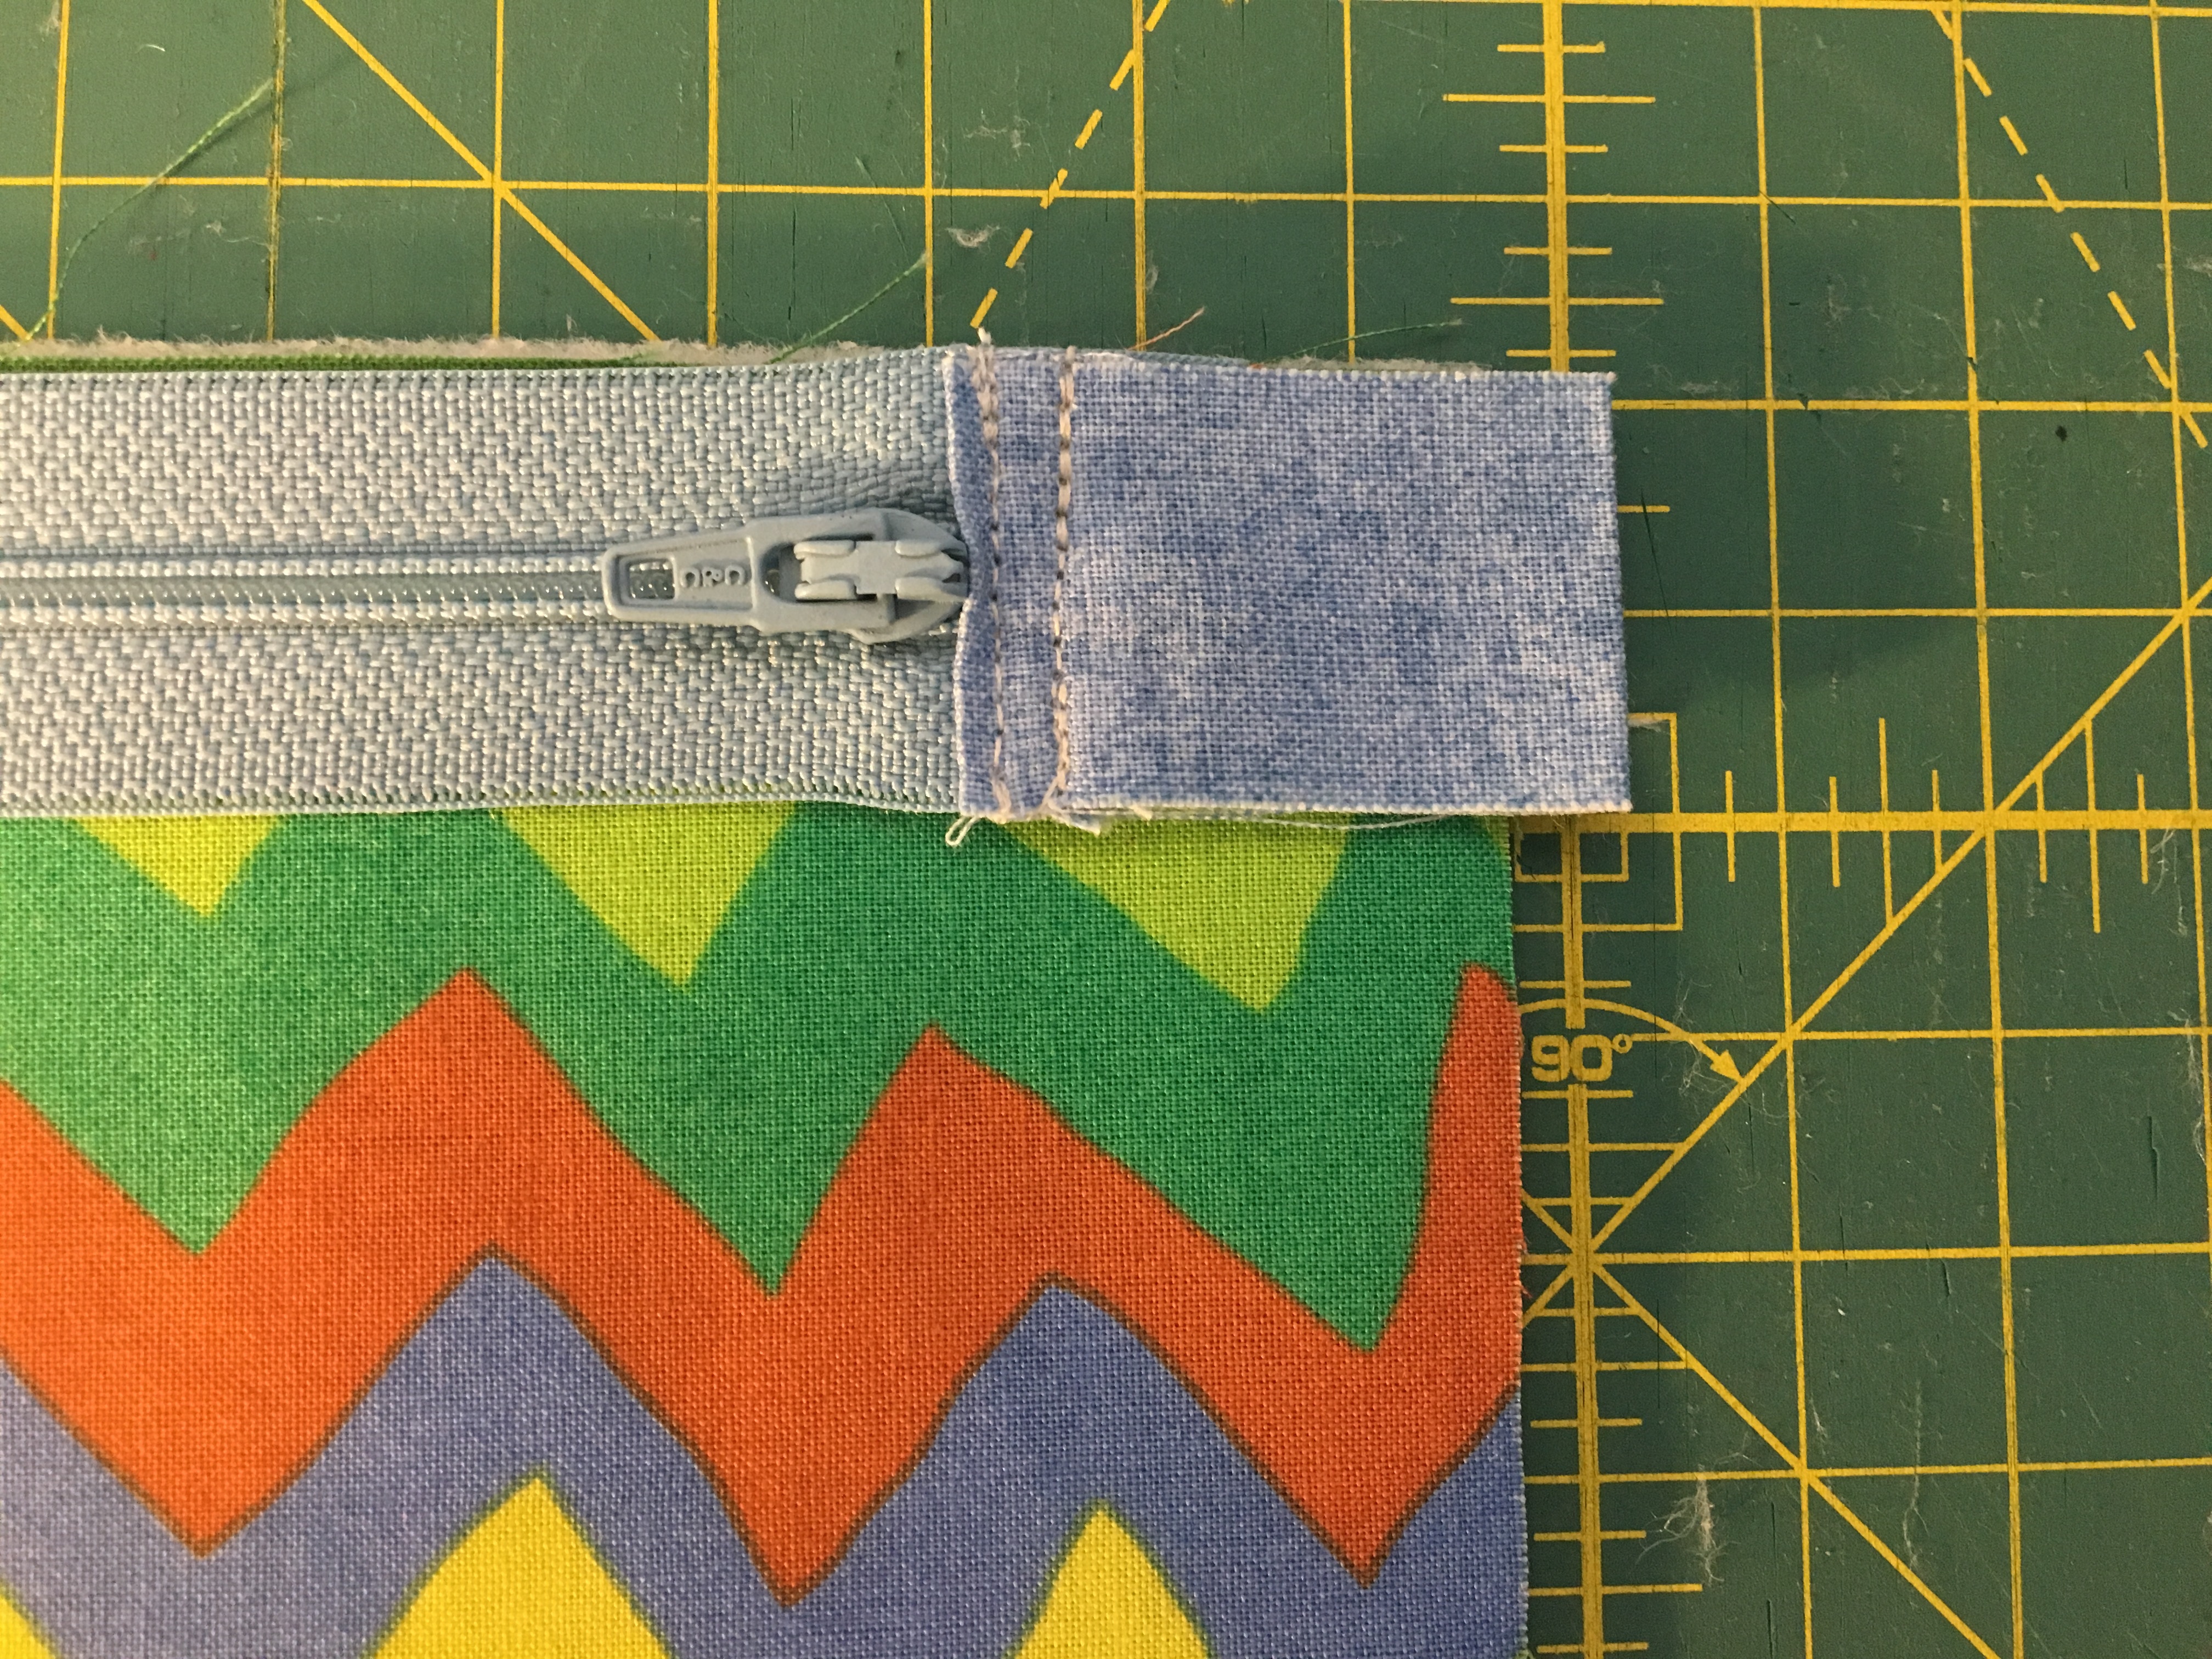
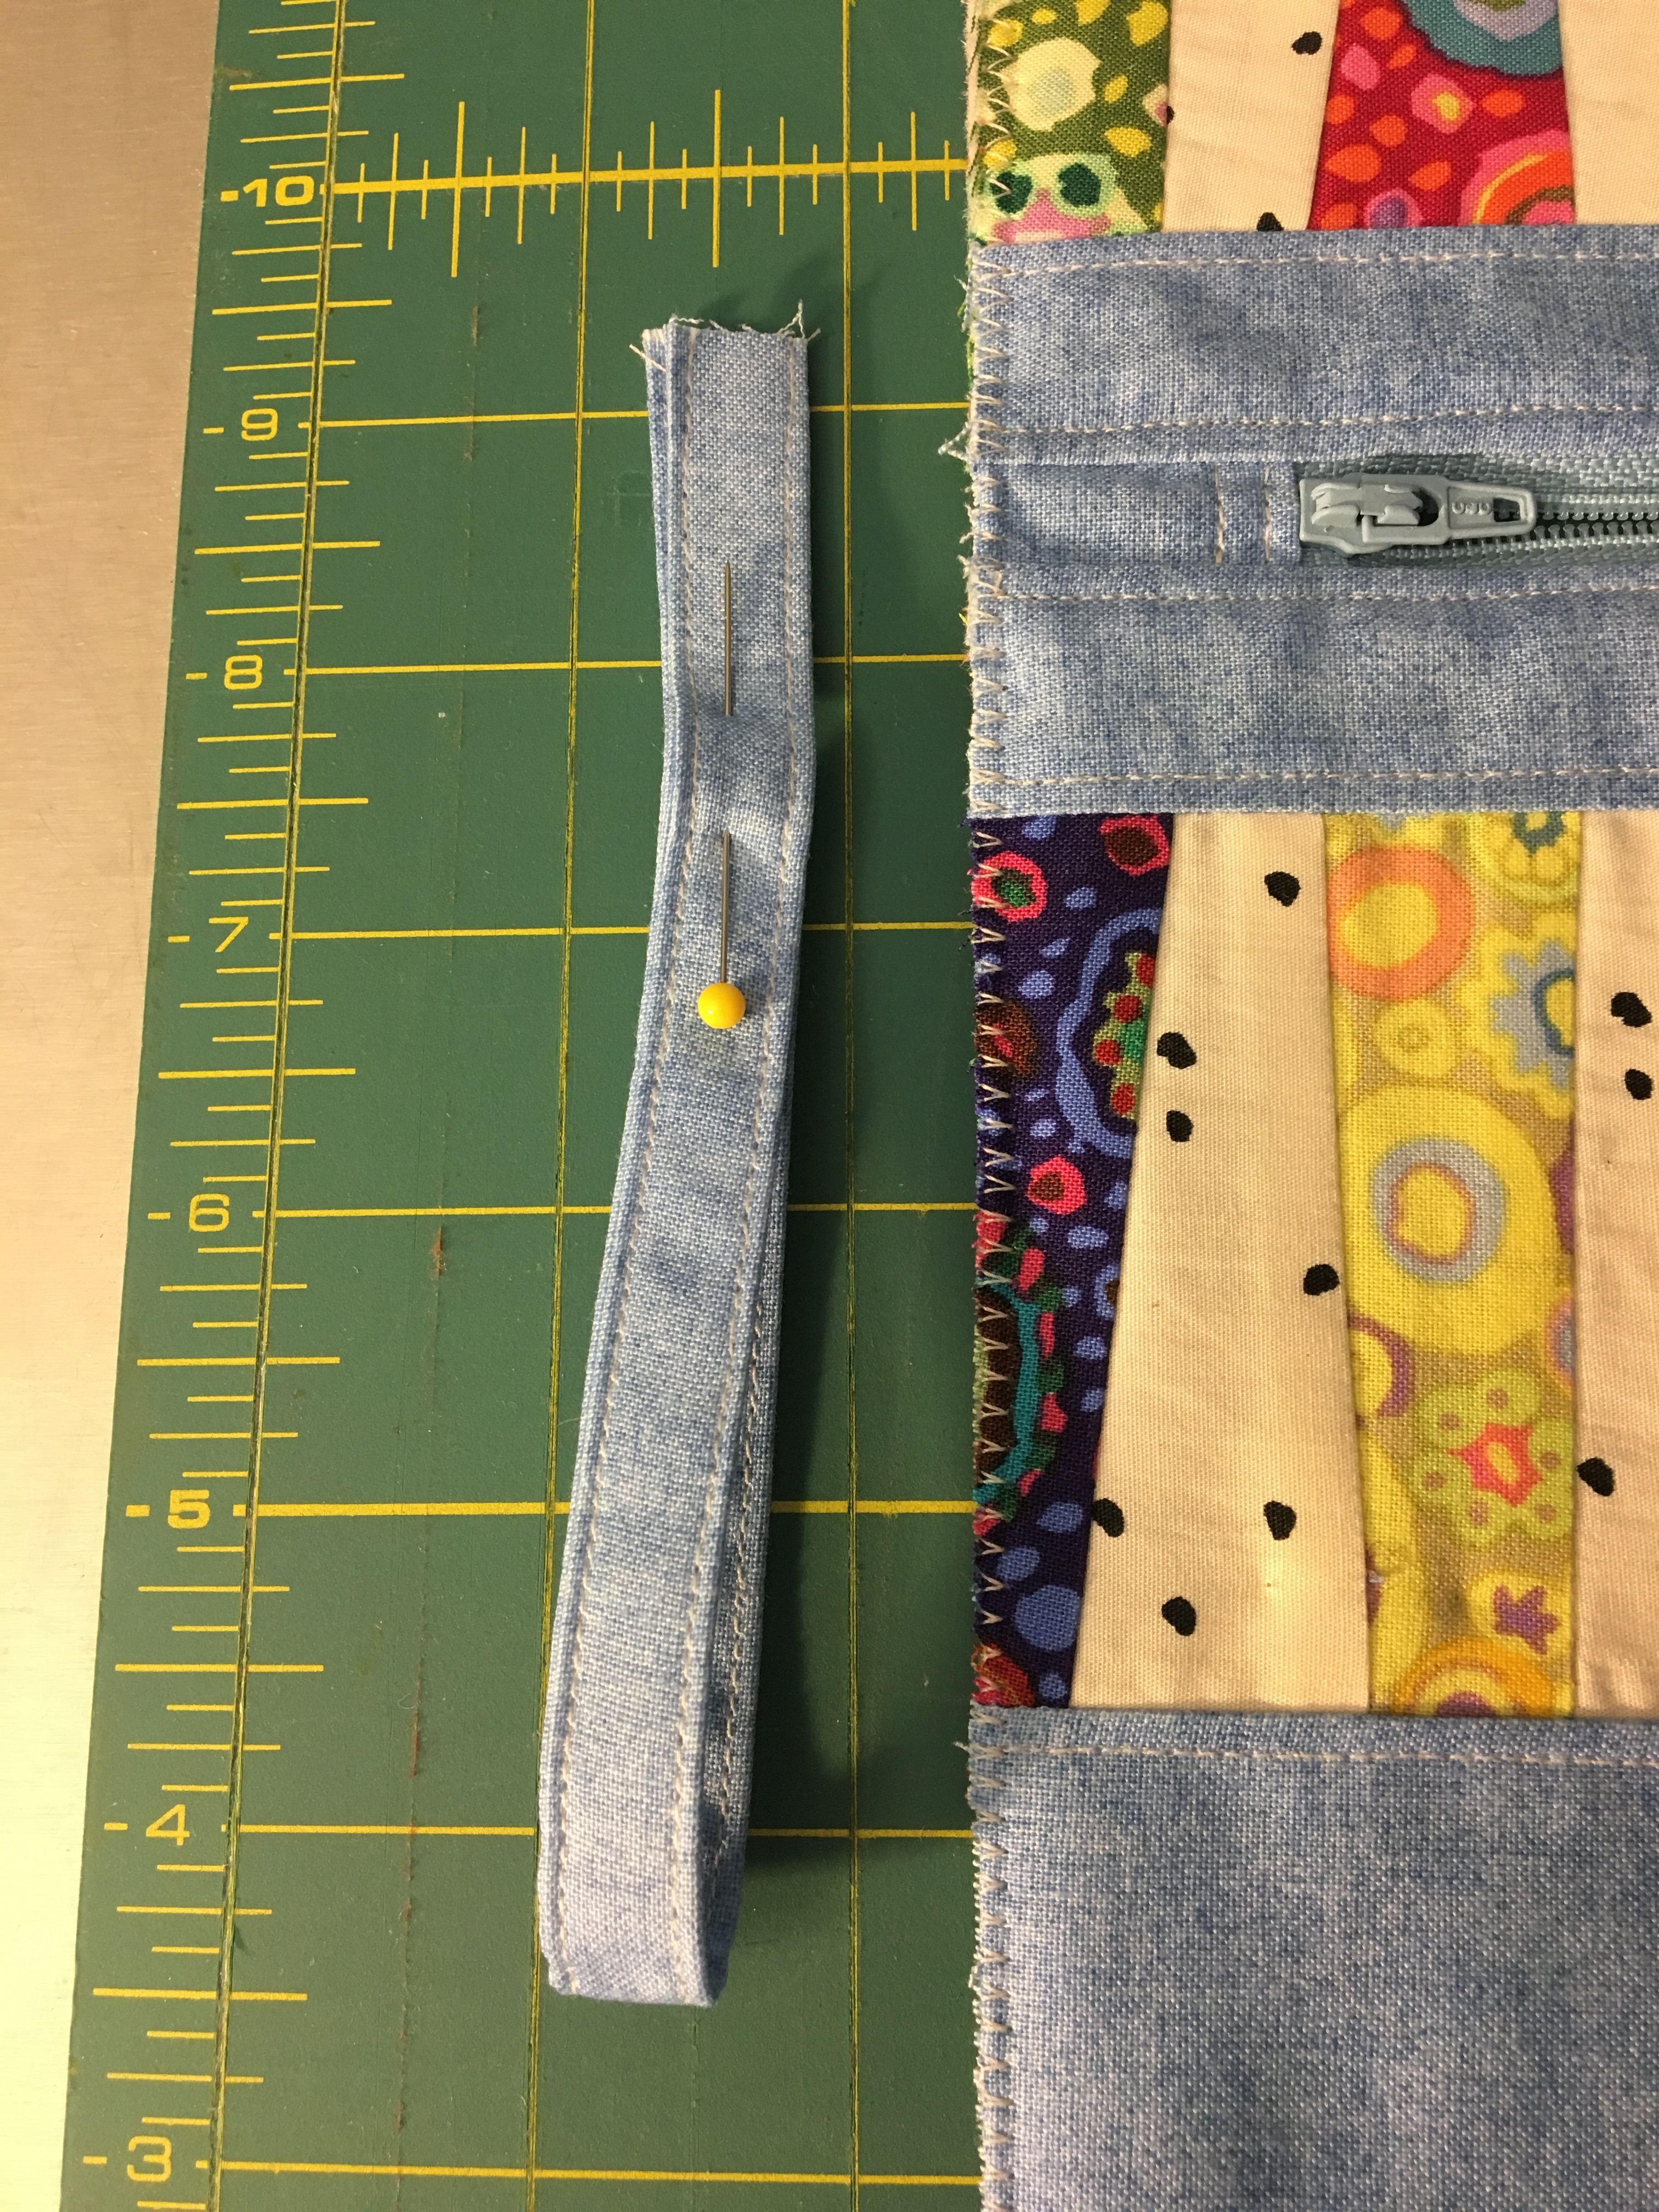
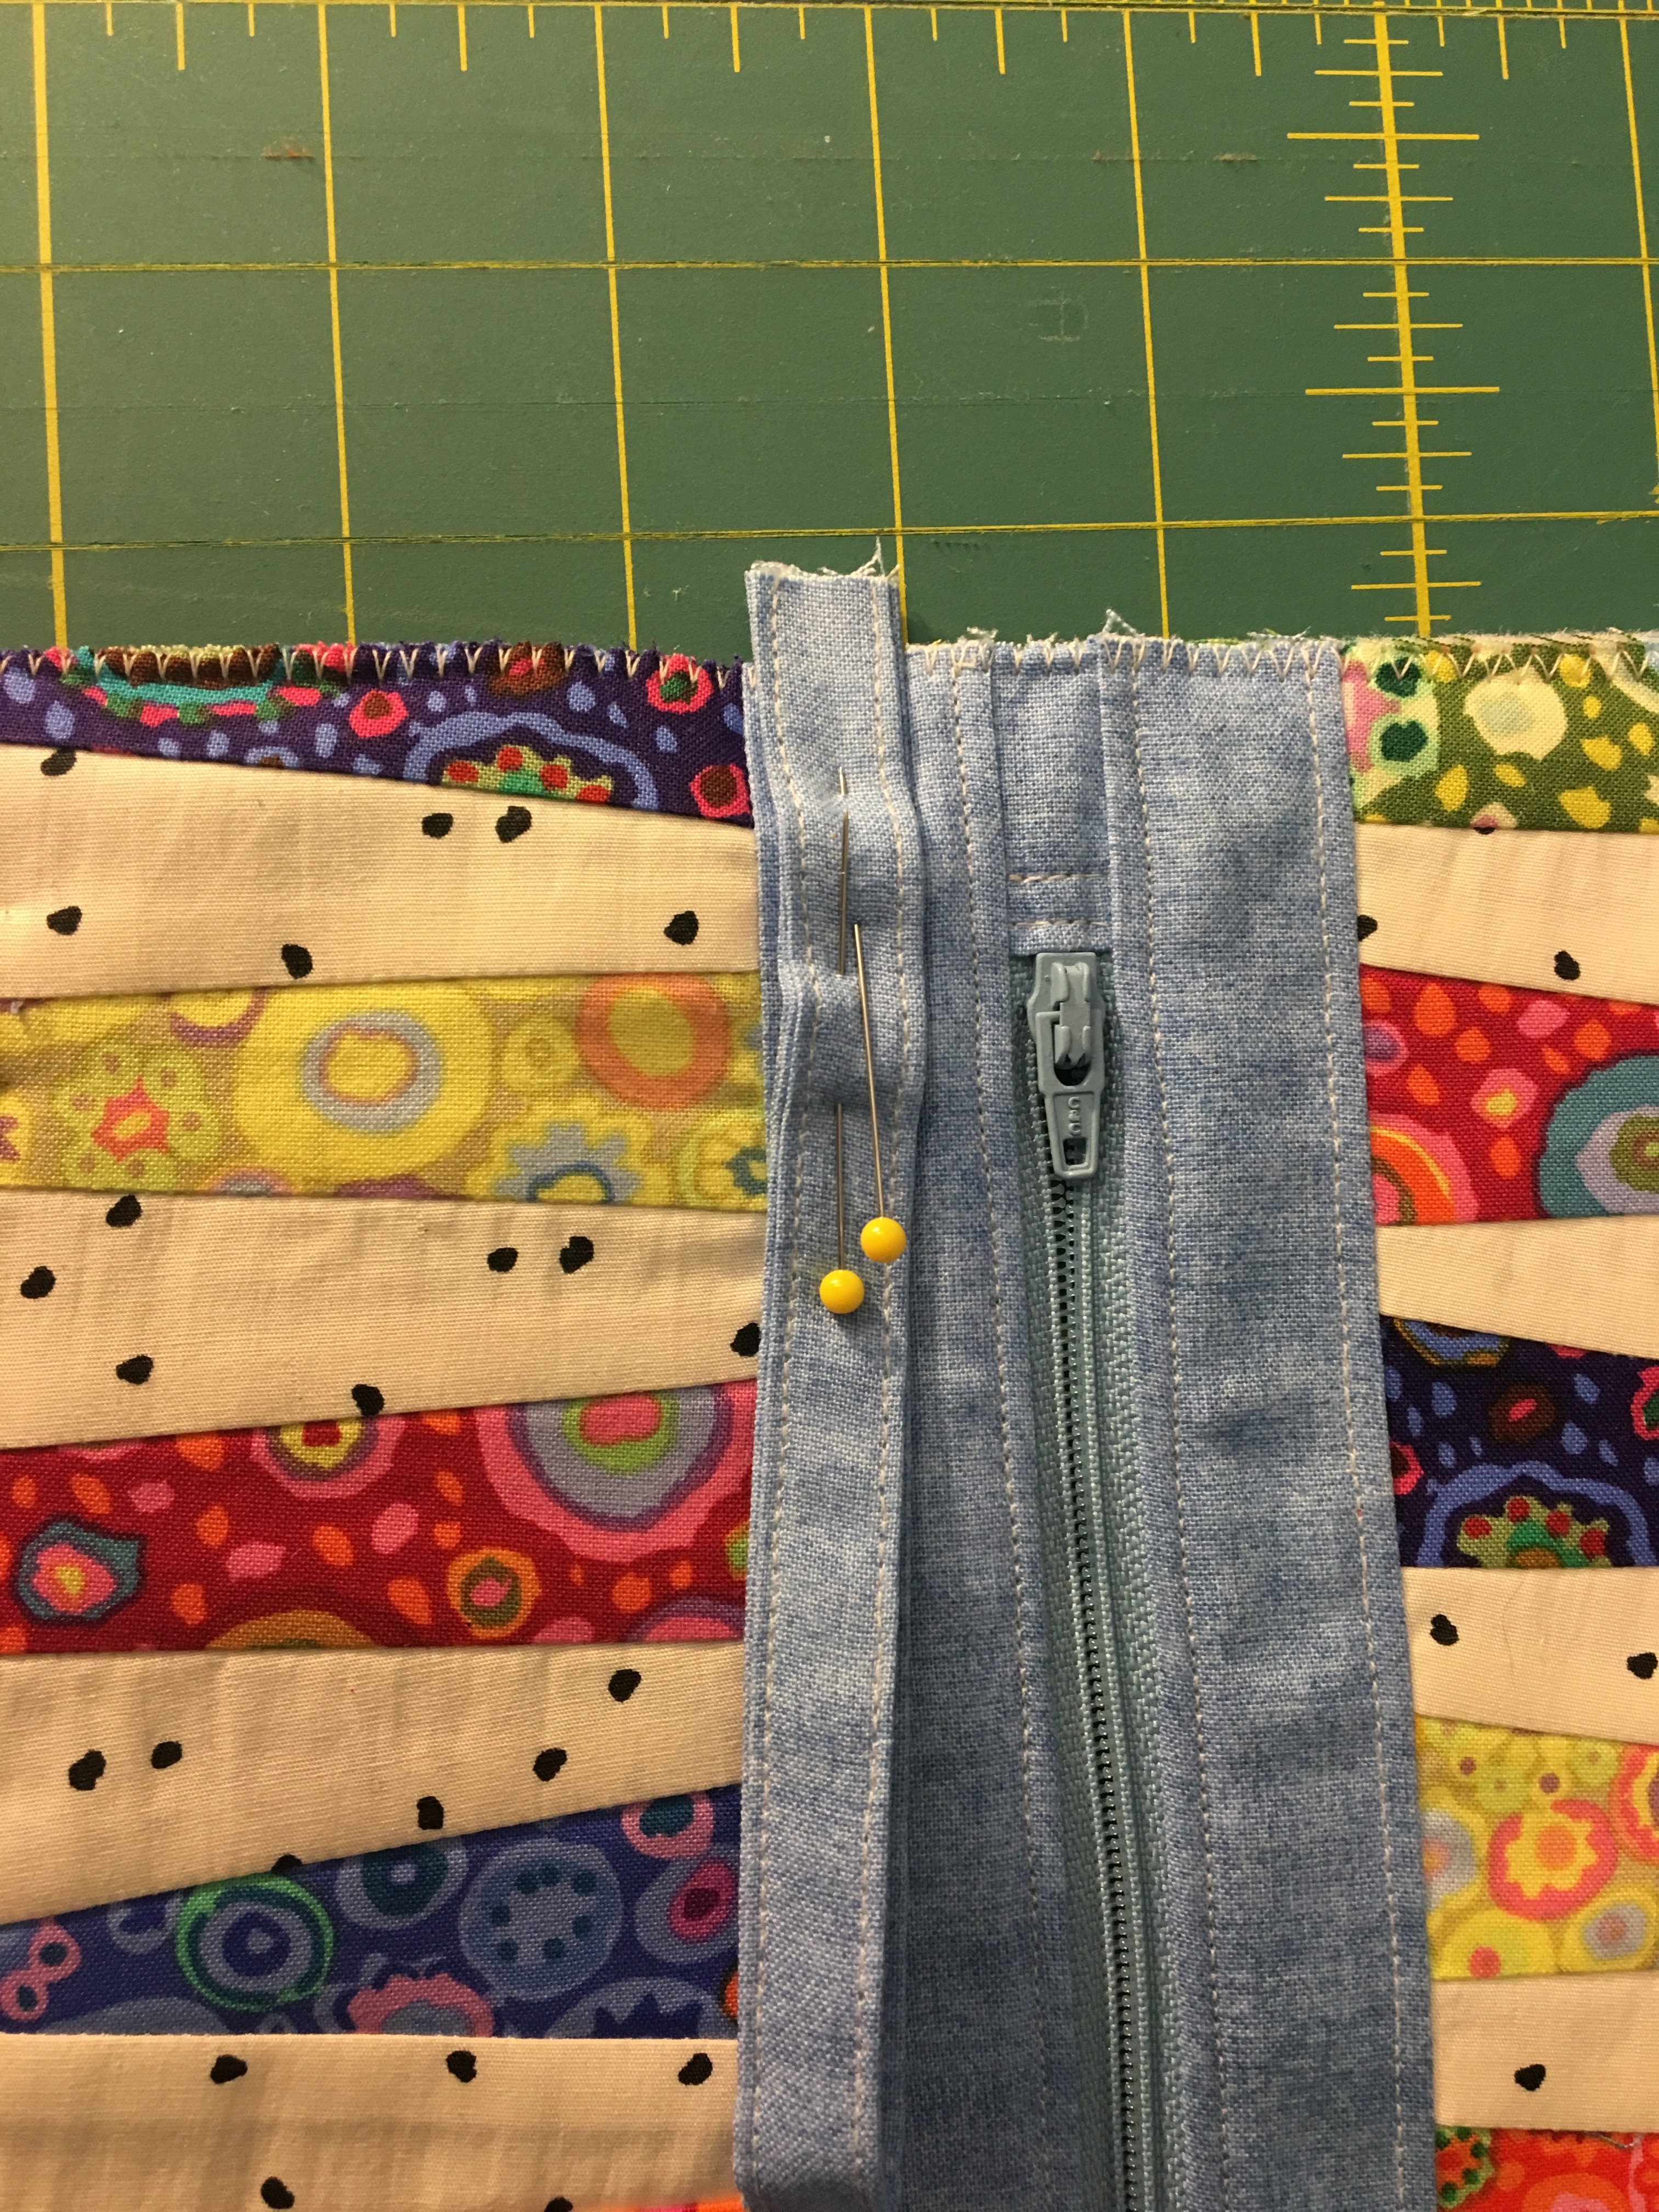
Left to right: handle, top strip, zipper tabs

Prepping handle, zipper tabs and lining:

  1. Handle: Fold in half lengthwise and press. Fold outside edges into center fold, and press again. Fold over, and press into one long strip. Top stitch close to edge on both long edges.  IMG_9290  IMG_E9291IMG_9292 IMG_9293IMG_9312
  2. Prep the zipper: Cut off the closed end of the zipper. Place the zipper on top of the lining along the 12 in width, with the right edge a generous inch in from the right side. Move the zipper tab to be on top of the lining, and cut off the open side of the zipper even with the left side of the lining. IMG_9299IMG_9301
  3. Zipper tabs: Fold in half, matching short edge to short edge, and press. Fold over about 3/8 inch on each end, and press, making sure that the two folded edges match. Pin these tabs onto the each end of the zipper, with the zipper sandwiched in between each folded end. Make sure about 1/2 inch of the zipper is inside the tab.  Top stitch two lines across edge of zipper tabs.IMG_9295 IMG_9296IMG_9297IMG_9305IMG_9307IMG_9308
  4. Lining: Fuse lining fabric pieces, right side up, to fusible batting according to instructions on batting.IMG_E9298


Assembling front bag panel:

  1. Sew 1-1/2 inch strip to top of pieced panel. Press seam allowances away from pieced panel. Top stitch along the body fabric.
  2. Sew bottom panel to bottom of the pieced panel. Press seam allowances away from the pieced panel. Top stitch along the body fabric.IMG_9289

Sewing in Zipper:

  1. Place one lining/Pelon piece on table, with lining fabric facing up. Lay the zipper with tabs along top edge and with zipper pull up and to the right. Center the zipper between the two sides. There will be excess zipper tab fabric extending beyond the lining piece on each side.IMG_E9313IMG_9314
  2. Lay one of the bag front panels right side down on top of zipper and lining, making sure to line up the top edges and the sides.IMG_E9315
  3. Carefully pin the zipper between the lining and bag front.
  4. Using your zipper foot, sew a ¼ inch seam along the top edge of these pieces. When you get within about an inch of the zipper pull, stop and put your needle down, lift the foot, and reach in and slide the zipper pull into the section you’ve already sewn. Lower your foot, and finish this seam.
  5. Press each piece away from the zipper. I press the front first, and the lining second.IMG_9318IMG_E9319IMG_E9320
  6. Lay second piece of lining face up. With zipper closed, lay the piece you just finished on top of the 2nd lining, with pouch front right side facing up. Make sure the top of the 2nd lining and the zipper are lined up. Also line up sides of these pieces. Now open the zipper (I do it this way because when the zipper opens, it will move — but your bag pieces will be in place. You can easily move the zipper back into place as you pin.) Open the zipper now, when everything is lined up place the second pouch front face down on this stack, making sure to line up the top and sides.IMG_9321IMG_9322IMG_E9323
  7. Pin carefully, about every two inches. Using your zipper foot, sew a ¼ seam to secure the zipper. When you get within about two inches of the pull, lift the fabric and slide the pull into the area you’ve already sewn.
  8. Press these pieces away from the zipper, starting with the front, then the lining.
  9. Top stitch about 1/8 inch away from the zipper on each side of the pouch.IMG_9325

Trimming, and preparing the pouch to be sewn into an envelope:

  1. Lay the flat piece on your cutting table. Flatten it all out with your hands,  and trim the side edges and bottom of each side to be even. I typically don’t trim much more than 1/8 or ¼ inch away.
  2. IMG_9326IMG_9327
  3. Pin about every two inches around the edge of the bag. Pin inside of the seam allowance so you can leave your pins in place for the next sewing step.IMG_9328
  4. Using your walking foot, zig zag the edge all the way around the bag, catching all three layers of front, batting, and lining. Make sure that the needle on the left side of the zig zag stitch catches fabric, and on the right side of the stitch the needle falls over the edge and wraps the raw edges. (This edge will be exposed on the inside of the bag, so you want it to be finished nicely.)
  5. IMG_9343IMG_9347

Sewing the pouch into an envelope:

  1. OPEN THE ZIPPER! This is SOOOO important! If you don’t open the zipper, you’ll never get your bag turned right side out!
  2. Fold the handle in half, matching ends, and place a pin to hold it all together.IMG_9349
  3. Pin the handle onto one side of the bag in the 1.5 inch section at the top. I pin it on the side where the zipper pull is when zipper is open. Leave about ¼ inch of the handle ends sticking out beyond the edge of the bag pieces.IMG_9350
  4. Fold over the sides of the bag with right sides together, match up bottom corners and pin.
  5. Match up edges of zipper at the folded top of the bag, and pin.
  6. Match up the panels on the sides and pin.
  7. Pin around the edges of the bag about every two inches, keeping the pins back away from the seam allowance so you don’t have to remove them as you sew.IMG_9351
  8. Starting at the top of one side, sew all the way around the pouch envelope. I back stitch at the top, and over the handle. I try to stitch just inside of the zig zag to keep the seam allowance as small as possible. Leave your needle down and pivot at the corners. In the photo below, you can see how close I stitch to the zigzag. IMG_9352
  9. Cut off the pieces of the handle sticking out beyond the seam. IMG_9355

Making the gussets:

  1. Put one hand into the envelope you’ve just made and separate the sides of the bag. With your other hand, press the side seam toward the bottom seam. Look inside the bag to make sure the side seam and bottom seam line up. Hold these seems pressed together with one hand and use the other hand to smooth out any folds on the inside of this envelope. Place one pin on the outside along the seam about three inches in from the point to hold this all together. Press the gusset flat.IMG_9356
  2. Side and bottom inside seams lined up:IMG_9359IMG_9360
  3. Using one of your square rulers (I use my 5.5 inch square), mark a 3.5 inch line across the folded corners of the pouch. Use the diagonal line on the ruler to keep the sewing line square and insure that your bag bottom is even. Keep the diagonal line on the ruler lined up on the fold on the left side, and slide the ruler up or down along that diagonal line until the 3 1/2 inch mark hits the fold on the right side. Mark this line with a pencil or quilting marker.IMG_9363
  4. Sew along this marked line. I backstitch at the start and end of this line of stitching.IMG_9364
  5. Cut the corner off, leaving a little less than ¼ inch of seam allowance.IMG_9367IMG_9365
  6. Zig zag along this cut edge to seal all of the raw edges.IMG_9368

Open the bag and turn it right side out, using your finger to push out the corners of the gusset, and using something with a rounded edge to gently push out the zipper tabs at the top.

YOU’RE DONE!!! I hope it’s pretty!

IMG_9373