I’ve wanted to make one of these coiled rope bowls for some time now, so I figured this cold winter weekend was the time to start.

We were supposed to wake up to several inches of snow yesterday, so I was ready to hunker down in the house for the weekend. I woke up to only a dusting of snow, so I decided to hit the stores and get the rope I needed for this project. I tried a couple of different craft stores, and no luck. I ended up at Home Depot and purchased 200 feet of polyester 3.8 inch clothesline rope. I was worried the polyester would make it difficult to sew, but it didn’t.
I started out this morning by digging into my stash, and went to my pre-cuts bin. I had batik fat quarters in bright colors, and decided to use them. I’m glad I went with larger pieced rather than scraps, because this took about 1.5 yards of fabric total.
I cut the fabric into one-inch strips, and decided what order I wanted them in the bowl.

I decided to put the darkest fabrics on the bottom of the bowl, thinking it would hide dirt better. Then I went to the lighter greens, then into the oranges and pinks. I added the purple later when the bowl ended up too small with what I had cut.
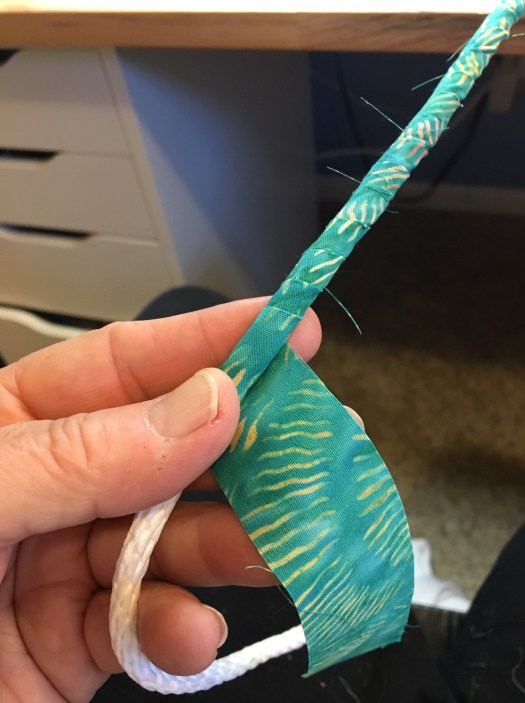
I had watched several different video tutorials on making these bowls, so I felt pretty confident to just dig in. I started by wrapping the fabric around the end of the rope, then spiraled it down the length of the rope. then I coiled it pretty tight, and started sewing.

I set the zig zag stitch as wide as I could make it, and started sewing from the center, turning the coiled rope as I went.
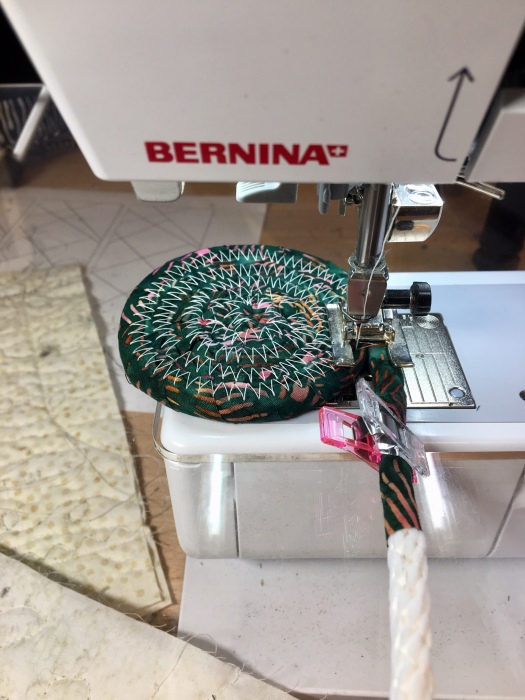
Once I got the very center stitched into place, I continued to wrap fabric around the rope, and zig zag it onto the coiled piece.
I had set my zig zag stitch length too short at the beginning, and I was not happy with how much the thread showed. So after a few rows, I lengthened the stitch, and it looked much better as the thread was hidden a little more on the dark fabrics. Once I got into the colorful fabrics, the thread blended in really well.

You can clearly see in this photo where I lengthened the stitch. The center is really showing all the stitches. It looked much better once I lengthened the stitch.
After the flat piece got to the size I wanted, I started to tip the flat piece as I sewed to start making the sides go up.

The hardest part about making this was wrapping the fabric around the rope and joining the fabric pieces together. It took me a few rounds to get it figured out, but once I got it, it was smooth sailing.
I wanted the wraps to be as smooth as possible, and I wanted to minimize overlap so that I could use less fabric. I used my fabric clips liberally… using one on top of each fabric join so that i would hold in place until I got it stitched into place. I would wrap several pieces of fabric around the rope, with each join clipped, so that I could sew more once I sat down at the machine. The sewing went really fast. The wrapping is what took time, so I wanted to be as efficient as possible and take fewer breaks to wrap.
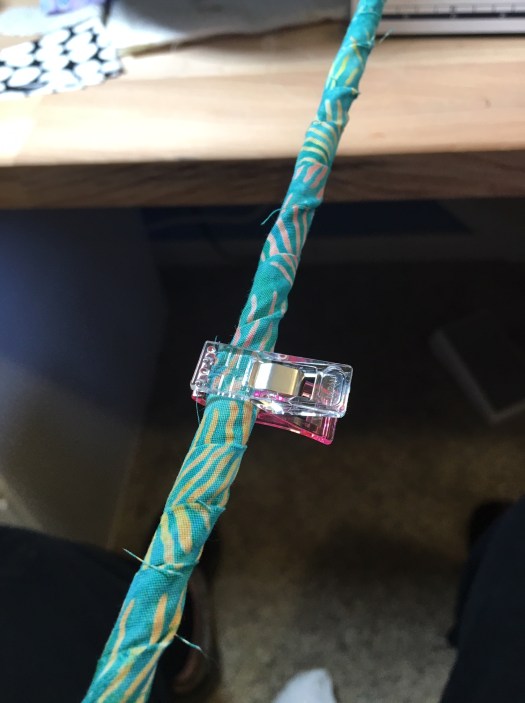
The clip above is holding the piece secure where the second piece of fabric was wrapped around the end of the previous piece.
Then I just continued to wrap and sew, wrap and sew, maintaining the slant of the side of the bowl.
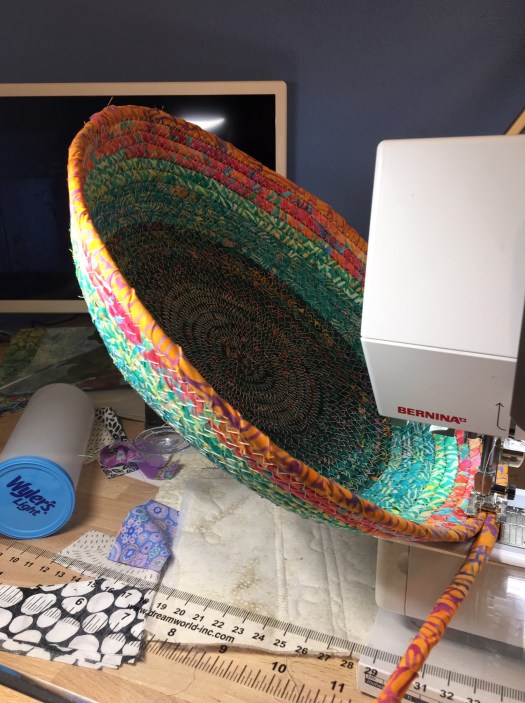


Until it was all done.
I’m really happy with how this turned out! I love all the bright colors, and I like the shape… even though it wasn’t quite what I was going for. It will take some time to figure out how to manage the slant!
But I will definitely make more of these!


