
I had a goal to finish this quilt top on my long New Years weekend and I did it. I came in just under the wire and sewed the final seam and pressed this quilt top at 10 pm tonight.

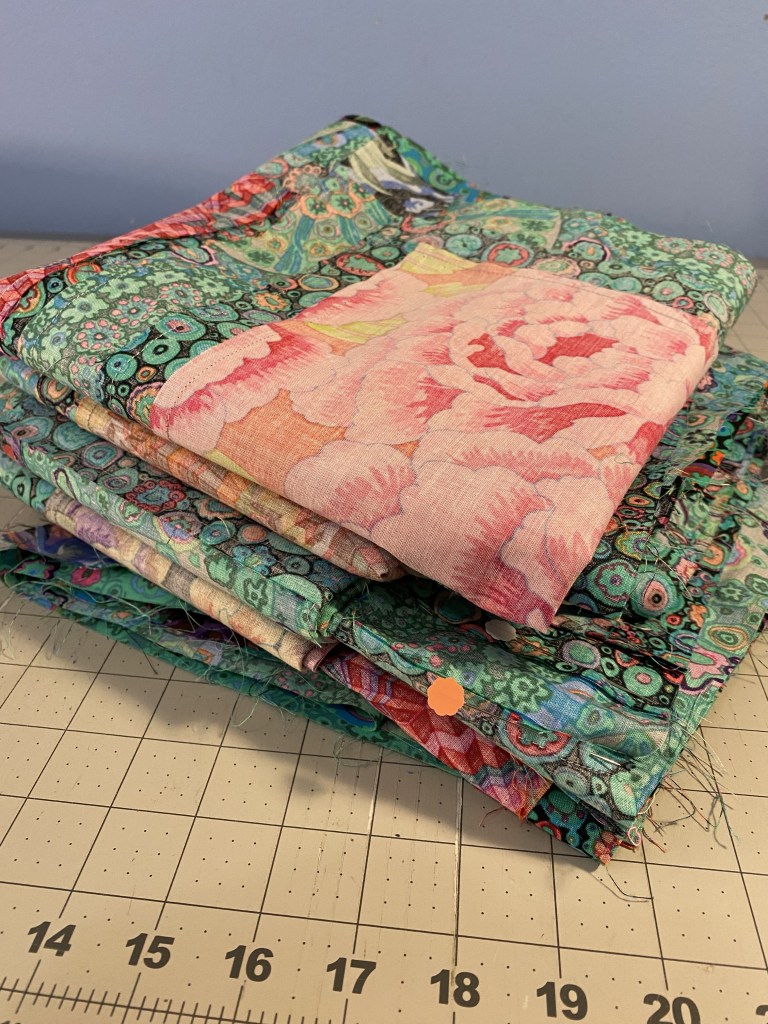
I realized yesterday that I had made a mistake when sewing the first four rows of this top together last week. I had added the green sashing to the last block in each row, but had neglected to add the cornerstones to that piece of sashing. Here’s what the sashing on those first four rows looked like (bottom of the photo).
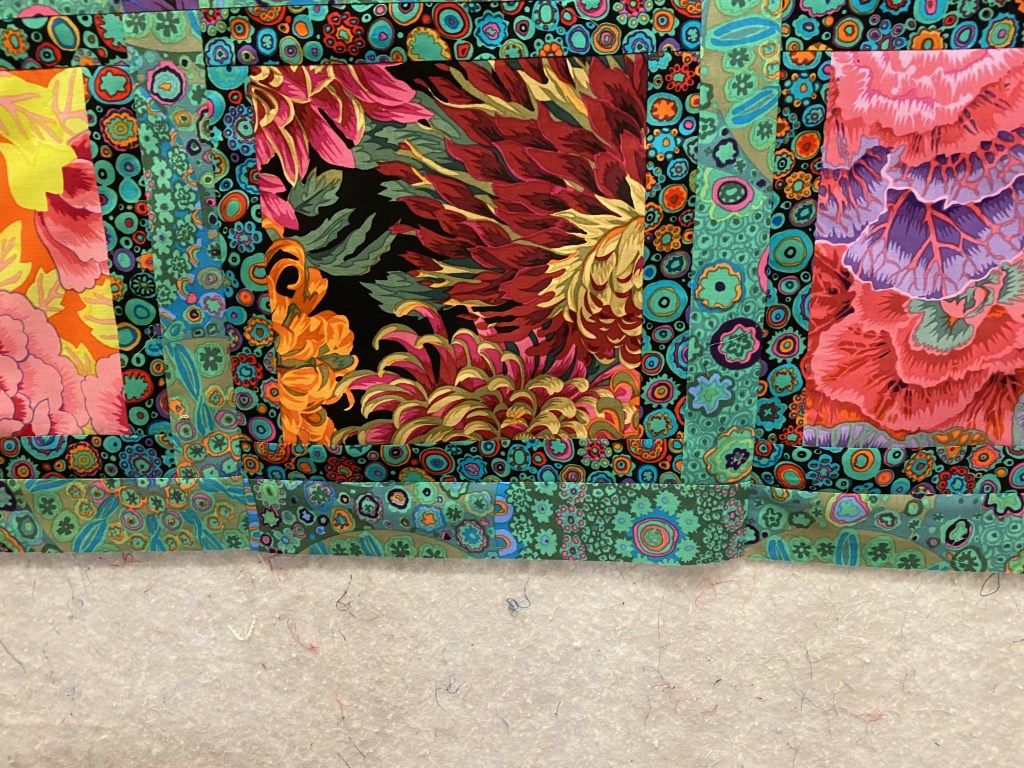
Here’s what they’re supposed to look like.
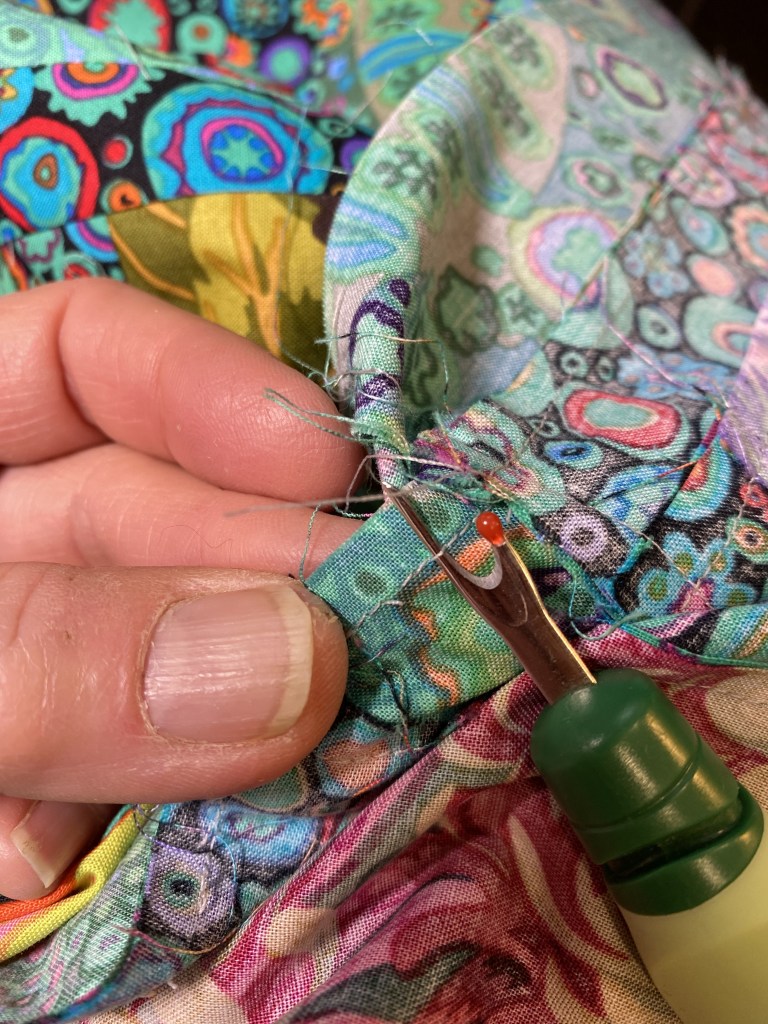
So before I dug in to finish sewing these blocks together today I had to rip out that sashing and add sashing with the cornerstones. Not my favorite thing to do.
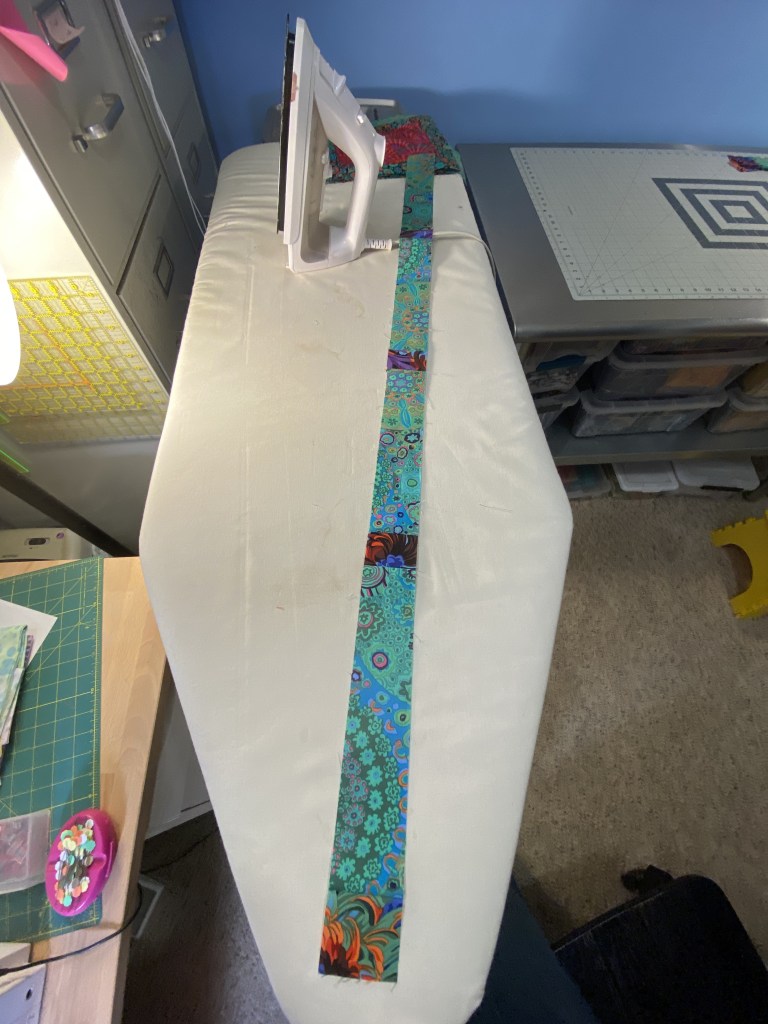
After ripping off the wrong sashing I made one long strip with cornerstones to apply to those four rows all at one time.
Once I had that sashing fixed, I was ready to crack on and finish sewing the top together… except… I had to make more sashing and cornerstone pieces… I didn’t have enough to finish the last row of the top.
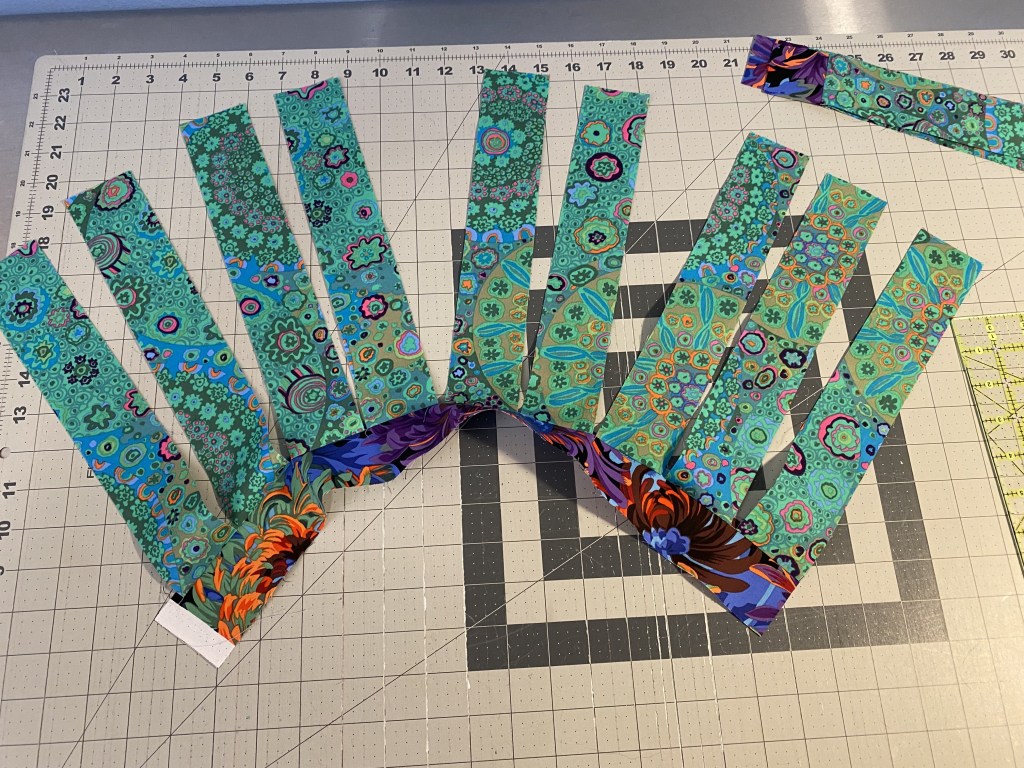
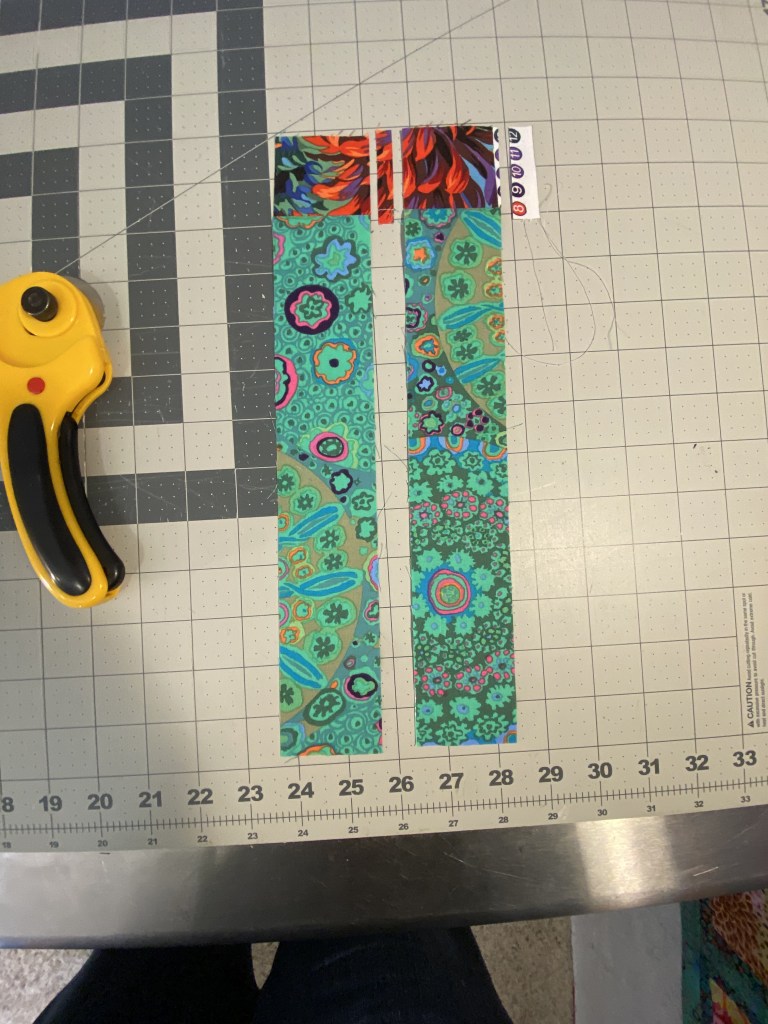
I sewed sashing pieces to a strip of the cornerstone fabric, then pressed and trimmed.
It’s pretty efficient to do it this way.
For reference, here’s a blog post from the past describing how I add sashing and cornerstones to my blocks. I do it block by block, rather than doing my sashing in long strips.
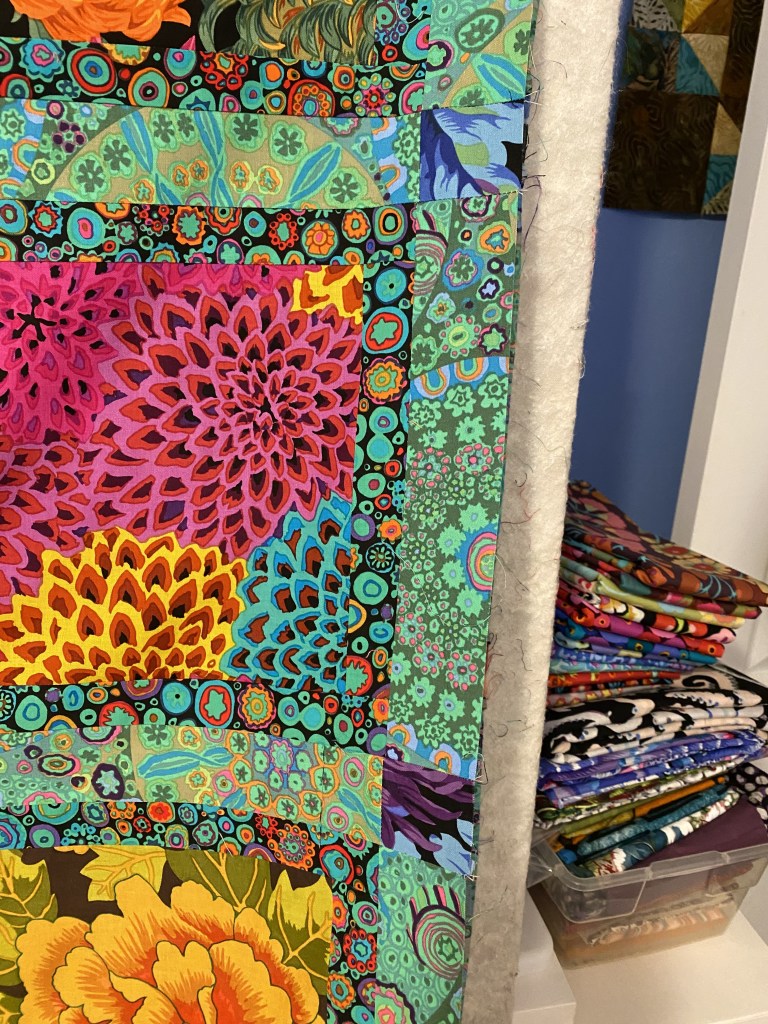
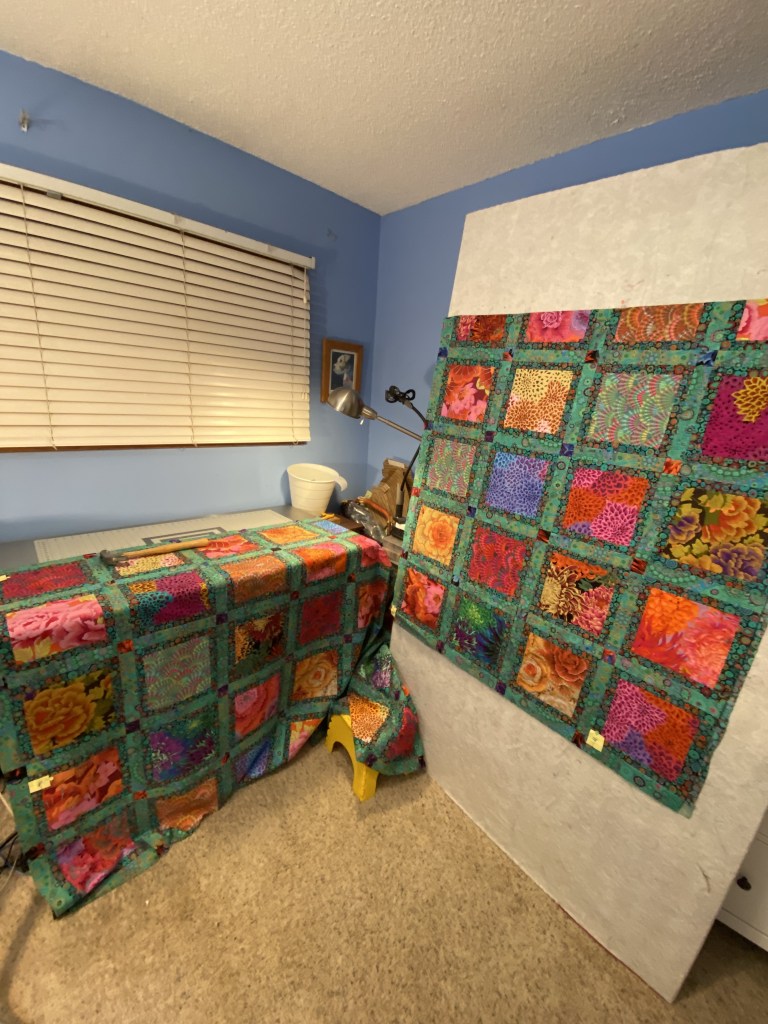
When I started sewing this afternoon I had three rows of blocks to sew together, plus a section of four sewn rows and a section of two sewn rows. So I ended up with a third section of three rows. That’s a total of nine rows. This quilt is nine blocks by 9 blocks. This quilt is so big I folded each section and pinned it to my portable design wall.
This photo shows the final two sections as I prepared to pin them for sewing… five rows on the cutting table and four rows on the design wall.
You can see that I used a hammer to keep that large piece on the cutting table while I prepared to pin.
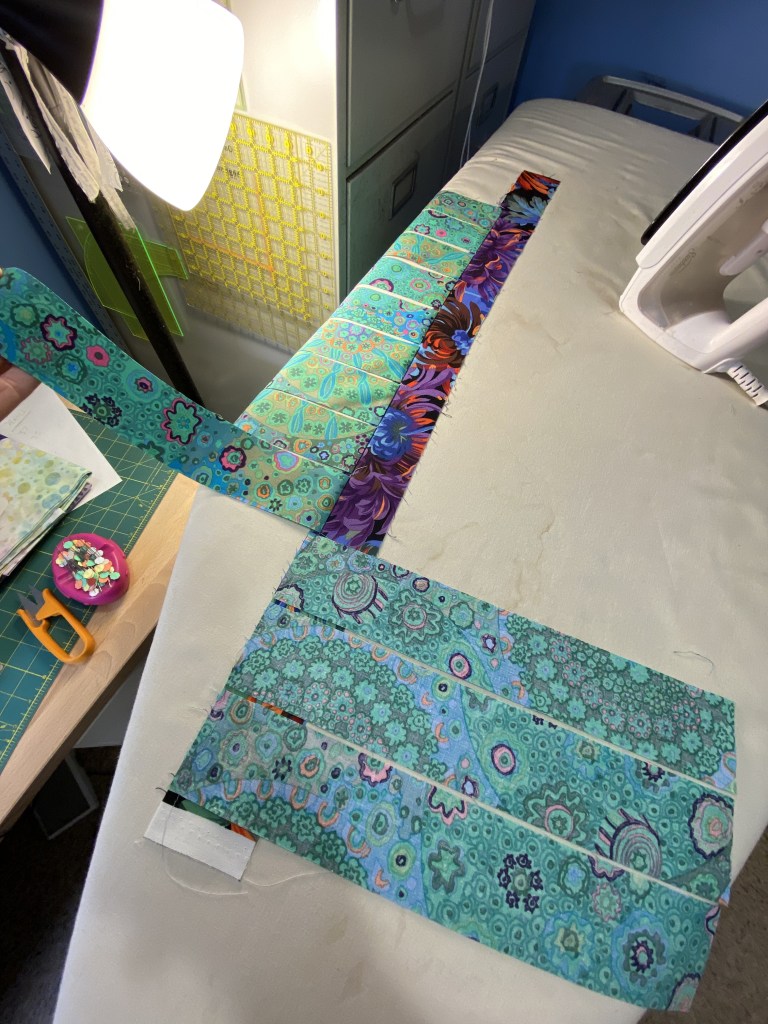
I pinned the two sections together, rolled It all up like a burrito, then accordion folded it in preparation to feed it through the machine to sew the final seam.
Then I tossed that bad boy on the ironing board for the final pressing.
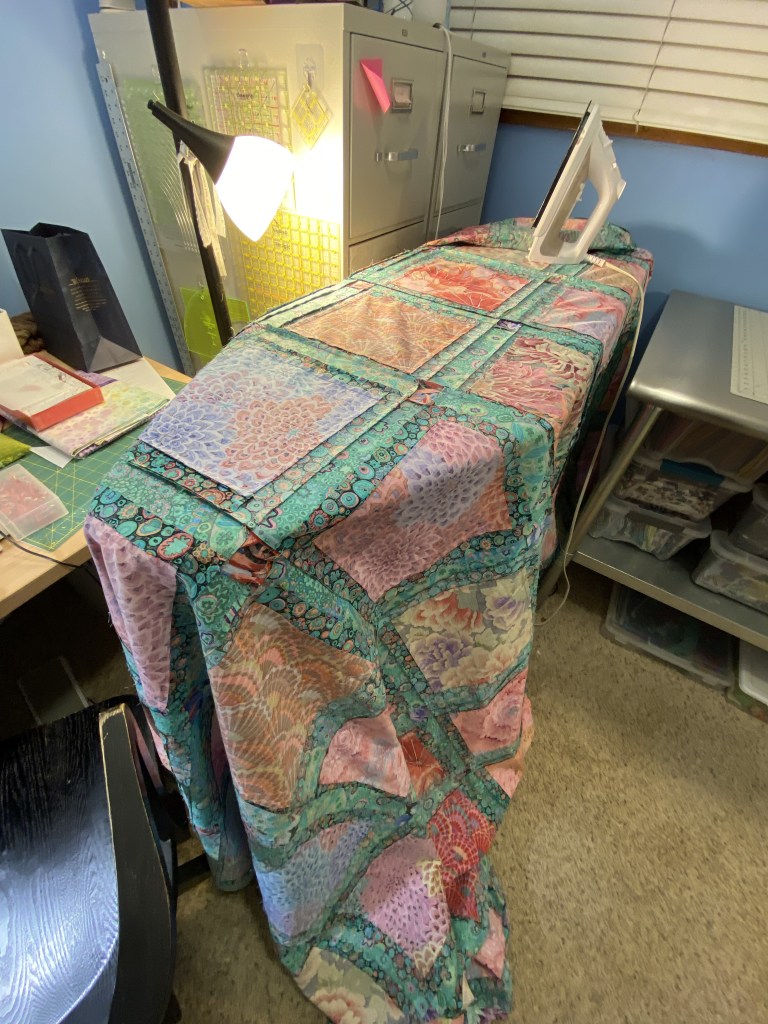
This is not my favorite part of making a quilt top. I really hate wresting with those big pieces of fabric. I’ve developed some things that make it easier for me, but it’s still a hassle.
I was thinking I would add a border to this quilt top using the black shaggy fabric that I used for the cornerstones.

I had thought that I’d need a border to make this quilt top big enough for my bed. But it measures about 98 x 98 inches without the border. The quilt that’s on my bed right now is about 91 inches square. Although I think it would have looked cool with that border, I’m relieved that I don’t have to do any more sewing on that large top!
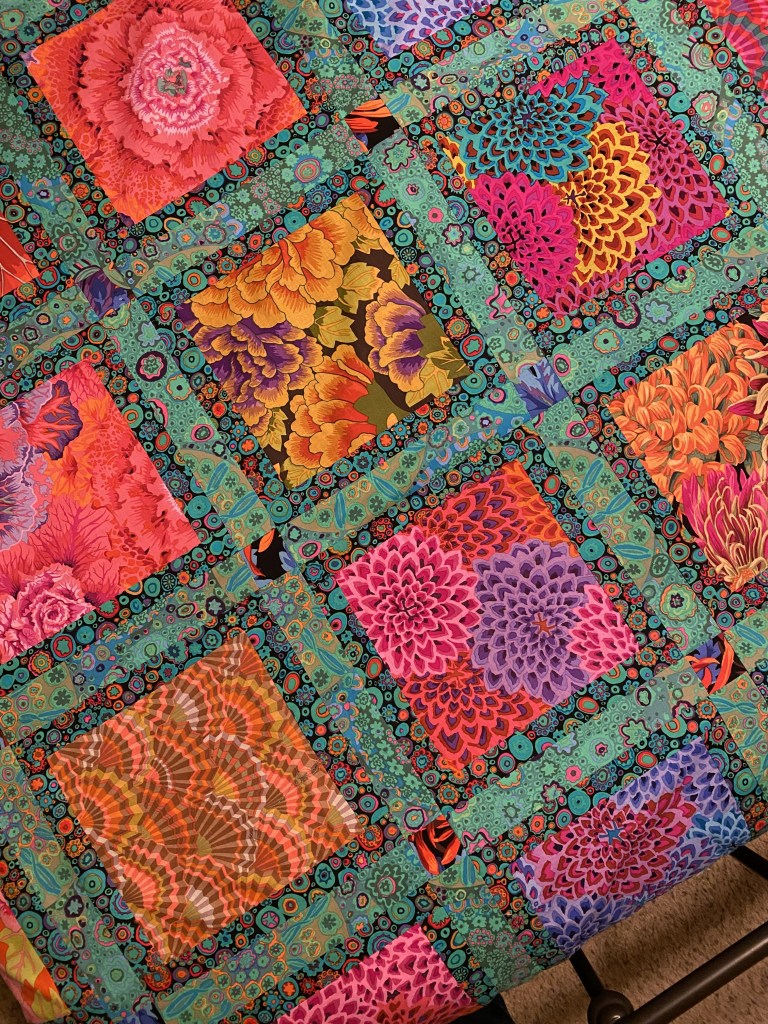
Here’s a little big of eye candy. I just love a freshly pressed quilt top.

Don’t look too closely at my corners.

It’s just so yummy!
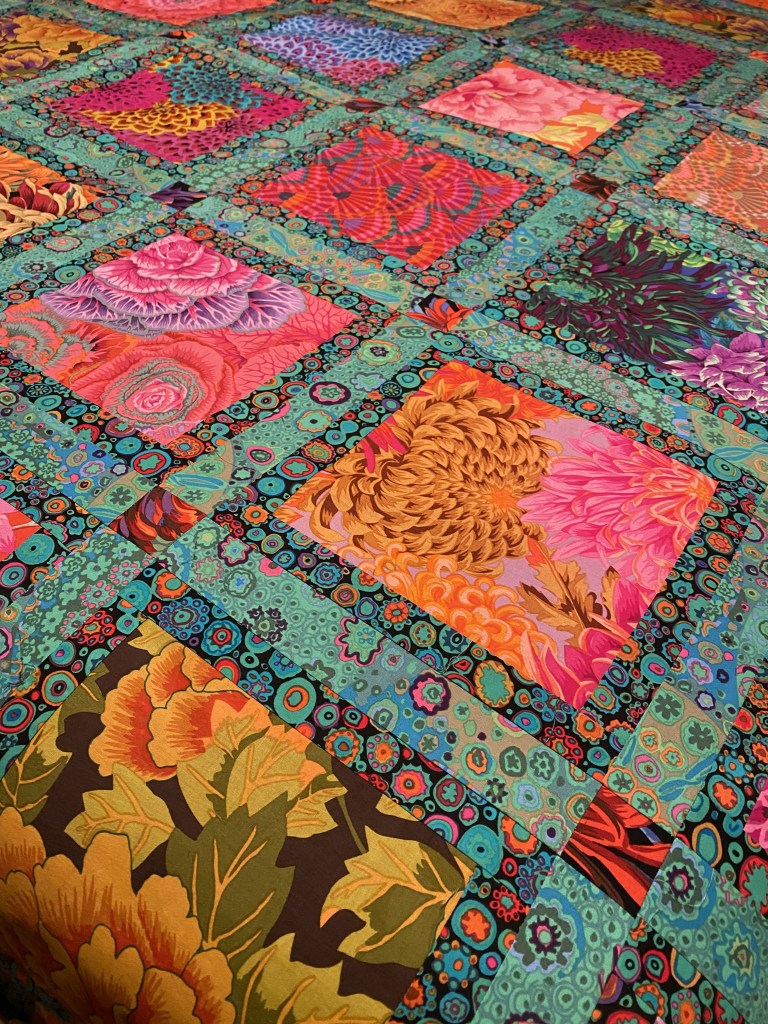
This next one shows how all the cornerstones are different… which I love!
I had a pretty productive final day of my long weekend. After breakfast this morning I made a batch of chicken tortilla soup in the crock pot and set it to high. Then I headed out to run some errands. I stopped by the post office to mail the teal and pink bag I finished yesterday. Then I stopped and bought some dog food. Then I ran out to the car dealership and had them put in some new headlights in my car.
Once I got home I took the dogs for a nice 4.5 mile walk. It was cloudy but dry. Then I puttered around the house a little before I had a nice dinner of home made soup.

I’ve been making this soup for a few years. It’s really tasty and spicy and warm. When I first started making it I used a recipe that a friend gave me that wasn’t fantastic… it required a lot of doctoring. So I make this now without a recipe. But for me, that’s the best way to make any kind of soup! There are a lot of recipes for chicken tortilla soup on the internet that are better than the recipe I started with.
I put four containers in the freezer and kept a container in the fridge for meals this week.
Rico is not happy that I have to go back to work tomorrow.

He felt a little better when I told him it’s only a three-day week.

Loving the quilt and handy tips you kindly give out.
New to your blog and really enjoy it, Kaffe and Border Collies…what’s not to like!
LikeLike
Loving that ‘black shaggy fabric’!! What’s it called, please? Must get some. KFC of course 😉
And the soup looks yummy too x
LikeLiked by 1 person
the name of the fabric is Shaggy. the color way is black. It’s a Philip Jacobs design. It’s a Kaffe Fassett Collective fabric.
Anne
LikeLike
I always hated tearing stitches out, too, until I discovered the Wahl trimmer at a quilt show. This little tool makes the job so much easier. I really enjoy reading your column and seeing all the beautiful pictures!
LikeLiked by 1 person
Luckily I don’t have to rip seams very often! Knock on wood!
thanks for reading!
Anne
LikeLike
The quilt top turned out beautifully! I agree that the cornerstone fabric colors POP! This one is one of my favorites!
LikeLiked by 1 person
Thanks! the pattern has you make cornerstones out of the same green fabric. then use the cornerstones to keep it all lined up. I thought that if I was going to go through the effort of making cornerstones, I wanted them to show!
Anne
LikeLike
This is so gorgeous 🥰!!! I love how the design lets each large print shine but not look blocky with the cornerstone sashing. I’m definitely going to add my next sashing that way, to each block. Those long strips get too fiddly and easily not lined up right. That black shaggy fabric looks like chrysanthemums to me❤️! Your soup looks so yummy! Sweet picture of Rico ❤️❤️❤️ Yay to a short workweek 🥰
LikeLiked by 1 person
this really is a good pattern to let those large prints shine! And yes… this is a great way to do sashing and cornerstones. I hate those long strips!
Anne
LikeLike
Love your quilt top I wish I had made mine with the cornerstones a different fabric. How did you make your design wall.
LikeLiked by 1 person
check out this blog post to see how I made that smaller design wall:https://agilejack1.com/2020/10/14/building-to-accommodate-my-next-make/
Anne
LikeLike
Wow that’s a lit of gorgeousness. You were thinking originally of adding “shaggy” border but instead maybe the binding? Or did you have something else in mind? Does the cheese grater hold earrings?
LikeLiked by 1 person
the quilt is too big to add borders. If I add borders it will be too big for the bed. So I’ll use the black shaggy for the binding, most likely. Maybe use some on the backing.
The cheese grater does hold earrings. I saw one years ago that was painted and had wooden beads for feet. I bought the cheese grater at a thrift store but never got around to making it pretty!
Anne
LikeLike
Reading this as the remediation team works to repair the walls of our condo from water damage sustained over the Christmas holidays. Caused by the malfeasance of the elderly gentleman in the condo above us, at his expense, we will be getting new paint and carpet in four rooms. Hence my question for you.
I noticed the file cabinets, near the ironing board, in one of these pictures of that glorious quilt. (Side note: My favorite of yours, to date.) What are they resting on to keep them from leaving rust on the carpet? Rust may be a problem only when the carpet is over padding on concrete, but we’ve encountered this situation in two (usually very dry) places. I’m hoping to avoid it for the third time.
Fortunately the damage and resulting mess of installing new drywall is in the other half of our condo away from my sewing/Guest Suite. I can’t even see my sewing machine as it’s where we’re sleeping and our closet at the moment but reading your news every morning gives me hope for returning back to normal and perhaps digging out my Kaffe fabric for a new quilt to go with the new carpet, in that bedroom with the (off the carpet) old file cabinets!
LikeLiked by 1 person
I really love this quilt top! It takes a brave soul to tackle using all those colours so freely. Heaps of praise to you. Linda Dubeau
LikeLiked by 1 person
I wish I could take credit for all this. It was a kit that was gifted to me. So all the colors were put together for me. But I’m pretty comfy with it all!
Anne
LikeLike
I’ve never had an issue with metal leaving rust on the carpet. I wonder if it’s because it’s not terribly humid here. Is that more of a problem in really humid areas?
So sorry about your water issues! What a terrible thing to have happen during the holidays. I’m glad you’re getting it fixed at someone else’s expense!
Anne
LikeLike
The rust might be from moisture that migrates up from the concrete through the padding and the rug as rust has accumulated on the rugs under the metal files both in Upstate NY and now in Maryland… where the AC comes on by early May and runs through September mostly because of the humidity.
I was hoping you had found some great, inexpensive solution. I’m back to looking for a large sheet of heavy-duty plastic. My filing cabinets act to hold up the ancient oak kitchen table top that has served for 40+ years as my desk!
LikeLiked by 1 person
Would it work to put a few layers of some kind of sealant on the bottom of your file cabinets?
LikeLiked by 1 person
OMG! I never thought of assembling cornerstones in this way. Brilliant!
LikeLiked by 1 person
It’s a great method. Definitely give it a try next time!
Anne
LikeLike
I love the quilt. So beautiful. Is there a chance you can share your soup recipe?
Thanks
LikeLiked by 1 person
Well, my soup recipe isn’t very good So I would not want to recommend it.I’ve changed nearly everything about it! It was bland and boring. Like I said in the post, there are a lot of recipes for this soup online. You should do a search and find one that sounds good to you.
Anne
LikeLike
I think that’s a great way to make cornerstones-too late for my recent project but I’ll try it next time. And a perfect pattern for gorgeous Kaffes!
LikeLiked by 1 person
You should try this method for cornerstones and sashing. I haven’t done it with long strips for quite some time.
Anne
LikeLike
J aime vous lire et découvrir ce que vous réaliser
Vous faites des choses magnifiques
LikeLiked by 1 person
Thank you so much for reading!
Anne
LikeLike
Great cornerstone technique!
Poor Rico – so boorringgg when his human works. 😀 His expression matches one of our dogs’ when we sit working on a puzzle instead of playing with him.
LikeLiked by 1 person
Rico is very sensitive. He feels everything deeply.
Anne
LikeLike
That’s the way I do sashing with cornerstones, too. So much easier than sewing long thin strips and matching the intersections. Great way to use large scale prints, btw.
LikeLiked by 1 person
I love this method for doing sashing. Any way I can avoid seeing long strips is a good method!
Anne
LikeLike
Top looks beautiful! Don’t you just hate when that happens. Thankfully it was before it went to the quilters. I have mis-turned blocks/rows in the rush to get a quilt to my LAQ only to have it glaring at me after it is all done. Great catch to find it before it was too late. 😊
LikeLiked by 1 person
I debated about fixing the cornerstones. I knew no one else would ever notice it, but I knew it would bother me. So I had to fix it!
Anne
LikeLike
They really make a difference besides making it easier to do sashing. As beginner I hated cornerstones, but now see the advantages in design and ease of assembly.
LikeLiked by 1 person
It’s amazing how many ways we can make construction easier and more efficient. I’m all about that stuff!
Anne
LikeLike
Absolutely stunning quilt. Another wonderful creation! Feast for the eyes!! Just love it.
LikeLiked by 1 person
thanks! I’m pretty happy with how it turned out.
Anne
LikeLike
Do you think anyone besides you would have noticed the different sashing? LOL!
LikeLike
Probably not. But it would have made me crazy. If I had completed the quilt and not realized it until I was done, it probably wouldn’t bother me. But if I knew I had made a mistake and didn’t fix it when I had the chance, it would bother me.
Amme
LikeLike
I’m late to the party on this one, but HOLY SMOKES THAT’S SO BEAUTIFUL!
I love Kaffe Fassett’s designs, & buy those fabrics to wear
LikeLiked by 1 person
thanks! that quilt has been made by a LOT of people. But I just love it!
Anne
LikeLike