I hit my sewing room after I did my blog post late last night and started cutting my Comb Stripe fabric for the corners for my new Brandon Mably blocks. I got about 3/4 of what I need for 80 blocks cut and then called it quits to get ready for bed. I cut the rest of the 80 squares I need during my lunch break today.

I had planned to finish sewing my green quilt top together tonight and then get the edges trimmed. But I convinced myself that I would certainly do it tomorrow night if I allowed myself to have some fun with these Brandon Mably blocks tonight. I felt confident I could trust myself this time so I felt good with this negotiation with myself. I told myself that if I worked on the Brandon blocks tonight, I couldn’t put them up on the design wall until my green quilt top is done.
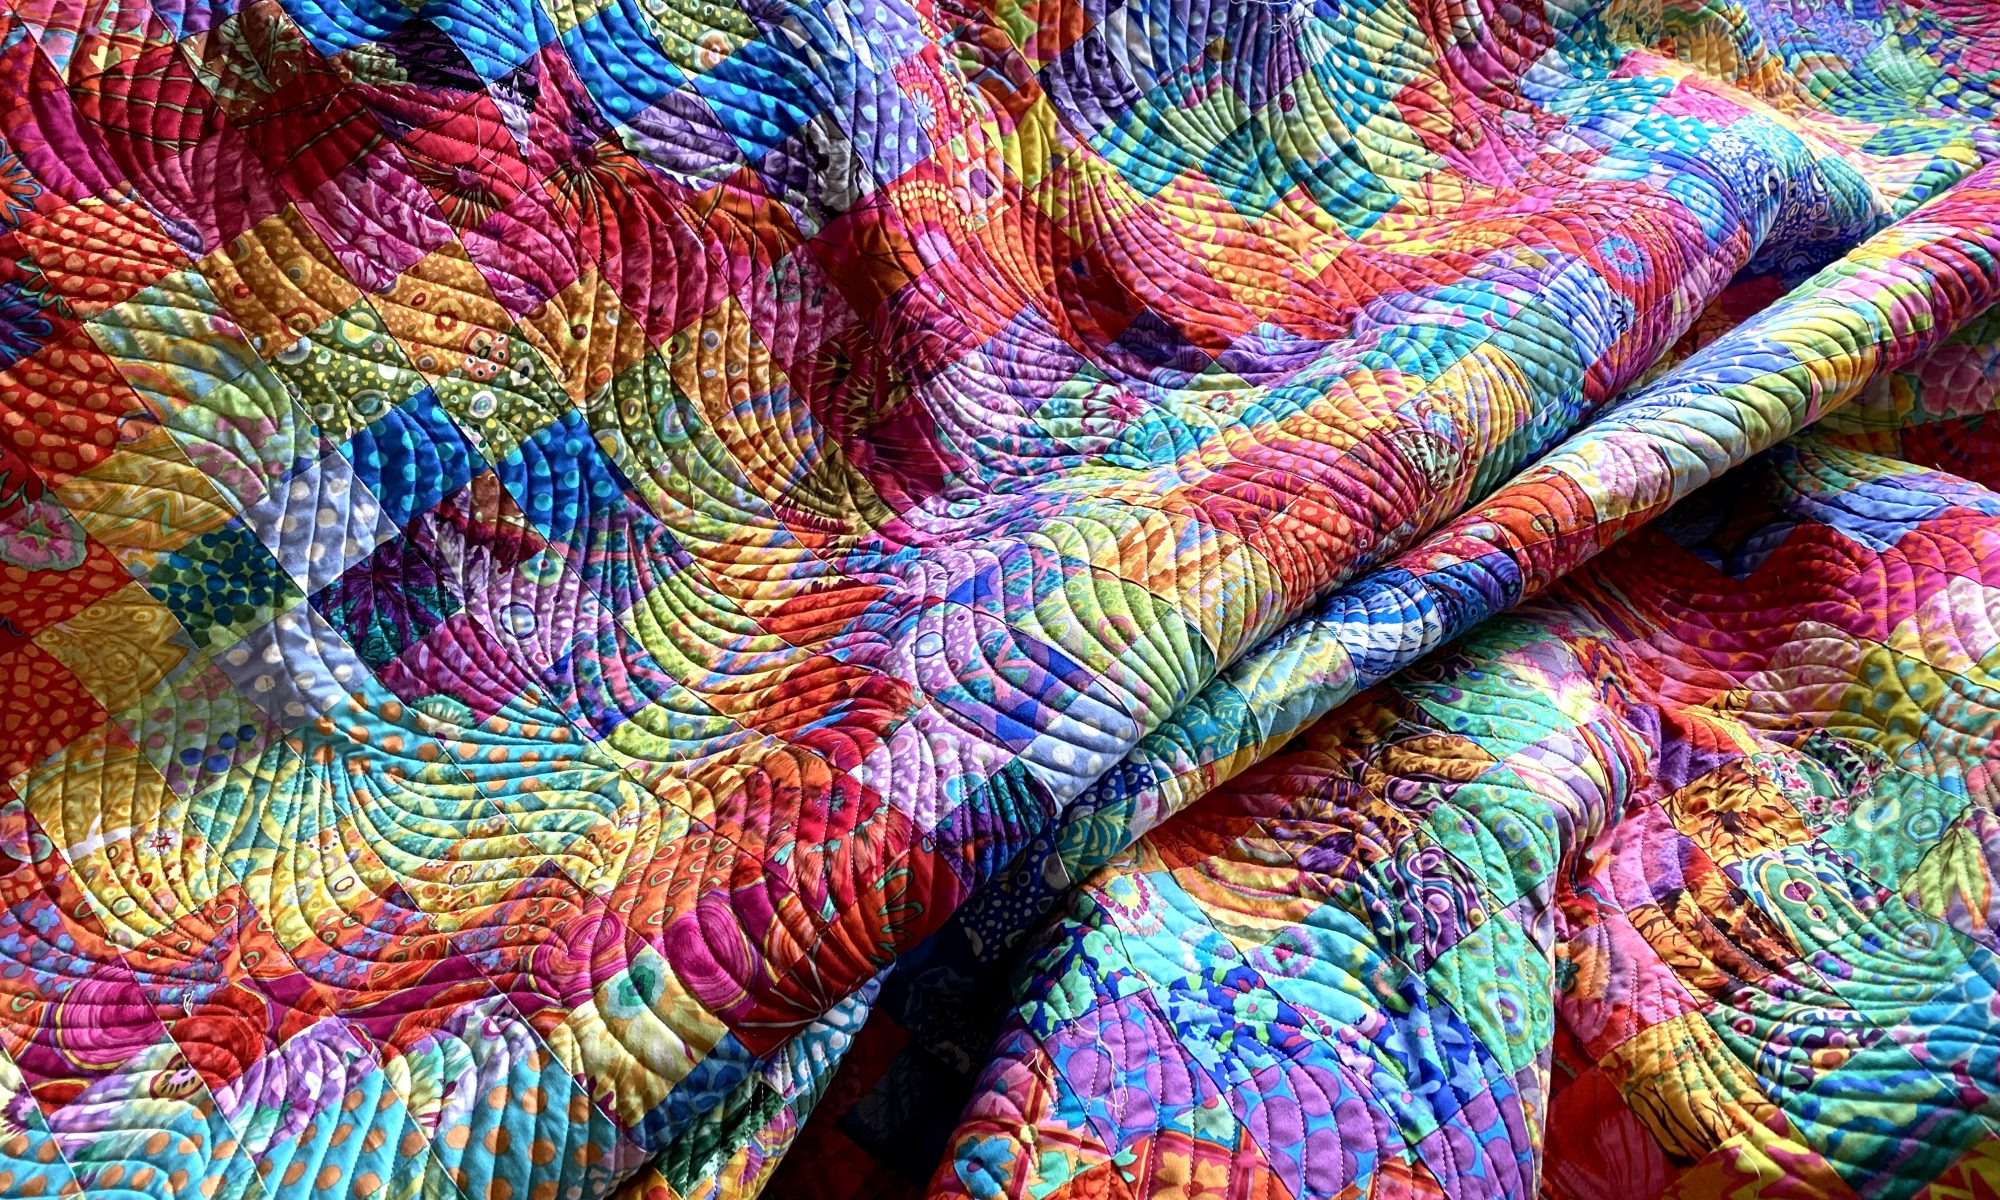
So I started prepping the pieces to add the triangles to the pieces I sewed last night. First I had to cut all the striped squares into triangles. In order to maintain the swirls where the blocks meet it’s important to cut all these pieces the same so that the stripes are oriented the same in all the triangles.

Here’s the 160 triangles ready to go.

I decided to take a few minutes and press creases to make the centers of the center strips and the triangles to make putting them together quick and easy. I folded the center pieces in half with wrong sides together then pressed a 1/2 inch crease on each side. Here’s the center crease on one side of the sharks teeth sashing.

Then I folded each triangle with right sides of the fabric together and pressed a 1/2 inch crease in the center of the long side.


Pressing this way makes the pieces nest with the creases marking the center.
Here’s the center strips with the centers pressed and all ready for assembly.

It makes aligning and pinning them so fast and accurate. Here’s the view from the top… You can see how those two pieces of fabric almost align them selves.

… and a view from the side.

I pinned triangles to centers until I ran out of pins, then I sat down and started chain piecing.

I got these 15 blocks all pressed and ready to square up.

You might notice that I was careful to make sure all the sharks teeth are pointing away from the colorful center fabric. The details are important to me!

Those two fabrics on the top row are out of print Brandon fabrics from my stash. I think this is a good way to use up a little of that precious material.
I finished this block assembly up earlier than I thought I would so I decided to get some work done on my green quilt. And I’m glad I did! I sewed one of the diagonal seams remaining so that the quilt top is basically in two equal pieces.
Then I put all the pressed pieces for the Brandon quilt on a ruler and moved it off my cutting table to make rom for pinning and trimming.

Then I got organized on my cutting table and started trimming.

I wanted to trim all I could with the quilt in two pieces because I thought it would be a little easier to manipulate. I didn’t cut all the way to the center diagonal line because I wanted to trim those sections when the two pieces are sewn together.

But I did trim the two corners that are all assembled.

So all I have left to do on this is to sew that final diagonal seam and trim the few inches that haven’t been trimmed yet. Then it will be ready for the borders to be added. I have to be gentle with this now because all those exposed edges are on the bias.

It rained a good portion of the day today so we didn’t get our daily walk in until around 5:00. But it was nice while we walked and we got a good three miles in. That makes two good boys happy… and me too!

The Oregon grape blooms along the trail are so spectacular right now and their scent is in the air.

I’m playing pickleball early in the morning before work. I’m looking forward to it!
Two more work days then a nice long weekend!
do the different angles of stripes and sharks teeth make your eye go funny…I find even ironing a fine striped shirt after a few minutes staring at it I’m dizzy. I get a 3D effect of the lines jumping up at me. Maybe it’s my ‘old’ eyes. I have to keep looking away. Can’t wait to see all those beautiful blocks put together ❤️
It all does seem to be vibrating as I work with it! Sensation you’re seeing is called moray. You never want to wear a stripe like that if you’re going to be on TV because it will move and jump and do all kinds of odd things on camera.
Anne
it’s so exciting to see the Brandon quilt coming together. But I’m also anxious to see the black and white and green one get it’s borders. borders are going to change it dramatically. I like how you extended the black and white on the edges. you’ve got a lot of wiggle room for sewing on the borders. Normally I would have sewn another black and white fabric border to “float” the top inside the outer borders. Do you find it’s tough to keep from stretching the edges? Do you use a ton of spray starch to stabilize it? Thoughts yet on what you’re using for binding on either of these? Can’t wait to see the lambing photos! Have fun!
Borders really will change that green quilt. I don’t often do borders but I think this quilt needs them.
All of those cut edges on the green quilt are bias edges. they will be fine once I get the borders sewn on, and until then I’m just being extra careful with it so I don’t stretch it out of shape. that’s why I waited until the very end to trim the edges.
For binding I will save some of the black and white stripe. It could be years before this gets quilted. My plan was to told up the black and white fabric with the quilt top so I don’t forget and use it on something else.
Anne
I really do like the movement that the sharks teeth give the fabrics. I do look forward to seeing the progress. I can’t wait to try this with some of the floral scraps I have.
thank you for sharing!
Linda
this quilt would be a really great way to use up scraps!!!
Anne
Love all your pictures, they really show details. I’m excited to see the green quilt finished, it’s just a fantastic quilt. This new quilt had me ‘gobsmacked’ when I saw it first. (Do I watch too much English TV?) I sure wish we had all your smelly bushes here in the St Louis area. Our lilacs haven’t started yet but I’m waiting. Spring is here with all the rain and things are starting to bloom. Glad your boys are enjoying their walks, they are so darn cute.
“Gobsmacked” is a great word! We should all use it more often!
It smells so amazing here!
Anne
Great tip about pressing creases for alignment. I will definitely do that when I make my swirly quilt. Got a shipment of some fabrics to get my mind working!
That pressing trick really saves a lot of time when pinning! It’s totally worth the extra step to me. And if I wasn’t pressing, I’d be finger pressing!
Enjoy your new fabrics! you should start cutting!
Anne
There is a lot of thought put into the Brandon quilt. Both of your quilts in progress are winners!
Thanks Wanda! I love the details. And who knows… making sure those little teeth are all pointing the same direction might make something amazing happen!
Anne
Green quilt looks great. Can’t wait to see the next steps for the newest blocks. I have a stack of Kaffe fabric I’ve been holding on to for a while, not knowing what to do with it. You are giving me some good ideas. Thanks.
You need to cut that fabric !
Anne
WoW! I’ll take it! U R so smart. 🌟
Sometimes I’m not so sure!
Anne
Well, you knew we’d all be clamoring for a tutorial, so … LOL. It’s all looking good.
Once this is done I’ll do a post with the variations from my Blue Swirly tutorial.
Anne
I am sorry to ask so many questions: 🤪 How many yards of stripe fabric do I need to try this? (I’ve got the sharks teeth.) Woohoo 🎉 Hugs Anne! You-d-Best🥰
For a quilt that’s 80 blocks like mine, you’ll need two yards for the corner triangles. You might want to get just a little more so you can make a mistake or two!
Have fun with this! I’ve been enjoying making this quilt!
Anne
I really like the look that the white with a little black blocks are looking like they set off the green blocks really well. I’m not a green person, but I do like the combination you have there
Thanks! I love green and this is the first time I’ve made a green quilt. It’s fun to finally strike out on this idea.
Anne
Good grief but you have so much energy. I love seeing how you use the fabrics, You give me such great ideas with the KF and BM fabrics..afraid that I need to order more ..Yikes
Oh, you always need to order more fabric!!! There’s never enough!
Anne
I just subscribed to your blog and am loving it. Great inspiration. And such happy pups!
Donna
Thanks for reading!
Anne