Copy Right Anne Ibach 2021
I made the front and back for another KFC Frankenbag Saturday afternoon. So I thought I’d take pictures as I made it to show you how I go about putting together the pieces and assembling these panels. For your reference, here’s a link to my Frankenbag tutorial.
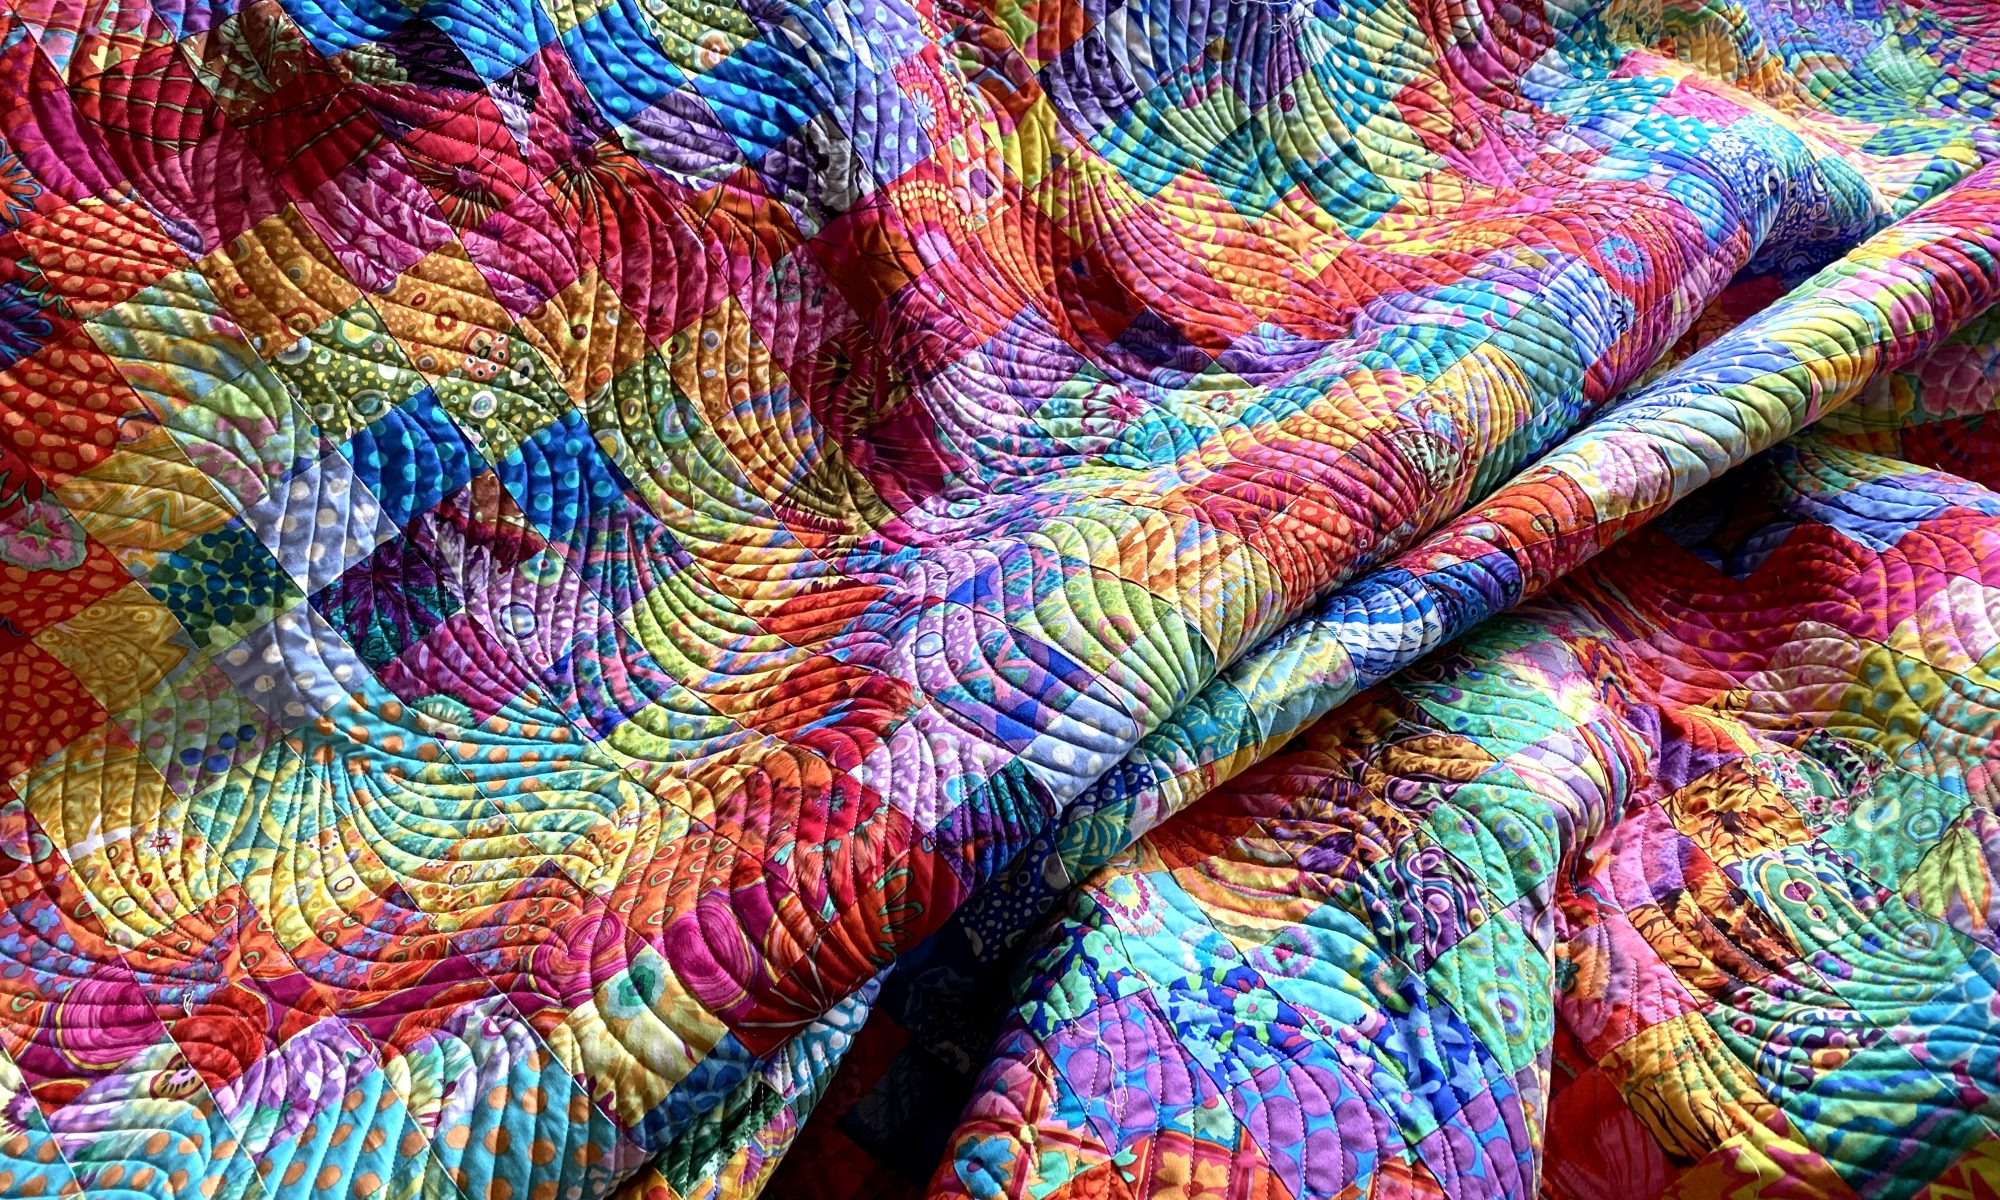
Here’s the final front and back that I’ll be showing you.

I taped off a 17×17 inch grid on my cutting table so it’s easier for you to see the size I want to make these panels. I don’t do this when I’m making my panels. Usually, I’m just using the measurements on my cutting table.

Here are the pieces I’ll use to make the front of this bag. There’s the larger flying geese block, the stacked block of strips on the right, and some crumb blocks at the bottom.

I think about putting these panels together a little bit like putting a puzzle together. Except that instead of finding a puzzle piece that has to fit the hole exactly, I MAKE a puzzle piece to fit that hole. If the puzzle piece is too big, I’ll cut some off. If it’s too small, I’ll add some fabric.
I assemble the top section of these panels first. The first thing I want to do is line up the pieces and get a general idea of how much space I’m going to need to fill to make it 17 inches wide. In this next photo you can see that I have about 4.5 inches of space that I need to fill. And remember that when you’re laying out these pieces you need to keep seam allowances in mind — you need to add extra width for the seam allowances. That’s an additional 1/2 inch of width for every vertical seam across the width. The more pieces you have horizontally, the more you’ll lose in seam allowances once it’s all sewn.

So I want to determine how I’m going to fill that 4.5 inches. I could add a crumb panel, or another block. But I like wide sashing on these pieces. So I start out by trying out different fabrics for the border on this larger block.

I’m pretending that I might actually use something here besides this Jumble. Haha. Nope. It will be Jumble! So I cut some two inch strips and sewed these borders onto that flying geese block. I like to use two inch strips because it makes a bold border, but it also gives me enough fabric that I can trim a little if I need to in order to make these pieces come out to 17 inches.

Before I get too far along I trim the big block so all the edges are straight.

Now I can figure out how I’m going to fill the space around that vertical stripped block on the right. I trimmed a little off that block so that I could use a wider border on it.

In the next photo, I’ve overlapped the two existing blocks to mimic my seam allowance. You can see that I have about 3 inches to fill to make these two blocks 17 inches wide.

So I selected some red Guinea Flower to border this block, cut it into two inch strips and sewed it to all four sides of this block.

When I got to this point I realized that I has going to be less than 17 inches when I sewed that vertical seam between these two blocks because I hadn’t allowed enough for the seam allowance. No worry. Just select a fabric to sew between those two bordered blocks to get you the width you need.

I love that red Strata fabric! It’s fun in a narrow strip. I sewed the Strata strip to the block on the right and checked my width again. See how I’ve overlapped the two blocks to mimic the seam allowance?

So it looks like I will have plenty of width when I sew these two blocks together. In fact… too much. So I trimmed a little off of that strata strip to account for the excess.

And when I sewed it all together I only had about a quarter inch to trim off of the right side. That’s pretty good.

I’m going to leave that quarter inch and move onto finishing the bottom of this panel. It’s nice to have a little extra that you can trim off at the end of the assembly. You don’t have to have it all perfect at this stage.
So next, I selected some of the crumb blocks that I made previously. I chose blocks that are similar in height, and selected enough to add up to more than 17 inches wide once they are trimmed and sewn together. At this point I’m just eye balling this. And it looks like I’ll have plenty of width with these four crumb blocks.

So next, I trim the edges of the blocks where they’re going to be sewn together so I’ll have a nice straight seam.

I do this on each seam and sew the crumb blocks into a strip, keeping the top edge of the blocks as even as possible.

Then I trim off the edge that will be sewn to the top part of this panel.

And when it’s lined up, I can see that it’s not tall enough to get me to 17 inches in height. So I needed to add in some more fabric. I could add more crumb blocks, but I decided to add a strip of fabric. So I pulled out some fabric to see what I liked in that space.
First I tried Crease.

Then I tried this little zebra print I have in my stash.

Then I tried Brandon Mably’s Vibrations. This is the one I decided to go with.

So I cut a 2 inch strip and sewed it in place.

And now that those two seams are sewn, you can see that I have a little more than 17 inches in height. So I trimmed off the little bit of excess at the bottom. And that means that this front panel is now 17 inches square. Yay!

Now let’s move onto the back panel. I’ve been making the back panel less involved than the front panel. So these bags definitely have a front and a back. You could certainly do something more involved for both sides if that floats your boat.
So, I’m using mostly crumb blocks on the back. I start by lining up some of my pre-made crumb blocks across the width of the space I taped off.
I had a choice to make on this first row. I could either add some crumb pieces to fill in that space, or I could make a little block to fill that space. I decided to use black and white KFC fabrics to fill that space.
When I eye balled these two strips to fill that space, I didn’t feel positive that I had enough width once I trimmed the blocks and sewed the seams.

So I added another strip of black and white fabric to make that piece wider and it looks like we’re good to go now.

So I sewed it all together and It’s plenty wide now.

So I trimmed the bottom and top off straight and moved on to adding fabric to the bottom of this piece. I don’t trim the sides until I have this whole 17×17 piece put together.

I continued adding strips of fabric and crumb blocks, making those puzzle pieces and putting them in place… trying out different things as I went along.

Trying out different combos of fabric….

… and different arrangements.

And when I liked the arrangement, I sewed all the elements together and trimmed it to 17 inches square.

And that’s how I make my Frankenbag panels. With whatever blocks I decide to use in a panel, it’s all just a matter of making the pieces of the puzzle fit together.
Give it a try! This is really the fun part for me. Leave me a comment if you have any questions.


