After our walk this evening I took all the blocks from my current quilt down off the design wall and divided them into piles based on color, or approximate color. Then I basically shuffled the piles to get one big pile of blocks with colors and values somewhat evenly distributed throughout the stack.

Then I started putting the blocks up on the design wall in the order they appeared in the stack. When I saw adjacent blocks were too similar, I made adjustments as I went along.

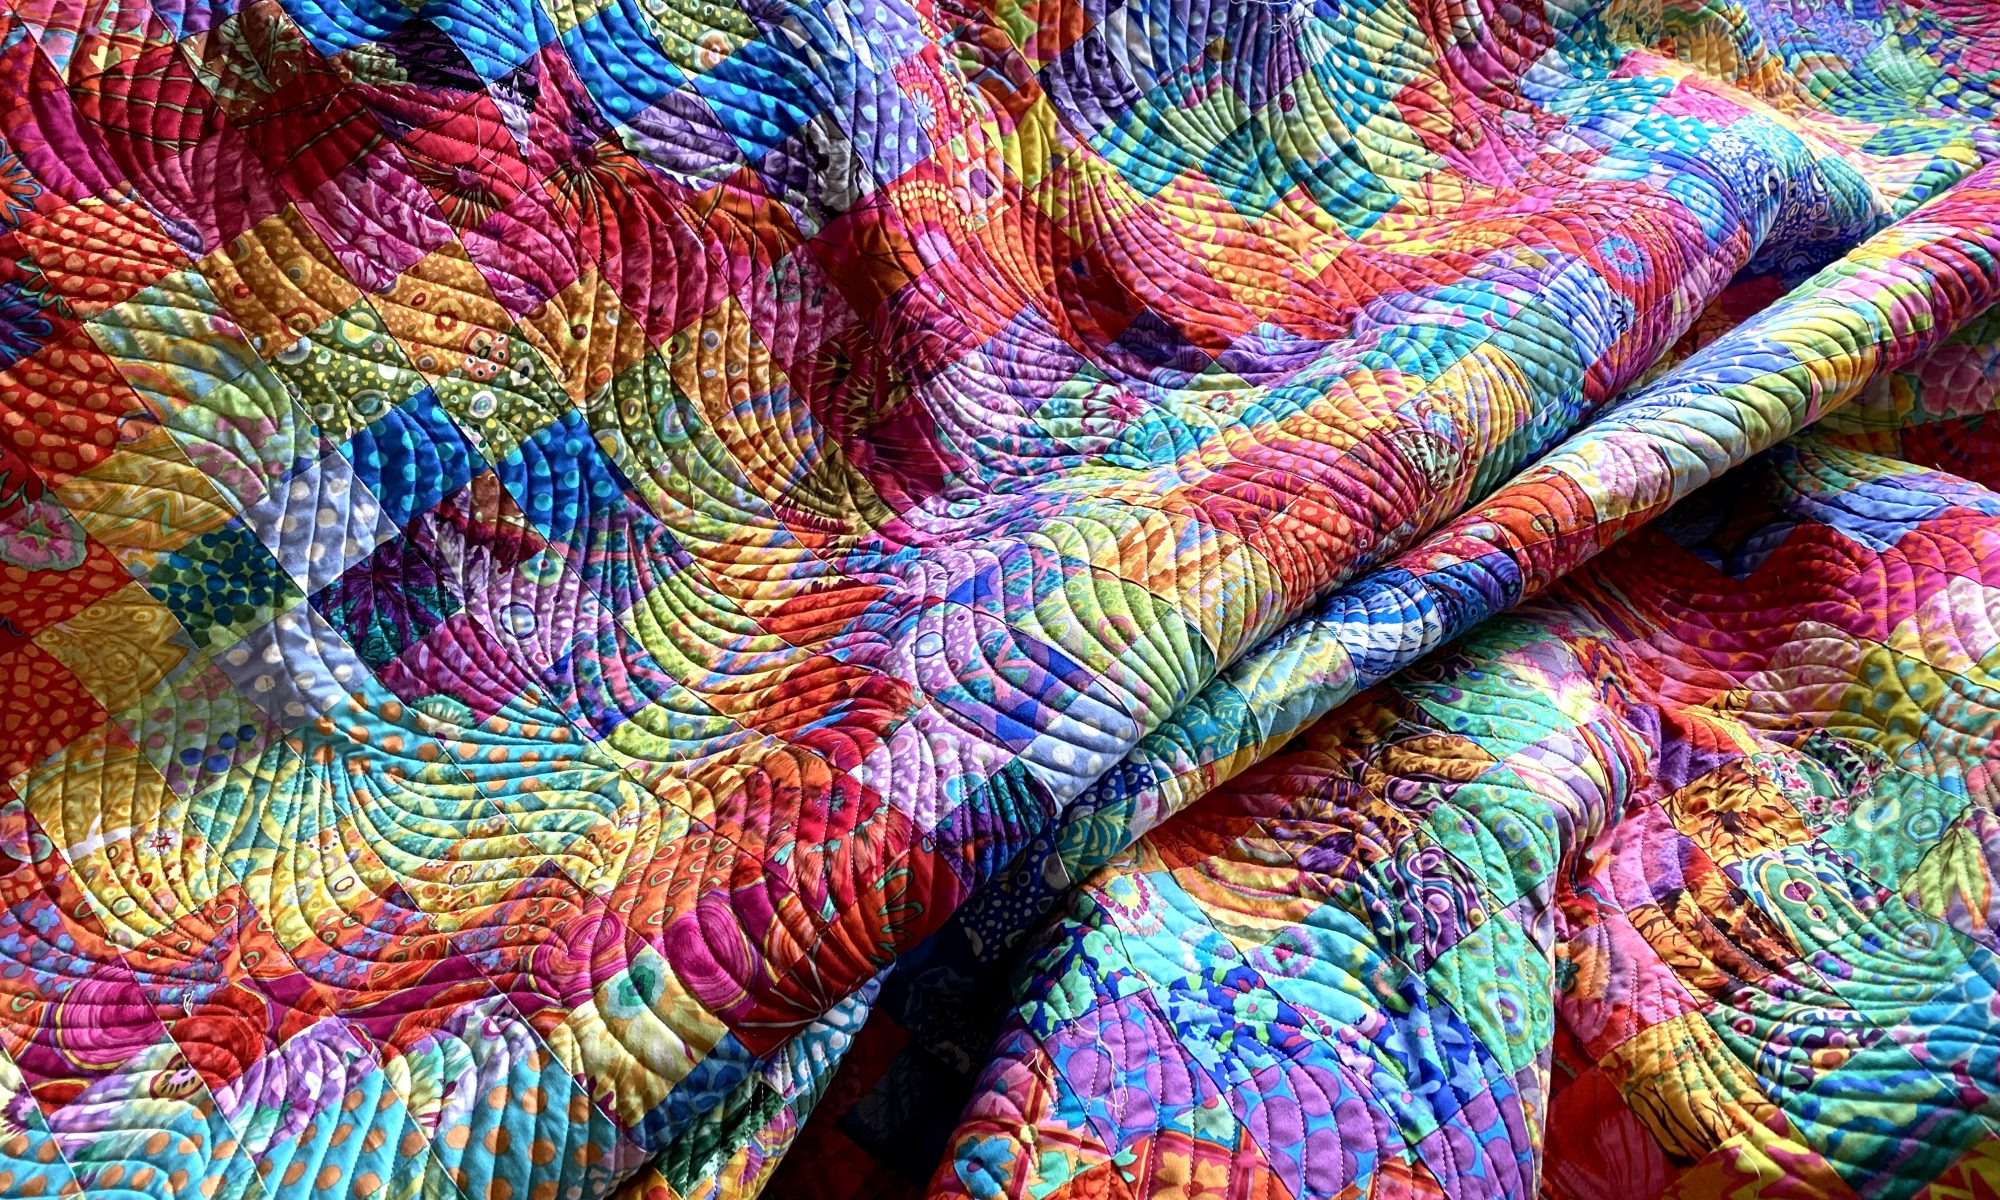
After just a few minutes I have a pretty good arrangement up on my design wall.

I’ve already sent a photo of this to my friend who was here visiting in September and she’s made a couple of suggestions. I’ll play with her suggestions tomorrow. Then I’ll leave these up on the design wall for a few days until I either feel satisfied with the layout or just give up.
@Thekitchentablequilter on Instagram commented on my photo today and said: “Do you enjoy the process of deciding on the layout? I find that to be a maze, going around and around again?”
I laughed as I responded, “NO! I do not enjoy the process! I agree it’s like a maze. I move one thing and it makes another problem so I fix that and then that makes three more problems. I finally just throw my hands up and say it’s good enough!”
So, I won’t agonize over this for very long. At some point in the next few days it will be “good enough.”
Lots of people have been asking me what pattern I used for this quilt. Well, I didn’t use a pattern. I did, however, use a lot of skills and knowledge I gained from using Wanda at the Exuberant Color blog’s 16 patch tutorial. If you haven’t checked out that tutorial, what are you waiting for? You can find Wanda’s excellent tutorial here… it’s really clear and made me love making 16 patches.
So, here’s how this quilt block varies from the typical 16 patch and from Wanda’s tutorial. For the 16 patch you sew two strip sets together, then cut them in half and sew those two pieces together. Then you cut that resulting 4-strip piece into 2.5 inch strips and then sew those smaller strips back together, alternating each row. Each strip set makes two blocks.
For this quilt, I cut that 4-strip piece in half and sew the two pieces together so I end up with a strip set that is 8 rows high and around 10.5 inches wide. This strip set will make one large block.

Then I carefully square off one edge of that block. Making sure I leave a full 10 inch wide piece intact.

Then I turn that piece around so I can cut a five-inch strip from the side that I just squared up. I turn it around because I’m right handed.

Here’s a photo of the first 5-inch piece cut from this piece.

Then I cut the remaining piece to five inches wide.

There’s not a lot of extra fabric trimmed away, so I try to sew very carefully and precisely to get two full 5-inch cuts. You can cut your pieces narrower if you have to, say 4.75 or 4.5 inches wide. You just want to cut all the pieces for your blocks the same.
After these two pieces are cut, I turn the left hand piece so the dark rectangle is oriented in the upper left corner. And the second piece is turned the alternating way.

Then you sew these pieces together. If you follow Wanda’s tutorial, the seams will nest beautifully and you’ll have beautifully matching corners. These blocks go together really fast and are a great way to showcase some beautiful fabric!
I got a fun surprise today when Free Spirit Fabrics used a quote I submitted several months ago about how Kaffe’s fabrics impact my creative work. They posted this on Facebook and on Instagram.

There are some people in my neighborhood who are WAAAAAAY into Halloween! Here’s something I saw on our walk tonight. This thing is 12 feel tall!!!

I am pretty much on the opposite end of the spectrum of Halloween enthusiasm. And I have to say, that thing would have scared the shit out of me when I was a kid!!! I would still be having nightmares about it!
It’s been a while since I posted photos of reader Frankenbags and I have a few to share tonight.
First up is this bag from Riana Nel from South Africa. Of course I love the bright colors and the graphic black and white. It’s all so bright and cheerful. I just love that vibrant yellow section in the lower part of the bag. Pow! She made this as a Secret Santa gift for someone in her quilt guild.


This next bag comes from Nancy Pendergast. I love all those watery green batiks! Did you know green is my favorite color? And the pops of red and blue are pretty great too!


Up next is this bag made by Linda Klysner. I really like all that gorgeous red crumb piecing. It’s so fun to see it done in one color way. it’s so deep and luscious! And I really like her accent blocks on the front and back. It’s lovely!


The final bag tonight is from Leslie Schroeder. It’s a fun little bag with a chicken theme and a happy lining. I think Leslie told me she made this for her sister or a friend who loves chickens. What a great gift this will be.


Thanks to everyone who sent photos!
While I’m ruminating over the blocks on my design wall, I’m thinking I might pull out my Bernina and finish up some bucket bags I cut out a few weeks ago. All my sewing has been on my little Featherweight since I set it up and made the blue lap quilt for my friend.
Oh, that reminds me… I should be hearing from my long arm quilter any day now to let me know my quilts are ready!
Hello I am very excited that I finished my first Frankenbag as a birthday gift for my best friend ! Can’t wait to make another one. !
Sent from my iPad
>
Great! You might be hooked!!! but they do make great gifts. Need to start working on my holiday projects!
anne
I like the block layout, good mix of them. Oh, my, I love the Halloween 🎃 yard! Too 😎 cool! I wonder how they keep the 12 foot one from falling over or getting blown over, or walking off with a thief.Now seeing one walking down the street is the stuff of nightmares! I enjoy the spookiness of Halloween 👻 but having a hard time finding just suspense scary movies, too many with killing sprees for me. We have had our rescue, Alfie, for a week now. He’s very sweet and learning to walk on a leash grudgingly. My 🐈⬛, Emily, still not happy.
I’m not a big fan of horror movies. Suspense is fun, though!
Glad Alfie is settling in. He looks like a sweetie.
Anne
The layout on your design wall is tremendous and I wholeheartedly agree that it does take an awful lot of playing about to finally arrive at something we’re happy with. The 16 patch tutorial from Wanda is great and I’m so pleased you kindly shared your tutorial for your version of 16 patch, no-one could go wrong with this. 16 patch is a favourite of mine, I think I’m going to have a ‘squirrel’ or two arriving in my sewing space next week! You can see the squirrel logo on my blog and discover how this came about – not from me I hasten to add.
Oh cool! I like the idea of chasing a squirrel… following what grabs your attention. that’s pretty much the way I do this all the time. And I get stuck on things… then as quickly as I got interested, aI lose interest and catch sight of another squirrel!
I’m thinking a sixteen patch on point like the one Wanda just finished is going to have to be coming up soon for me! I just LOVE that quilt!
Anne