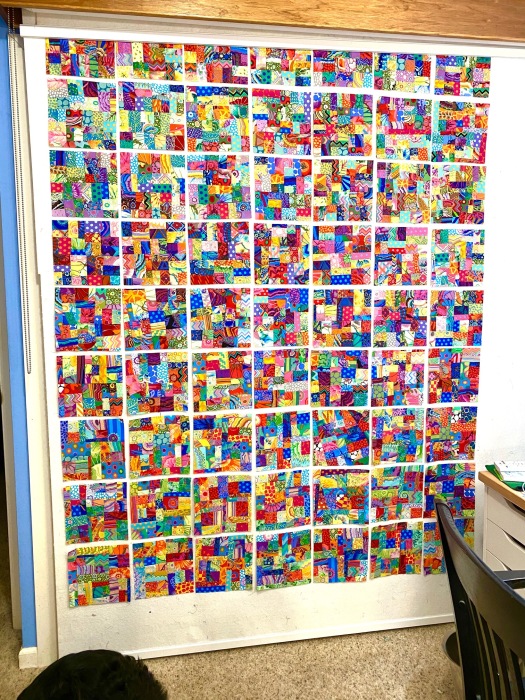
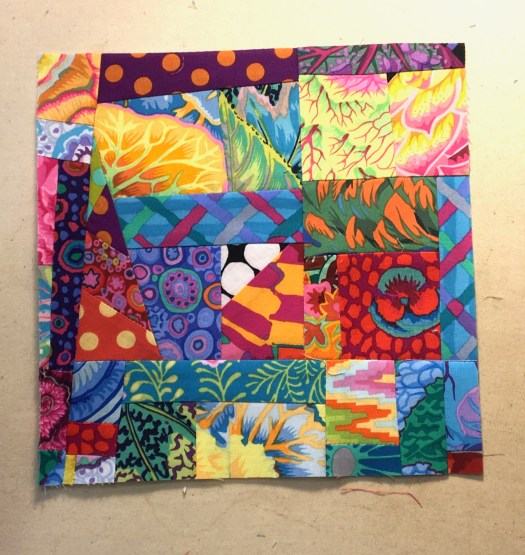
I finished up 63 crumb blocks in a matter of a couple of weeks. I’m pretty surprised I got them done this fast. I was really efficient and productive!
They’re all up on the design wall and now I’m trying to decide how to finish them.
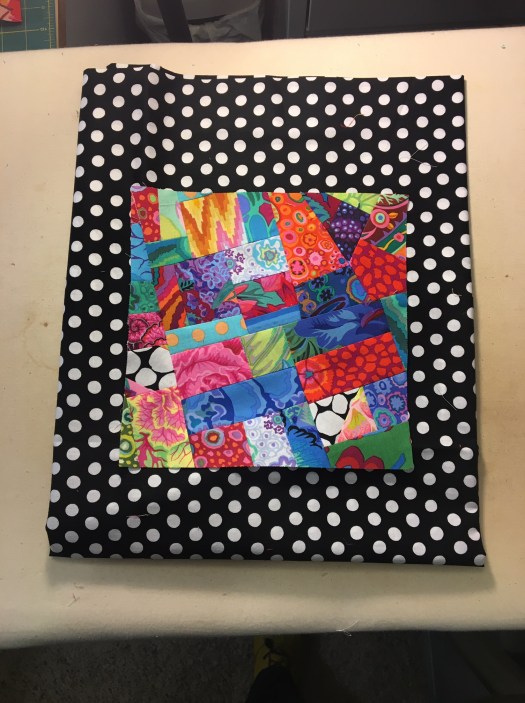
I’m going to do some kind of sashing or borders on each block using Kaffe’s spots in various colors. I originally thought I would use a wider white with black spots sashing with black spots cornerstones, like this:
But I have to admit that I don’t love it. All I see is the white. I thought maybe part of the problem was that the photo was taken late at night, but it didn’t look any better in daylight.
But it still reads too white and the crumb blocks get lost in it.
So now I’m thinking I will do just a bunch of different color spots as a border on each crumb block, and will leave out the white and black. I’ll arrange them randomly rather than in a pattern or order.
I like the way this looks, but I have to try out some different widths for the borders to get it right. I also need to buy more colors in the spots. I only have about a half dozen. I’m lucky that there is a store near where I take Rico for our sheep herding lessons that has a really good selection of the spots. I won’t be up there for another week, but will take some blocks with me to select another group of spots.
I have several large cuts of Kaffe fabrics that I bought, mostly on sale, to be used as quilt backs. But none of them really work with this quilt. So on an impulse I went online last night and found the fabric I wanted and ordered enough for the backing, plus enough to leave some for me to fold and fondle.
I have this design in two color ways that would be large enough for backings. But this color is so amazing! And I think it will be perfect for the back of this quilt!
It will be hard to wait a week to get going on finishing up these blocks. I’m going to have to find something else to work on. Maybe I’ll finish the blocks for the Japanese X and + quilt for my guest room. That’s a crazy idea!
I have a tendency to go in jags when I take on new projects or new techniques. I really get into it and have a lot of fun getting familiar with a new technique, and with exploring my own way of doing it. When I get on a jag like this I can be very obsessive and quite productive. . . often ignoring other things I should be doing.
I’ve had to dig into my bigger Kaffe Fassett Collective scraps in order to get the color balance I want in these blocks. I discovered a small drawer full of KFC scraps. It’s amazing to me how many scraps I generate and don’t feel I actually make that many projects that would generate scraps.
That’s just the scraps that I pulled together to make these crumb blocks. There are many, many more where these came from.
When making quilt blocks, I love to do assembly line piecing to make it all more efficient and quick. So I’ve used a lot of my scraps that are cut into strips to make these blocks… sewing shorter pieces onto longer pieces, and pressing and slicing them into smaller pieces, which will then be sewn together into larger pieces. It’s really a crazy process!
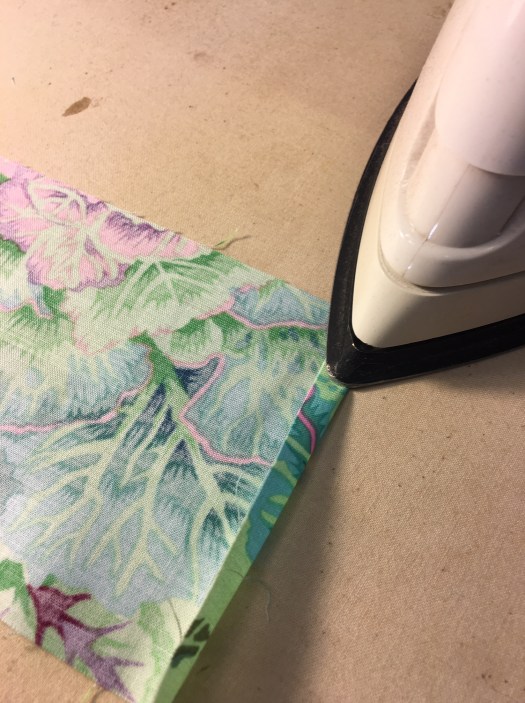
That’s a long string of pieces that have been chain pieced and are ready to press and cut apart. This string is probably at least forty feet long. Here they are lined up on the ironing board ready to be pressed open.
Once these pieces are pressed, they’re then sewn together into larger pieces…
Which will then be sewn together into even bigger pieces.
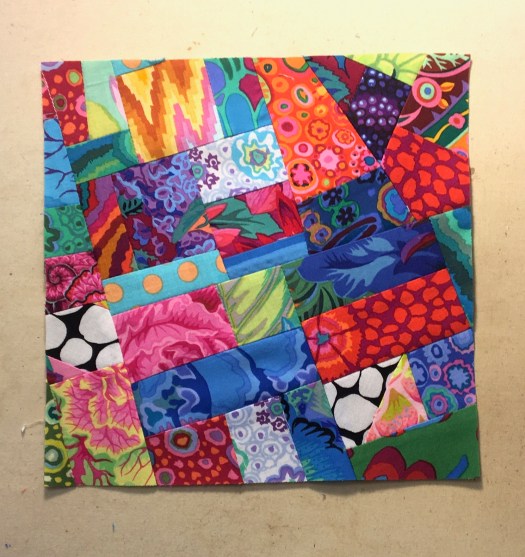
At this stage, I start putting together these blocks to make eight inch blocks.
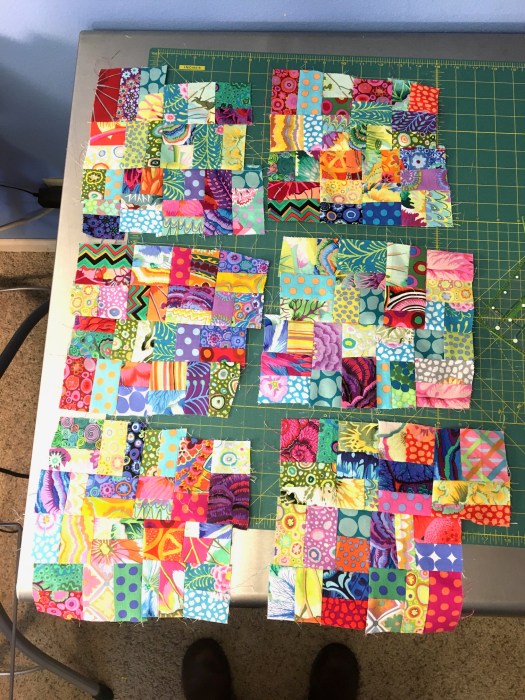
When I feel confident that each sets of blocks, once trimmed to have straight edges, will make a block that is a little larger than eight inches, I sew them into blocks. Here are six blocks that are all sewn together and are ready to be trimmed to eight inch square.
I use a clear eight inch square ruler to lay over the top of each block so I can see the block underneath. I adjust the square until I have fabric extending beyond all four sides, and then I use my rotary cutter and trim away the excess. (click on each photo below to get a bigger view.
Any pieces that I cut off that are big enough will be saved and sewn into another block.
While trimming one of these blocks the other night, I got careless and had my finger sticking over the edge of the ruler. I ran over it with my rotary cutter. It bled like a stuck pig!
Luckily, I didn’t get any blood on the blocks. I just bled all over the bathroom counter top. Sewing is not for sissies!
I’ve been giving a little thought to how I’ll put these blocks together once they’re all done. And I’m thinking I’ll sash them with the Kaffe black with white spots and white with black spots and will alternate every other block. I just love the graphic black and white with these bright colors!
Once I get the six remaining blocks done, I’ll cut the sashing fabric and sew the pieces to the blocks assembly line style.
I have several pieces of Kaffe fabric that are large enough for a backing. I have one in mind that I’ll probably use, but I’m not completely decided yet.
I anticipate that I’ll have the remaining blocks done later this week.
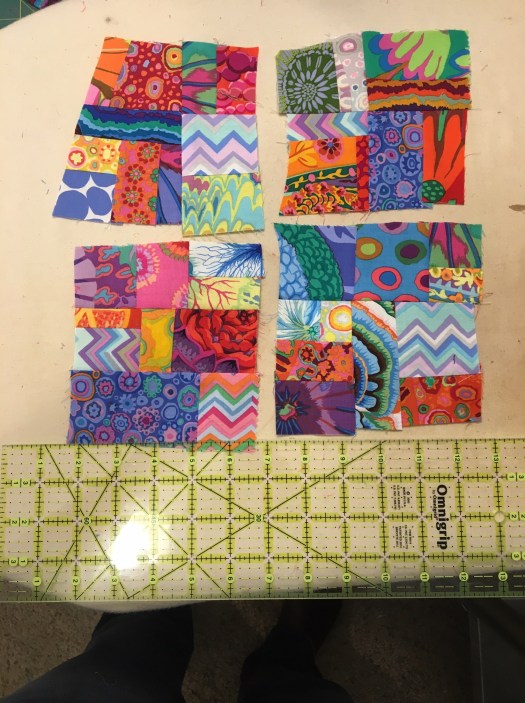
I’ve been wanting to try crumb quilting for awhile, and when someone recently posted a crumb pieced block on the Facebook Kaffe Fassett Collective page, it was just the push I needed.
So I went to Youtube and searched for tutorials on how to make these blocks. There were a lot of results, and after watching just a few minutes I had enough information to forge forward. Here’s my first two attempts…
These were made from my Kaffe Fassett Collective scraps. It’s a really fun way to use up scraps and I know I’ll be making more blocks like this.
And something interesting… there is very little blue in my scrap pile. And very little blue in my Kaffe stash. Blue is not my favorite color, but I never realized that I might be actively avoiding it. I might have to give some thought to blues as I’m out and about in the local quilt shops.
My plan is to sew these blocks into a drawstring pouch made from my tutorial.I’ve started looking at fabrics for the bag body and was initially thinking black and white. So I dug into my Kaffe black and whites and kept going back to this combo…
Good lord… how I love those bright Kaffe colors with a graphic black and white.
But I think I may go a completely different direction on this one. Stay tuned!
I’ve been anxiously waiting for the new collection of KFC fabrics and finally ordered some recently. They came this week and they are gorgeous! The mosaic circles is crazy gorgeous! I bought a yard of each, plus some other new fabrics, and some pieces to replace some pieces from my stash.
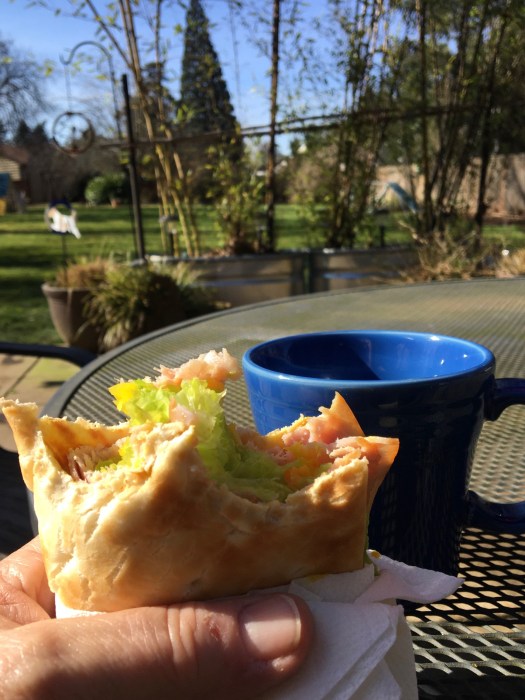
After a wet December and January in Portland, February has been pretty amazing! It was so warm and Sunny today that I had my lunch in the sun on the patio! What a glorious thing to be able to do in February!
And the next ten days looks pretty amazing too!
My brother and his wife are visiting this weekend. We’re going to go to Rico’s sheep herding lesson tomorrow, then for a field run and nice walk with the dogs. Followed by a visit to the Ridgefield Wildlife Refuge in Washington. We may stop for dinner on the waterfront in Vancouver before heading home.
Sunday, I have an agility trial. Not sure we’re ready for it.
We finished up our radio membership fundraising drive on Saturday, so I was really happy to have today as a Holiday and an extra day to recuperate. So I decided I was going to have a restful weekend at home with lots of sewing and hanging out with the dogs.
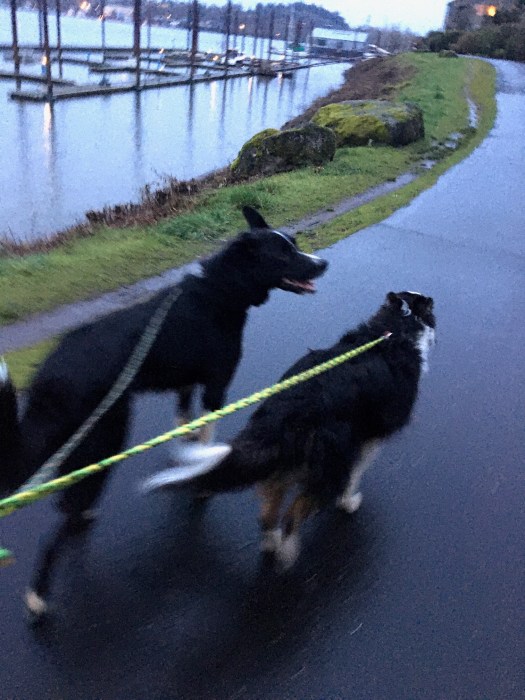
After the drive ended on Saturday I decided to take the dogs for a walk along the Willamette before heading home. So we walked from my office north along the waterfront for a little over a mile. Then turned around and headed back. It was a great way to get a little exercise in before heading home for a lazy two days. It just started to rain as we got back to the car.
Sunday was a day spent at home. I didn’t even shower, but I did take the dogs out for a two-mile walk after dinner.
Then today I made a couple of pouches, hit the grocery store, and took the dogs for a 3.5 mile walk along the Fanno Creek Trail. It was a beautiful day with some amazing sunshine. It’s been such a dark and wet winter that it was really nice to get outside in the daylight. the forecast for the next ten days includes five days of sun or partial sun!
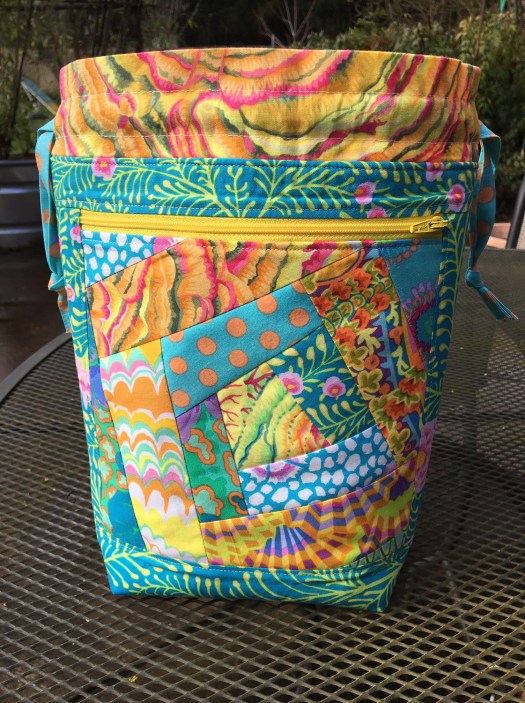
The first was this turquoise and yellow bag made from Kaffe Fassett Collective scraps. I’ve wanted to put these colors together for awhile and I just love the result! I don’t know if I’ve ever seen a quilt made from this color combo of Kaffe fabrics, but this make me want to make one!
And the lining…
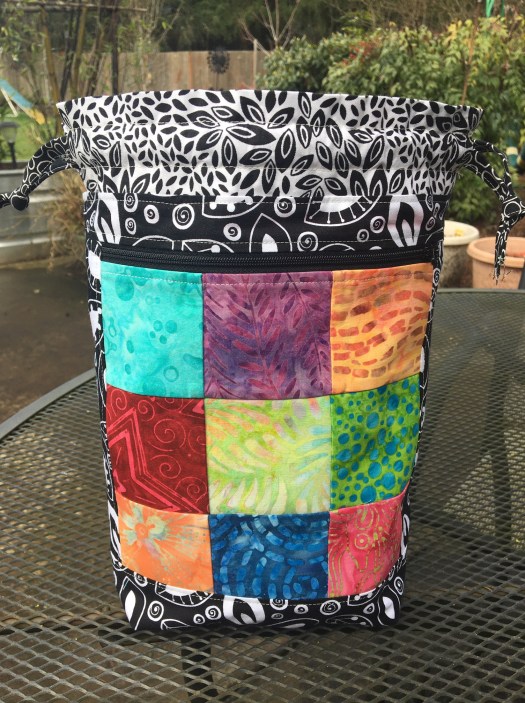
Next I played with some batik scraps combined with some graphic black and white fabrics. I just love the bright colors with the black and whites. And that cow print is just so good! I’m not terribly crazy about the square block pocket panel. It’s just a little boring.
Added a really fun bright yellow batik lining.
On the second batik with black and white I completely forgot to add the fusible batting. It still works. It just has less structure and isn’t quite as comfy feeling. It will be interesting to see how differently the fabrics age and the bags wear.
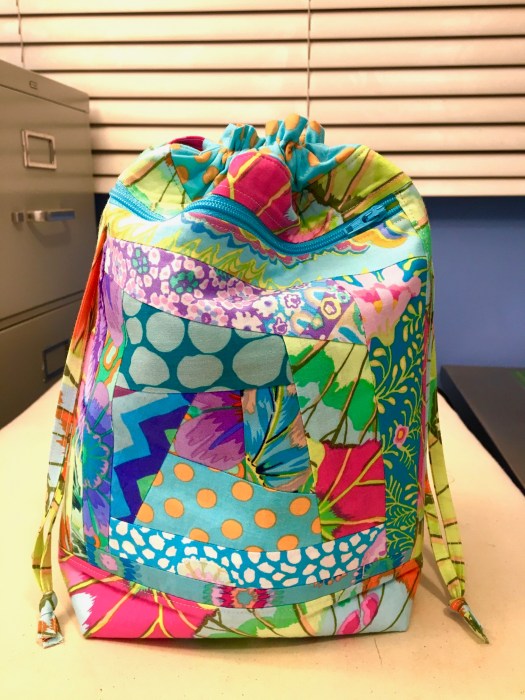
The last one I made today is this batik wonky log cabin block combined with an indigo batik for the body. I used a brightgreen batik lining. I just love the bright batiks with the indigo.
I think I’m going to combine some pink and green Kaffe Fassett Collective fabrics for the next one. I pulled a few fabrics in these colors from my stash the other day and it was pretty fun!
Here’s my very detailed tutorial on making Agilejack’s Drawstring Knitting Project Bag. If you have questions, or find errors, please leave me a comment and I’ll answer and edit the tutorial where appropriate. I hope you have fun making it and get creative and make your own variations!
The photos and video for this tutorial were taken as I made this bag. Click on any photo here to see a larger view.
The finished bag measures approximately 9.5 inches wide and 12 inches high when the bag top is open. It features a roomy zipper pocket on one side.
Here’s a batik variation I made for myself. The pieced block is made with 2 inch squares.
Here’s a yellow and red version I made for a friend.
Please feel free to make as many bags as you want for yourself or for gifts. And feel free to send the link to this blog post to friends.
All I ask is that you don’t sell bags made from my design.
Also, feel free to make a paper copy for yourself, but please don’t distribute paper copies to others.
Materials
Fabric scraps cut into strips from 1.5 to 2.5 inches in width and in varying lengths.
Larger fabric pieces for bag body and lining, I like a different fabric for the lining. 1/3 yard each of body lining fabric is more than enough.
Muslin for foundation for center block enough for two 9 inch squares
Nylon zipper, at least 10 inches or longer
Fusible batting, enough for two 11 X 12.5 inch pieces
Thread
Fabric cutting instructions.
I use mostly scraps, but like to use the same fabric for the sides, top, bottom and sides of the bag. But you could certainly make it really scrappy and use different fabrics for each piece.
Patchwork block– make two 8 inch square blocks (video tutorial linked below)
Fabric scrap strips of your choice, cut into varying widths from 1.5 inches to 2.5 inches and varying lengths (2 inches to 9 inches long).
Muslin square for wonky log cabin foundation, cut two 9 inch squares
Lining: Cut two pieces, 11×12.5 inches
Casings – cut two pieces 4×11 inches (I like a fabric different from the body fabric)
Pocket lining – (Same as bag lining, or use something different) Cut one piece 8×18 inches
Bag sides – body fabric. Cut four pieces 2×8.5 inches
Bag bottom – body fabric. Cut two pieces 4×11 inches
Bag top – body fabric. Cut two pieces 1.5×11 inches
Drawstrings -body fabric, or choose something else. Cut two pieces 1.5 inches by 26 inches
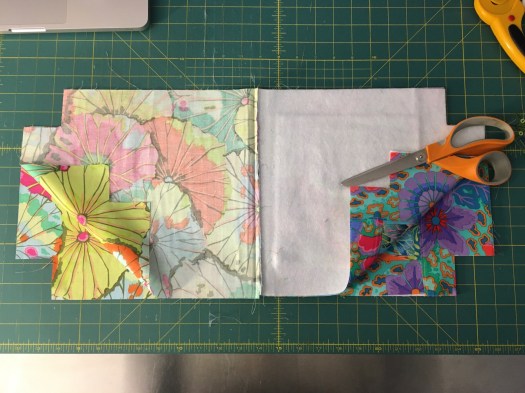
Scraps cut into strips ranging from 1.5 inches to 2.5 inches, of varying lengthsBag lining, fusible batting, pocket lining, strings.Bag body pieces prior to assembly
Let’s Get Sewing!
Make the Wonky Log Cabin Blocks
Using the strips of scraps and the muslin squares, follow this video tutorial to make two 8 inch square wonky log cabin blocks for the front and back of your bag:
This is just one type of block you could make for the front and back of your bag. You could piece a traditional quilt block, use another improve method to make a block, make a paper pieced block, etc… Get creative and have fun! All you have to do it make sure it measures 8×8 inches.
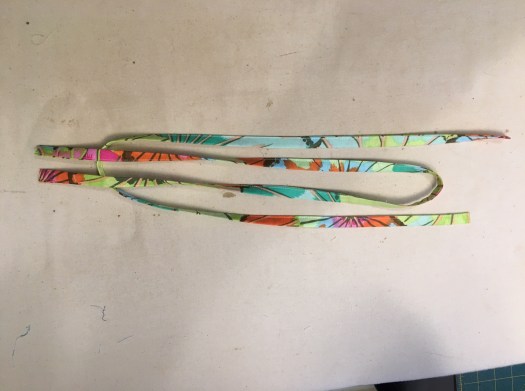
Make the drawstrings
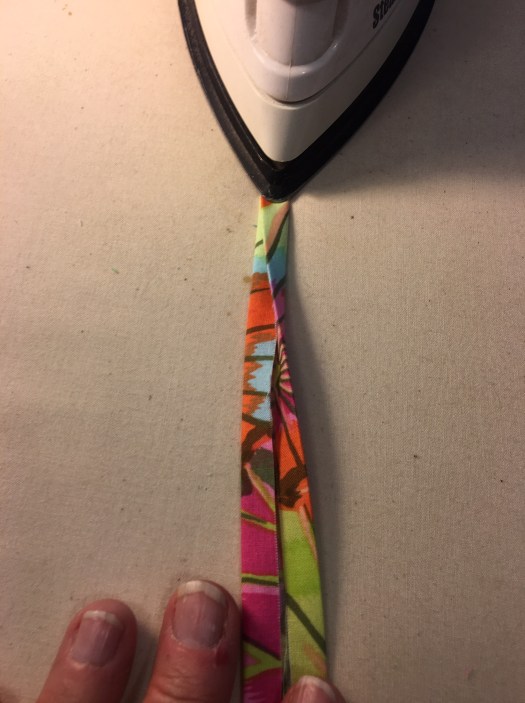
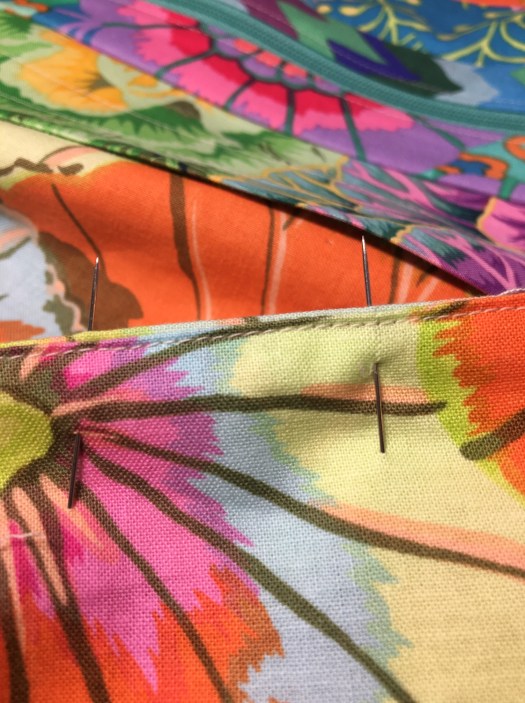
Fold the two 1.5 inch x 26 inch strips in half lengthwise and press.
Open up the strip and fold one outside edge to the center fold and press. Fold the second long edge into the center and press.
Now fold the entire length of the strip in half and press, making sure the folded edges meet nicely. All of the raw edges should be hidden inside the fold.
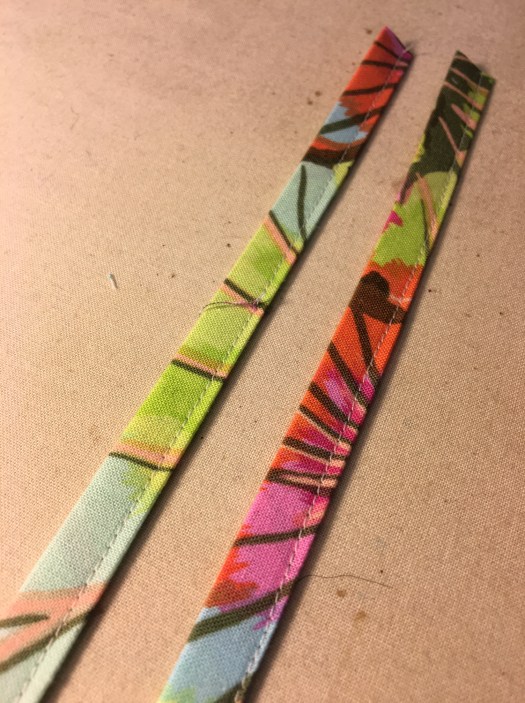
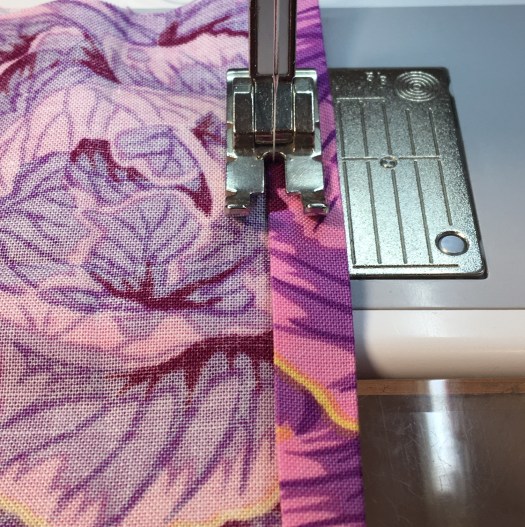
Stitch down the open side of each strip, very close to the edge, making sure you catch both front and back sides of the folded edges.
Here’s the finished string:
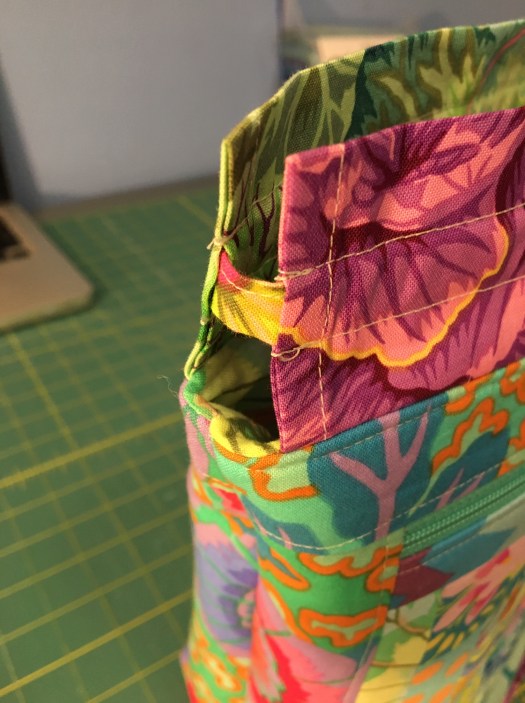
Make the casings
Fold the short side of each piece over 1/4 inch and press. Fold over 1/4 inch again and press.
Stitch down this small hem on the four sides of the casings, staying close to the folded edge.
Fold the casings in half along the long side, and press.
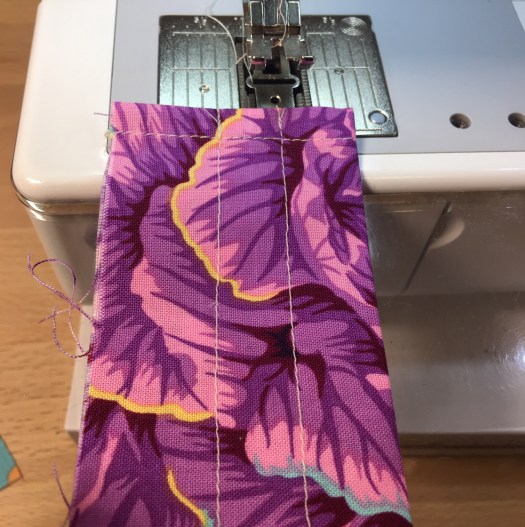
Stitch a line along the length of each casing, 1/2 inch from the fold. Now stitch another line of stitching approximately 3/4 inches away from the first line of stitching.
Assemble the zipper pocket
(all seam allowances are pressed toward the outside, and top stitched on the body fabric.)
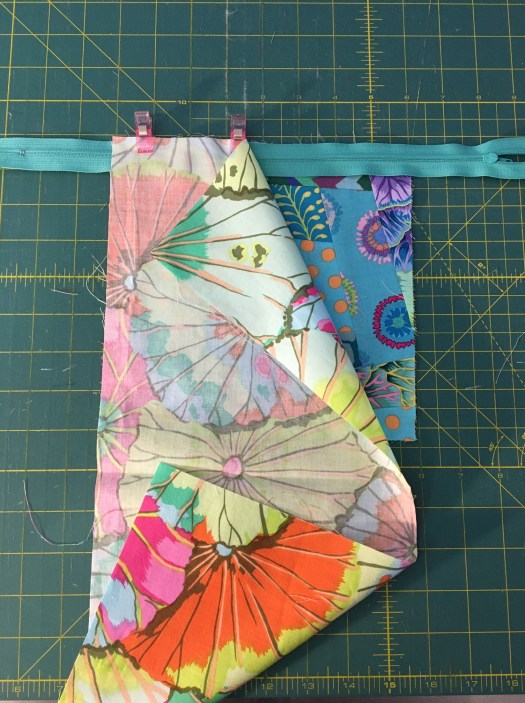
Lay one of the 8 inch pieced blocks face up on the table. Lay the zipper (keep the zipper closed) along the top edge with the zipper pull facing down toward the pieced block. (The zipper will extend beyond the width of the pocket pieces. Center the zipper so that the same amount extends on both sides. Lay the lining right side down along the top edge of the 8 inch block and zipper, being careful to line up the top edges of all three, and clip or pin along the edge.
Using a zipper foot, sew along the top edge with a 1/4 inch seam.
Fold the 8 inch block and lining fabric away from the zipper and press. Top stitch about 1/8 inch away from the seam, catching the lining, zipper, and pieced block.
Fold the pocket lining up behind the 8 inch block, with the pocket lining right side to right side.
Line the pocket lining up with the top edge of thezipper, and clip or pin. The fold at the bottom of the pocket lining will be about 1/2 inch below the bottom of the pieced block.
Using your zipper foot, sew along the zipper tape with a seam allowance just shy of 1/4 inch.
VERY IMPORTANT — DON’T MISS THIS STEP!!! Slide the zipper pull so it’s over the pocket body, and stitch a vertical line across the zipper very close to the edge on both sides, making sure to stitch through the very edges of the fabric. I go back and forth several times to make sure it’s very secure. This stitching will secure the ends of the zipper in place as you assemble the rest of the bag.
Trim away the excess zipper ends even with the sides of the zipper pocket.
Assemble the bag front (the side with the zipper pocket).
(all seam allowances are pressed toward the outside, and top stitched on the body fabric.)
Sew the two side pieces onto the zipper pocket, aligning the short edge with the top of the zipper pocket on each side. They will not all line up on the bottom.
Fold the side pieces back, press, and top stitch along the side piece about 1/8 inch away from the seam.
Trim all the layers of the piece along the bottom so it measures 8 inches high. (this trimming allows this piece to be the same size as the non-pocket pieces on the other side — you added extra height with the zipper.)
Sew the bag bottom piece onto the bottom of the zipper pocket piece. Make sure that you catch all the pocket layers in the seam.
Fold down the bag bottom, press, and topstitch along the bottom piece, about 1/8 inch from the seam.
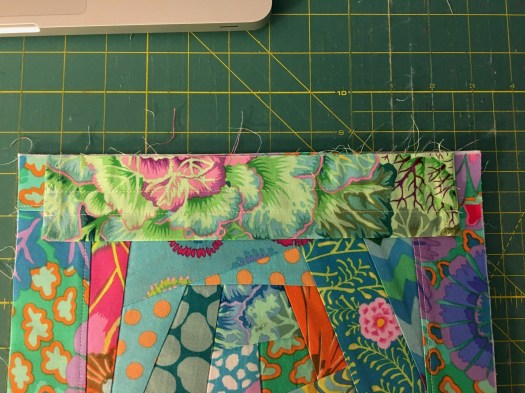
Line the bag top up along the top edge of the zipper pocket and bag sides section and clip or pin. Sew a 1/4 inch seam using your zipper foot.
Fold the bag top up and press and top stitch about 1/8 inch from the seam.
Assembling the bag back
This side of the bag goes together just like the front, except that there’s no pocket and no zipper.
Sew the bag sides to the left and right of the remaining pieced block, making sure to line them up with the top edge of the fabric. Fold back the sides, press, and top stitch. The side pieces will be about 1/2 inch too long. Trim off the excess so the bottom is one straight line.
Sew the bag bottom and top onto the back piece, fold back, press and top stitch. Here’s some detail of the finished bag front/back.
Assembling the bag
In this portion of the project, you assemble the side with the pocket and the side without the pocket exactly the same way. So there aren’t separate instructions for front and back.But I’ll refer to the bag front. You’ll need to assemble the bag back the same way.
Fuse the batting to the wrong side of the bag front and back according to the batting instructions. On the bag side with the pocket, you’ll fuse the batting directly onto the back of the pocket. See the photo below.
Lay the bag front with batting fused on right side up on your table. Center one of the casing pieces along the top edge of the bag front with the raw edge of the casing toward the top edge of the front and the fold edge toward the bottom of the bag. Lay one of the lining pieces right side down on top of the bag front and casing, being careful to line up the top edges.
Clip or pin the top edge, then sew across the entire top with a 1/4 inch seam. Then fold the lining and front away from the casing and press. DO NOT TOPSTITCH THIS PIECE .
Line up all the pieces and cut a 2 inch square out each of the bottom corners of the layered piece. (These cut outs will become the gussets on the bottom of the bag) I like to use a square ruler of some kind to cut this portion. Here, I’m using my 5 inch square and lining up the corner on the 2 inch mark to cut.
Repeat these steps with the second bag body piece, lining and casing.
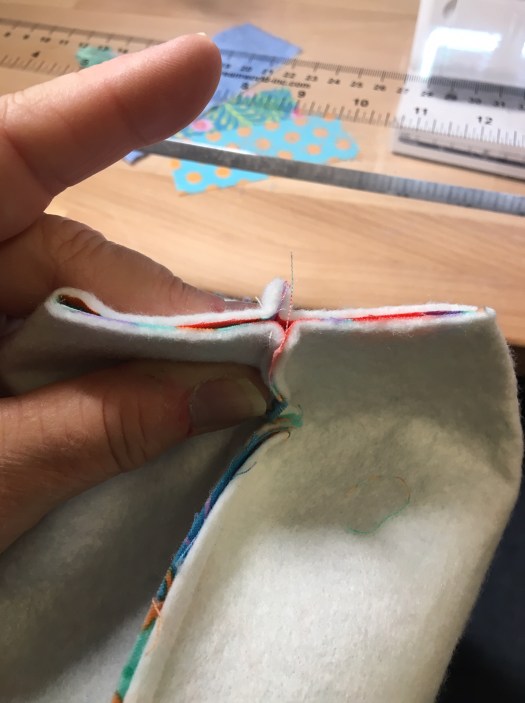
Open up one bag side and lay right side up on your table. Open up the second bag side and lay it right side down on top of the first piece. Put the lining side on top of the lining side and the bag front on top of the bag back. Pin the sides and bottoms, making sure to match the top seams carefully.
Sew a 1/4 inch seam across the bottom of each side and along the two sides,LEAVING ABOUT A 4-INCH OPENING ON ONE SIDE SEAM OF THE LINING. (When pinning this section I put two pins to mark the beginning and end of the side opening) Back tack on each side of this opening to reinforce the edges of the opening. DO NOT SEW ALONG THE SIDES OF THE 2 INCH CUT OUTS.
This is a good time to press back a 1/4 seam allowance on both sides of the opening in the lining. This will make it easier to line up these sides to sew them closed once the gussets have been sewn.
Take each bag bottom where the 2 inch cut out is and open the cut out. Line up the bottom seam with the side seam so that the open sides create a straight line. Pin or clip along this line, then sew with a 1/4 inch seam and back tack on each end. You have just sewn one gusset. You’ll need to do this to all four corners.
Reach your hand into the open lining side seam and carefully turn the bag right side out. Put your hand inside and gently push out the corners of all four gussets. Finger press down a 1/4 inch fold on each side of the lining opening (this is a lot easier if you pressed them before making gussets). Line up the two sides and sew a tiny seam to close the opening, making sure you catch both sides of the folded edges of the opening.
Push the lining into the inside of the bag and carefully mold the bag pieces into shape, being careful to line up the top edge of the bag and finger press well. Then turn the bag inside out. With the right side of the bag facing up, top stitch all the way around the top of the bag, about 1/8 inch from the top edge.Make sure to keep it all lined up and neat as you top stitch. (I turn the bag inside out because it makes it easier to sew the topstitching from the outside of the bag. You get a nicer finish this way).
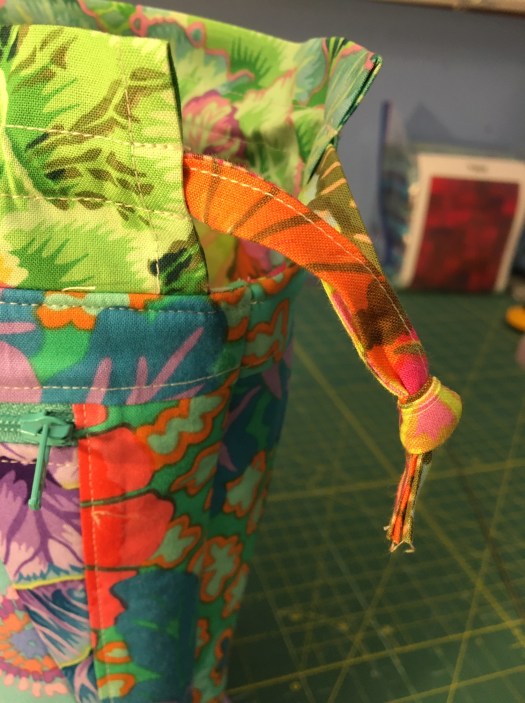
Threading Strings into Casing
Starting with the left side of the casing, thread one of the strings through each side of the casing, making sure that the two ends of the string end up on the right side of the bag.Try to keep the string from twisting in the casing. I used a bodkin to pull the strings through, but you could use a safety pin or your other favorite method to thread the string through the casing.
Now pull the two sides of the remaining string through the casing from the right side, making sure that both ends of this string end up on the left side.
Here’s how the strings are arranged within the casings. This loop arrangement allows you to close the bag by pulling on the ends of the strings on each side of the bag.
Tie the two ends of each string into a knot and leave about 1/2 inch of the end of the strings beyond the knot.
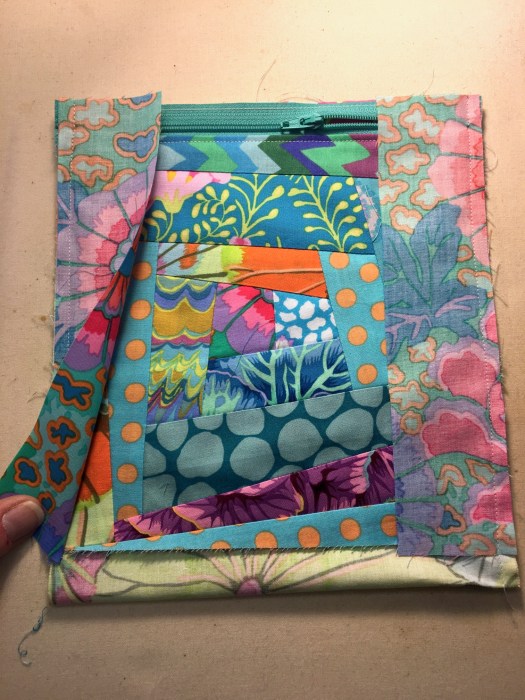
Several months ago I had an urge to make a drawstring bag, so I whipped one up from scraps. I recently started using it as a knitting project bag, and quickly realized that I was in need of a zipper pocket to hold extra circular needles, stitch markers, my scissors, and other sundry stuff — like my phone and my keys.
So the bag has to morph!
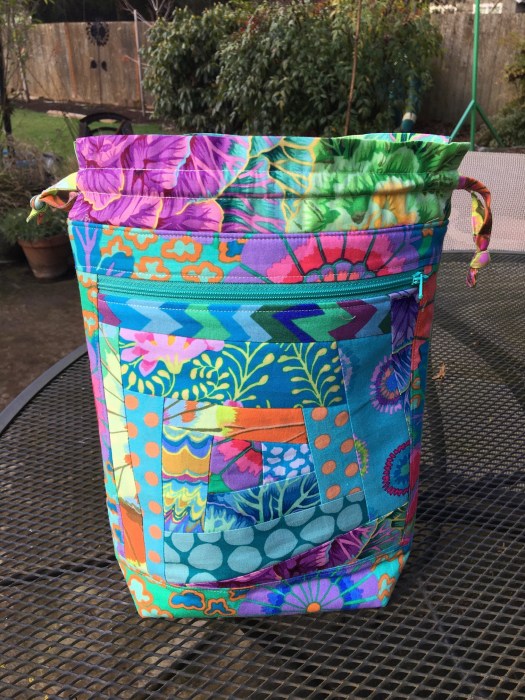
I whipped up another one, but added the zipper pocket on one side.
It’s made from fabrics left over from my turquoise Algorithm quilt that I completed in December. You can see it here.
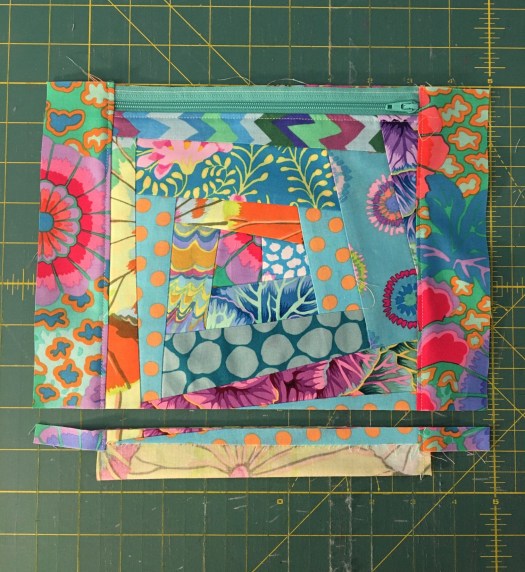
Here’s the first one I made with fabrics left over from the first red and yellow Algorithm quilts I made. See the quilt here.
It’s basically a pattern I made up after seeing several pouches I liked, incorporating features from several bags and made in a size that’s good for the types of projects I make. I finally wrote down all the measurements for the bag pieces, so the next one should be a little quicker. I have several friends who want one.
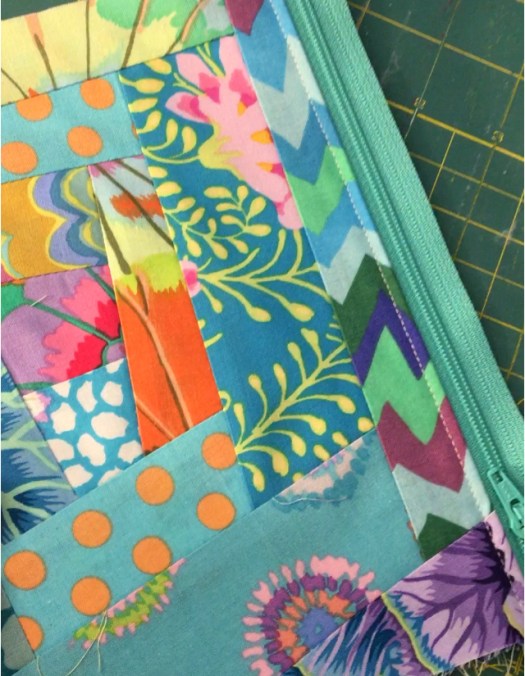
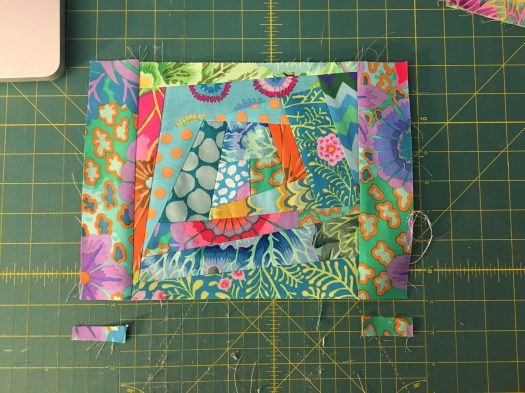
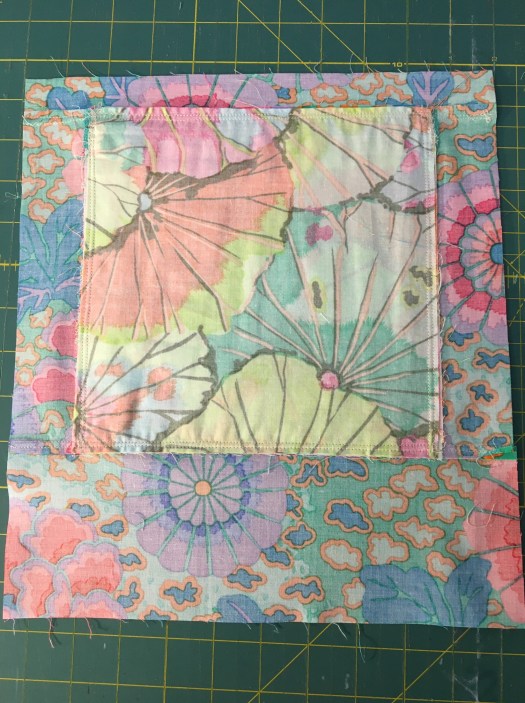
I pieced the wonky log cabin panel on a piece of muslin, which holds it all together nicely.
The pocket I added on the front is roomy and will be really practical.
It’s a great bag for a smaller project like a hat or socks. It has a nice deep gusset and is quite roomy. The drawstring makes it so the mouth opens wide so it’s easy to get things in and out.
I’m thinking of writing up a tutorial for this pouch, similar to my Zipper Pouch Tutorial, seen here. Leave a comment if you’re interested in a tutorial for this.
I’ve managed to post something I’ve made every day for the first 28 days of our 30 day project. And now, there are just two days left and two canvasses left. I’ve really enjoyed this project, but it’s been a bit difficult to do on some days.
Here’s today’s and yesterday’s canvasses. I’m calling this my “floral acrylic stage.”
I just love the way these have turned out. The colors make me very happy. And I like that you can tell they’re flowers, but they are somewhat abstract. I have a lot of variations of these that I want to make.
Before the floral stage, I had a very serious dotting phase. These little pieces make me so happy! and they are so much fun to make.
Not all of my dotting attempts have been successful. This first one below did not turn out anything like what was in my head. I consider it a complete fail. In fact, I didn’t even post it on the Facebook for the 30 day project. The second one… well… it started out as a dotting piece, and went so spectacularly bad that I blended all the wet paint on the canvas together and made this dark monstrosity.
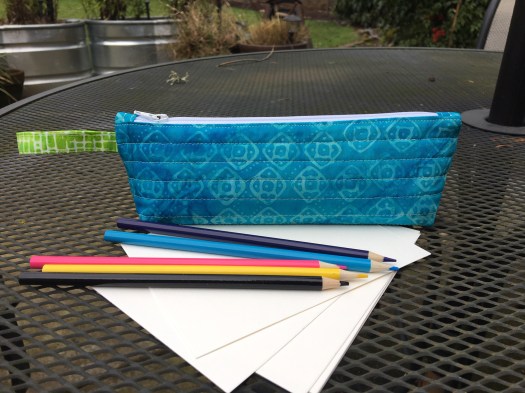
The week of January 24 I had to go to Austin, TX, for work. In anticipation of that trip and wanting to keep up with the project, I bought some cheap colored pencils to take along.
So before that trip, I made a zipper pouch for my colored pencils as the day’s project. It’s really nice to be able to make a custom pouch when you need one for a specific purpose.
One thing I learned in my colored pencil phase is that I don’t so much enjoy working with colored pencils. But I plugged along, posting one piece every day while I was in Austin.
On the flight back from Austin I started a new knitted wool cap and that was the project I posted for that day. It’s a great cap and will be a workhorse for whoever receives it. I’d like to keep it for myself, but it’s rarely cold enough here for me to need a knitted cap.
And a couple random projects that defy categorization… a mandala stone, and a cheerful little sunflower.
I think I’m going to be a little sad when the 30-day project is done.
A friend of mine started a 30 Mini Canvases in 30 Days project for January. Members of the group are creating one piece of art every day during the month and share it with the group on Facebook.
Here’s my first entry on January 1. This one is water color.
The point is not to create perfect art. The point is to try new things… new ideas, new techniques, new mediums. And it’s been really fun. I’ve pushed myself a little and have been really happy with most of the results.
Because I’m usually finishing up my piece each day after midnight, I post my photos first thing in the morning. Here’s the piece I made tonight that I’ll post tomorrow– and I just love it! It’s acrylic paint on a 3×3 canvas.
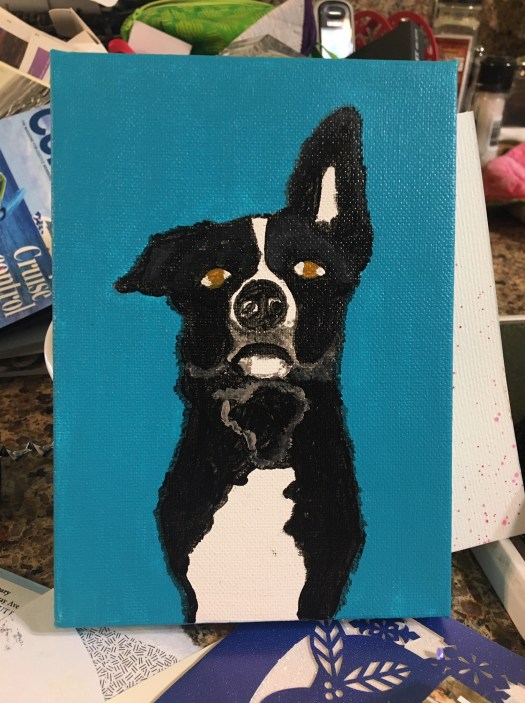
This piece is still unfinished. I have to do the detail and shading. But it’s pretty fun and I like where it’s going. Couldn’t get it done in one day! This is acrylic on a 5×7 canvas. It’s Rico — that big old ear should give it away.
Here’s the rest. Click on each photo below to read the caption and get a bigger view.
Watercolor – trees you might not see in nature
Acrylic on Canvas — abstract
Acrylic on Canvas — Quakies
Watercolor — good boy sniffs a snowflake
Watercolor — birds on a wire
Acrylic on canvas — Dot mania
Pencil on paper — Bender at Midnight
Acrylic on Canvas – Dots morph to circles
Improv pieced fabric, adhered to an 8×8 canvas and spray sealede
Watercolor — practicing leaves
Watercolor — abstract floweres
Acrylic on beach rock — Dot mandala
This has been a really fun project and there have been some really amazing things created by members of the project. What a bunch of creative, artistic and brave friends I have!
I’m really looking forward to trying some ideas I’ve had rattling around my head.
I just got this quilt back from my long arm quilter and I’m really happy with it. It’s not as exciting as the red and yellow version. It’s more calm and sedate, but it’s still pretty.
It’s all Kaffe Fassett Collective fabrics except for the white strips, which are a white on white batik.
This was the algorithm quilt that started it all. I had seen it posted on the Kaffe Fassett Collective Facebook group and wanted to make it from the moment I saw it. I had most of the fabrics in my stash, but added a couple to make it a little bigger.
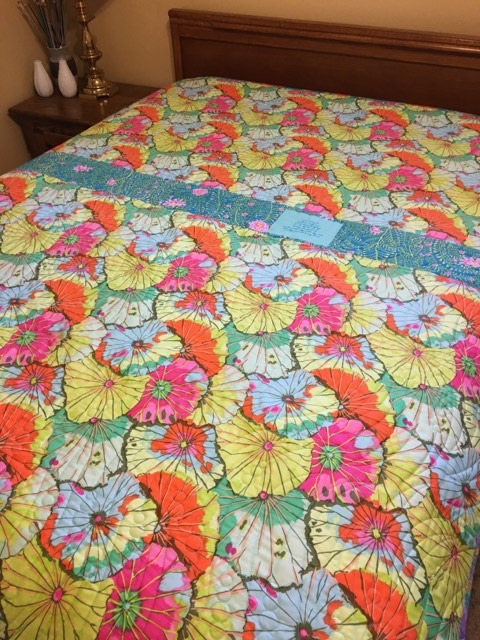
The backing is the citrus color way of Kaffe’s lotus leaf fabric. This is one of my favorite Kaffe fabrics and I’ve wanted to use this color way for a backing since it came out a couple years ago. I just love it with this quilt… it’s bright and vibrant and ads a nice pop of color to the monochromatic front. It also appears in the front of the quilt.
The quilting design is Urban Elements Bohemian Beaded Shade. I love the way the curved lines and circles break up the angular attitude of the blocks. It’s quilted with a light turquoise thread.
It’s very similar to the design I used on the red and yellow algorithm quilt, but it’s oriented vertically rather than horizontally and it’s more dense and has more circles.
Here’s the back of the quilt. I used the turquoise ferns to make the backing fit the front and to avoid having to match the print. I like the way the strip adds interest and it makes a great place for the label.
This quilt will be a house warming gift for my sister and her husband. It’s only the second quilt I’ve made where I included a label. My friend Carol embroidered the label for me on her machine.
I’m going to wait until after the holidays to ship it. I hate the idea of it getting lost in the rush of the holidays.
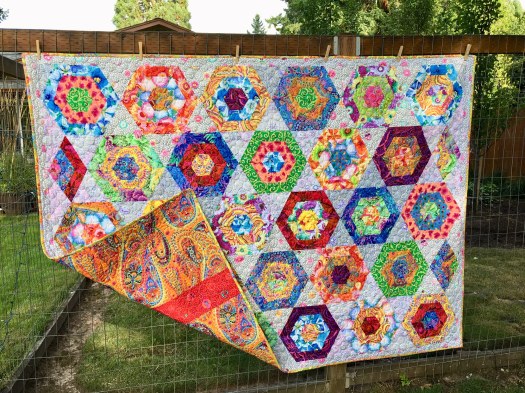
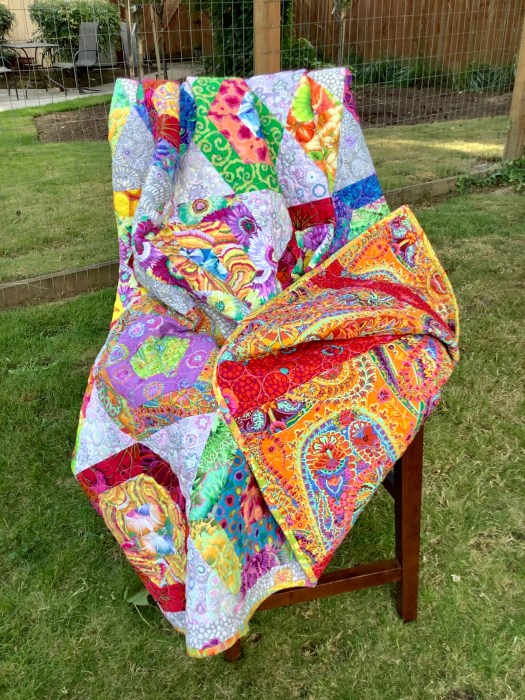
I got my Kaffe Fassett Collective hexagon quilt back from my long arm quilter a couple of months ago and I’m really happy with it.
I based this off of a quilt I saw on the KFC page on Facebook. It’s basically the My Fair Lady quilt pattern in one of Kaffe’s books. Can’t remember off hand which one.
I wish it photographed better. it’s much softer looking in person. These photos look pretty harsh.
I made this out of strip sets. It was a lot of fun to make. I love the gray background fabrics.
The backing is made from Kaffe’s Paisley Jungle in tangerine. I added the strips of guinea flower because I knew matching the fabric would be a huge job and completely out of my skill set! I just LOVE that backing!