
Copyright by Anne Ibach 2020
Here’s my very detailed tutorial on making Agilejack’s Drawstring Knitting Project Bag. If you have questions, or find errors, please leave me a comment and I’ll answer and edit the tutorial where appropriate. I hope you have fun making it and get creative and make your own variations!
The photos and video for this tutorial were taken as I made this bag. Click on any photo here to see a larger view.


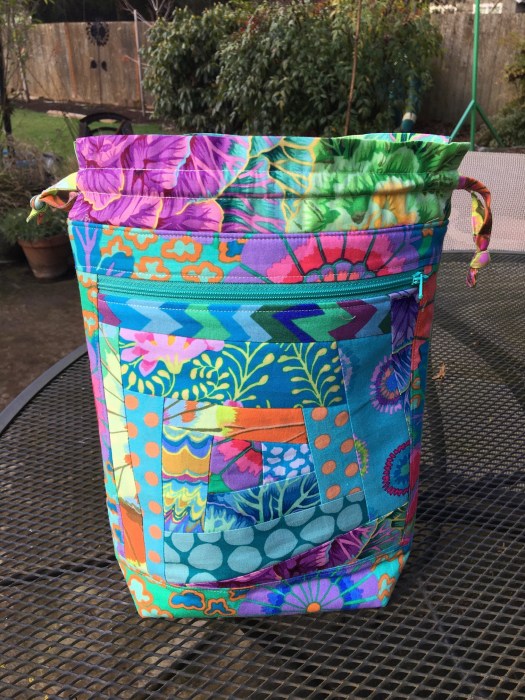
The finished bag measures approximately 9.5 inches wide and 12 inches high when the bag top is open. It features a roomy zipper pocket on one side.
Here’s a batik variation I made for myself. The pieced block is made with 2 inch squares.


Here’s a yellow and red version I made for a friend.


Please feel free to make as many bags as you want for yourself or for gifts. And feel free to send the link to this blog post to friends.
All I ask is that you don’t sell bags made from my design.
Also, feel free to make a paper copy for yourself, but please don’t distribute paper copies to others.
Materials
Fabric scraps cut into strips from 1.5 to 2.5 inches in width and in varying lengths.
Larger fabric pieces for bag body and lining, I like a different fabric for the lining. 1/3 yard each of body lining fabric is more than enough.
Muslin for foundation for center block enough for two 9 inch squares
Nylon zipper, at least 10 inches or longer
Fusible batting, enough for two 11 X 12.5 inch pieces
Thread
Fabric cutting instructions.
I use mostly scraps, but like to use the same fabric for the sides, top, bottom and sides of the bag. But you could certainly make it really scrappy and use different fabrics for each piece.
Patchwork block– make two 8 inch square blocks (video tutorial linked below)
Fabric scrap strips of your choice, cut into varying widths from 1.5 inches to 2.5 inches and varying lengths (2 inches to 9 inches long).
Muslin square for wonky log cabin foundation, cut two 9 inch squares
Lining: Cut two pieces, 11×12.5 inches
Casings – cut two pieces 4×11 inches (I like a fabric different from the body fabric)
Pocket lining – (Same as bag lining, or use something different) Cut one piece 8×18 inches
Bag sides – body fabric. Cut four pieces 2×8.5 inches
Bag bottom – body fabric. Cut two pieces 4×11 inches
Bag top – body fabric. Cut two pieces 1.5×11 inches
Drawstrings -body fabric, or choose something else. Cut two pieces 1.5 inches by 26 inches


Let’s Get Sewing!
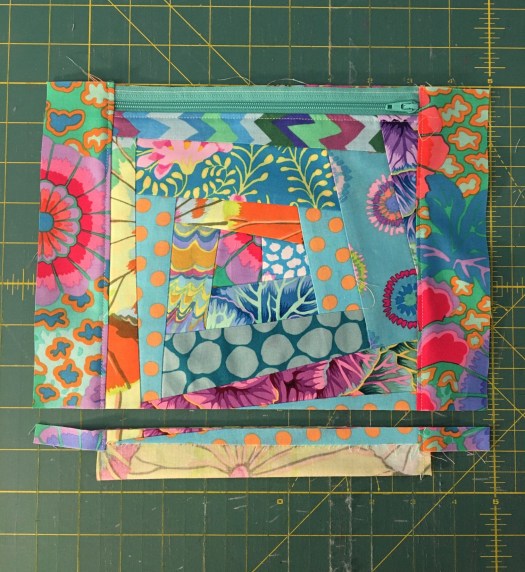
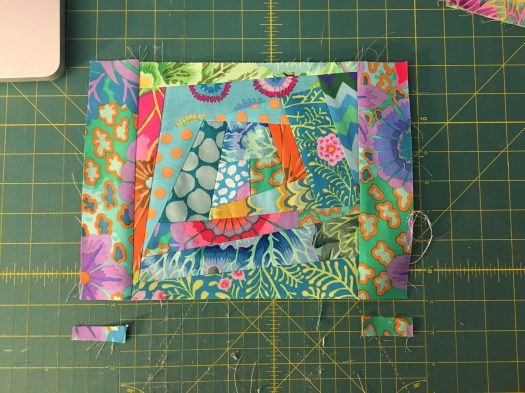
Make the Wonky Log Cabin Blocks

Using the strips of scraps and the muslin squares, follow this video tutorial to make two 8 inch square wonky log cabin blocks for the front and back of your bag:
CLICK HERE for Agilejack’s Wonky Log Cabin Blocks Video Tutorial
This is just one type of block you could make for the front and back of your bag. You could piece a traditional quilt block, use another improve method to make a block, make a paper pieced block, etc… Get creative and have fun! All you have to do it make sure it measures 8×8 inches.
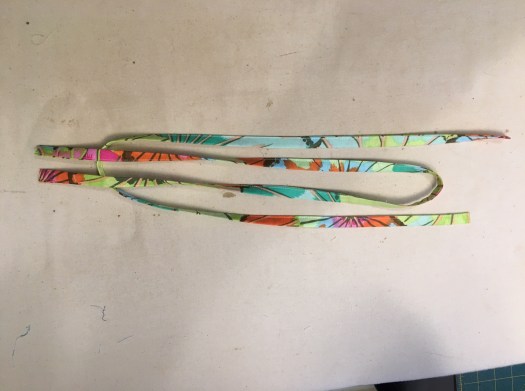
Make the drawstrings
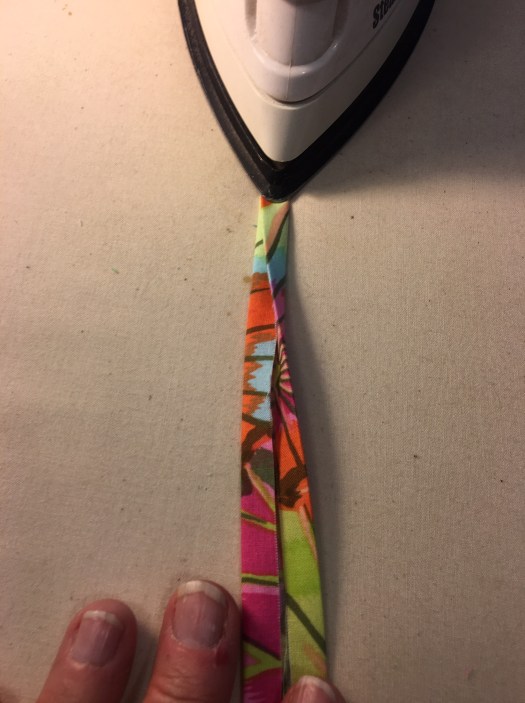
Fold the two 1.5 inch x 26 inch strips in half lengthwise and press.

Open up the strip and fold one outside edge to the center fold and press. Fold the second long edge into the center and press.

Now fold the entire length of the strip in half and press, making sure the folded edges meet nicely. All of the raw edges should be hidden inside the fold.
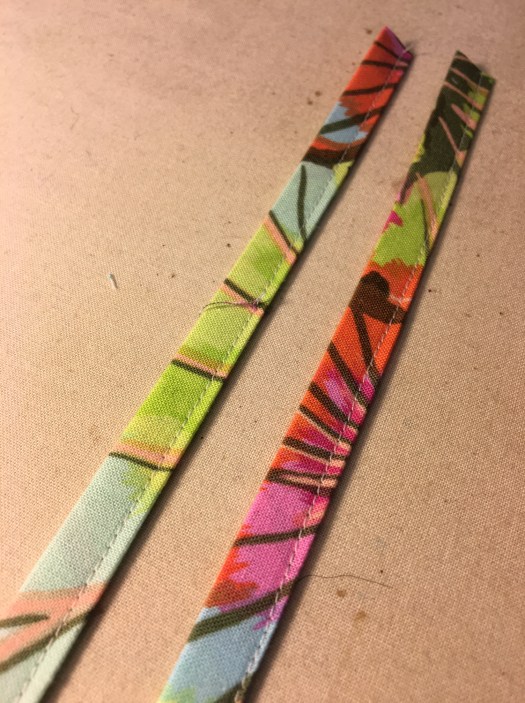
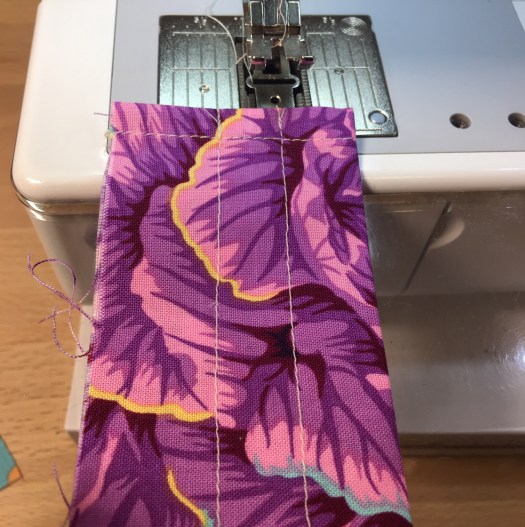
Stitch down the open side of each strip, very close to the edge, making sure you catch both front and back sides of the folded edges.

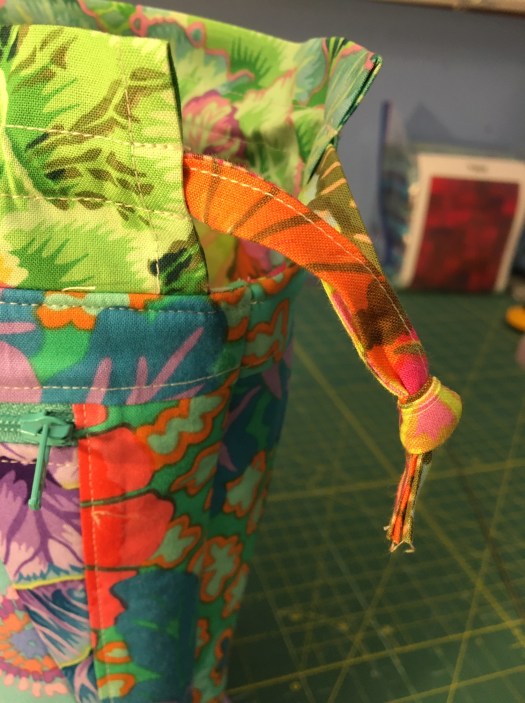
Here’s the finished string:
Make the casings
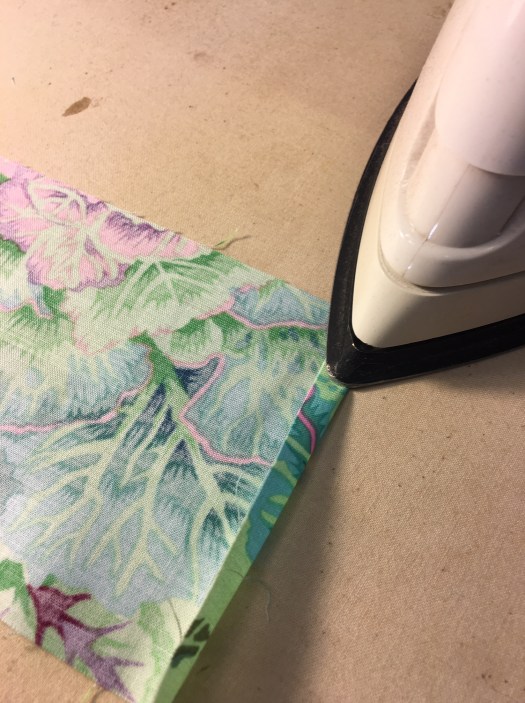
Fold the short side of each piece over 1/4 inch and press. Fold over 1/4 inch again and press.

Stitch down this small hem on the four sides of the casings, staying close to the folded edge.

Fold the casings in half along the long side, and press.

Stitch a line along the length of each casing, 1/2 inch from the fold. Now stitch another line of stitching approximately 3/4 inches away from the first line of stitching.

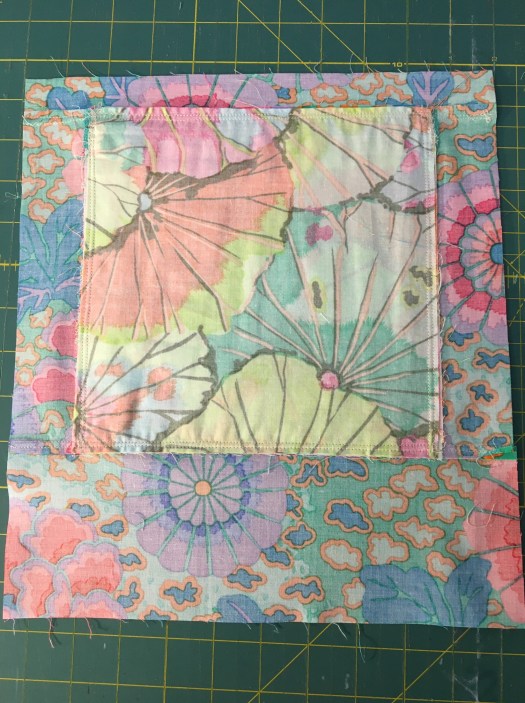
Assemble the zipper pocket
(all seam allowances are pressed toward the outside, and top stitched on the body fabric.)
Lay one of the 8 inch pieced blocks face up on the table. Lay the zipper (keep the zipper closed) along the top edge with the zipper pull facing down toward the pieced block. (The zipper will extend beyond the width of the pocket pieces. Center the zipper so that the same amount extends on both sides. Lay the lining right side down along the top edge of the 8 inch block and zipper, being careful to line up the top edges of all three, and clip or pin along the edge.
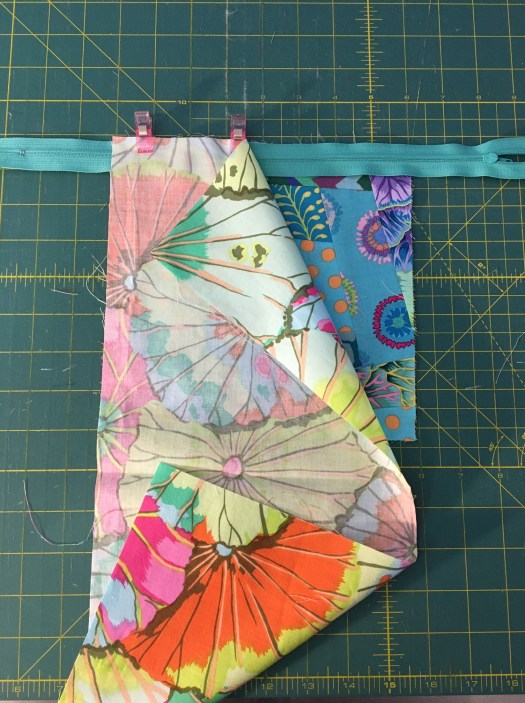
Using a zipper foot, sew along the top edge with a 1/4 inch seam.

Fold the 8 inch block and lining fabric away from the zipper and press. Top stitch about 1/8 inch away from the seam, catching the lining, zipper, and pieced block.
Fold the pocket lining up behind the 8 inch block, with the pocket lining right side to right side.

Line the pocket lining up with the top edge of the zipper, and clip or pin. The fold at the bottom of the pocket lining will be about 1/2 inch below the bottom of the pieced block.

Using your zipper foot, sew along the zipper tape with a seam allowance just shy of 1/4 inch.
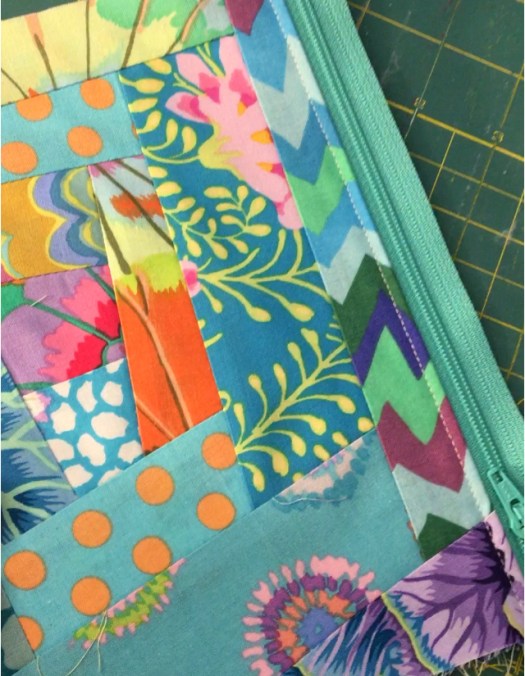
VERY IMPORTANT — DON’T MISS THIS STEP!!! Slide the zipper pull so it’s over the pocket body, and stitch a vertical line across the zipper very close to the edge on both sides, making sure to stitch through the very edges of the fabric. I go back and forth several times to make sure it’s very secure. This stitching will secure the ends of the zipper in place as you assemble the rest of the bag.


Trim away the excess zipper ends even with the sides of the zipper pocket.

Assemble the bag front (the side with the zipper pocket).
(all seam allowances are pressed toward the outside, and top stitched on the body fabric.)
Sew the two side pieces onto the zipper pocket, aligning the short edge with the top of the zipper pocket on each side. They will not all line up on the bottom.
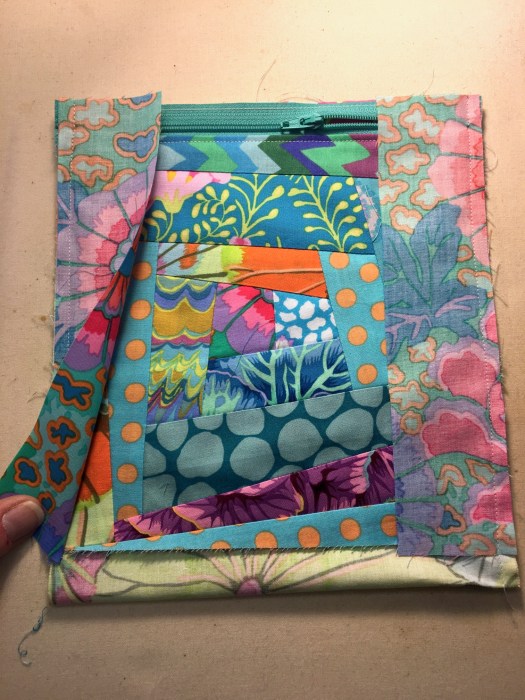
Fold the side pieces back, press, and top stitch along the side piece about 1/8 inch away from the seam.
Trim all the layers of the piece along the bottom so it measures 8 inches high. (this trimming allows this piece to be the same size as the non-pocket pieces on the other side — you added extra height with the zipper.)
Sew the bag bottom piece onto the bottom of the zipper pocket piece. Make sure that you catch all the pocket layers in the seam.
Fold down the bag bottom, press, and topstitch along the bottom piece, about 1/8 inch from the seam.
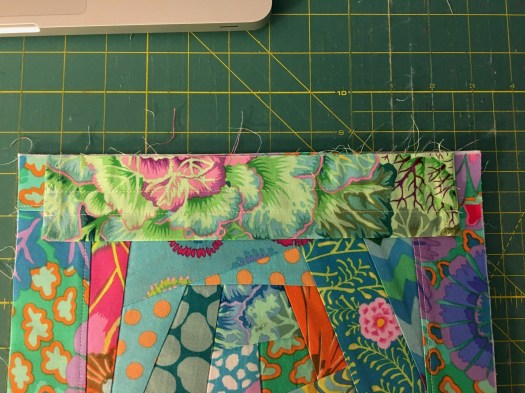
Line the bag top up along the top edge of the zipper pocket and bag sides section and clip or pin. Sew a 1/4 inch seam using your zipper foot.
Fold the bag top up and press and top stitch about 1/8 inch from the seam.


Assembling the bag back
This side of the bag goes together just like the front, except that there’s no pocket and no zipper.
Sew the bag sides to the left and right of the remaining pieced block, making sure to line them up with the top edge of the fabric. Fold back the sides, press, and top stitch. The side pieces will be about 1/2 inch too long. Trim off the excess so the bottom is one straight line.
Sew the bag bottom and top onto the back piece, fold back, press and top stitch. Here’s some detail of the finished bag front/back.


Assembling the bag
In this portion of the project, you assemble the side with the pocket and the side without the pocket exactly the same way. So there aren’t separate instructions for front and back. But I’ll refer to the bag front. You’ll need to assemble the bag back the same way.
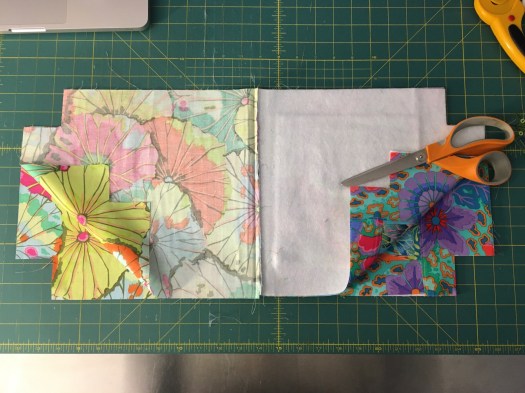
Fuse the batting to the wrong side of the bag front and back according to the batting instructions. On the bag side with the pocket, you’ll fuse the batting directly onto the back of the pocket. See the photo below.
Lay the bag front with batting fused on right side up on your table. Center one of the casing pieces along the top edge of the bag front with the raw edge of the casing toward the top edge of the front and the fold edge toward the bottom of the bag. Lay one of the lining pieces right side down on top of the bag front and casing, being careful to line up the top edges.

Clip or pin the top edge, then sew across the entire top with a 1/4 inch seam. Then fold the lining and front away from the casing and press. DO NOT TOPSTITCH THIS PIECE .

Line up all the pieces and cut a 2 inch square out each of the bottom corners of the layered piece. (These cut outs will become the gussets on the bottom of the bag) I like to use a square ruler of some kind to cut this portion. Here, I’m using my 5 inch square and lining up the corner on the 2 inch mark to cut.

Repeat these steps with the second bag body piece, lining and casing.

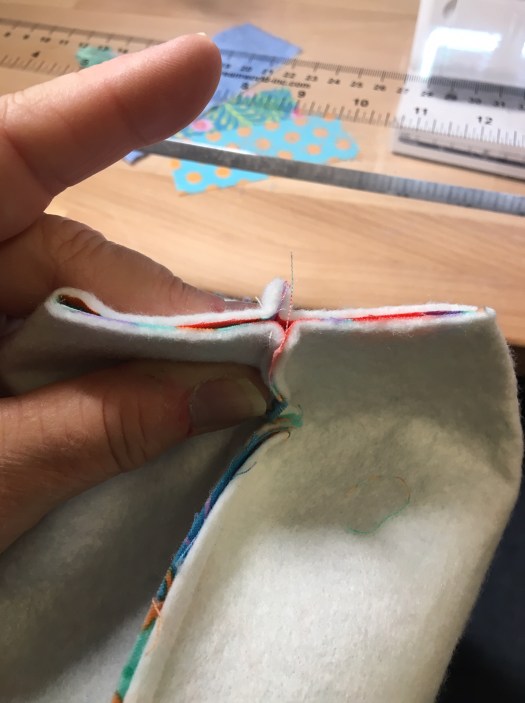
Open up one bag side and lay right side up on your table. Open up the second bag side and lay it right side down on top of the first piece. Put the lining side on top of the lining side and the bag front on top of the bag back. Pin the sides and bottoms, making sure to match the top seams carefully.
Sew a 1/4 inch seam across the bottom of each side and along the two sides, LEAVING ABOUT A 4-INCH OPENING ON ONE SIDE SEAM OF THE LINING. (When pinning this section I put two pins to mark the beginning and end of the side opening) Back tack on each side of this opening to reinforce the edges of the opening. DO NOT SEW ALONG THE SIDES OF THE 2 INCH CUT OUTS.

This is a good time to press back a 1/4 seam allowance on both sides of the opening in the lining. This will make it easier to line up these sides to sew them closed once the gussets have been sewn.
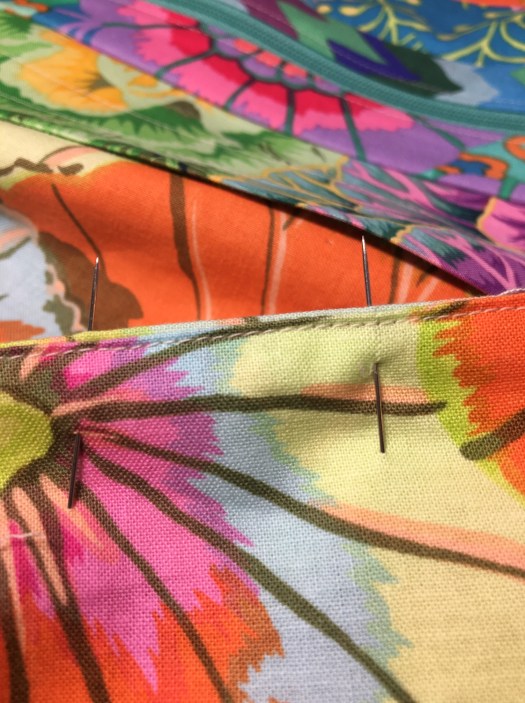
Take each bag bottom where the 2 inch cut out is and open the cut out. Line up the bottom seam with the side seam so that the open sides create a straight line. Pin or clip along this line, then sew with a 1/4 inch seam and back tack on each end. You have just sewn one gusset. You’ll need to do this to all four corners.


Reach your hand into the open lining side seam and carefully turn the bag right side out. Put your hand inside and gently push out the corners of all four gussets. Finger press down a 1/4 inch fold on each side of the lining opening (this is a lot easier if you pressed them before making gussets). Line up the two sides and sew a tiny seam to close the opening, making sure you catch both sides of the folded edges of the opening.

Push the lining into the inside of the bag and carefully mold the bag pieces into shape, being careful to line up the top edge of the bag and finger press well. Then turn the bag inside out. With the right side of the bag facing up, top stitch all the way around the top of the bag, about 1/8 inch from the top edge. Make sure to keep it all lined up and neat as you top stitch. (I turn the bag inside out because it makes it easier to sew the topstitching from the outside of the bag. You get a nicer finish this way).

Threading Strings into Casing
Starting with the left side of the casing, thread one of the strings through each side of the casing, making sure that the two ends of the string end up on the right side of the bag. Try to keep the string from twisting in the casing. I used a bodkin to pull the strings through, but you could use a safety pin or your other favorite method to thread the string through the casing.

Now pull the two sides of the remaining string through the casing from the right side, making sure that both ends of this string end up on the left side.
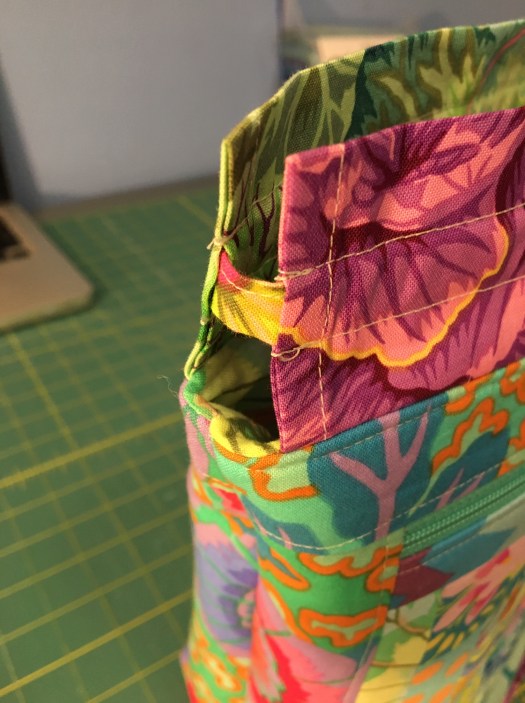
Here’s how the strings are arranged within the casings. This loop arrangement allows you to close the bag by pulling on the ends of the strings on each side of the bag.
Tie the two ends of each string into a knot and leave about 1/2 inch of the end of the strings beyond the knot.
You’re done!!! I hope you like how it turned out!
Copyright by Anne Ibach 2020

Your directions are great! I’m going to give this a try this weekend. Thank you so much for sharing!
LikeLike
Thank you for the feedback! I sometimes worry that I’m providing too much detail!
LikeLike
I note you don’t want bags sold but would you object to them being in a tombola which was raising money for a charity I ask as my quilt group is having a tombola at our exhibition and the theme is bags and the proceeds are being donated to our chosen charity
LikeLike
Yes, I’m fine if the entire sale price goes to charity. Thank you for asking!
LikeLike
Thank you
LikeLike
appreciate the tutorial! I wish all parts were on the video.. but this is great. can’t wait to try it. thank you!
LikeLike
Yes, it would be nice to have it all on video, but I worked on this for hours. Can’t imagine editing all those hours of video. Then uploading it would take days!!!
LikeLike
What are the sizes from this bag??? Can’t find it..
LikeLike
It ends up approximately 9.5 inches wide and 12 inches high when the drawstrings are not pulled tight.
LikeLike
I love these bags and also the bright colors you use, they are happy colors!
LikeLiked by 1 person
Thanks! It’s really all about the color for me! I find it very exciting!
Anne
LikeLike
Excellent tutorial!! Thanks for sharing!!! Can’t wait to get started on the bag. I love your fabric choices on all your bags.
LikeLiked by 1 person
Thanks Joann! Please let me know if there’s anything in this tutorial that in unclear or confusing. I do keep tweaking these to make sure people can understand them. Would love to see what you make!
Anne
LikeLike
This is so lovely. Thank you for your generosity in sharing! I sew and knit for charity and have been wanting to make myself a bag to haul my supplies around in. Thank you again!
LikeLiked by 1 person
Thanks for reading! Send me a photo when you make one.
Anne
LikeLike
I just made this bag and I’m so thankful for your clear, logical directions. You really went out of your way to help us understand how to construct this bag, and it worked! I am really happy with the way mine turned out and it was a lot of fun to make. Thank you very much!!
LikeLiked by 1 person
Oh cool! Thanks for letting me know! I’m glad my tutorial worked for you!
Anne
LikeLike
Love that I joined up with your blog! All these bags are so damned cute!!! Thank you for all the inspiration. Sincerely, Louise Mills
LikeLiked by 1 person
I’m glad you found me and I’m glad you used a little profanity!!!
Anne
LikeLike