(Special Note: Amazon delivered a THIRD 10.5 inch square ruler today! I wonder how many more I’m going to get!!!)
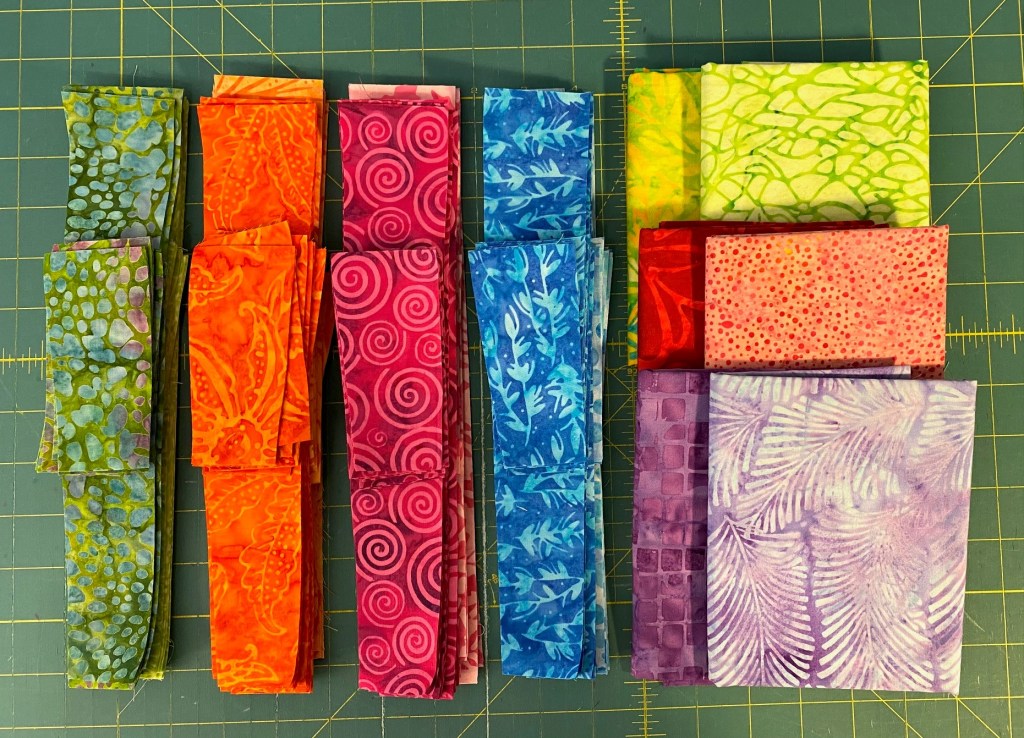
After work today I grabbed a quick dinner and then finished cutting the four remaining sets of batiks for my new quilt.
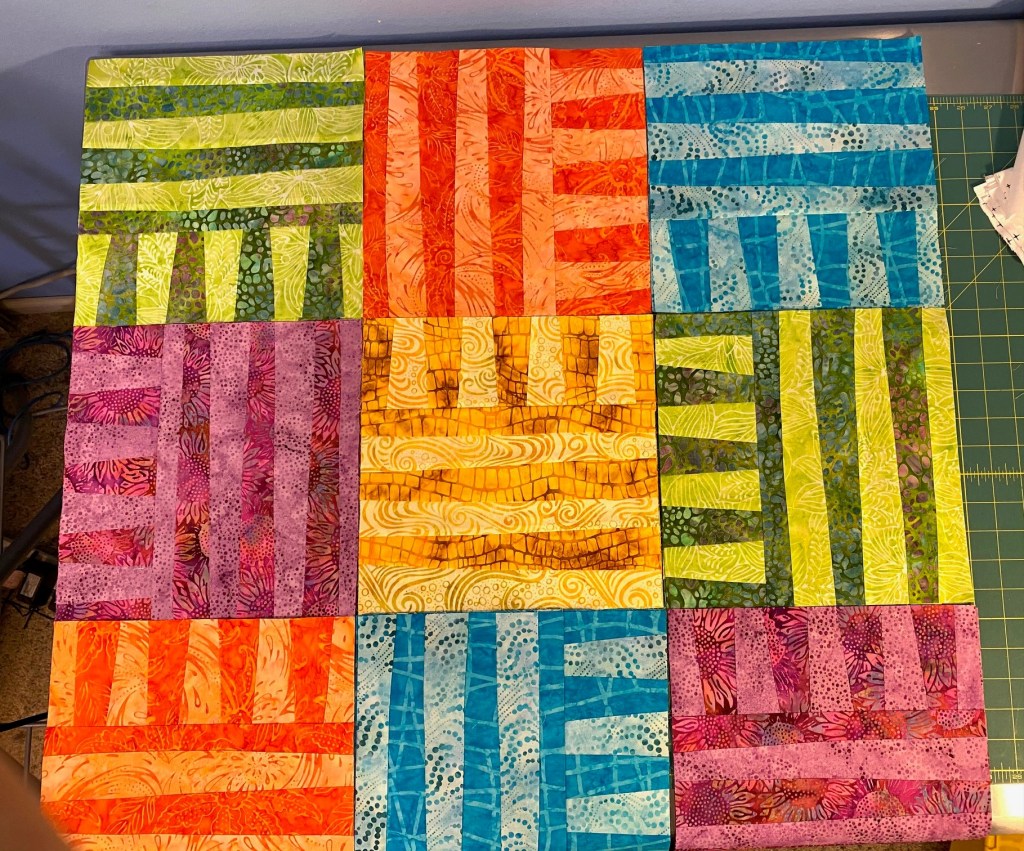
Then I sewed the larger section of these green blocks before I headed out for a walk with the dogs and a phone conversation with a friend as we walked.
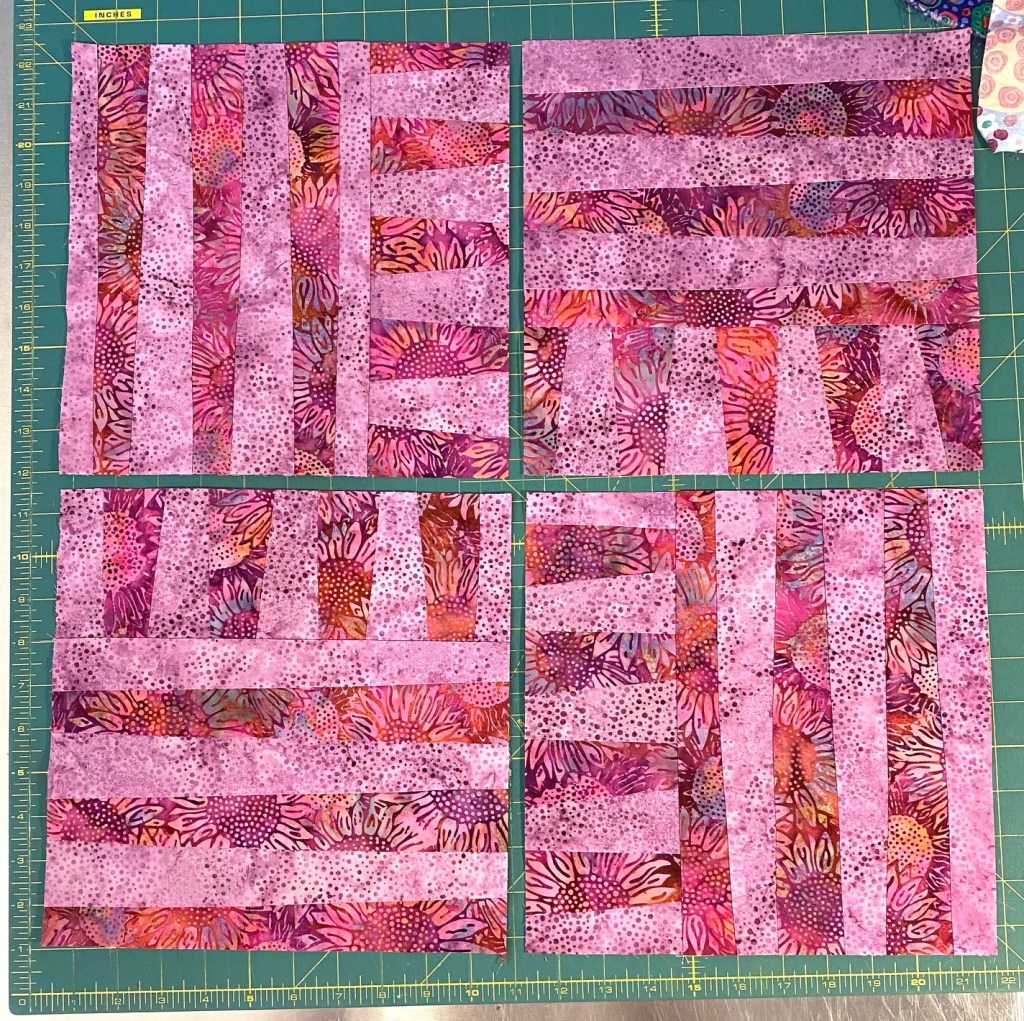
I finished these four green blocks when we got home, and sewed up the orange set as well. I now have half the planned blocks for this quilt done.
I’m loving these colors!
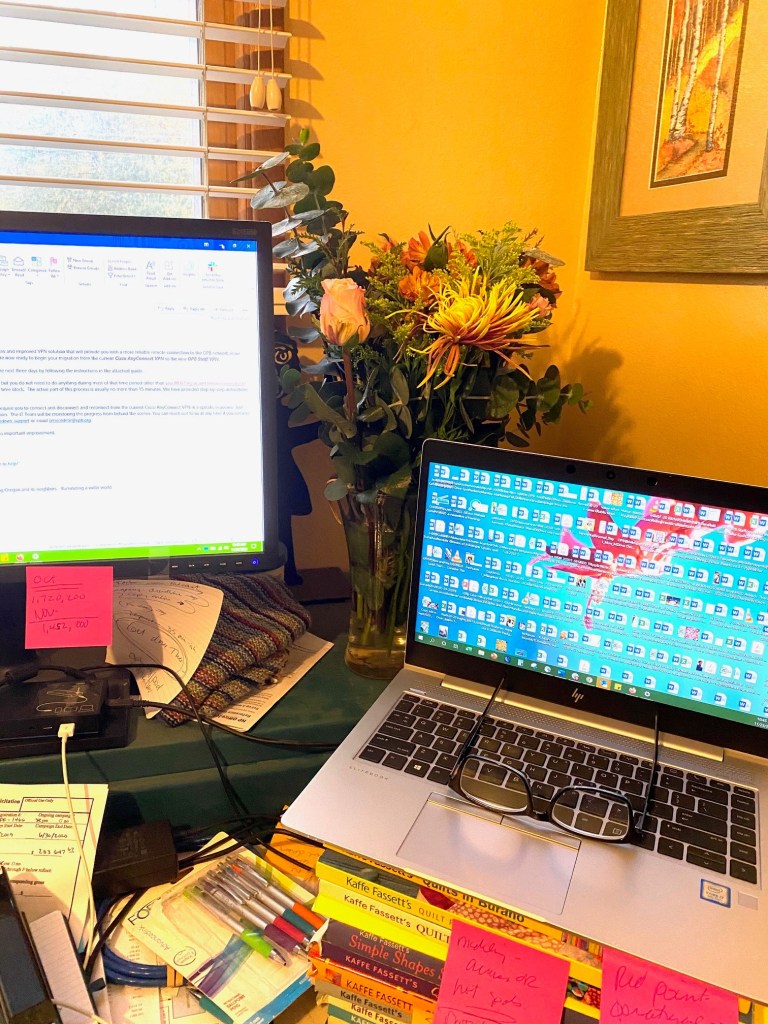
Some friends of mine brought by a huge bouquet of flowers this morning for my birthday, which is on Wednesday.
They smell soooo amazing!It has some fresh eucalyptus and it’s filled the house. I keep moving the flowers around the house so I can enjoy them. I had them in my office today as I worked. Tonight they’re on the coffee table.
One more day of work and then I’m off for five days. I’m planning a couple of hikes, a trip to the coast if the weather allows, and another trip up to the Olympia, WA, area to do a little sheep herding on Saturday. I’m guessing there will be some quilting and sewing in those five days too.
I woke up this morning and after a hot shower had a good breakfast and a couple cups of delicious French press coffee. Then Rico, Bender and I went for a brisk four mile walk and had a long conversation with my sister in Wisconsin the entire time.
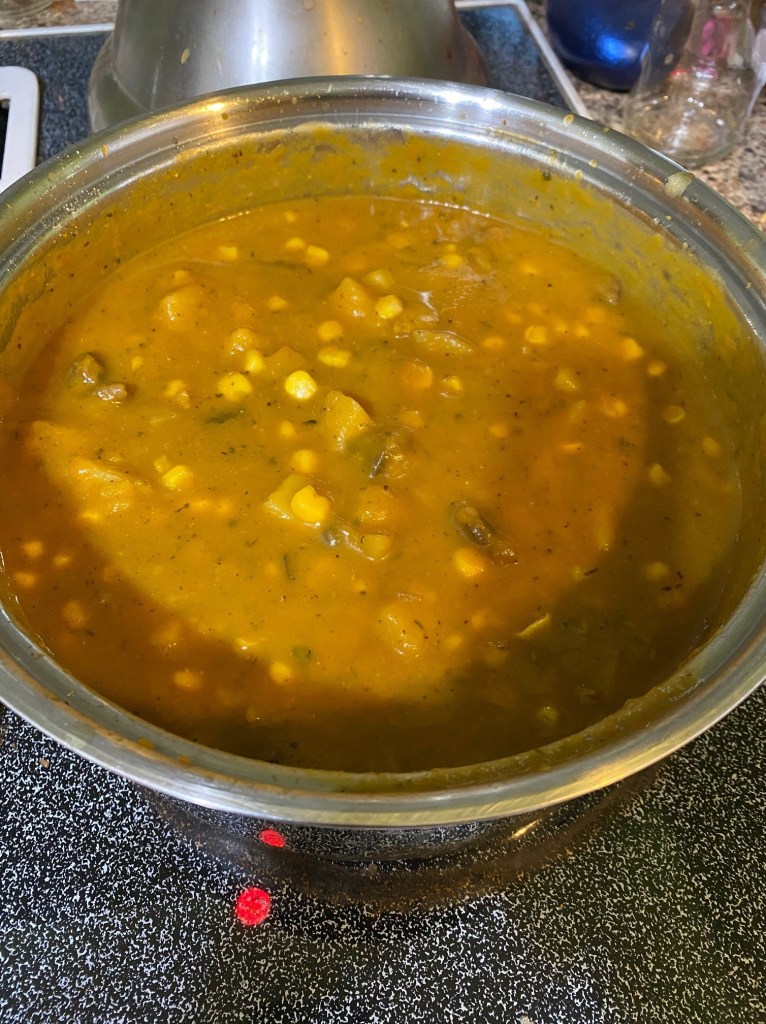
Got home and got a big pot of soup on the stove. It was nice to get warmed up… a really good day to stay in the house.
Yesterday I roasted some butternut squash with onions, celery and carrots, and simmered it all today in some chicken broth and added some lovely herbs and warm spices. In a separate pan I simmered some potatoes, mushrooms and corn in stock. I pureed the butternut squash mix, then added in the contents of the other pot. It made a really tasty and comforting pot of soup. I gave a generous container to a friend and have enough for four meals for myself during this week.
After having some soup for lunch and then cleaning up the kitchen and getting the dishwasher loaded and running I put up some white twinkle lights on my back fence right off my patio. I love having lights in the back where I can see them as they make me feel better with all the darkness this time of year.
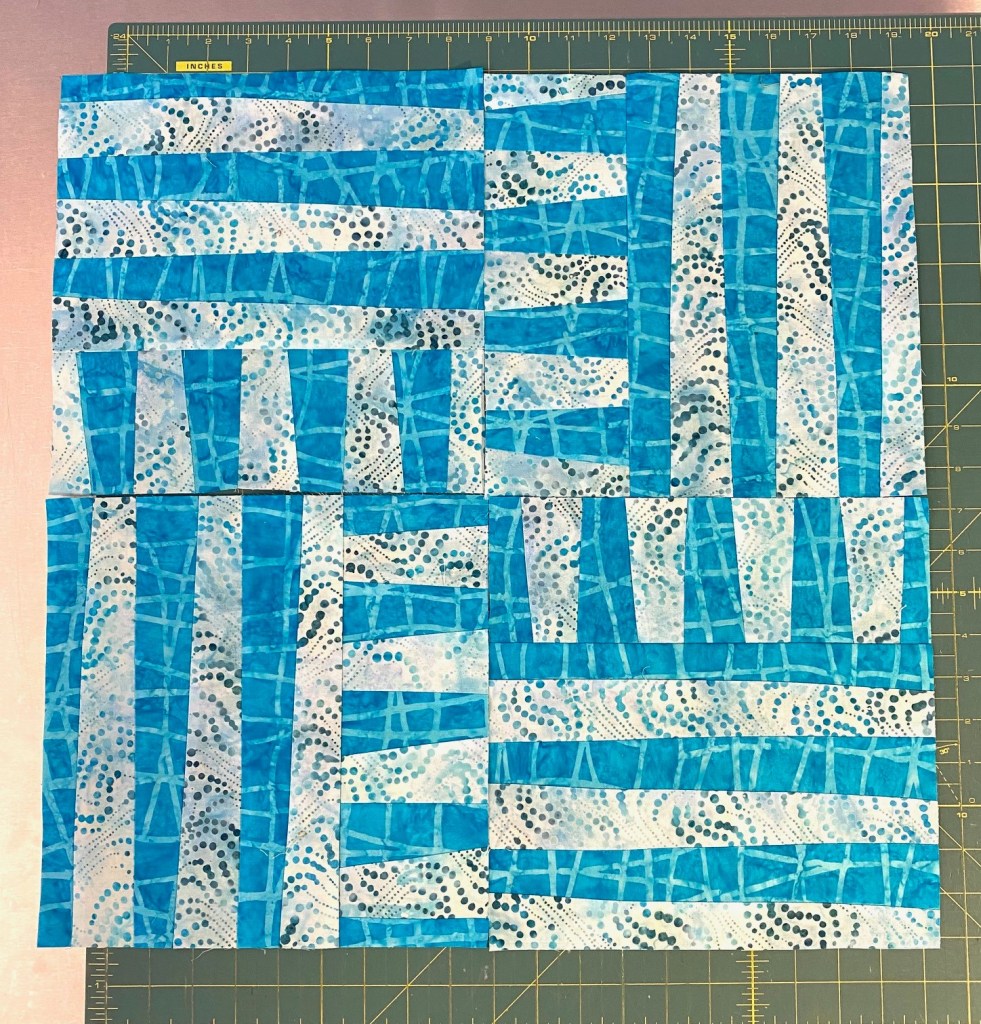
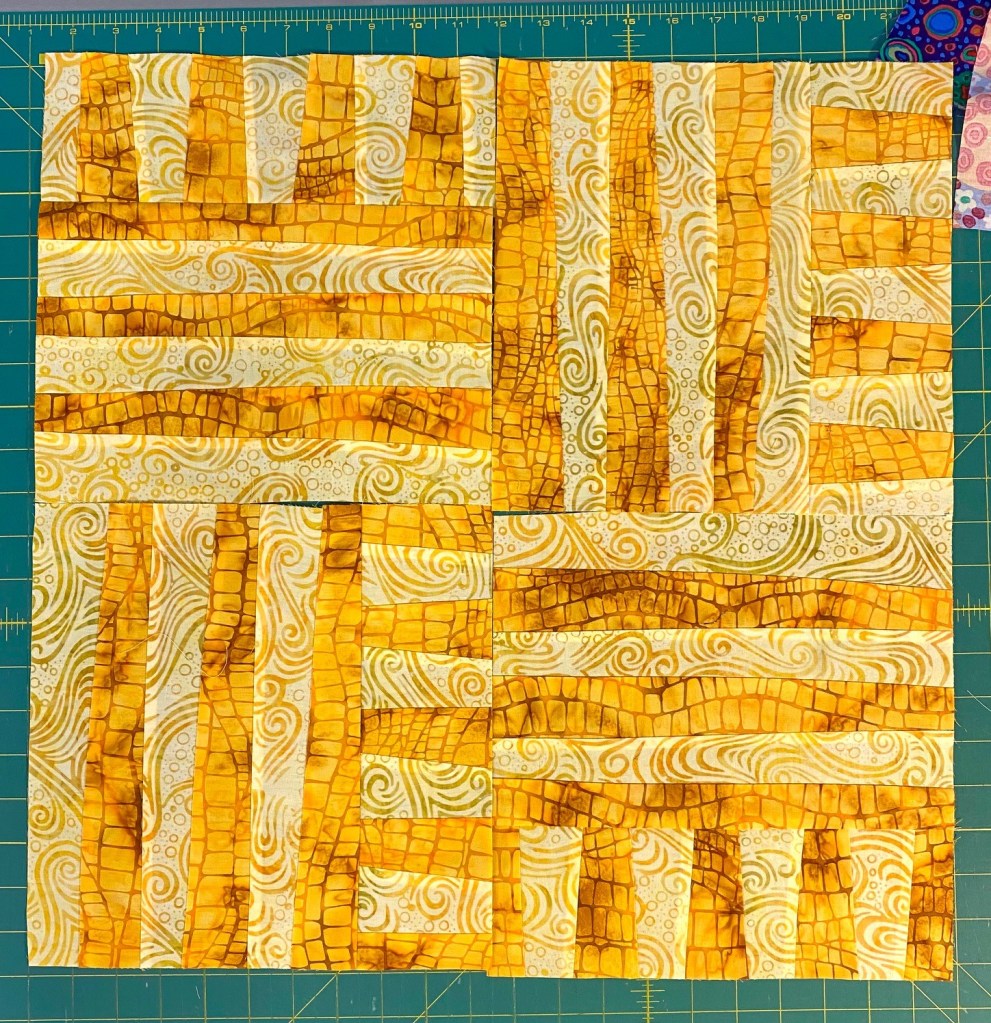
After another phone conversation with a friend I dug into some sewing and made two more sets of blocks for my impulse quilt.
I just love the effect of this swirly yellow fabric!
So I have the blocks out of three fabric sets done.
I quickly figured out a way to chain piece all these strips and it’s making these blocks go much faster. Each set gets a little easier than the previous set.
The trickiest part is trimming the two main block pieces prior to sewing them together. The yellow set all turned out really tight with very little extra fabric to trim away, so they took some time to get right. But rather than trimming the two pieces to the exact size and then sewing them together, I’m preferring to sew them together prior to precise trimming, and then trim the entire block to 10.5 inches. I just haven’t memorized the best way to do this, but I will before I’m done.
My 10.5 inch ruler arrived today. In fact, they delivered TWO of them to me about an hour apart. I checked my orders on Amazon to make sure I hadn’t accidentally ordered two and I hadn’t. The 10.5 inch ruler made it so much easier to trim these blocks. I’m glad I ordered it before I was too far into this project.
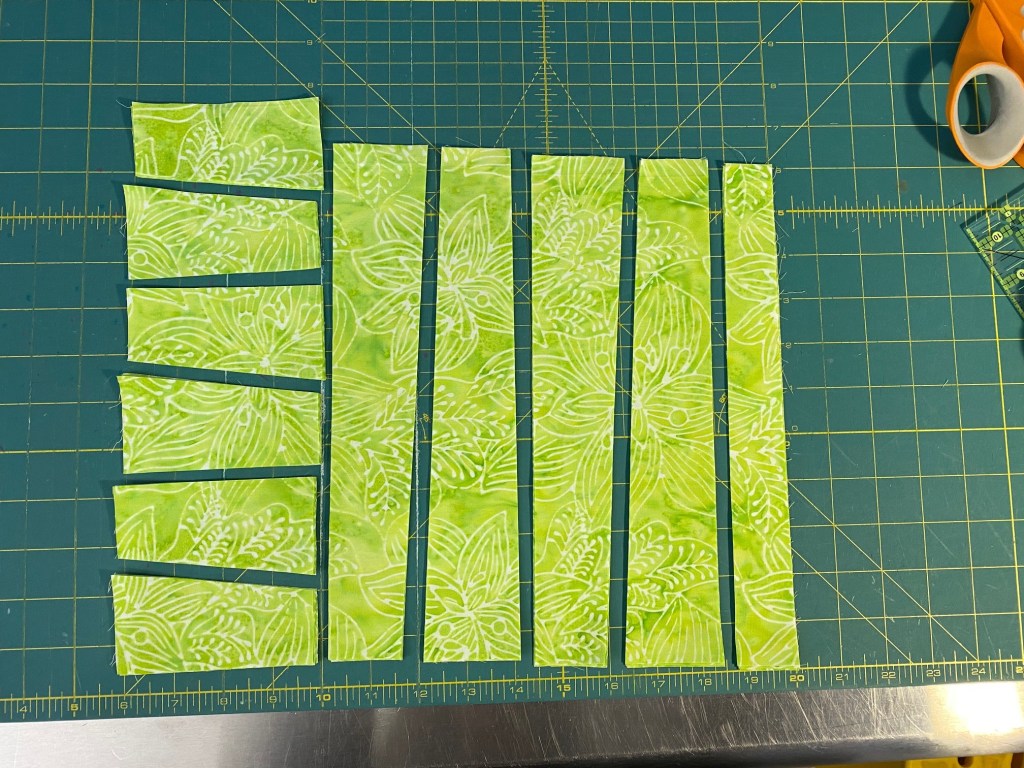
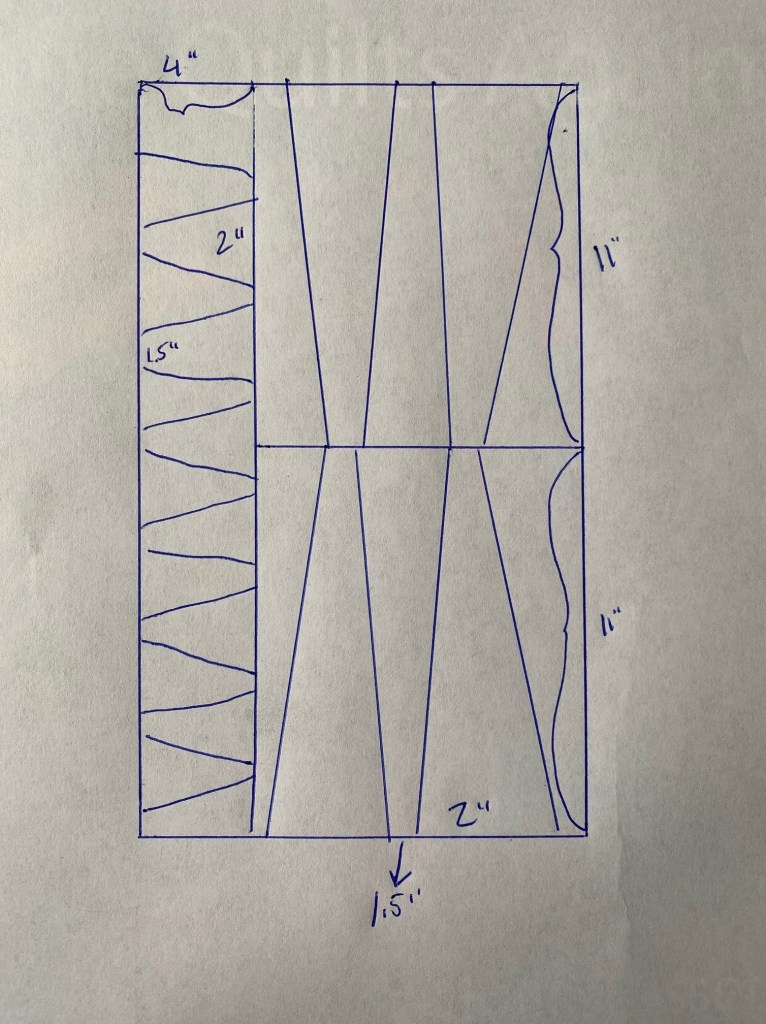
Here’s a basic idea of how I cut my pieces out of my 1/3 yard pieces of batik.
I cut the piece into two pieces that are about 11 inches tall. These pieces each measure about 11×12, depending on how generous of a cut I got when I purchased the fabric. There is one local fabric store where they are notoriously skimpy in cutting yardage. I’m often lucky to get a full 12 inches, but never get even a quarter inch to square up my fabric. I have choice words for that store every time I recognize a cut from them in my stash.
Then I stack these two pieces and rotate them to the right, so the 12 inch side is at the top. Then I cut off 4 inches on one side. This small piece will be the wedges for the shorter section, and the larger section will be cut into the longer wedges.
Here’s how these pieces are cut.
To cut the wedges I line my ruler up with the two inch mark at the top of the fabric and the 1.5 inch mark at the bottom, and then cut this line. Then switch to 2 inches at the bottom and 1.5 at the top to cut the next wedge. Then I just alternate across the fabric. The small strip at the end will probably go into my scrap bag.
I got the fabric for four more sets of blocks cut before I called it quits tonight. I’ll get the final three sets cut tomorrow night and will probably get at least one set sewn.
I was so excited to get this delivery today! All the girls at sheep herding are going to be very envious of my sexy boots!
I took a bit of a detour a couple of days ago when I saw a quilt on Pinterest that I want to make. It’s a very improvisational, big block approach. I was able to locate a pattern for this quilt by Suzy quilts, but I decided that I would strike out and figure out how to put my own spin on this.
It’s not uncommon for me to see something I want to make, something that sort of excites me, and it will push other planned projects to the back burner. This is one of those projects. I don’t think my mother appreciated my impulsiveness, but it’s a sort of fun way to go through life!
So I dug into my batik stash and started selecting fabrics. I’ll be using an array of colors in light and dark values, and it will all be sashed with some indigo batik. I had to order some indigo batik because I didn’t have enough in my stash. It’s very similar to what’s here.
Here’s a picture of the quilt I’m riffing off of. You can find more variations on this quilt and info on the pattern at Suzy Quilts on Instagram.
Since I’m making my own “pattern” for this quilt, the first thing I did was dig into my batik scraps and make a practice block. Have I mentioned that I love figuring out how to make things like this? It’s a fun process for me to noodle it out and make my own adaptations. Plus, I just LOVE improvisational piecing. It’s really my happy place!
Making a practice block is a really great way for me to approach a new project that I’m figuring out because it illustrates what works and what doesn’t work. I had cut these scrap pieces into 1.5 inch strips. I found that there was a lot of waste in using straight cut strips, plus a lot of time to trim off the excess once I sew them a bit wonky. I also thought these strips were a little too narrow.
So I pulled out a couple of pieces of coordinating fabric and started cutting. Most of my batik fabrics are 1/3 yard pieces. Here’s the improved block that I made.
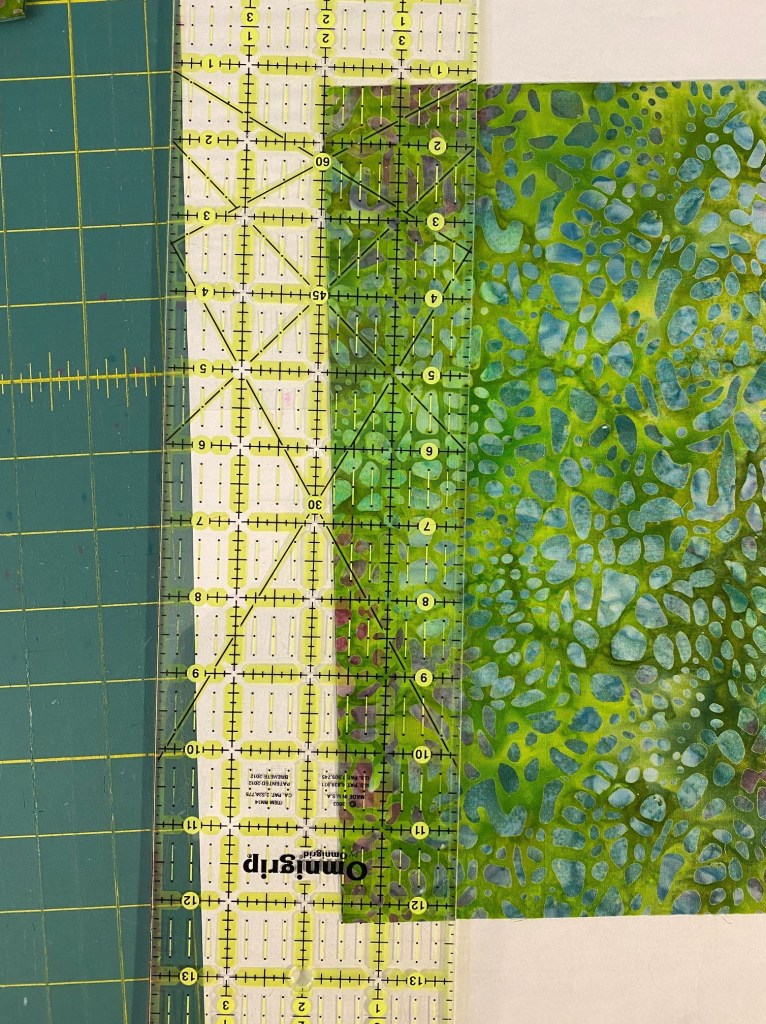
Here’s how I cut the 1/3 yard pieces of fabric to get the strips I need for these blocks. The fold is at the top.
I need the longer pieces for the main body of the block, plus the shorter pieces for the strip along the side of the block.
Rather than cutting straight strips and having to trim waste away, I decided to cut these pieces into sort of free form wedge shapes. The beautiful thing about this is that these strips are all improvisational so they don’t have to be precise. I just used my regular ruler to cut the wedges about 2 inches wide on one side and about 1.5 inches wide on the other side.
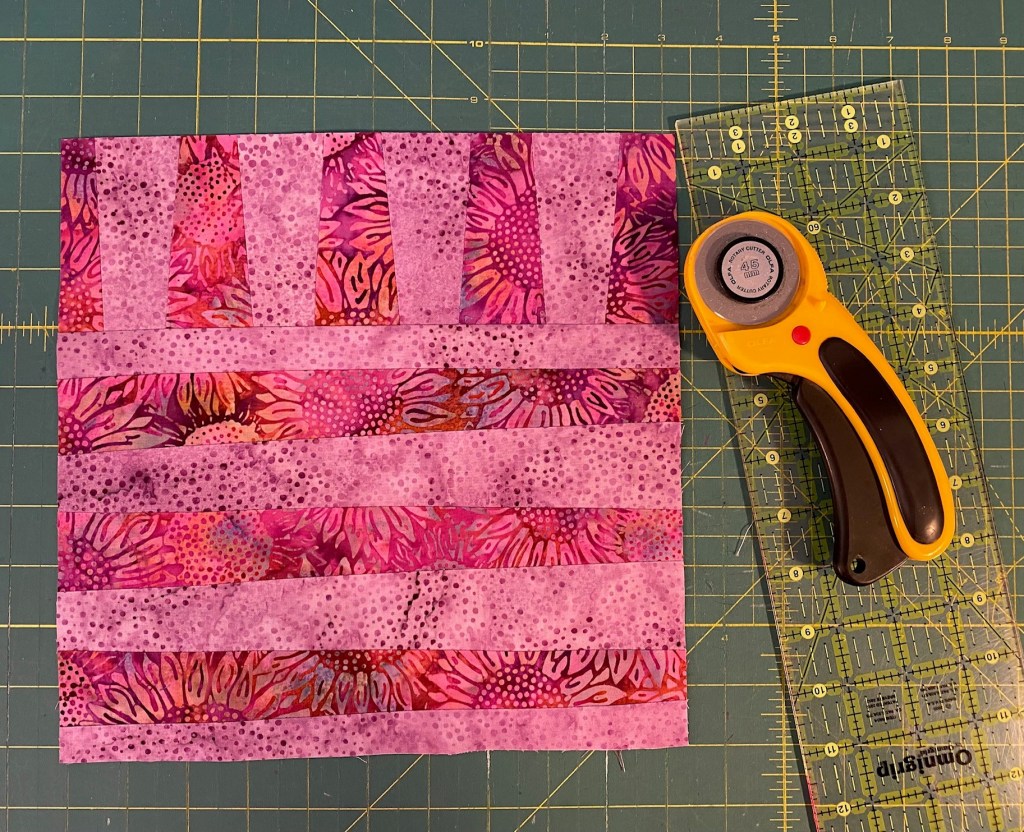
Here’s the first set of blocks sewn with this cutting method. (Aren’t these fabrics gorgeous!!! that sunflower fabric is so beautiful!)
There should be enough fabric in two 1/3 yard pieces to get seven blocks, if I’m lucky. I don’t need seven blocks of each color combo in this quilt so I’ll have some fun scraps left over when I’m done.
These blocks finished at 10.5 inches square so this quilt will go together pretty quickly. I’ve ordered a 10.5 inch square ruler to make finishing these a little easier. I can square up easily with my 12.5 inch ruler, but I can use a 10.5 inch ruler in the future.
I’m excited to see more color combos come together. Haven’t decided yet how wide the sashing will be. I’ll have to play with that once I have some blocks done and my new fabric arrives.
I took Rico to his herding lesson yesterday. He was amazing, as usual. We both just love getting out there in the fresh air. It was cold and foggy, but we stayed warm and happy.
I have a short work week coming up with Thanksgiving. I’m taking Wednesday off because it’s my birthday! Then I’ll keep celebrating with Thursday and Friday off as well. I’m hoping that I can drive to the coast on Wednesday, but it looks like the weather is going to be terrible for a run on the beach. But I’ll keep an eye on it over the next couple of days. There will be some long walks happening on those days off as well.
I’ll be staying home for Thanksgiving. A friend of mine is cooking dinner and is going to deliver a full meal plus leftovers to me. I’m very happy that I’ll have turkey and all the trimmings, plus left over turkey for sandwiches… my favorite part of Thanksgiving.
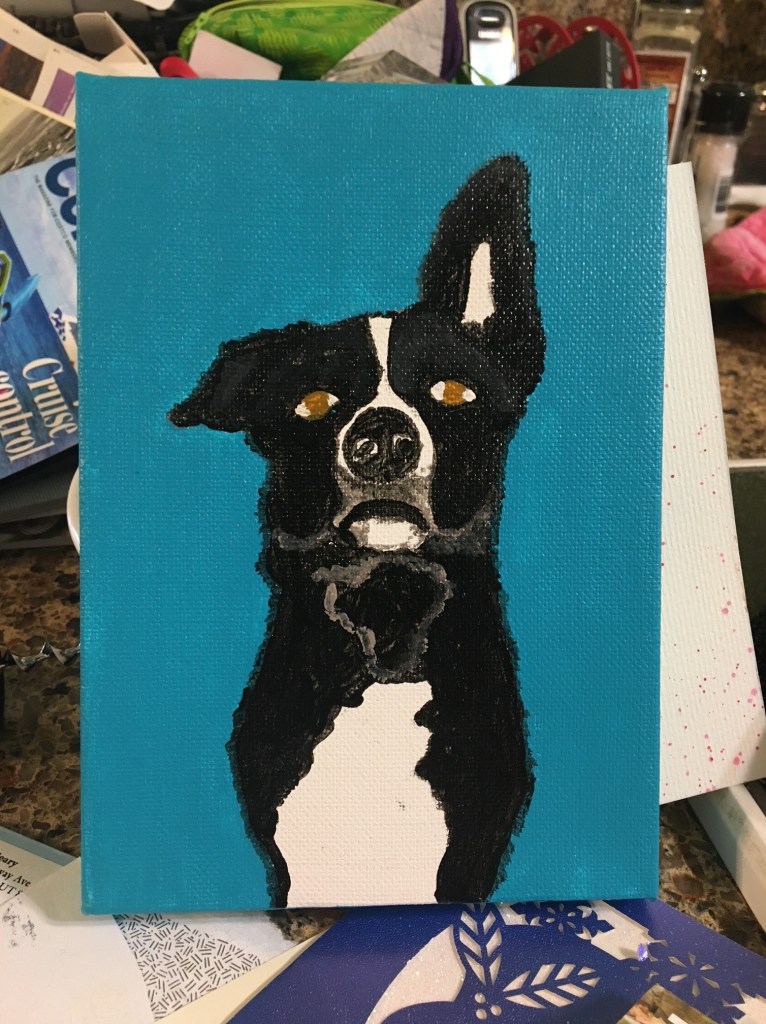
I’m not a natural artist, but I’ve always been interested in painting. I find that the secret is to know what my skills and abilities are and paint things that are within those limits.
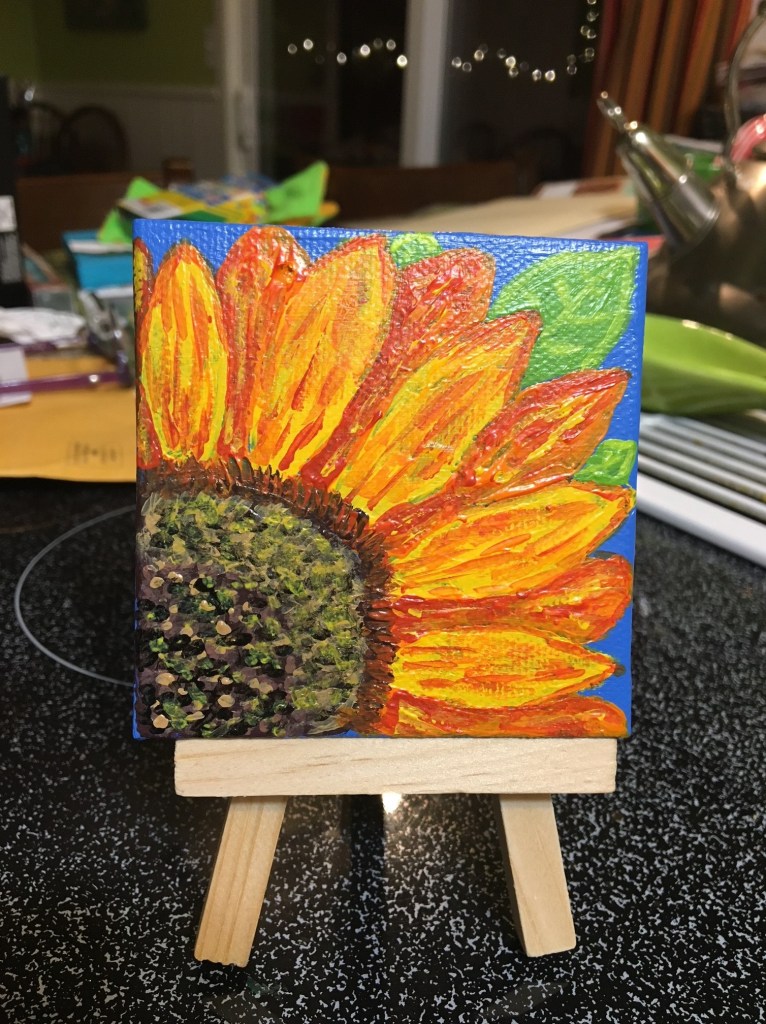
I bought some new acrylic paints a few months ago and have not tried them out until last night. And I’m pretty happy with what I was able to do.
This is a very small canvas — just 3×3 inches square. They are really fun to paint. They don’t take much time. And there’s not a big commitment to a huge project. I’m really happy with how this turned out and it felt really good to have my paints out again.
So today I painted another small canvas as I was listening to a webinar for work. It was a great way to keep my hands busy while my brain was occupied.
Then after out nightly three mile walk, I pulled out another canvas and finished up another painting. I’m really having fun with these little desert landscapes and they’re helping me feel warm!
I’m thinking I may paint six or nine little desert scenes and combine them into one wall hanging. Not sure how I’ll mount them all, but I have a picture of it in my head and I think it will work. I may have to enlist my wood working brother to make a custom frame for me.
I haven’t done much painting with acrylics, with the exception of using them to paint rocks. (I’ll do a post soon about my painted rocks.) I first tried painting with acrylics last January when some friends and I did a “Thirty mini canvases in thirty days” challenge. We were supposed to make one small piece of art every day for a month.
It was really challenging and forced me to step outside my comfort zone to try some new things. Here’s some of the things I made during this challenge with acrylic paints.
That is, of course, a sunflower. And next is a tree made from dots. You’ll see a lot more dots when I show you my painted rocks.
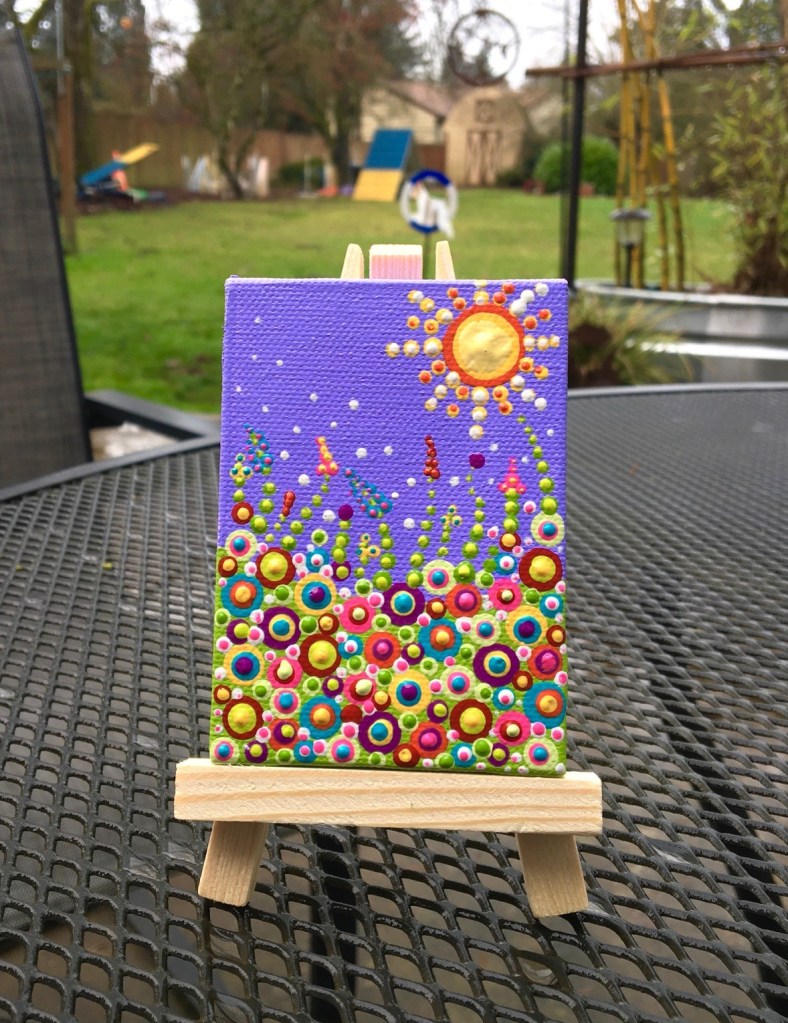
And then these really fun little floral landscapes made from dots. I just love these!
This one is 3×3.
This one is 4×4.
This one is 3×4.
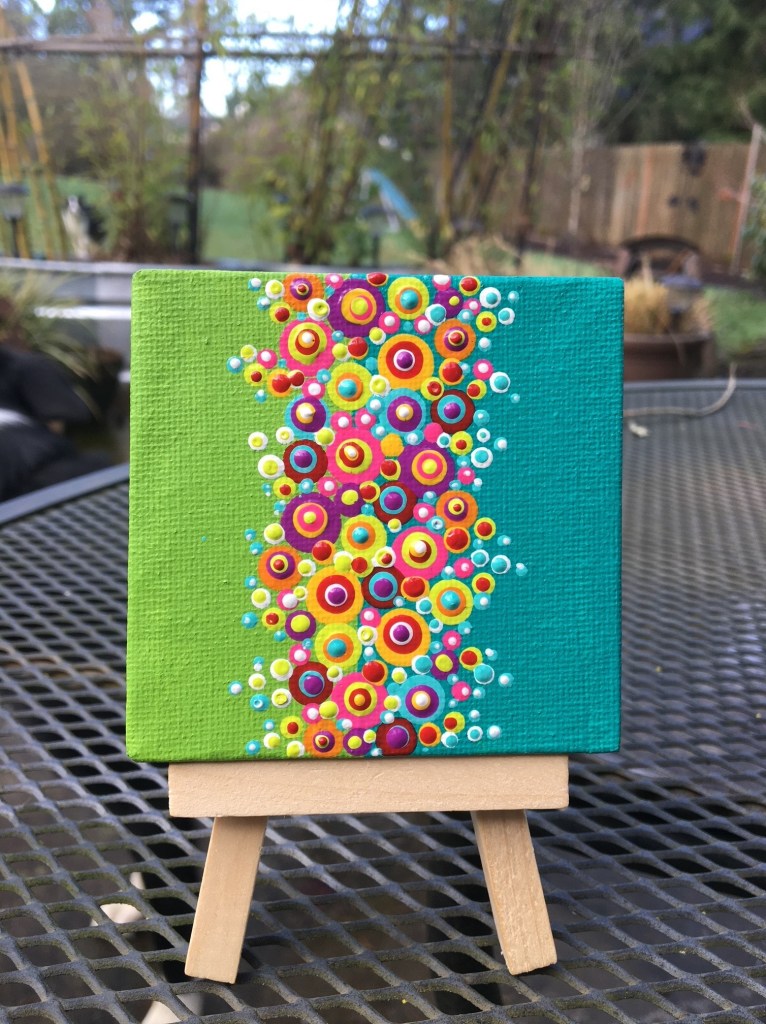
And a little abstract dots painting, 3×3.
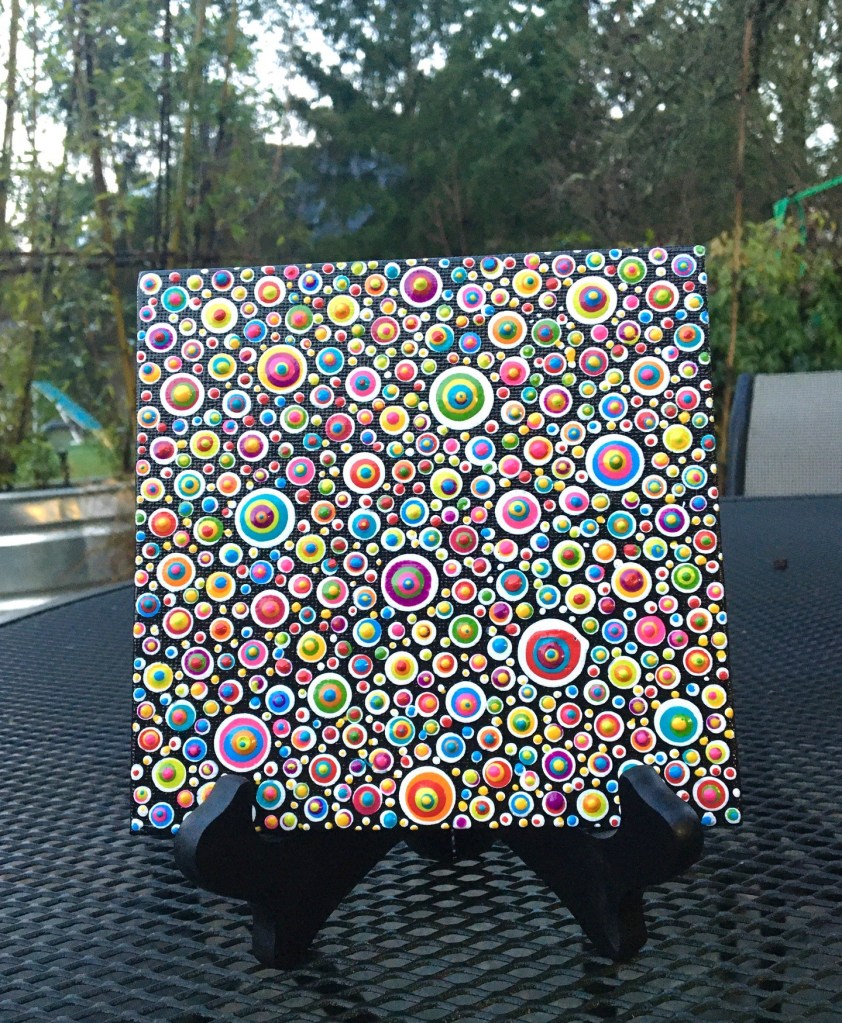
And more abstract dots. This canvas is 8×8 and this took forever! That’s a lot of dots, but i really like how this turned out!
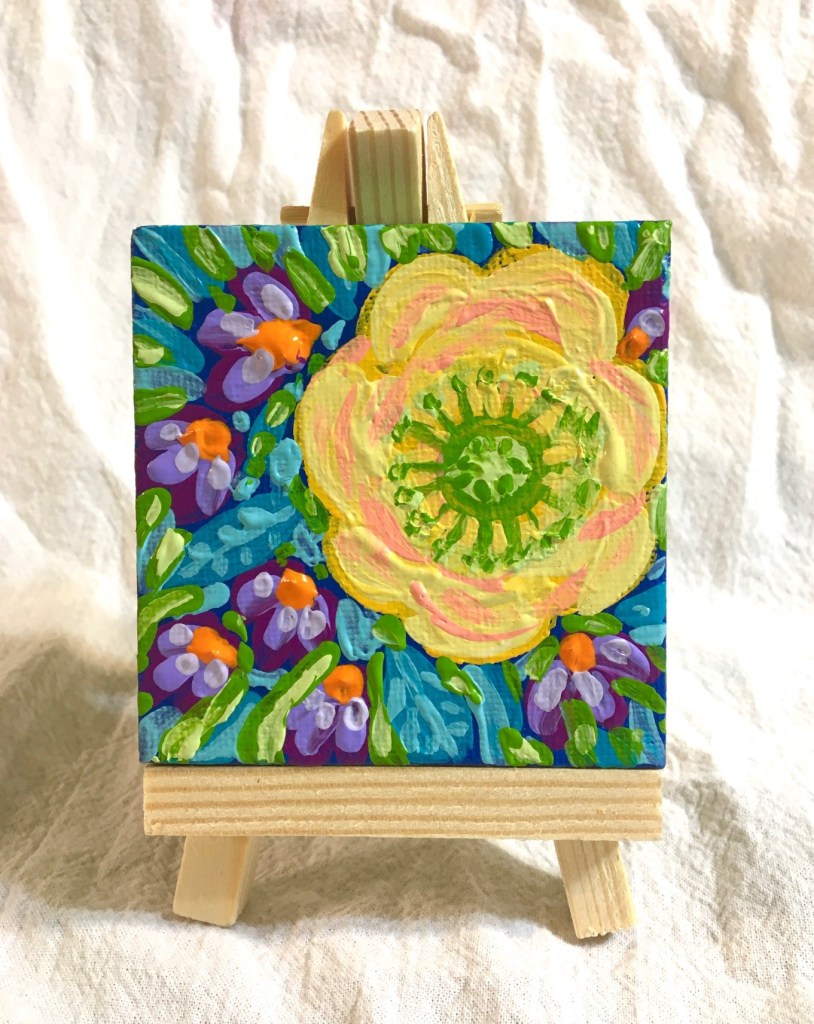
Next is this cute little floral. I really want to try this with my new paints. The paints I used for this were pretty cheap.
And finally, I made this painting of Rico, but never got around to finishing all the details. This is 5×7.
A friend of mine commented that all of my paintings that I share on social media are so good. I laughed and told her that I don’t share the ones that are terrible. And I’m not going to share them here.
I’m not a great painter, but I’m enjoying something that is really outside of my comfort zone and my natural talents!
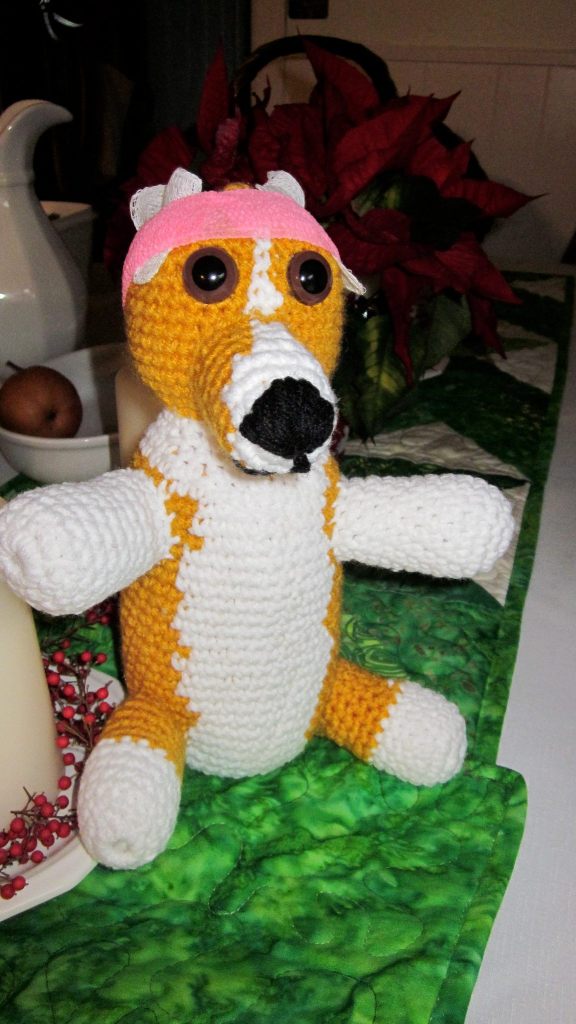
After I moved to Portland 10.5 years ago I started playing with crocheted dogs. At first, the dogs were very free form and sort of like cartoon dogs. Each dog was designed as I crocheted, shaping and creating personality as I went on.
The green one in the back was the prototype. You can see that I roughly embroidered the eyes and nose on. the blue and orange dogs show some improved ways of doing the nose, and I used two buttons for each eye… a white one and a black one. I love the way they look like they’re whistling! I still have the orange one sitting on the buffet in my kitchen. I had a lot of fun with these bright and vibrant colors.
The dogs were made in several parts. The body and head were crocheted all in one piece. the muzzle, arms and legs, ears and tail were made separately and stitched on. All of these dogs are around 14 inches tall from their butt to the top of their heads.
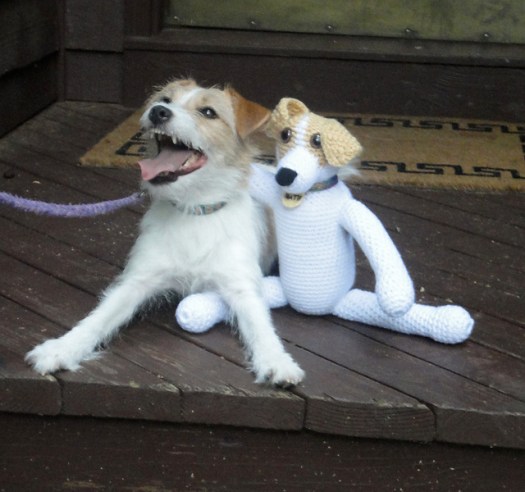
I soon moved onto making actual dog breeds. Of course, I started with Jack Russell terriers. And soon I was making custom dogs to match real dogs. I made a lot of Jack Russells because I know a lot of people with Jack Russells.
This was made in the likeness of my friend’s Natty who is a full older sister to my Skeeter. She was completed with a collar and a crocheted tag with her name on it.
By the time I got to this point I was using pre-made eyes. They gave a really nice finish to these more realistic dogs.
Here’s Natty Two with the real Natty!
When someone would request a dog made to match their actual dog, I would ask them to send me photos that showed the dog’s markings from all sides so I could make the crocheted dog a close match.
Here’s a Jack Russell named Jack showing the markings on his back.
It’s really common for Jack Russells to be mostly white with color on their head and at the base of their tail. It’ not uncommon for them to have other body markings, but many of them are white other than the head and tail markings.
Here’s Jack with his tag.
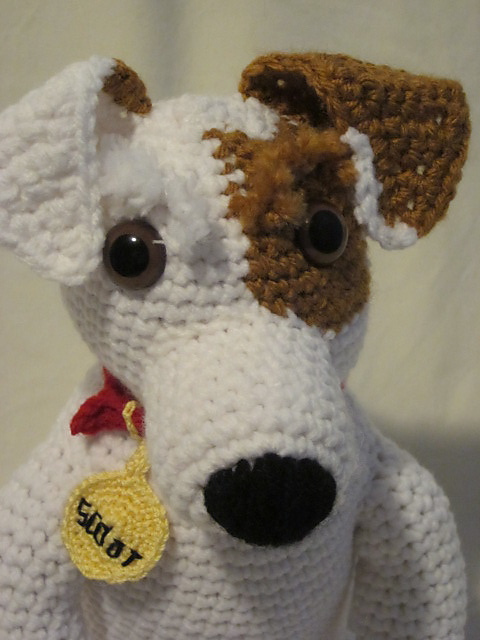
Here’s a close up of some fuzzy eyebrows I made for a Jack Russell named Scoot.
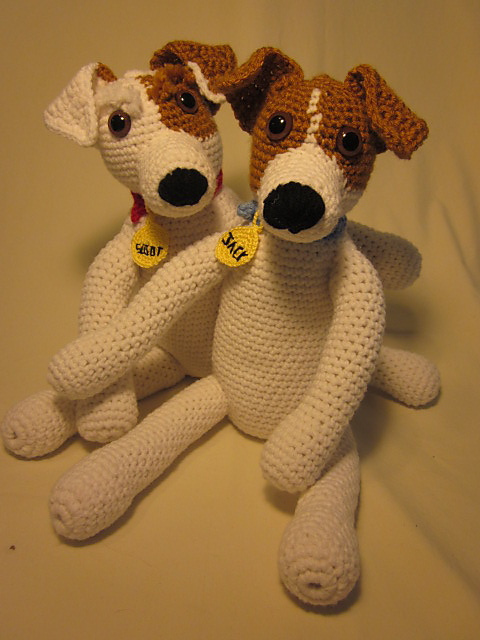
Here’s Jack and Scoot together.
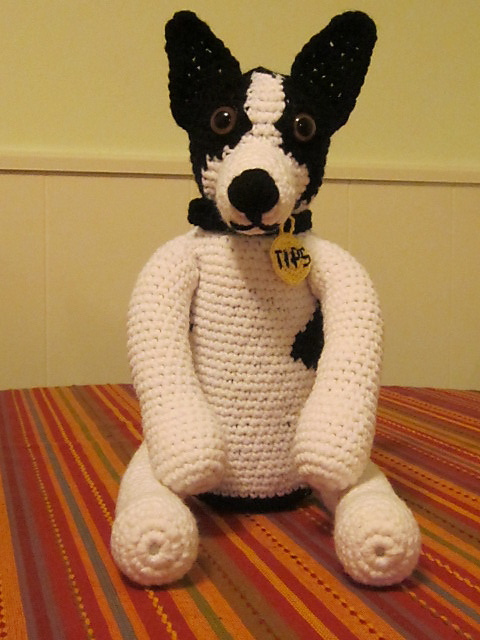
This next one is a border collie named Tips made as a gift for a good friend of mine who got me started on the path to quilting. I really put a lot of effort in making the markings match the real Tips. He now sits on my friend’s baby grand piano in her living room.
He was a complete surprise to her and she loved this little dog!
Here’s a fun little wiener dog… just because I wanted to make one! He’s so cute.
Here’s a really cute little corgi named Emmy that I made for a friend for Christmas. I just love those short little legs!
I really struggled to get those ears right. In fact, I didn’t get them figured out in time for Christmas, so I gave Emmy as a gift like this…
And one of my favorite that I made was this little chihuahua named Chica. It took me some time to figure her out, but I just love how she turned out. That little pink stomach and pink ears are just too much!
Even the detail in the shape of the ears is just so much fun!
These were really fun to make with crochet because I could do all the shaping on the fly. I could make this with just a pattern in my head. But my hands were starting to give me problems at about this time, and making these was torture. I love a really nice tight and consistent stitch, and it aggravated all the issues I deal with because of all the repetitive things I’ve done with my hands my entire life.
I was looking through some old photos on my computer last night and came across some of my old felted wool projects. I think I started making these about the time I moved to Portland ten years ago.
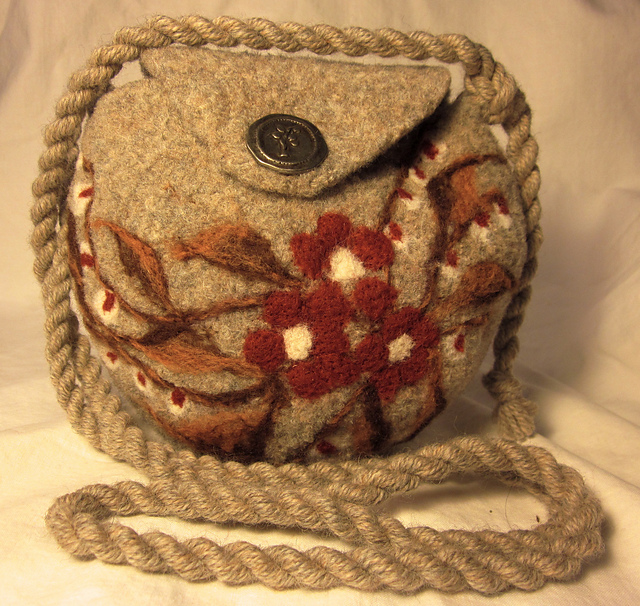
Here’s one of my favorites.
This was made from scrap wool that had been used on other felted projects. It was made on my own pattern that I wrote up and have sent to many knitters who have seen this bag online. I never really liked using wool that would felt for a garment. It just made it too hard to take care of. But it’s wonderful when it’s felted!
I made several bag bodies on this pattern, but finished them differently. Here’s a blue striped one that I gave to a friend.
To make these bags I would hand knit a really big bag and then felt it in my washing machine. It would shrink significantly once it was felted. Here are some pictures of the bag before and after felting. My little Jack Russell Skeeter is there for scale. She’s a little 12 lb dog. (Skeeter now lives with a friend of mine in Seattle.)
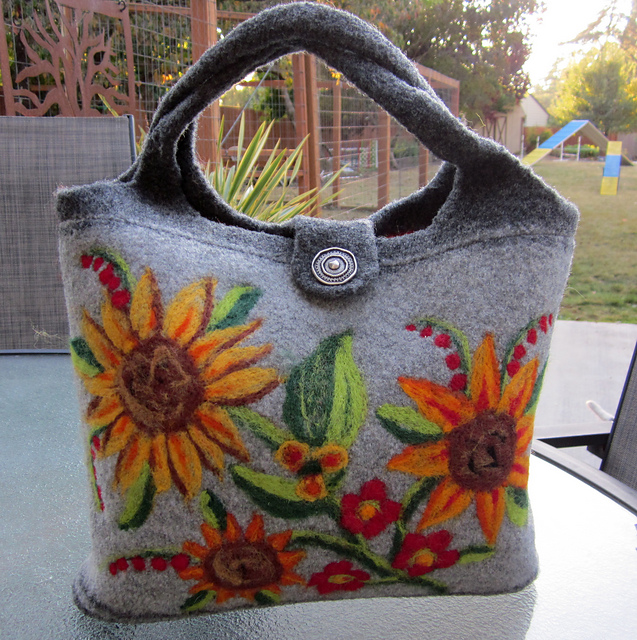
This next bag was knit on the same pattern and then I needle felted the sunflower design onto the front. I was pretty happy with how this turned out. It was given to a good friend of mine.
Here’s another bag that was made on the same pattern and was also needle felted with a floral design.
Here’s one that’s a little bit of a modern take on the same bag pattern. All of these bags were finished with a batik lining, complete with a zipper pocket and a slip pocket and a snap closure.
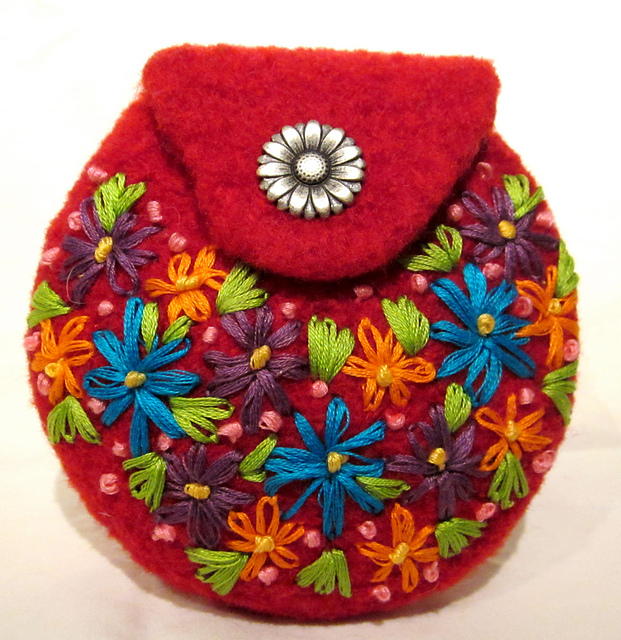
I also made a bunch of little round coin purses that were always some of my favorites. These were hand crocheted on my own pattern, felted in the washing machine and finished with embroidery. I think these are just the sweetest little things.
I also made a bunch of these little shoulder bags with sheep needle felted on them. I think I could have sold as many of these as I could make. But I got really tired of making the same thing over and over. But they were pretty cute.
I also made a couple on this pattern, which is also one I designed, and added embroidery.
I also made a whole bunch of these little wallets in different shapes. These were all hand knit on patterns that I made up, felted in the washing machine and then needle felted with floral designs…. and more sheep!
Then I made a bunch of these little round shoulder bags with needle felted designs. These were crocheted on my own pattern and felted in the washer.
I really loved making these bags, but I lost interest in needle felting pretty quickly. Drawing doesn’t come natural to me and needle felting is basically drawing with wool. I was really happy with how these pieces turned out, but I wasn’t very driven to make more. Another reason I stopped making these is that the knitting and crocheting is just so darned hard on my hands. I love knitting but don’t do much of it these days. I only make an occasional hat or other small project. I wish I cold do more because I really love it.
Now for my other projects. I’m about 3/4 done with the batik jewel box quilt I’m working on. Only the top row in this photo needs to be assembled, then a couple horizontal seams and I’ll be done. I’m forcing myself to get that done and off the design wall before I move onto my next quilting project… and I’m itching to get onto the next one!
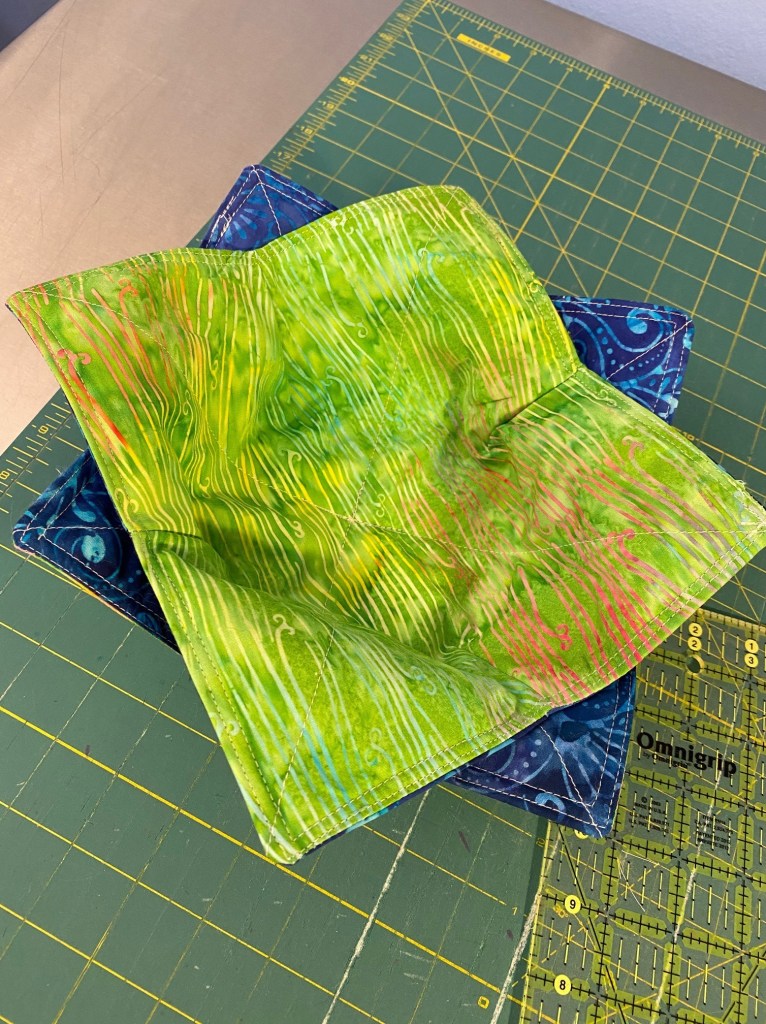
As a quick afternoon project today I decided to make myself a couple microwave bowl holders. I have one that I made a few years ago and I use it all the time. I really needed more.
Here’s the pattern I used for these, in case you’re interested. There are a good number of free patterns and tutorials available for these on the internet.
It was really rainy today so we didn’t get a walk at all. the dogs are not happy about that. I have another sheep herding lesson tomorrow afternoon, so I’m hoping we can get a good walk in tomorrow morning. The weather looks like it will be a little better… still raining, but not a downpour like it was today.
I didn’t do any sewing over the weekend until Sunday night. But I’ve been flying since then and I have 52 Sunburst blocks done. I’m having so much fun making these blocks! I love the free form piecing. It’s relaxing and I love that every block is unique. Here’s 40 blocks.
I need to move these blocks to my larger design wall, but I’m not going to do that until I finish up the batik Jewel Box quilt and get it off the design wall. I don’t want to take it down when it’s in pieces. I’m just not very motivated to finish it. I have several other projects I want to make and that brown thing is not on the list!
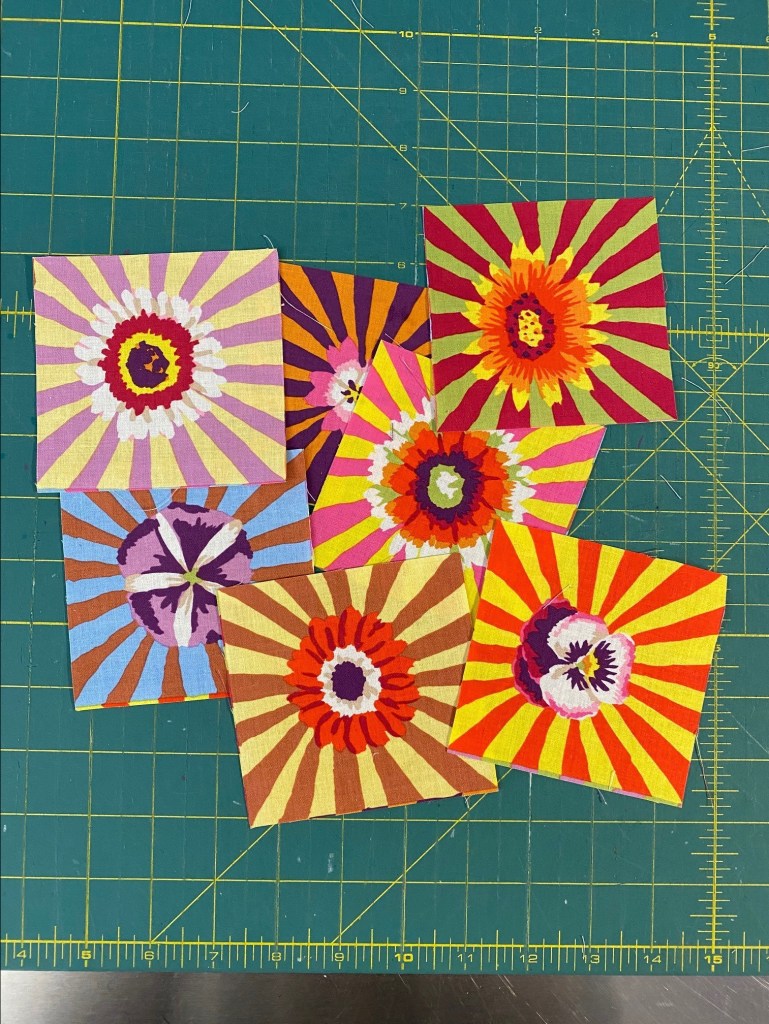
Here’s the last twelve blocks that I made tonight.
I was thinking this would be a throw size quilt top, but my brother told me the other day how much he loves my sunburst quilt. This is the brother who goes through life wearing brown, grey, and khaki. So I’m thinking I might make this a queen size quilt for their bed. I have plenty of sunbursts and plenty of scraps.
I’ve been on a short vacation this week, taking Monday, Tue and Wed off. So a nice five day stretch.
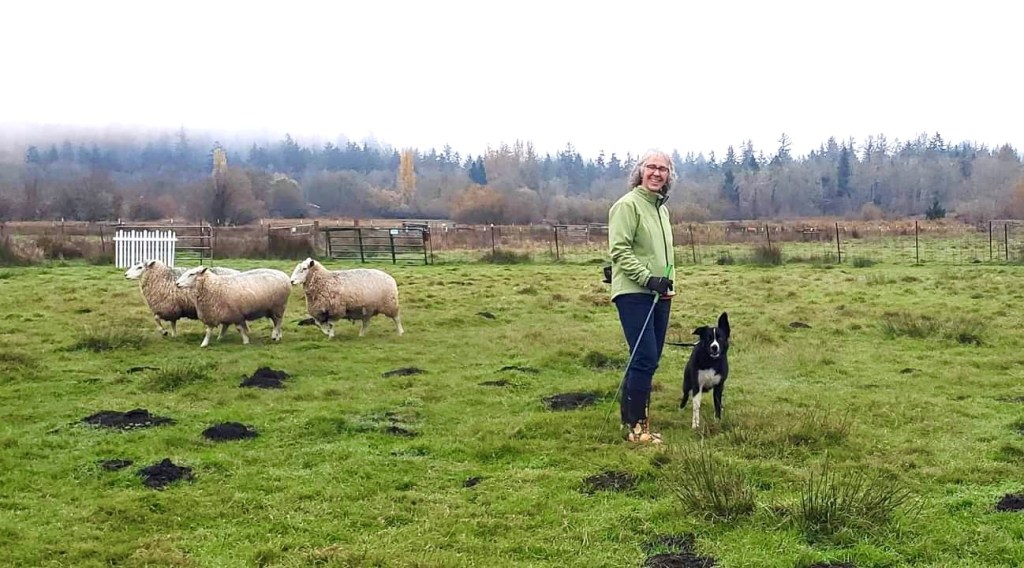
It started on Saturday when some friends and I drove up to the Olympia, Washington, area to have a sheep herding lesson and spend some time working sheep on our own. It was a great day, but I nearly froze my patootie off! Rico had a great lesson! I anticipated that he would be really fired up and wild in a new place on new sheep, but he was amazing! He is so talented. I just love watching him work sheep. There’s nothing quite like watching a dog do what they’re bred to do.
Sunday I had a lazy day at home and in the afternoon I hopped in the car to go and pick up some dog food and realized I had a flat tire. I could see a screw sticking out of it. I’m so glad that I got home from Olympia before this happened!
So I called AAA to come and fix it. I had planned to spend Monday at the coast because it was the best weather of the days I have off, but instead had to spend it getting my tire repaired. Unfortunately, the screw hit the tire in a bad place and it couldn’t be repaired, so I had to buy a new tire. So no trip to the coast for me this week.
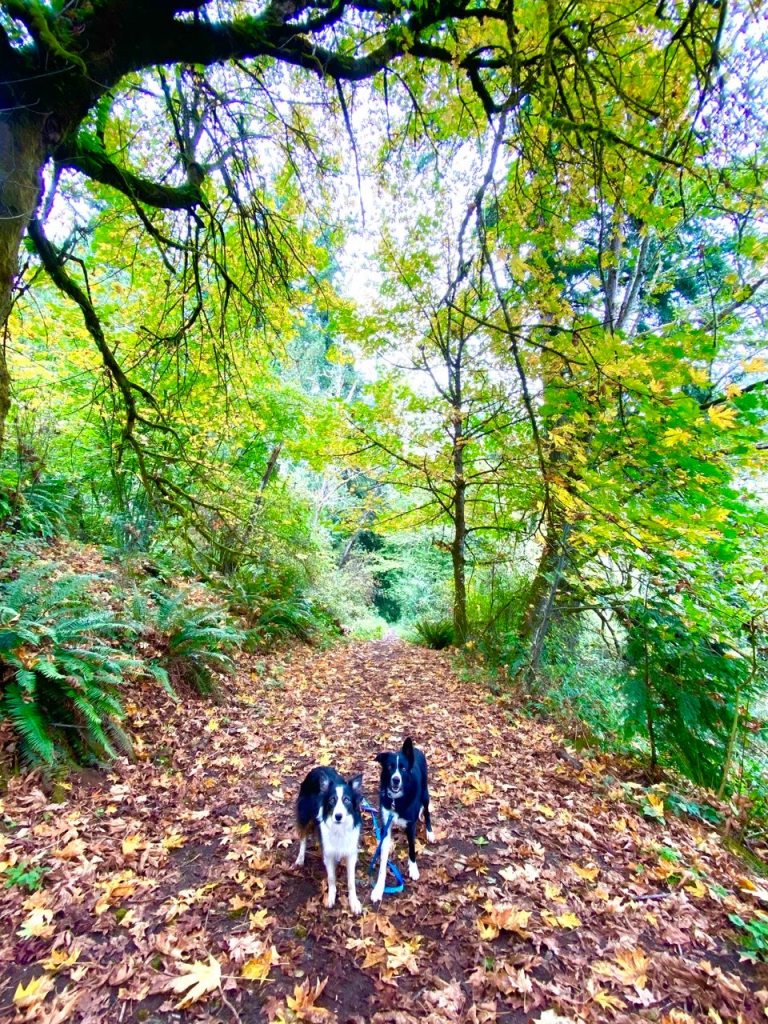
I made my monthly trip to Costco this morning and then had to figure out how to get it all into my freezer and fridge. Then I loaded up the dogs and headed west to take a walk on the Banks Vernonia Trail — a rails to trails state park. I figured there wouldn’t be many people out there since it was a bit rainy today. We walked for six miles and didn’t see another person until we were almost back to the car.
It was absolutely gorgeous. . . leaves all over the trail. Birds singing. Nice cool weather for walking. We didn’t get much rain to speak of, but did have water fall on us when the breeze blew through the trees. The dogs had a blast and are sleeping well tonight.
There are some really gorgeous places around Portland. Here’s a view we saw before we got back to the main highway. I just had to stop and take a photo.
Tomorrow is the last day of my short vacation. I think I’m going to take the dogs up to the Columbia for a long walk and a good swim. Then back to work for a short week.
I’m plugging along on making these scrappy sunburst KFC blocks. I finished up nine after my dog training lesson tonight. So I’m up to 32 blocks total. It’s helping me stay away from watching the news about the presidential vote count. But I’m still stressed. I find myself gritting my teeth throughout the day.
I’m really loving this quilt. It’s so funny to me how I can think about a quilt for months, wondering if it will work, how it will work, how it will all come together. And then BAM! There it is! Up on my design wall.
Holy cow! KFC scraps do make a really pretty quilt1
I’m just putting these blocks up as I finish them. I’ll need to eventually move them all to the larger design wall and spend some time arranging them. Then I have to figure out what I’m going to do with the setting triangles. I’m thinking I’ll just make the same blocks, but a little bigger, and then cut them in half to finish the edges. We’ll see once I get to that point, but I’m guessing that’s where this will go.
So yummy!
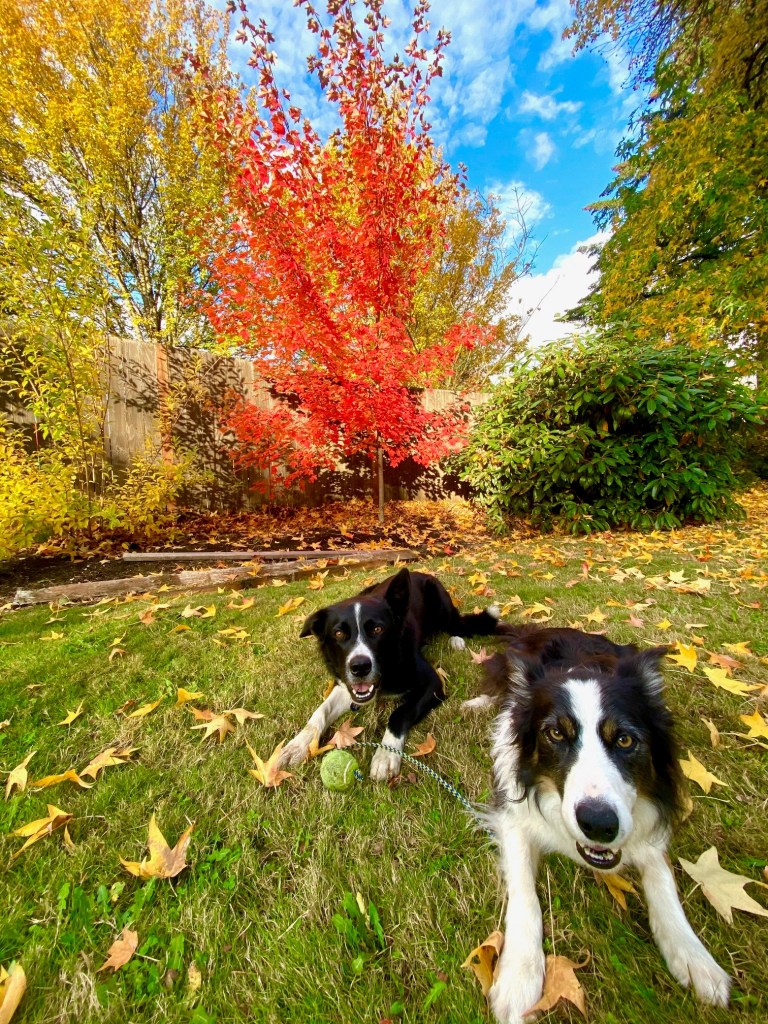
We’ve had such a gorgeous fall here in Portland. October was essentially rain free, and every day was prettier than the last.
Look at those trees against that amazing blue sky. GAH!
I planted this little red maple tree a couple of years ago. This is its third fall foliage. I just love this tree. It’s exactly the color that I was hoping for when I selected it.
I noticed yesterday that it’s actually grown quite a bit since I planted it. They have a saying around here for when you plant trees and how you can expect them to grow: First year sleep. Second year creep. Third year leap. And it’s true. This was its third summer and it really had a growth spurt.
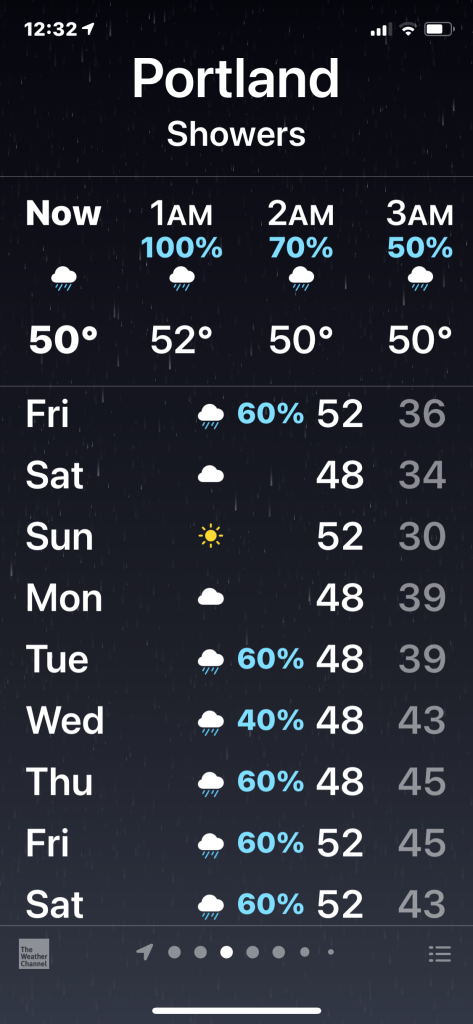
And after this amazing fall season, the rain started today. This rainy season will last until May or June. The winters in Portland are mild in temperature, but we do get A LOT of rain. Here’s what our next tend days looks like. And this is pretty much what the next eight months will look like.
I’m glad Saturday and Sunday are nice. I’m heading up to Washington with a friend this weekend for a sheep herding lesson in a new place. Rico is getting close to being ready to enter his first trial, but we need to get him to a new place on new sheep first and see if he can do what he can do at our regular place.
I’m taking Monday, Tuesday and Wednesday off next week prior to the end of year fundraising period getting started. It’s a killer time for us and I need to refresh a little first. I’m hoping to drive out to the coast and spend a few hours on the beach. Not sure the weather is going to let us do that.
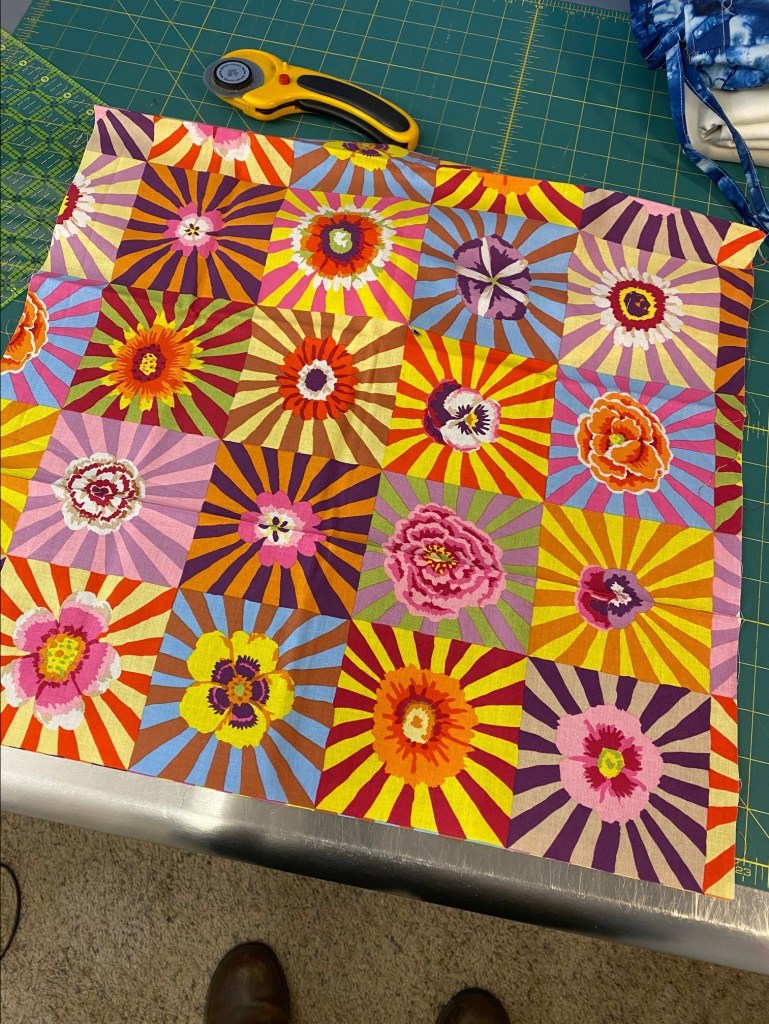
I’m so stressed and so unenthusiastic about the quilt I’ve been working on that I sat down with some Kaffe sunburst fabric and a box of Kaffe scraps tonight and started sewing. Phew. I feel better already. And here’s what happened…
The photo doesn’t show the colors as bright as they are in person. That’s one of the challenges of taking photos late at night. But I just LOVE how this is turning out!
I’ve wanted to use these fantastic little sunburst squares for a quilt like this for some time. I don’t know why I’ve waited so long. I thought I’d make a couple of blocks tonight, but whipped up these nine in no time.
I recently purchased a yard of several color ways of the sunburst fabrics to add to what I already had in my stash. It’s no longer in production and it’s pretty fantastic! I’ll have enough for a few other future projects.
Each sunburst is almost 4 inches square. They’re not precise, so if you demand precision you might want to stay away from this fabric!
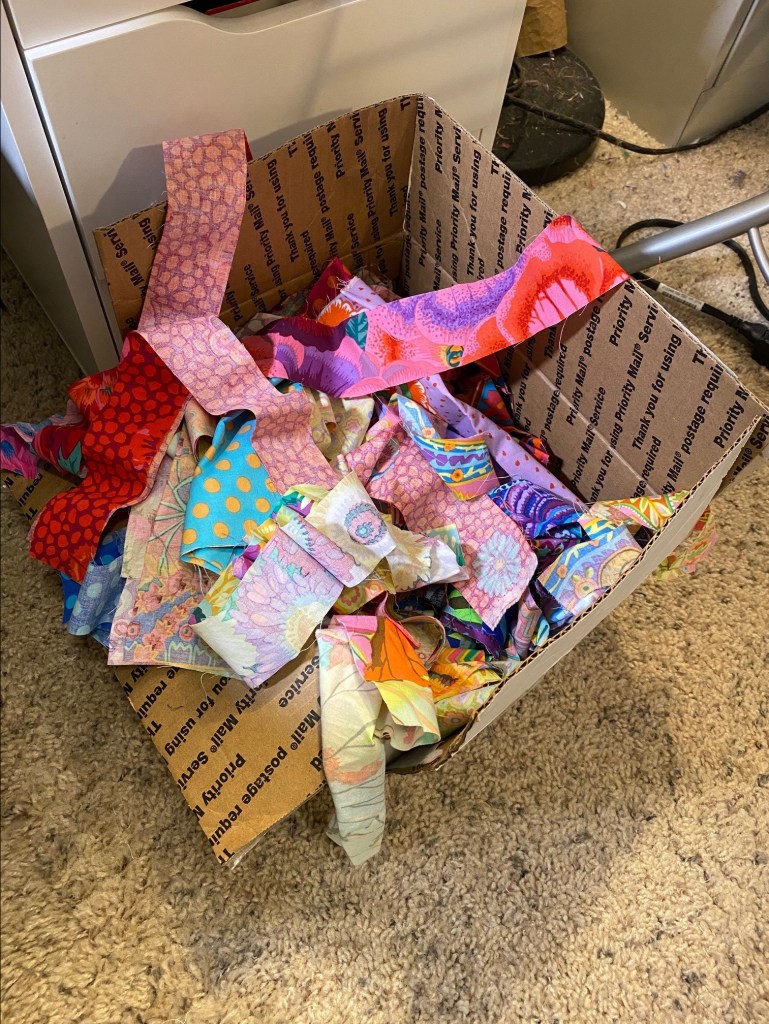
I have a love for scrappy quilts and with these amazing KFC fabrics, they are even more fun. I love it when my sewing room has piles of scraps everywhere!
Oh, and I’m making even SMALLER scraps that will be perfect for more crumb piecing!
I’m really going to have to force myself to finish that drab batik quilt I have on my design wall…
I’ve finished all the pieces for this Jewel Box quilt made from batik charm squares I had on hand. I had to add some extra batik scraps to make this big enough for a throw quilt. This will eventually have a border on it. I had to order some extra of the off white to add a smaller outer border before I add a batik border. Luckily I kept the cover sheet that came with those charm packs and was able to find some.
There’s still a fair amount of sewing left to do on this. I have the four patches and HSTs all done. I like the way this looks, but I’m not crazy about the fabrics. It’s just so dark after all the bright and beautiful prints I’m used to working with.
I really wanted to make some of these blocks prior to making this same quilt pattern in a collection of KFC fabrics. I’ve learned a few things and will adjust accordingly.
First of all, I’m going to cut my fabric pieces a little larger so I can square up the HSTs and the four patches at 5 inches. For this quilt, I was able to do some squaring up of the HSTs at 4.5 inches, but there’s not enough of the four patches to square them up. I want that precision before I assemble these pieces into larger blocks.
So today I’m going to do some calculations and make a couple of practice blocks to make sure I’ll get blocks I can trim.
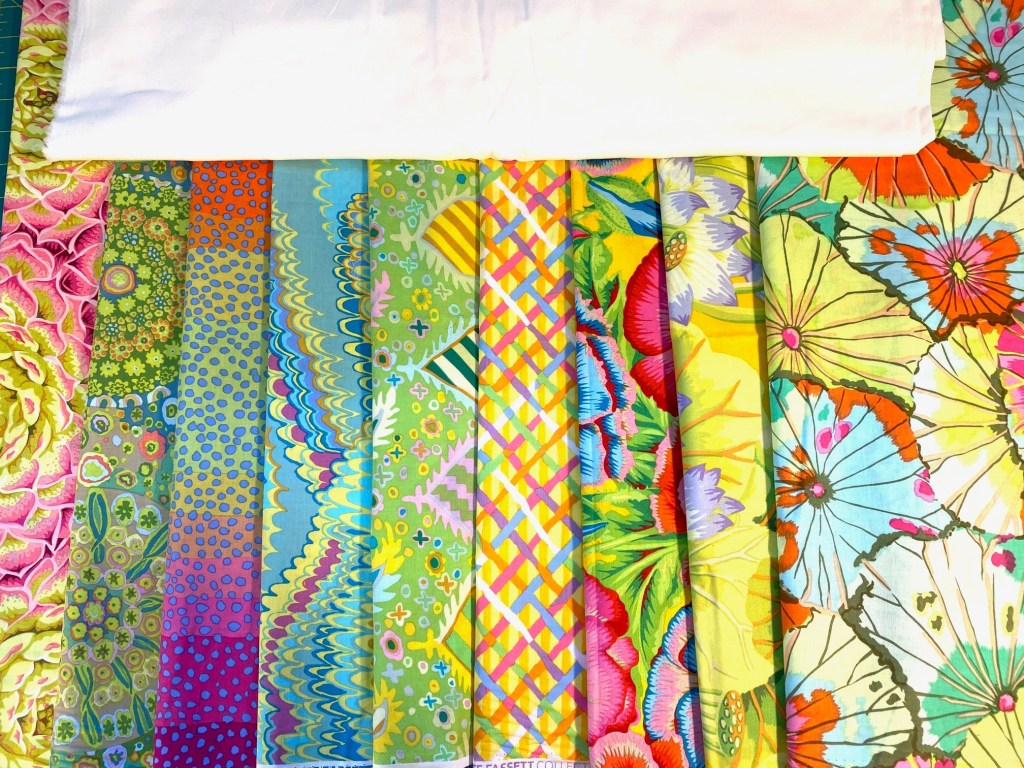
Here’s the Kaffe Fassett Collective fabrics and a Kona off white “snow” that will make up this new quilt:
The fabrics appear much softer than in this photo. Oh and that fabric third from the left (Ombre Stripes in Pink) was hard to find! I looked all over the web and couldn’t find any. It’s out of print. My friend did find a fat quarter in her stash. So I went to one of our local shops yesterday that carries a LOT of KFC fabrics and they had it!!! It’s a nice pop of various pinks that this needs.
The weather has turned somewhat cold here, but the rain hasn’t started yet. It’s been a really gorgeous fall so far. It’s such a great time of year to be outside. I took the boys for a nice forest hike yesterday after Rico’s sheep herding lesson. We’re heading out for a nice neighborhood walk soon.