Contact me at anne@agilejack1.com
I'm a long-time fundraiser for public media. I'm a news hound. I think politics is fascinating and horrifying at the same time. I love my dogs more than I can tell you. I love the challenge of learning and making new things. My favorite part of a new project is the planning and learning! I'm not afraid to fail! I LOVE color!
Thank God It’s Friday! And a long holiday weekend at that. I’m so glad I get a long weekend.
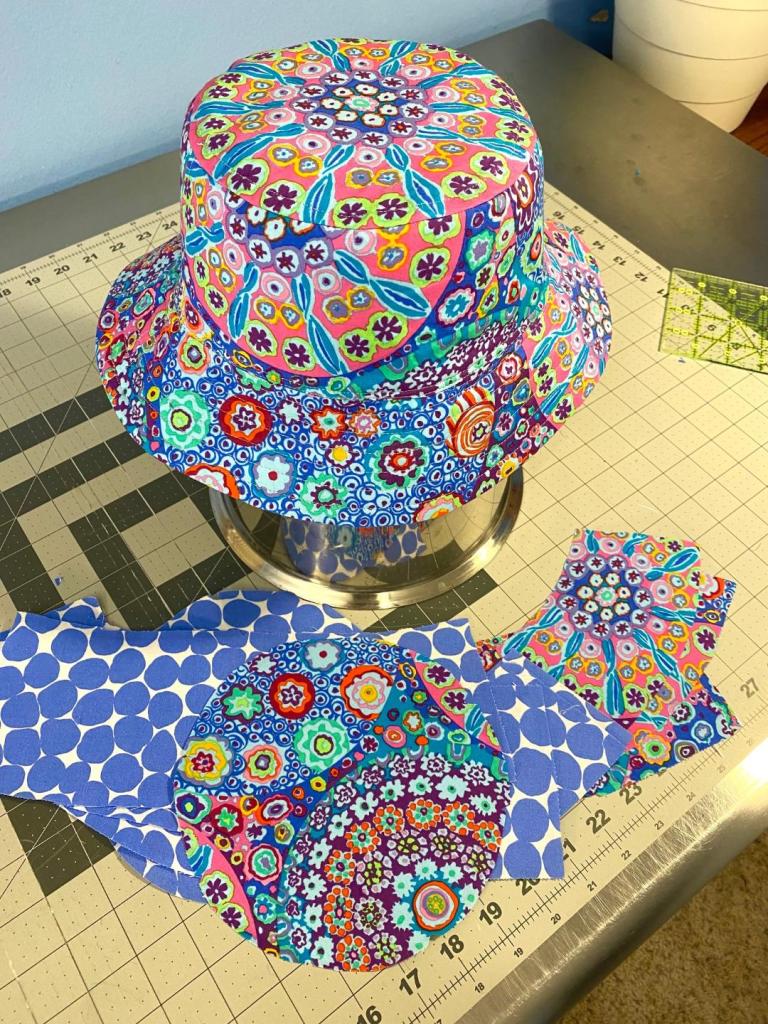
After a quick dinner and a 3.5 mile evening walk with my boys, I hit my sewing room and started cutting! I was really careful cutting out these fabrics and realized that I can cut all the pieces for the lining and outer hat for TWO hats from two half-yard cuts.
Oh my goodness! That aqua millefiori is so amazing! I don’t typically love the look of fussy cutting and rarely do it, but I did fussy cut the top of this hat and I’m glad I did. It’s so cool! If you look at the top piece sitting on the table, you’ll see it’s NOT fussy cut. I didn’t have enough fabric to fussy cut both. And I do love the more random look of the one on the table!
And I’m very happy that this hat has a pretty good fit! Finally!
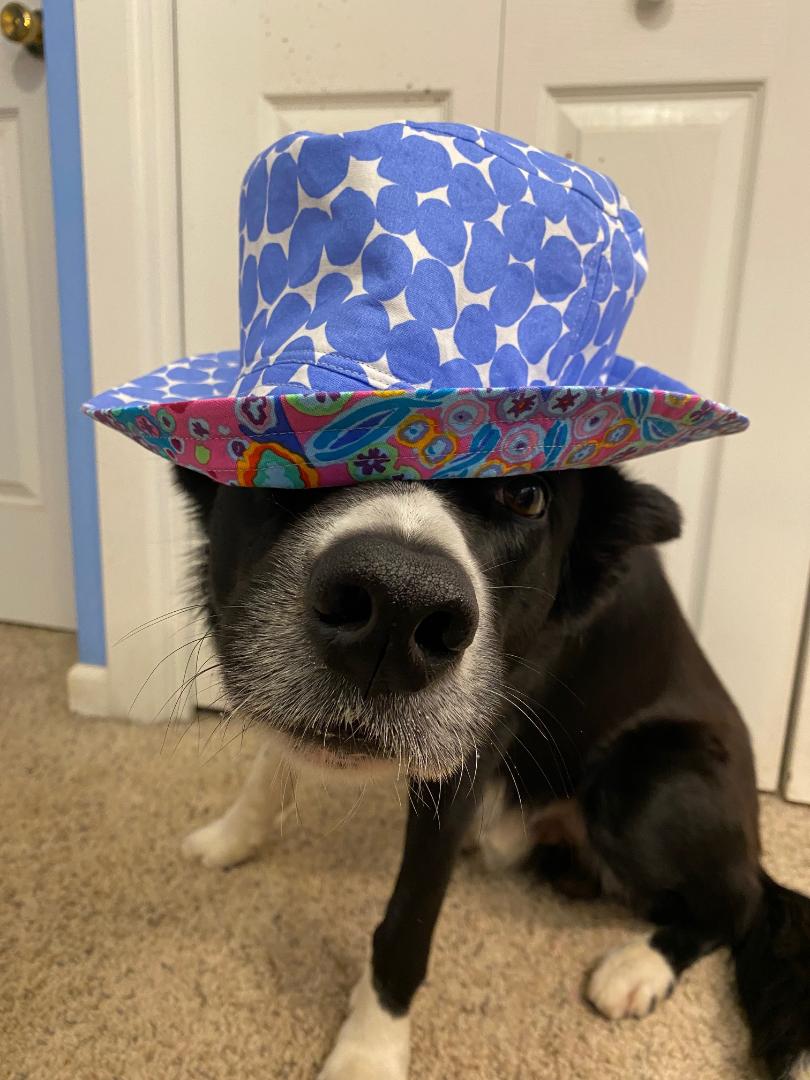
Rico got in on the act tonight!
He finds this all very stressful. But he was a good kid and very cooperative, even though he was horrified. He did get some cookies for his effort.
Here’s a few more photos of this hat.
Before I wrapped it up for the evening I cut the fabric for another hat from scraps. This will be a smaller size of the combo I made last week. I love that combo and that hat is just too big. This smaller one will make me happy!
I didn’t have enough of that jumble to cut the top of the hat lining. But this will be fine since I don’t plan on wearing it with the lining out… but it might actually be fun that way!
It’s amazing how difficult it’s been to get a hat that fits right!
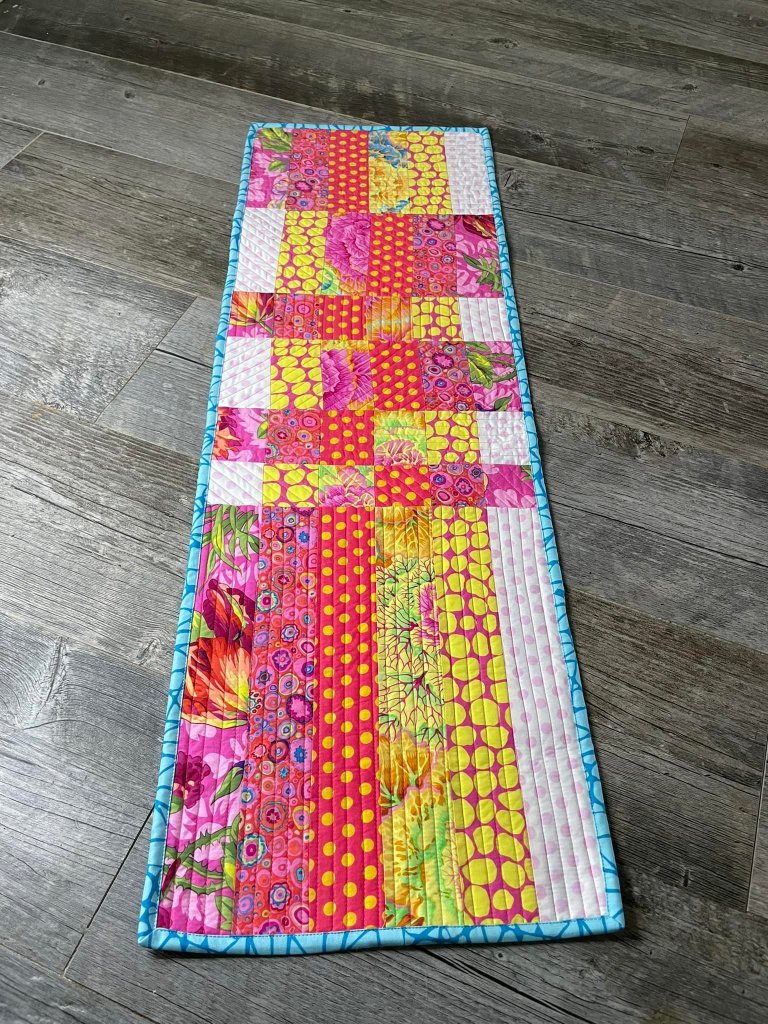
I saw this table runner on Facebook today and it gave me an idea. It was made by Stefanie Wolicki Jarrell. She made a strip set and then cut the set into different width pieces and then reassembled them.
I’m thinking this would be a great way to treat the left over Ice Storm quilt strip tubes to combine with the octopus fabric. I think I’ll work on that tomorrow. It should come together quickly and I’m pretty sure I have enough strip tubes to pull this off.
And I have to say, that turquoise binding is the best thing!!! It just sings!
I thought about starting on that tonight but I need to do some measuring and re-measuring before I start.
It was beautiful during our afternoon walk today. There is a second wave of flowers, trees and shrubs blooming. The rhododendrons are in their glory right now.
I’m so lucky to live in a neighborhood where people love having a lot of flowers around!
Rico has a herding lesson tomorrow morning and there is 100% chance of rain, so it looks like we’re going to be getting wet. We’re supposed to be pretty wet this weekend, so it might be a productive weekend for me.
I decided to cut out the pieces for another bucket hat tonight. One of the pieces of fabric I was using was just a quarter of a yard.
So, what did I do? I cut the interfacing piece from the main fabric. The interfacing pieces are smaller than the main hat pieces.
And that means that I don’t have enough fabric to cut the crown pieces from the right pattern.
I’ve asked a friend if she has some of this fabric, and I’ve found it on two different websites. So I’m not totally stuck.
It was after 11 pm when I was cutting these pieces. I had a feeling I might be making a mistake, but I kept on going until BAM! Looks like I’ll need to cut out another hat tomorrow so I have something work on.
I was going to make the lining form my crumb quilt tonight but I just couldn’t face wrestling with all those big pieces of fabric. So I made the VERY wise decision to put that aside for when I’m fresher.
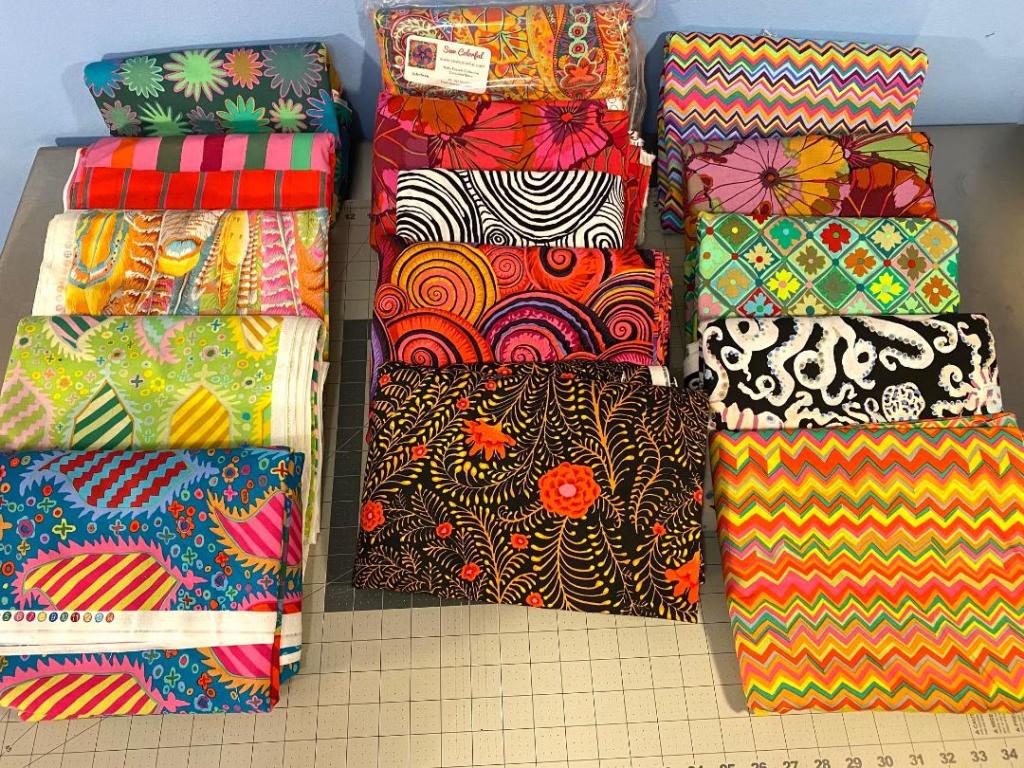
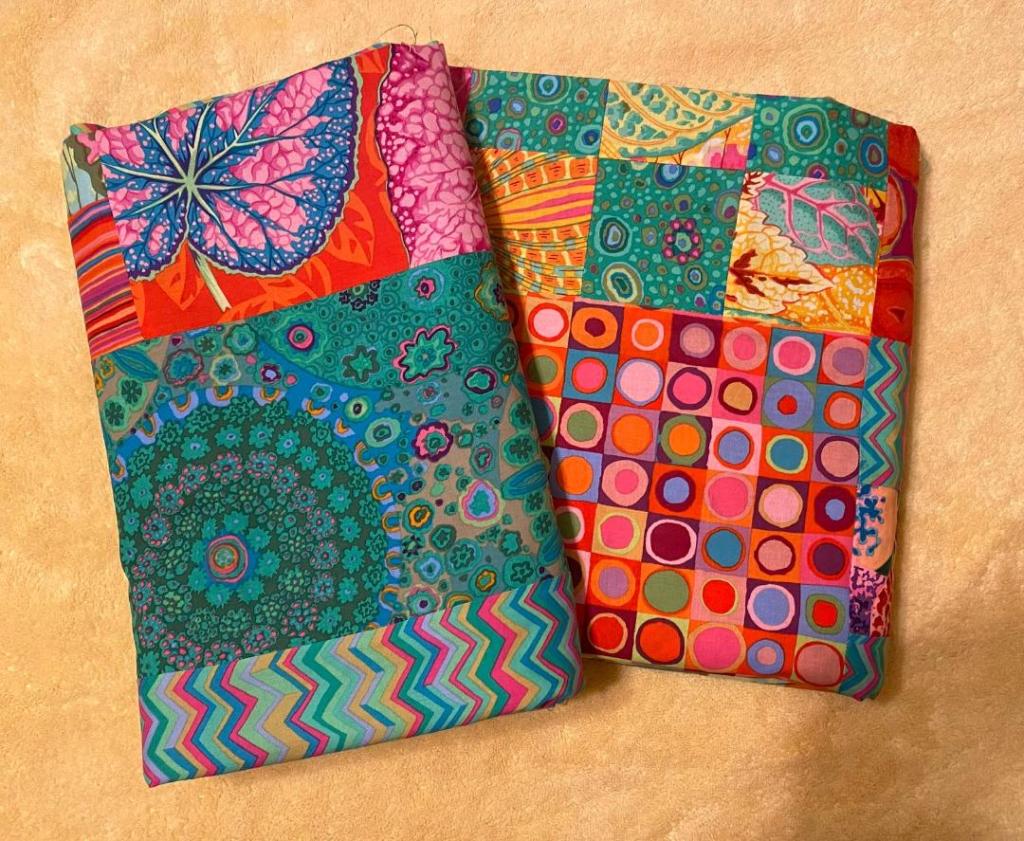
As I walked the boys tonight I was on a phone call with a friend. We got to talking about our fabric stashes and I was reciting to her all the larger pieces of KFC fabric I have that were purchased with backings in mind. I have a few.
That’s fifteen large pieces of fabric that are enough for a backing. Nine of them are actually meant for a specific quilt that’s either done or in process.
The red piece on the top will back this quilt that is nearly ready to sew together.
That ochre and purple fabric will be the back for this quilt in process for my guest bedroom.
The tangerine Paisly Jungle will be the backing for my Aboretum quilt that I’ll make from a kit.
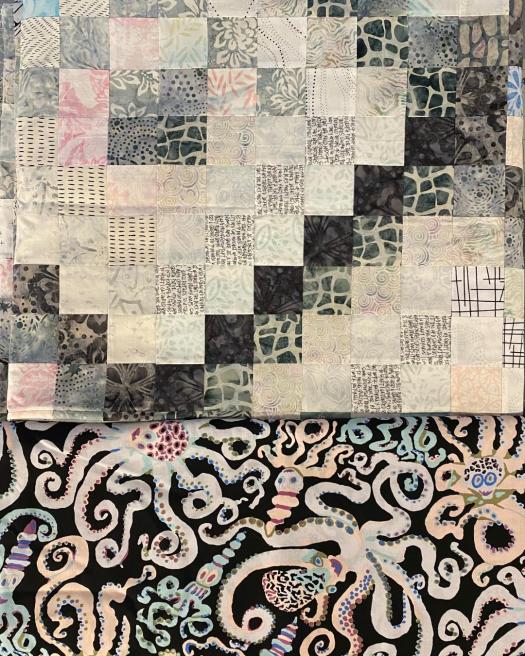
The Octopus fabric will back my Ice Storm trip quilt. I LOVE this backing with this quilt top!
I think I might try to get this quilt backing put together this weekend. I don’t have plans to have it quilted immediately.
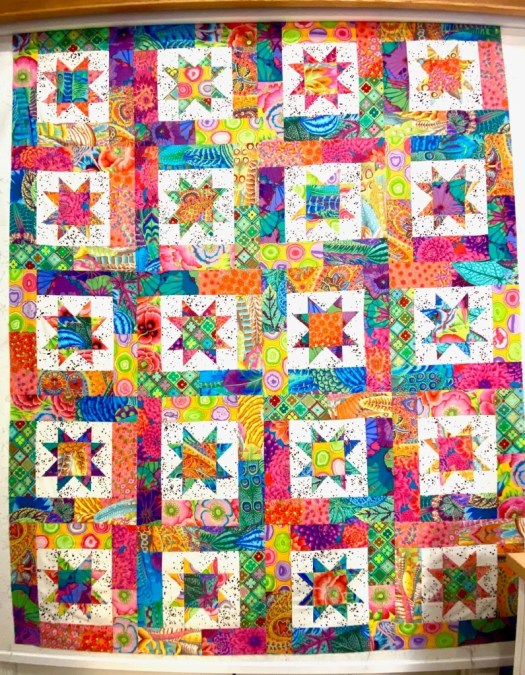
The green Antwerp Flowers will back this Lucky Stars quilt eventually.
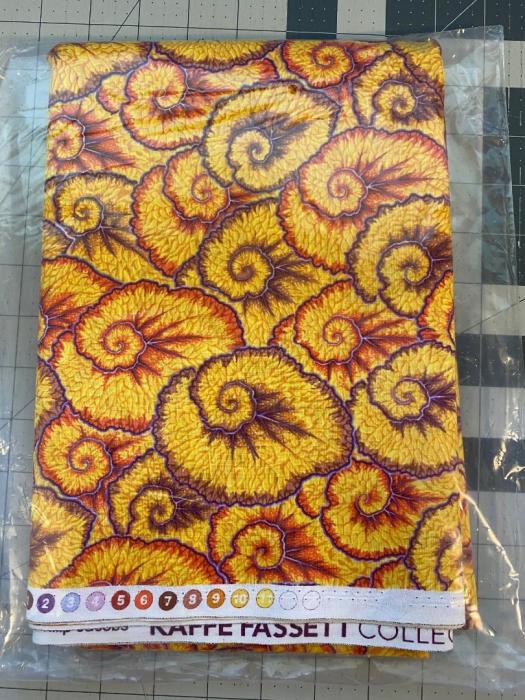
This gorgeous red spiral shells fabric was initially planned for this chaotic black quilt. But the quilt isn’t worthy of that gorgeous fabric. So not sure what I’ll back this quilt with or what I’ll use that gorgeous shells for…
… but it won’t be for this chaotic mess!
And finally, this wonderful blue backing fabric will be used for this quilt.
I was so tired of dealing with bias edges by the time I go this done, I may never do another quilt that involves bias edges.
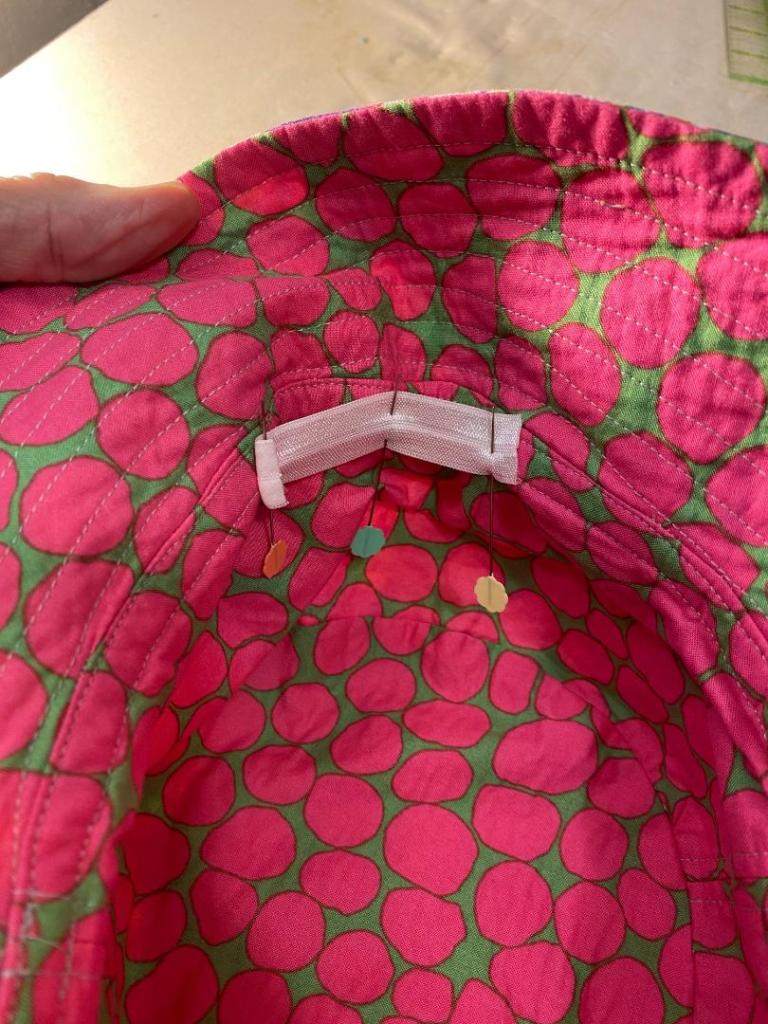
Before I wrapped up the evening in my sewing room I sewed the elastic into the back of this huge bucket hat. And it refused to gather.
I think this happened because of the thickness of the hat around the brim and the fact that I used the wrong elastic… the only elastic I had… some lingerie elastic. It’s just not substantial enough to pull the layers of the hat together. So I had to rip it out.
I’ll pick up some better elastic this weekend.
It was a lovely day today although cloudy. After our afternoon walk I could hear an odd noise as I worked. And I realized it was Bender snoring like a buzz saw!
With the increase in his epilepsy meds, he sometimes sleeps like the dead! But the good news is that he’ll be 12 weeks seizure-free on Saturday. He’s still a little bit dopey from his meds, but he’s a little better every day. It’s so nice to be on another stretch of time without a seizure.
I had to run to the post office tonight so I didn’t have much time after our walk to get any sewing done. So I decided to make a quick backing for my scrappy trip quilt.
I finished this quilt top over a year ago. I’ve had the fabric for the backing for at least 9 or 10 months. It’s about time I get this backing done.
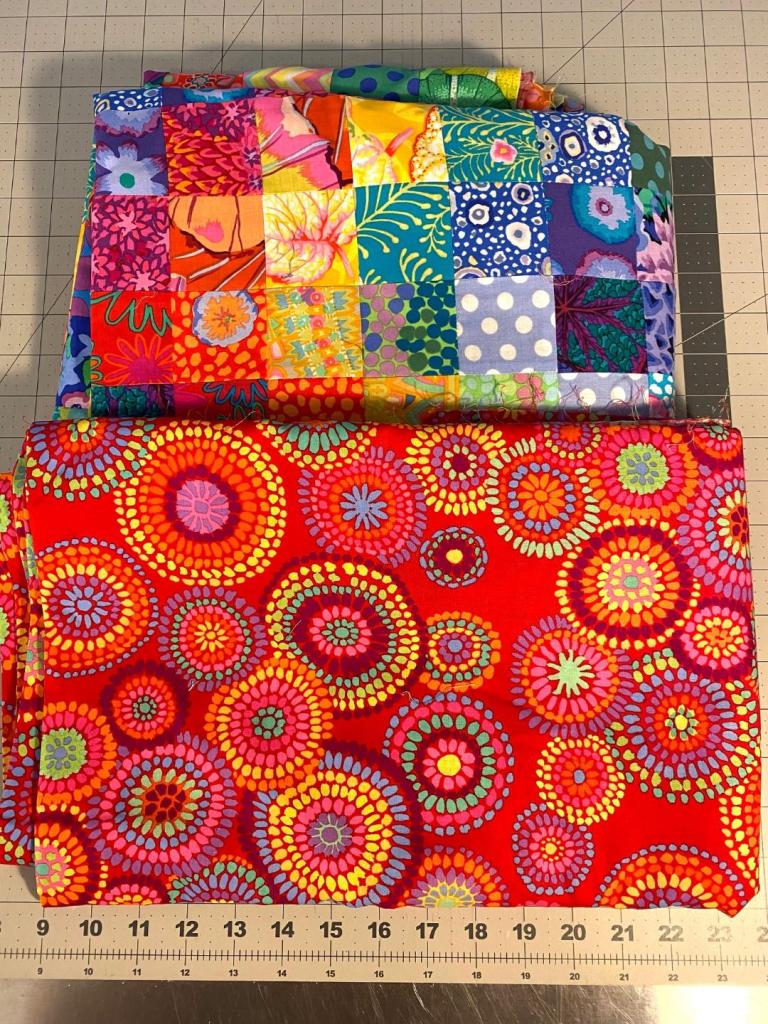
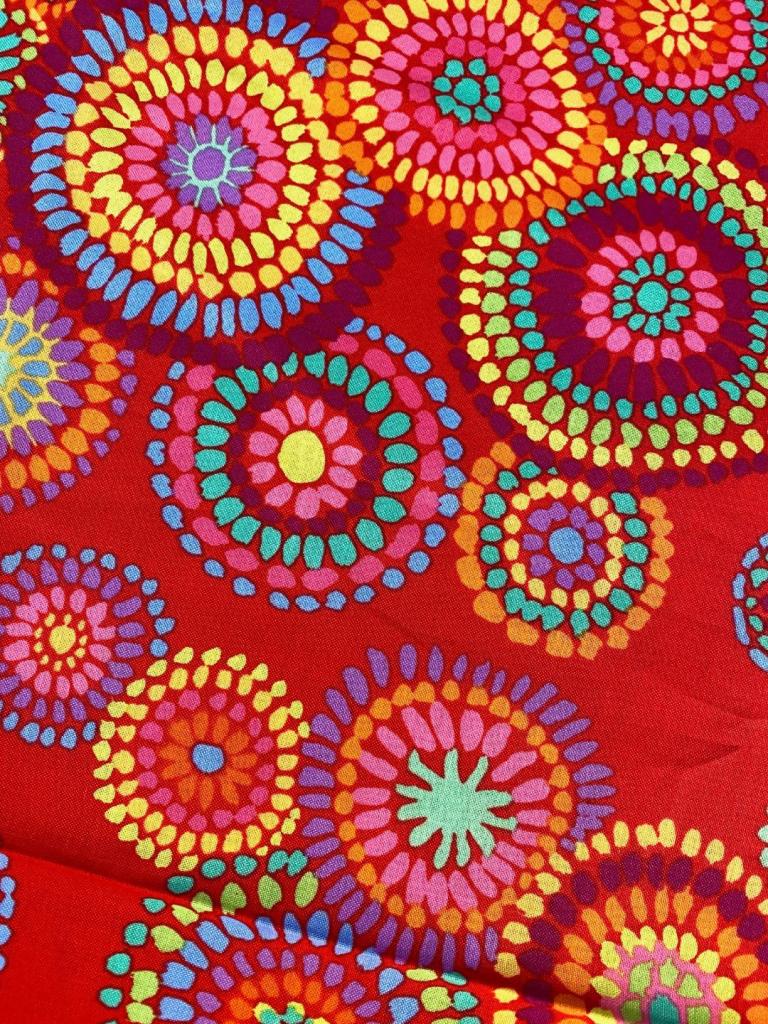
That red fabric for the backing is a Kaffe Fassett design called Mosaic Circles and I just love it. When I was making this quilt I was picturing this fabric for the back and I was really fortunate to find it on sale.
This quilt is small enough that there was no need to add any extra fabric to the backing. I was able to use two pieces of fabric sewn side to side and it’s the perfect size. And the real benefit is that the design is busy enough that I didn’t feel that there was a need to try to match the fabric.
I think that once it’s quilted that seam will virtually disappear. Have I mentioned how much I hate trying to match fabric on a quilt back?
I was very careful in measuring this quilt top to determine the size of the back. I think I measured seven times before I cut.
I didn’t want to have a repeat of the issues I had with the quilt back I made last weekend. And I have to say, it feels good to have another quilt ready to go off to my long armer! I will keep this quilt for myself. No idea where I’ll use it, but it’s one of my favorites and was something that I had wanted to make for a long time. I cut the fabrics for it from 136 unique fabrics from my stash!
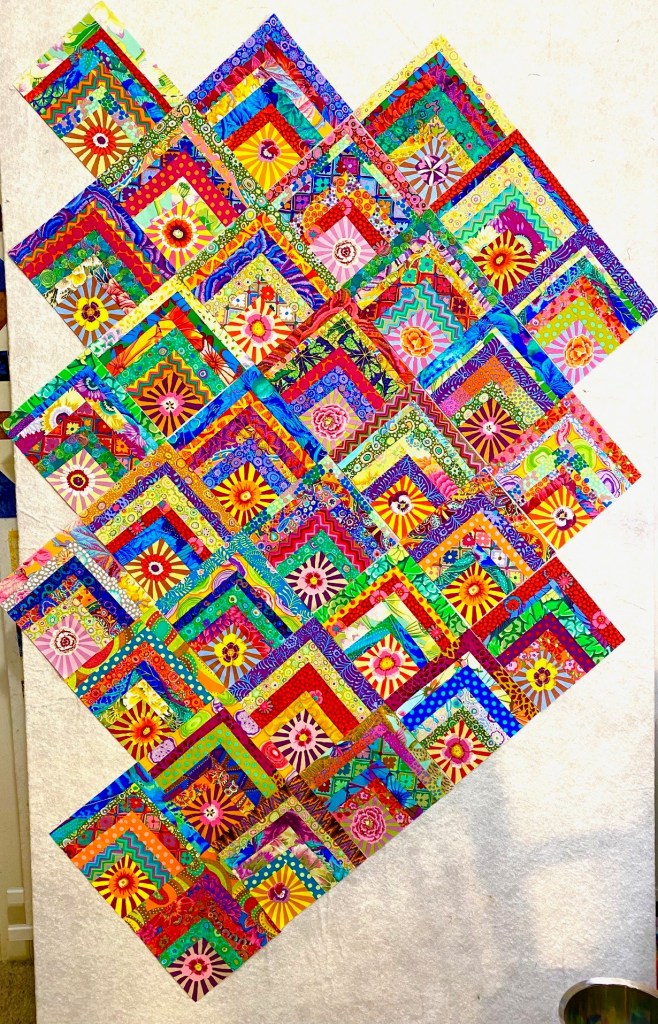
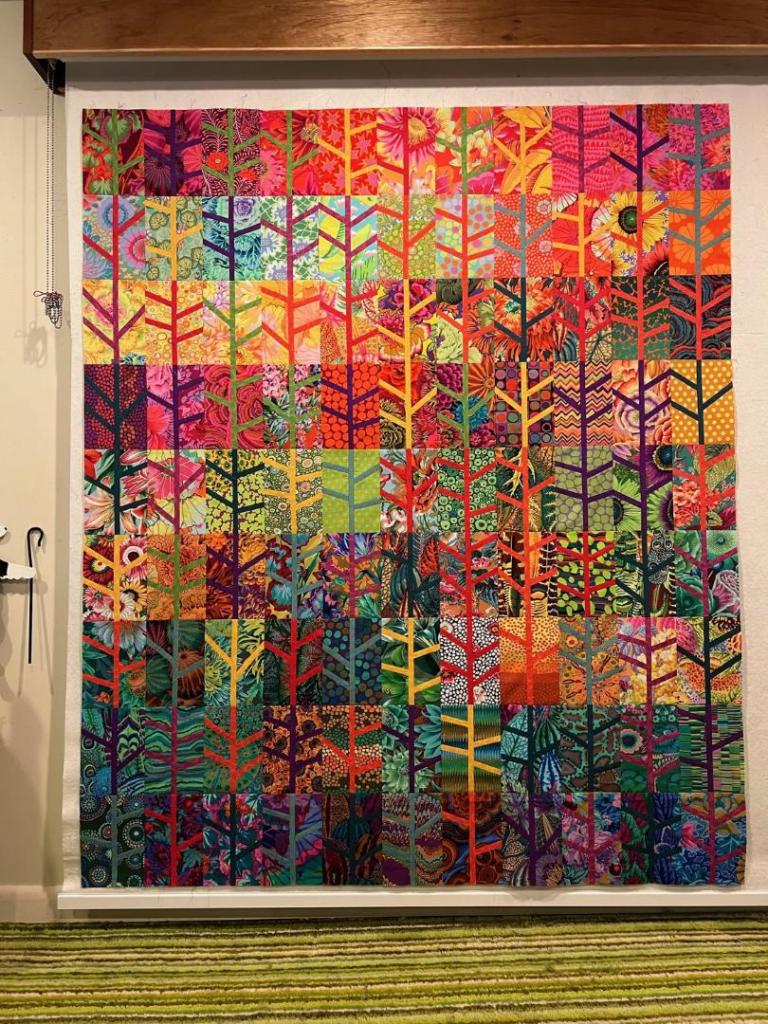
And just take a minute to appreciate the amazing color ways that Kaffe Fassett creates!
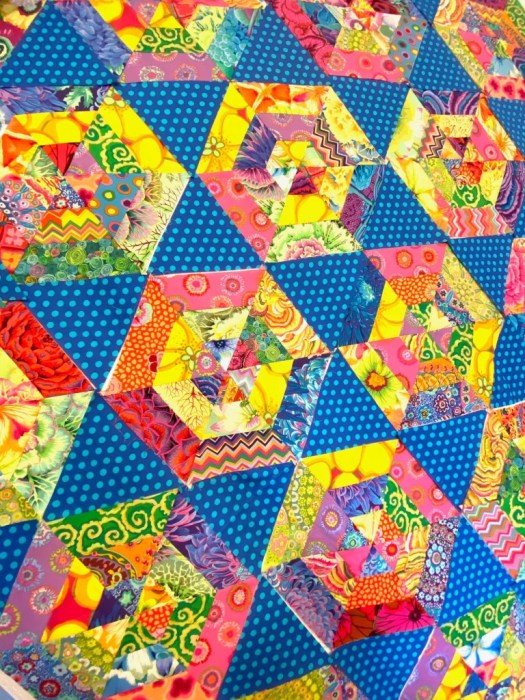
I’ve decided I’m going to make a backing for my Kaffe Fassett Collective crumb quilt by the end of the weekend. I just love this quilt. In fact, it’s my favorite of all the quilts I’ve ever made. I will be keeping this one as well. I just can’t imagine parting with something that I love so much.
I finished this quilt top in July of 2020. I’ve had the backing fabric for quite some time. It’s another piece that I got on sale. I love finding fabric for a backing on sale!
It will be another simple backing. But I’ll need to add a strip of fabric across the center of this one to get the width I need. I pulled out some of Kaffe’s spots tonight to see what floated my boat. I also included the red guinea flower as an option since it’s the sashing fabric on the top.
I like this option the best.
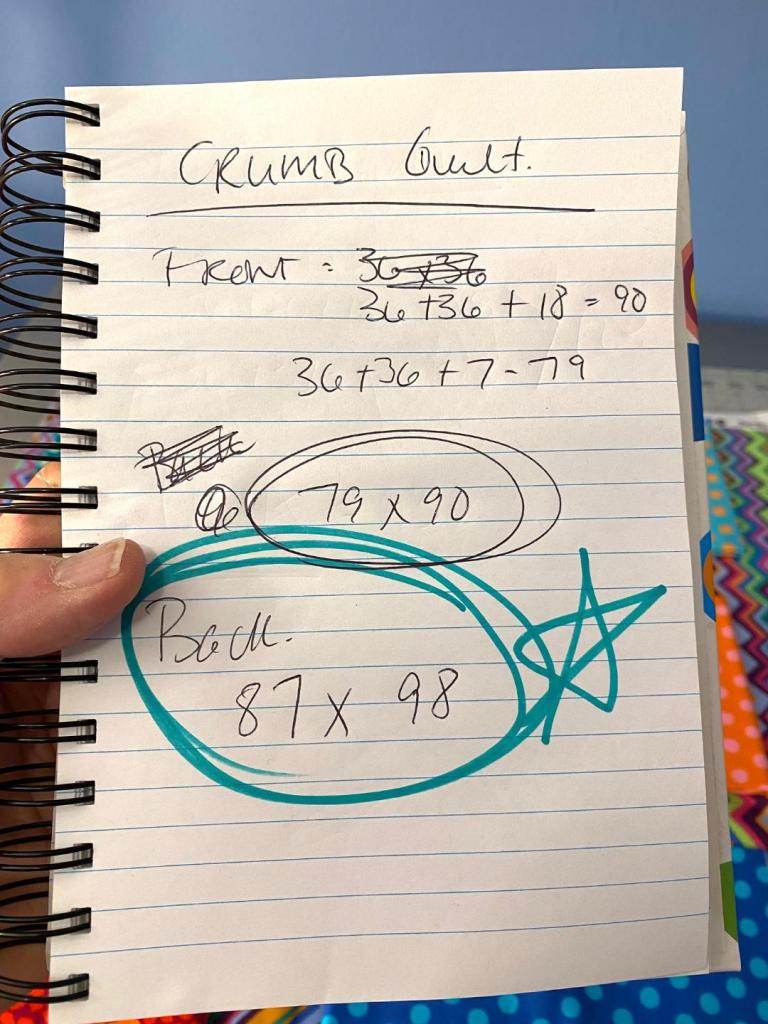
I didn’t start cutting tonight but I did measure many, many times and wrote it all down.
It should all be pretty obvious when I come back to this later.
A really fun thing happened today. Free Spirit Fabrics featured Bender and my bucket hats on Facebook and Instagram! What a fun thing to see when I was scrolling through my social media feeds!
That Bender is becoming quite a social media star!
I think spring is finally serious here in Portland. We are on our second wave of blooming plants. It’s like everything took a month off and is now waking up! Th Rhododendrons are in all their glory right now. The roses are just starting to bloom. Here’s the first rose I’ve seen this spring. And it’s a doozy!
The peonies are also starting to open up. This one was pretty spectacular!
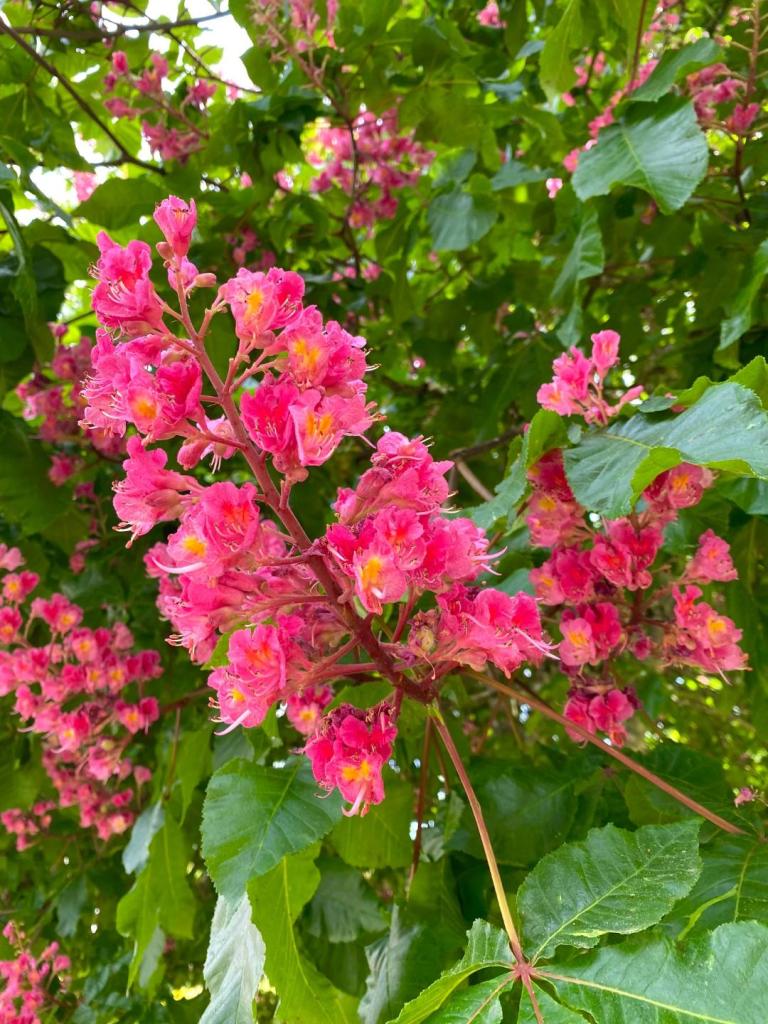
And this red horse chestnut tree was so vibrant! The pink color is striking. It’s the only one I’ve seen in the neighborhood.
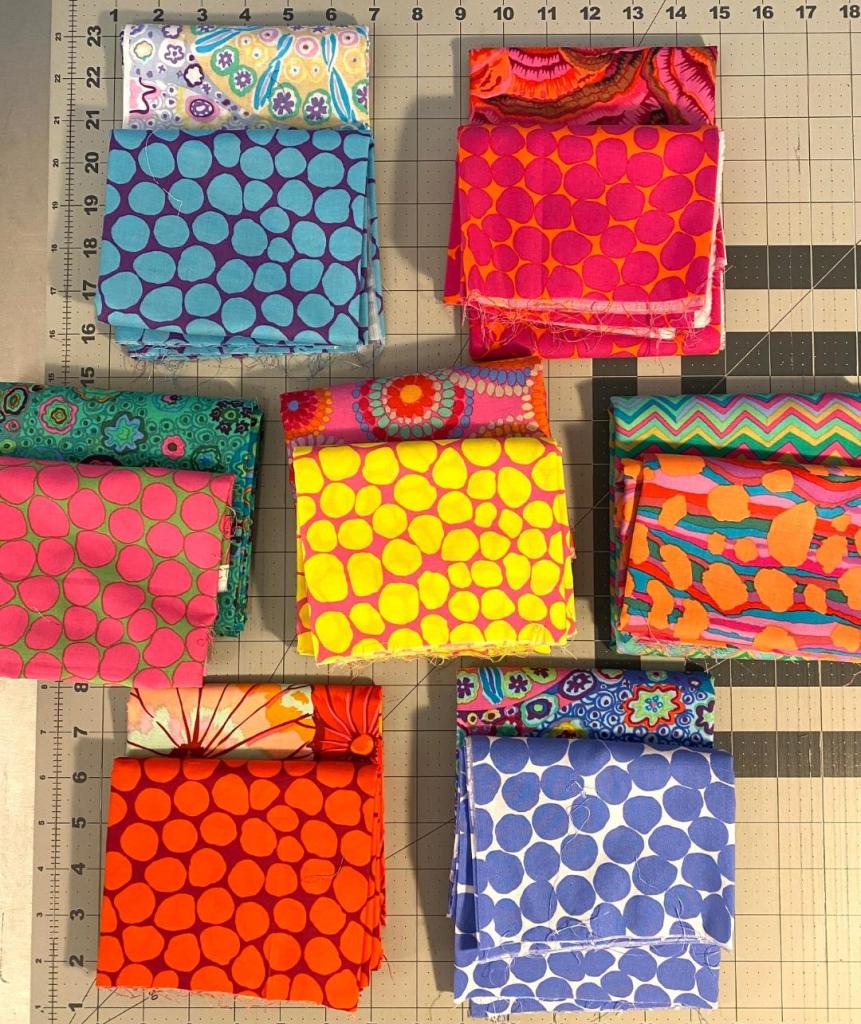
And finally tonight, I’m thinking of making a few more hats so I put some fabric combos together this afternoon.
Most of the combos have at least one fabric that is a smaller, partially used piece. I thought that would be a good place to start so I would have smaller scraps left over. I might try to cut another hat out tomorrow night. I won’t have much time to be productive as I’m joining some friends for an evening of dog agility training.
I’m already looking forward to a long holiday weekend!
We had agility class tonight and I think Rico had a little bit too much fun.
You can always tell how much fun Rico is having by the amount of slobber on his head! This is quite impressive!
I didn’t get home until about 10 pm tonight so I didn’t get any time in my sewing room. But there are a couple things I’m working on.
First, I decided I’m going to sew a strip of elastic into this hat that’s so big. I just love this fabric combo and am sort of attached to this one. And someone asked me to measure my head and it’s a whopping 23 inches. That seems big to me. I think it’s because my brain is so big and powerful.
I did some Google searches to find the average women’s hat size, and apparently it’s 7 – 1/4, which meant nothing to me, so I found this:
So if my head measures 23 inches, that puts me right at the average. So maybe my head isn’t a melon.
I decided I’m going to make the Orange Bettie pattern printed at 100%. I just want to see how it fits. I like the hat I finished last night, but it’s still a little loose.
I’m marking all my different pattern pieces clearly. I would really hate to get them all mixed up.
Oh, and look at this combo! It’s so yummy! I have no idea where that quarter yard of the Lotus Leaf came from. I’ve never purchased quarter yards. Must be left over from some project. I’ll use this for the 100% hat.
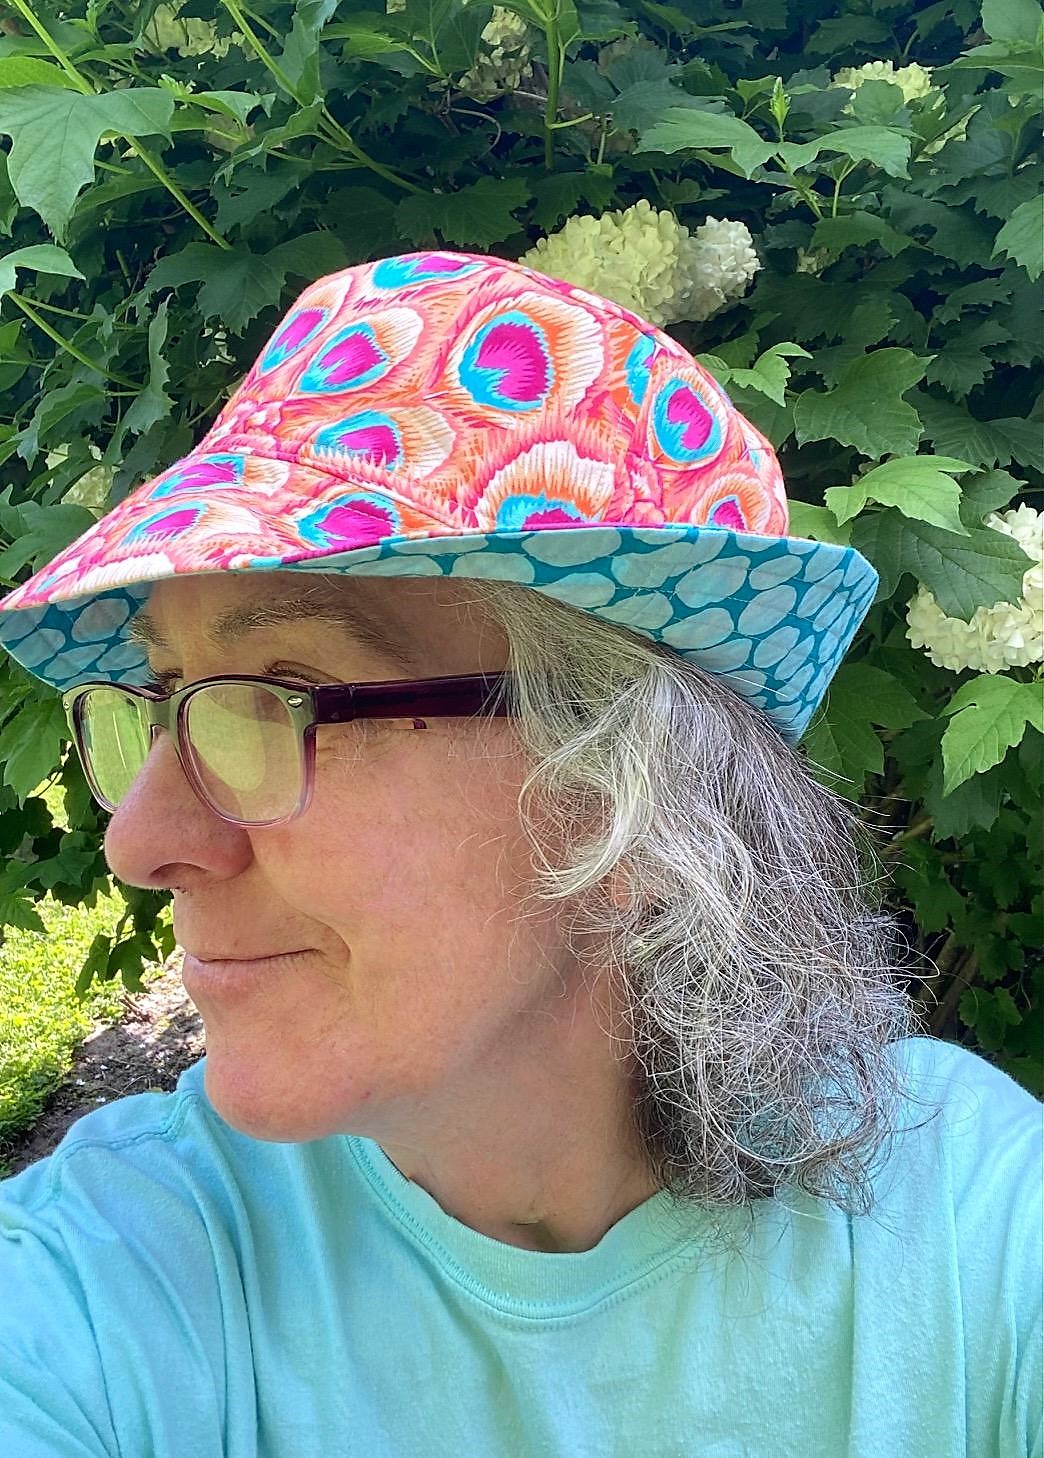
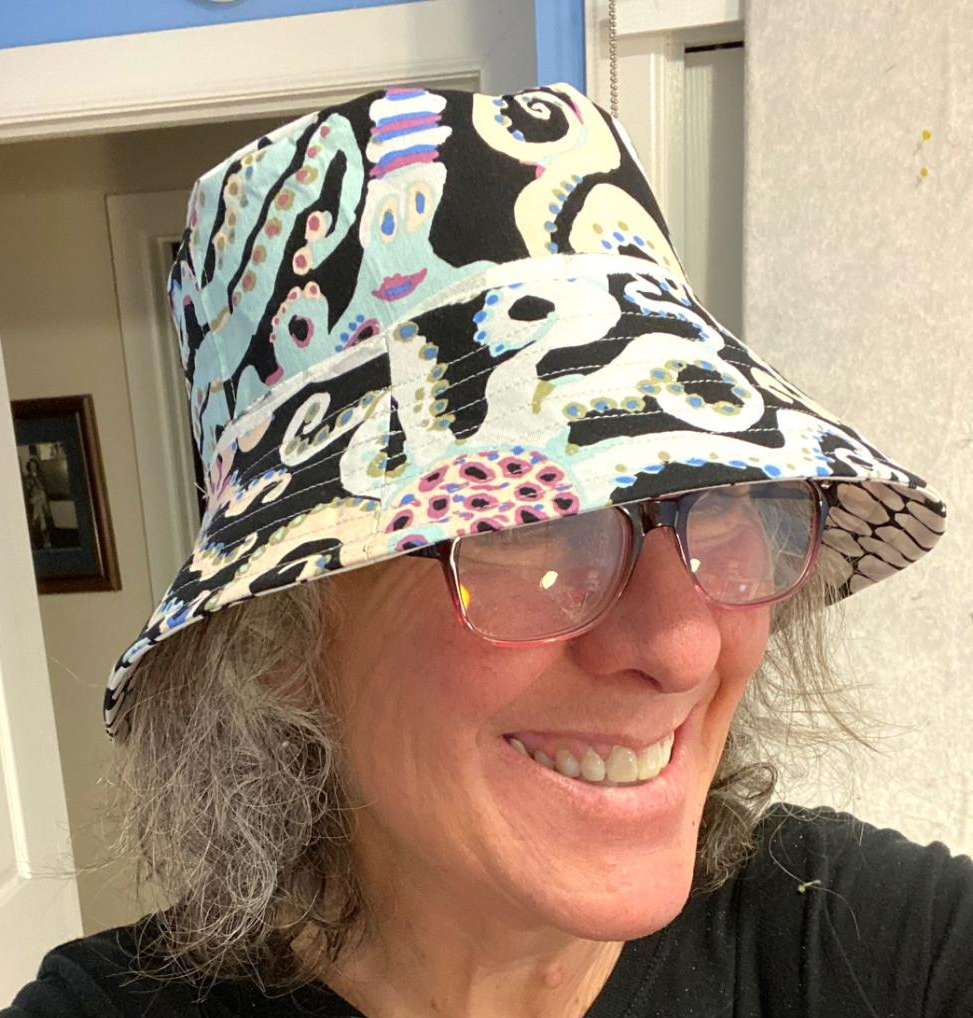
I took advantage of a beautiful day to take some better photos of the hat I finished last night.
The color is so much more true when you can get a photo in good natural light. And every hat is better with the right model.
I gave this hat to my friend Anne tonight.
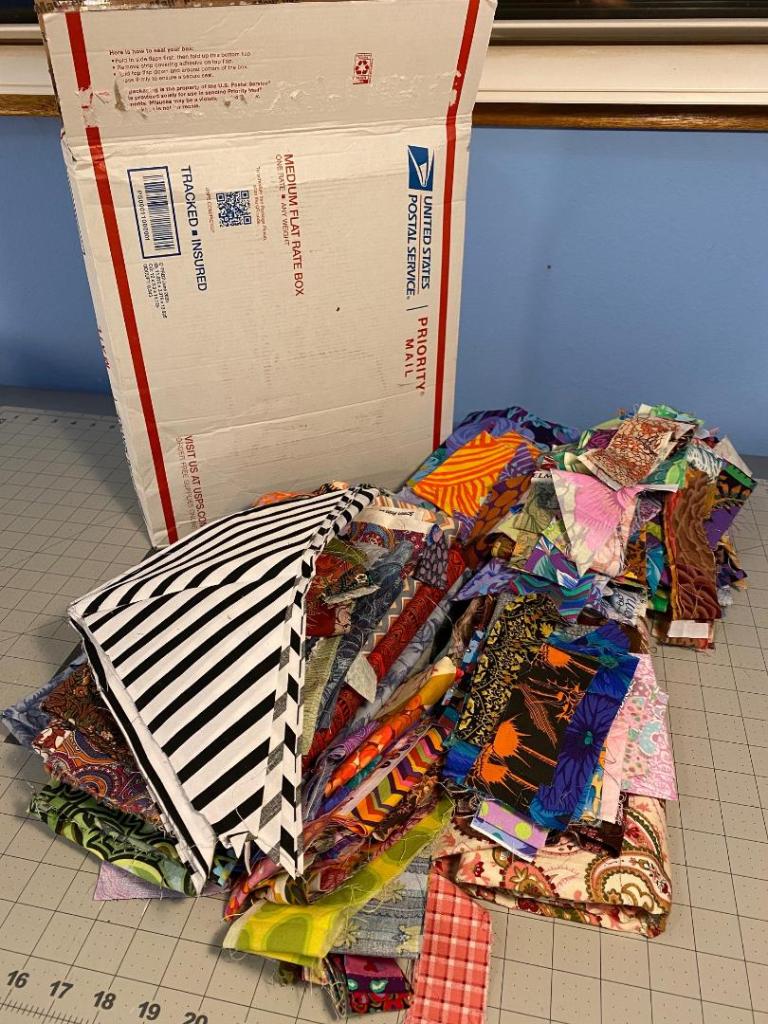
I got an amazing package of fabric scraps in the mail today from my internet friend Kitty Sogren. She is an inspirational quilt maker who lives in Washington state. I knew she was putting a package of scraps together for me, but she really went all out!
It’s a huge pile of fabric! It’s over 6 lbs of scraps!!! I can’t wait to get some time to sit down and go through it all and sort it into groups. Thanks for thinking of me Kitty… although I don’t know if she checks in here or not.
I’d also like to thank everyone who sent me good wishes and positive energy last week! It did me well to know so many people were concerned about me. I’d also like to thank the people who sent cards and care packages! You all rock and made my boring days of isolation brighter.
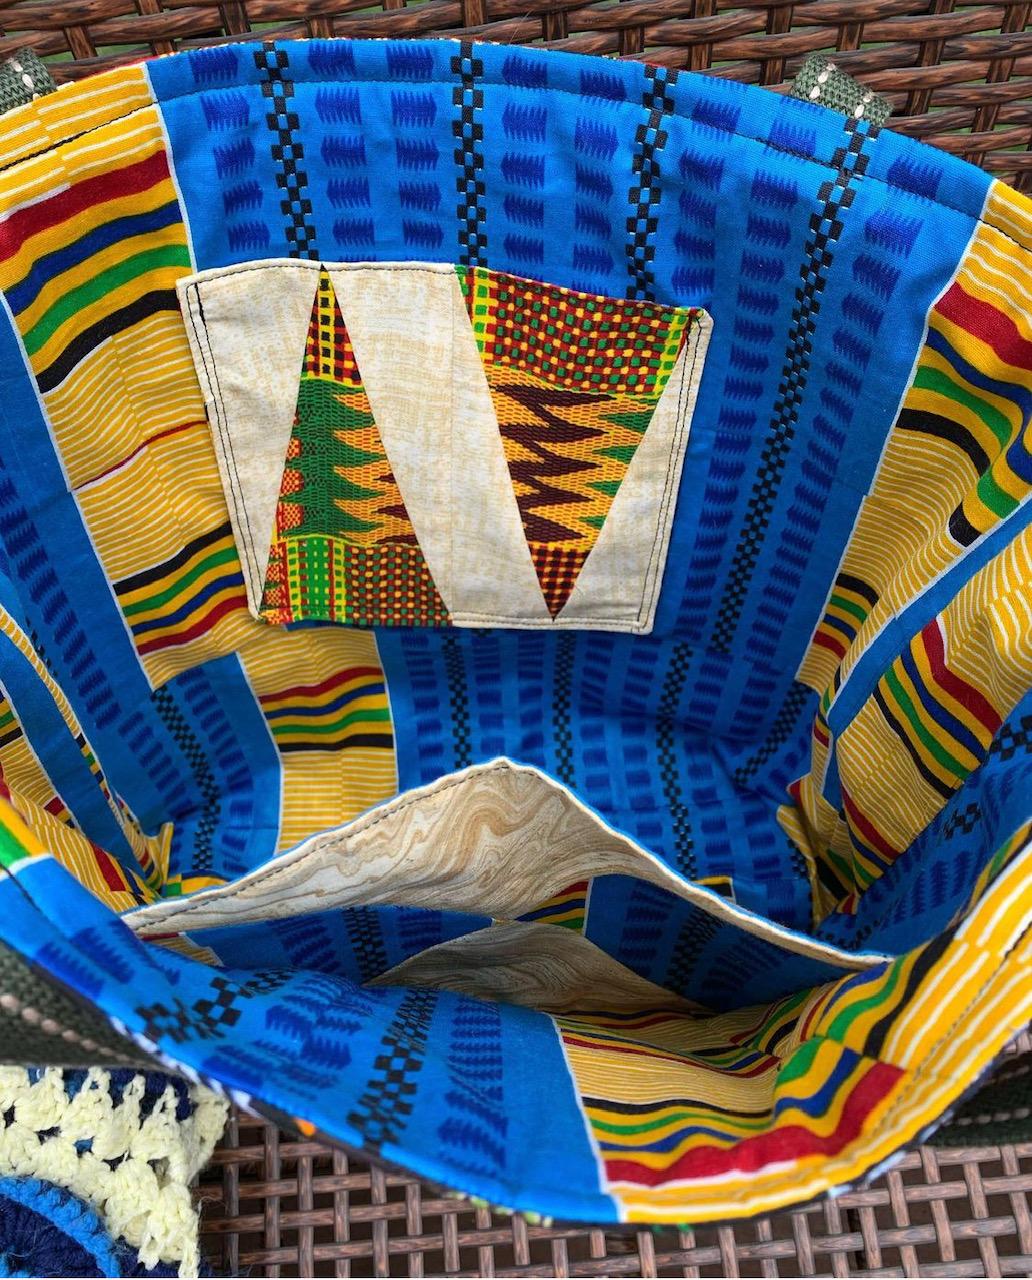
I do have a few Frankenbags from blog readers to share tonight. This first one was made by Jan Snell and I just LOVE it! She used African fabrics left over from a quilt project. It’s all so graphic and bold and full of color… It’s just so fantastic! I’ve wanted to get some of these amazing fabrics for myself, but I’ve never run across them in stores I’ve been able to visit. But I’m going to be keeping my eyes peeled!
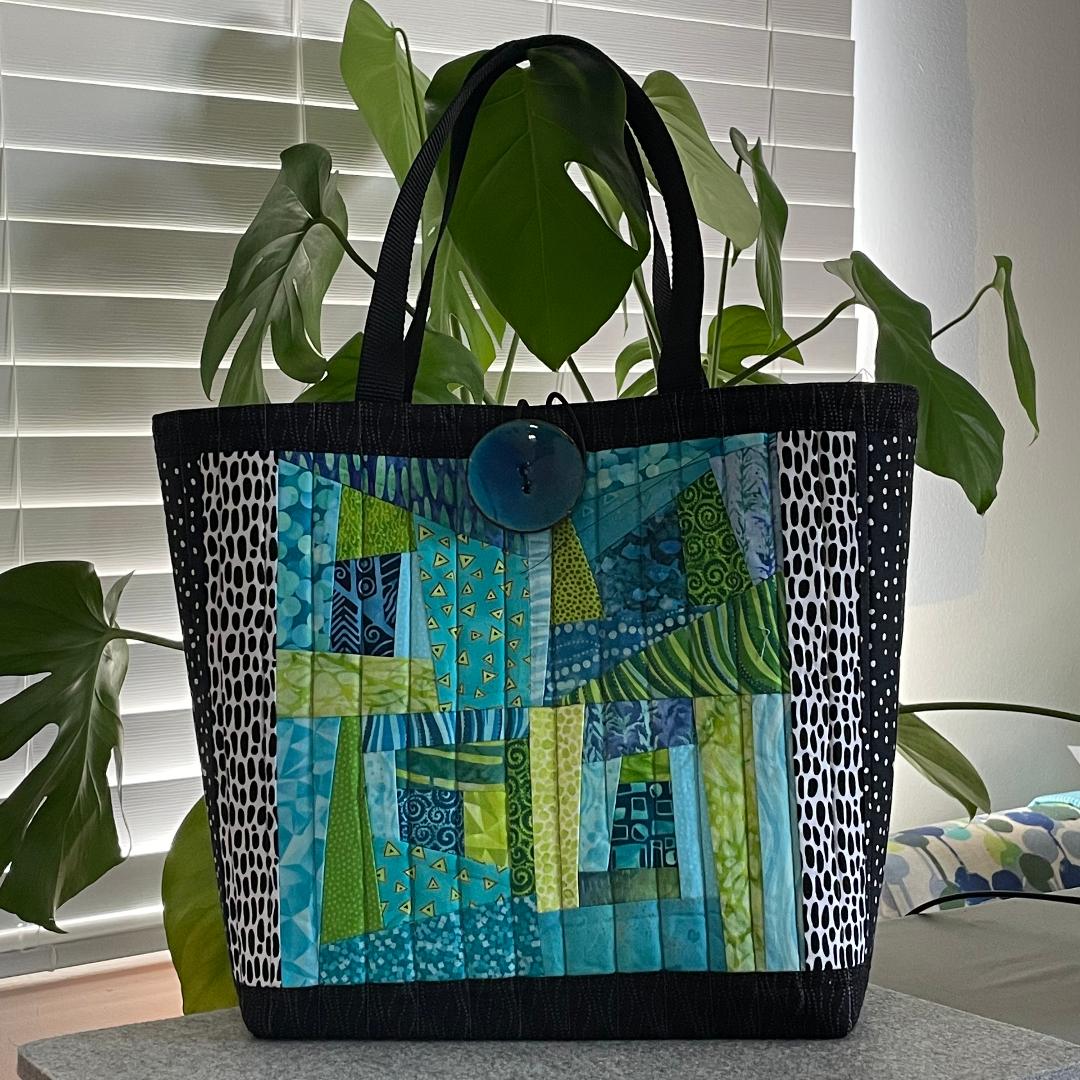
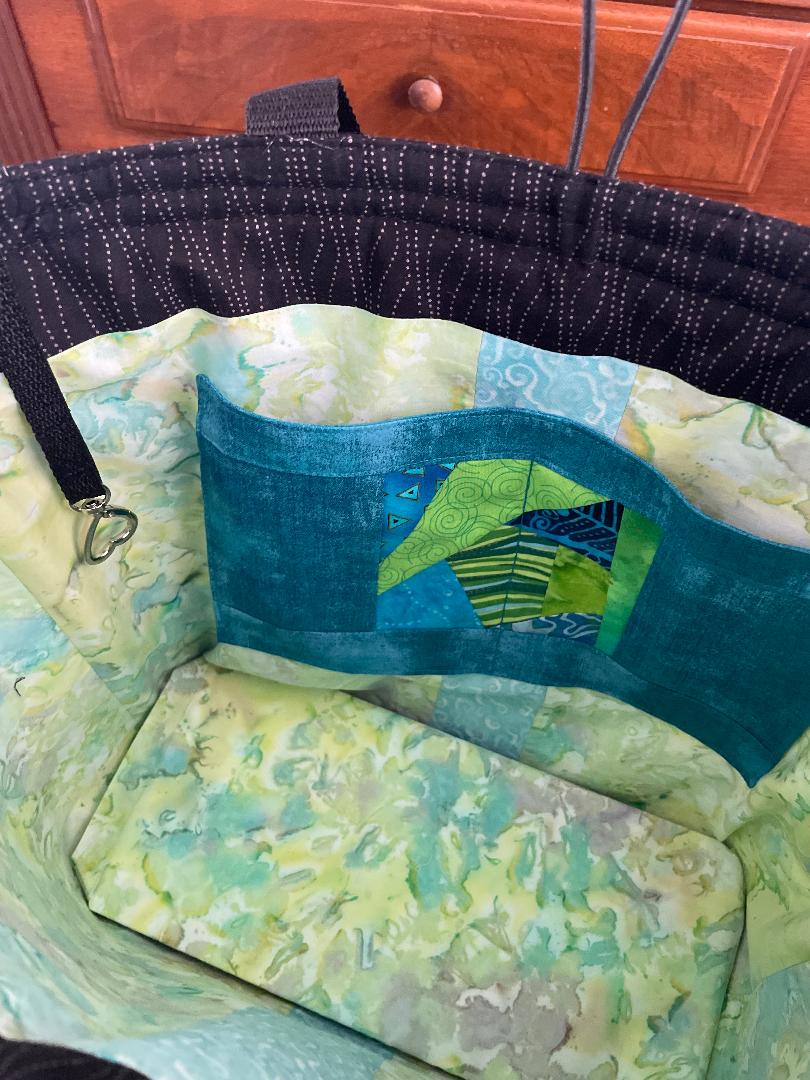
This next bag is from Sheri Knox. This bag is so cool! I’m going to share what Sheri wrote to me about making this bag because I loved it:
“I’ve recently been experimenting with improv cutting/piecing, and wanted to try circles – I got my inspiration from Cindy Grisdela who is so awesome at this (you may know of her and have seen her YouTube videos) – I tried her method of 4 squares all laying face up (several inches larger than you want the finished block, then freehand cutting through it three times (resulting in four pieces of each fabric) making differently shaped curves each time you cut, then mixing them up and piecing them. Then trimming them to the final size, not trying to make things match at the seams. In my personal opinion it turned out mega gorgeous – used it as a panel on one side of a bag. I was always a careful piecer, and more geometrically oriented (?!) so trying this was out of my comfort zone, but I am so happy with the outcome! It’s so fun to try all different techniques!“
The last bag tonight was made by Lynn Brooks. She used what she called crazy colors for a teacher friend who’s been in her life for a very long time! Lynn said she has brought light and color to her life and all of these reminded me of her of her friend. What a great sentiment and what a great gift! And look … lots of zippers and pockets! Nice job Lynn!
I’m hoping to get out and play some pickleball with friends tomorrow night. The weather is supposed to be glorious. It finally feels like spring is here!
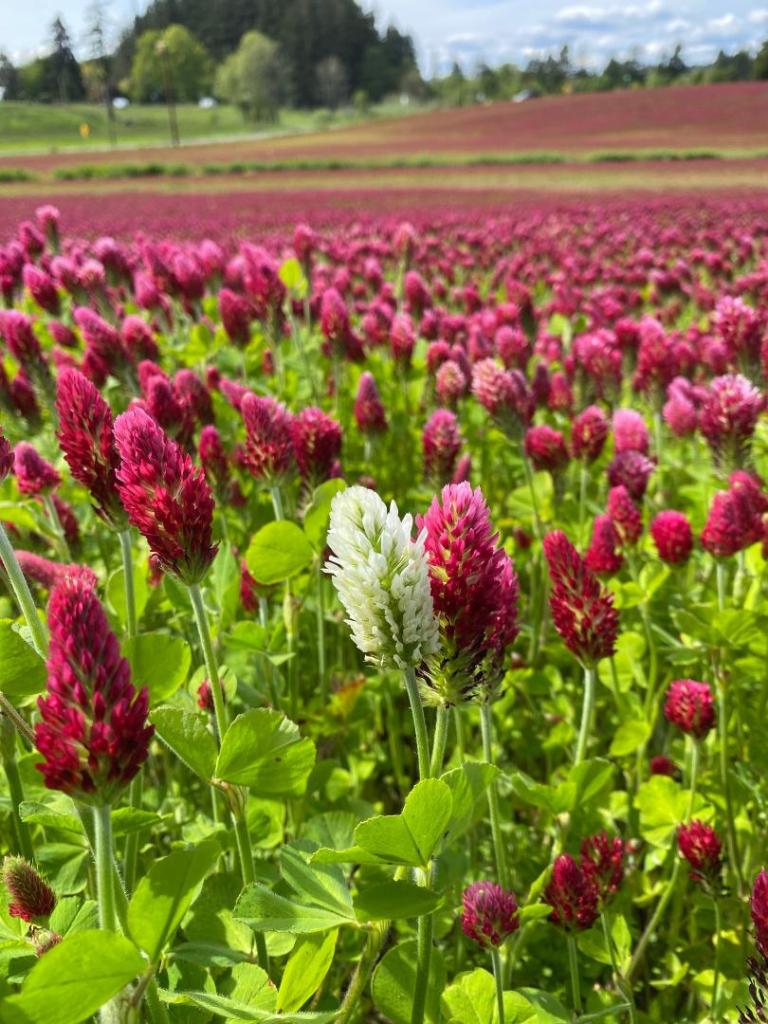
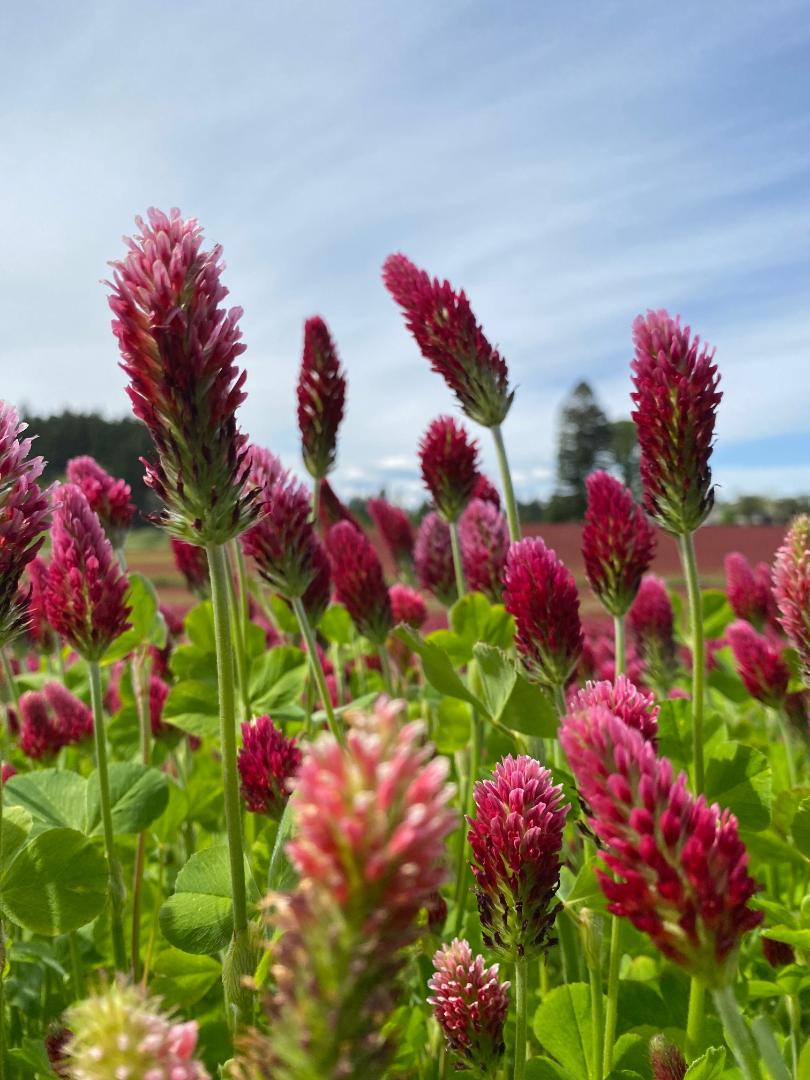
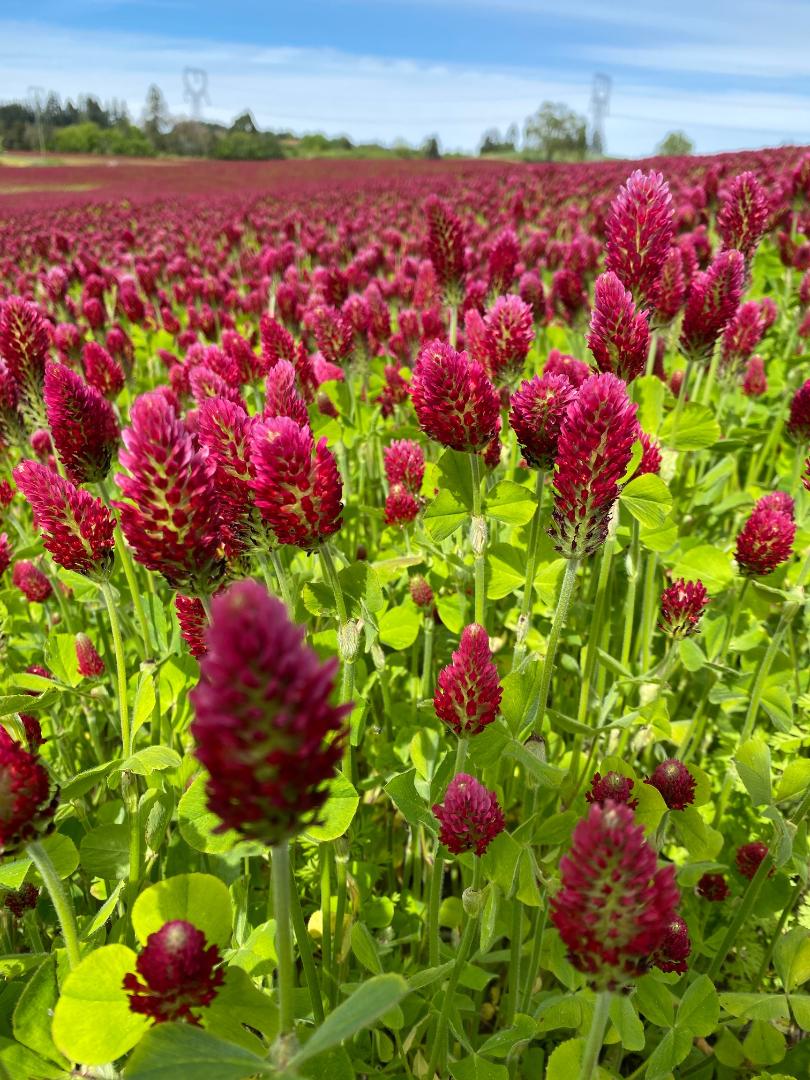
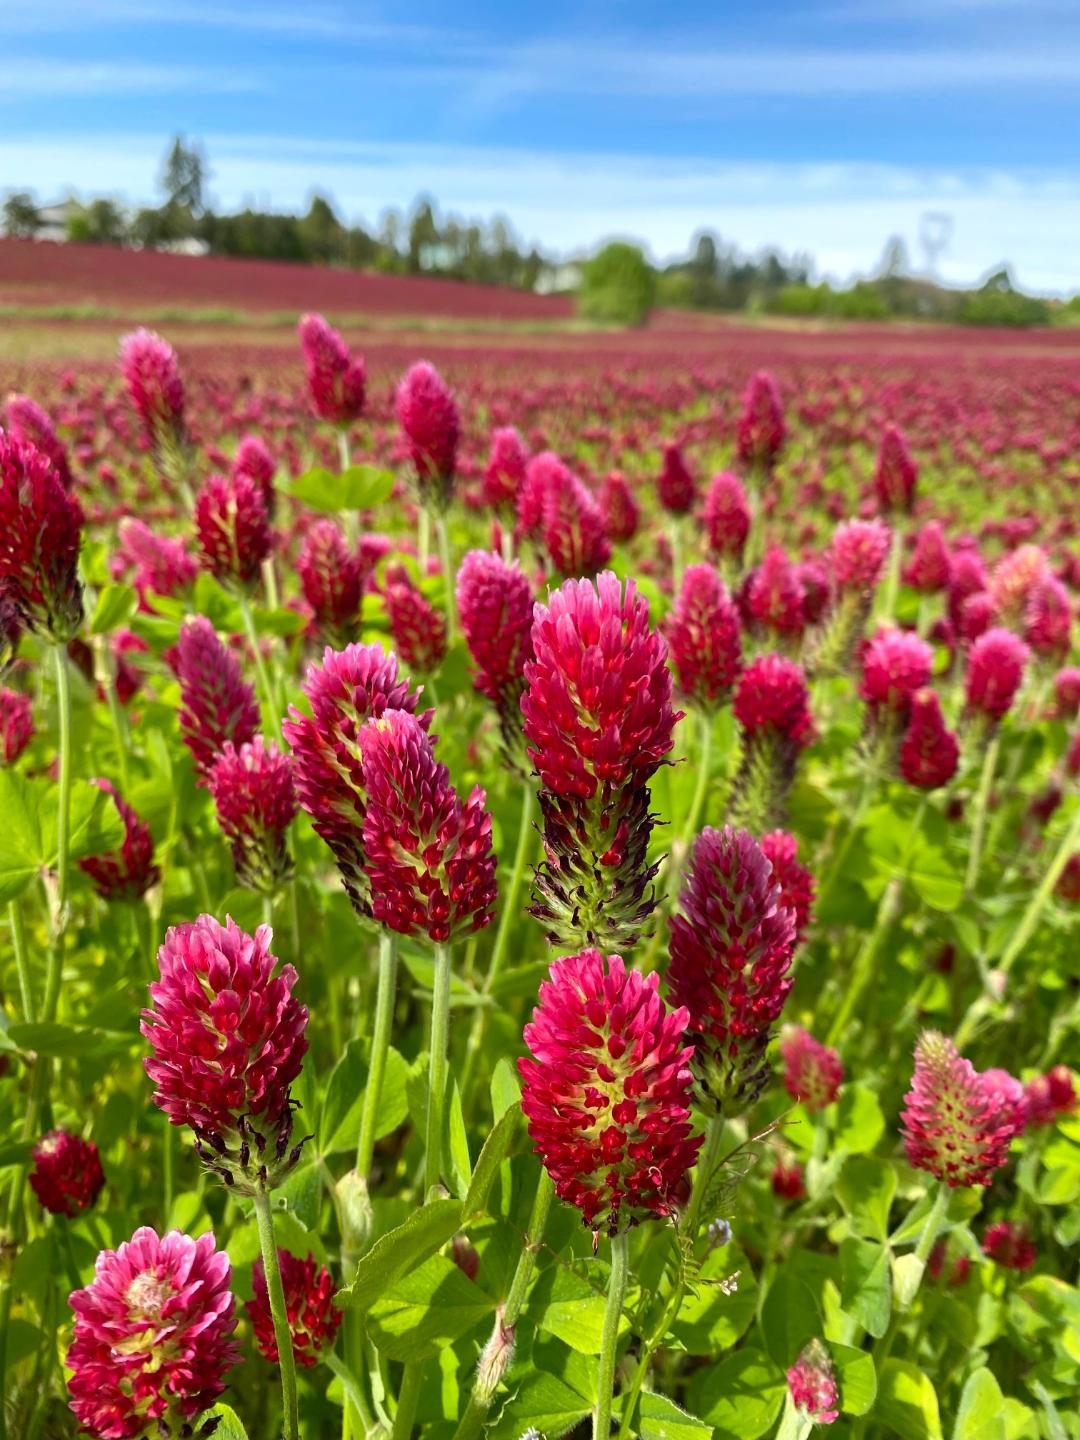
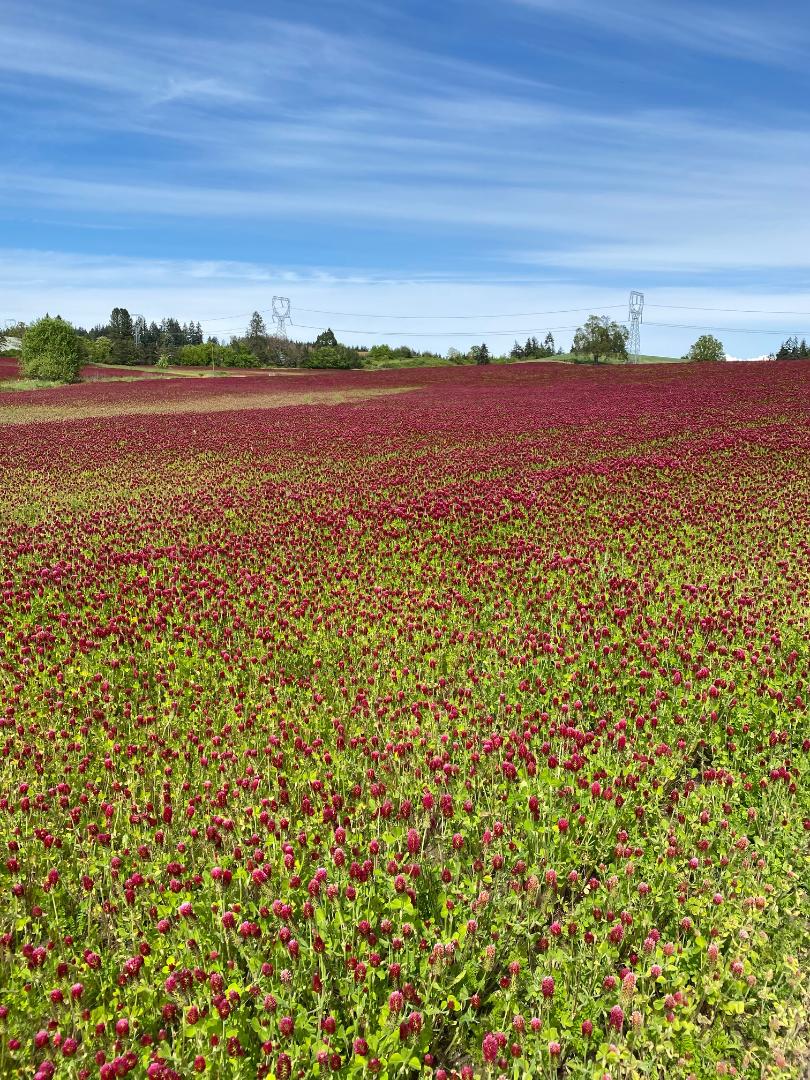
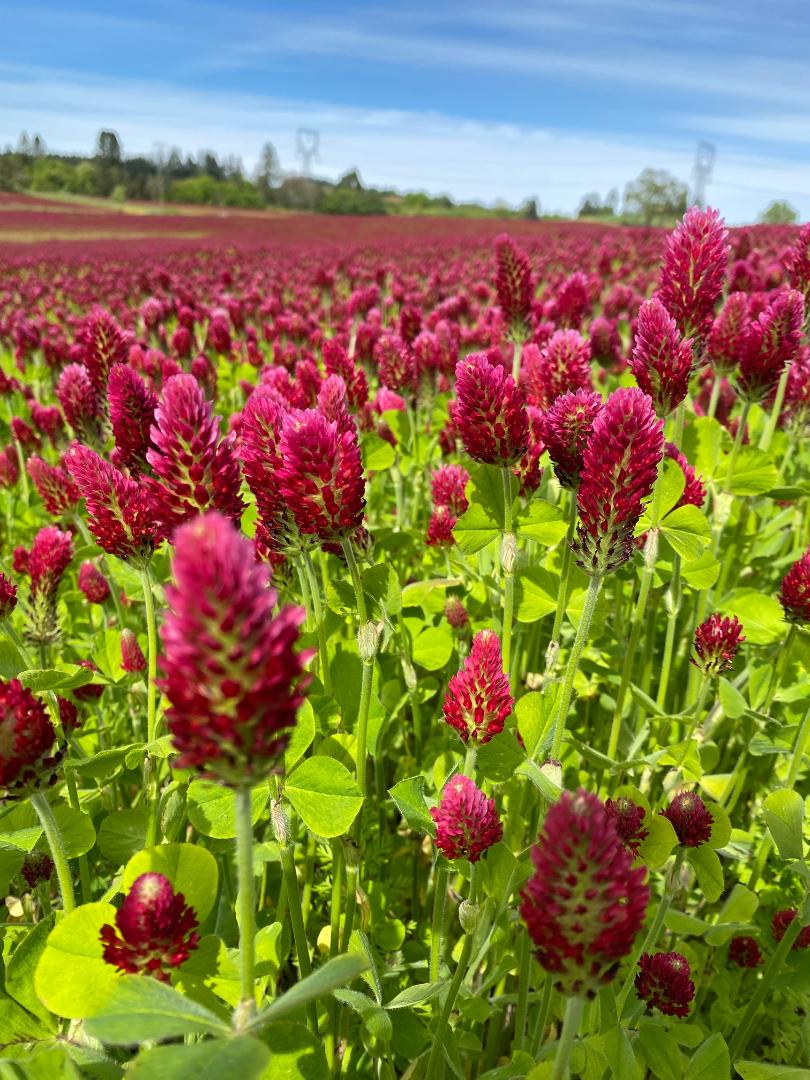
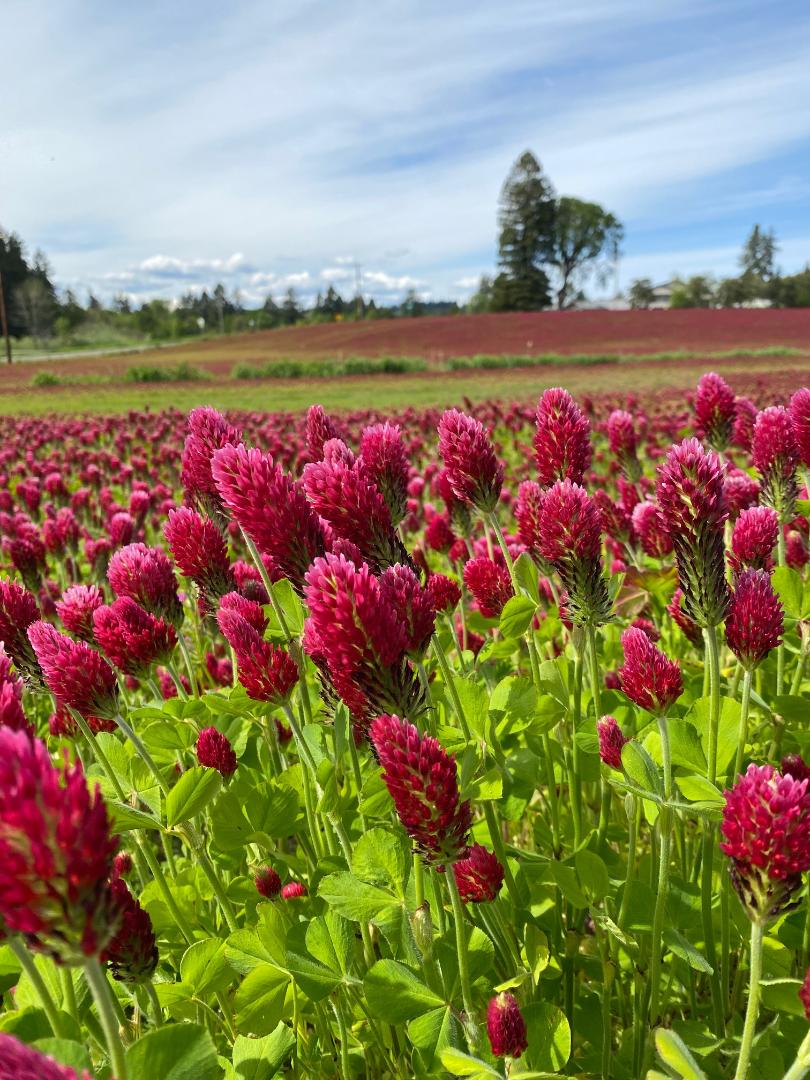
One of my favorite things about spring around Portland are the farm fields filled with crimson clover. And today I headed west to farm country on my annual quest to get my fill of it.
Crimson clover is used as a cover crop that adds critical nitrogen back to the soil and as forage for livestock. Oregon is the largest producer of crimson clover in the US. And the bees who love it and pollenate it make fantastic clover honey.
I still remember the first time I saw a field of Crimson Clover when I moved to Oregon. I had never seen anything like it. It was one of the most beautiful things I’d ever seen.
And as you stand in the clover you can hear thousands of bees buzzing.
I’m just going to overload you with photos.
It was another gorgeous day here in Portland. It finally feels like spring is really here. I started the day with a nice 4 mile walk with the boys and then I lost a few hours somewhere.
We hurried home after our clover quest and got to Costco before it closed. Then we grabbed some dinner and had our evening walk as the sun was going down.
I had a spurt of productivity after our walk and actually trimmed up that quilt backing that’s been giving me fits this week.
I measured very carefully before cutting! And now it’s all ready to go off to my long arm quilter…. after I make the binding. I’m waiting for some Kaffe strata in red to be delivered later this week.
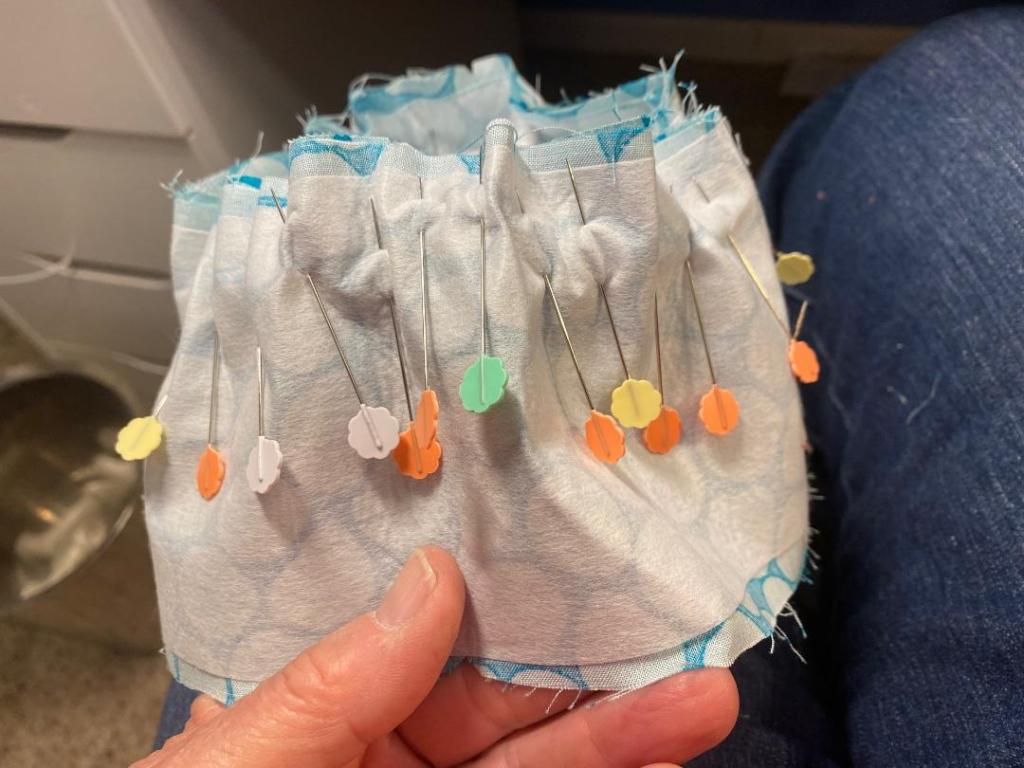
Then I sat down and started pinning, pinning, pinning to start sewing on the hat I cut out last night.
Any time you’re sewing a straight piece to a curved piece you need a lot of pins. And then you have to sew slowly and adjust your fabric often. If you do these things it all comes together pretty well.
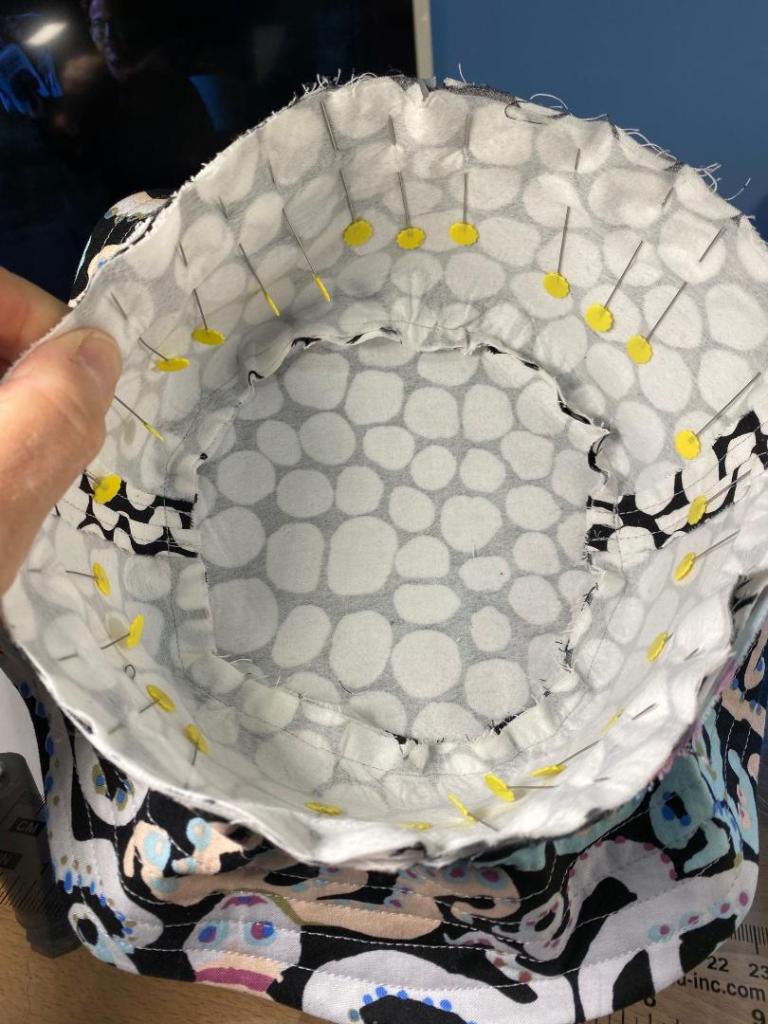
A couple of people have told me they’re confused by the patterns when it comes to sewing the two halves of the hat together. The pattern has you sew the lining crown to the brim, and then sew the main fabric crown to that. But it’s vague on just how to do that.
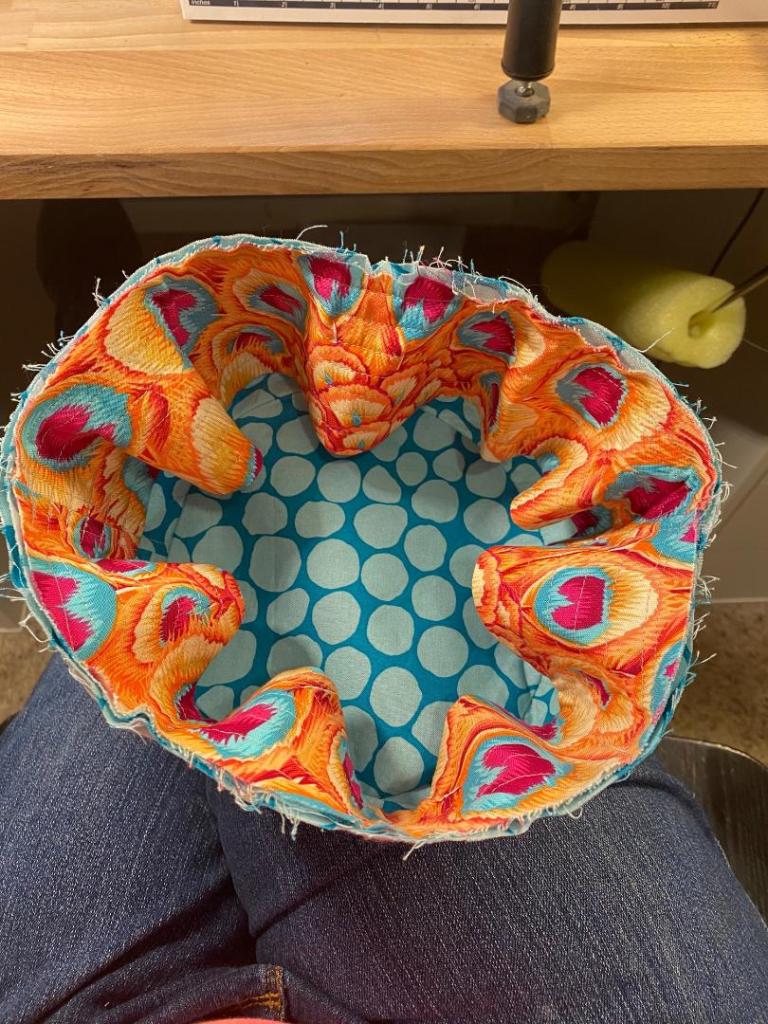
So, here’s how you do it. You have to turn the lining wrong side out and tuck the brim down into the crown lining.
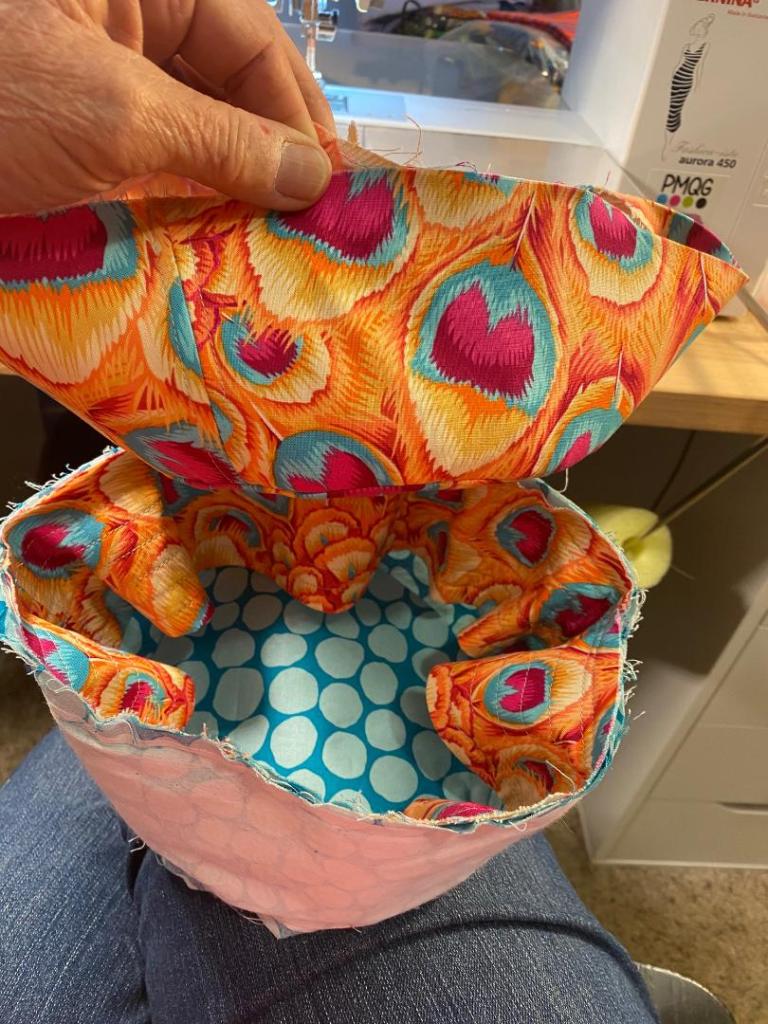
And then make sure your main fabric crown is right side out, and put it down into the lining crown.
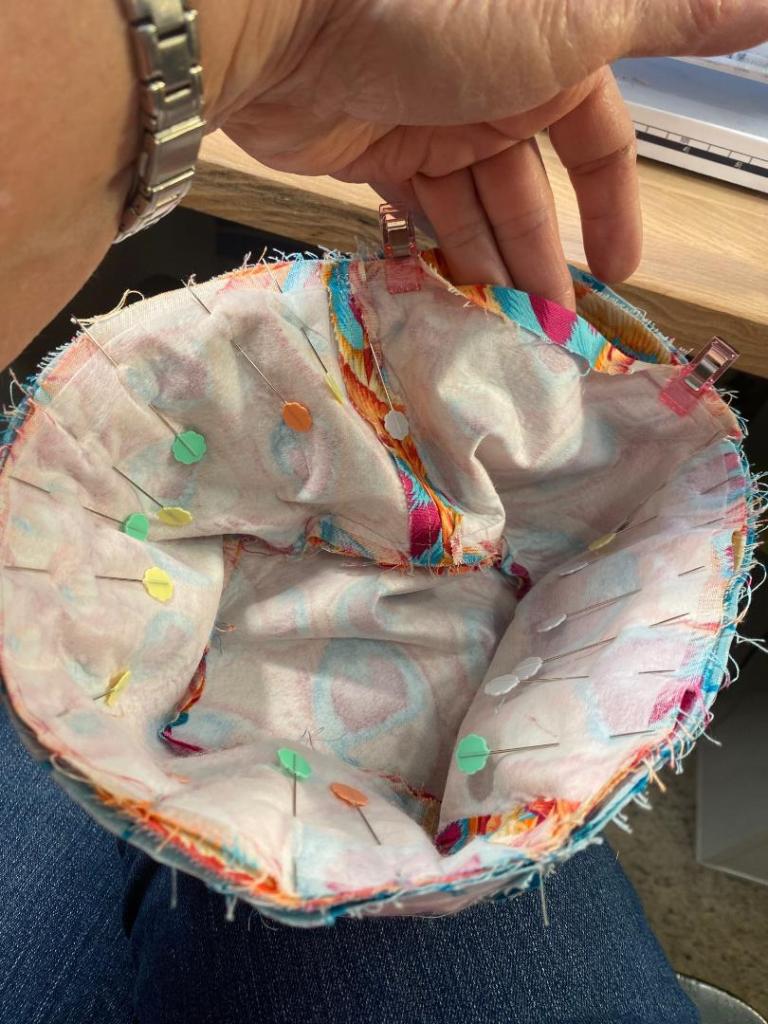
Then pin the two pieces together, matching the side seams and the center points of the brim pieces and the crowns. Pin like the biggest pinning fool that ever stuck a pin in anything!
There’s that neat little package with the brim inside. And that opening that I’m showing will allow you to turn the entire thing right side out.
Here’s the finished hat.
I’m happy to say that this one fits pretty perfectly! So it only took me three hats to get the fit right. And this is why I don’t make a lot of things that have to fit any body part!!! But hey… I’ve got three hats and some mad hat making skills!
Another fun combo of fabrics. I’m thinking these hats are a great way to use up a lot of 1/3 yard pieces in my stash.
Back to work tomorrow after my sad little vacation spent in my house.
Today was the official end to my isolation… even though I went to the beach yesterday. Today, I felt like It was ok to walk the dogs around the neighborhood and on the trail without having to worry about being too close to people. It felt good! Also, I’m almost completely back to normal. And that’s good news.
We started out Saturday with a nice three mile walk. It’s the first neighborhood walk we’ve had since May 11! I wonder if anyone was wondering where we were.
It was an absolutely gorgeous spring day here in Portland. We’ve had a cool and wet couple of weeks, so this day felt extra special. When we got home I sat out in the SHADE and had a cup of coffee and poked around the inter webs.
Then I got a productive streak and hit my sewing room and whipped up another bucket hat.
The hat I made yesterday is just too tight. So I poked around and found another pattern, printed it and compared it to the first pattern and it was generously bigger. It’s essentially the same pattern, but this hat turned out a little too big! I’ve sprayed it with water several times and tossed in a hot dryer. I even put it through a hot wash and dried it on hot. It’s still a little to big.
I got looking at the pattern and when I printed it, it was not at 100%. It printed at 110%. At 100% it’s the same size as the first hat pattern.
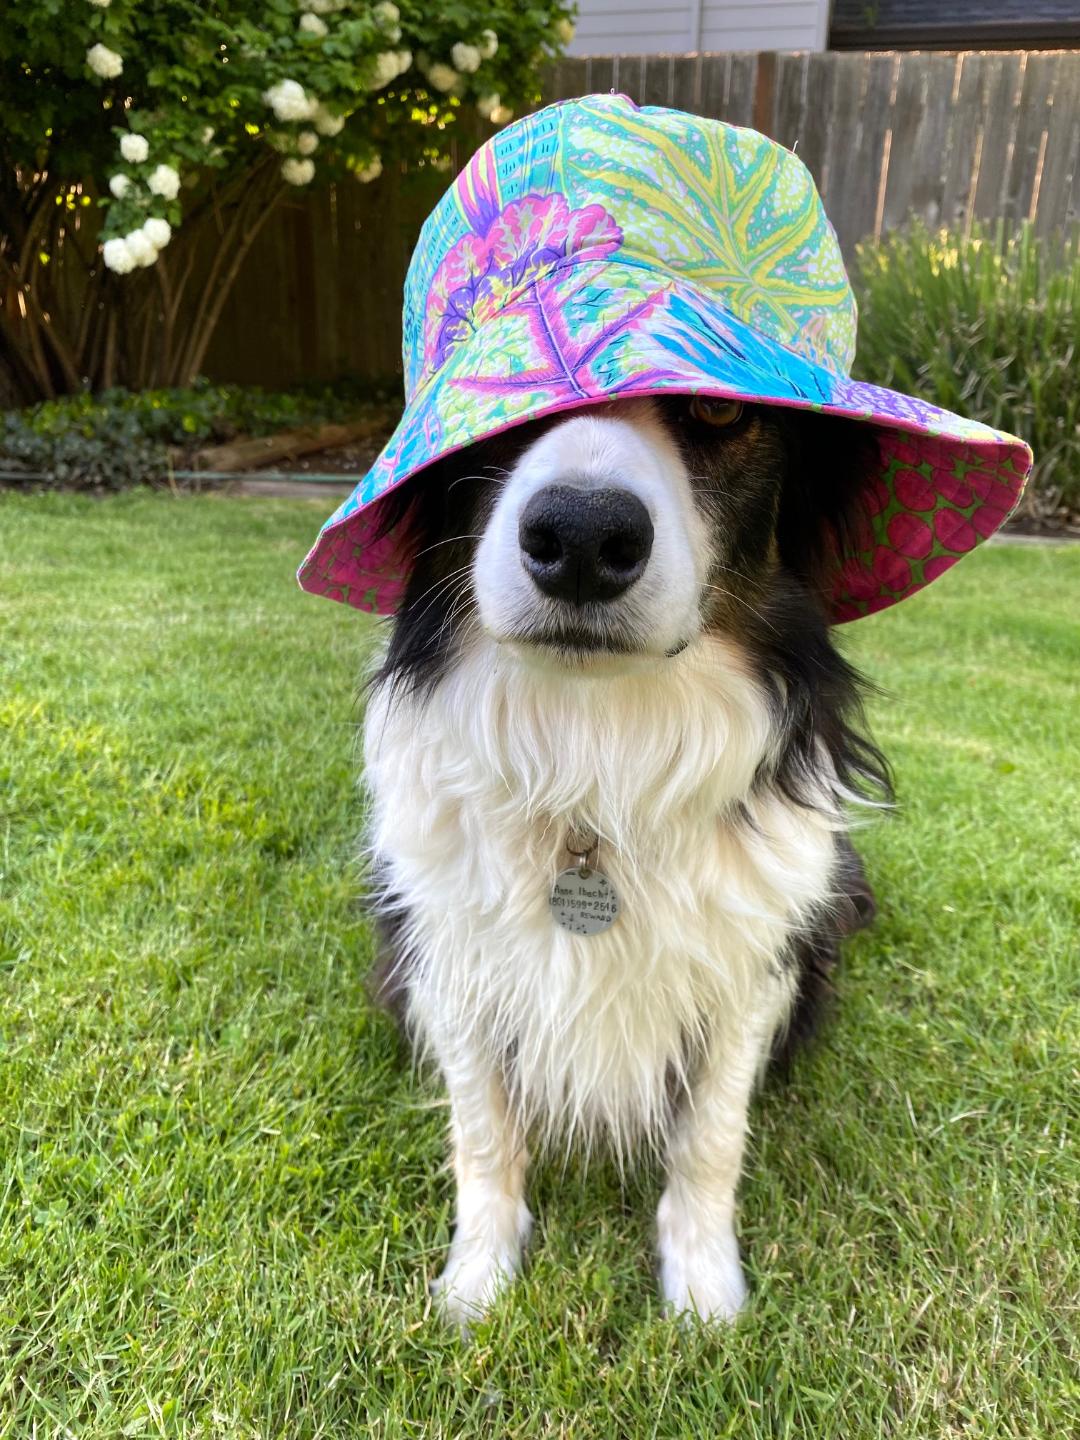
Speaking of 110%, Bender is giving that much!!!
And he just keeps on giving…
I really like this fabric combo of Philip Jacobs coleus in contrast and that gorgeous pink jumble. I might sew a piece of elastic into the back of this hat, just because love it so much and want to be able to wear it.
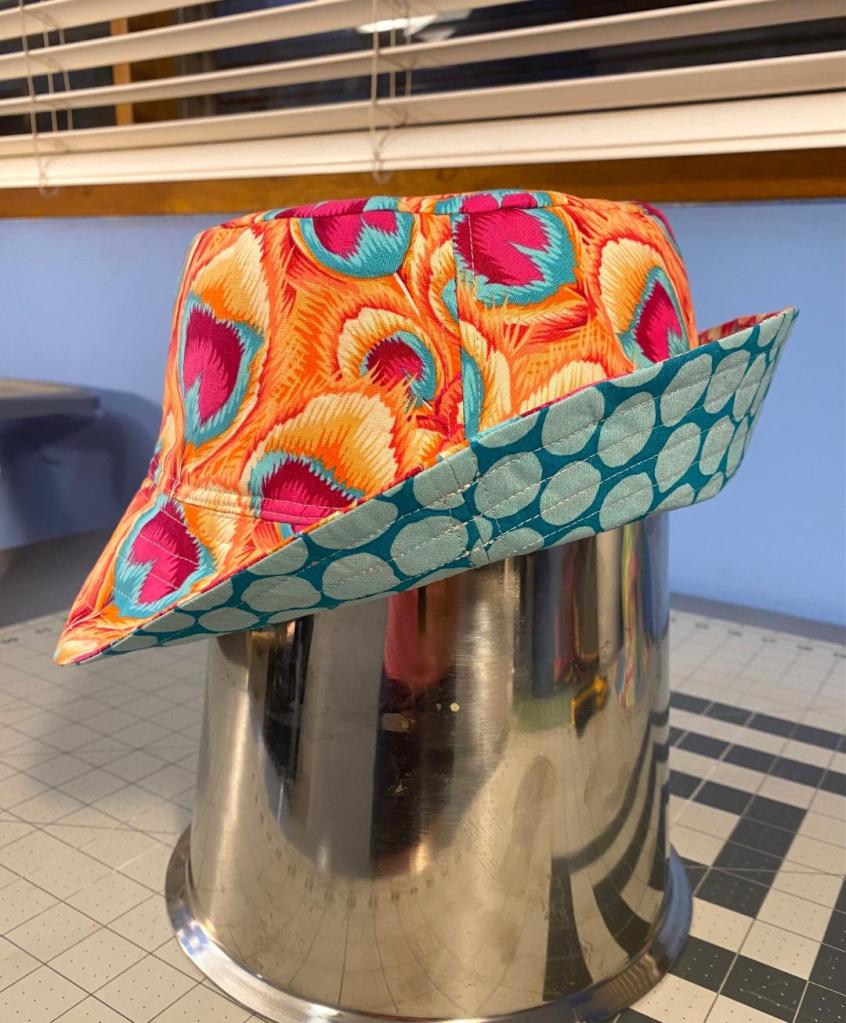
In my continuing Goldie Locksian quest to make a hat that is just right I reprinted the second pattern at 105%. I compared it to the larger version and I think the difference is going to make this next one a perfect fit. So I went ahead and cut out all the pieces and got the interfacing fused to the hat pieces.
I have been very careful to mark each pattern piece so I can keep the sizes all straight.
That peacock feather fabric is a Philip Jacobs Snow Leopard design. And of course, more jumble. I’ll finish this up tomorrow. The cutting is the most time consuming part, so this will finish up quickly. And I really should trim the excess fabric off that quilt backing I made a few days ago. I’d like to get that all bundled up and ready to go to the 9long arm quilter.
Apparently I wore my dogs out today. Rico is currently sleeping next to me with his paw over his ear.
Maybe his paw is stuck there!
And Bender is sleeping so hard his eyes are rolling back in his head!
Another beautiful day on tap for tomorrow. I’m hoping to get some pickleball in!
But first, I finished up this bucket hat tonight. It really went together quite easily and quickly.
How cute is that?!?!?!
If you’re gonna make one of these, make sure you have your pins handy.
I didn’t trim off the excess on that quilt back that gave me such pains yesterday. I want to be fresh and alert when I do it because I’m afraid I’ll make even more trouble if I’m not. I’ll tackle it tomorrow after measuring five or nine times.
Ok. Now to the beach.
We left home around 8:15 this morning and were on the beach at about 10:30. There were only four cars in the parking lot when we got there. That’s always a really good sign.
I always check the tide tables before I go the beach because this beach has a cliff and I’ve seen it completely swamped at high tide. You don’t want to be caught between a cliff and the ocean when the tide is coming in.
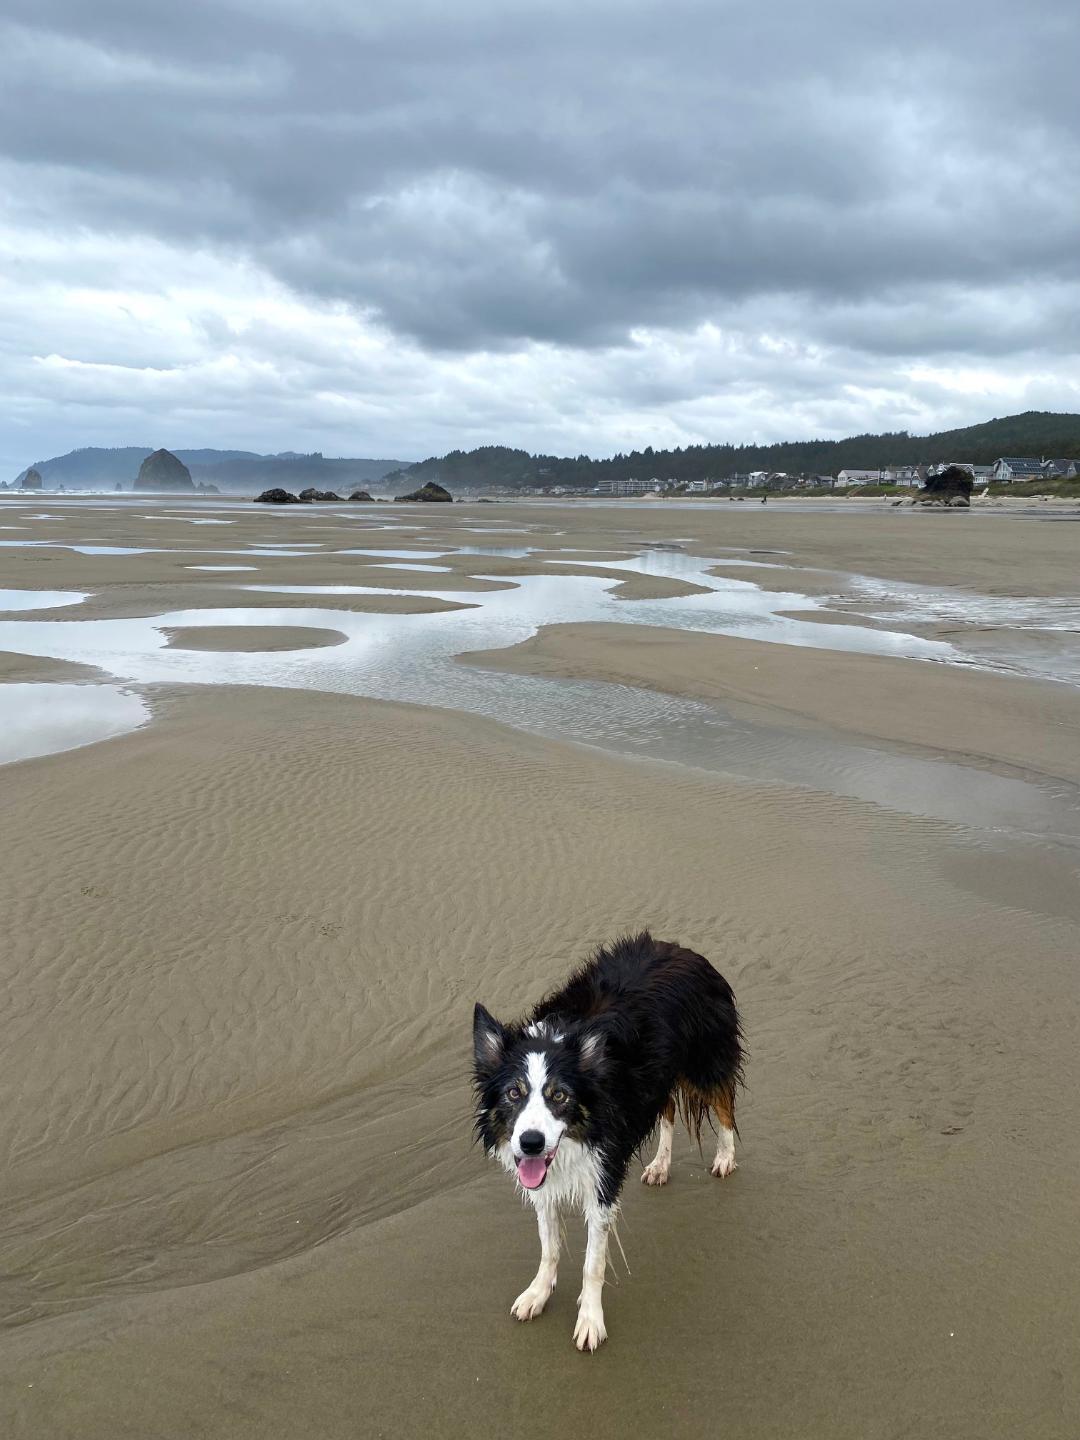
Low tide was at 10:55 this morning. And this was an extremely low tide, which meant that we could easily walk north onto Cannon Beach with plenty of time to get back before the tide cuts off access.
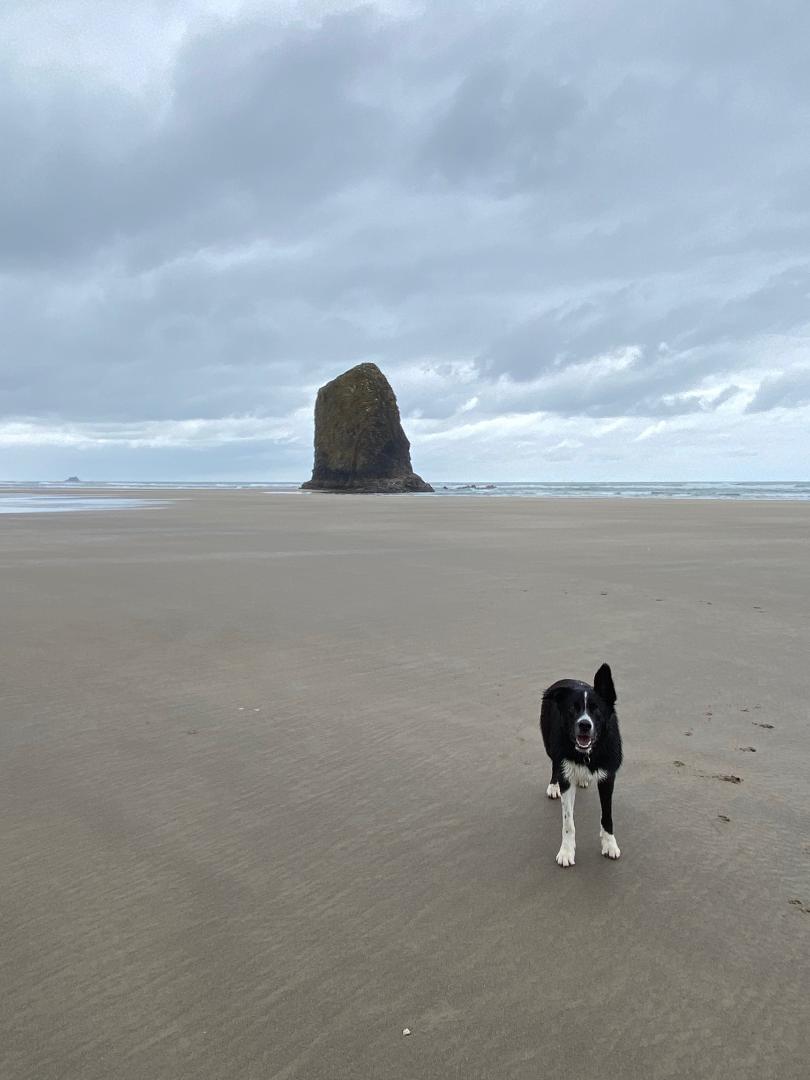
Cannon Beach features the iconic Haystack Rock. It’s likely you’ve seen photos of it. It’s the large rock formation on the right in this photo.
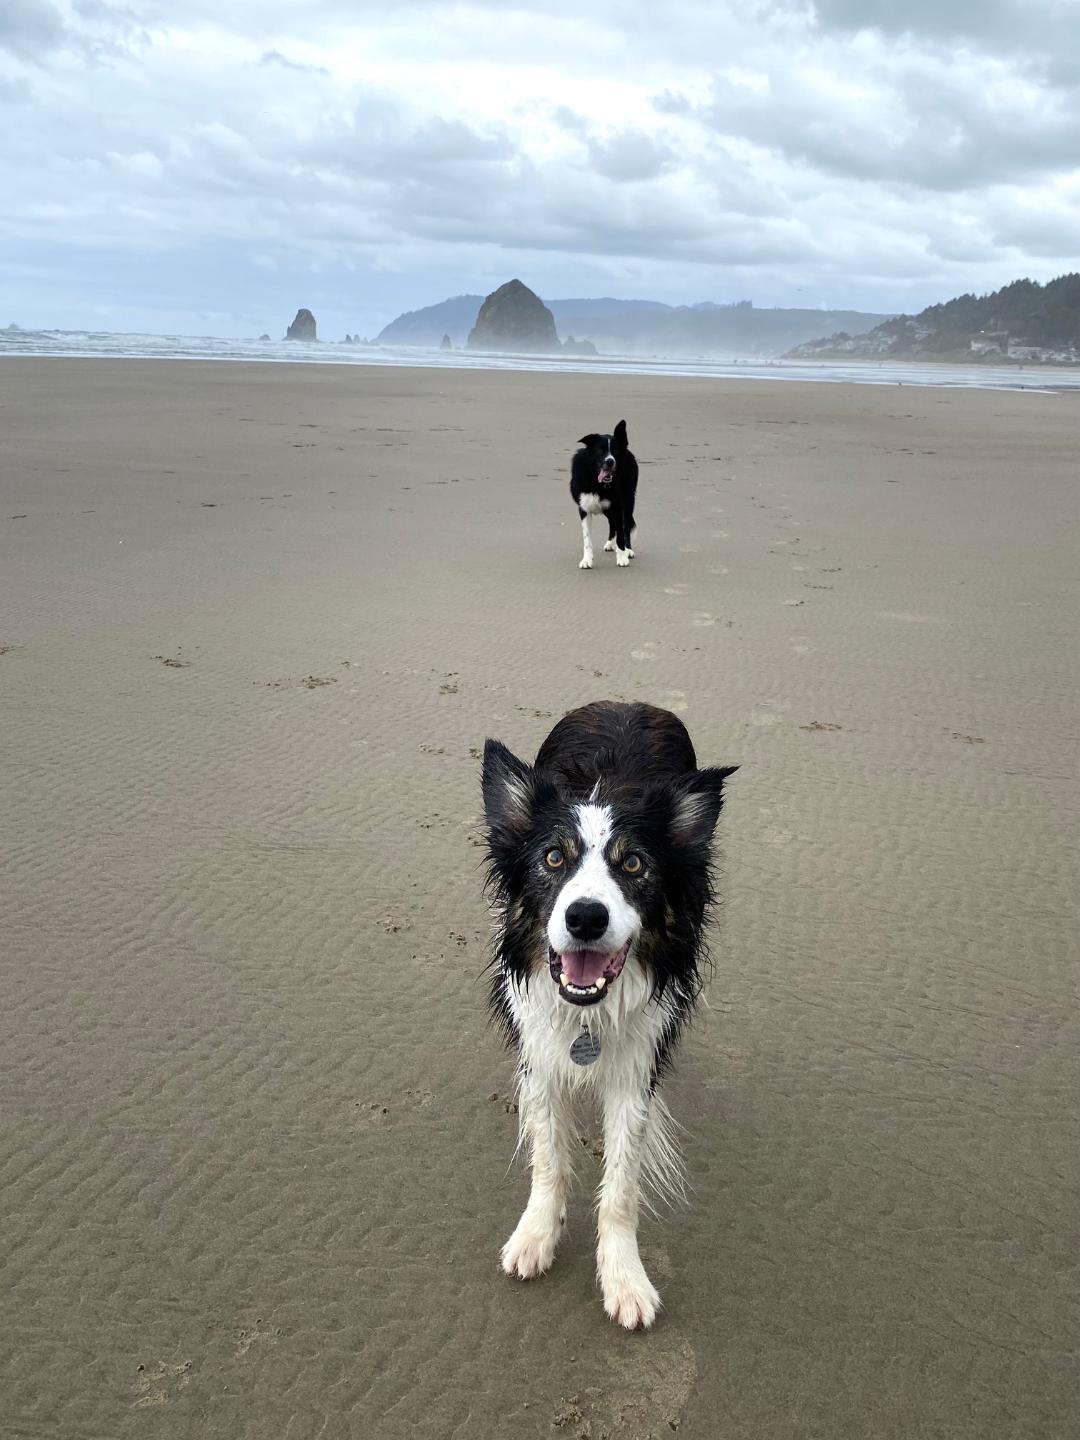
The beach was covered with these tidal pools today. And that meant fun for doggos!
We walked almost two miles north onto Cannon Beach before we turned around and headed back south. It felt so good to get out and move around after so many days of being stuck at home and so sedentary.
That’s three happy campers!
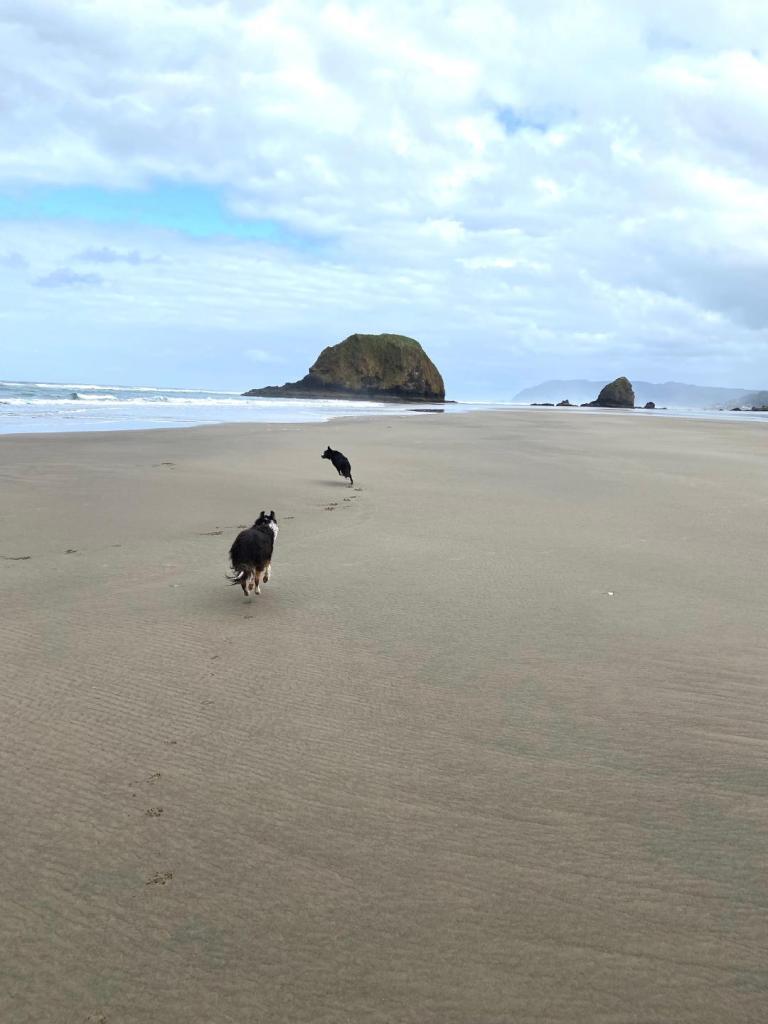
If you’ve never been to the Oregon coast, I feel a little sorry for you. It’s very rugged with lots of rock formations and it’s often harsh weather. But it’s stunning. The skies can be amazing and the water is gorgeous.
Here’s some more photos of Cannon Beach.
Did I mention that Bender and Rico whole heartedly enjoy the beach?
I walked 6.5 miles today. I’m guessing they RAN close to 20 miles. They are both exhausted tonight and they got a solid 90 minutes of sleep on the drive home. I had to stay awake.
And they LOOOOOOVE the water! They are in and out of it the entire time. But the good thing is that they don’t go in too deep.
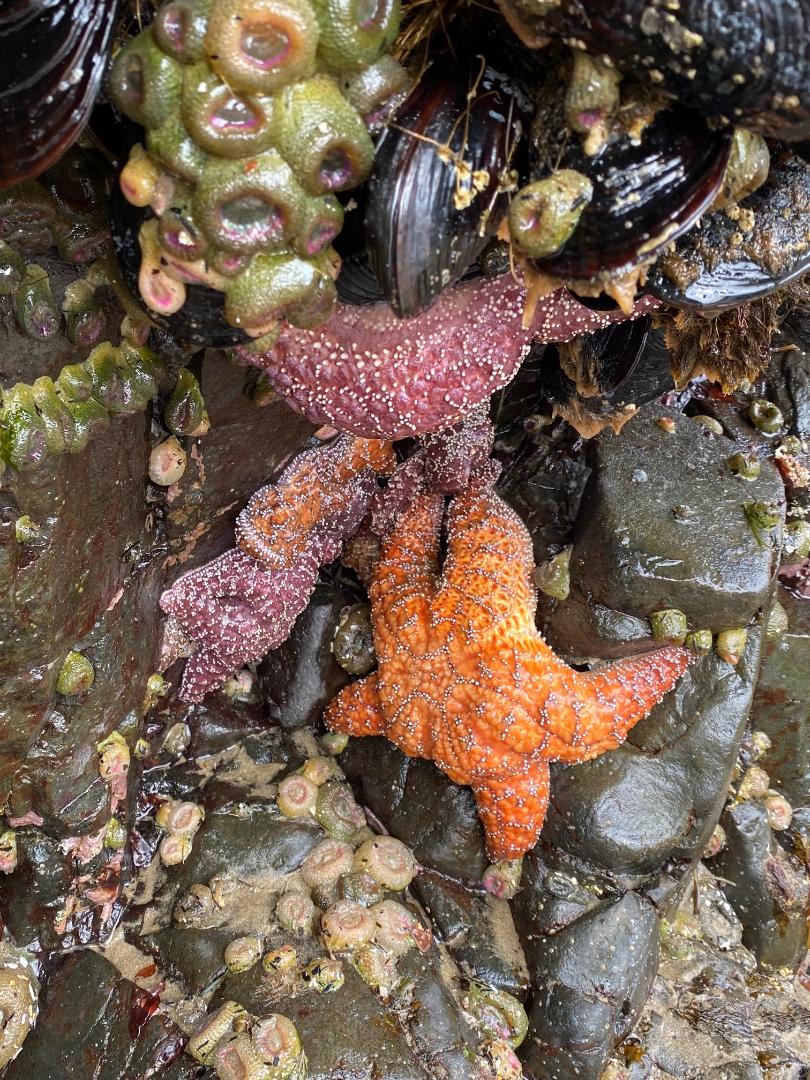
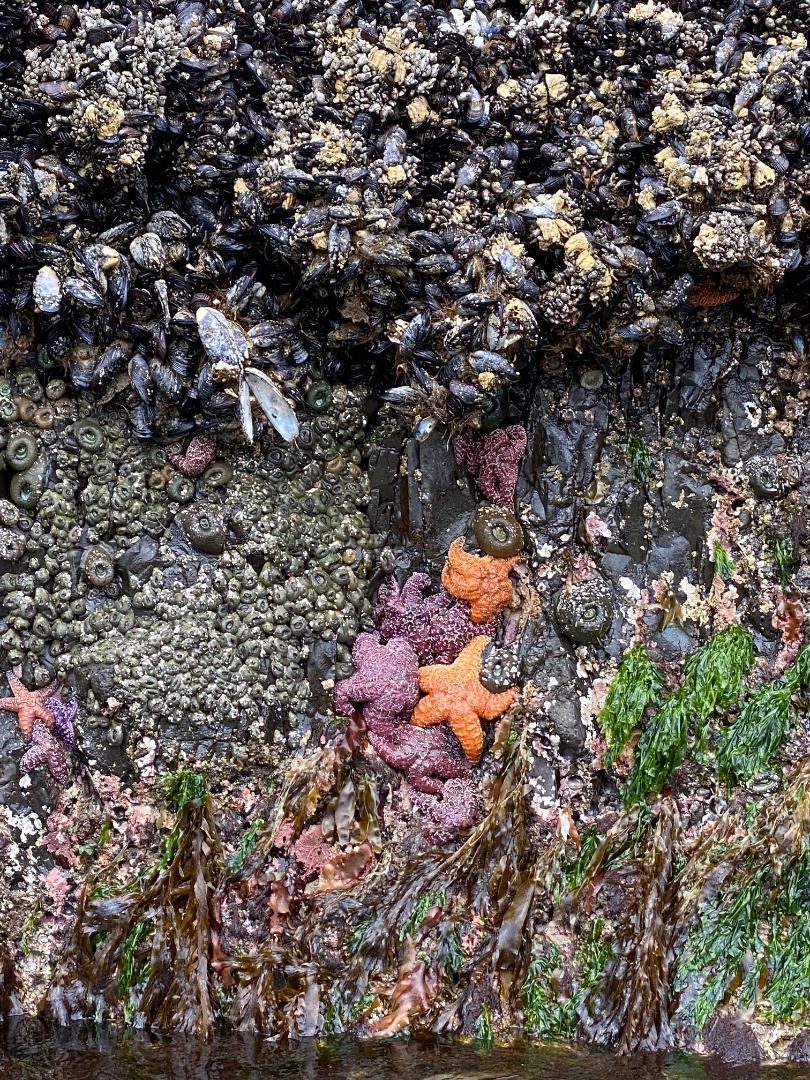
Once we turned around and headed back south toward Arcadia Beach the tide had turned. But it was still waaaay out there. It’s about 1.5 miles down to the south end of Arcadia Beach. But first, we took a closer look at the rocks. And look what we found — sea stars. (click on the photos for a larger image.)
When I first moved to Oregon in 2010 it was very normal to see lots of sea stars on the rocks. And then there was a terrible wasting disease that wiped them out. And for a few years you never saw a sea star. But now they are making a comeback! It’s so cool to see them again! Look at those vibrant colors.
And speaking of vibrant colors. Look at this one! I’ve never see one this color purple before! It was so amazing!
Isn’t is amazing to see that color on a live animal!
Here’s the view looking south along the coast. That’s me in the foreground.
On the south end of this beach is an outcropping of rocks. It’s really unusual to be able to walk around that point. It’s almost always impassible except in these extremely low tides. I made a video of it for my friend Linda who used to visit often before the pandemic.
We were all slowing down a little by the time we made it back to the car. I felt really good considering that I’m on the tail end of my Covid experience. It felt so good to be outside and moving around. And a day at the coast always does us so much good. It felt really normal.
I’ll close tonight with this final photo of Bender with a crab on his head. It’s a long story, but I just had to do it.
I spent a good portion of today making the backing for this quilt.
This is a big quilt. It’s 96 x 96, so my plan was to make the backing 104 x 104 to give my long armer plenty of backing to play with.
I lived streamed a sheep herding competition in Kentucky as I hung out in my sewing room.
There is a lot of math involved with making a quilt backing, and even more when the quilt is this big. Math is not my strongest skill, but I’m pretty accurate at simple addition, subtraction , multiplication and division. Plus, I have a brain that has an easy time of making sense of spatial things.
I measured and cyphered and measured again and did more math and had it all figured out. And then I proceeded to cock it all up and cut both pieces of fabric 8 inches too short. I didn’t realize this mistake until a little later. It was quite dramatic when this issue came to light.
Basically, I did all kinds of fancy math to arrive at a size to cut the fabric for the backing and then proceeded to cut it the exact same size as the quilt top.
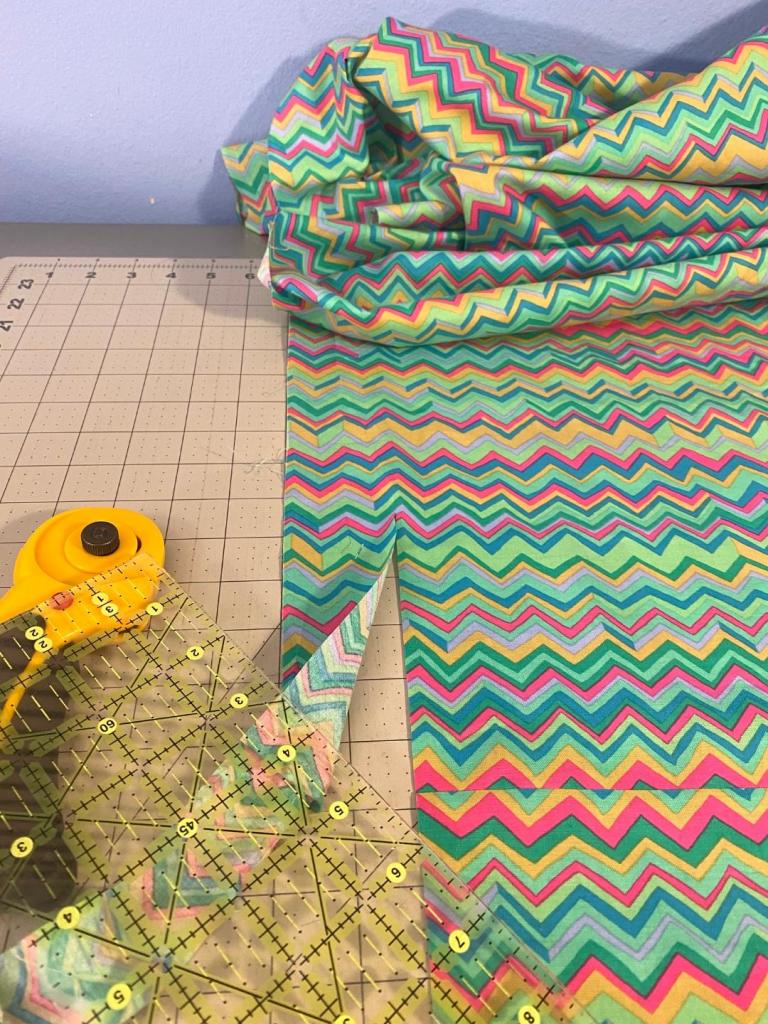
With the size of this quilt, I knew I would have to add some length to reach 104 inches. So I decided to use the leftover blocks and other fabrics to make up the difference I needed to add 20 inches of height to this. So I used this strip of left over blocks and flanked it with a strip of Jade Millefiore on each side.
So remember that I cut my large pieces of fabric 8 inches too short? Well, I discovered it as I was pinning this strip to the first larger piece of fabric. Dammit!!!
But one of the great things about this zig zag fabric is that you can add a piece and it blends in really well. So, while I will always know this seam is here in two spots on this backing, no one else will ever know.
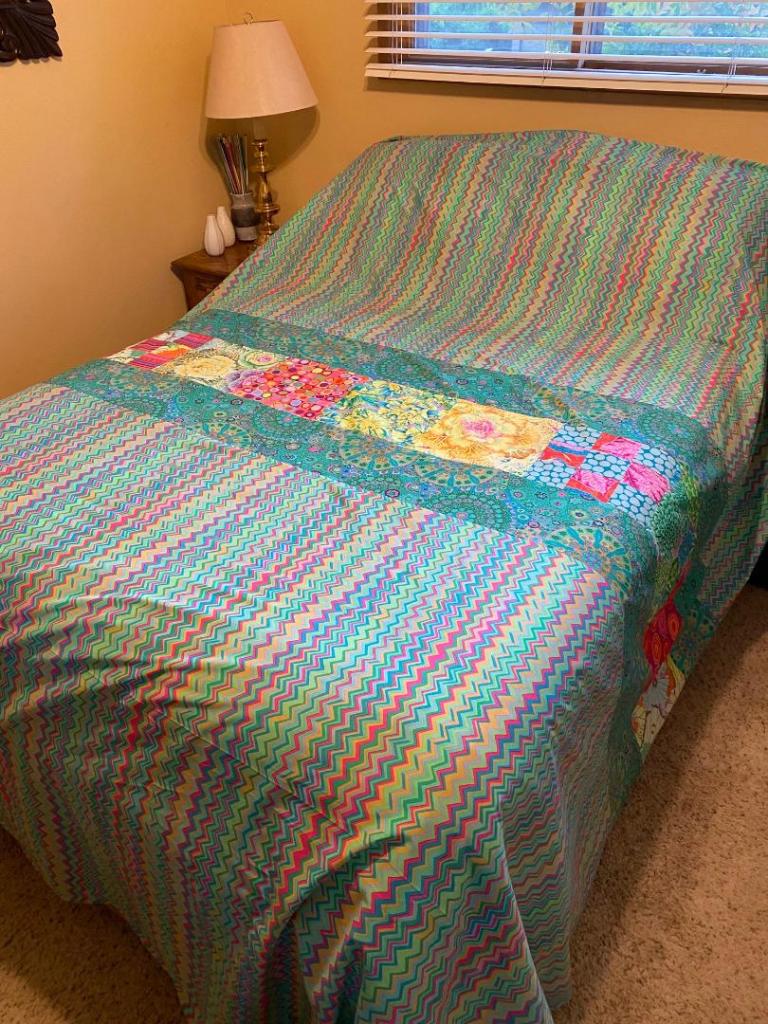
After I fixed that mistake, the rest of this backing went together really well. Here it is on my guest bed so I could get a good look at it.
And then, when it was all done, I measured it and one side was four inches shorter than the other side. Did I mention that this quilt is square? FOUR INCHES SHORTER! Which means my backing is not at all square. I went over my math again and again trying to figure out how I had made one side so short, and I started making plans for how I would extend the length of this one side. I came up with a plan and set it aside to tackle when I’m fresh.
A little while later I was talking to a friend, expressing my frustration with the issue with my backing measurements. And we started going through my math together to see if we could figure out what had happened.
Well, we figured out that the side that I think is short is actually the correct measurement. The other side IS FOUR INCHES TOO LONG!!! My backing isn’t too small, it’s too big!
Too big is a lot easier to fix than too short. So tomorrow I will trim off 2 inches from the top and bottom so the strip down the middle will be easier to center for my long armer.
PHEW!
I don’t love making quilt backs. And I especially don’t love making BIG quilt backs. But I’m so relieved that I figured this all out before I started cutting and made an even bigger mess.
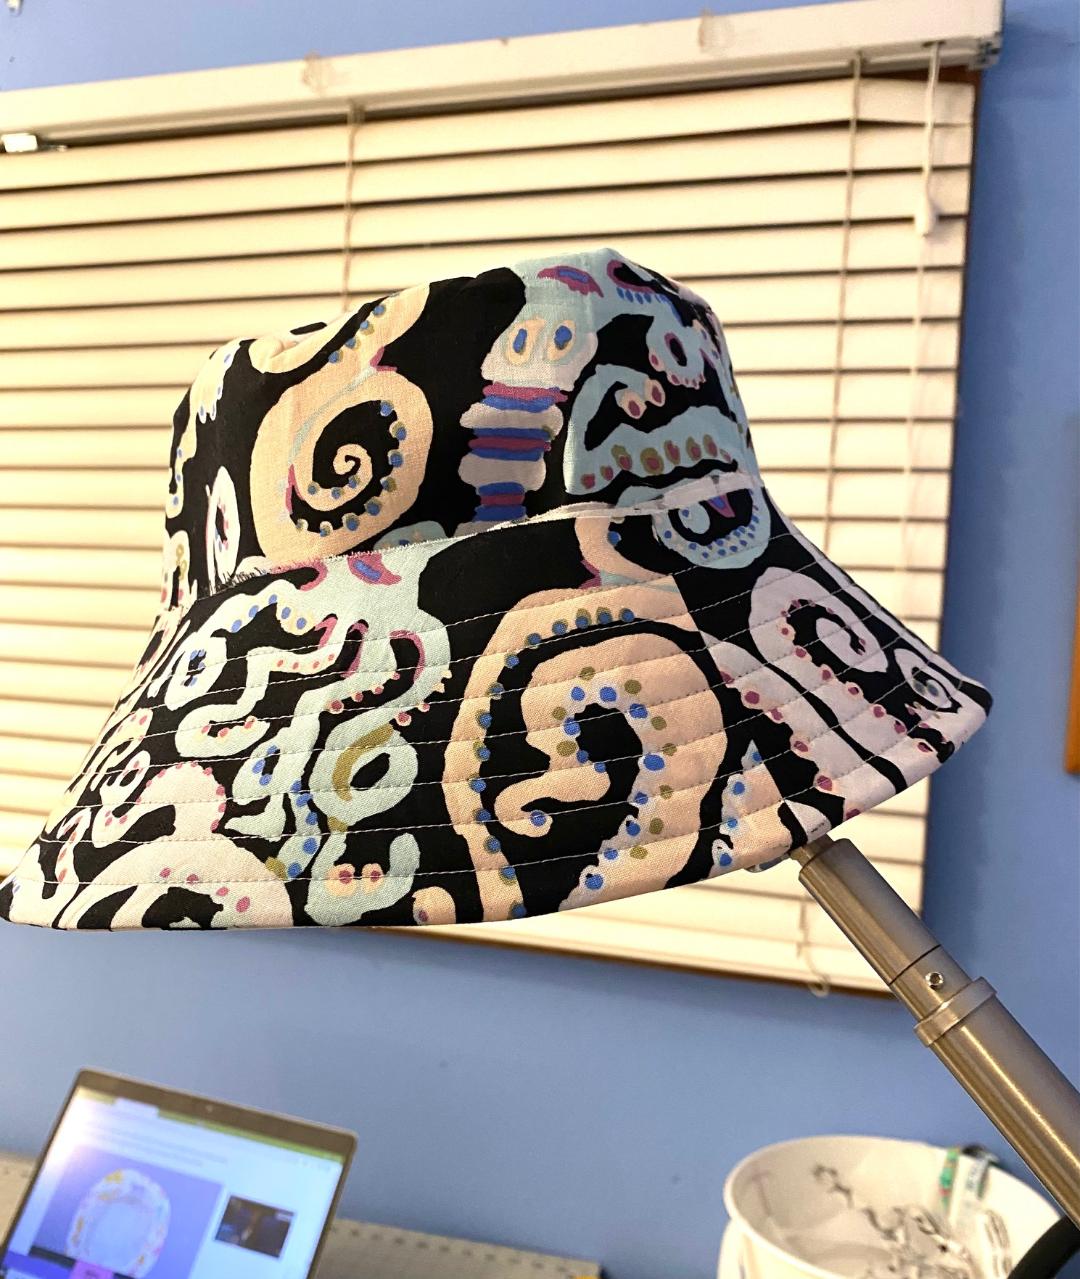
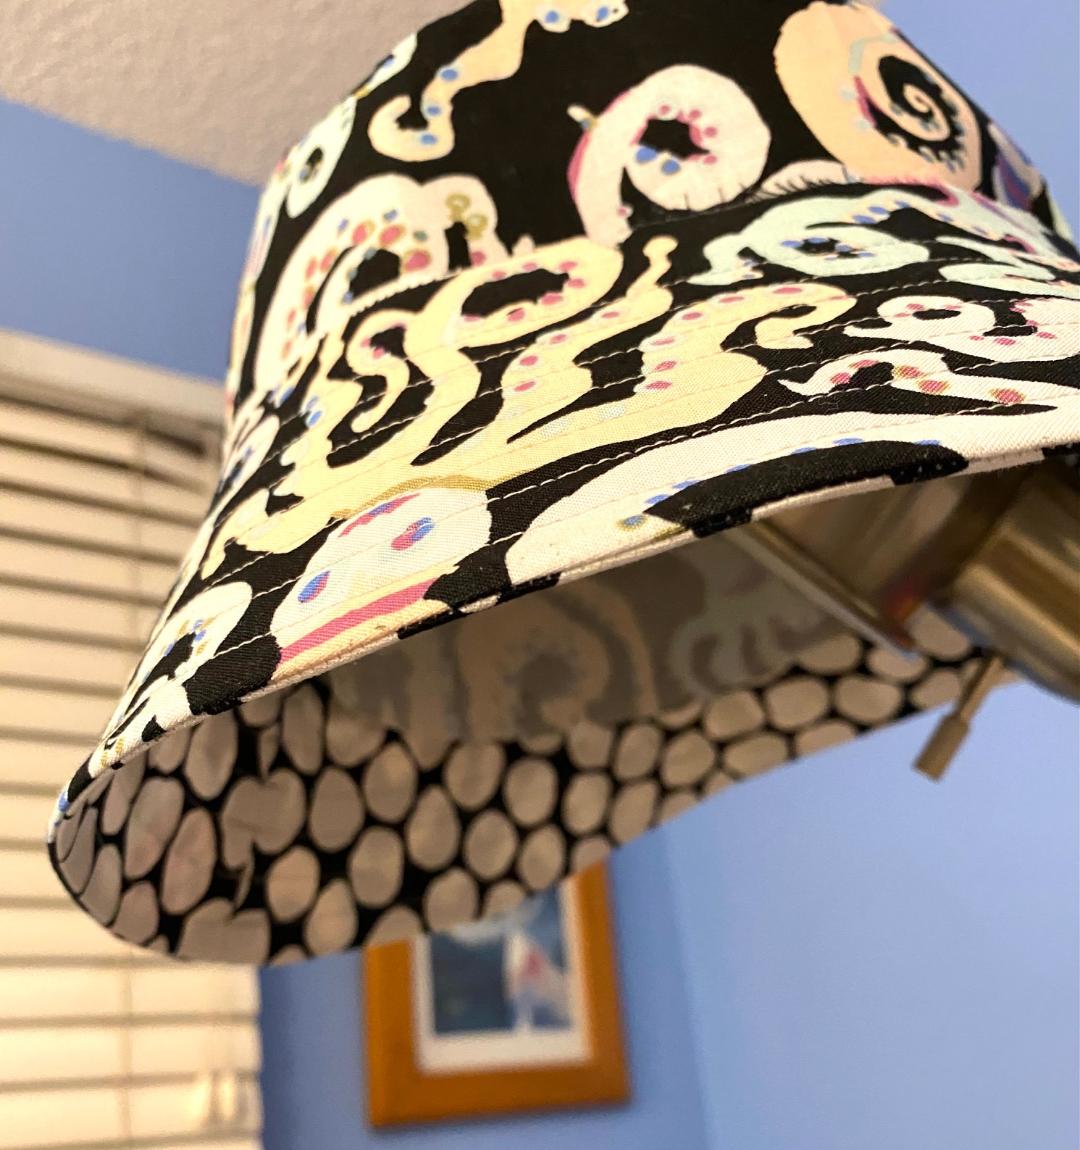
After an uneventful dinner I decided to start working on a bucket hat. The pattern I’m using is a free pattern from Sweet Red Poppy. A woman posted one she made on the KFC Facebook page today and I loved it. This is nowhere near done, the crown and brim aren’t even attached yet, but it’s coming together nicely and it going to be so fun!
The outside is Brandon’s octopus in black. The inside is Brandon’s black and white jumble.
It took more time to cut out all the pieces than it’s taken to do the actual sewing. But there may be more of these in my future.
I didn’t end up going to the coast today because the weather looked bad. There were a few beautiful moments here in Portland today.
But by damn, I AM going to the coast tomorrow! The weather took a turn for the better and low tide is at 11 am, so we’re going for it! My plan is to be on the road at 8 an.
I was so disappointed to find last night that the Pods fabric that I wanted to use for the lining for my current project was not to be found anywhere, except for some terribly expensive pieces on Etsy. I was so sure I had just added this to an online shopping cart a couple weeks ago. But I was not able to find the store that had it.
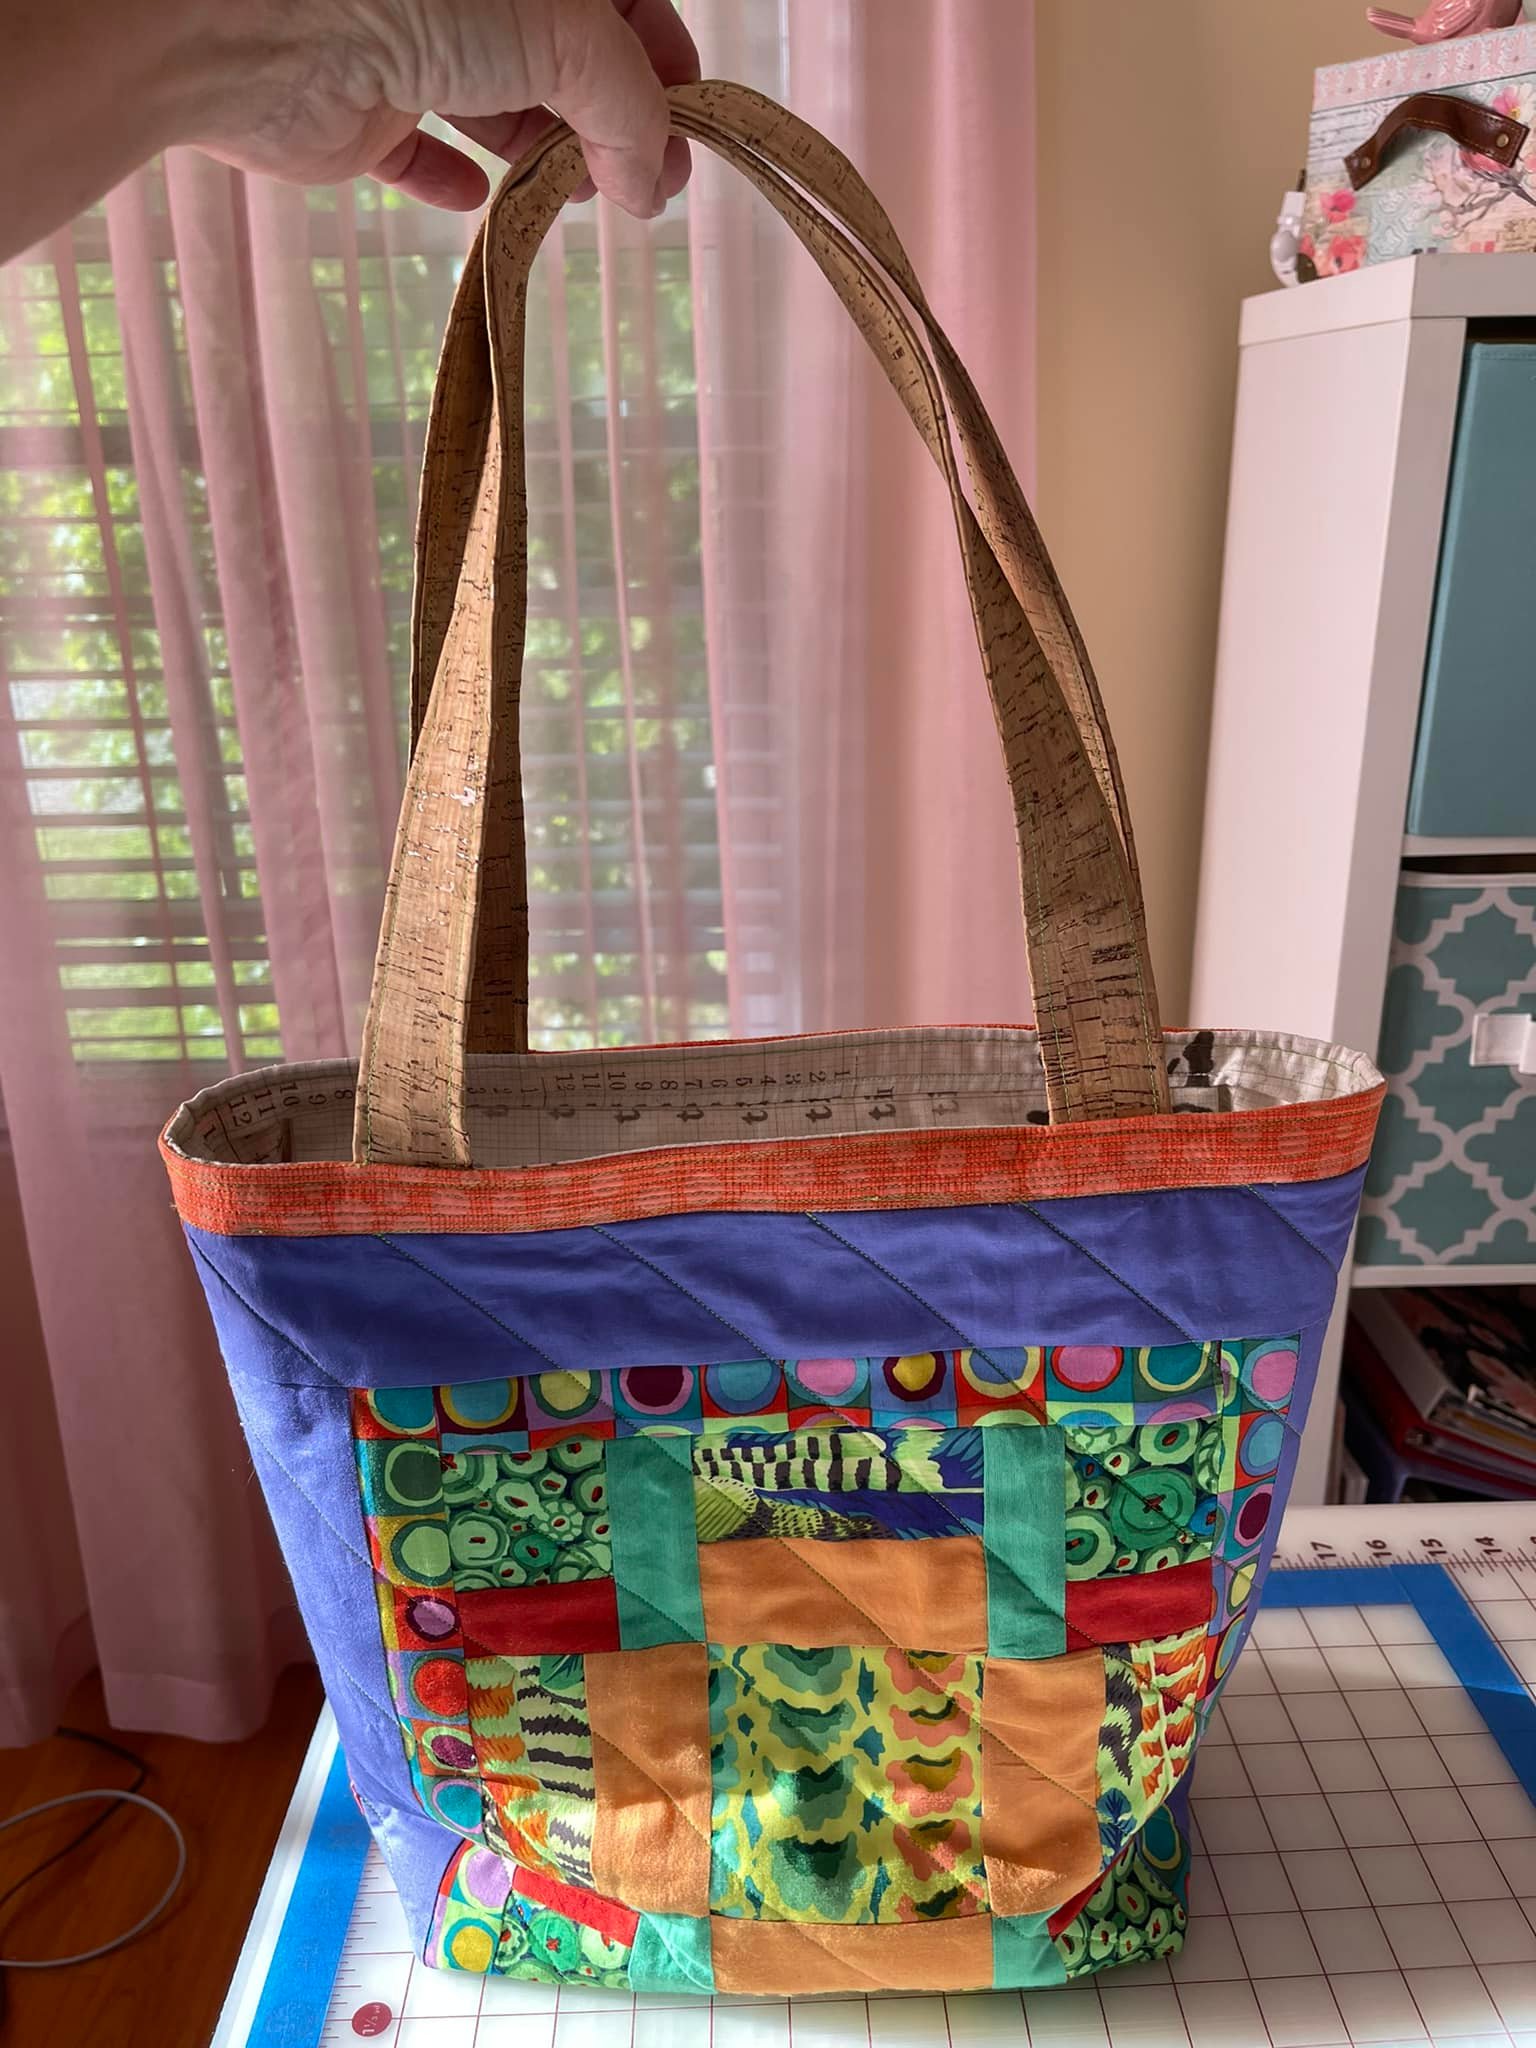
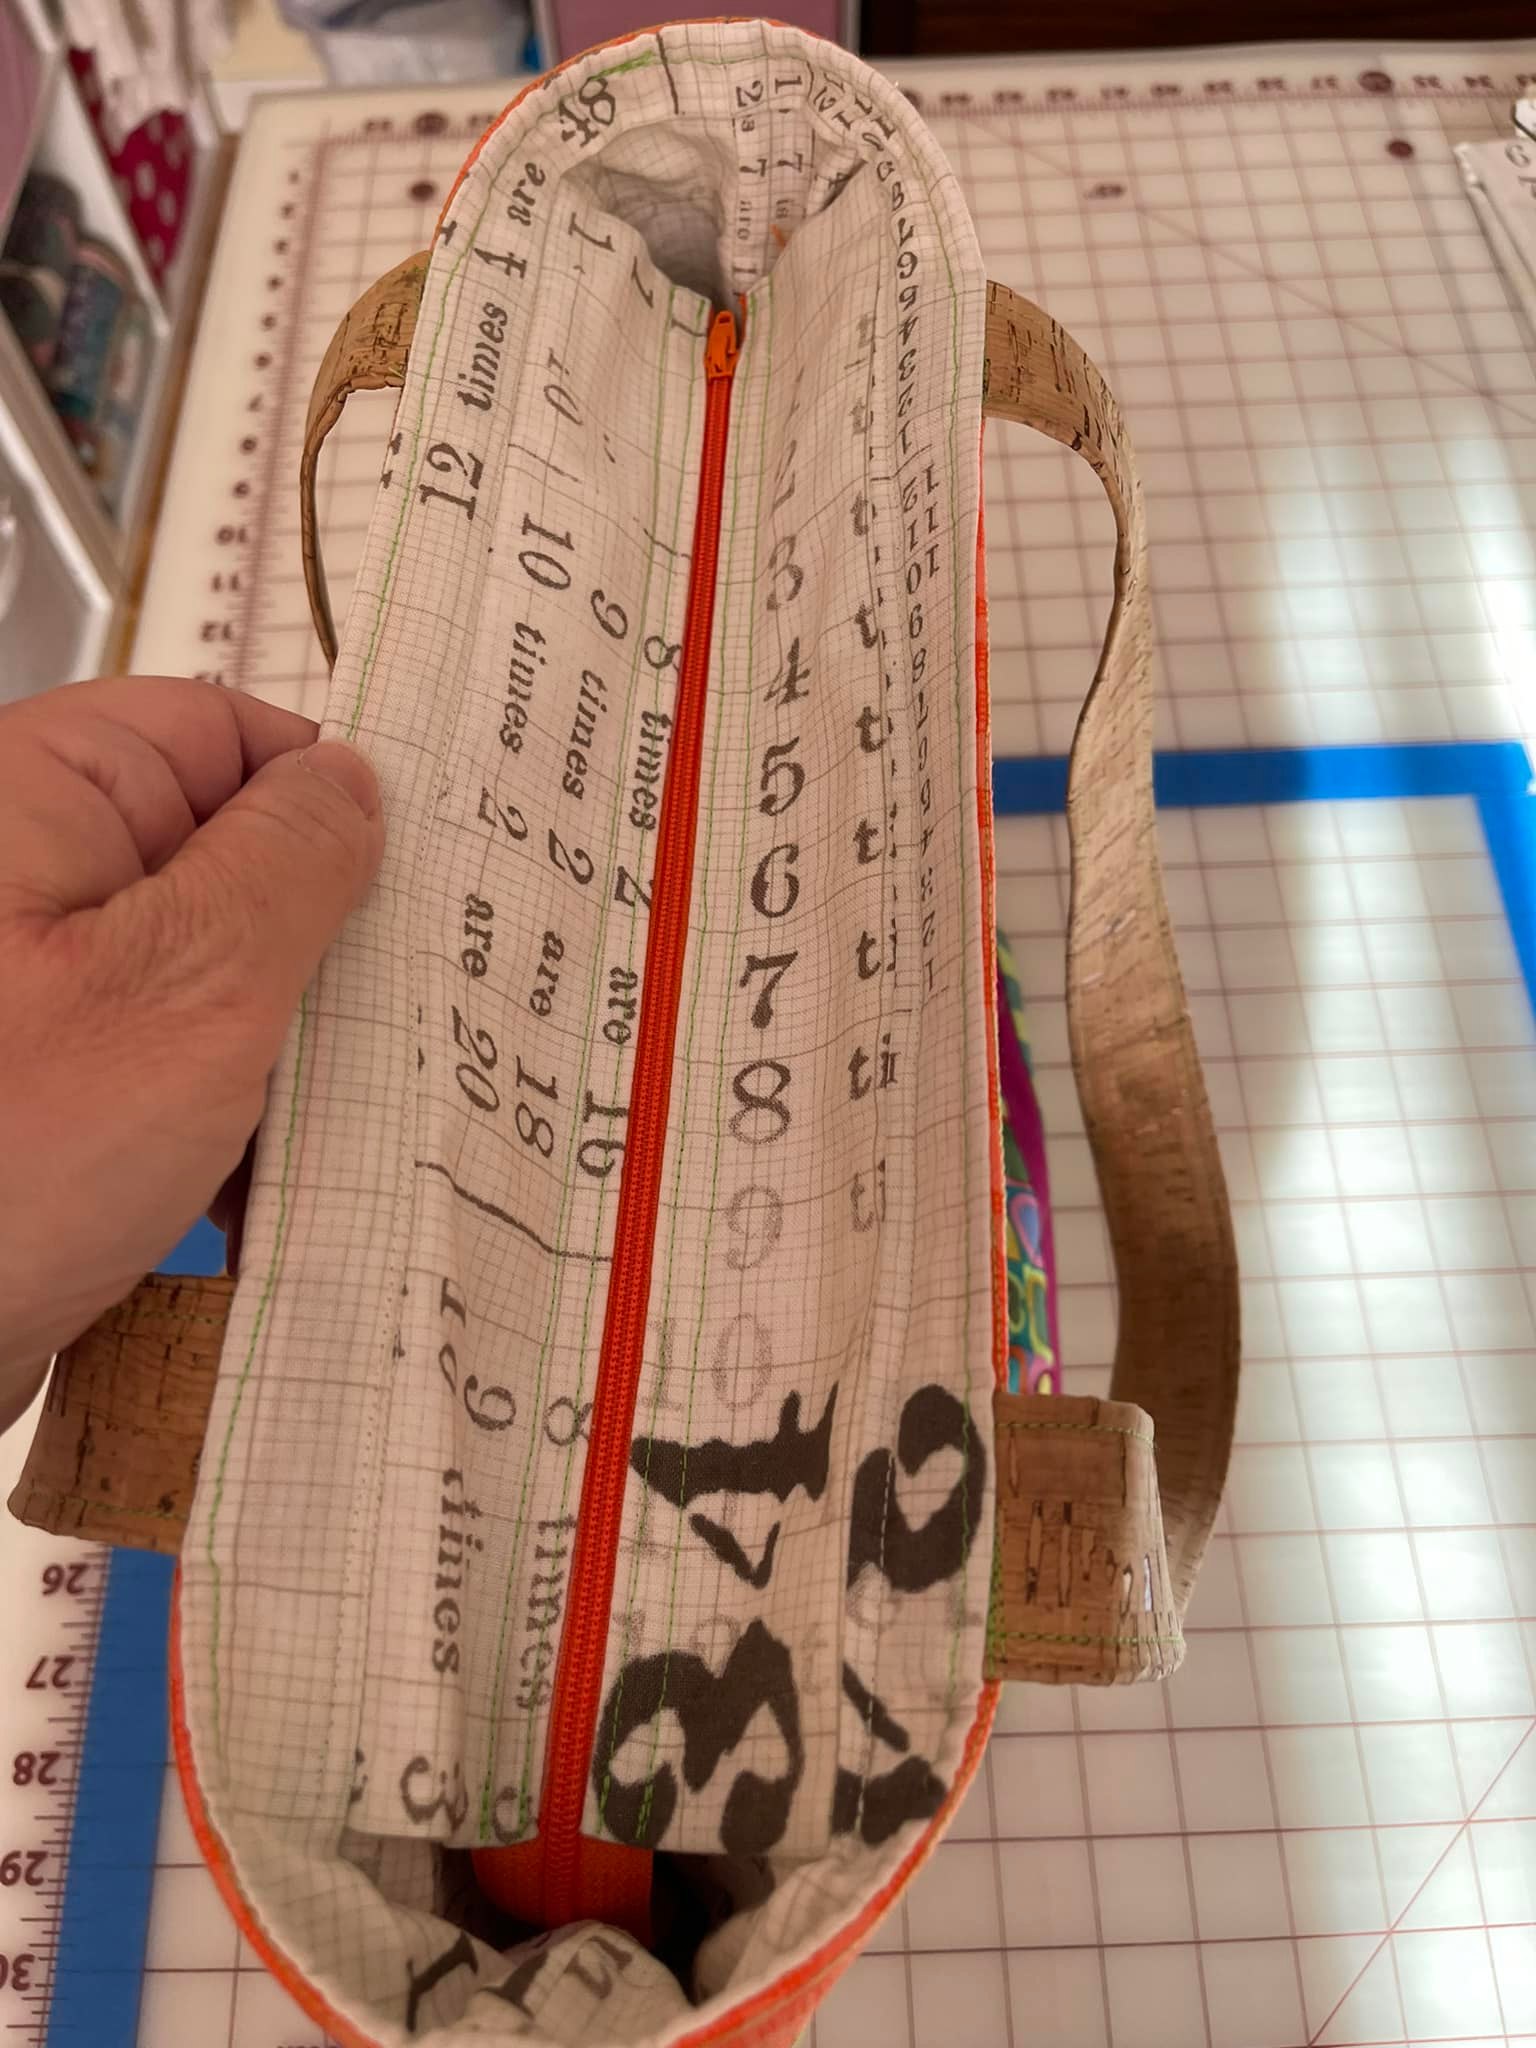
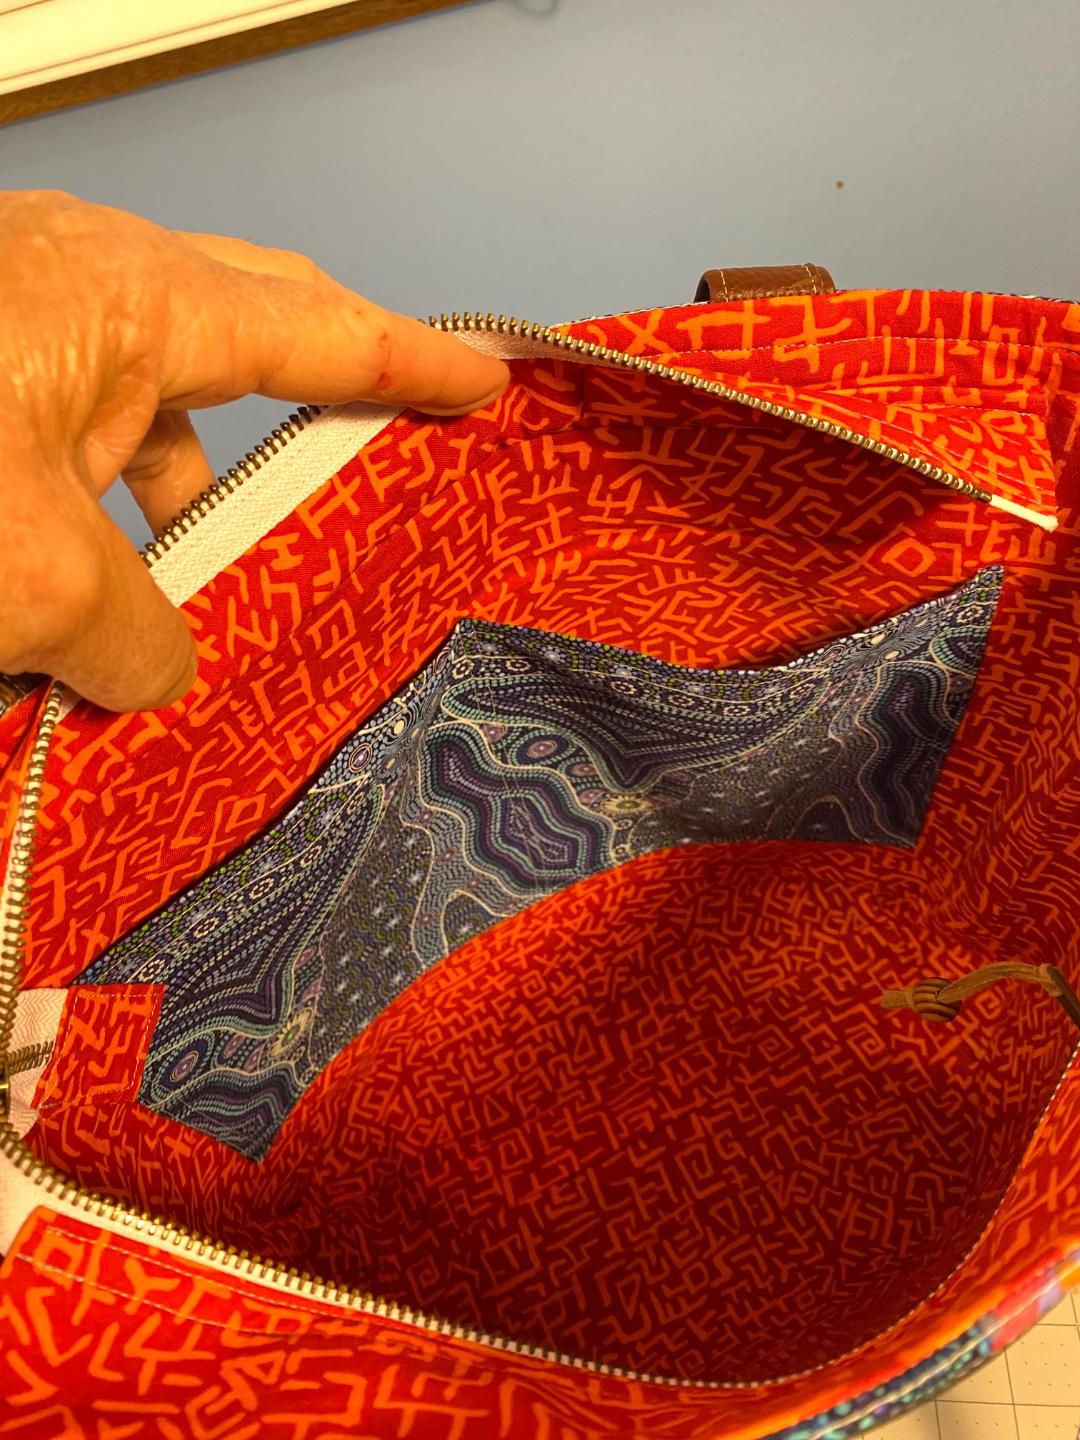
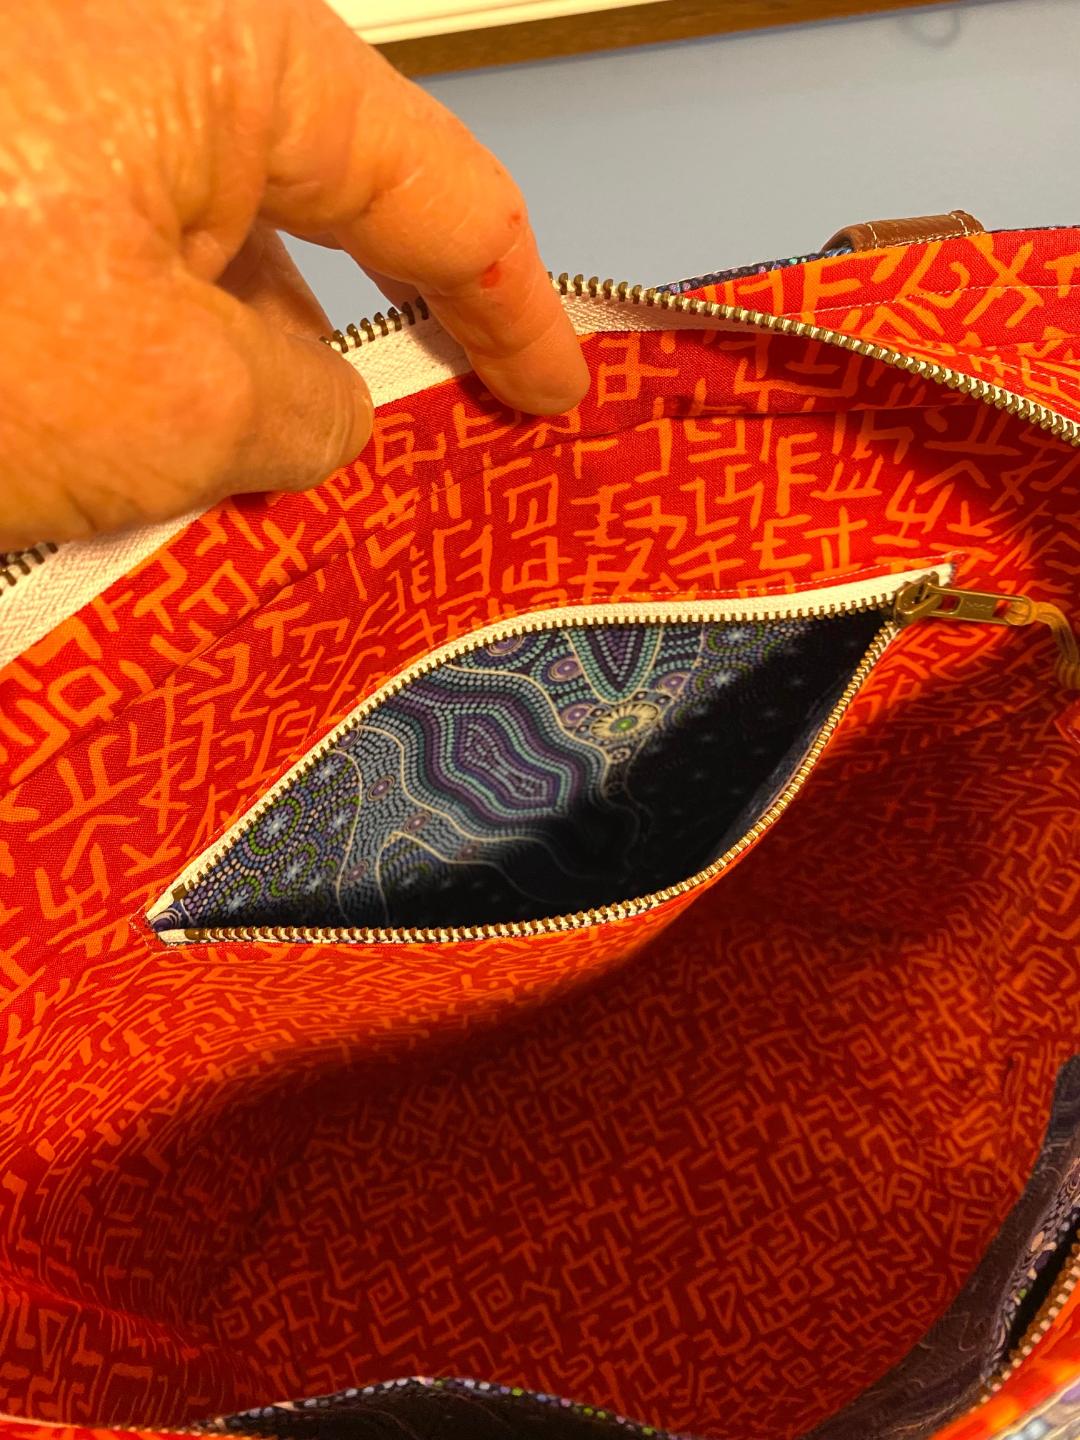
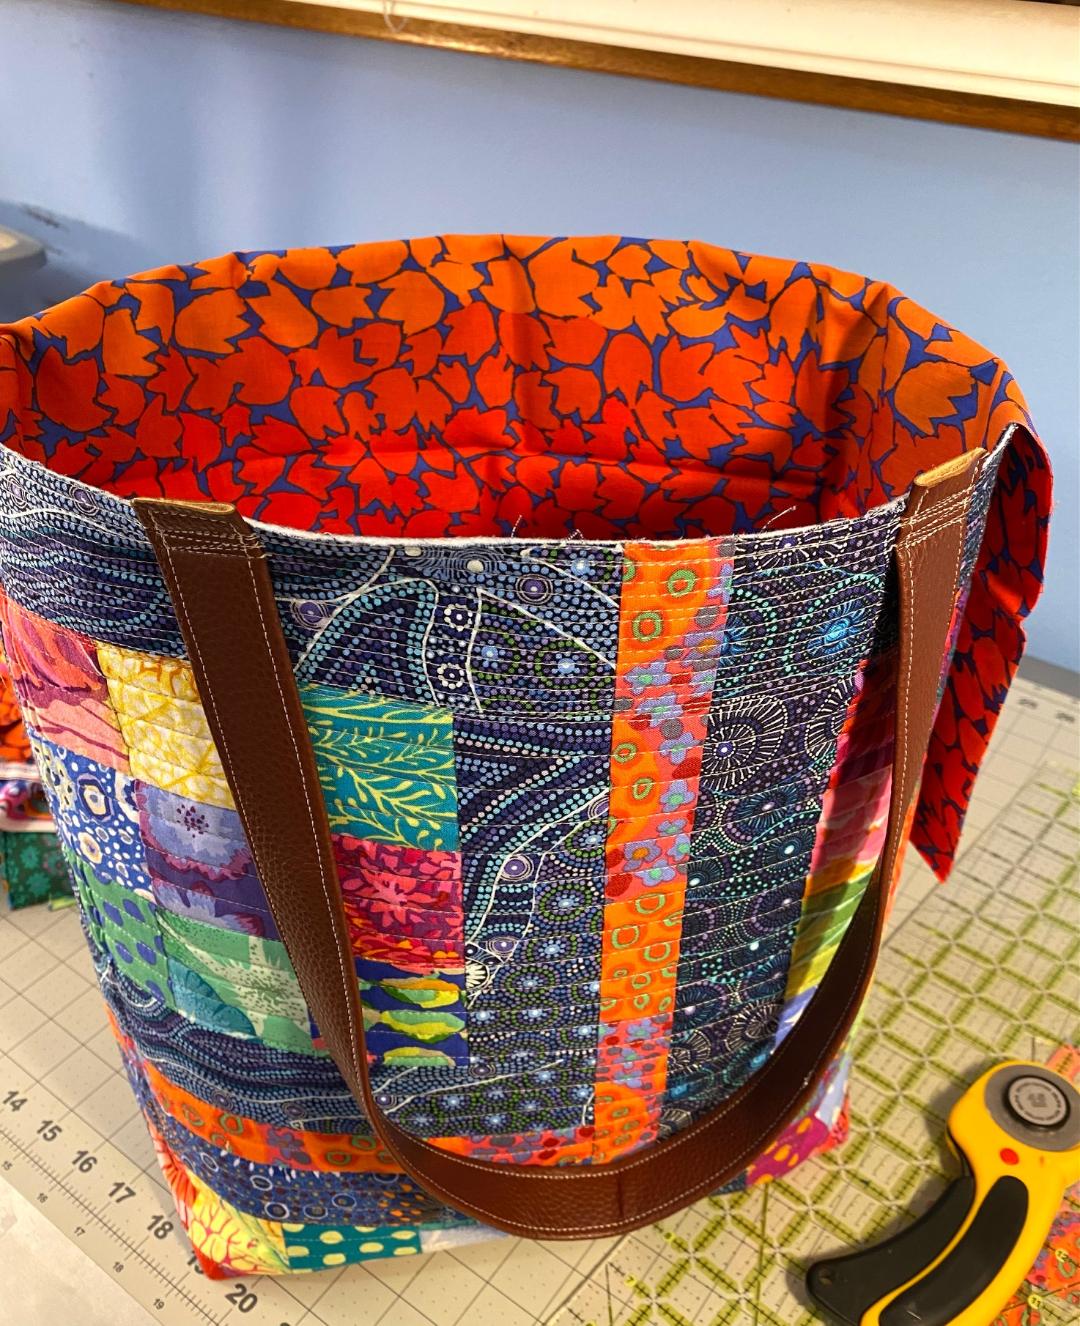
So I had to change my plans. I looked at all the options for linings that I had pulled from my stash and nothing really spoke to me. And then I was looking in a bin of KFC fabrics in the closet in my sewing room and I saw Amaze in red and I pulled it out and slipped it inside the bag. And it worked!!!
It’s a pretty damned good choice! I love that it still has the pop of orange that works so well with the front of the bag, but it’s not insane. It a lovely vibrant pop without the chaos.
Bender agrees!
Here’s some photos just because I like looking at them!
And some more detail. And then tell me that the lining of a bag isn’t important! I mean… look at this!!!
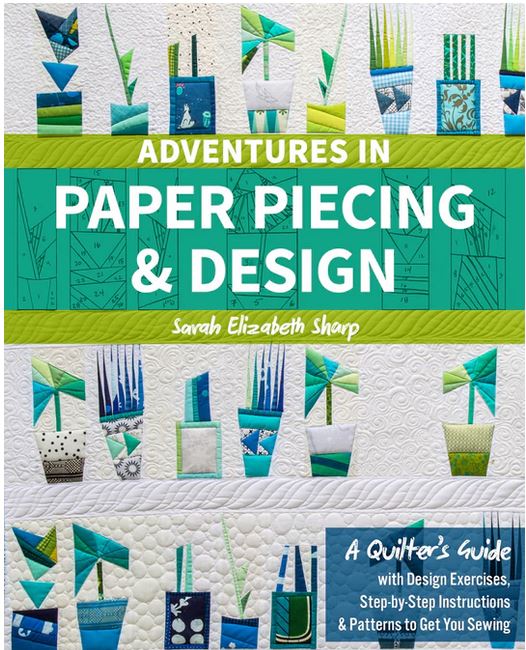
As I was thinking about paper piecing last night I remembered a book I bought a few years ago that I’ve never made anything from.
I can’t find it for the life of me. I’ve looked everywhere. In the process I turned my sewing room upside down looking for it….And then I got sidetracked and started straightening up my messy work space.
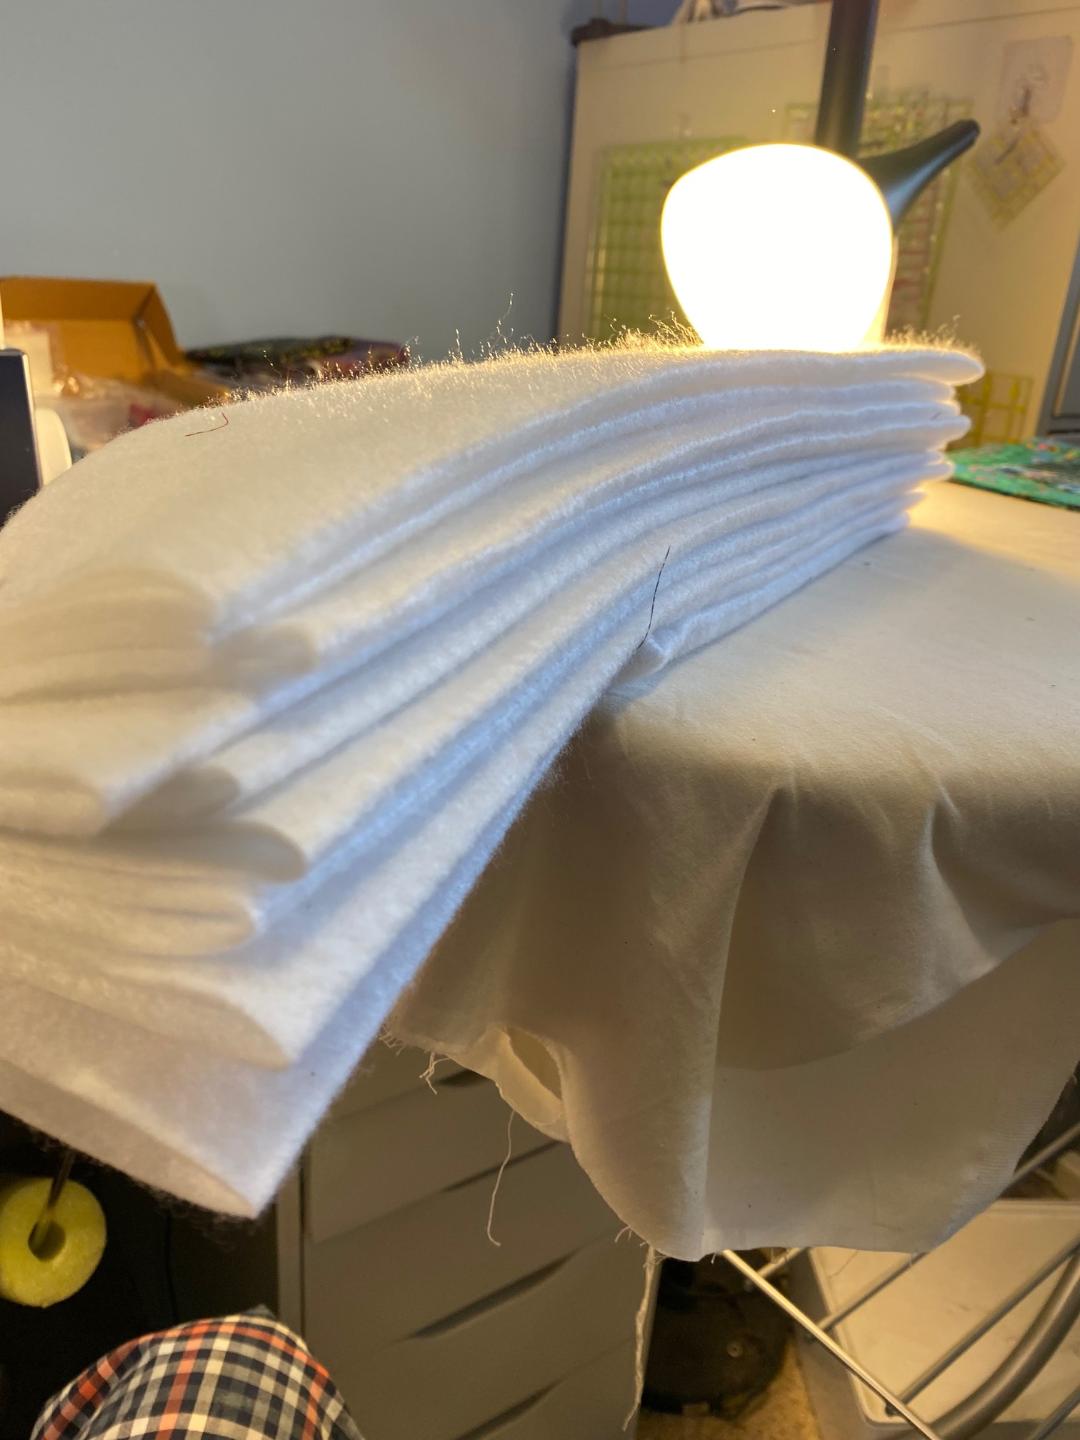
I took a pile of fleece pieces and sewed them together into pieces large enough to use to make bags. I ended up with enough pieces to make four bags!
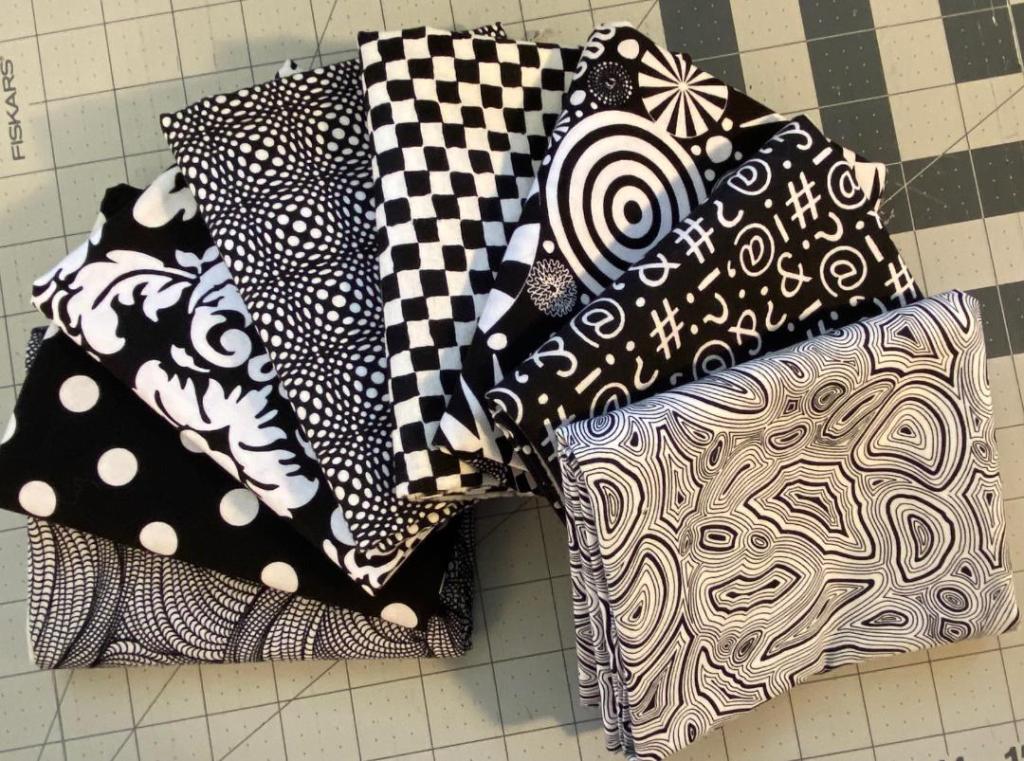
Then I folded, organized and put some fabrics away. I found a stack of black and white fabrics I bought recently, then pulled out a roughly folded stack of black and whites that were tucked in a drawer.
I folded them all more carefully and found some space for them in one of my drawers.
I also found this piece of KFC fabric that I was looking for a few months ago.
In a further quest for the illusive book I dug into a set of drawers in my closet and located a bunch of bags of fabric that I’ve set aside for upcoming projects.
Some of these have literally been sitting there, waiting and waiting for me to do something with them, for several years! Here’s what I was thinking…
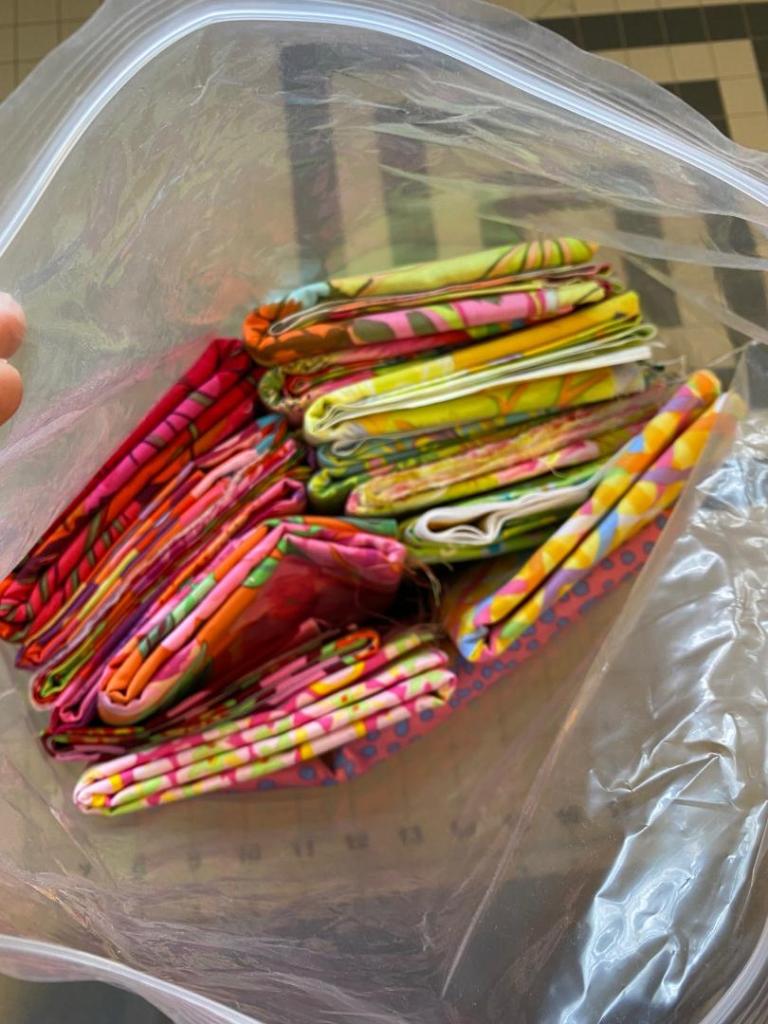
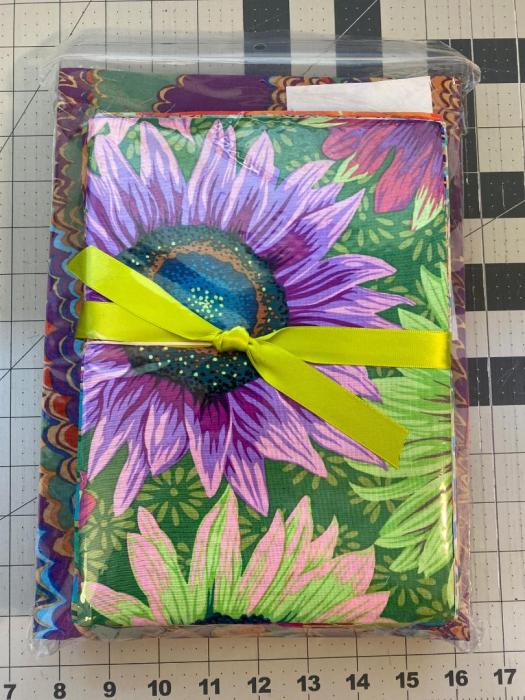
This first bag is the newest of all of these. I basically built a KFC Parakeet pre-cut package from my stash.
I had originally planned to make a jewel box quilt with this but I made one out of ugly batiks and I’m not sure I want to make another one. Still thinking about ideas for this fabric. I might remove some yellows and add more pinks before I actually start cutting.
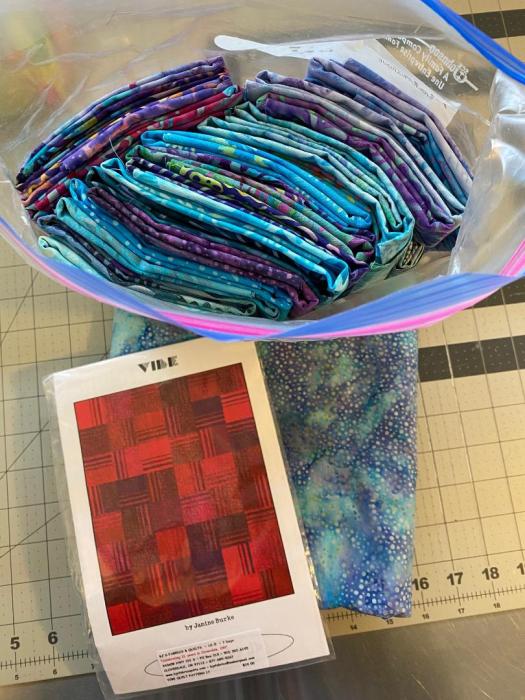
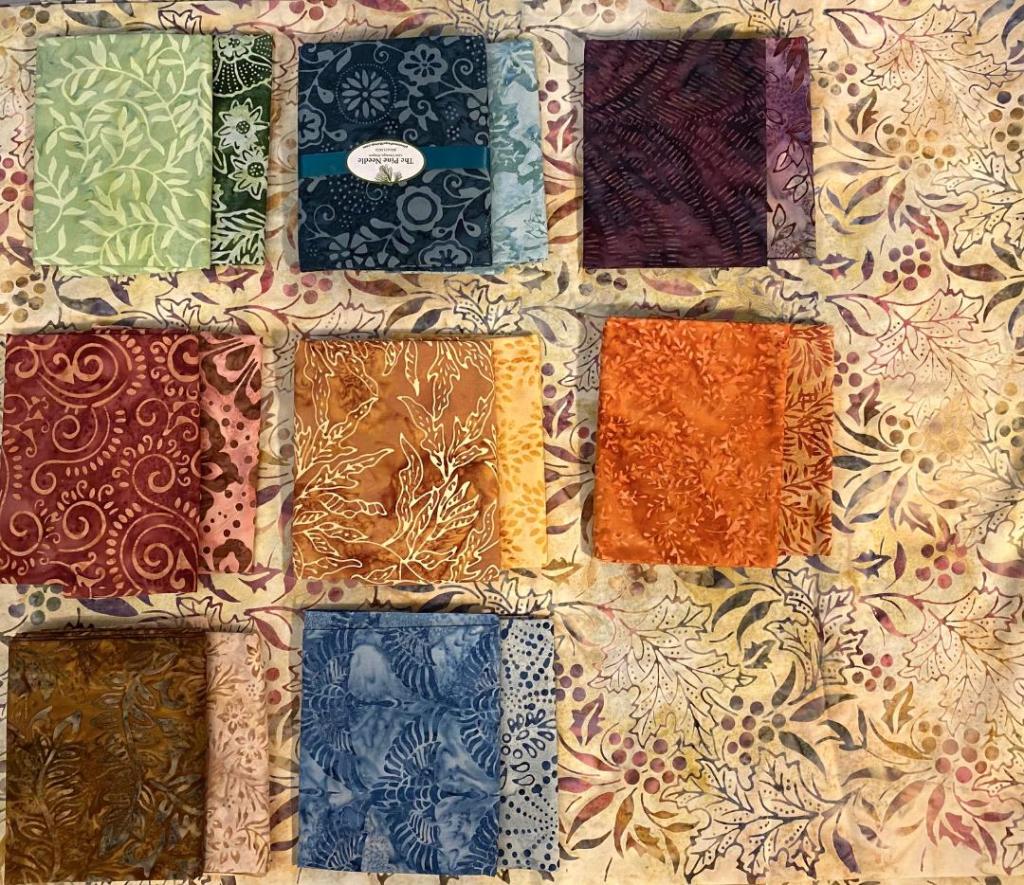
This next package has been sitting in a bag for years. It took me a few years to collect the purple and aqua batiks I had in my head… all with this specific pattern in mind. I even purchased backing fabric for it.
I saw this quilt made up in a store a few years ago and just loved it. It would be a relatively quick make.
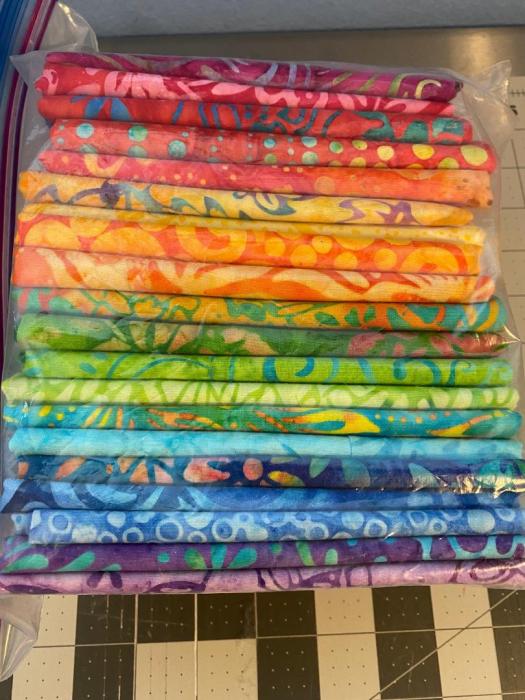
This bright and beautiful collection of batiks was originally meant for my Lucky Stars quilt. But I ended up making that quilt entirely from batik scraps.
It’s a really pretty set of fabrics. I keep telling myself I should just break this all up and put it back in my stash. But I still think these fabrics would be fun in some kind of quilt top. I’ve thought about using them for a 16-patch, or a Moss garden type quilt. I’ll leave them all in this bag for a few more years while I think about it.
This next group of fabrics took me forever to put together. I drug these fabrics around from fabric store to fabric store for a year before I had all the pieces I wanted. I love the muted colors and the batik I bought for the background.
It’s a free pattern and I really love it. But I have an unfinished project that uses those same corner blocks and I lost my enthusiasm for sewing on all those little corners! Maybe I’ll find my enthusiasm again some day. In the mean time, this set of fabric will remain in its baggie.
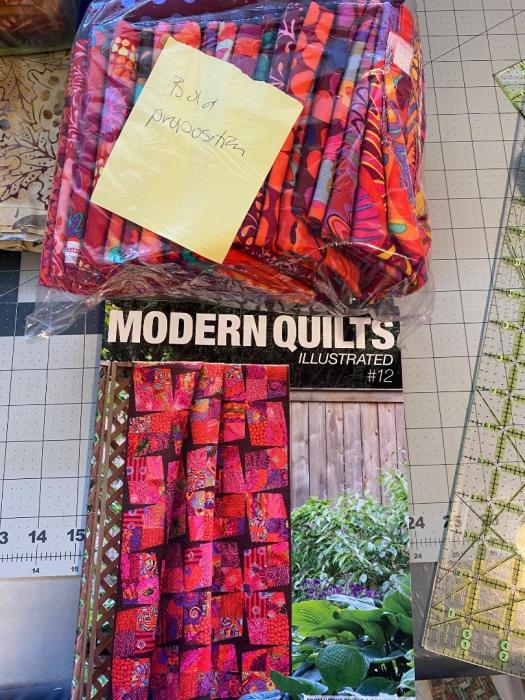
The last set of fabrics I’ve squirreled away is a vibrant and exciting one! It’s all red KFC fabrics… with a lot of pops of color included!
I’ve wanted to make a quilt from these fabrics for some time, but I keep going back and forth on the pattern to use. The pattern above, called Bold Proposition, is a likely contender, but I haven’t landed on this one for sure. Hmmm. I just had an idea that I could use this pattern for the yellow fabrics in the Parakeet set. I kind of like that idea!
Sometimes my brain is a scary place to be.
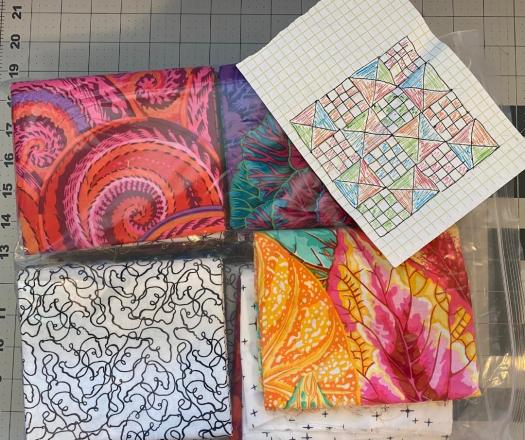
This next set of fabrics is the most recent one I’ve squirreled away. I wrote about it in this post. The pattern I’m thinking of making is something I drew up. It combines 16 patches with corner fabrics.
Here’s the block I’m envisioning making. This will allow me to make a square block but it will look like the blocks are set on point. Win, win!
I also found this Arboretum quilt kit I bought last year. I bought this kit for a friend as well and she recently finished hers. Mine, of course, is still in the package.
I don’t typically buy kits, but I love this quilt and the kit includes precut rectangles of something like 96 unique fabrics. I’m happy to pay someone else to do all that pressing and cutting!
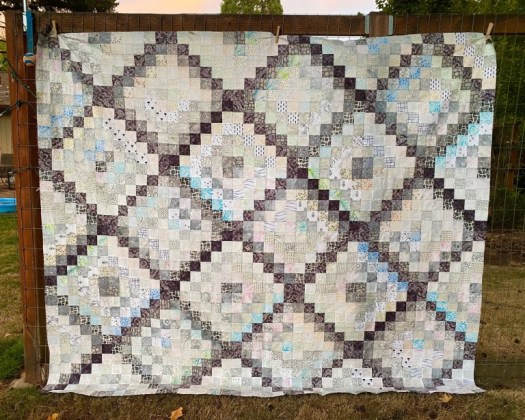
Here’s my friend’s finished quilt top. Isn’t it pretty!
All this and I still didn’t find that book. I wonder where the hell it is.
I’m not being terribly productive as I fritter away my vacation in isolation. I did play ball with the dogs three times today. They thought that was exciting. Oh, and I planted my tomato plants. That took all of ten minutes.
And while I was at it I fertilized all the pots on my patio (there are a lot!) and removed some old twinkle lights from the fence. It’s all looking so good!
I did get my primary ballot filled out and dropped off this afternoon. So that’s something I accomplished.
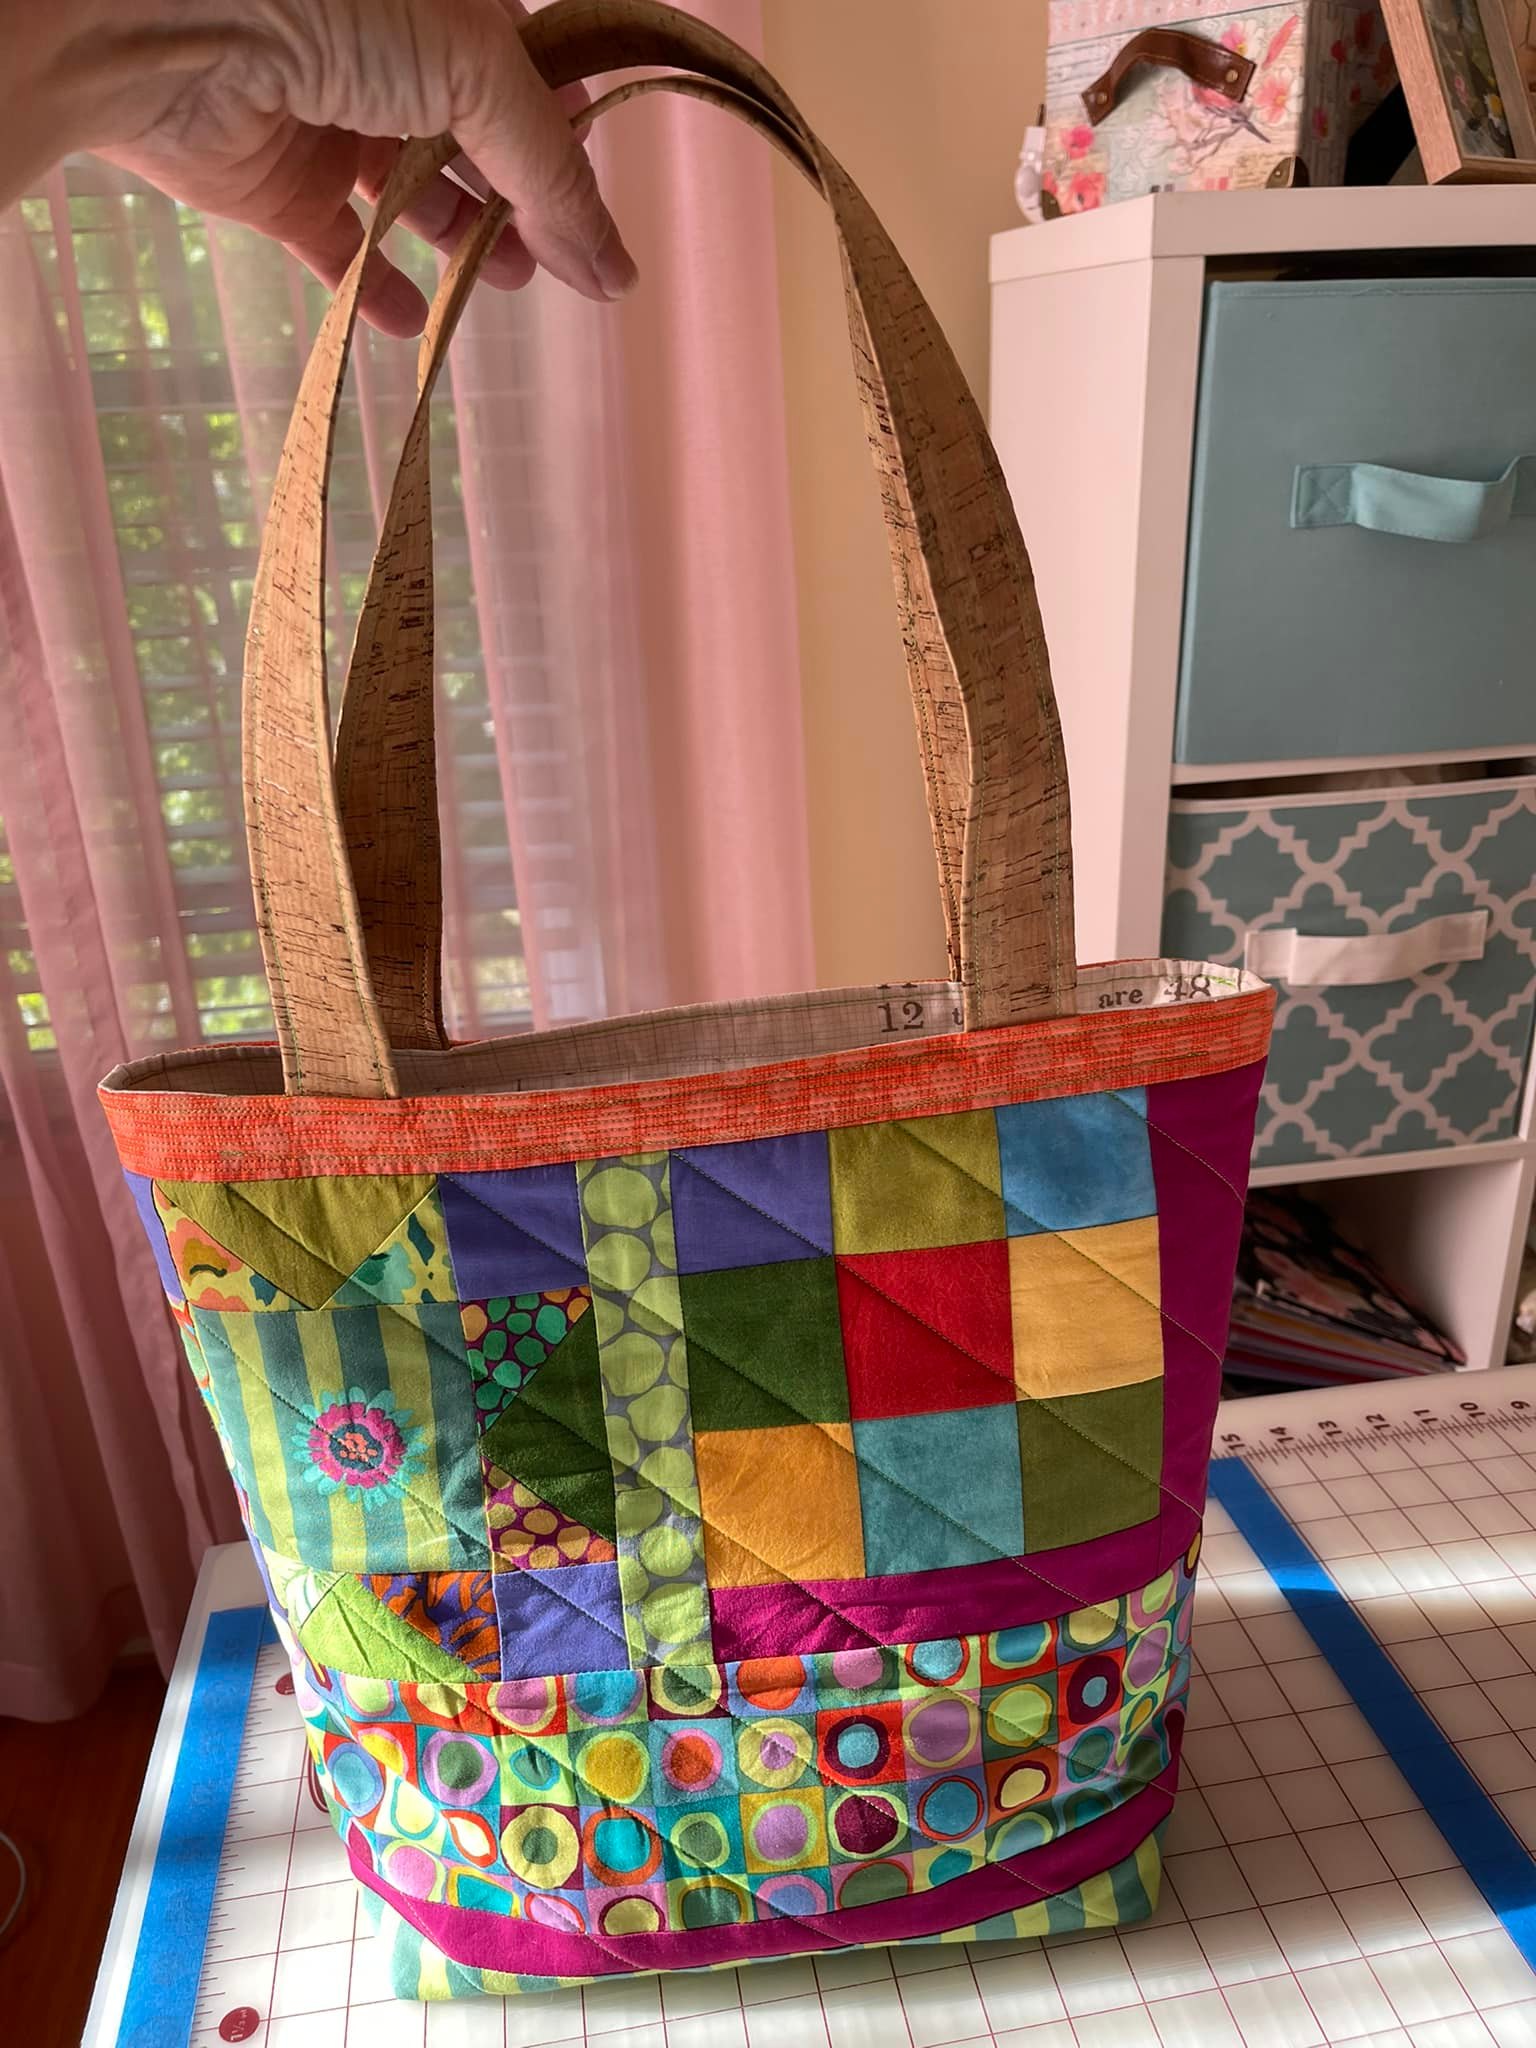
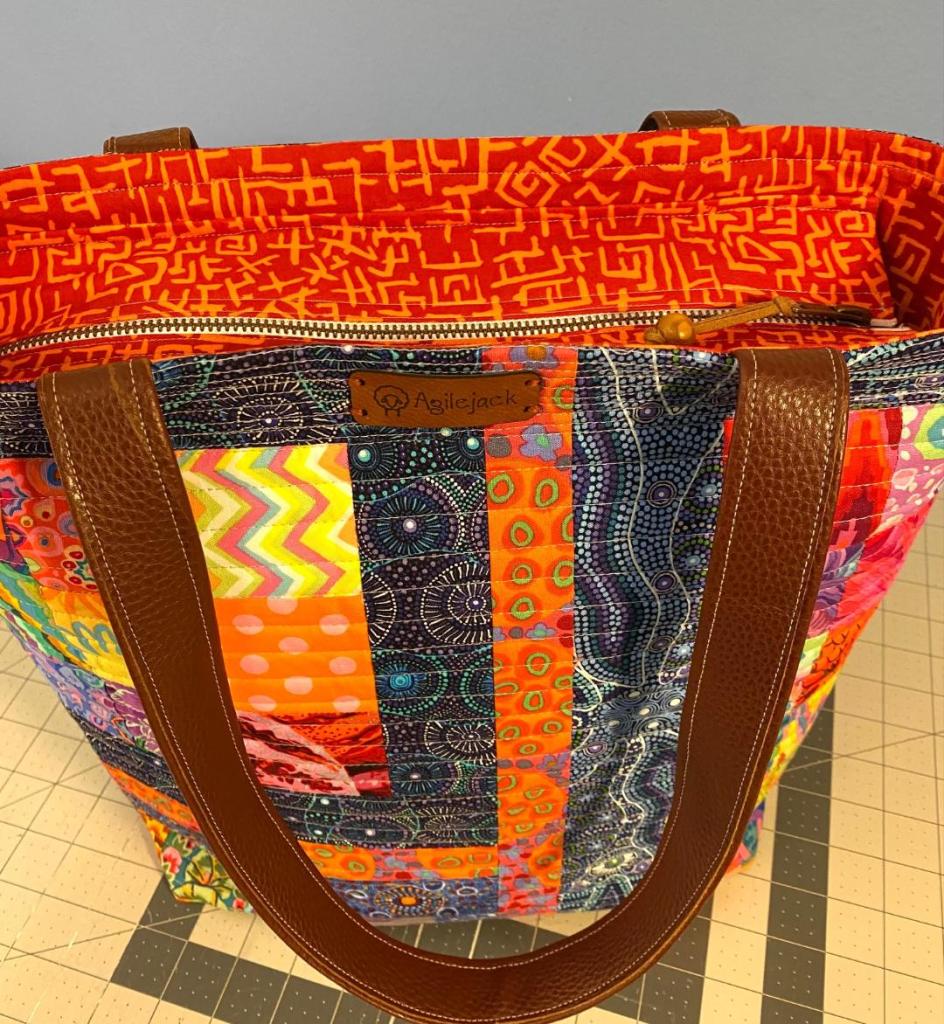
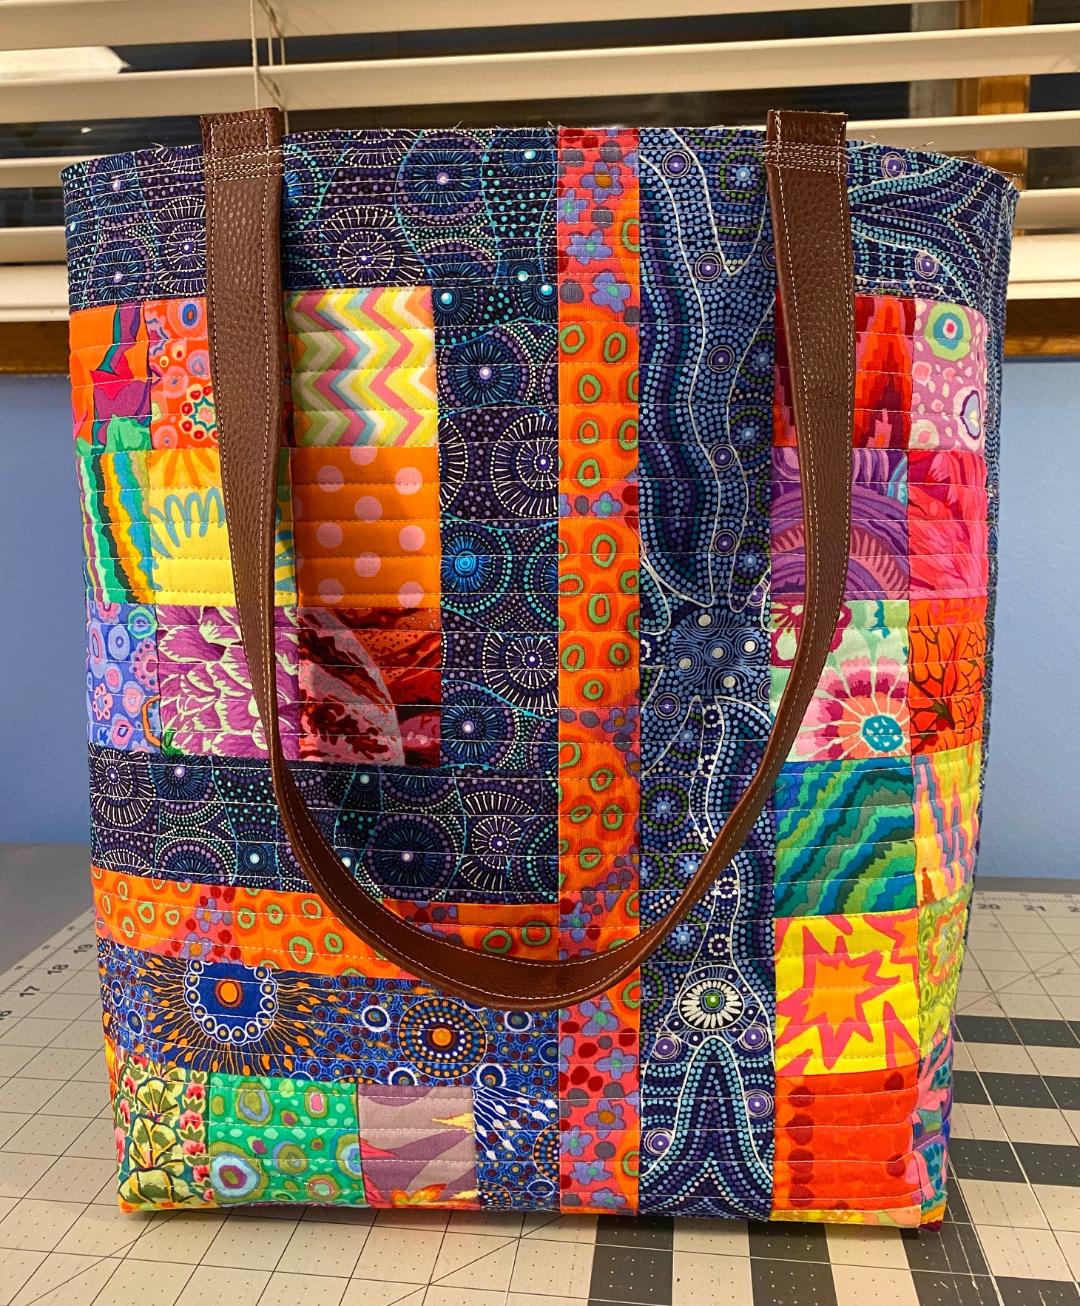
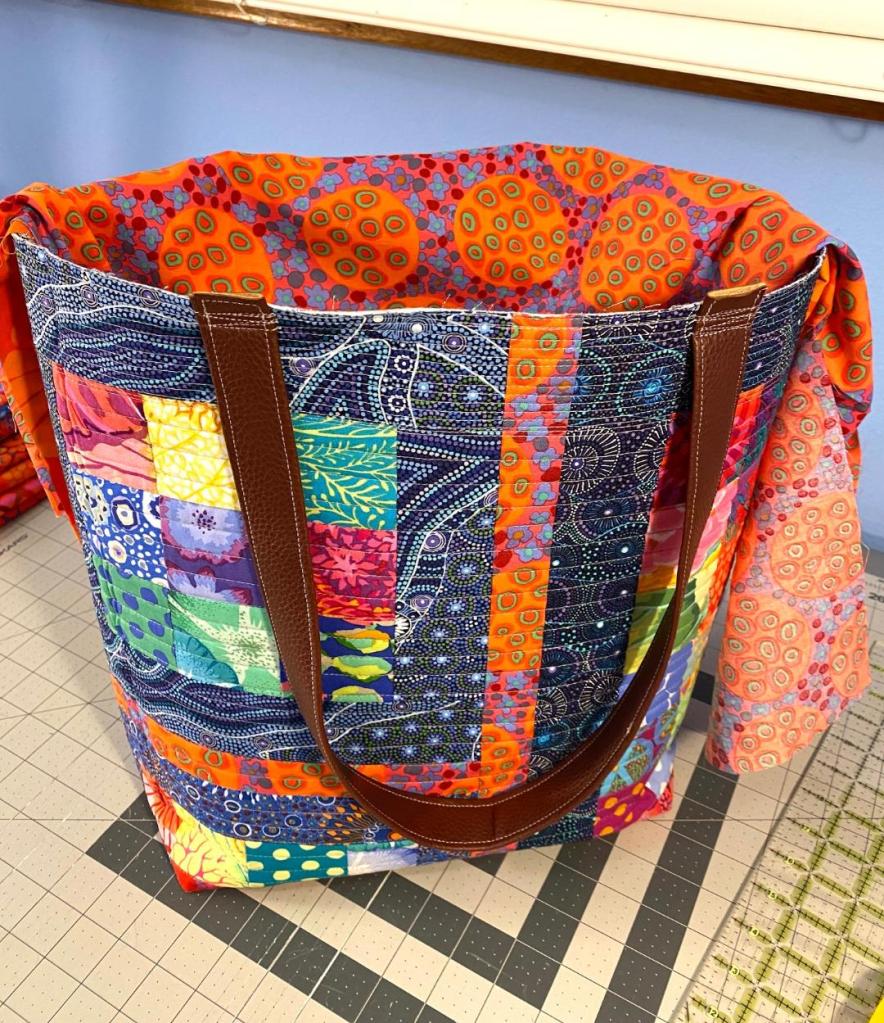
I did pull off a little productivity today and sandwiched and quilted the bag panels I made yesterday. And I got the outer bag constructed.
I have to say that orange strip was a good decision!
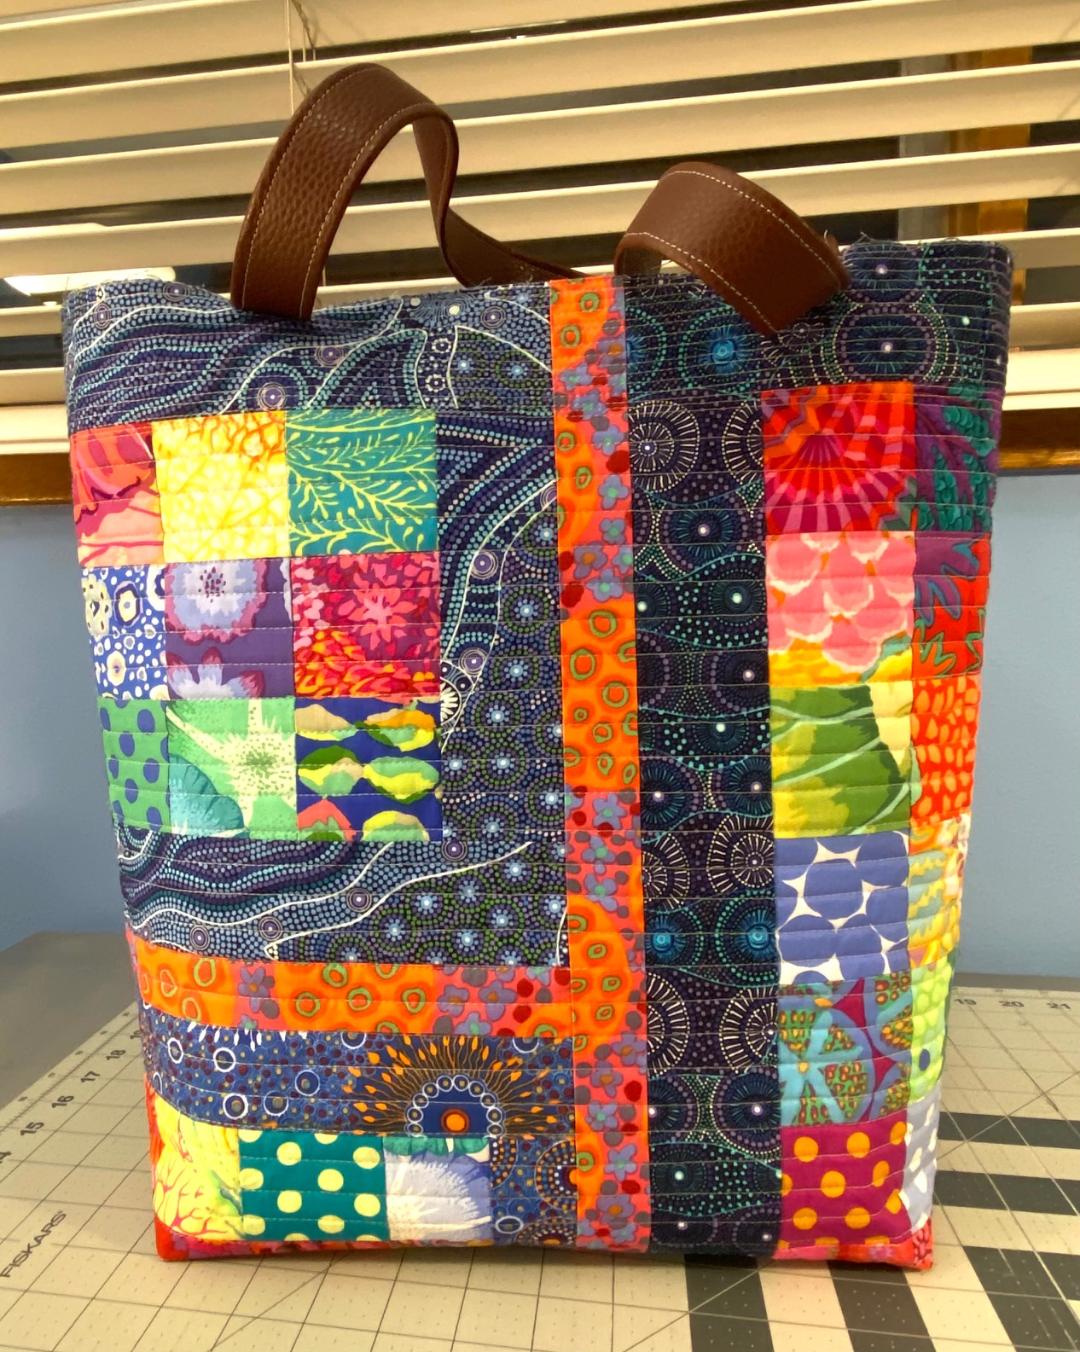
And now I’m at a bit of a standstill. I can’t decide what to use for the lining. I tried some different options. Started off with some blues and greens.
There were a couple of these I liked but I didn’t LOVE any of them. So I switched to something that I think is much more exciting…
There are some really good options in there, but I know where I have to go with this…
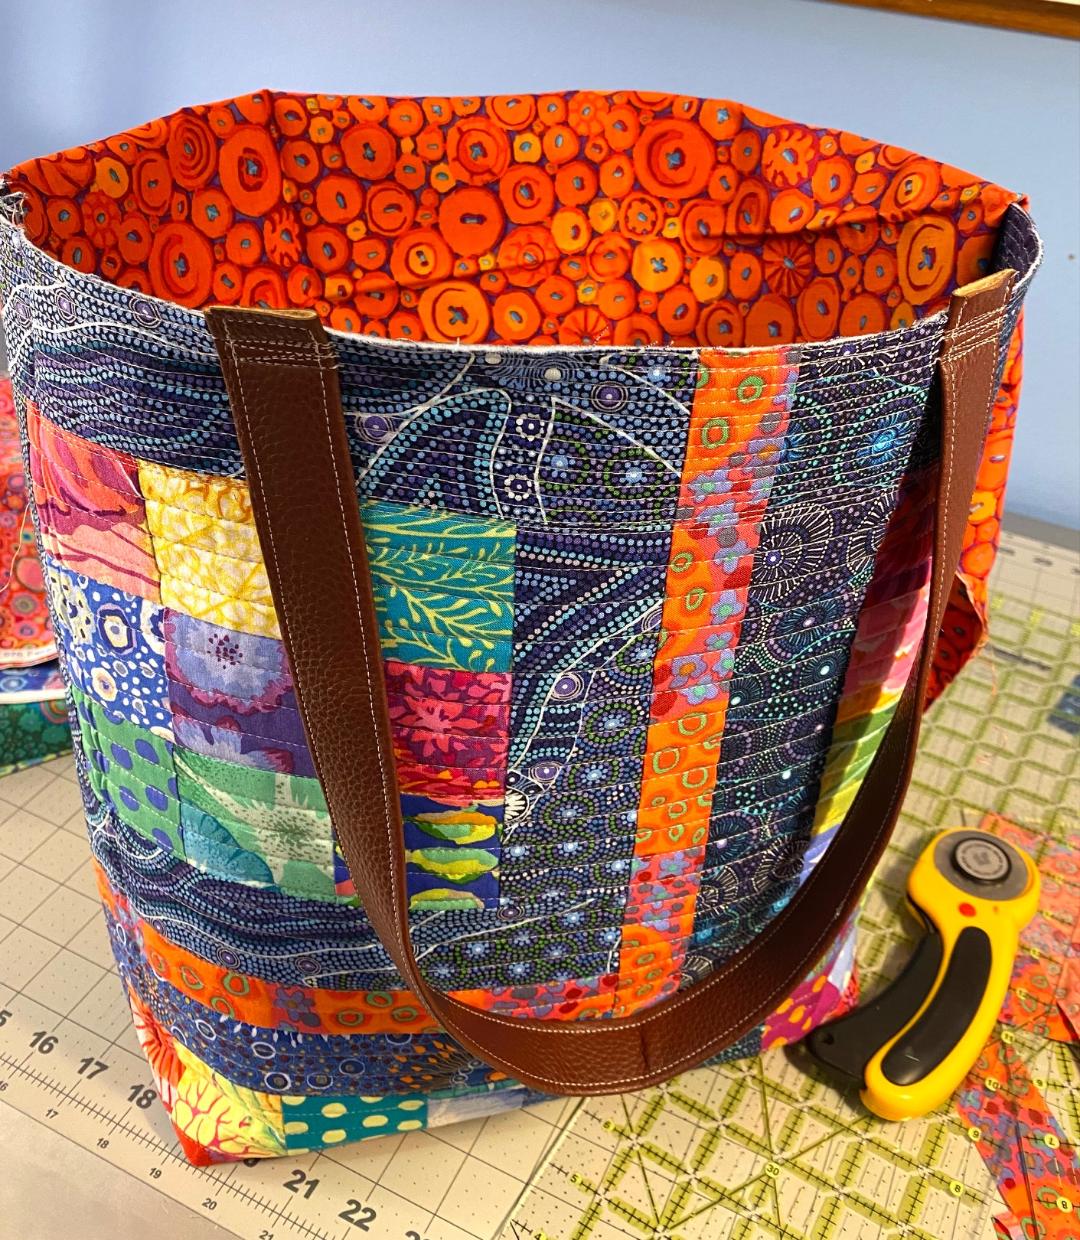
It’s so perfect! The only problem is that I don’t have enough of it! So I will order some and wait until it arrives to finish this bag. it will be worth the wait. I had actually started a fabric order last week that included some of this and I never completed it. Now I’ll have to go back and wrap it up.
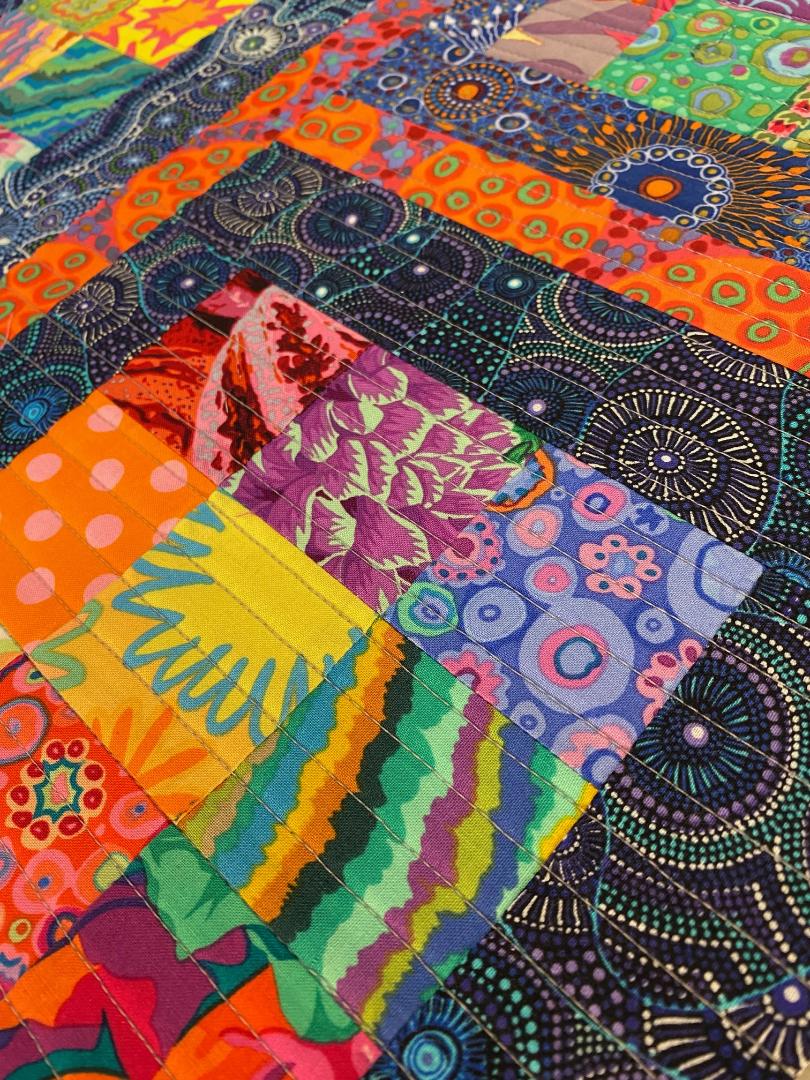
Here’s some eye candy!
I’ve been thinking about a new project and my mind keeps going to paper piecing. So I dug into my pile of templates this evening and found some that I was afraid I had lost.
One that I was especially happy to find in that pile is a nice little leaf that I made into a couple of different zipper pouches. I would love to incorporate one of these into a Frankenbag.
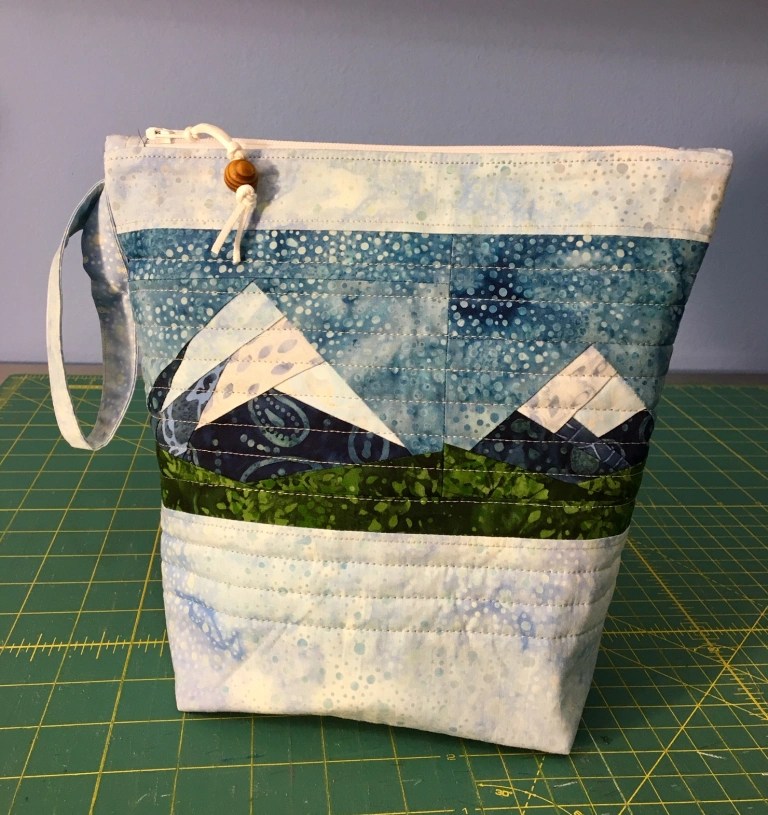
Another one I was really happy I still had was Scrappy Mountains that I made into a zipper pouch.
I’d have to do some design wizardry to figure out how to build that rectangular block into a Frankenbag. But it will be fun to try.
I’m thinking I might start off tomorrow morning by making the backing for this quilt top.
Now that I have my new bed I’m getting itchy to have one of my quilts finished and on display!