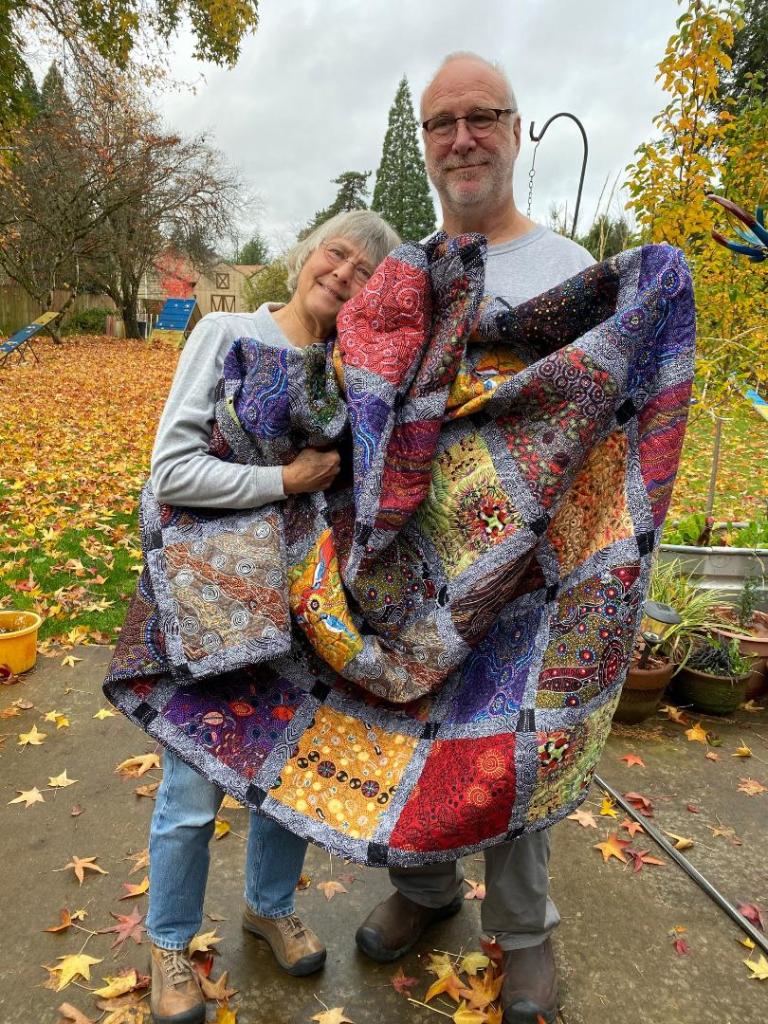
I had a wonderful long weekend with a visit from my brother and his wife. They drove up on Thursday, a really rainy day. Friday was even more rainy and wet and we stuck around home most of the day but did manage to run a couple errands. But Saturday was beautiful so we were able to get outside.
This was the first time I’ve seen them since I recently got all my quilts back from my long arm quilter. So it was the perfect time to gift them the quilt I made them.
If you haven’t already seen my posts on this quilt, you can find several of them here, here and here. I originally called this quilt my Social Distancing quilt, but that name just doesn’t work for my brother and his wife since there’s rarely much distance between them!
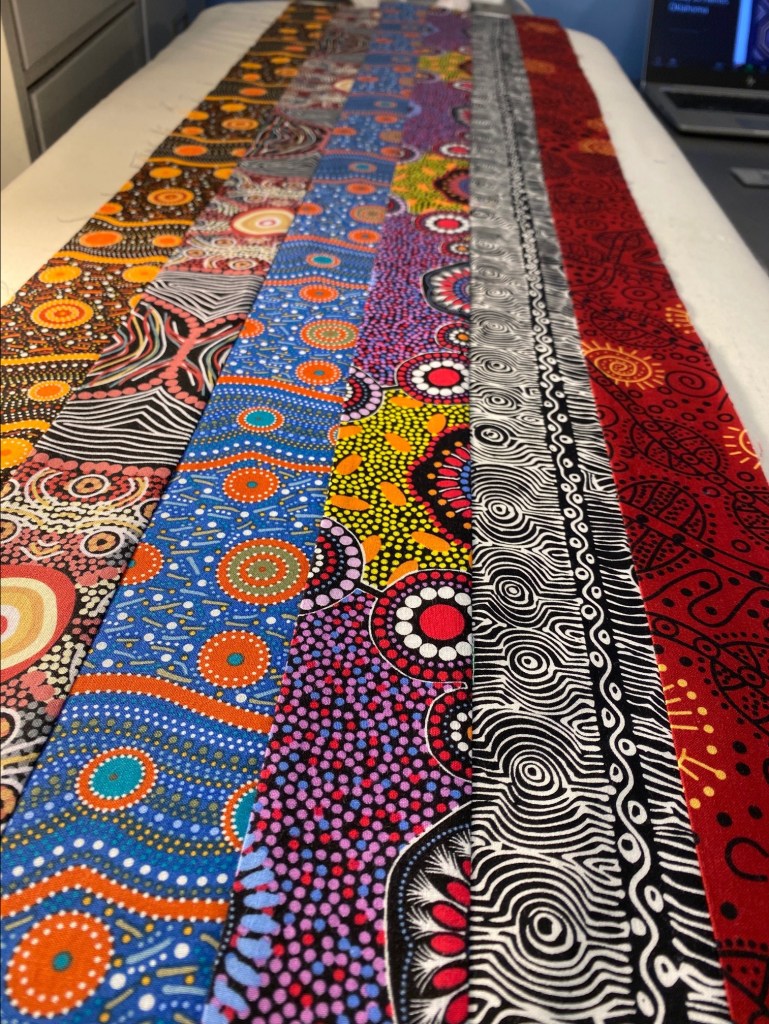
I just love this quilt! The fabrics and colors are so amazing. And my brother and his wife love that they are authentic Aboriginal designs. They are excited to dig into the M&S Textiles webpage and read the stories of the artists and their designs.
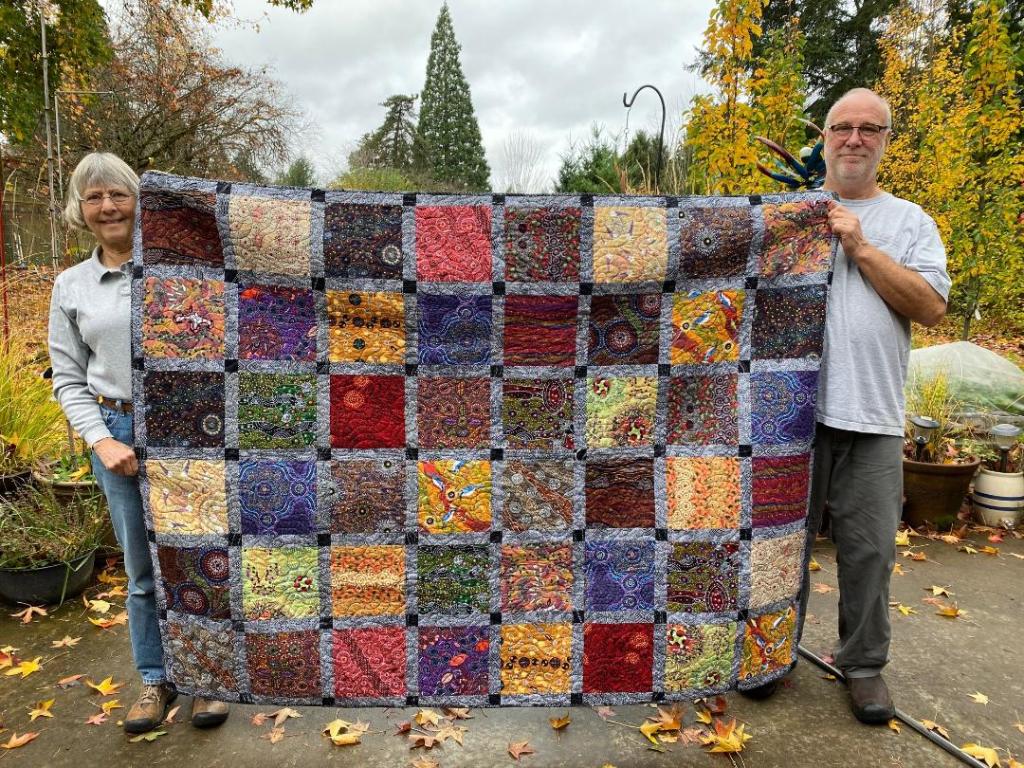
Here’s a view of the full quilt on this beautiful fall morning.
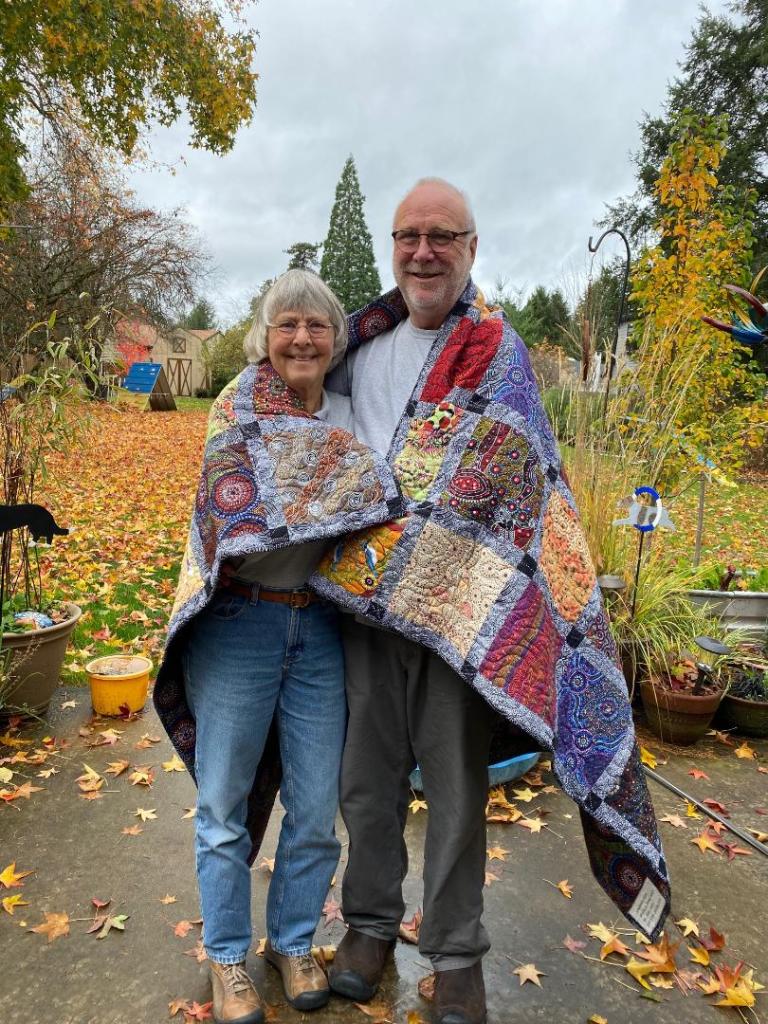
They promised me that they will actually use this quilt. It will reside on the back of their sofa. I can’t wait to see photos of it in their house.
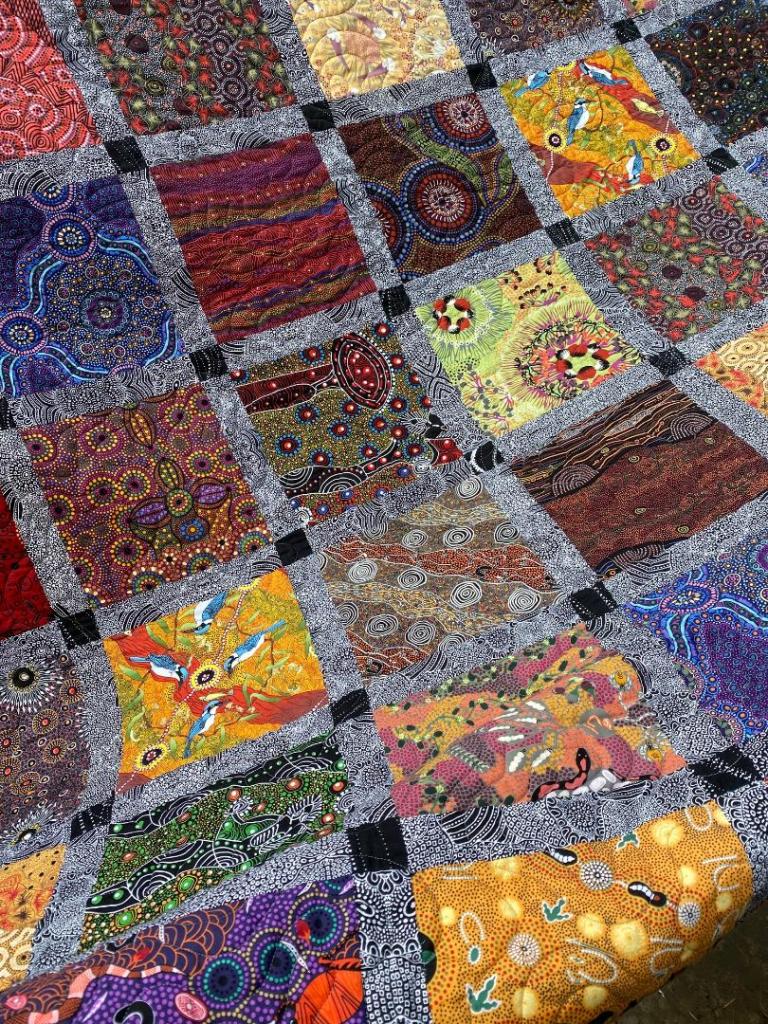
Here’s a few more photos. Click on each photo to enlarge.
With the rainy weather on Friday, we took advantage and my brother helped me assemble a stand-up desk that I purchased for working from home a couple months ago. I’ve dreaded putting it together. It was much easier with two of us.
He even attached a power strip to the wall for me.
It’s going to be so nice to have the option to stand up while working. I have a stand-up desk at my actual office and it’s one of the things I miss the most about working from home.
You can see that I’m surrounded by dog photos as I work!!!
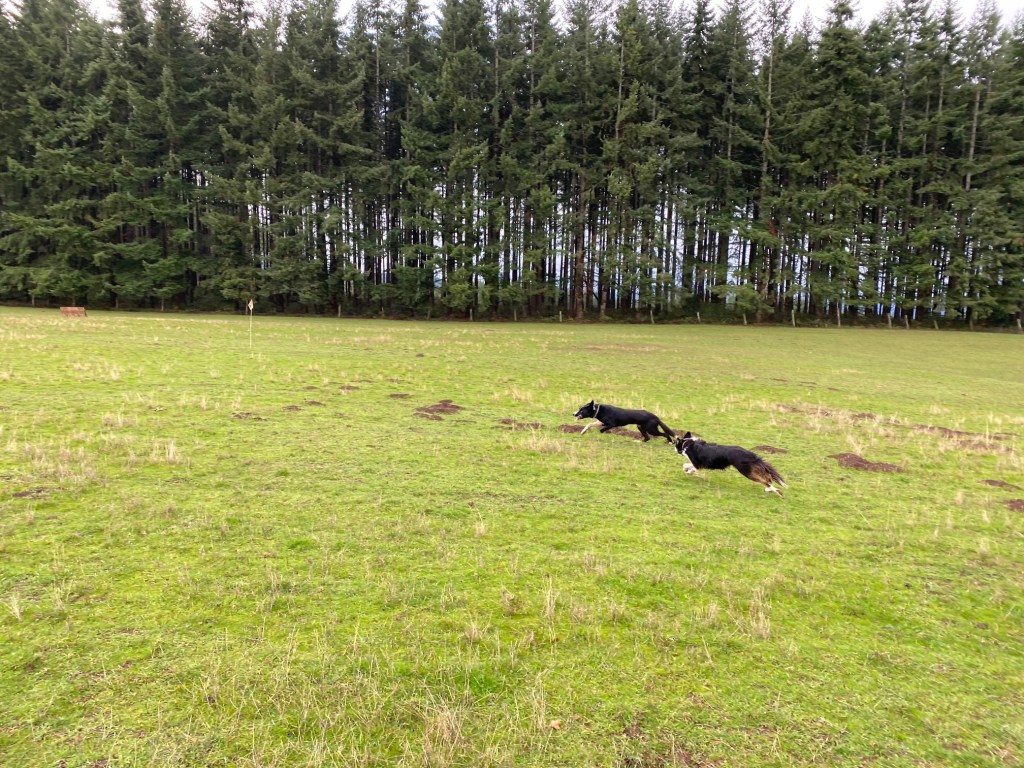
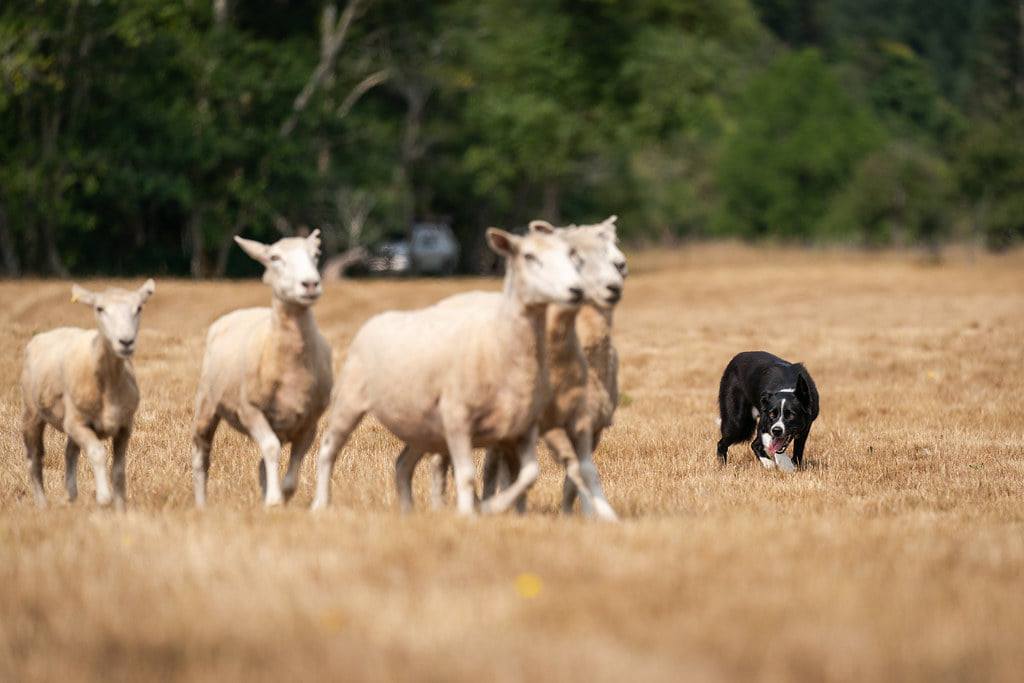
Since the weather was nice yesterday I was able to do my regular sheep herding lesson and Rico was amazing. We’ve been working on his driving (where he needs to move the sheep around the field at my direction). This is more difficult to train as the dog’s natural instinct is to bring the sheep to the handler, rather than moving the sheep away from the handler. I’ve seen some really wonderful progress in Rico’s driving in the last few weeks. It’s very exciting to see. Here we are after our lesson… we are both pretty pleased with ourselves!
On the way home from my lesson we stopped for a nice walk and field run for the dogs, and then we stopped at a large nursery to check out some plants. It was absolutely gorgeous, but it’s a little early for Christmas for me.
Oh, and I just remembered that on Thursday my friend brought her border terrier Ernie by for a visit. I just love Ernie!!! I don’t think I’ll ever own another Jack Russell, as much as I love them, but there is a strong likelihood that I WILL have a border terrier in the house some day.
It’s Sunday morning around 10:30 as I’m writing this. I’m going to grab a shower and then take the boys for a nice long walk. Then my plan is to settle into my sewing room and get these blocks back up on the design wall.
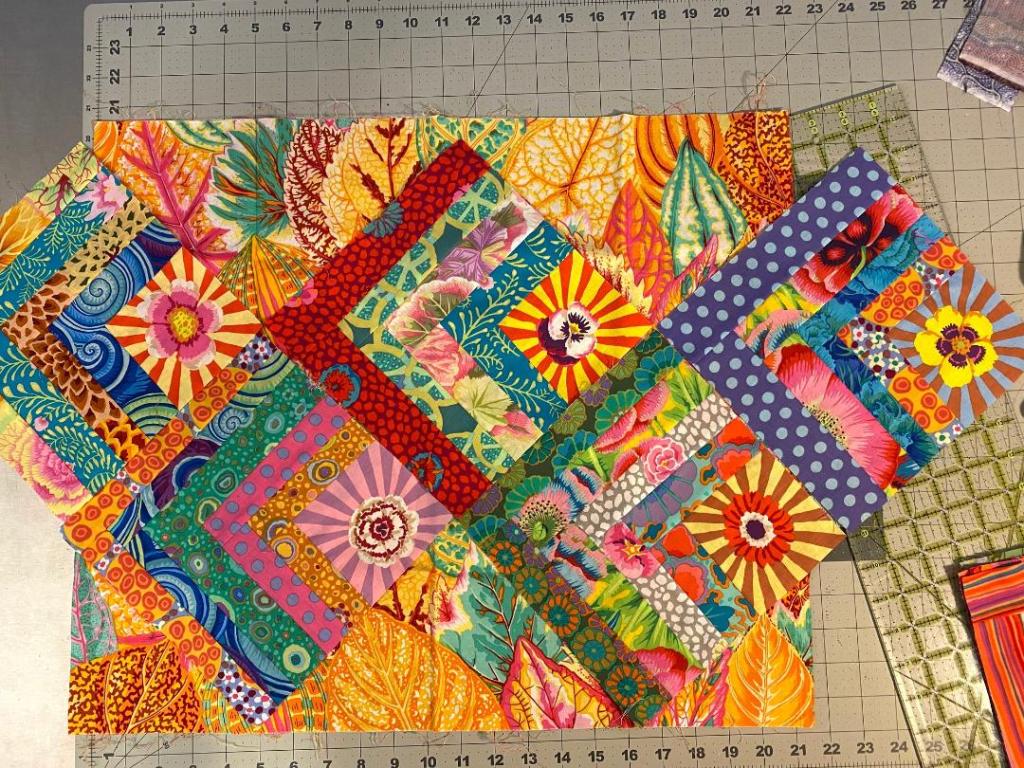
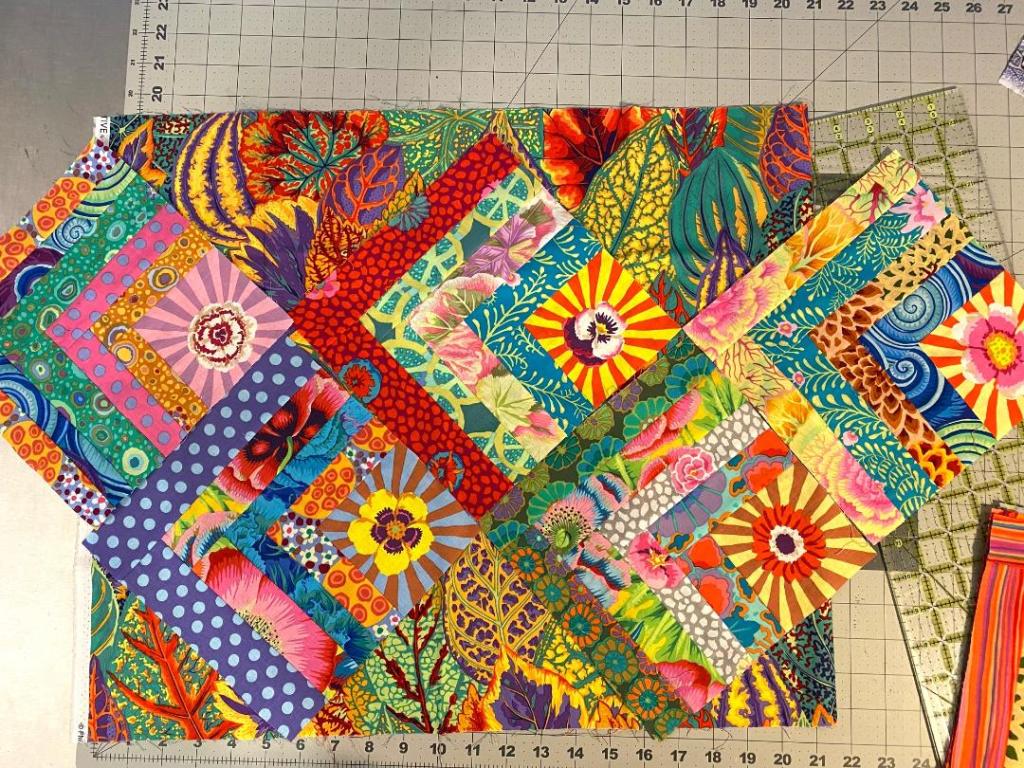
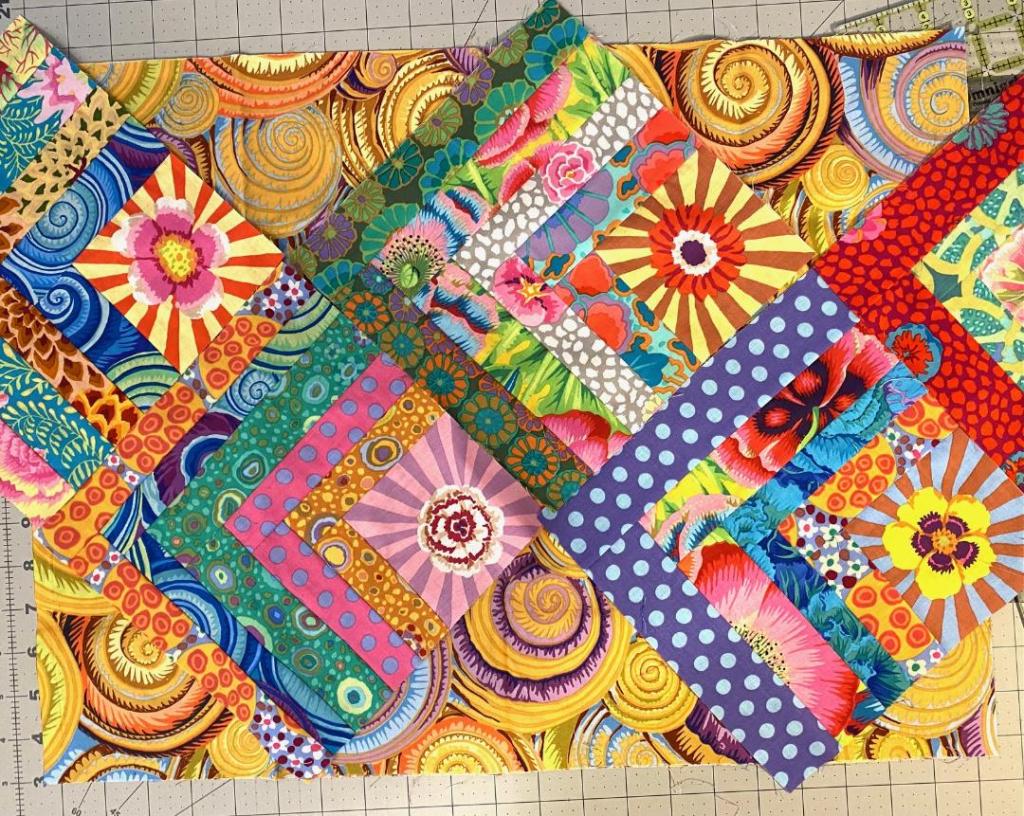
I’ve been thinking about my unfinished projects recently… again. I’ve been specifically thinking about this quilt. It’s made in a very free form way, starting with a piece of Kaffe’s sunburst fabric in the corner, and then free form pieced strips on two sides. It’s all made from Kaffe Fassett Collective scraps.
Here’s a view of some of the blocks.
I’m really close to having all the blocks done that I need for a queen size bed quilt. I think I only need to make five or six more and then I can get it on the design wall. I’m just stumped, once again, on what to do about those setting triangles.
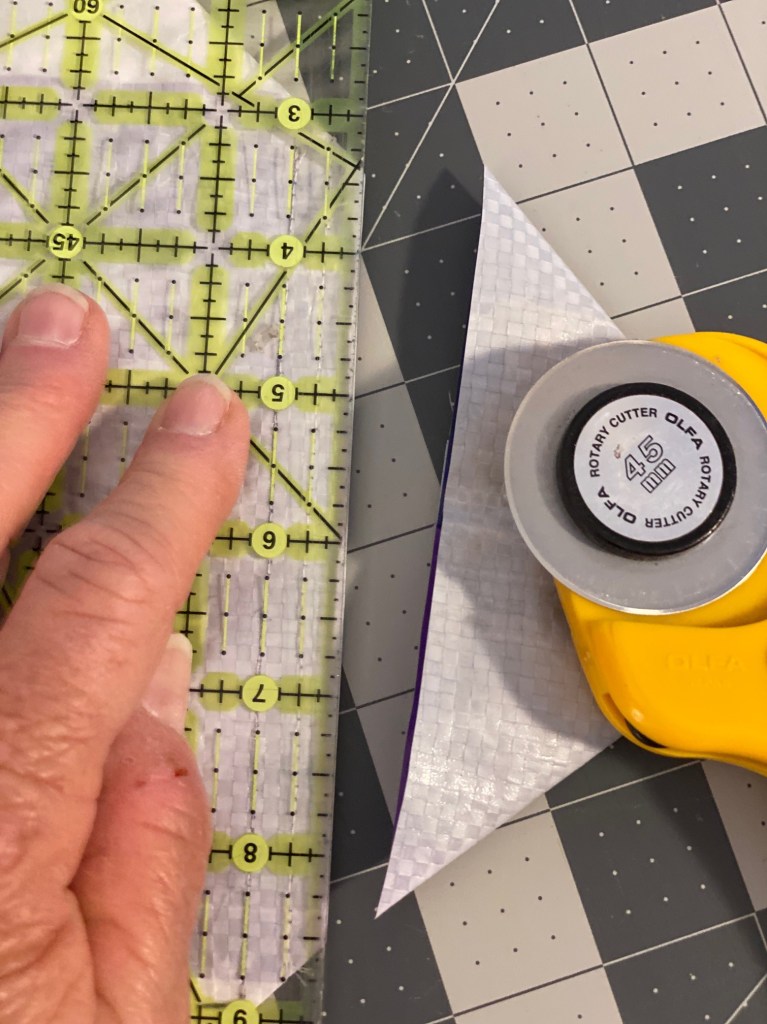
I have posted previously about trying to decide what I was going to do for setting triangles. After experimenting with a bunch of different options, I decided to just make the same blocks but a little larger and cut them in half for the setting triangles.
And now I’ve changed my mind. Partly because I am really just wanting to be done with this and don’t want to make another 15 or so blocks. Partly because I like the effect of the setting triangles made from yardage. Partly because I want to put that bin of scraps away!
So tonight I pulled out some fabrics that are mostly shades of yellow to try out. I had an idea in my head as I started pulling fabrics and it’s in this set of photos. Here’s what I came up with.
After sending these photos to a friend tonight and a follow up phone conversation, I’ve decided on one of these — my idea that prompted this evening process. Can you guess which one it is?
I even went online and ordered the fabric tonight. So I’m definitely committed. Maybe that will prevent me from changing my mind. Ha! I kill me.
I am really looking forward to getting this thing in the done pile. It will be finished and given to my brother and his wife.
A friend of mine gave me a gift certificate to Island Quilter for taking care of her dog, Jolene, when she went on vacation earlier this fall. So tonight I went online and ordered a bunch of the new KFC collection. I exceeded the certificate she gave me, but didn’t buy the entire collection. I was amazed at my restraint. I can’t wait to see the fabrics in person. I’ve only seen a few pieces of the new collection. it’s always different to see them in person.
After a really stressful week of work last week (I had five hours of Zoom meetings to start my Friday!) I was really happy to have a Saturday filled with sheep herding for me and Rico. I had my regular weekly herding lesson in the morning, and then high tailed it down to Molalla, Oregon, for a lesson with a different trainer in the afternoon.
I really lucked out in the weather. There were showers coming and going all day and every turn I had with the sheep was nice and dry. I even got to see a full rainbow accompanied by sheep and a dog!
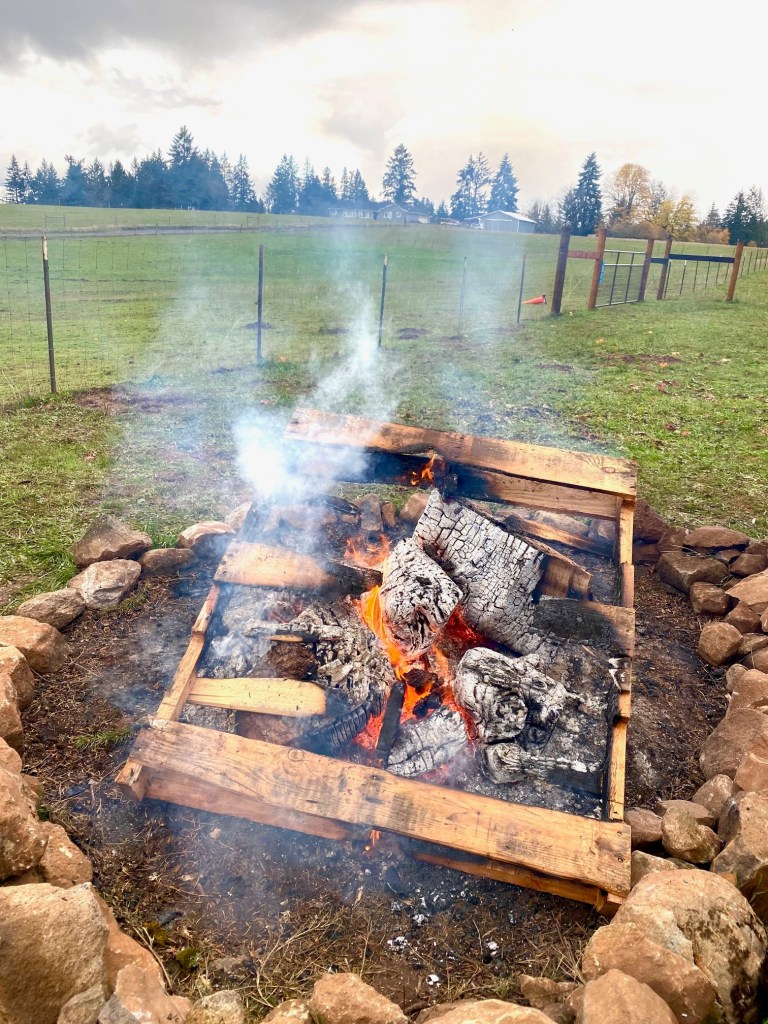
It was a nice cool day so the host of the second lesson had a lovely fire going to keep us all warm between turns with the trainer.
It’s been quite a while since I’ve been around a nice camp fire. And I smelled just like bacon when I got home!
While we were there I took my boys for a nice field run to stretch their legs since we would not be getting a walk at all that day. They do love their field runs!
Sunday, I spent most of the day house keeping as I actually have company coming later this week. This will be the first time I’ve had company come and stay since the pandemic hit! I hope I’ve maintained a few of my social graces so I don’t offend anyone! Company also means I’ll have a short work week since I’ll be taking Thursday and Friday off. This part makes me really happy! It’s been a stressful few weeks.
The view of this little red maple tree has been keeping me happy at work for a couple weeks. I’m really happy that I planted it where I get a good view of it from my desk.
My company will be taking home with them one of the Aboriginal fabric quilts I made this year. So last night I sat down in my sewing room and got the label affixed to the quilt. It definitely looks hand sewn!
I will find a different method for stitching the edges of the next one. The label has been affixed using a fusible webbing. So the stitching is partially decorative… which makes this even more sad! I have no plans to become known for my hand work!!!
I need to get three more labels affixed to quilts to I can get them shipped in plenty of time for the holidays.
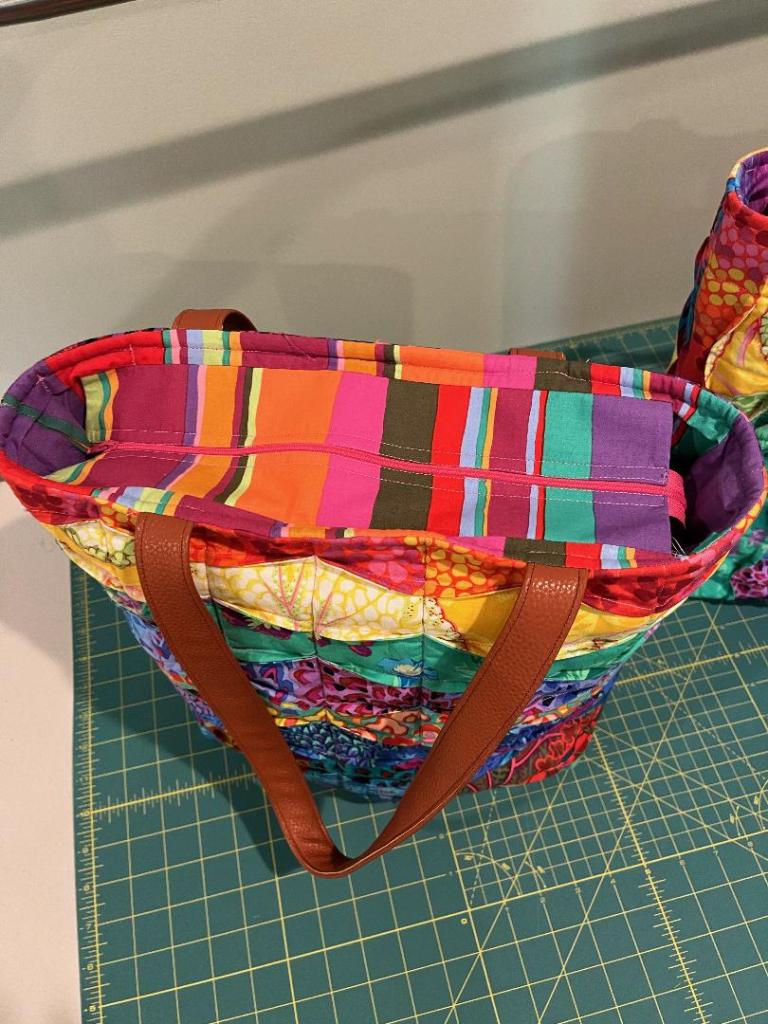
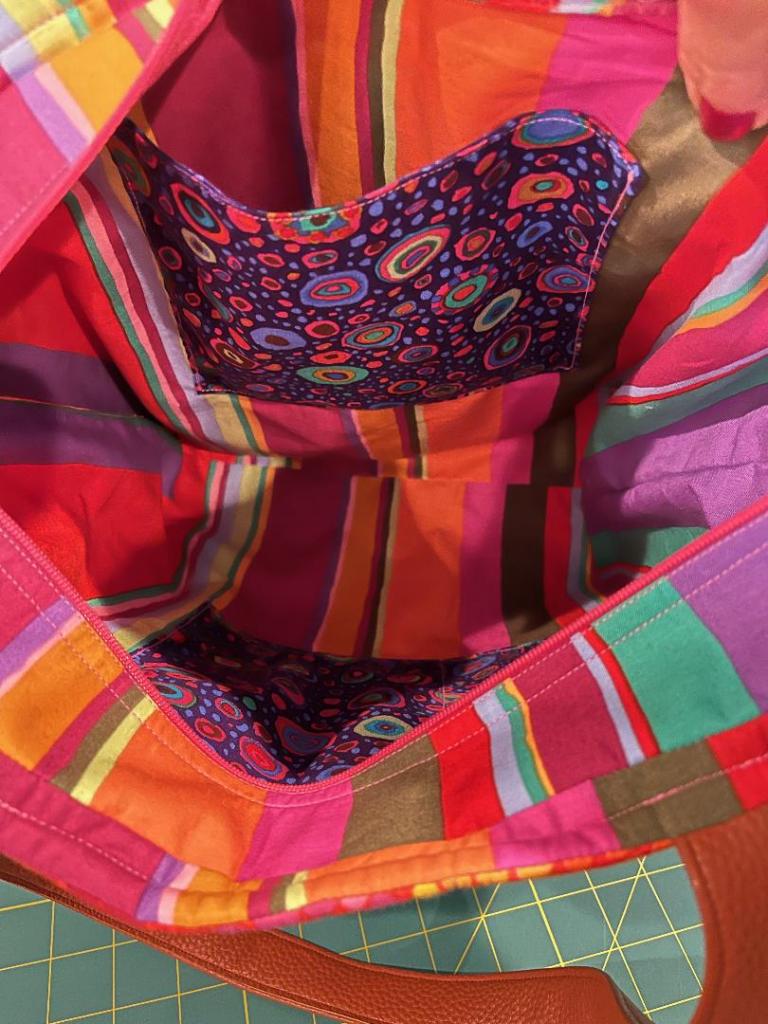
I’ve been chunking away on a few more feedbag totes over the last few days. Guess which one is my favorite…
I’m getting really fast at cranking these out. I made three tonight in about an hour. The hardest part is just wrestling with all that stiff fabric.
I have some more Frankenbags to share with you tonight.
This first one was made by Nyla Bales… at least I think that might be her name. I kind of made assumptions by looking at the email. I hope I’m not wrong. This is her first Frankenbag and she made it for her mom. I love her scrappy approach. I think her mom will love this!
Next up is this bag made by Mary Sanderson. Mary is 83 and lives in the UK. She said she loves to make fabric crafts and learn new skills… she’s never quilted before! She is going to donate this bag to a local charity that works with women who have been trafficked. I think she did a great job and for a great cause!
Next up is this bag from Wendy Shapiro. I just love those cool periwinkle blue notes and the pops of color! It’s just really fun and eclectic! And she went for it with the lining! And you know I love that! This is Wendy’s first Frankenbag and she said she’s off to the races with more.
These next bags are from Eleanor Reidy. I love that she used the wavy design that I tried a couple of months ago. And she used some really bold colors! I love that she turned the waves vertical for one of her bags. Eleanor said she’s a recently new quilter — started during COVID — and she’s found her true love for it! Her cousin gave her one of her older Berninas and she was on her way. I hope we see more from her!
Next up is this bag made by Joyce Ruff. She said she enjoyed making her summer Frankenbag so much that she made one using more autumnal colors. She likes the size so much because it can hold a book, umbrella, or sweater and still be lightweight.
I just love her fabrics and that nice dense horizontal quilting! And it looks really good with the flowers on her patio. And look… another zipper placket. This bag reminds me of warm spices, like a rich butternut squash soup with Indian spices. Mmmmm. So good!
Thanks to everyone who sent photos! There’s so much inspiration there!
A lot of people have been asking me how I made my feedbag tote bags, so I decided to make a quick tutorial. These bags are really quick and easy to put together, so this shouldn’t take too long.
Here’s the bag I made for this tutorial.
Here’s another one I made last night.
It seems like the size of the bag corresponds with the size of the animal.
The first thing you want to think about is selecting your feed bag. You can use any bag (chicken feed, goat feed, bird feed, horse feed, etc…), but I like the ones that are made from a woven synthetic fiber, coated with plastic, rather than just plastic. This picture shows the inside of the bag. I like bags that have fun and colorful images.
If you have friends with chickens, you may be able to get feed bags from them. I have a good number of friends who have various livestock, so I’ve gotten a lot of bags… sheep, horses, cows, goats, etc… If you don’t know anyone with animals, you might want to check with your local farm store and see if they know of a source. One of our local farm stores has a recycling area for feed bags. I’m guessing they would let people just take what’s been put there. I even saw some for sale on Etsy the other night.
Once you have your bag, you’ll want to make sure it’s clean. If the bag was for a dry food and clean food, I find that a wipe down with a damp cloth is enough. Some feed is dirtier and stickier and stinkier… these bags will require more cleaning. You might want to cut off the top and bottom of the bag, turn it inside out, and run it through your washing machine if it’s really bad.
Once you have a nice clean bag, the first thing you’ll want to do it cut off the top and bottom of the bag to make sure it’s all even and square. The size is up to you. I like to have mine cut a little taller than they are wide. The bag I made for this tutorial started out at about 15 inches wide by 21 inches. I’m not including the width of the sides of the bag. Just the actual front/back section.
Most of these bags have a pleat or fold on the side.
I have the sides folded in, as in this photo, when I’m measuring and trimming the bags.
The width of these folded sections varies from bag to bag. This bag has a really wide folded section.
Also important to know… use the bag at the full width and then there’s no need for side seams — don’t cut the sides. You’ll use the folds in the bag to form the gussets and sides of the bag. It’s like magic!
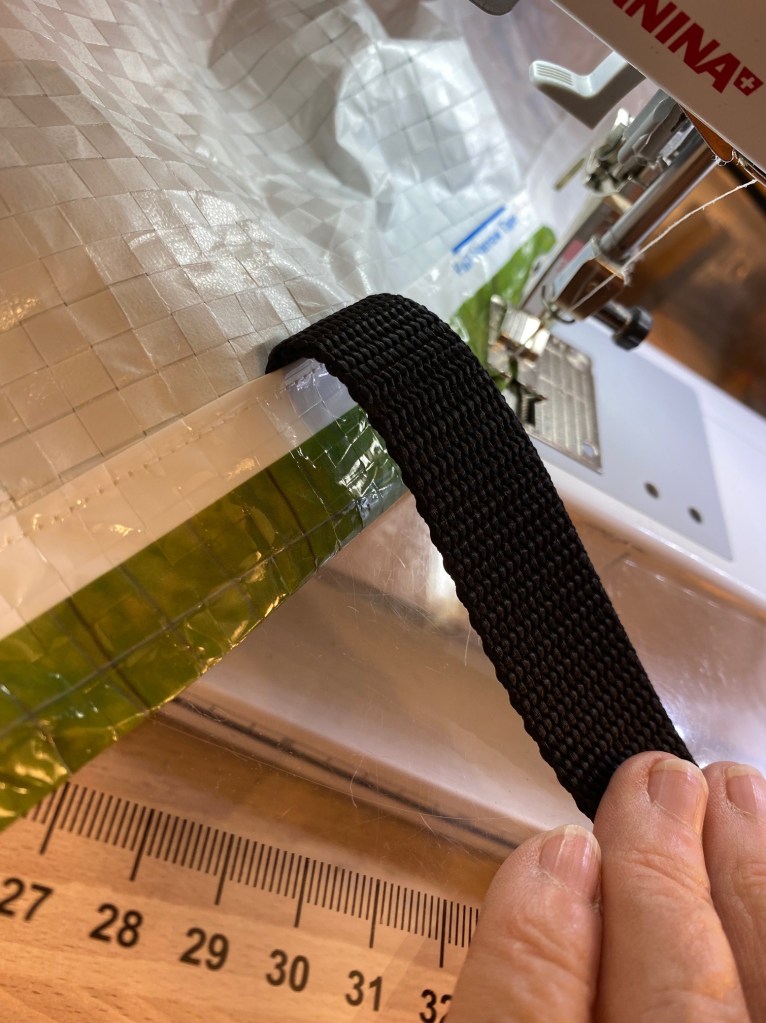
So once your bag is all trimmed and even, mark the top of the bag to place your handles. On a large bag like this horse feed bag, I measure over 7 inches from each side and mark (I do this because it’s easier than folding the bag to find the center!). Then I make a mark between that mark and the side of the bag, 3.5 inches away from the mark. Do this on each side of the 7 inch mark. I make these marks about 1 1/4 inch from the top of the bag. That way I can see them when the top edge is folded over. Mark each side of the feed bag.
This photo shows the 7 inch mark from the folded edge, and the 3.5 inch mark to the right of it. The mark at the right is where you will place the handle.
This next photo shows all the marks on this side of the bag: the two 7 inch marks in the center, and the 3.5 inch marks on either side.
Next, with the bag right side out, you’re going to fold over about 3/4 inch all the way around the top of the bag and finger press. These bags take well to finger pressing. Which is good because using a hot iron would be a hot mess. Get it? A HOT mess!
Once you’ve finger pressed this first fold all around the top of the bag, fold that top edge over again, finger press the fold, and clip in place. Slip the handles up under the folded edge at the handle marks (centered on the mark), and clip them in place. Make sure your handles aren’t twisted.
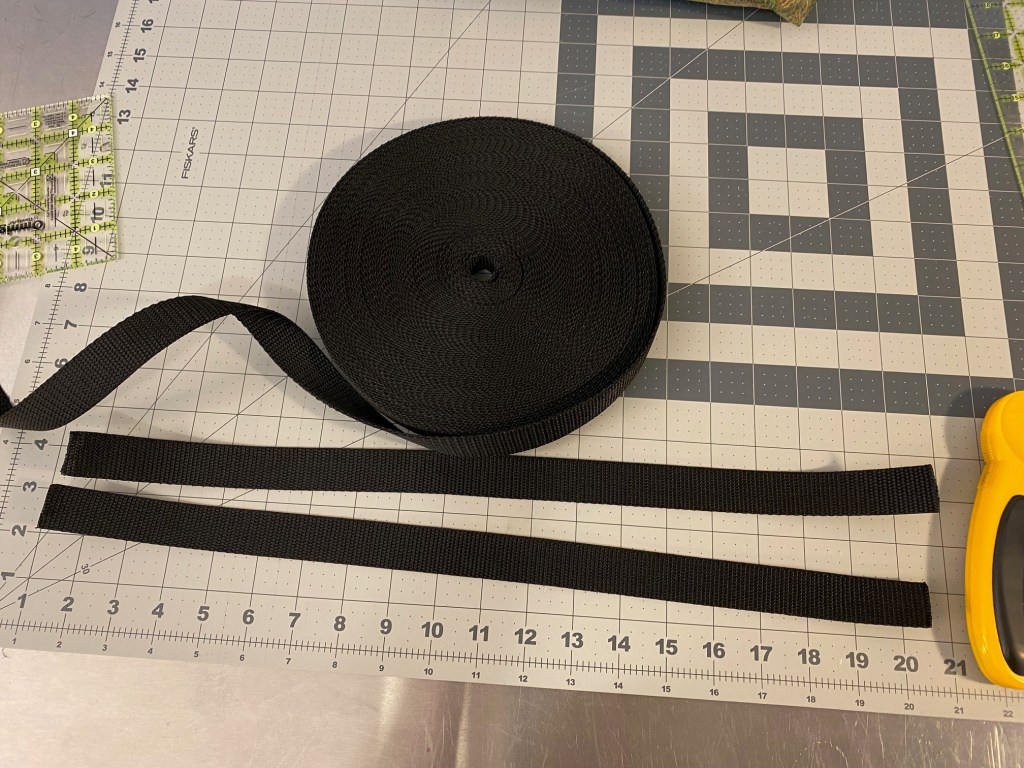
I’m using nylon webbing that I bought online, cut to 22 inches long. You’ll need two handles. You can make handles from the sections of bag you cut away. I prefer the nylon handles.
These handles are not long enough to serve as shoulder straps. If you want shoulder straps, you’ll want to cut longer straps.
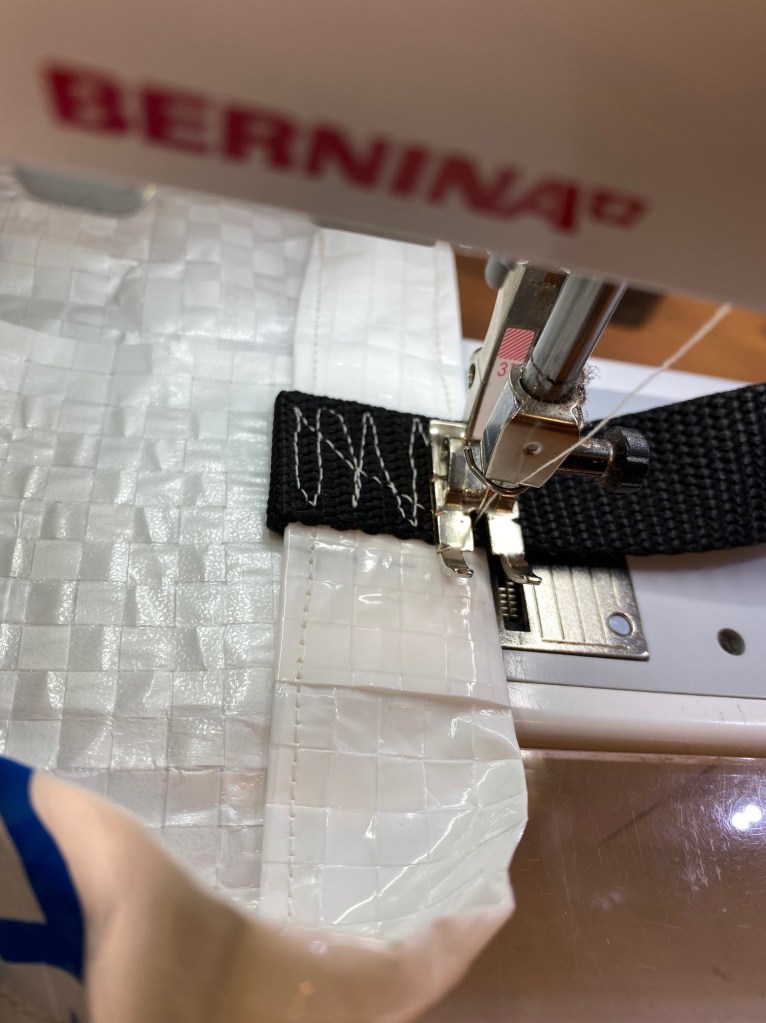
Next, you’re going to run a line of stitching all the way around the lower edge of that folded section, catching the handles in the fold as you go. I’ve stitched pretty close to that edge, but you can certainly sew your line 1/8 inch from the edge.
Once I’ve sewn all the way around, I lift my needle and presser foot and move the bag so that my needle is lined up with the top edge of the bag, and run another line of stitching all the way around, making sure you fold the handles up and stitch over each one as you come to it.
I also use my reverse button and twist the bag a little to do zig zag lines across the bag handle to reinforce it, making sure that I end up with my needle back on the right edge so I can continue my line of stitching around the top of the bag.
Once you’ve gone all the way around and have reinforced all four handle attachment points, you’re ready to sew the bottom of the bag closed.
Turn the bag inside out and lay it flat, opening up the folds on the sides. You don’t want to sew the folds in place. You want it all flat. Pin along the bottom edge and sew a line of stitching about 1/2 inch from the edge. Then sew another line of stitching about 1/4 inch below that first line. This will reinforce the bottom of the bag.
Now it’s time to make the gussets. Leave the bag inside out and put your hands inside and finger press the bottom seam you just sewed.
Then with one hand inside the bag and one outside the bag, start forming the gusset. you basically want to line the center of the side fold with the bottom seam. This photo shows the fold on the left and the seamed bottom on the right. You can see that they are lined up.
Holding the seam and the fold together from the outside, flatten out the gusset point, finger press the edges, and pin in place. Then, you’re going to draw on your seam line for the gusset. In this picture, I’ve marked the folds in the side of the bag so you can see them. You’ll want to run your line of stitching from where the fold lines on each side meet the folded edge of the gusset. This will ensure that your bag is square.
Sew one line of stitching along the marked line. Then sew another line 1/4 inch from this line on the point side of the line. This will reinforce the gusset.
Once you’ve sewed two lines of stitching on each gusset, trim off the excess fabric corners.
Then turn your bag right side out, finger press the gusset seams and you’re done!
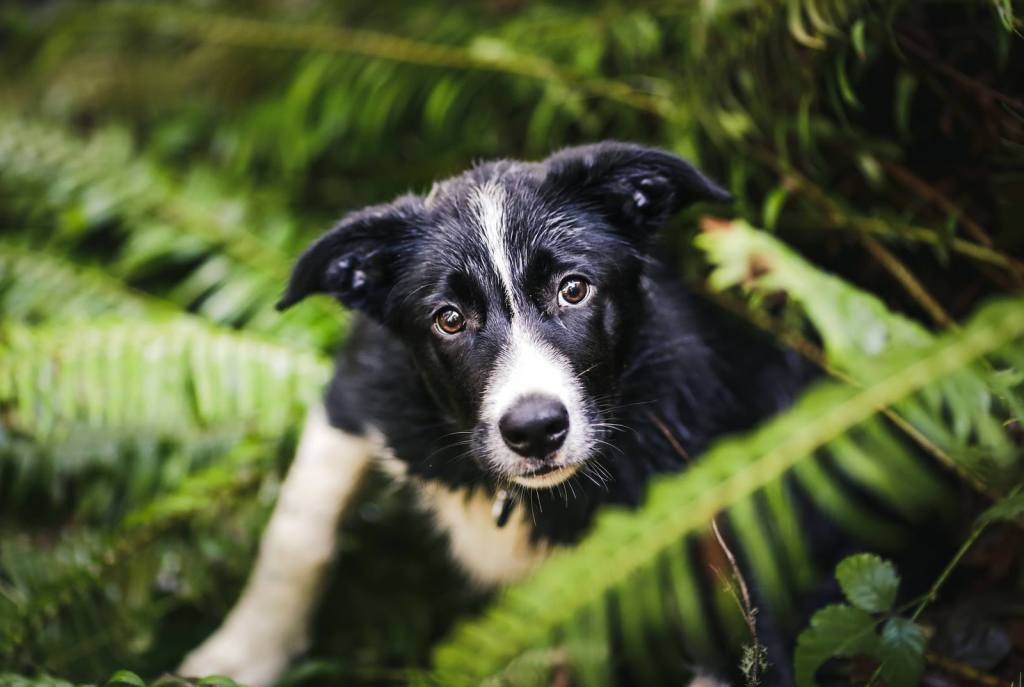
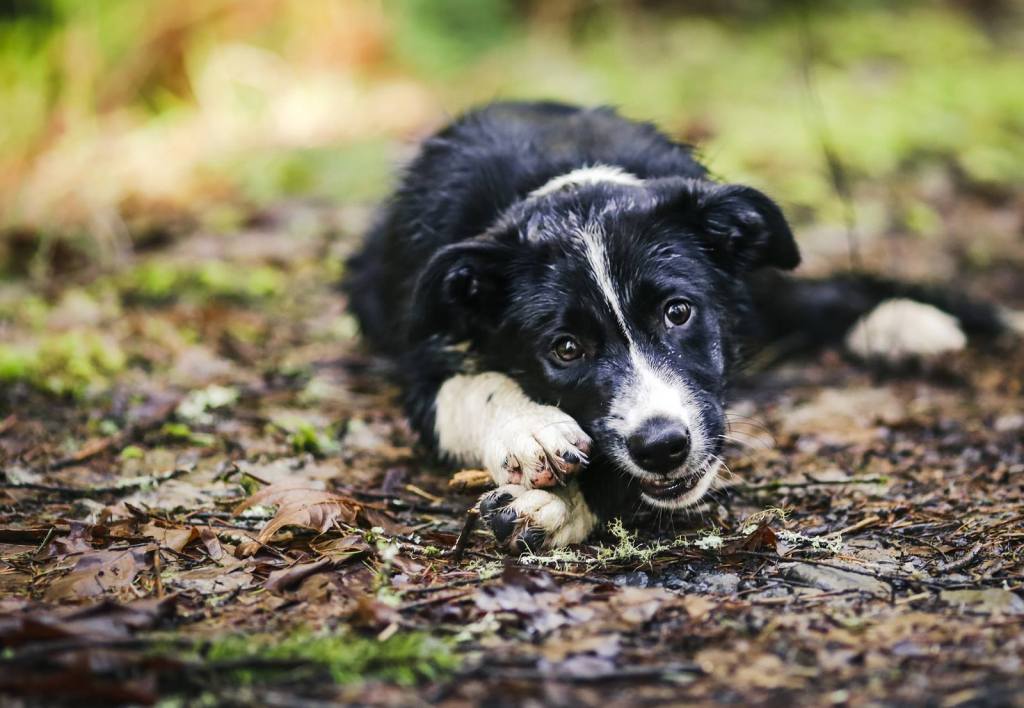
I can’t believe Rico is five already! He’s just the sweetest and most sensitive dog I’ve ever had. And he has all the enthusiasm you could ever hope for.
I took this photo this morning.
Poor thing. He just hates posing so much. And yet I continue to torture him.
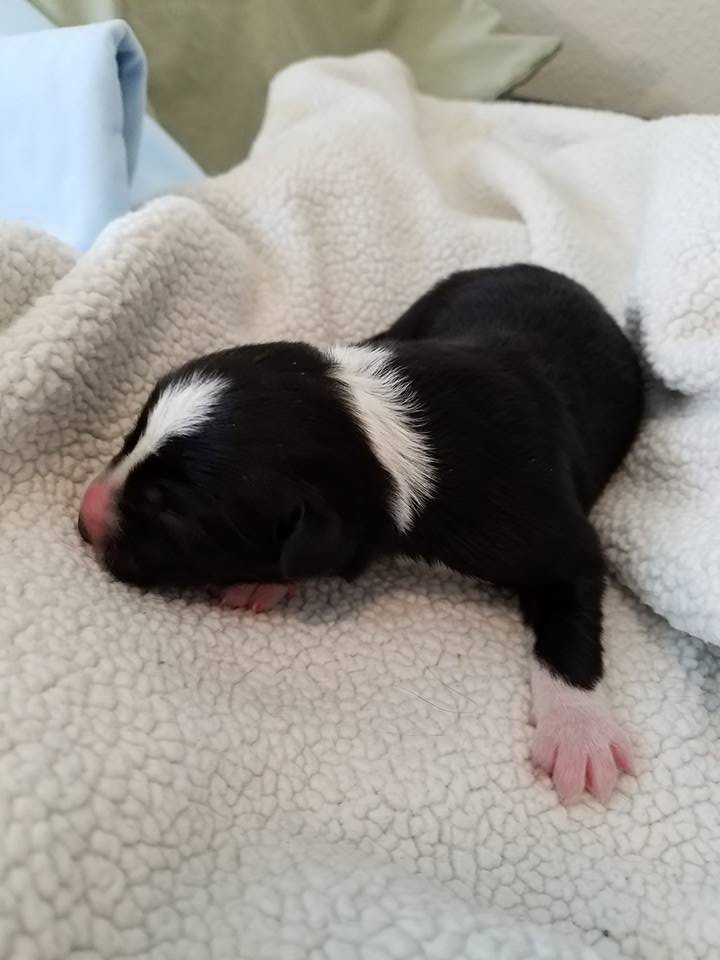
Rico was one of eight puppies born on November 1, 2016. Here he is on the day he was born.
Look at that big old foot!
This is Rico’s mama Mira with her eight puppies. Rico is somewhere in that puppy pile!
Here he is when he was a few weeks old and the puppies were given some goats milk. I’m pretty sure he went swimming in it!
This is Rico at about a month old. He was called Spot until I named him because he has a black spot on his belly.
Here he is at about four weeks old. I would know him anywhere!
This is me and Rico when I flew to Utah to bring him home to Oregon when he was 8 weeks old.
Oh, how I miss those gorgeous mountains!
This photo was taken the same day. Look at how big his feet were! I should have known he’d end up big!
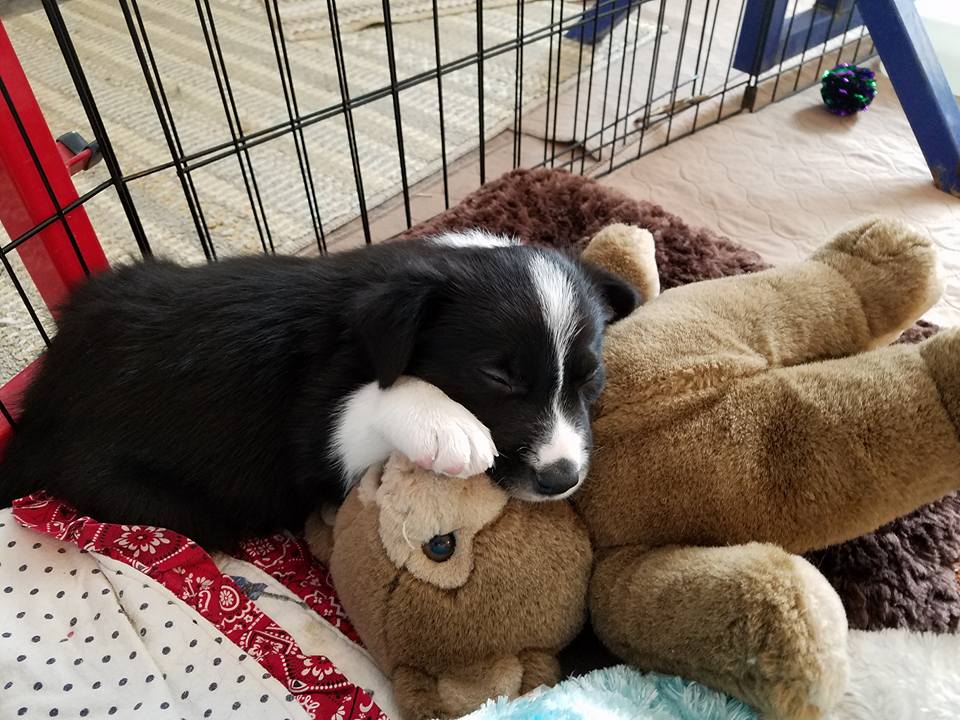
These are the first photos my friend Heather took of Rico when he first came home to Oregon. She’s a wonderful photographer and I’m so lucky to have such amazing photos of my dogs.
Good lord. Just ridiculously cute!
Incoming!
These photos are from Rico’s first hike with all his border collie friends.
Such a sweet expression on his face.
And here he is enjoying the organic Oregon country side.
This photo was taken the day I sneaked Rico into the office to meet everyone there.
That’s a big bag and he didn’t fit in it for very long.
A week or so after I brought Rico home we had a huge snow storm. Forrest got cold out in the snow and Rico cuddled up next to him to keep him warm.
Rico and Bender were destined to be the best of friends.
He was always a beefcake!
I kept track of Rico’s growth by photos in this doorway.
I came home from work one day to find that Hurricane Rico had devastated the kitchen.
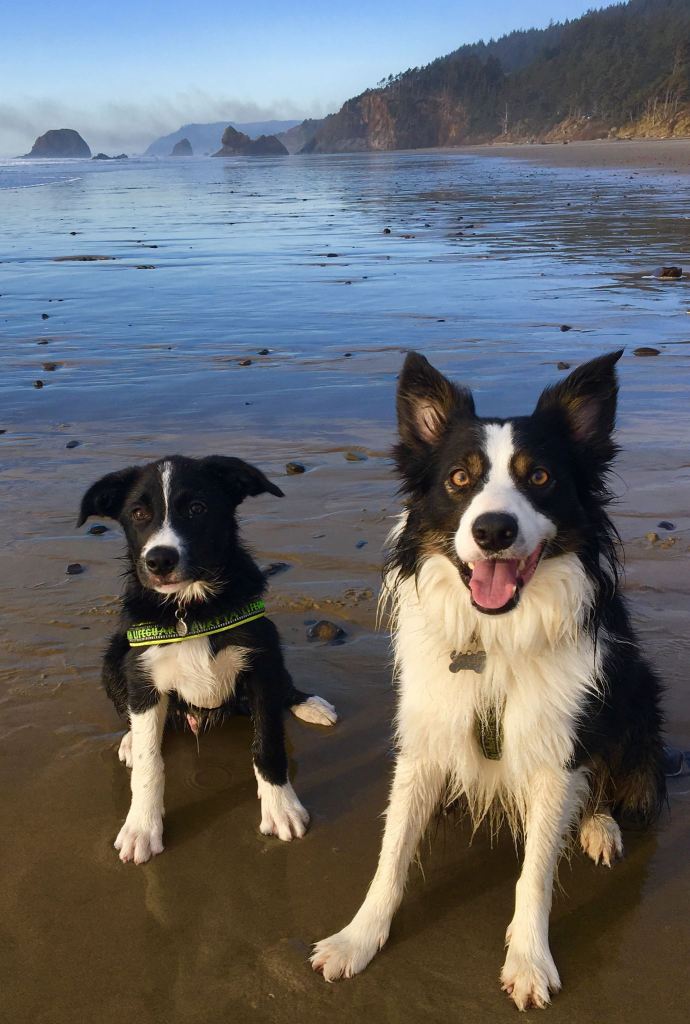
This was Rico’s very first trip to the Oregon Coast. I think he liked it.
Every puppy I’ve ever had discovers the toilet paper at some point.
And here’s proof that he actually can be a very bad dog.
This was the very first time Rico met sheep. Little did he know his future would have a lot of sheep in it.
My friend Heather took this photo of Rico to celebrate his first birthday. What a handsome and manly kid!
And Rico is more than just a pretty face. He’s incredibly athletic and talented. Look at all this power and concentration!
And he’s cool and collected when working on sheep.
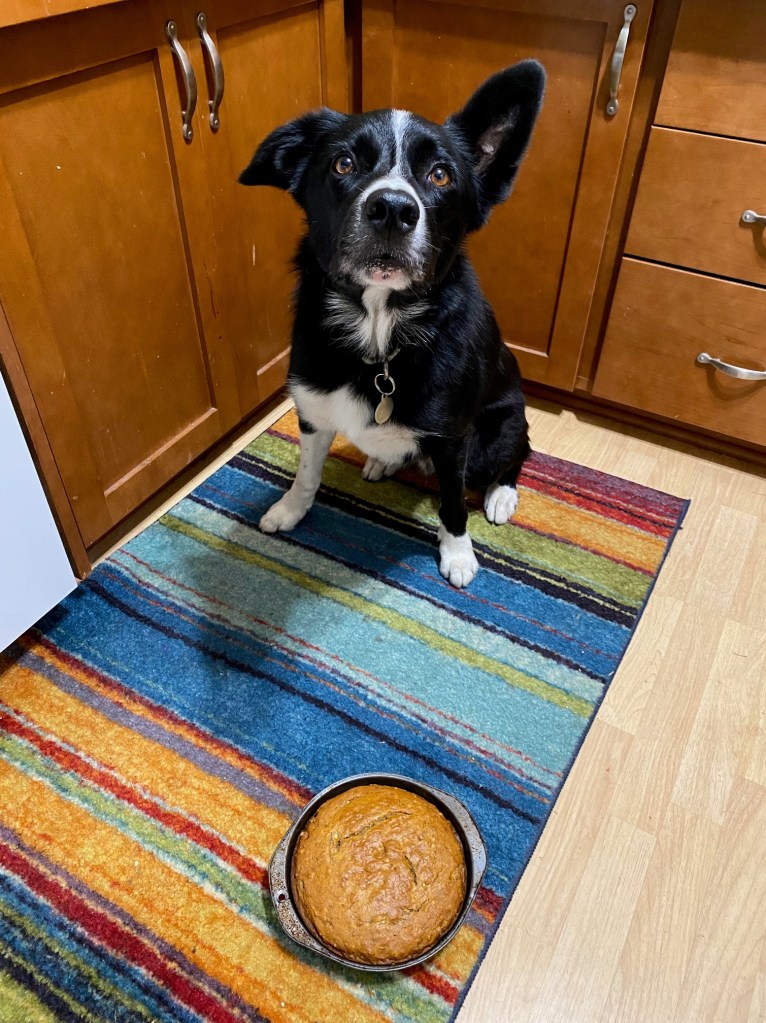
We celebrated Rico’s birthday tonight with a peanut butter, banana and honey cake I made for him. He did not like waiting for it to cool.
We had another absolutely gorgeous fall day here today. And now we have ten days of rain on tap. So I made sure I got a lot of time outside to enjoy it.
I took the boys down to Canby, Oregon, this morning to spend an hour doing some agility training in our club barn. It was a great way to start the day. Rico sure did enjoy himself!
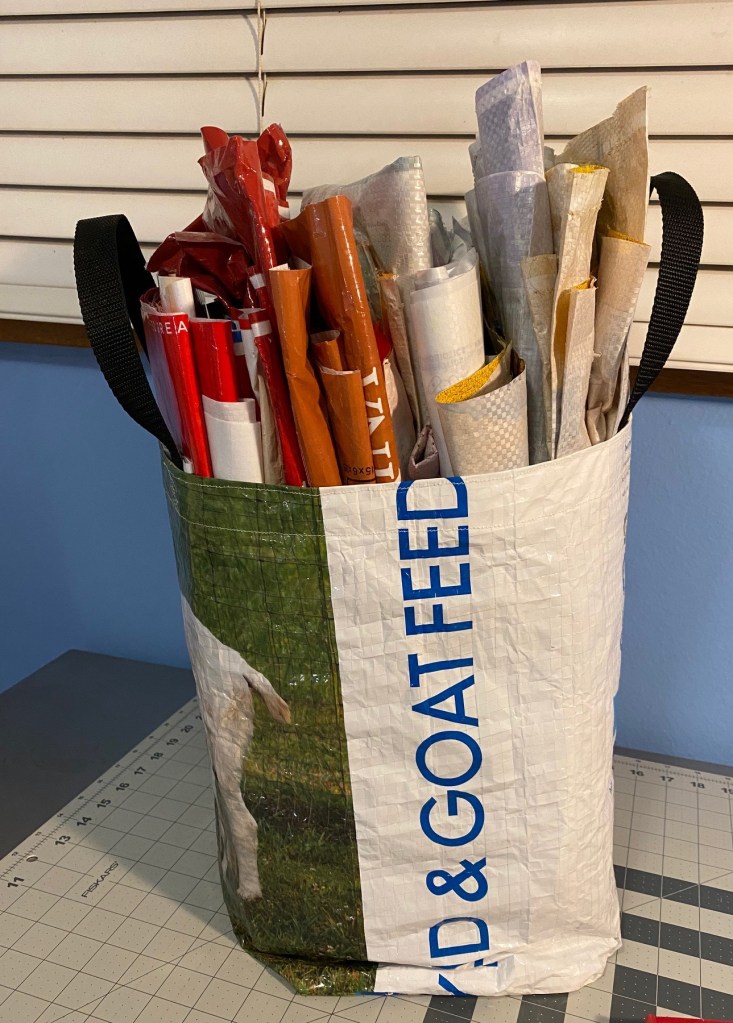
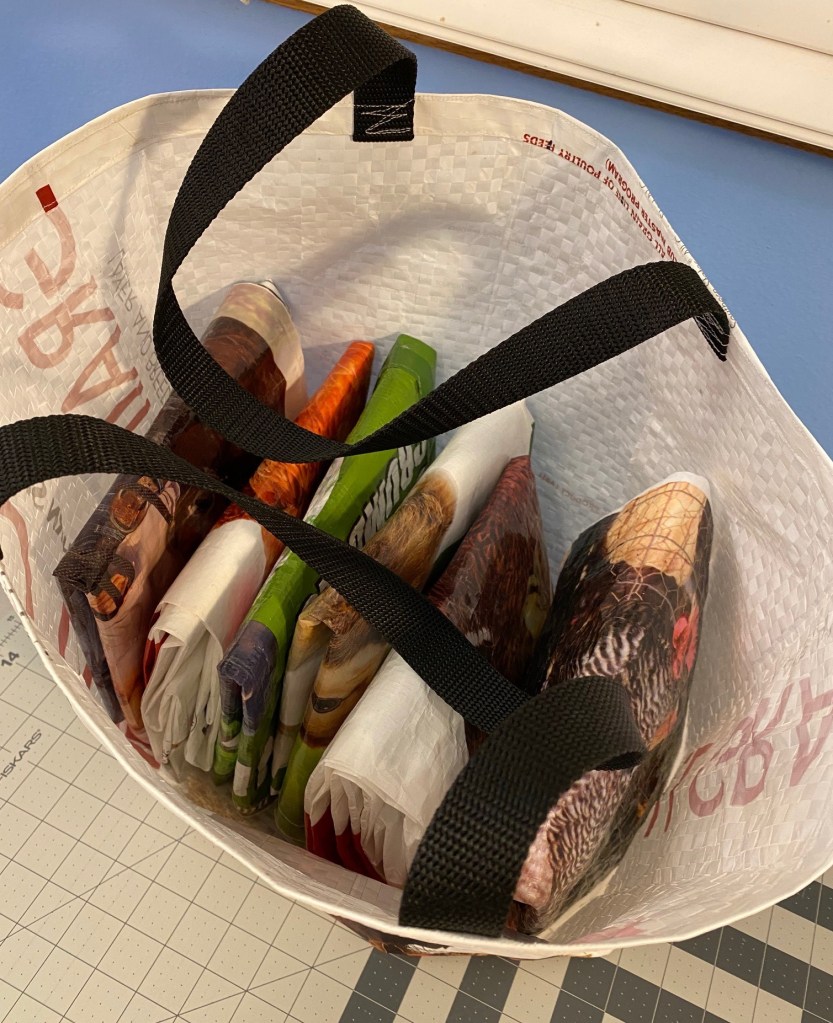
Once we got home I took advantage of the beautiful sunshine and took all the feed bags from the garage to the patio and sorted out what was clean and what needed to be washed. I think I had around 20 bags to go through and only seven of them needed a trip through the washing machine.
I folded all the clean ones and stuffed them into one of the totes I made earlier this week. So these are all ready to trim up and start constructing.
Once I finished up with the bags, the boys and I headed out for a nice five mile walk. There were a lot of people out walking! I think everyone wanted to get some sun before the rain sets in.
When we got home I cleaned up the kitchen and made some nectar for the hummingbirds.
After dinner I took the boys for a quick walk through the neighborhood in the dark to see what was going on with trick-or- treaters. And there were quite a few out and about.
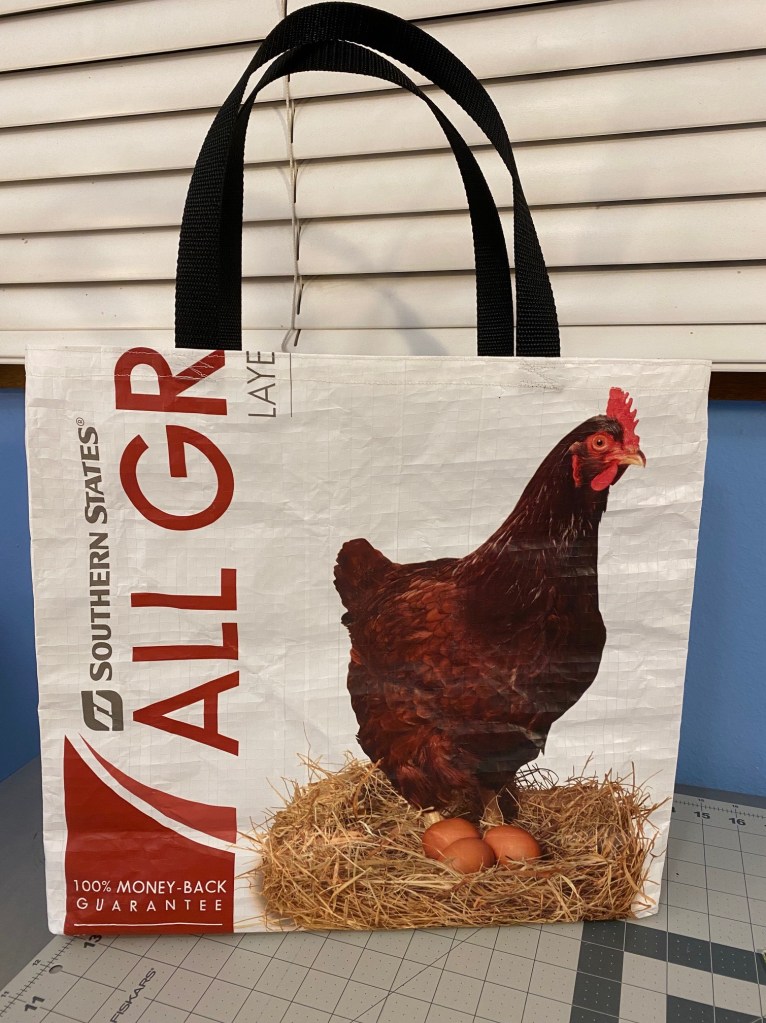
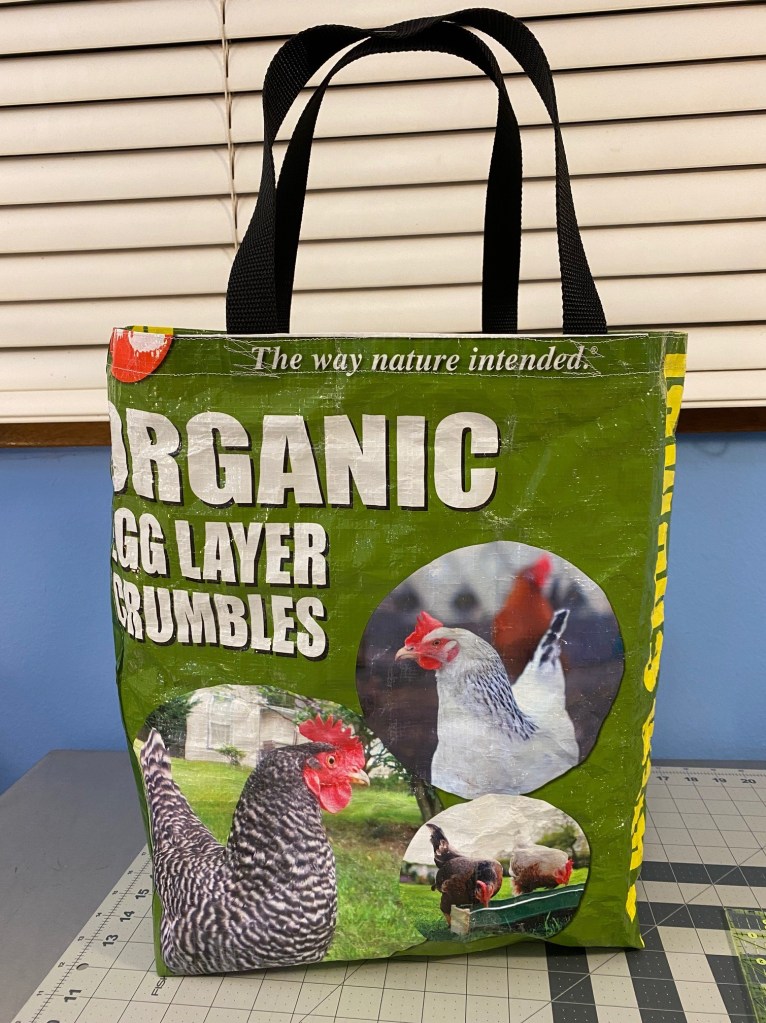
When we got home I dug in on some more feed bag totes. I finished up four this evening. This first one came to me in a nearly-done state. All I had to do was add the handles and finish the top. Doesn’t this chicken look like it’s wearing little boots?
I love this next one. The colors are so fun. I would love to find more bags with this kind of color!
These next two are really big! I love the images on the bags.
I wish this picture showed the size differences in the bags a little better. They do vary quite a bit in size.
I think I’m going to keep one of the really big ones and put it in my car to hold my muddy rubber boots after sheep herding. That would be a perfect use for it.
Once I had those four bags finished, I folded up all my finished totes and put them into one of the bags I finished tonight.
Damn. Why are weekends so short? I would love a few more days off.
After about ten days of rain we’re having a gorgeous and sunny fall weekend. So I decided to head out this morning and drive south to Scio, Oregon, to watch a sheep dog trial. And I’m so glad I did! What a perfect way to spend such a beautiful day.
I even got to see a few friends there. And on the way home, I stopped by another friend’s place and picked up a few more feed bags, let the dogs have a nice run in her field, and had dinner on the patio. It got a little cool after the sun went down.
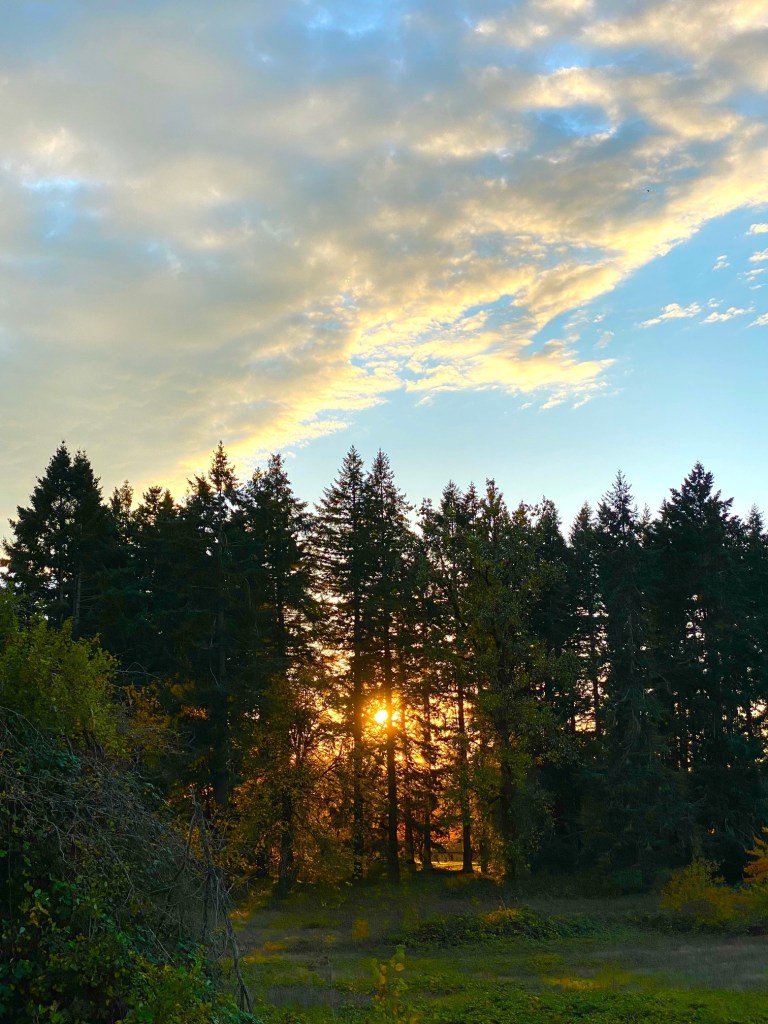
We saw this gorgeous sunset when we were on our way to pick up our dinner.
We didn’t get home until after 7 pm. So I fed the dogs and then we headed out for a quick evening walk as they spent quite a few hours in the car today.
I want to thank the people who pointed out to me that the little white animals on the bag I made last night are not in fact sheep, but actually goats. I knew they were goats. I just hink I had sheep on the brain! I do spend some time around sheep and should be able to recognize one. But maybe not!
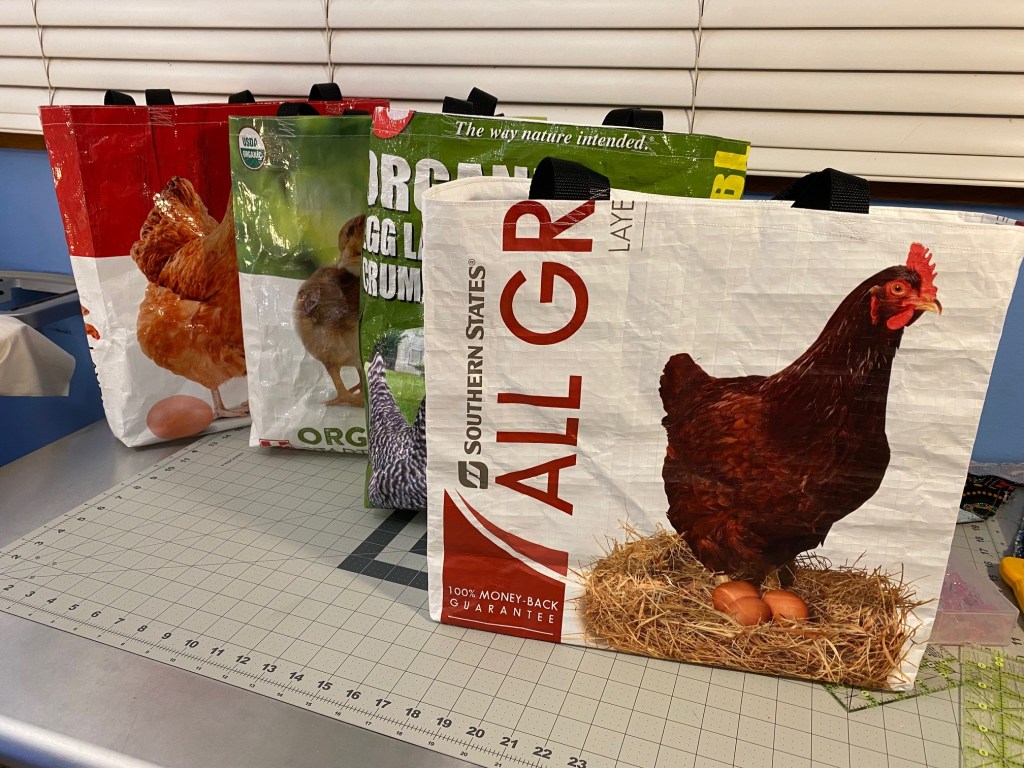
Once I got home this evening I hit the sewing room and whipped up two more feed bag totes. They went together really fast!
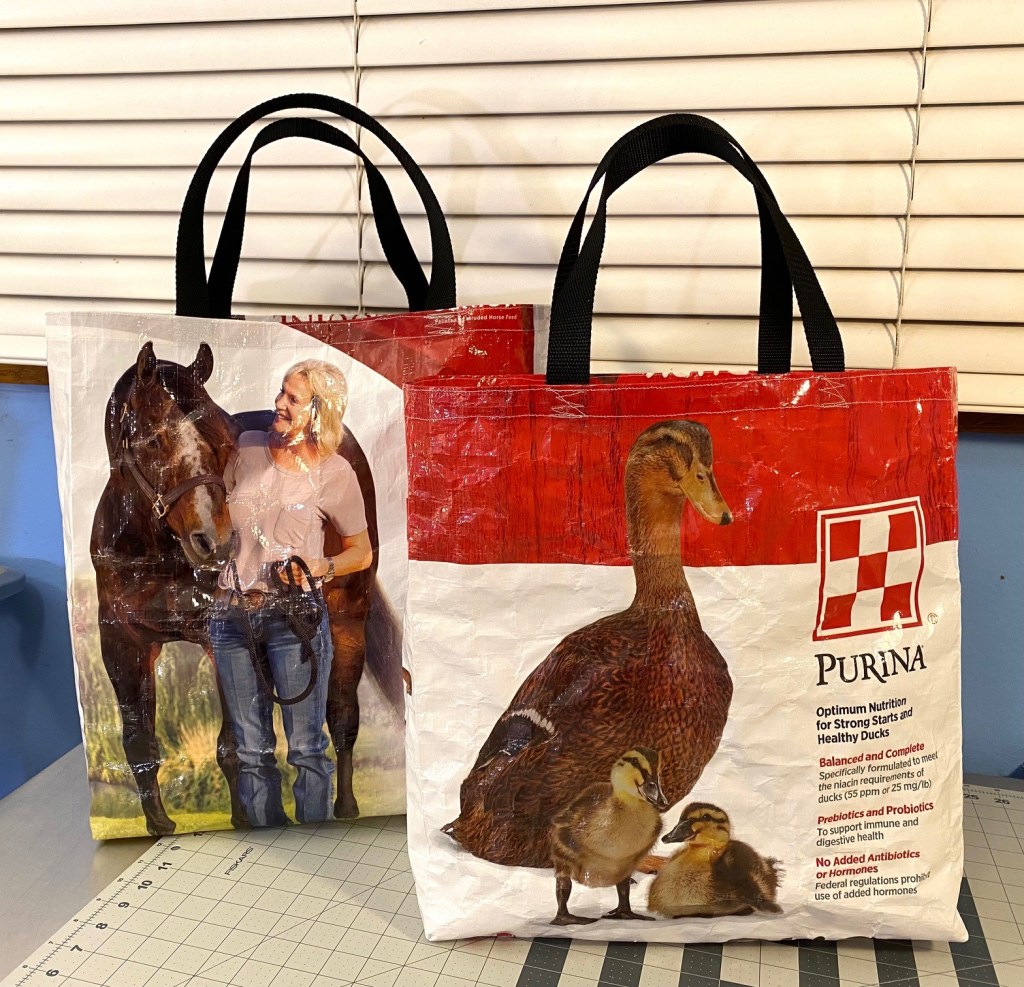
I just love those little ducks. And this bag is bigger than the ones I made last night. It’s all dependent on how big the feed bag is since you don’t sew any side seams. And the size of the bags can vary quite a bit.
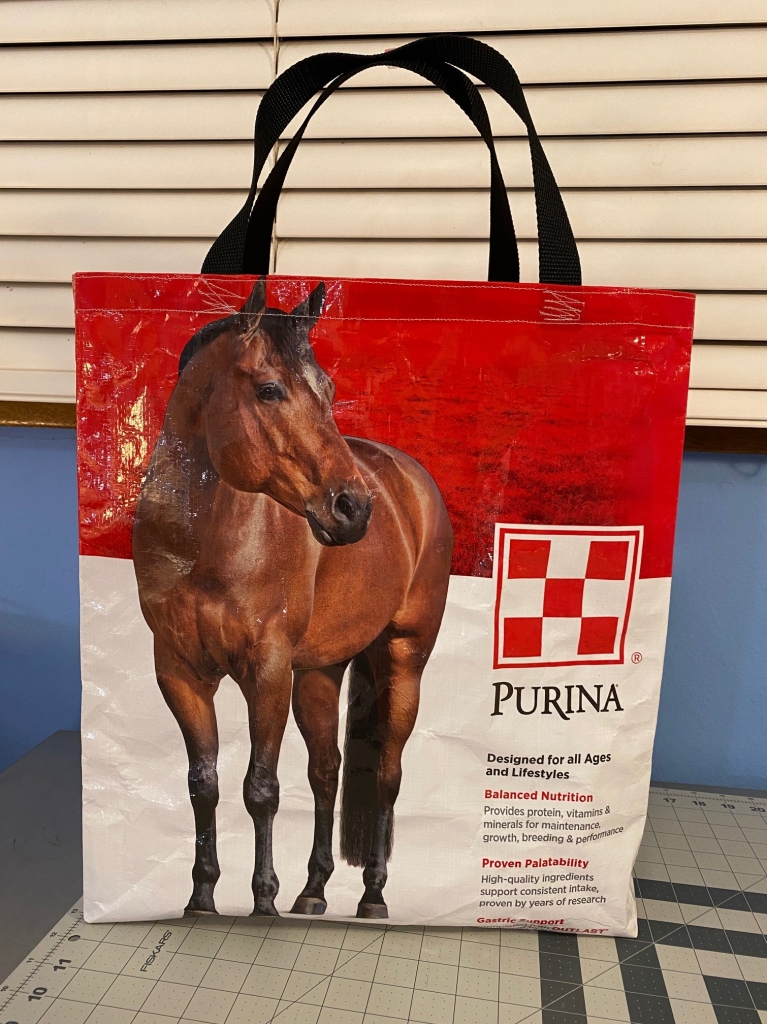
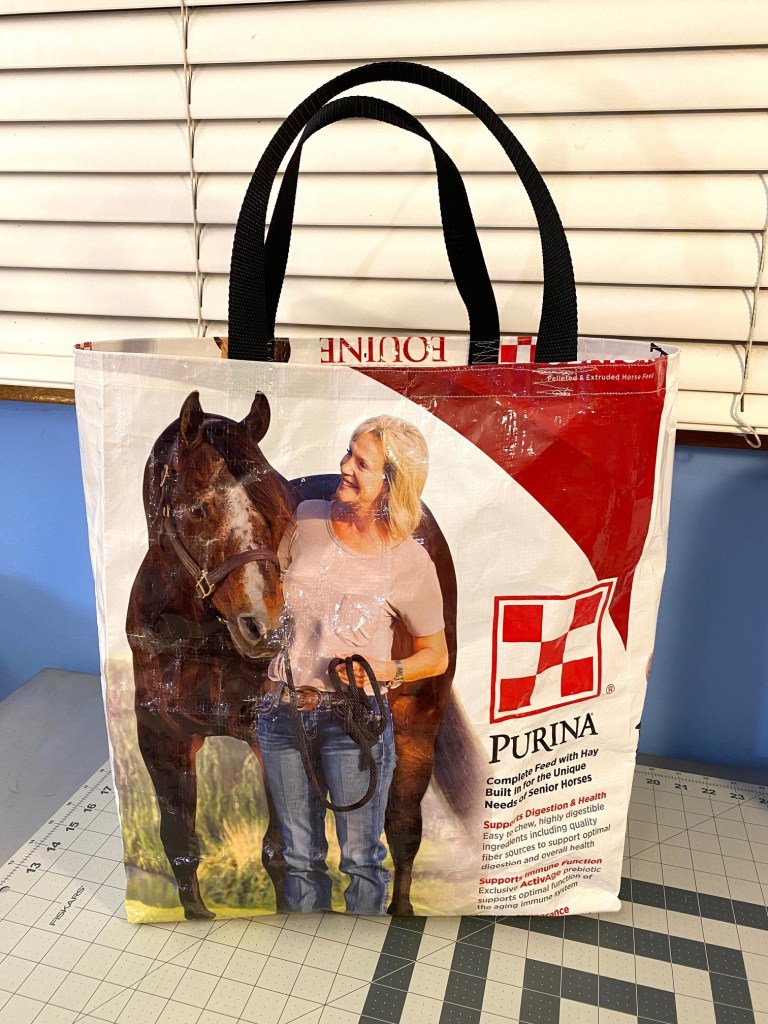
I also made this horse bag tonight. And it’s enormous!
I also realized tonight, although I think I actually did this last night… you need to make the gusset the same size as the side of the bag. These bags have a sort of accordion fold on the side of the bag. The size of the fold varies from bag to bag. So some bags are deeper from front to back than other bags. I guess it keeps it all interesting.
Here’s tonight’s too bags. The horse one is bigger than the duck bag.
I also prepped some bags by cutting of the tops and bottoms. They’ll be ready to start sewing on tomorrow.
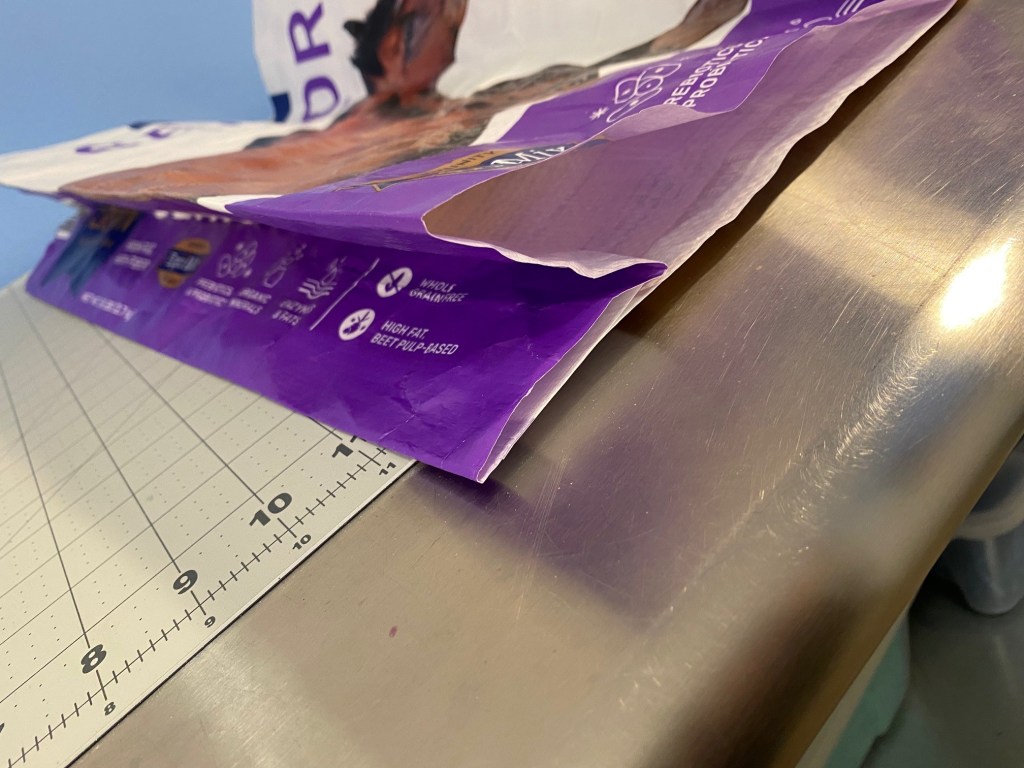
I just love this next green bag. The colors are so fun. But it has some odd flanges of material on the side folds that will stick out oddly on the finished bag. I’m thinking I’ll stitch the flanges down before making the bag. I’ll take a look at it tomorrow and see if it will work.
You can see the flange on the left side of this bag.
Tomorrow is supposed to be another gorgeous day. I’m planning on heading out and doing some dog agility training in the morning and then hanging around home for the rest of the day.
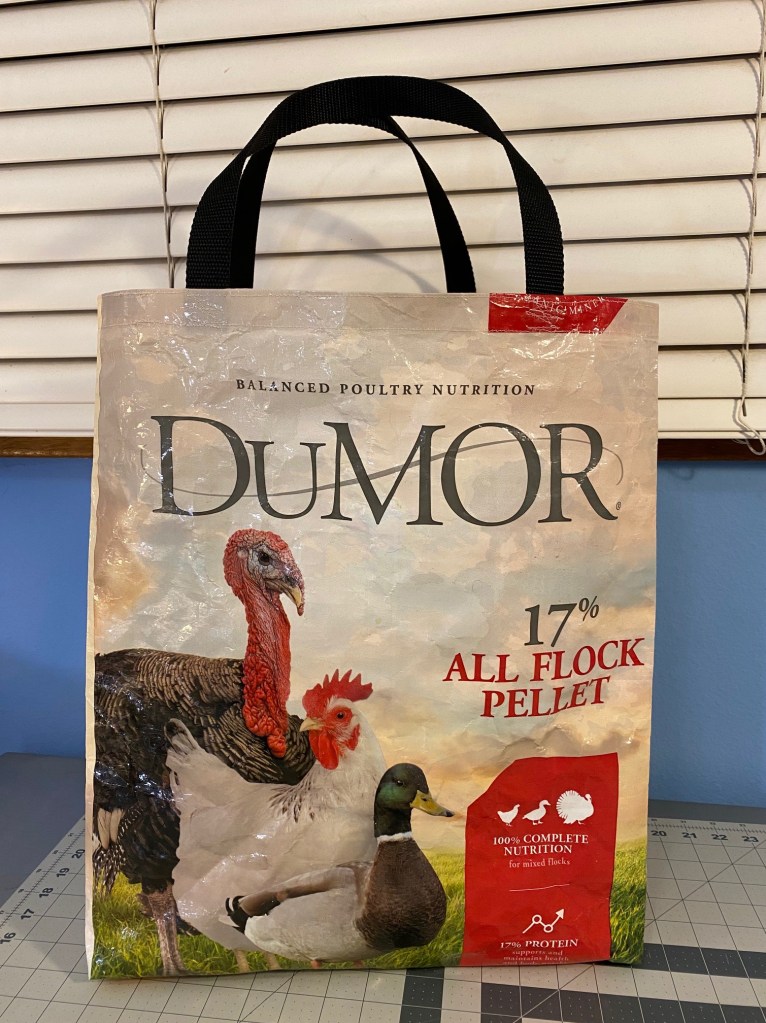
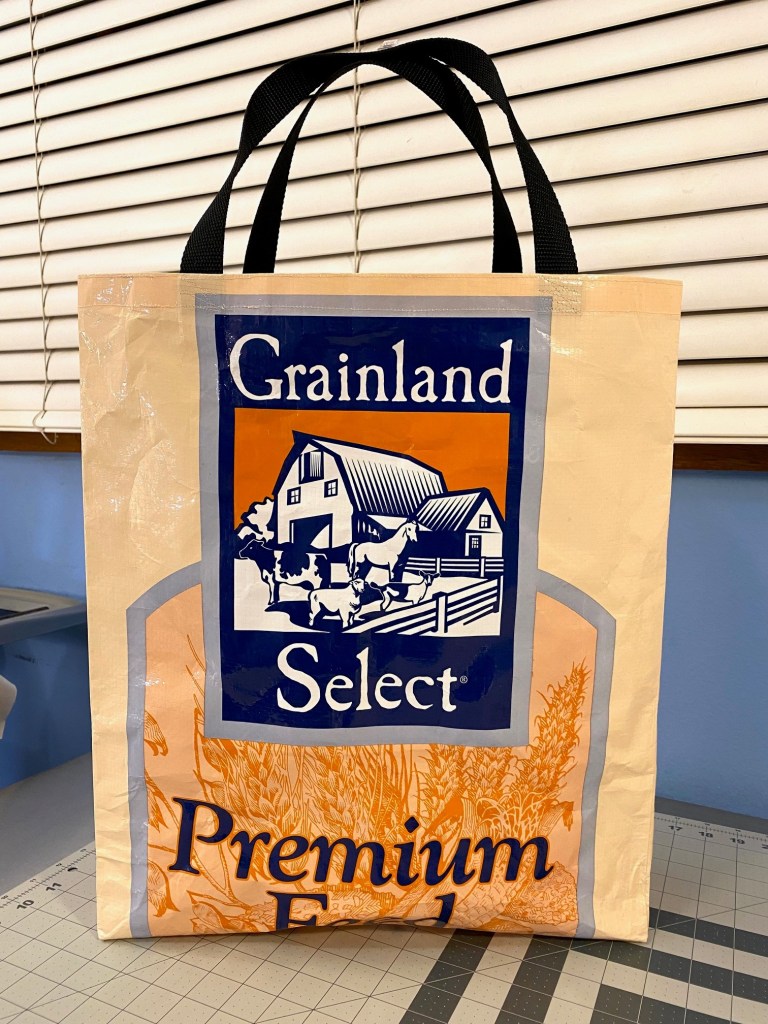
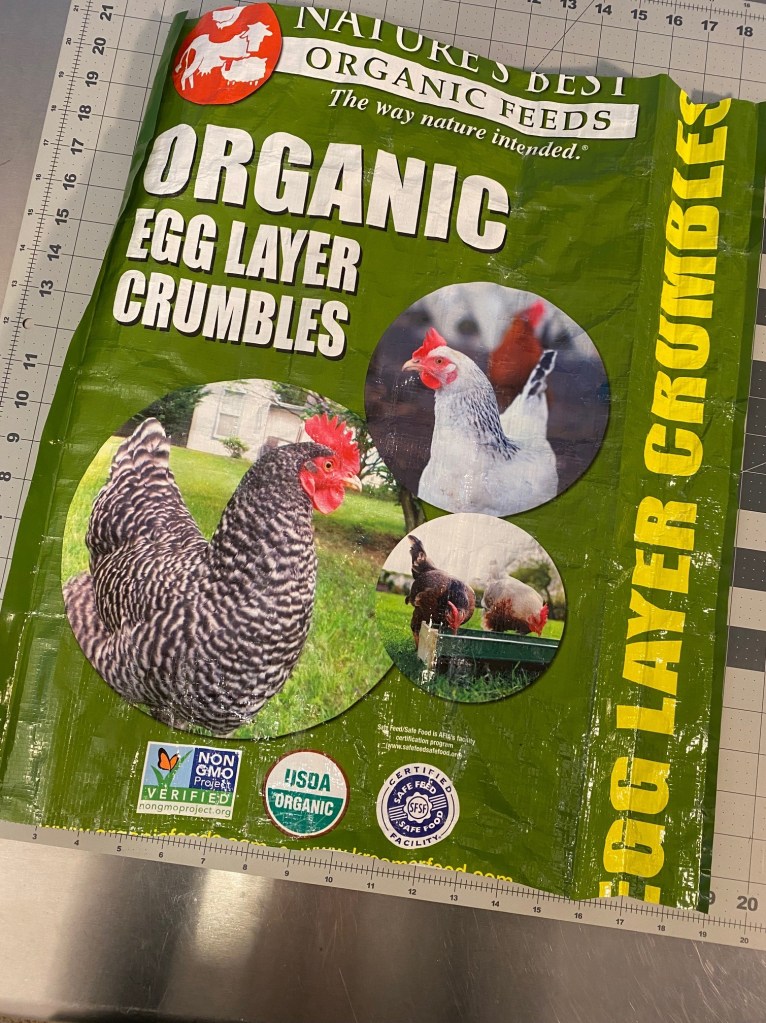
A couple weeks ago a friend of mine gave me a chicken feed bag, thinking I might want to do something with it. So I looked around on the internet and, apparently, making tote bags from animal feed bags is a thing.
And because I don’t do anything half-assed, I put out the call on Facebook that I was looking for empty feed bags and my friends really came through in droves. I think I must have at least 40 feed bags in my garage — horses, chickens, pigs, goats, sheep, and more chickens and more horses. Some really fun and colorful designs.
A Facebook friend even mailed me some all the way from Maryland! And tonight I decided that I was ready to dig in and make a bag. And I actually ended up making two!
The feed bags are made from a synthetic plastic coated fabric that has strong thread running through it. So it’s really strong, but it’s a little stiff. I knew that it would be very different than sewing on quilting cotton.
There are a lot of tutorials out there for making these totes. I kind of got ideas from several different ones and applied them to these bags.
I made the sheep bag first and learned a few things that made the chicken bag so much easier and quicker.
First, on the sheep bag, after trimming the bag square, I sewed the bottom seam first, cut squares out of the corners to make gussets, and then sewed the gussets. Once this was all done I finished the top.
On the second bag I trimmed the bag top and bottom square, and then finished the top and added the handles first.
This meant that I was doing all of this manipulation of the bag when it was a tube.
And that made it all much easier to manipulate. The top on the chicken bag was so much easier and quicker to sew and the finish was much nicer.
To finish the top I turned down about one inch at the top of the bag and then turned it over again. Then I marked where I wanted the handles, slipped the handle ends up under the fold and clipped them in place.
Then I ran a line of stitching along the bottom edge of the folded piece, enclosing the handle ends in the fold.
Then I ran another line of stitching about 1/8 inch from the very top of the bag, folded the handles up to catch them in this line of stitching and adding some reinforcing stitching across the handles where they overlapped the folded edge.
Here’s the reinforcing stitching.
To finish the gussets on the second bag I simply did it with the folding and flattening method and then stitched a line across the folded corner.
I did two lines of stitching to reinforce the gussets and then trimmed away the excess fabric.
The gussets were faster and easier with this method.
I also made the gussets on the fist bag a little do deep so I made them an inch smaller on the second bag and the proportions are better.
Most of the tutorials I looked at made the handles from strips of the bag fabric. But I decided to purchase some nylon webbing instead. I’m glad I didn’t spend time making the handles. I like the feel of the nylon handles much better. And they took a lot less time.
I’m guessing the second bag took half the time of the first bag. I just love figuring out quicker and more efficient ways to make things.
Here’s more photos of these fun little bags. Even the backs are fun!
A couple of the tutorials show people lining the bags, but I think it’s overkill for the purpose. I see these as very utilitarian… like for groceries or packing stuff to toss in the trunk of the car for the beach.
Big thanks to Judy Jaudon for sending me these fun feed bags!
I’ve gotten a few photos of Frankenbags in the last week to share with you.
First up is this bag from Sabine Müller-Rückriem from Germany. I just love these bright blues and greens together. She’s also included some cool curved piecing. And I love the peek at what looks like a really good lining!
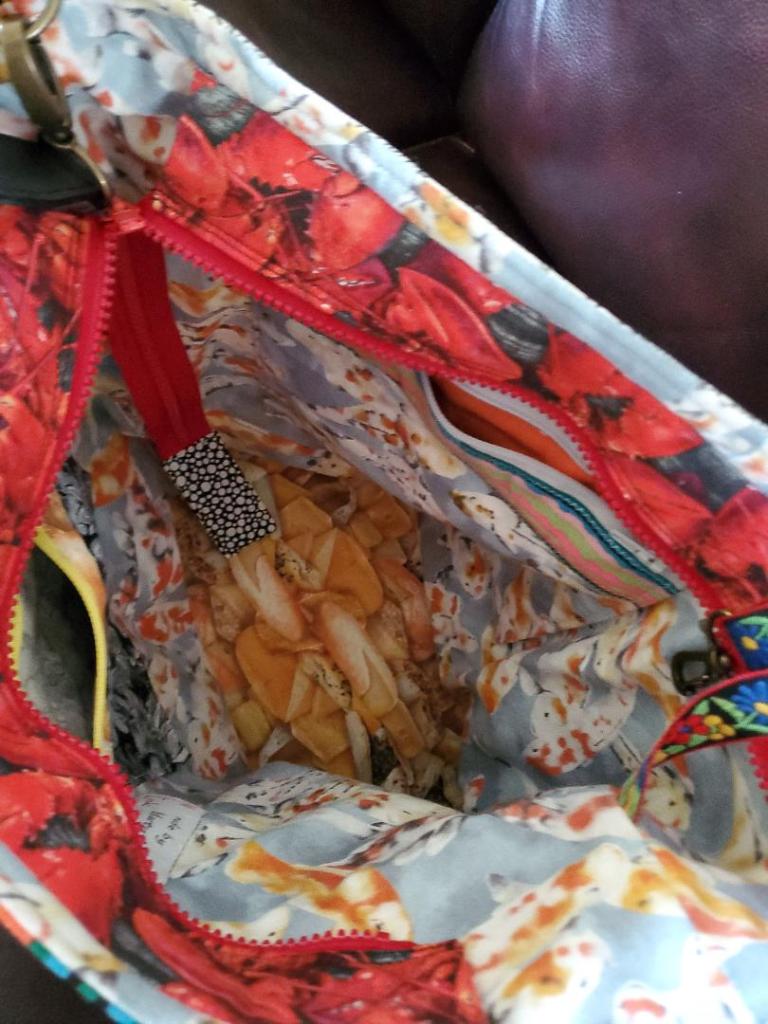
Next up is this bag made by Anita Goodson. She made her bag from a solid piece of fabric with a contrasting fabric on the bottom. And I love that she added a zipper placket. The inside of this bag with all the black and white is so cool! Love it!
Last up tonight is this bag made by Cookie Little. I love her saturated blues with the pops of green and the sunbursts are always so good! And she used one of my favorite fabrics for her lining! The last photo shows the key fob she added. It’s a great way to secure your wallet or keys.
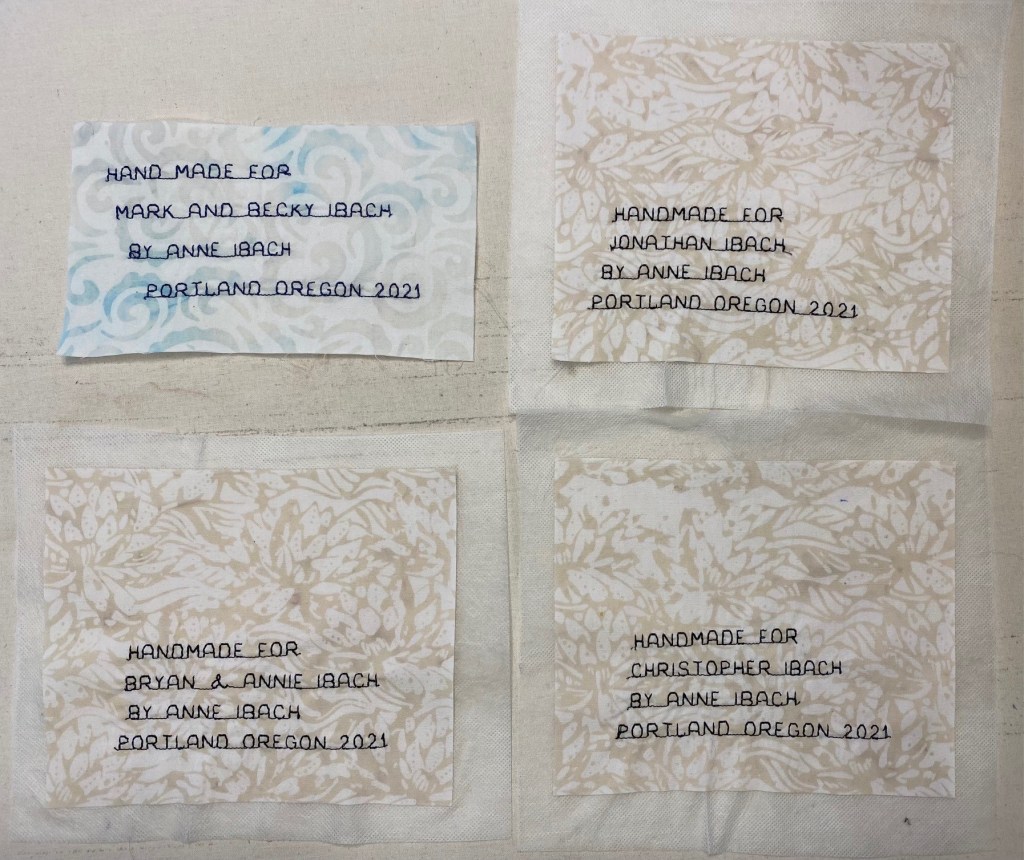
I was talking to a friend as I was walking the boys tonight and remembered that I needed to make labels for the five quilts I got back from my long arm quilter a few weeks ago. I’ve been thinking about this a little bit and had an idea of how I was going to approach this.
Here’s four of the labels.
My plan was to use my sewing machine’s memory function to make labels using a basic alphabet.
So after our walk, I hit the sewing room and started playing around. I made a label for the quilt I gave to my nephew and his wife for their wedding last summer. That label turned out waaaay too stiff and I wasn’t happy with it.
So I had been thinking that I had a couple of options for stabilizing these labels for stitching, and a couple of options for attaching them to the back of the quilts. You really do need to use stabilizer when stitching these labels. Without it you’ll have a puckered mess!
I thought maybe I could use a light heat and bond to both stabilize and attach the labels. FAIL! The paper was too stiff to pull away from the stitching. So I tried using some water soluble stabilizer that I’ve had for a few months. And then I though I could use some fusible webbing to attach this to the quilt. And I liked how it worked.
I used some practice labels to test out these different stabilizing and adhesive options and bonded them to a quilt sandwich I use while setting up my machine for free motion quilting.
The stop one was done with the fusible webbing. It’s soft and more smooth. The bottom one is using the light Heat and Bond. it’s too stiff and it doesn’t look as good. So, I will use the fusible webbing once the labels are done. Then I’ll do a simple blanket stitch to finish the edges of the labels.
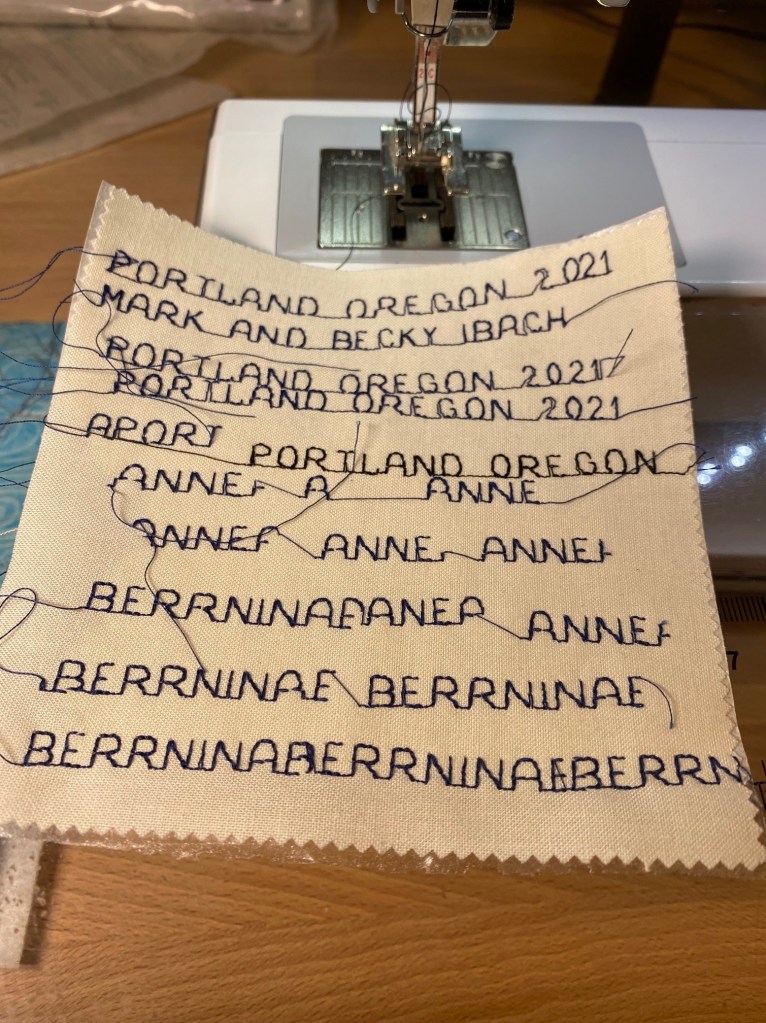
It took me a little bit of time to remember how to set up strings of words in the memory of my machine. So there was a lot of stitching!
And then, once I figured out the memory part, it took some time to figure out how to make the machine stop once it finished the text in memory, rather than repeating the same text over again.
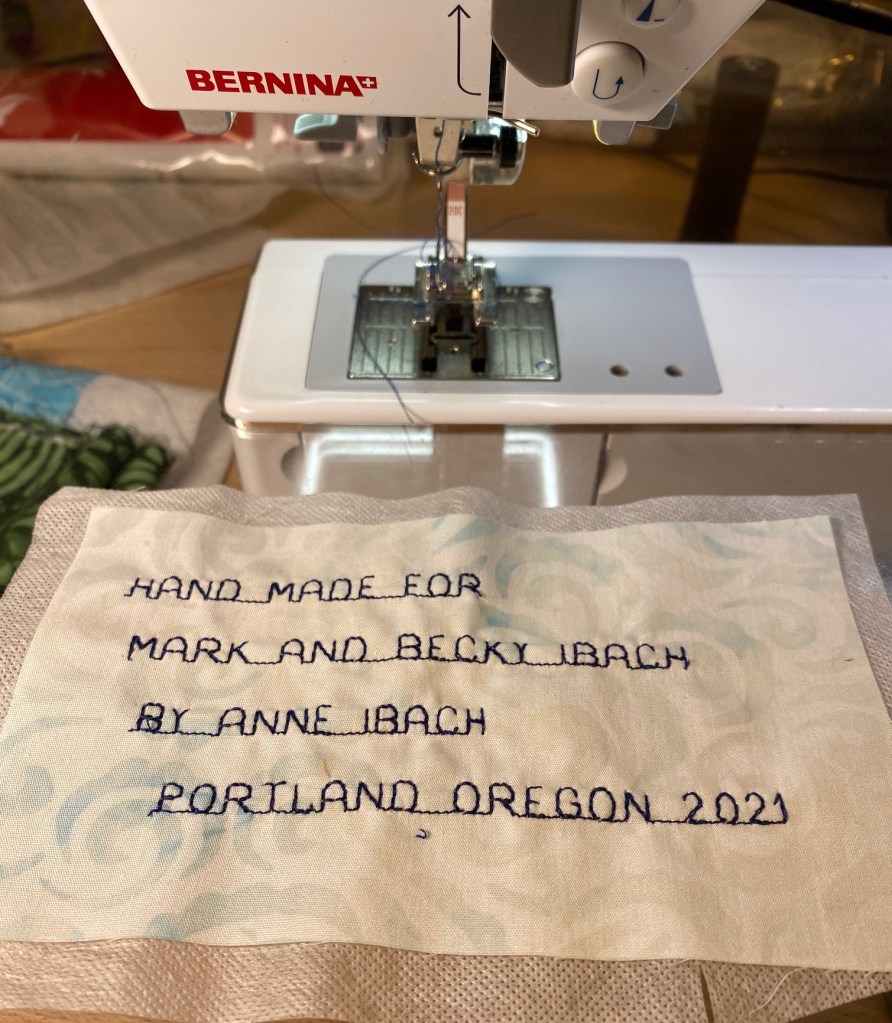
After about an hour, I had it all figured out and I made the first label on the light blue batik. I thought it was great until a friend pointed out that I had misspelled handmade. So, I will remake this one.
I made the three beige labels assembly line style. I started with the bottom line on each label and sewed that line onto all three labels. Then I moved up line by line until I was done.
Oh, and something to remember for the next time I make labels. Batik fabric works much better! It has a higher thread count and helps keep the fabric flat with all that stitching. I was using some Kona cotton for my test piece and it was pretty puckered.
Later this week I’ll finish up the labels and get them attached to the quilts. I want to get them shipped in plenty of time for the holidays. And that’s getting closer every day!
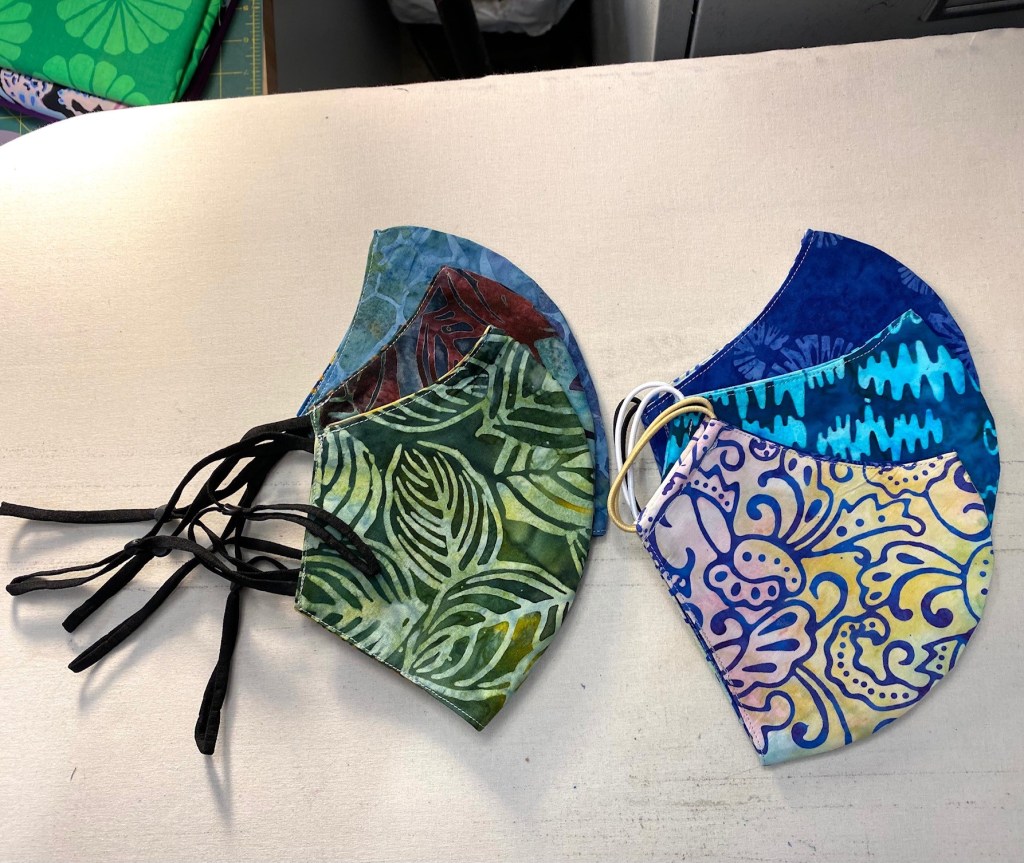
I did do a little sewing over the weekend. I made six masks for some friends who had asked for more. I have made them masks since the pandemic hit and they love the fit of these.
The husband wears hearing aids so has trouble with some masks. He really likes the adjustable ear straps on the masks at the left. All of these masks are made with two layers of batik with one layer of fusible nonwoven interfacing. You can find the pattern for my masks in this blog post. If you make masks, you should give this pattern a try. I’ve made a LOT of different mask patterns and this one fits the best, is really comfy and is really easy to make. Everyone I’ve made them for absolutely love them.
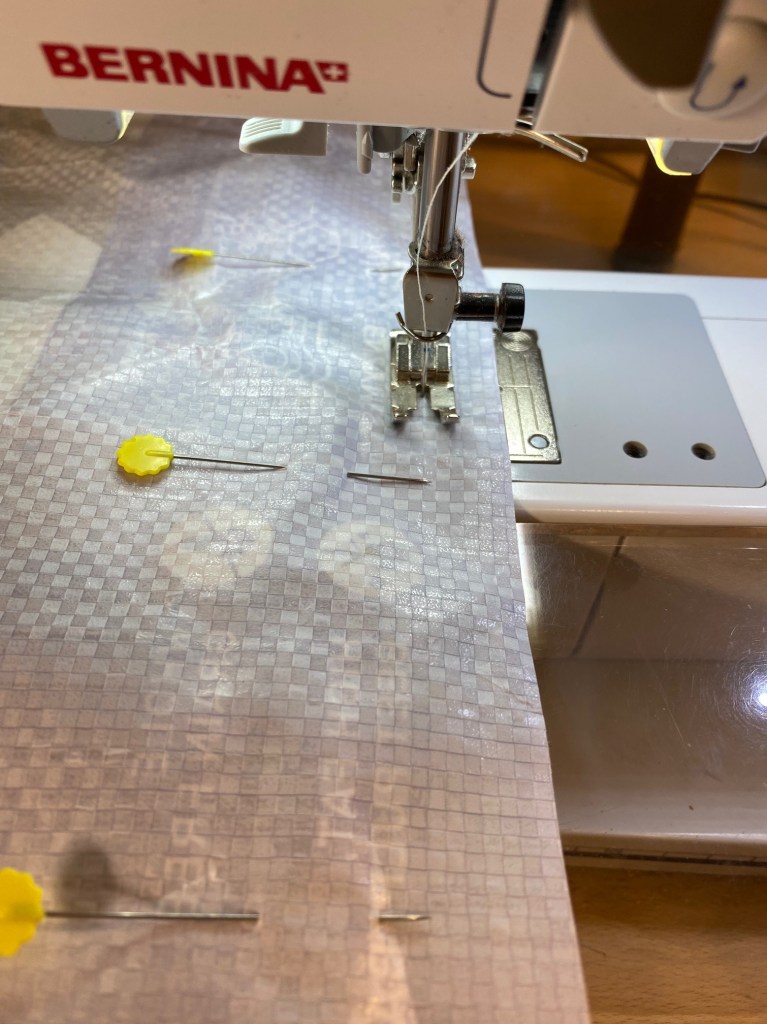
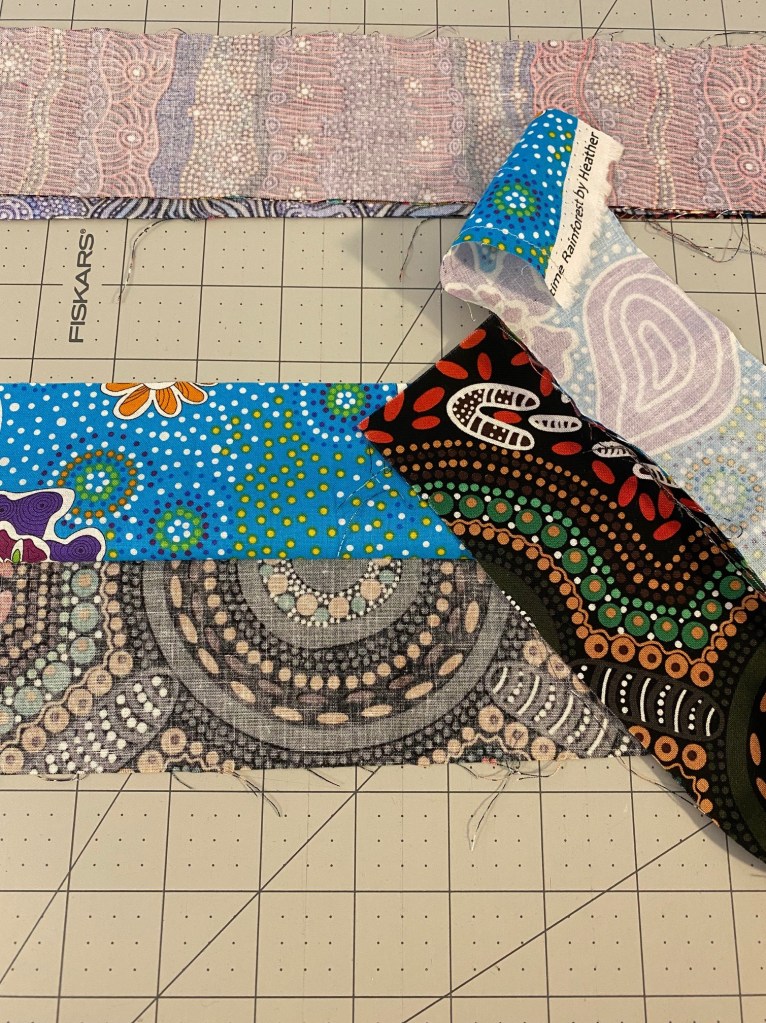
I also made a few strip sets for my Aboriginal fabric trip quilt.
I quit sewing after I sewed two strips together with the wrong and write sides facing each other. I haven’t yet been able to make myself pick this seam out and start over.
Luckily, one of those fabrics is nice and dark so it will be easy to see the stitches. Damn.
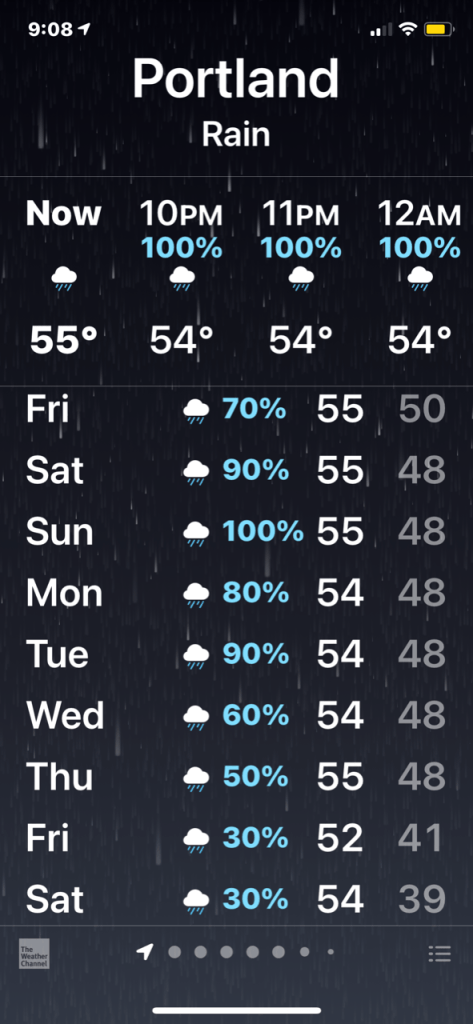
Some significant rain and wind storms were predicted for my area over the weekend, but they never really materialized. So it was a pretty nice weekend and the boys and I got some good walks in.
This is such a gorgeous time of year here in Portland.
On our mid day walk in the rain this afternoon I saw the biggest mushrooms I’ve ever seen!
The weather is looking pretty dreary here in Portland. It looks like the rainy season has definitely arrived.
I worked pretty late last night and had to be on a Zoom meeting this morning at 8 am, so I made a point of stepping away from my desk this afternoon for a full hour-long walk with the boys. There would be no evening walk with all this rain.
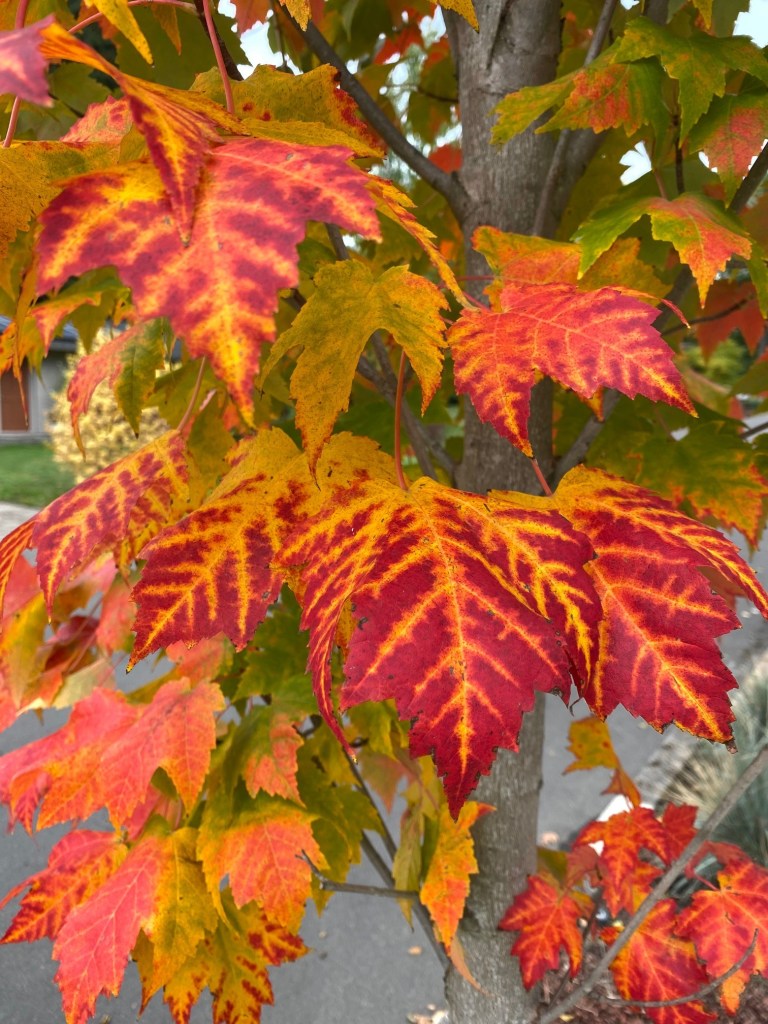
I ran across the prettiest little maple tree on our walk. Just look at these gorgeous colors!!!
Since I was going to be in the house all evening, I decided to sit in on the monthly meeting of the Portland Modern Quilt Guild. I had the meeting running on my laptop while I did some stuff in my sewing room. I straightened up a few things, cleaned off my cutting table, and put together some fabrics for the KFC and low volume white fabrics quilt I’m thinking about.
It’s all bundled nicely in a big zip lock bag and has been put away in the closet in my sewing room. I’m going to force myself to finish at least one other quilt top before I start this one.
Here’s some of the Kaffe Fassett Collective fabrics in this bag.
There are 12 different KFC fabrics and 12 different white with black fabrics. it’s entirely possible that some of those fabrics will change before I actually start cutting.
I did sew three strip tube sets for my Aborginal trip around the world quilt while I listened to a presentation by a quilt historian in the guild meeting.
I’m a little anxious to see what this quilt will look like when I get more blocks done. It’s definitely going to be chaotic. I’m hoping it will actually calm down just a little once there are more blocks and the patterns made by the diagonal lines is more apparent. It will probably look totally different!
Those fabrics are so gorgeous! Here’s another strip set.
And here’s the third one I made tonight.
I might make a few more strip sets before I start cutting the ones I made tonight. Then I’ll be able to have a good stack to pin to keep my hand busy during long Zoom calls.
I’ve had a little flurry of Frankenbags appear in my email box and social media feeds over the last few days. So here’s the latest collection.
This first one was made by Jan Ballentyne in New Zealand. Jan made this bag from fabrics that were left to her by her dear friend who passed away. She said it took her some time to get to where she could work with the fabrics. She will gift this bag to her granddaughter Lily when they are able to visit each other again.
This story just makes my heart feel like it’s getting too big for my chest! What a wonderful and loving gift to make.
This next bag was made by Marty Link. She did a lot of customization to this bag, which I love. She made the handle just a single strap attached at the side seams of the bag… which I’ve actually been thinking about doing, and now I think I have to do it!!! I do have some hardware that I purchased a couple of years ago.
She also added lots of pockets and some foam to make the bottom more rigid. I love it that I get so many ideas from all these photos that my readers submit!
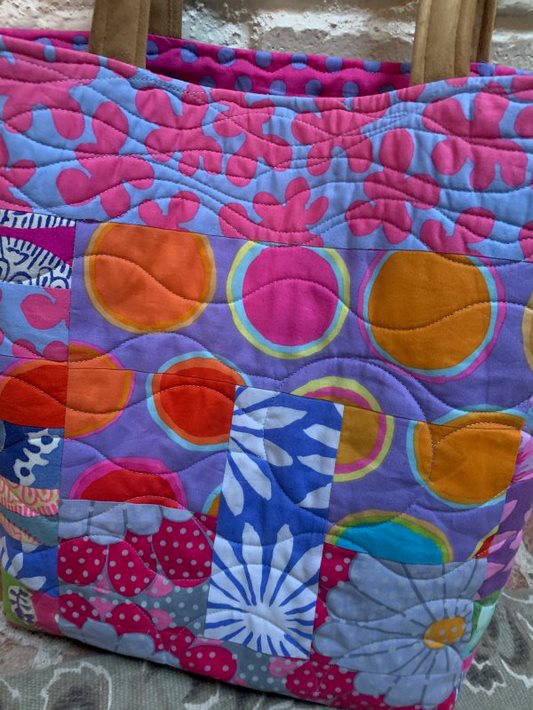
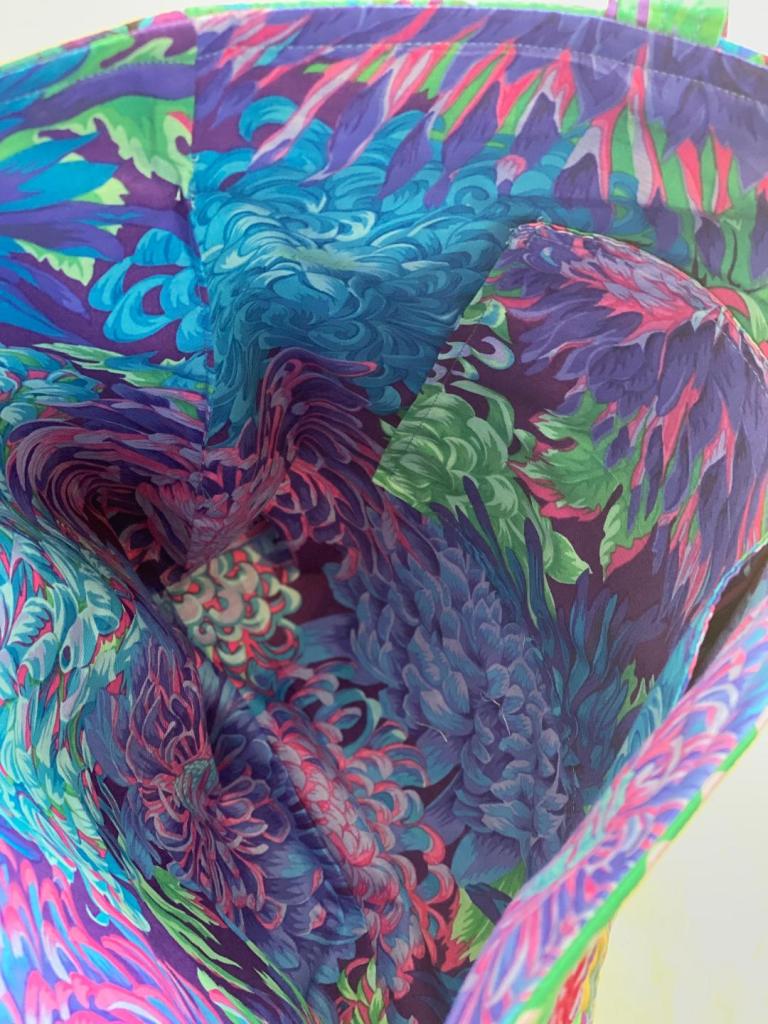
Next up is this bag from Laura Fitzgerald. She used Kaffe Fassett Collective fabrics that were left over from a quilt she made. I just love all these cool greens with the blues! I love the way she did her piecing. There little bits of organization, then all kinds of wonderful chaos! And hey… y’all are knocking me out with your linings! No beige linings here!!!
This next bag was made by Judy O’Connor. For her handles, she used some cork that she had laying around that she knew would be perfect for a project some day. And the bag is made from really lovely batiks. I love the simple horizontal strips with the little dragon flies. And those diagonal lines are fantastic!!! I just love batiks and this bag looks so squishy and comfy!
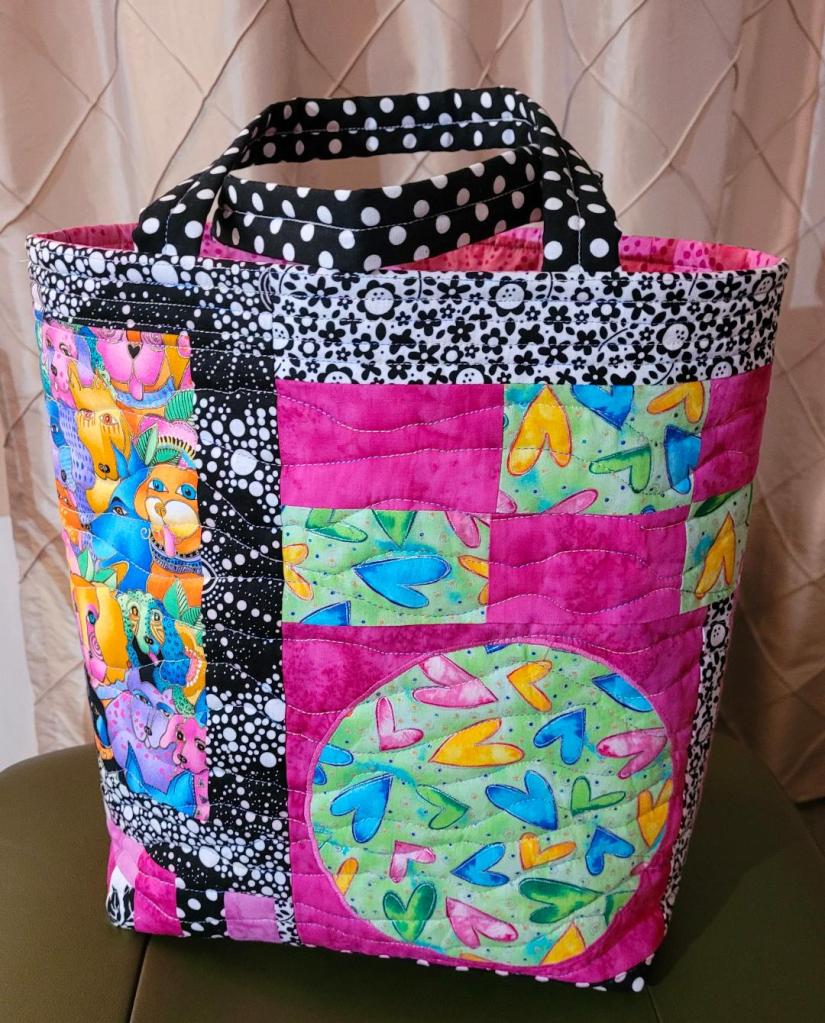
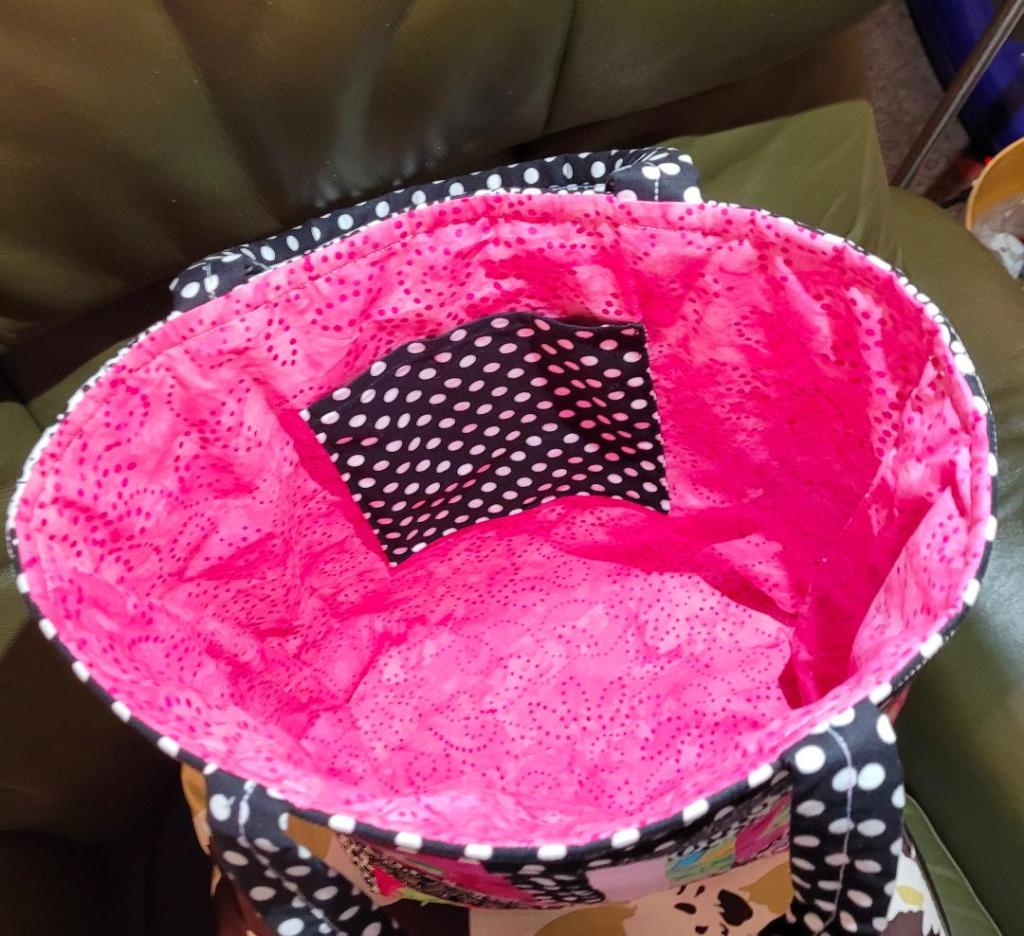
Next up is this bag made by Niki Sager… it’s pretty freaking amazing! First off… I love the black and white crumb piecing. And the way she combined it with those little cat panels… so good! And that fun panel on the other side with all the strong black and whites and the little touches of pink… well, it just all works so well! And look at that lining. Bazinga!!! Love it!
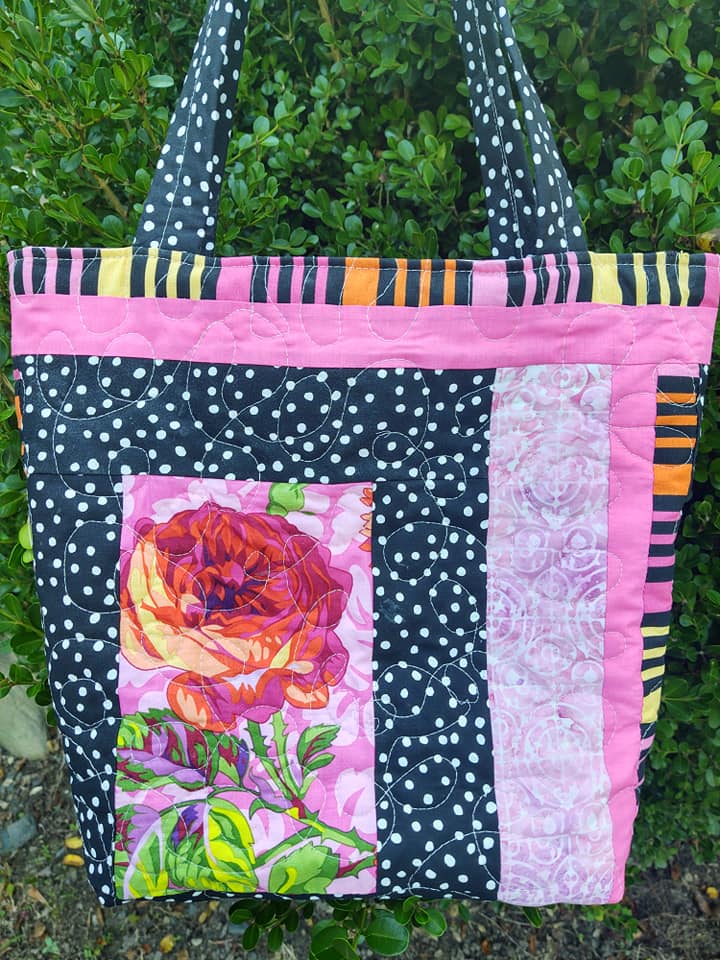
Last up tonight is this bag from Anita Goodson. first off… I just love the print on the front. I know I have some of that in my stash, but I can’t think of the name. I love those big floral blocks with the graphic black and whites. And those stripes across the top and sides play so well with the blooms. Very nice!
Thanks to everyone who sent photos. This was a really good batch of bags. And now I’m feeling a little of that inspiration I’ve been looking for!