Itching to Get Started on My Next Quilt

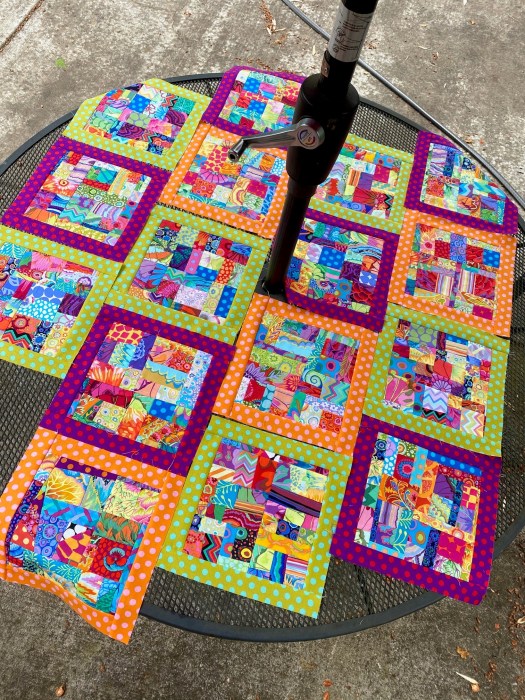
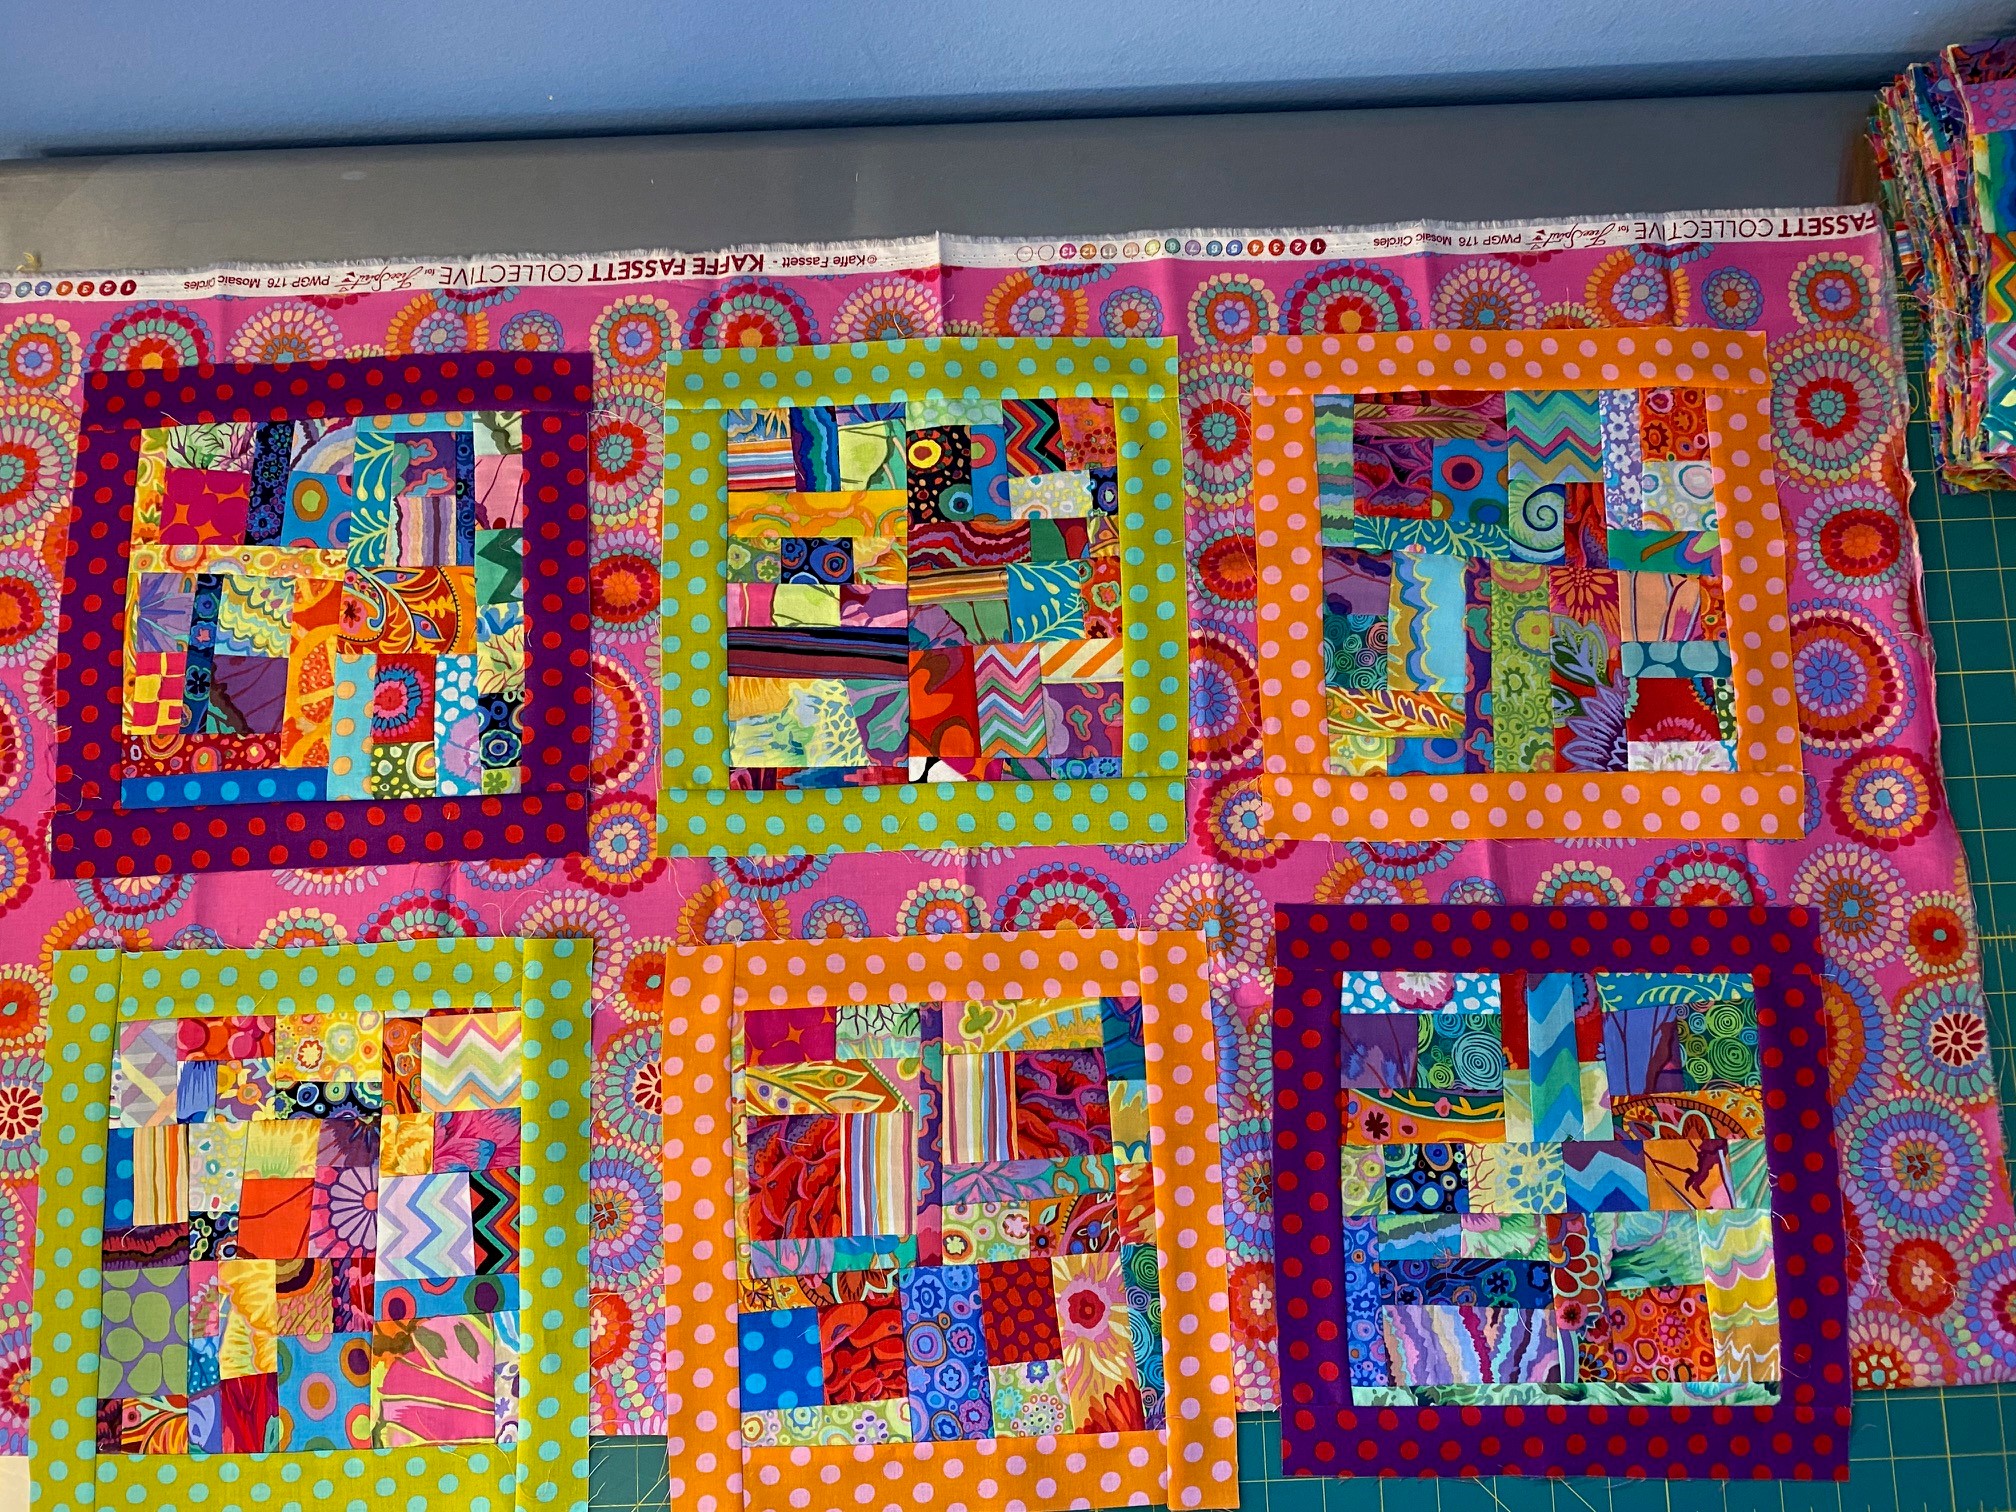
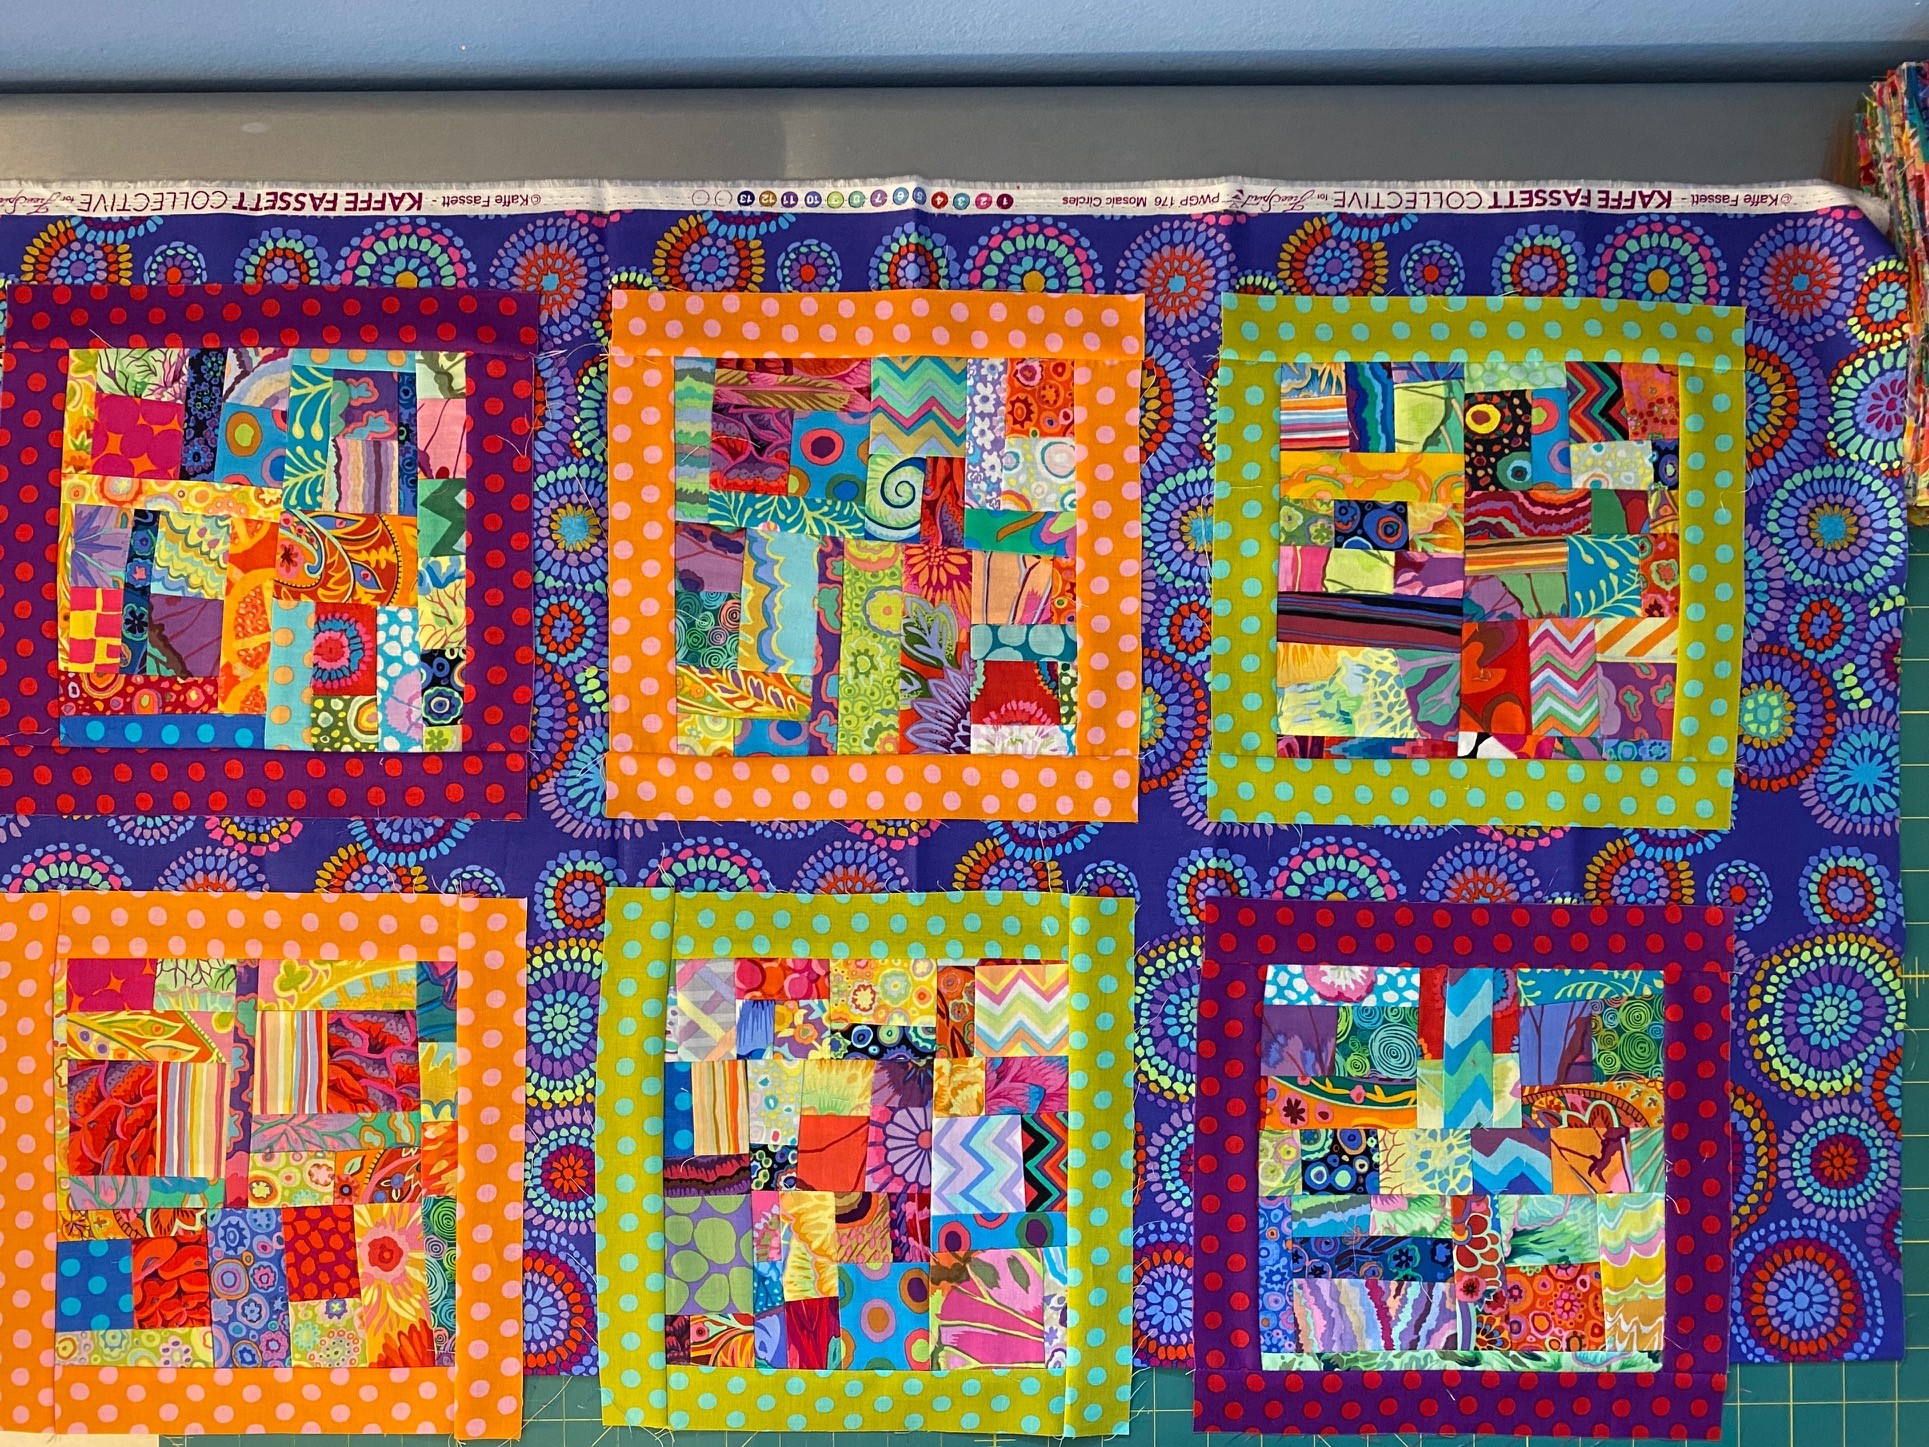
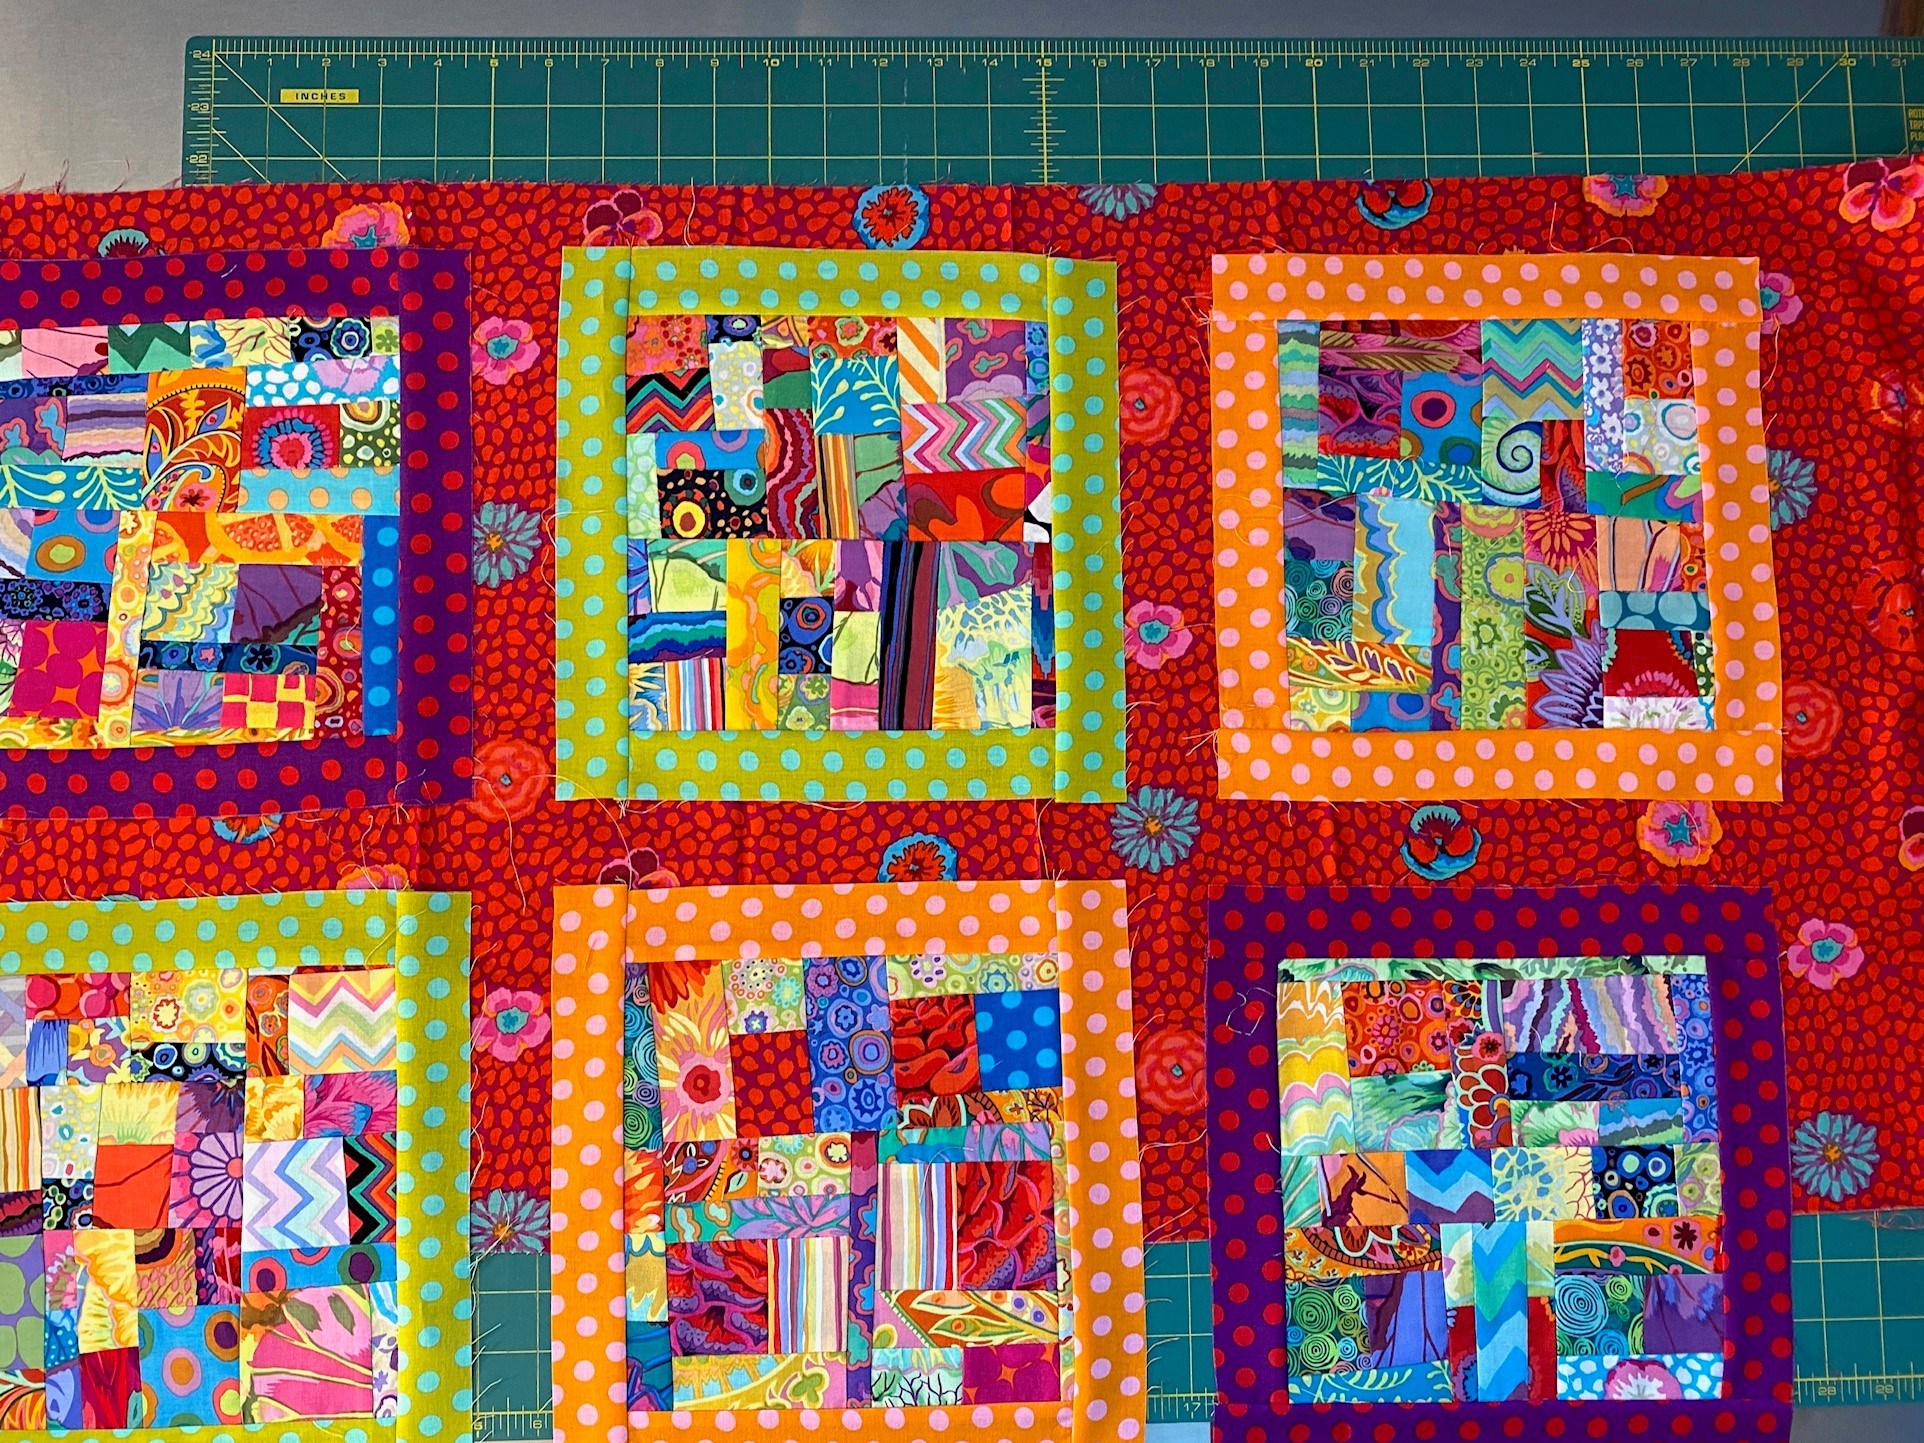
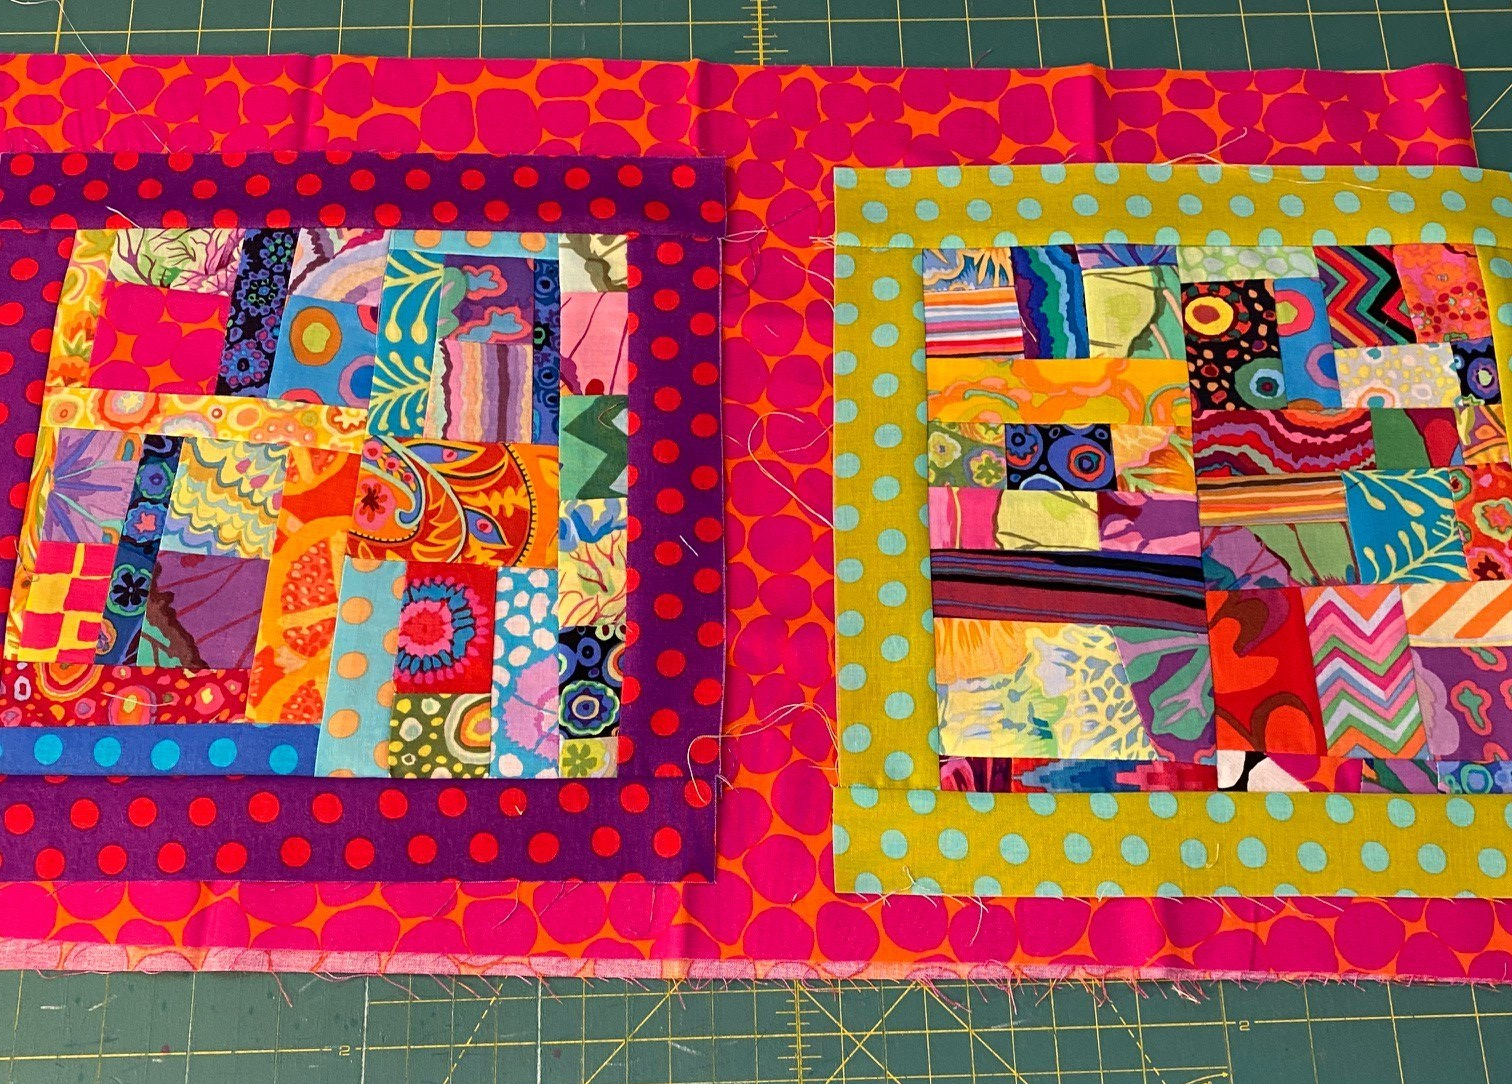
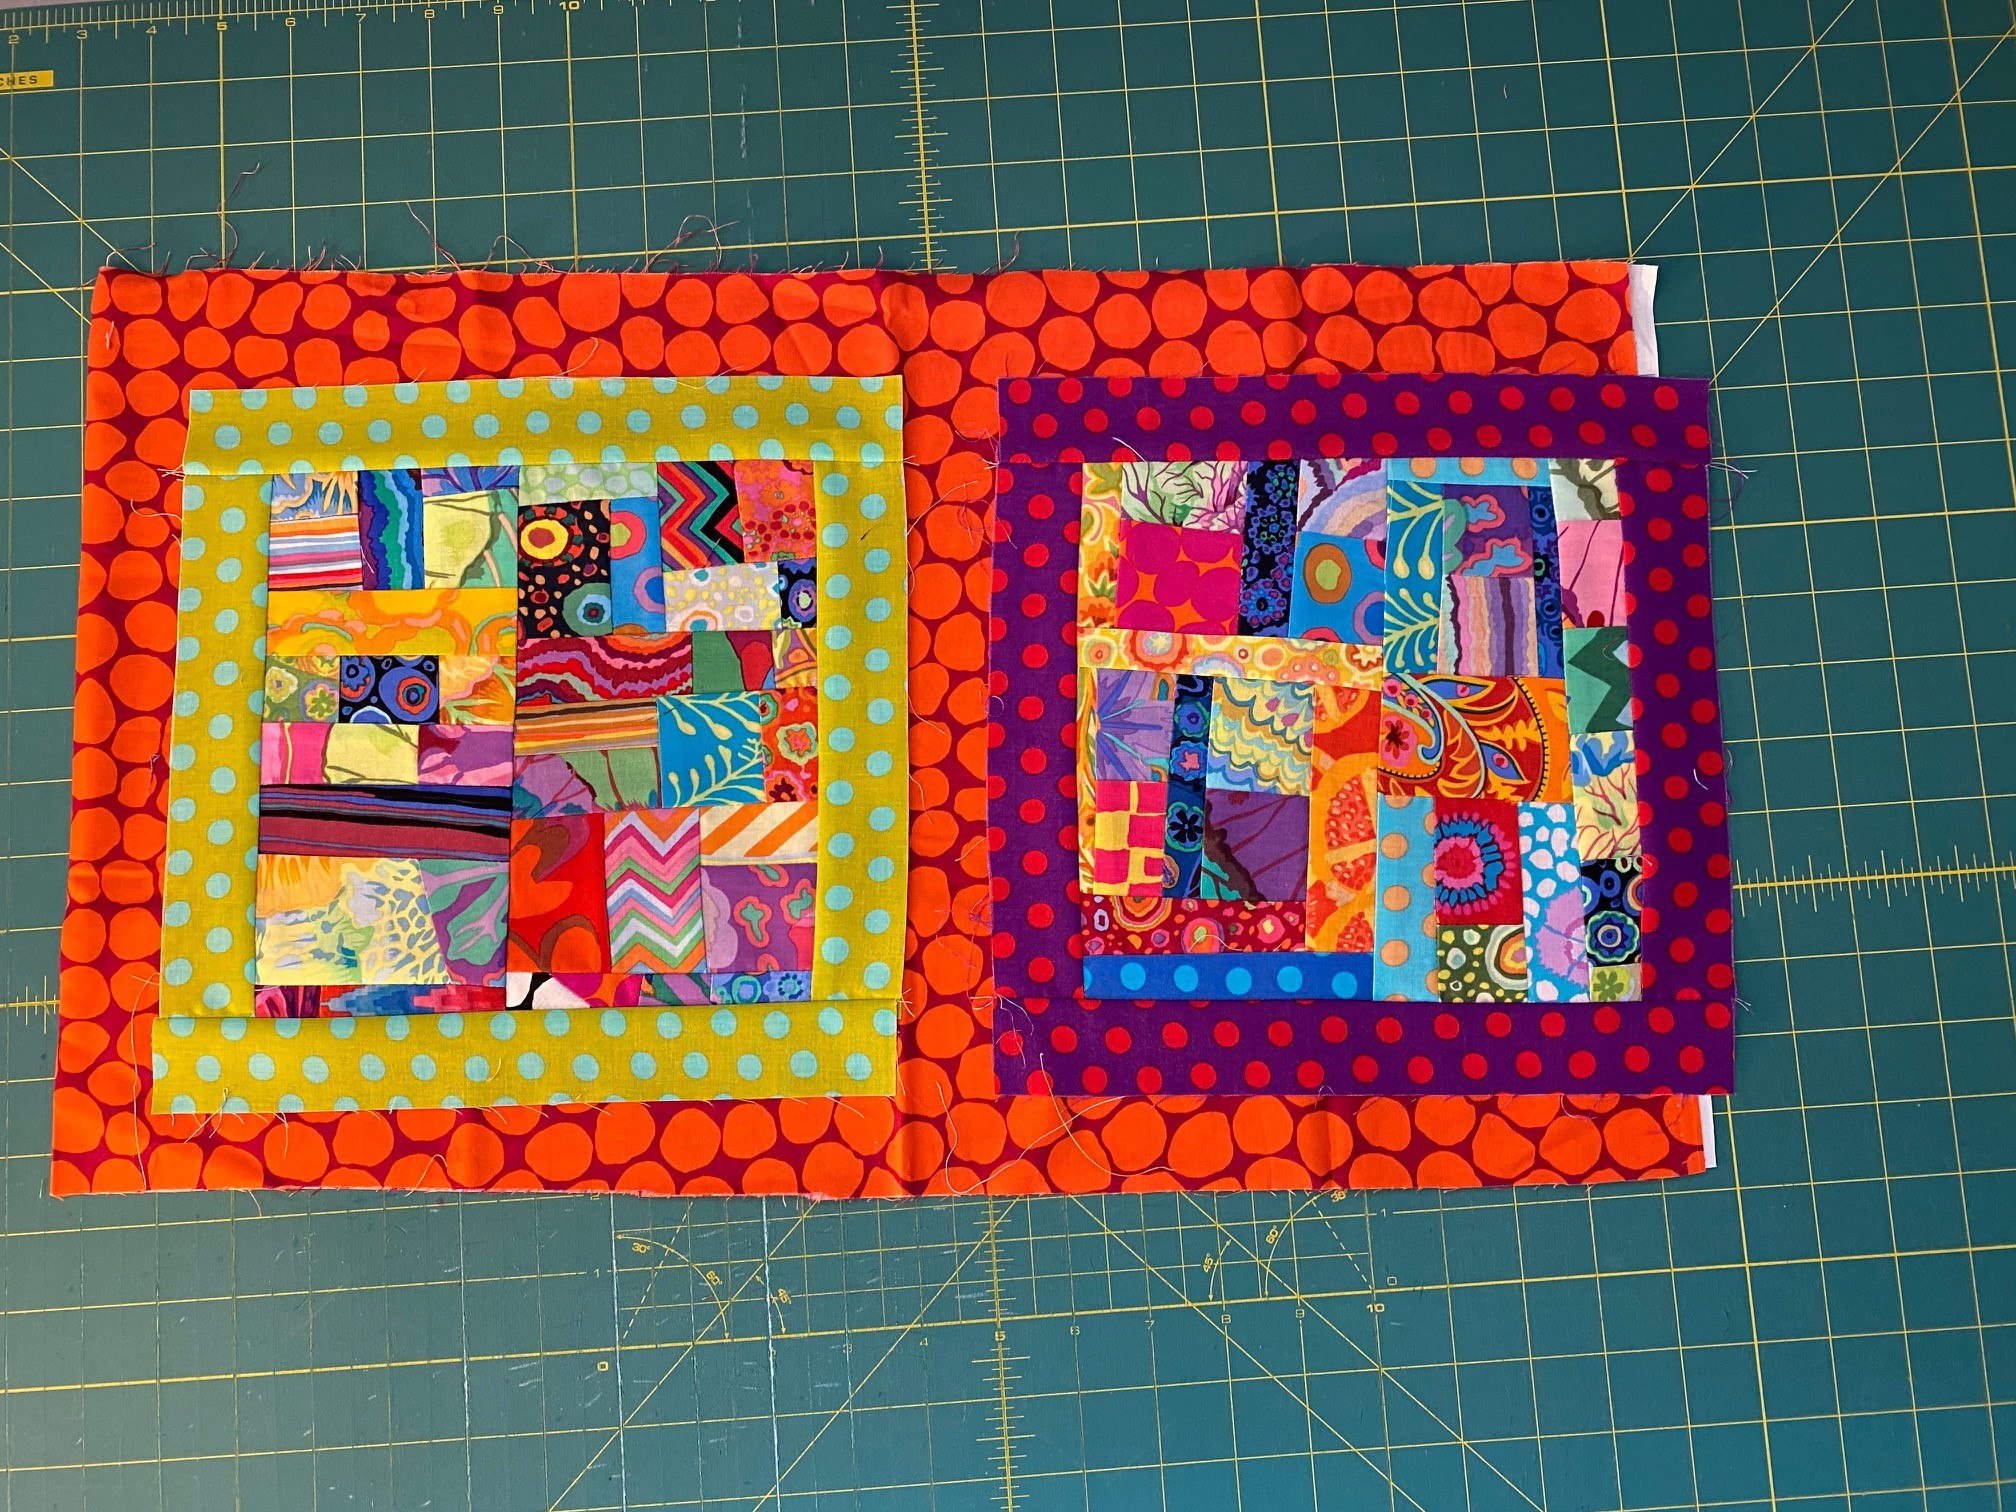
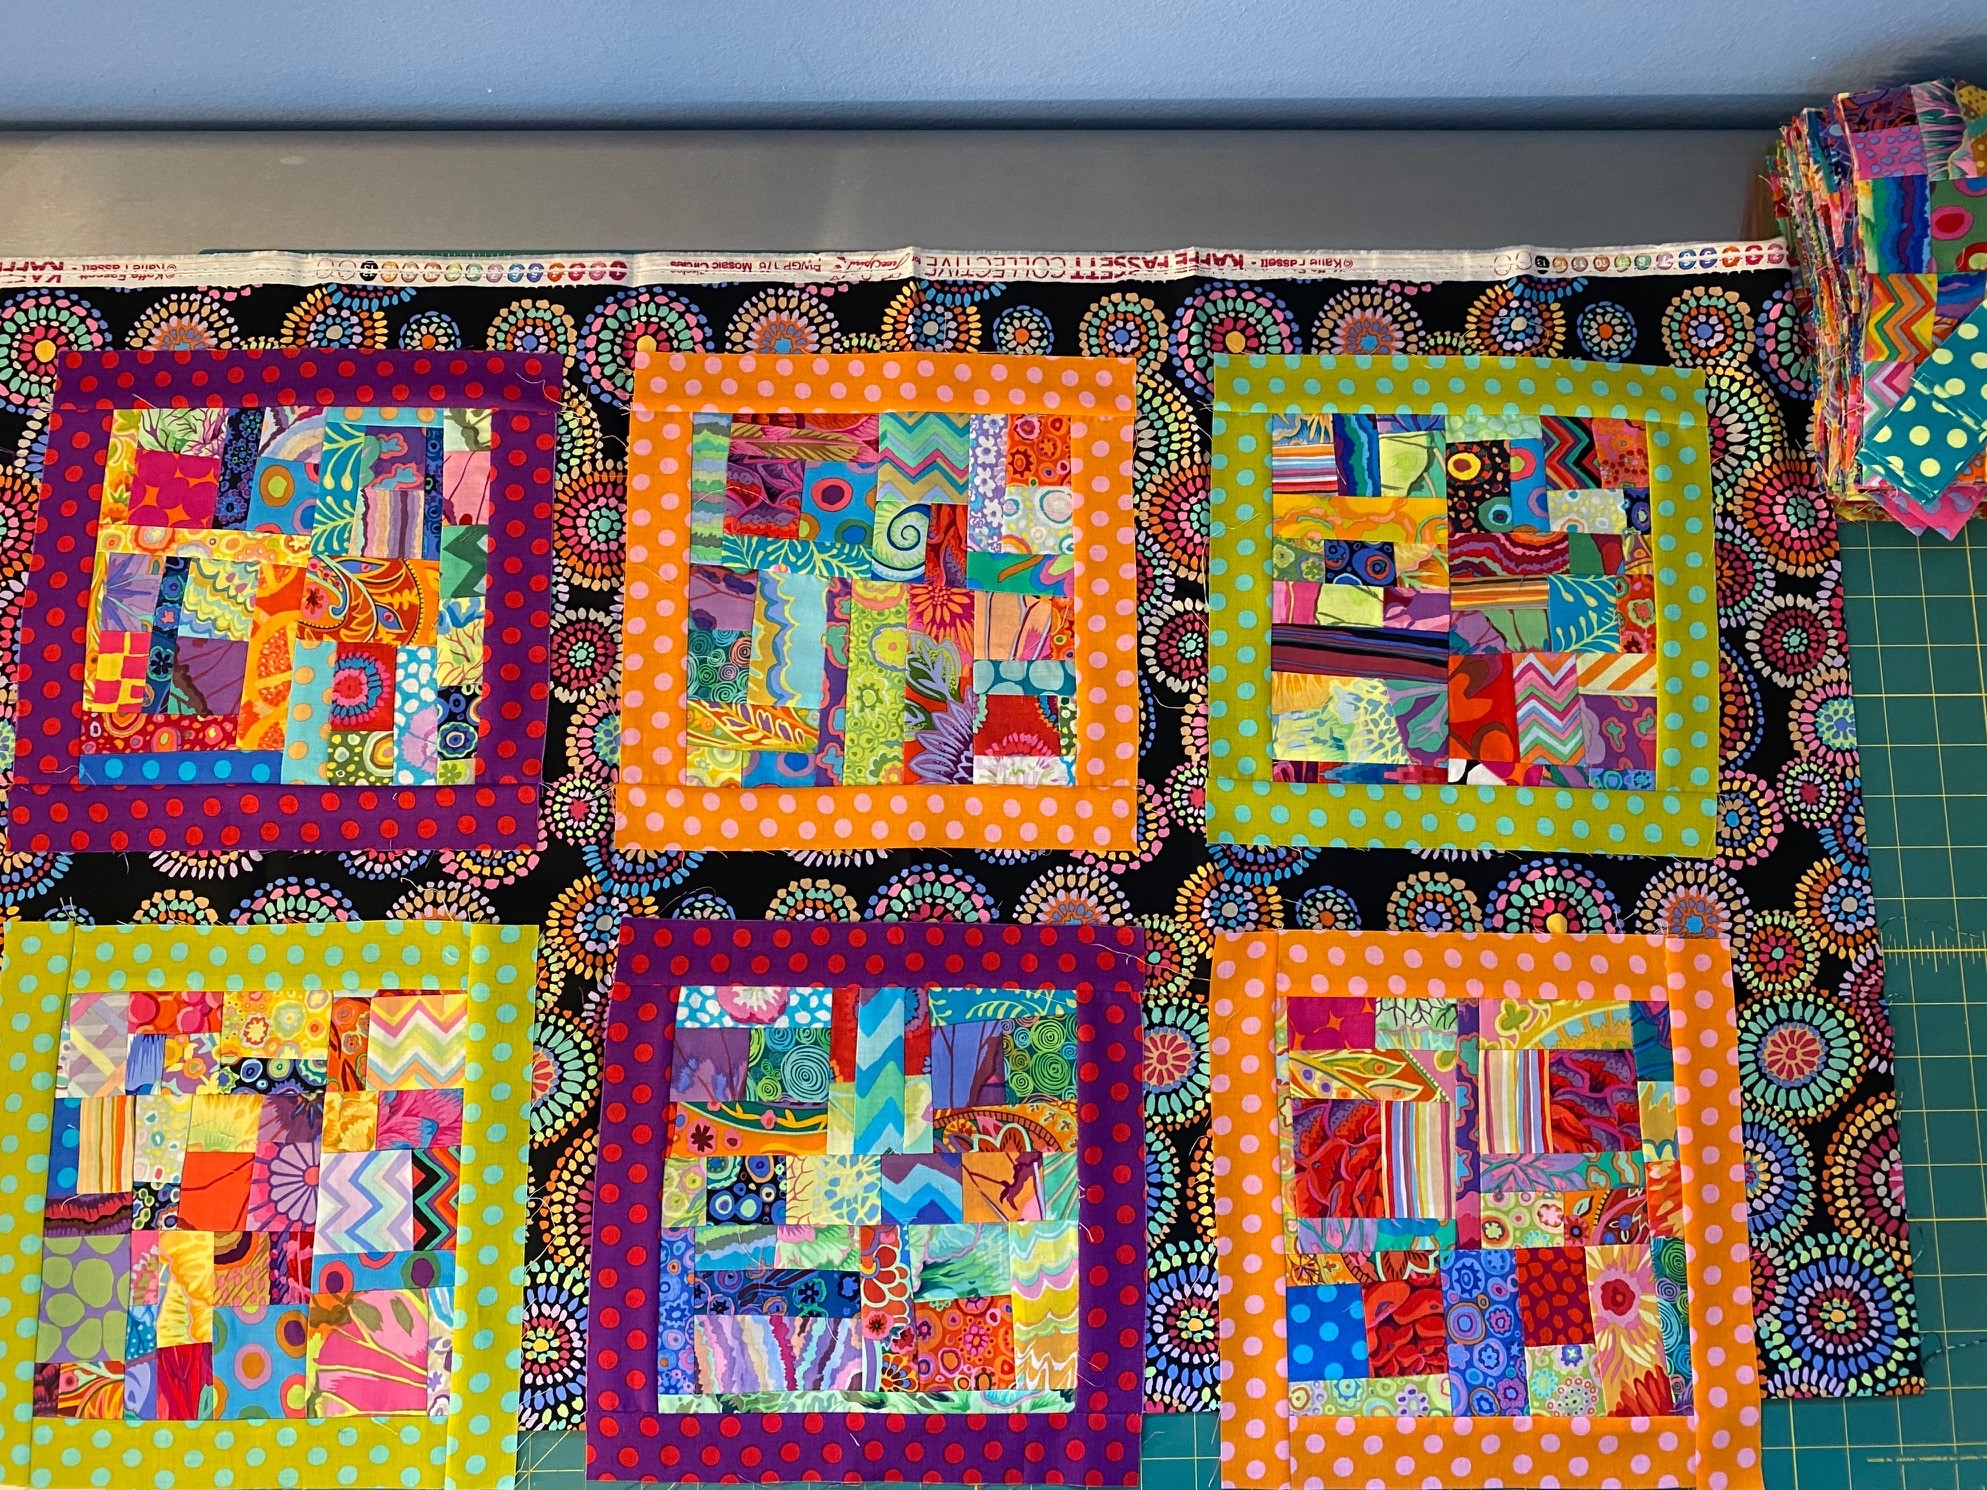
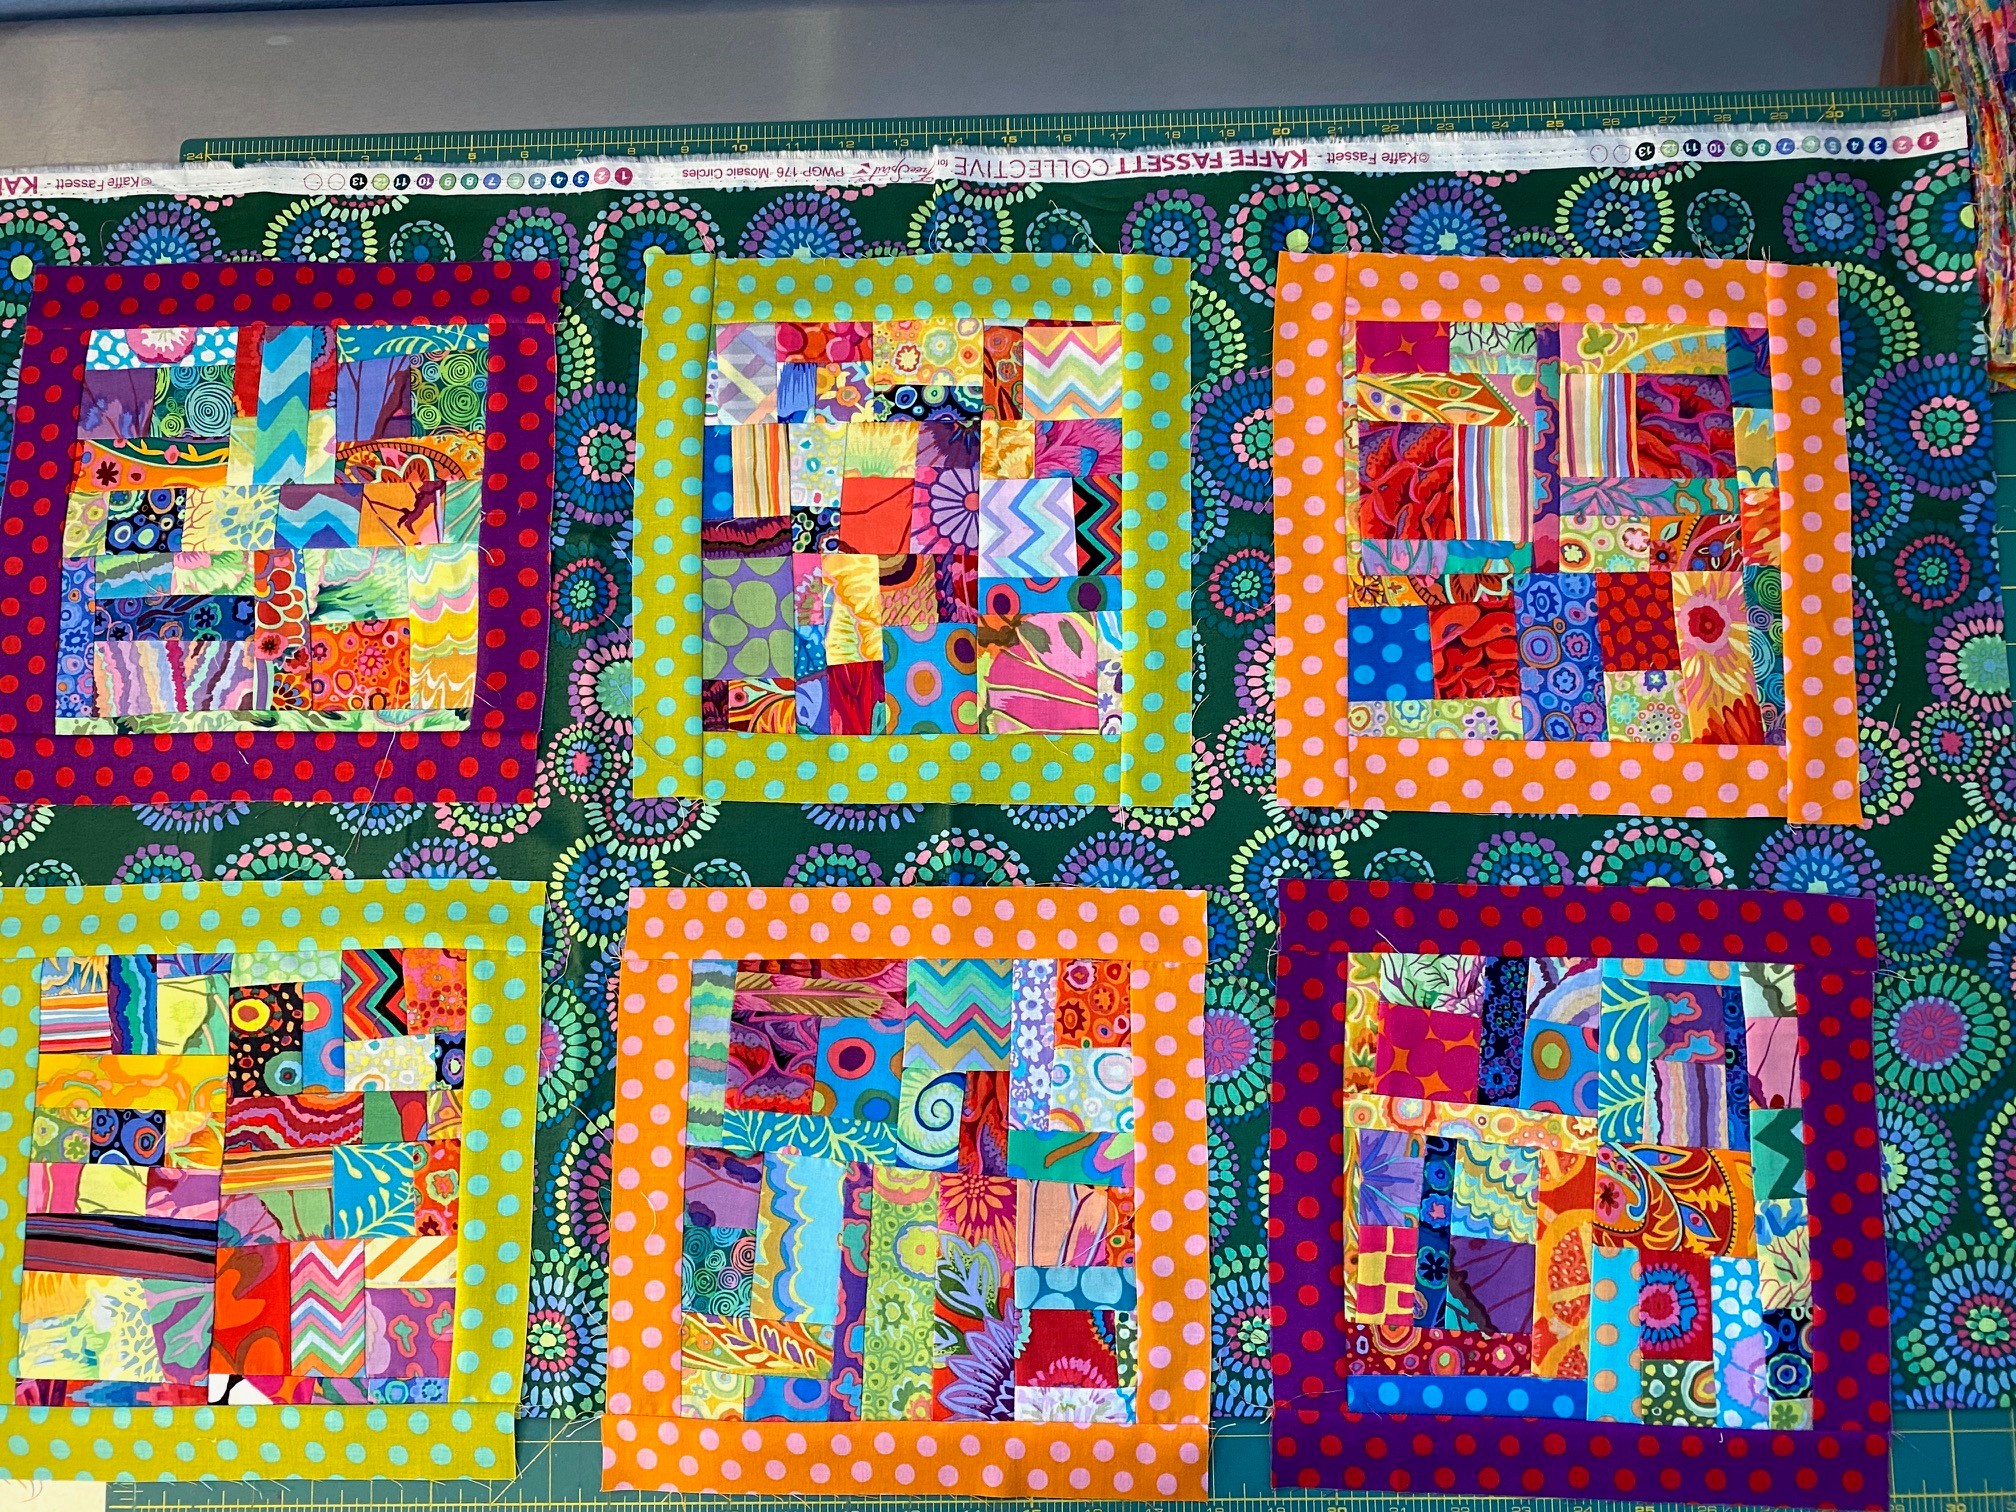
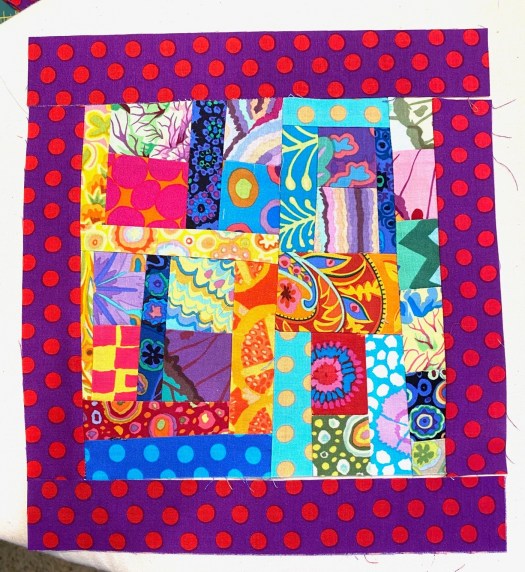
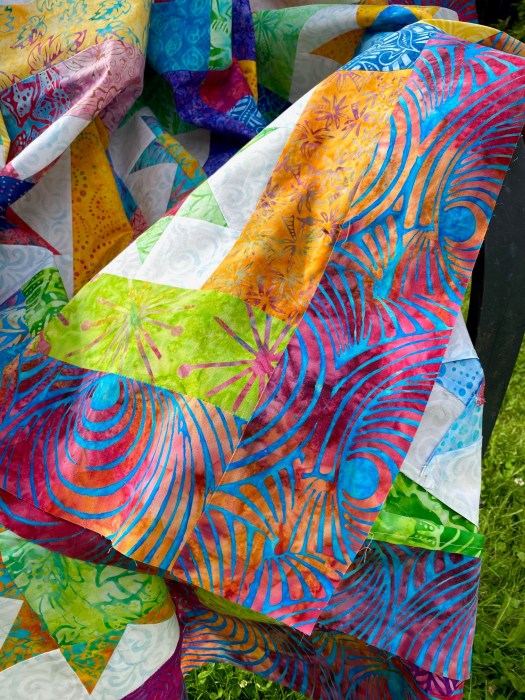
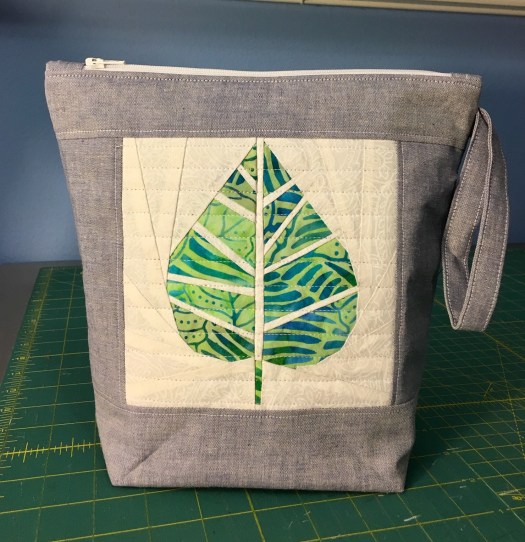
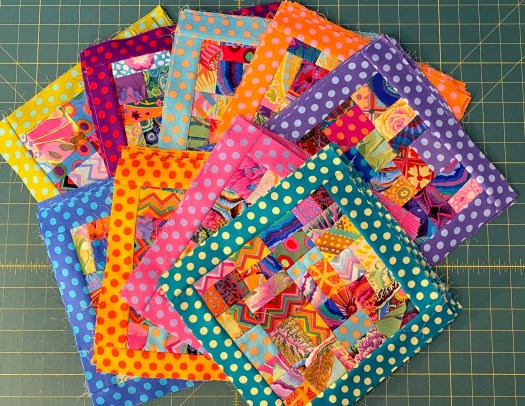
I’ve got all the borders and sashing sewn onto my crumb blocks and have set them aside until I get my design wall cleaned off. I’m not going to show what I decided on for the sashing until I can get a more complete photo, but I’m really loving how it’s turning out.

I chain pieced the sashing onto two sides of each block in the last two evenings. So they’re all ready for the design wall.

r7

That’s 63 blocks all connected by thread. I have a handy little tool that I use for separating large quantities of chain pieced blocks like this. It makes it go really fast. I got them all pressed and they’ll wait a couple days.

I will finish up the scrappy hexagon quilt top today. I only need to sew a few rows together and it will be done. It goes fast because the blocks are big. I want to get a portion of that off the design wall so I can take photos of how I put the partial rows at the top and bottom together.

My next project is probably going to be an Aboriginal fabric string quilt. A friend of mine just made one and I’m in love with it. Here’s my friend’s blocks. They all have paper on the back to she can’t put them on her design wall.

r14

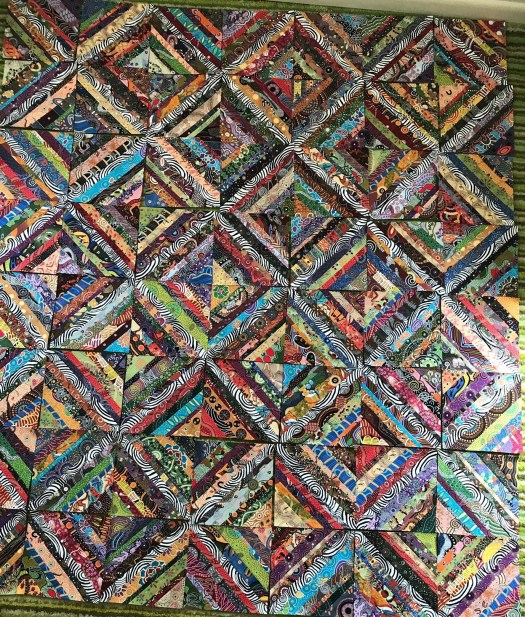
And a close up so you can see the amazing fabrics. I just LOVE this quilt and can’t wait to get going.

close up

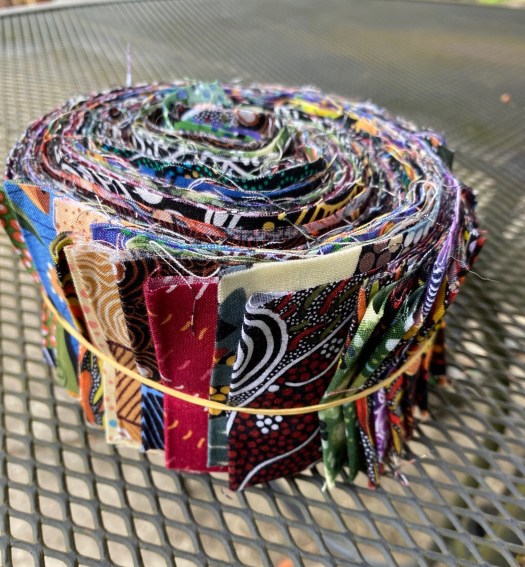
My friend sent me a bunch of her Aboriginal scraps, all neatly organized and labeled. There are strips of varying widths and lengths, triangles of different sizes, and larger pieces of fabric that I can cut strips from.

r10

She even sent a roll of 2.5 inch WOF strips that she cut. I think each fabric only appears once in this roll, and a rough count last night tells me that there are more than 50 2.5 inch strips — so enough to make another quilt! I’m going to look at some jelly roll quilts to get an idea of what I might want to eventually make with these. I have a bunch of black and white fabrics that I might combine these with.

r11

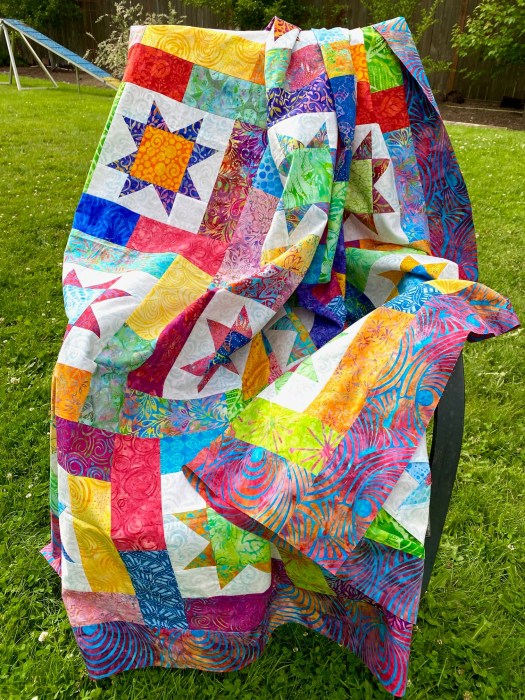
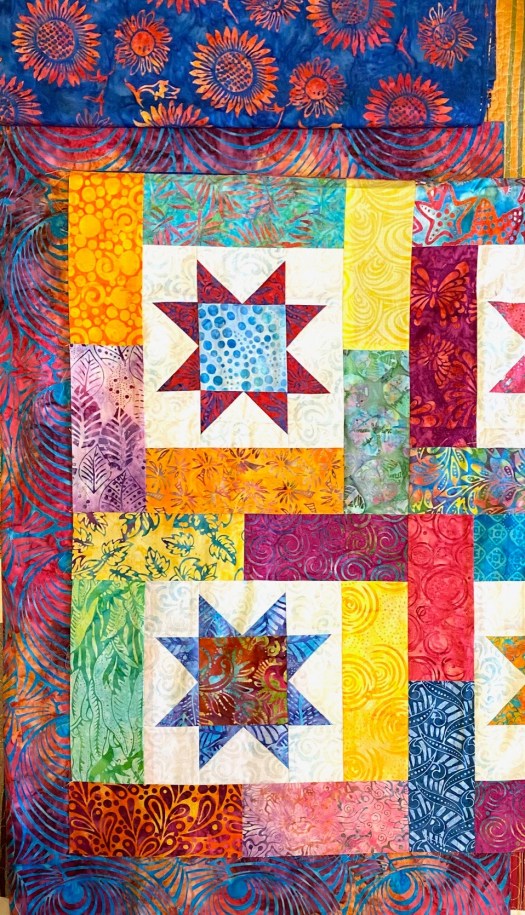
I’ve made several different string quilts like my friend’s in the past. One from Kaffe Fassett Collective scraps, one from bright batik scraps, one from super hero fabric for my nephew’s son, and two baby quilts from KFC fabrics for my nephew’s twin daughters – one in purples and one in pinks.

I love making string quilts. But all except one that I’ve made in the past were sewn onto paper squares. Then, when the blocks are all sewn I had to remove all that paper. Not my favorite activity. So for this quilt I’m planning on sewing the strips onto muslin squares. I used this method for the super hero quilt and it worked really well. It adds a little thickness to the quilt, but these fabrics are so light and soft that it will be fine. I’ll just have to be sure to wash and dry the muslin first.

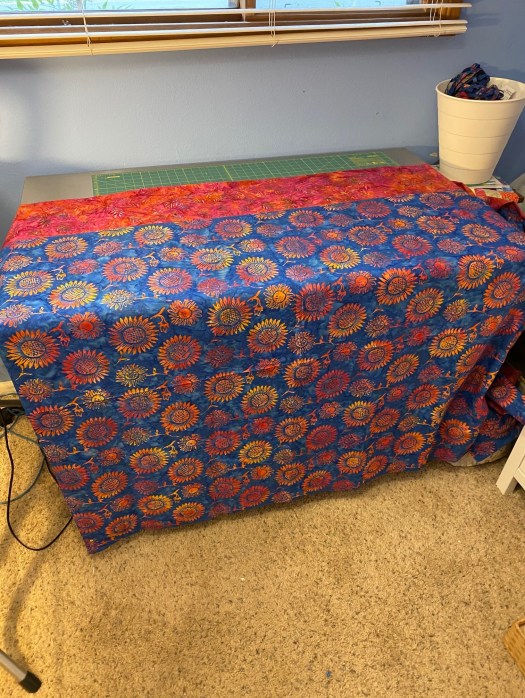
I got a gift certificate to sewcolorful.com from a friend recently after her dog stayed with us for a few days. I used it to purchase a big piece of Brandon Mably’s onion rings to use on the back of this new string quilt… and for the center strip of each block. I just love this fabric. And anyone who has paid any attention to my quilting knows that I have a soft spot for graphic black and white prints!

r12

This quilt will be a gift for one of my nephews.

I’ll do another post soon showing my previous string quilts.

Crumb Spotted Borders Are On

I got the borders on all 63 crumb blocks over the weekend. Well, I actually did 64 — I made one more crumb block at the end because when I made the first set, I did 8 in one color. This was before I did the calculations on how many of each color I needed. So I ended up with 8 of darker purple, 7 of 7 other colors, and 6 of yellow. Rather than taking dark purple spots off of one block and adding a yellow border, I just whipped up another crumb block and bordered it with the yellow.I knew that having only six yellow blocks would irritate me once the quilt was done!

g1

I just love all the color and all the spots! It’s going to be fun to see how these all look once I get them up on the design wall.

So next up I’ll finish the scrappy hexagon quilt and get it off my design wall. Then these blocks will go up. I had to order the fabric for the sashing so I can’t make any progress on this crumb quilt until that arrives.

I met some friends down in Molalla, OR, today to work Rico in a little bit of sheep herding and then we took a three-mile hike through some beautiful stands of trees. Oregon really has amazing trees.

g6
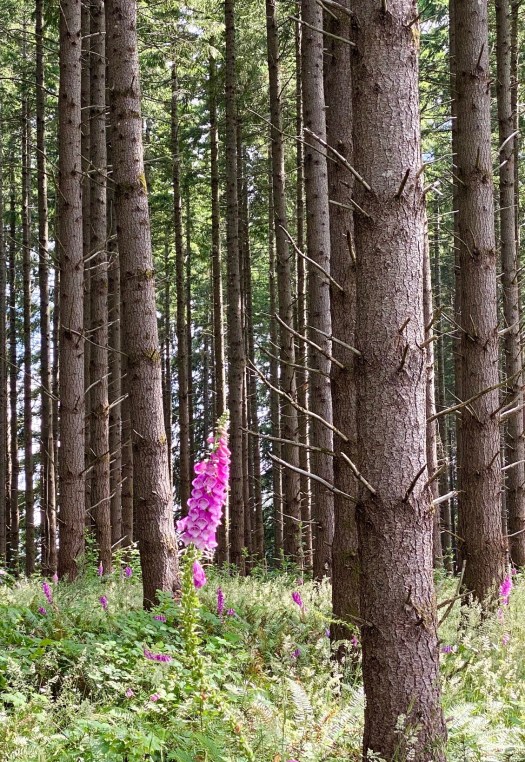
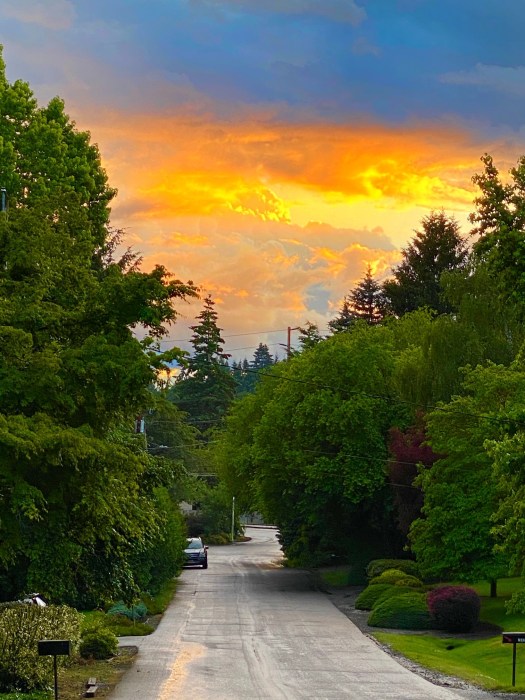
There were wild flowers all over the place. You can just see some pink foxglove in this photo. It really felt good to get out in the fresh air and see something different.

g7

There’s a little better picture of some foxglove. So pretty.

We had fourteen dogs out on this walk. All of them border collies except for three of them. There were five people. Amazingly, the dogs all got along wonderfully, but that’s border collies for you. You can toss fifty of them into a field together and they all just coexist nicely.

My friend Heather is a wonderful photographer. She took this photo of my boys. They’re so cute!

boys at maddys

We were on BLM land on an old logging road. It’s right next to my friend Maddy’s property. I can’t imagine having such close access to a nice hike like that — plus, having sheep right on the property to work any time. My dogs would be in heaven.

g9

When I got home I decided to dig into organizing my messy garage. I’ve been trying to make myself do it for several weeks now. It was getting really hard to get to things I needed. And I had a ridiculous collection of cardboard boxes that had been tossed in there. I completely filled my recycle bin and my garbage can.

I took before and after pictures, but the before picture doesn’t really show what a mess it was. There’s still a lot of stuff in there, but it’s all stuff I need and it’s all organized.

This is the before photo. A lot of the mess is hidden behind other mess. But the pile was that deep all the way to the back of the garage.

g3

Here’s the after photo.

g2

You can see all my pandemic panic buying in this photo. Three huge packages of toilet paper, one unopened package of paper towels (another package is on the shelf), four cases of sparkling water, and four big bags of dog food. I’m getting to Costco about once a month, so I just buy toilet paper each visit. At some point in time I’ll stop buying. Not sure what that point is.

And, of course, the stuff I had really hoped to find wasn’t in the garage. But it feels good to have it all done anyway.

Crumb Block Borders Happening!

Once again I’m taking advantage of my renewed interest in sewing and have started getting all these fun spotty borders put on my 63 crumb blocks. There will be nine different color ways of spots once I’m done.

c1

I cut out all my border strips as I was live streaming my nephew’s wedding Friday afternoon. It was a Catholic mass so there was plenty of time for pressing and cutting! they were married in Wisconsin with about a dozen people in the church… just immediate family, with hundreds watching on the internet.

c5

(This is the couple who received my recent blue and green batik quilt as a gift. they opened it while we were on a Zoom call this morning and the bride loved it! She said the colors are her colors and she LOVED the fish quilting! I told them that the biggest compliment they could give me was to USE it! They promised they would.)

These crumb blocks are squared up to eight inches. The spot borders are cut to 1.5 inches wide. Each block gets two cut to 8 inches and two cut to 10 inches.

I’m chain piecing these borders onto the blocks in sets of seven — all with the same color border so that I don’t accidentally mix the border colors on any given block. That sounds like something I might do!

c2

I sew the eight inch pieces onto opposite sides of each block. then press those pieces and add the ten inch pieces to the two other sides. I can whip through a set of these pretty quickly. It’s amazing how each color of spots makes the blocks look completely different. Amazing how this plays with our brains!

I have been using Best Press prior to cutting my strips. This helps me keep the blocks more square and it’s a little harder for me to press wonkiness into the strips once they’re sewn on.

I had done a lot of debating previously about what to do for the sashing for these blocks. After a lot of debate and auditioning a lot of different options, I decided that I would use black and white Jumble with black spots for cornerstones. See a blog post about all this deliberation here.

I can’t believe I’m saying this, but I’ve decided NOT to use the graphic black and white option! I almost always go to the graphic black and white option. But I’ve been thinking about it and I just don’t think the jumble is making the blocks sing.

So I dug into my stash to try some other options and had a friend on the phone while I texted her photos of options. I’m not going to tell you which one I decided on, but I HAVE made a decision and I’m ordering the fabric as we speak! But we were both in total agreement on the one I chose!

I should have a pretty good start on getting the borders on all 63 blocks done this weekend. Then I’m going to finish up my scrappy hexagon quilt top so I can get it off my design wall.


Chipping Away at UFOs – Scrappy Star Ready for Quilting

I’m taking advantage of my recent enthusiasm for sewing to finish up some UFOs I promised myself I would get done during pandemic isolation. Today I finished the backing for my scrappy batik star quilt and it’s all ready to go off to my long arm quilter.

sunf2

I just love this dark blue sunflower fabric. I bought it in Utah during my vacation last summer. There’s a little quilt store in Bountiful, just north of Salt Lake City, that has the most amazing selection of batik fabrics. I always go just a little crazy when I’m there. I bought this specifically with this quilt in mind and I think it’s perfect.

sunf4

I always suffer a little anxiety when I make a quilt back, worrying that my calculations are wrong and the back will be too small. I always measure, double check my measurements, do the math again, and make sure I have left plenty of extra size for the quilter to deal with. When I finish the back I fold the quilt top and back in quarters and lay the top on the back to verify that I’ve made it big enough. Even as careful as I am with my measuring and double checking I’m always a little relieved when it’s all correct. In the photo above you can clearly see the backing fabric extending beyond the edges of the top. Phew!

I really dislike making quilt backs because I hate managing all that fabric. So I’ve come up with a few methods that help me keep it all organized and ready to move through my machine. This frequency of pins makes those long seams stay together really nicely for me, and it makes it all come out much more even. Once pinned, I fold up all the excess fabric so I have many layers thick, but only about 12 inches wide. I leave plenty of room between the folded fabric and the edge I’ll be sewing. the I accordion fold the whole thing so I can more easily feed it through the machine.

sunf6

I put this folded pile in my lap and feed it through the machine, adjusting it as I go, making sure it’s not catching on my extension table or piling up as it goes through the machine.

sunf5

I also don’t love matching prints for a backing and it would be pretty impossible to match a batik anyway, so I often use blocks left over from the front to make a strip to connect to larger backing pieces. But for this quilt, I used a strip of batik that plays well with the colors in the sunflowers. I like the bold contrasting strip on the backing. The strip is sewn in between the two larger pieces of backing fabric.

sunf9

And it’s times like this that I really love my cutting table. It’s actually a stainless steel restaurant table that I bought online a few years ago. It has a shelf underneath where I put bins with all my batiks. It has plenty of room for my cutting mat, it’s a really comfortable height and it’s durable as all get out.

I’ve also decided to start chunking away at putting the spots borders on all of my crumb blocks. I think I have 63 eight-inch blocks. With the borders and sashing this will end up being a generous size quilt. I started cutting the various spots fabric this evening before our walk and got a few strips sewn on before I ran out of bobbin thread. I can’t wait to see this quilt come together.

sunf1

You can see posts about the crumb quilt here, here, here and here.


Finishing Touches on My Scrappy Star

I’ve decided who I’m going to gift this scrappy little star quilt to so I thought I would get it ready to go to the long arm quilter. I have been toying with the idea of putting a border on it because it turned out just a little small. So I tried out some fabrics I had and landed on this gorgeous blue, red, fuchsia and orange batik. It’s such a gorgeous fabric and ties in with a lot of the scrappy batiks in the quilt.

star8

It also ties in nicely with the dark blue and sunflower batik I bought for the back. I chose a bright yellow to be used for the binding. I love a binding with a nice pop of color!

star17

Here’s a look at what the binding will look like.

star15

I messaged my quilter a week or so ago and she is actually keeping quite busy during the shutdown. She has saved a slot for my two quilts. All I need to do now to have this one ready is to get the back pieced.

star4star7star12

For the quilting design, I’m thinking of something floral and curvy, maybe with a golden thread. I have time to ruminate on it as this is planned for a holiday gift.


Bright and Happy Weekend Fish

I was looking at Pinterest last night and you know how it happens. You go down some rabbit hole and pretty soon you find something you’ve always been looking for but didn’t know it. Well, last night I ran across this fun little fish pillow pattern and decided that it would make a quick and fun little project for today.

fish1

The pattern included options for a checkerboard or tiger stripe body, but I opted to improv piece my own from my Kaffe Fassett Collective scraps. The pattern has you top stitch the pieced panel onto muslin. I just did a quilt as you go technique instead. Then cut the body pattern out of the resulting piece.

fish9

I always love the way an improv piece looks after you trim it up. It’s the part of the process I love the most. It looks so clean and tight!

fish10

It went together pretty easily, but there were a few curves to sew. I don’t mind curves, but these are curves with some bulk and some interfacing. So they were a little bothersome and didn’t go together as well as I would have liked.

fish6

I was going to use some yellow Aboriginal Dots fabric for the face, tail and fins, but I couldn’t find the piece I KNOW I have. Also couldn’t find several other colorways I know I have. So the first one I found was this purple, and I think it’s pretty perfect!

fish4

Here it is… all ready to sew the two sides together. It seemed like I got to this point pretty quickly.

fish3

Finally! All those fins tucked in where they’re supposed to be tucked in! Ready to stuff.

fish2

All stuffed and sewn closed. I used a long handled wooden spoon to shove the stuffing into all the nooks and crannies.

Not really sure what I thought I’d do with this when it was done, but I’m thinking it will end up hanging from the ceiling of my sewing room.

Here’s the pattern. I found it on Etsy.

fish pattern

Leafy Paper Pieced Zipper Pouches

I’m really fascinated by paper piecing and have seen some really amazing things made with this technique. I’ve dabbled a little but haven’t done anything too difficult or large. It really goes against the type of quilting I like to do. I’m not attracted to really fussy quilts with lots of tiny pieces. I can appreciate the work and skill that goes into making them, but it’s just not something I’m very interested in making.

But I have made some small paper pieced projects — a lot of them have been used as panels in my zipper pouches. Here’s two on a leaf template that I just love. I sewed them into nice little tailored zipper pouches with lots of details, and a zipper pocket on the back.

l9

There were a lot of pieces in these blocks. It’s amazing how many seams it takes to make the curve on the lower part of the leaf. You can see all the seams.

(I went into m way-back machine and found that I purchased the pattern for the leaf on Etsy. You can find it here: https://www.etsy.com/listing/637507460/geometric-leaf-foundation-paper-piecing

I just love making panels like this for a zipper pouch. It’s a fun way to experiment with a new technique or a template. I like that I can try something new without a huge commitment to make an entire quilt.

How pretty is this?!?!

l5

And this one too. I love the gorgeous batiks, but there’s something about that chambray that just makes me so happy. I love the way it comes out so crisp and tailored. Gah!

l4

I just love all the detail of the quilting on the paper pieced panel, the top-stitching all over he pouch, and the zipper finish on the top and pocket. I just love all these crisp details. They really make a piece like this special.

These pouches have a generous zipper pocket on the back. It’s a great size to hold an extra set of circular knitting needles, your stitch markers, darning needles, scissors, and all the other stuff you need when you’re knitting. And I just love the pop of color from the lining. Nothing like a little surprise in a lining.

Click on these photos for a larger photo and take a look at the details on this pocket. It’s a really easy and quick way to make a pocket and it looks so good!

I’ve been collecting other paper piecing templates that I will make at some time. I have a really fun one of a fish that’s all bones. It’s so cute and so different. I expect to see it on a pouch some time.


A Little Enthusiasm Mustered

I took the day off from work today because I have two personal days I need to take before June 30 or I lose them. I am not one who likes to lose my days off!

I had a nice sleep in and then got up and had some breakfast and some good coffee and then got ready to go because one thing I wanted to accomplish today was to get the green and blue batik quilt for my nephew’s wedding shipped off.

I’ve had a little bit of sewing enthusiasm the last few days, so I wanted to take advantage of it. When I got home I sewed a couple of rows of the scrappy hexagon quilt together. It looks like I may be able to finish this quilt top this weekend! There are only four full rows in this quilt, and 6 partial rows.

It was pretty hot today, so after lunch I sewed the center seams on the outer fabric and lining for 20 face masks made from Kaffe Fassett Collective scraps. Then I sat down in the shade outside and clipped the seam allowances on the curves.

d5

I use a non woven fusible interfacing in my masks. This particular interfacing was a little thicker so I’m using it with the thinner Kaffe fabrics. It was a little too stiff with batiks, but works well with this fabric. I was finally able to get my hands on ten yards of the Pellon medium weight non woven fusible online. I’ve been trying to get some for a couple months.

d4

For the lining I’m using a white on white cotton that I’ve had in my stash for years. it’s a great way to use up fabric that I don’t love as much as when I bought it!

I sat with a small garbage can on my lap as I clipped. Looks like I missed the can a few times.

d6

I was covered with this confetti by the time I finished clipping all 20 masks!

Since it was so hot today I waited until after dinner to take the dogs for a walk so we only got one walk today. My friend’s dog Argos is staying with us for a few days. It’s more work to walk three dogs!

walkss

After our walk I decided to cut a few more masks. I had found some Kaffe scraps the other night that would work well and had some batik pieces I was planning on using for masks. I now have about 50 masks cut out and in various stages of construction. I still have to cut the lining and interfacing for about 20 Kaffe masks, and have to cut the interfacing for 20 or so batik masks.

d1

I had made about 30 masks a couple of weeks ago and am down to only three! I’ve given the rest away to friends, co-workers, and I shipped a few to family. I’d really like to always have some on hand when people I know need one. I think we’re going to be needing them for quite some time.

Riding the Blue Spots Wave

I’m taking advantage of a brief spurt of enthusiasm for sewing to finish up the scrappy hexagon and blue spots quilt top.

It poured after dinner so I spent about a half hour sewing blue triangles to hexagon blocks and got ten done before the rain eased off a bit and we headed out the door.

dots2

To start the assembly I sew one blue triangle to opposite sides of the hexagons. Then these blocks will be sewn together in diagonal rows. This all goes together really quickly because these blocks are big.

dots3

It gets a little tricky on the bottom and top of the quilt, but it’s still pretty simple construction.

After our walk I finished sewing the triangles to all hexagon blocks that aren’t on the bottom or top row. I want to do those rows when I’m fresher because they require a little more attention.

But I did cut the remaining triangles I need to finish all the blocks. Then I sewed most of them into pairs. I’ll show how the bottom and top rows go together on another blog post.

dots1

We got rained on for the first two miles of our three-mile walk. But like they say in Oregon, there’s no such thing as bad weather, just inappropriate equipment. So I put on a rain coat and a water proof baseball cap, leashed up the dogs and headed out. They got really wet, but they just don’t care!

For the final mile of our walk we got to watch a really beautiful sunset develop.

walk

So, of course, I had to have the boys pose too!

boysun

The past couple of weeks I’ve been making sure to walk through our park on the way home from our walks and let the dogs run free for a few minutes. They really enjoyed their run in the cool and damp air tonight.

ricotomgue

Rico’s enthusiasm shows all over his face… and his head… and all over Bender!

Scrappy Hexagon Blocks Done!

I told myself that I wanted to finish my scrappy hexagon blocks this weekend, and I finally dug in this afternoon and finished the last 8 blocks!

h3

All I have to do is cut a few more blue spots triangles and then I can start putting the diagonal rows together. It will all go together quickly from this point because the blocks are big. Most of the work has been done.

I just love these blocks. How can you go wrong with a scrappy collection of Kaffe, Phillip and Brandon fabrics? They are so amazing and the colors are so bold and bright.

h1h2h6h4

I even celebrated with my first beer since the end of January! It was delicious. It made me a little light headed! It was worth the 240 calories!

h7

I’ll chunk away at putting these rows together over the next couple of weeks. And I need to decide which project I’ll finish next. I’m thinking I’ll start working on finishing up my crumb blocks quilt. You can see it on my blog here,  here, and here. (sorry… they’re not listed here in chronological order.)

You can also find some blog posts about this scrappy hexagon quilt here, here, and here.