Contact me at anne@agilejack1.com
I'm a long-time fundraiser for public media. I'm a news hound. I think politics is fascinating and horrifying at the same time. I love my dogs more than I can tell you. I love the challenge of learning and making new things. My favorite part of a new project is the planning and learning! I'm not afraid to fail! I LOVE color!
I got the body of this bag constructed last night, but it was too late to finish the lining. So after work tonight I hit the sewing room to get this done before dinner.
I like the way this turned out. I may try some other color combinations in this blob technique. Might try this with some batiks.
Here’s the back of the bag.
And my favorite little tag.
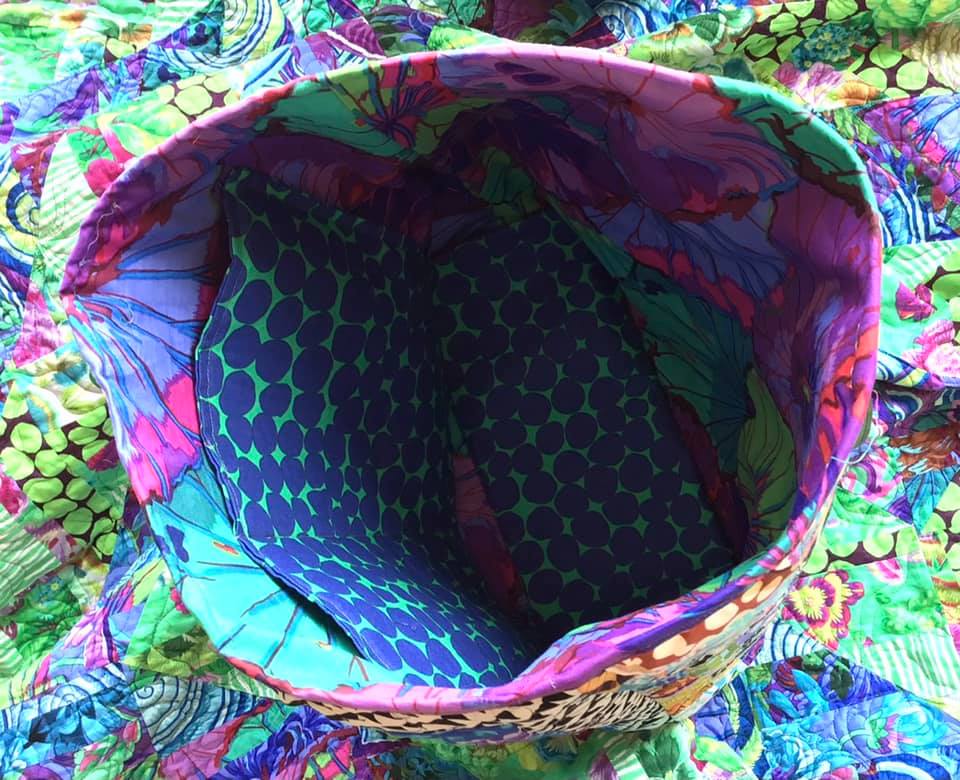
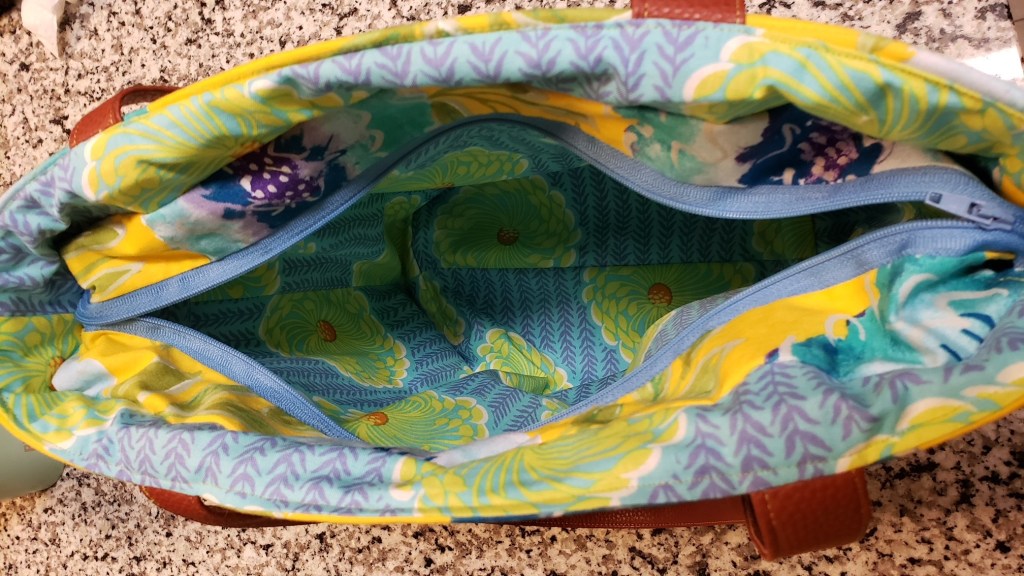
I went a little conservative for the lining. I used the same white with black fabric that I used on the front. I like it, but still prefer a more vibrant lining.
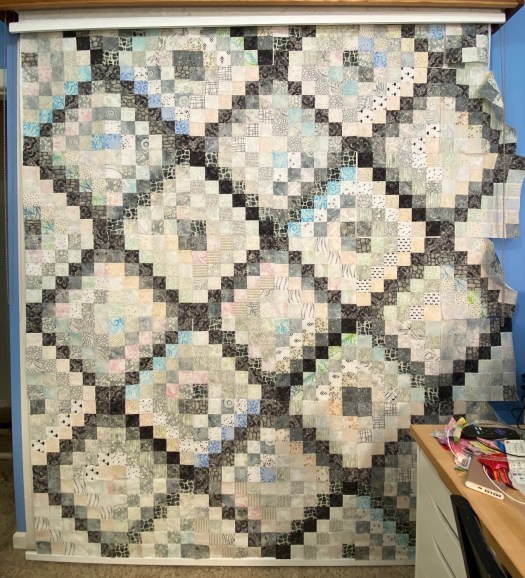
I’ve decided that I’m going to finish up my Ice Storm quilt. The blocks have been up on the design wall for too many months. So tonight I got the rows all tagged and stacked the blocks up in rows.
I thought I’d pin a few rows while I watched the Olympics. I got all seven rows pinned while I watched some equestrian events and the US women’s indoor volley ball team!
These blocks are pretty big so this should all go together pretty quickly.
We’re in a bit of a heat wave again. Not as bad as the one a month ago, but still warm. I took the boys for a walk this afternoon to get a break from work and it was pretty toasty! We found a dried artichoke on the road.
So random.
I took some time today to officially get some vacation time scheduled. I checked my calendar, talked to my boss about a few things that are coming up, and decided on The last week of August and first week of September. Now I need to figure out what I’m going to do. One thing on my list is to paint my sewing room. The walls are a bilious bright sky blue, and I HATE it! I’m planning on painting it a bright off white. And then I’m going to make some bright wall hangings to bring in some color.
I received some more Frankenbag photos over the last few days.
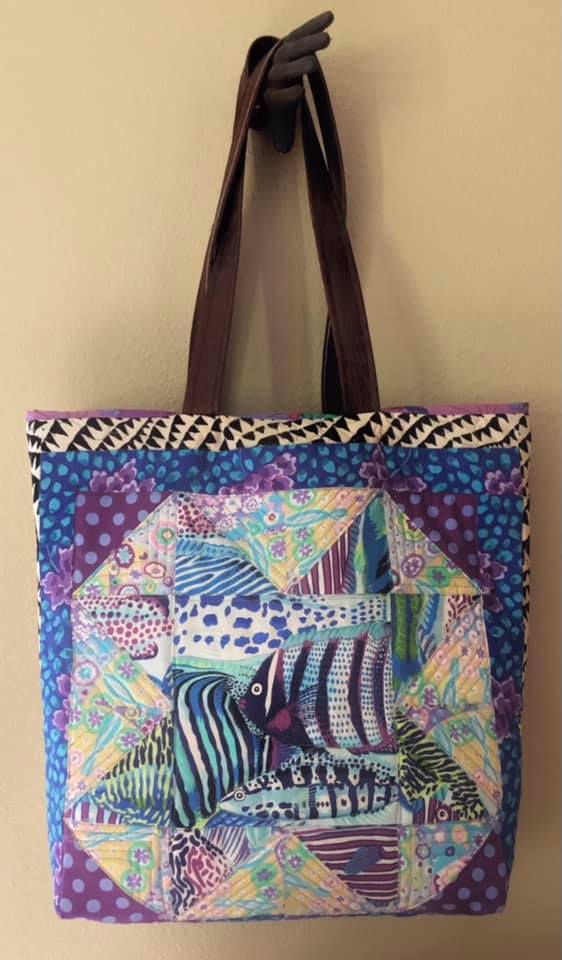
This first one was made by Cheryl Reinagle. I love the cool colors on this, and those fish are so cute! Cheryl tried crumb quilting for the very first time! I love that so many people are pushing themselves to try something new!
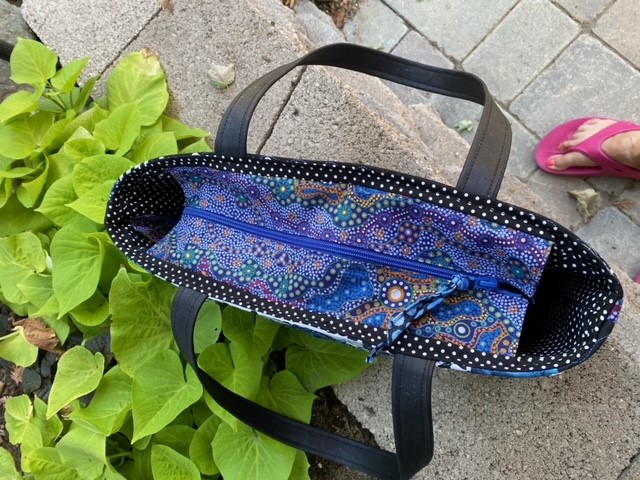
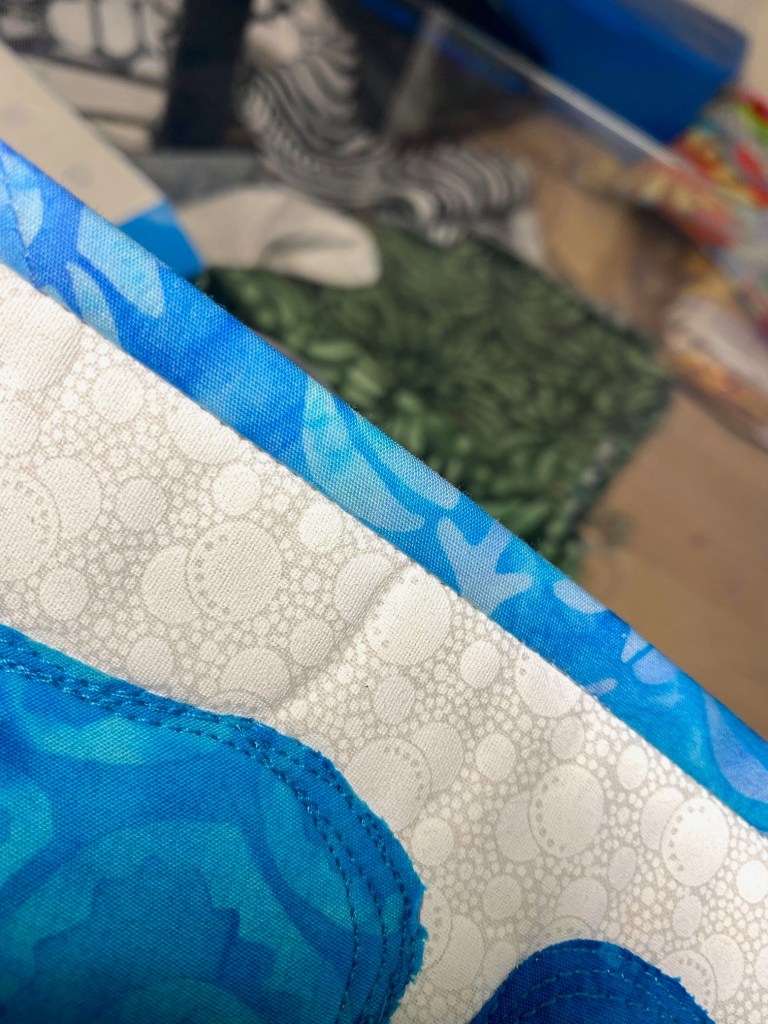
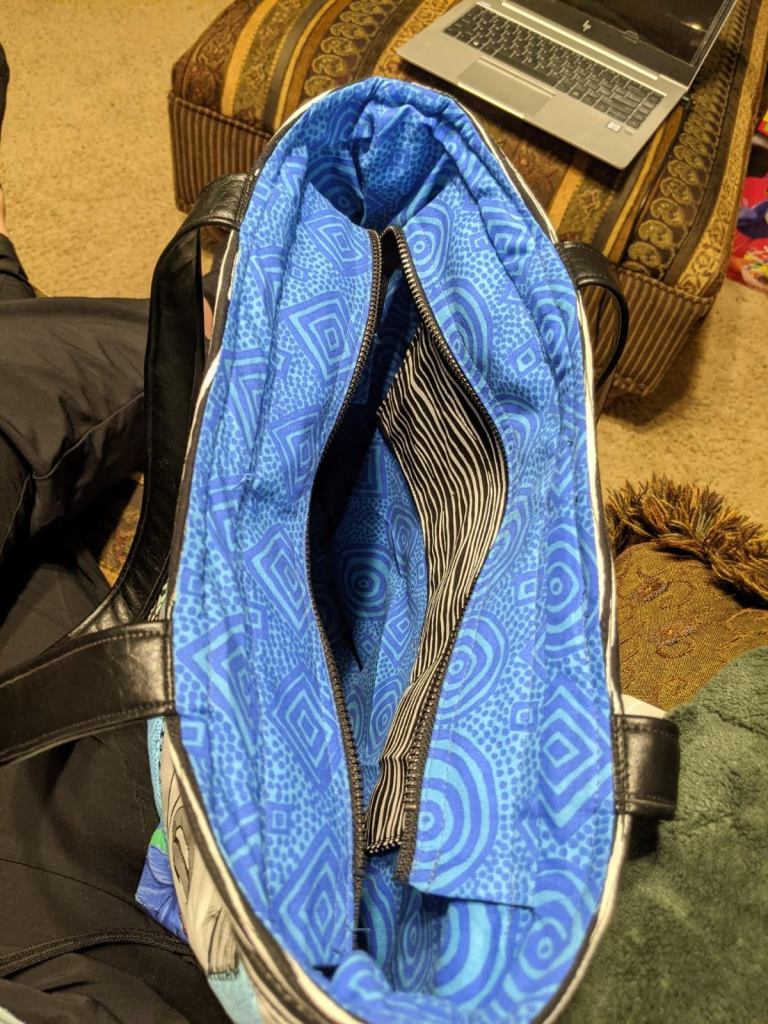
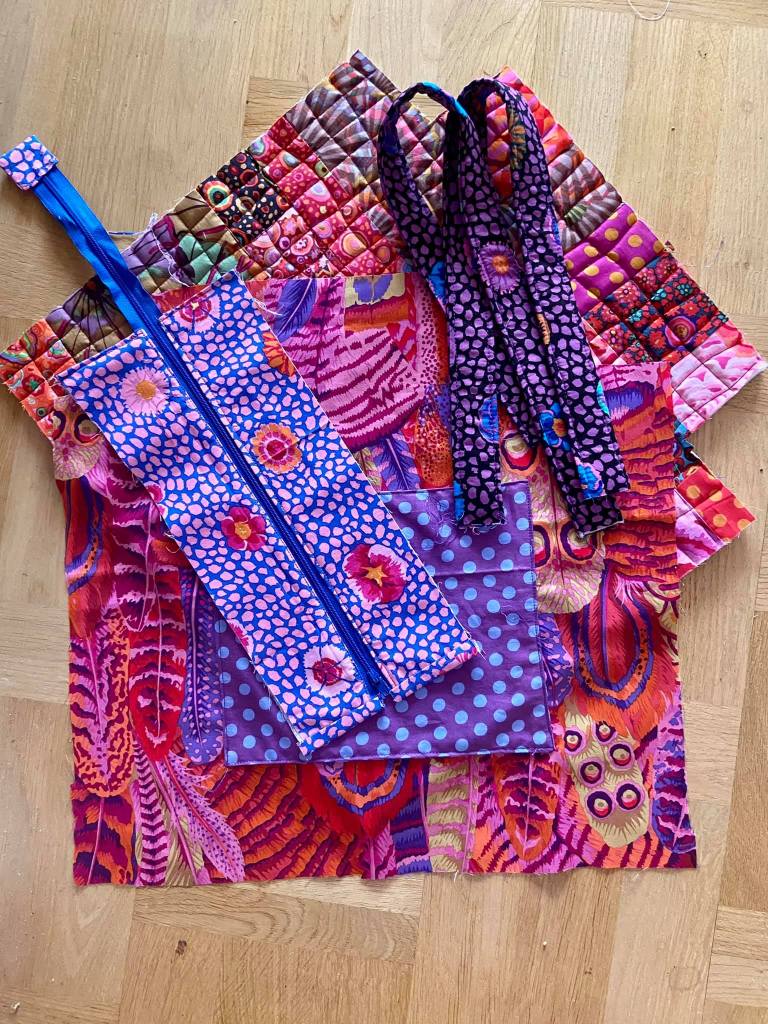
This next one is from Paula Aldrich. I love this blue Aboriginal fabric she used on the zipper placket! And how pretty is that blue with the off white? Paula also made a zipper placket, using a little bit different approach than me. But it turned out great!
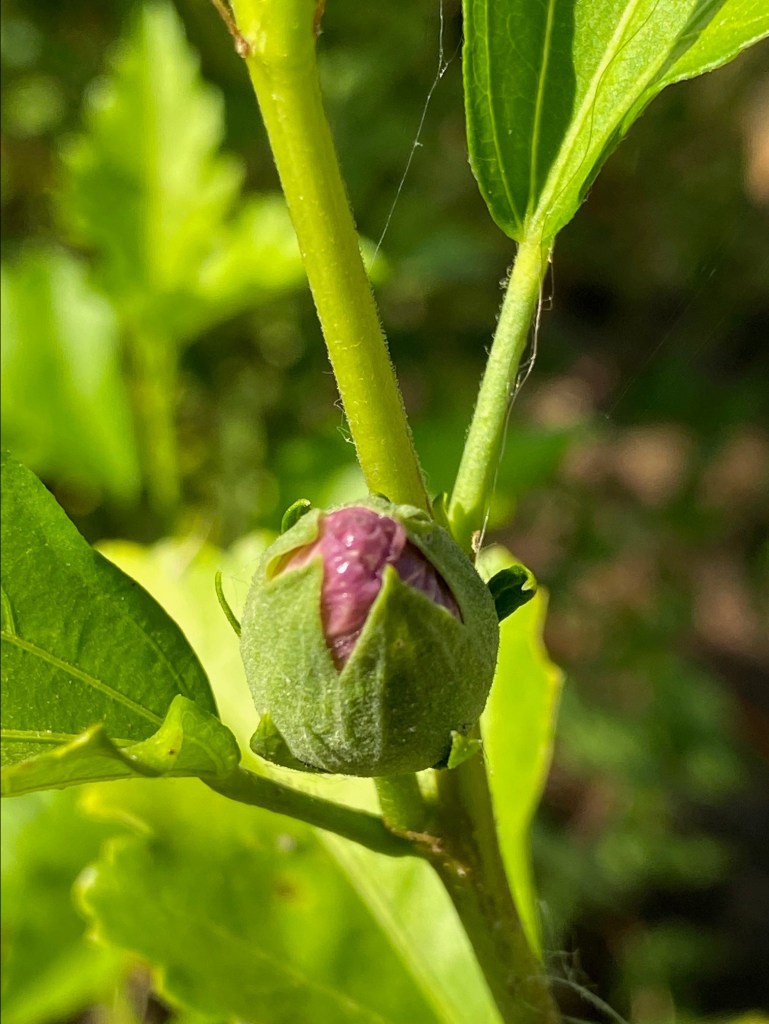
I noticed yesterday that there is a bloom on my new Rose of Sharon, and it’s going to be so pretty!
A friend of mine dug this up from her yard and gave it to me last spring. She wasn’t sure what color it would be. Looks like it will be purple! I can’t wait to see the bloom open up.
Gotta go to bed. I have a long 3.5 hour meeting starting at 8:30 in the morning! Yikes!
It was another hot weekend here in Portland so my sheep herding lessons on Saturday and Sunday were both canceled. So I spent most of the weekend at home and watched a lot of the Olympics. And I had a BBQ with some friends on Saturday night. It was nice to have some conversation and laughs. The dogs got to run with their many friends while the people talked.
I did start another Frankenbag this weekend. I wanted to incorporate some raw edge applique pieces, like in my sea glass quilt, into the bag panels. So I hit the sewing room and started digging through my scraps.
Here’s what I came up with.
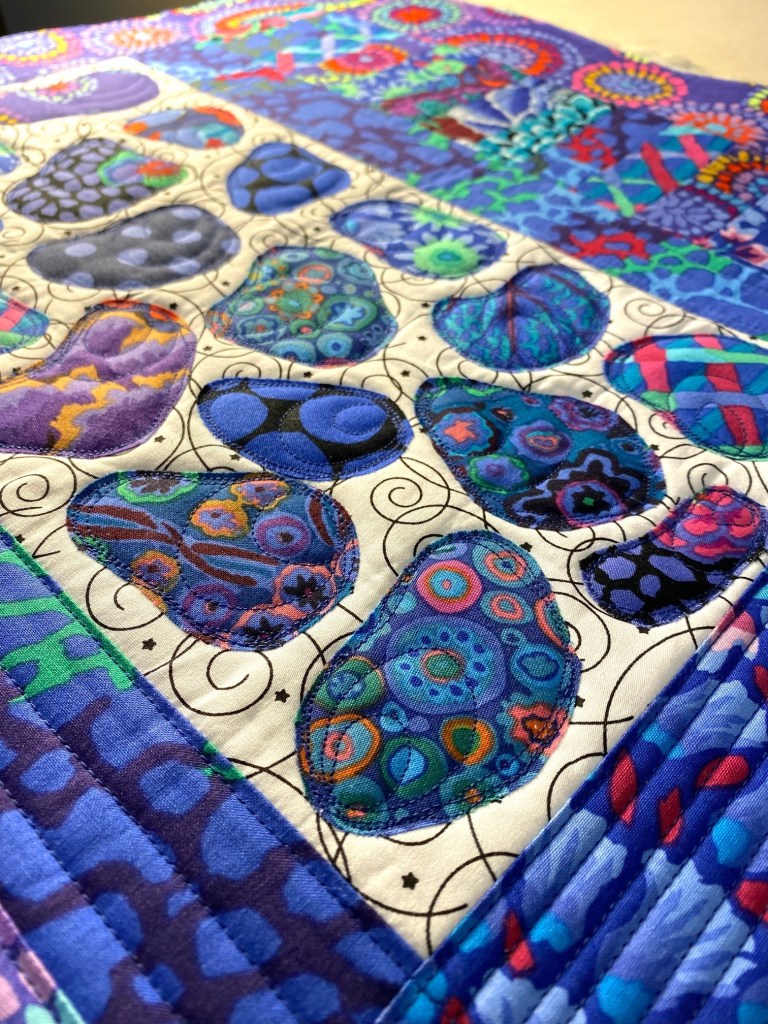
This first panel is all done and ready for assembly. I free motion quilted around the blobs, then combined horizontal and vertical quilting on the rest of the bag. I’ve been wanting to do some vertical quilting, so this was a good opportunity to do it.
Here’s the second panel.
The biggest difference in the two panels is that the white section on this one is smaller. And only because I just used what I had left of some scraps of this black and white.
I ran out of thread before I finished the second panel.
I had planned to get the body of this bag constructed tonight. But I’m using navy blue thread to quilt this and don’t have any spools in my supply. I’ll have to run to the store and buy another spool tomorrow after work so I can finish this up.
I really like the quilting and I like the corners where the match stick quilting and vertical quilting overlap.
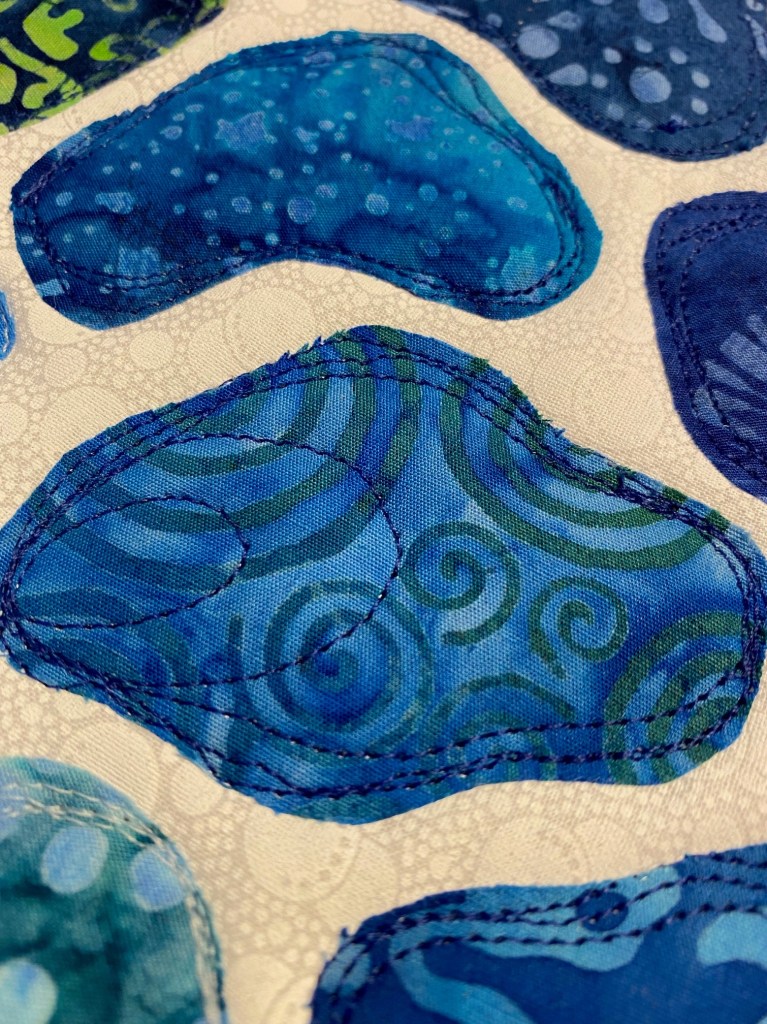
This image shows the quilting on the blobs a little better.
I’m anxious to see this constructed. You really don’t know how something works until it’s sewn into the bag shape.
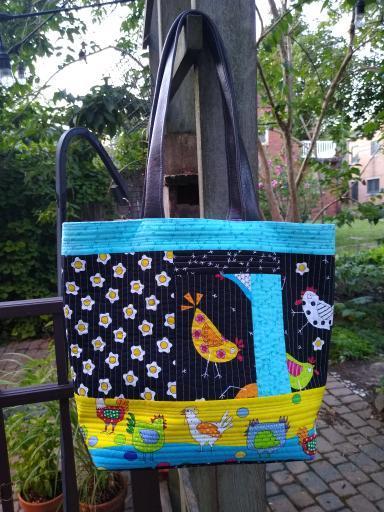
Holy cow! I’ve been getting so many photos of Frankenbags from blog readers. Take a look at this first one from Laura Hillaker. Chickens! Such cute and whimsical fabrics. And the colors are fun too.
This next bag is from Linda Woods. I love the springy colors. And she chose a really great and vibrant lining too!
This next one was made by Laura… she didn’t give her last name. I love all the purple and turquoise in the first one. I’ve been wanting to try that color combo. And the second one just has such a nice vintage feel… like your favorite quilt from your childhood. Nice job Laura!
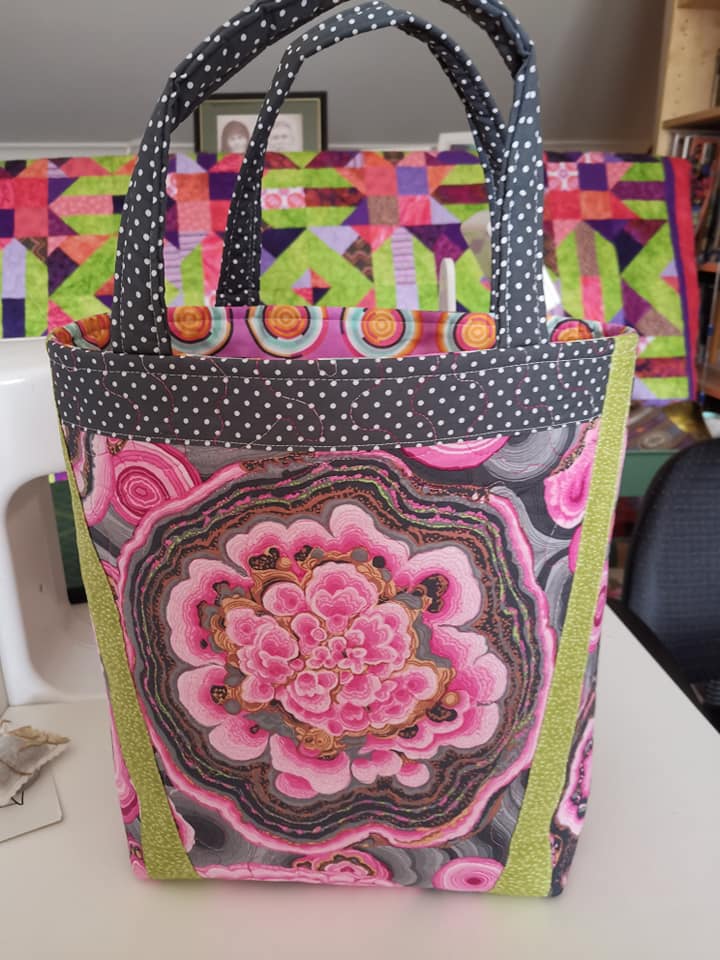
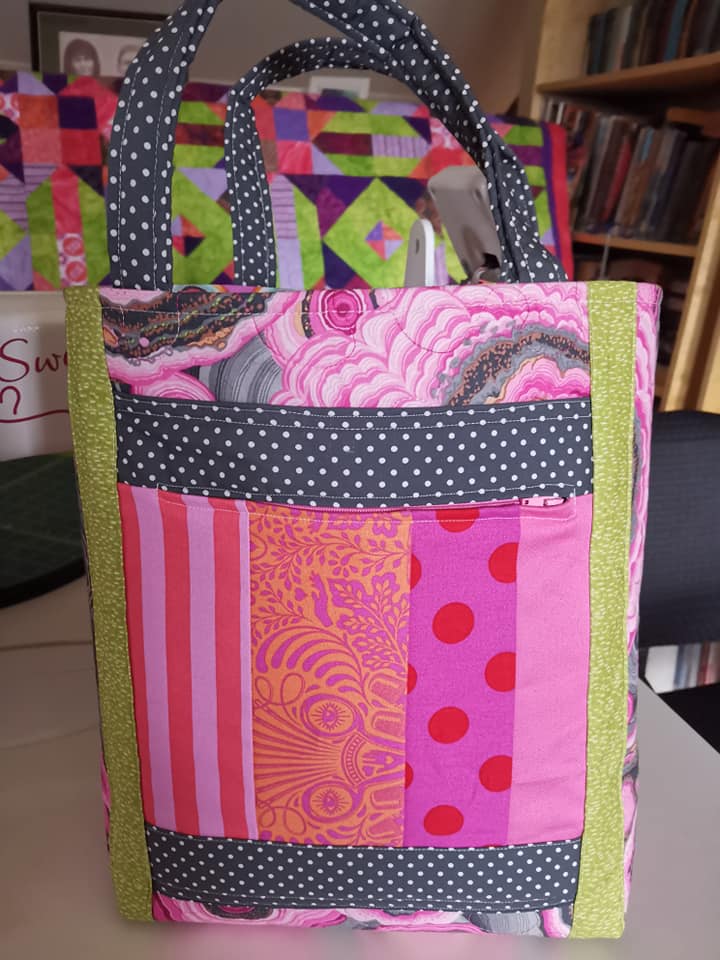
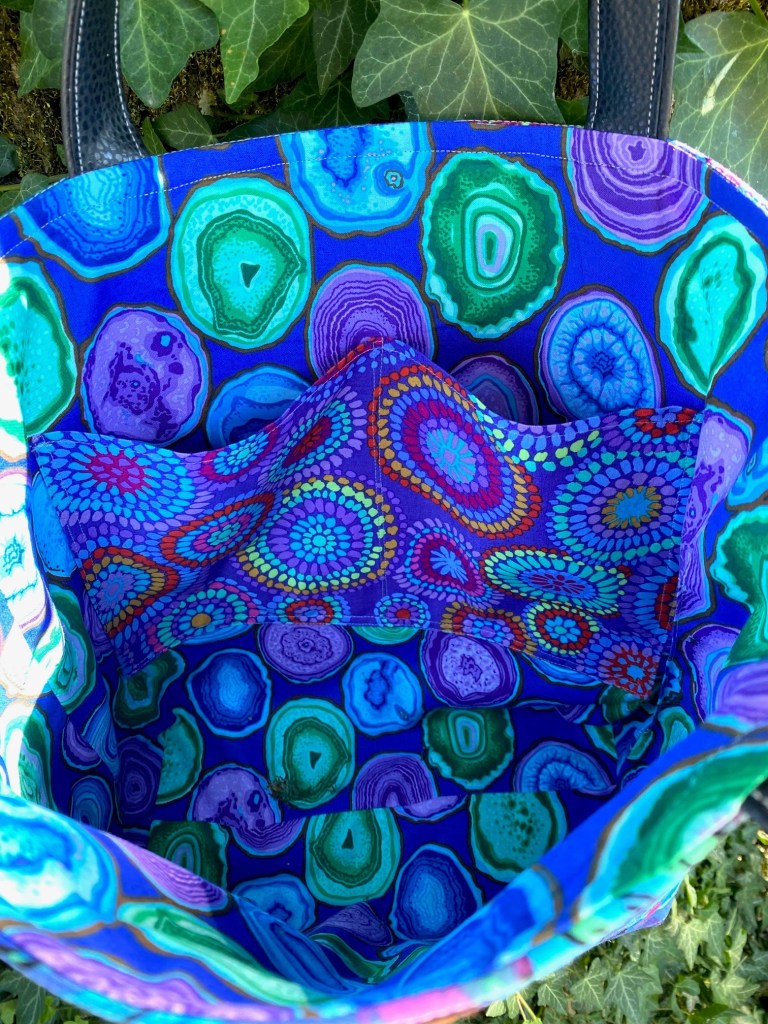
This next bag is from Jan Cafcakis. I love the way she fussy cut that pink agate from Philip Jacobs. What a great way to use that fabric. And the polka dots are so happy1
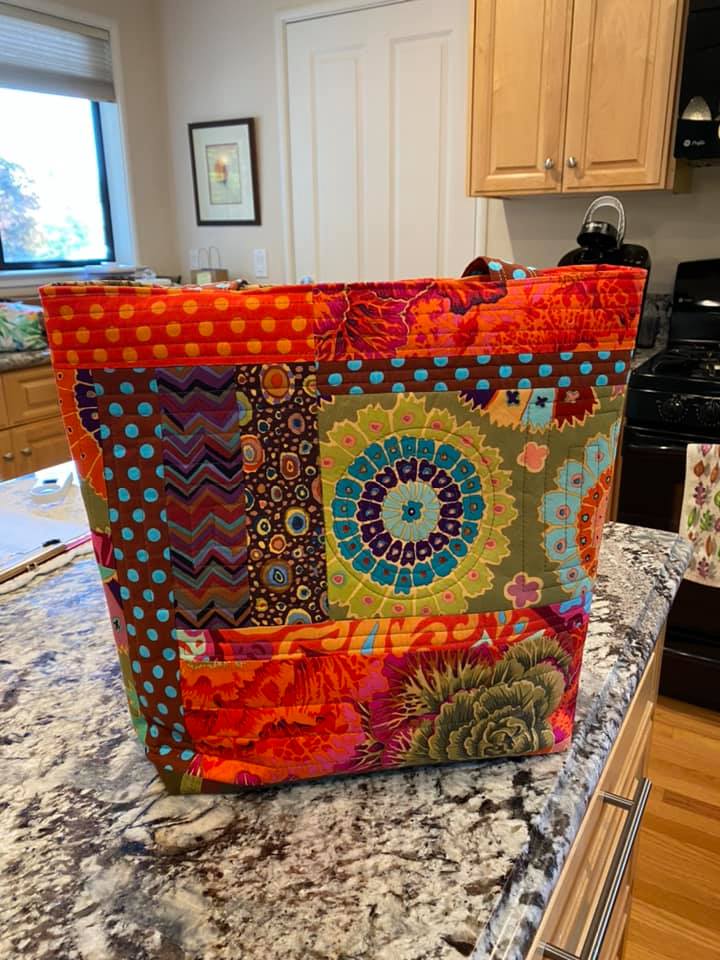
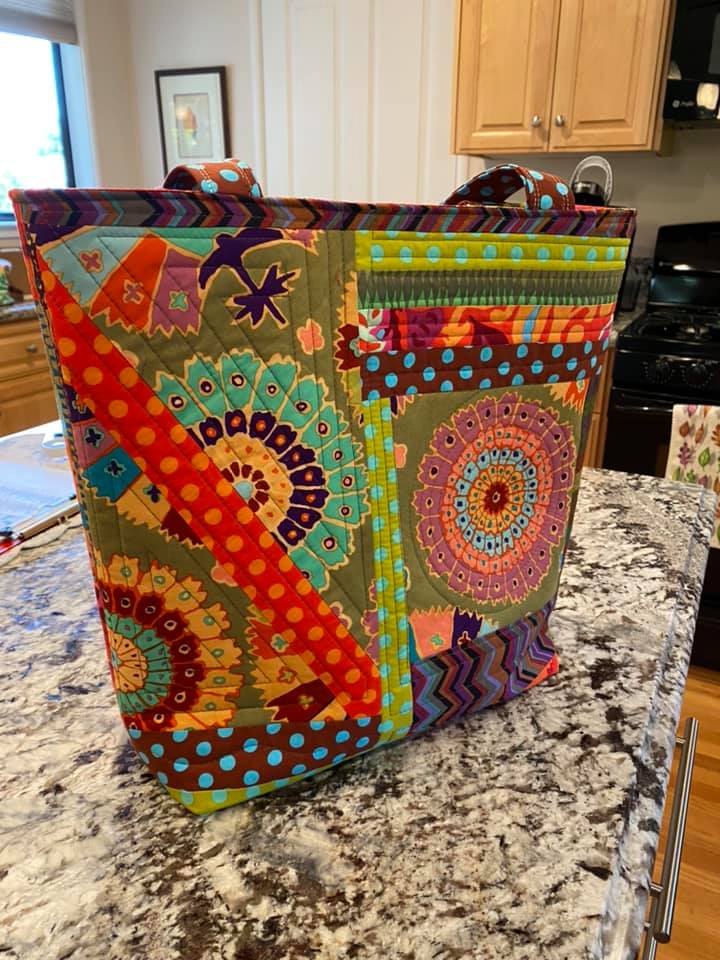
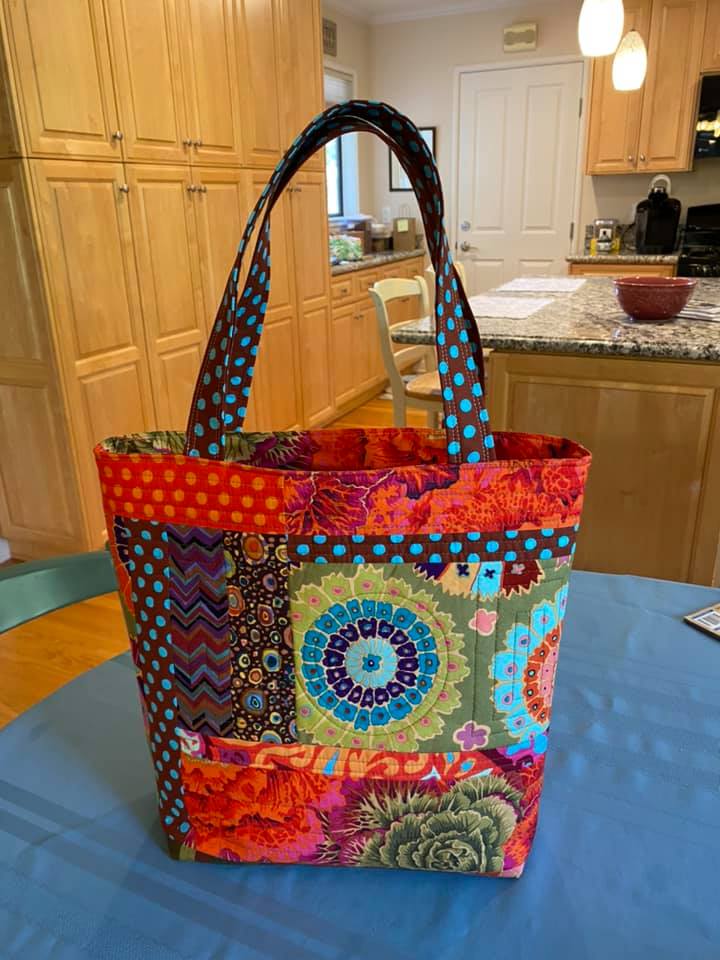
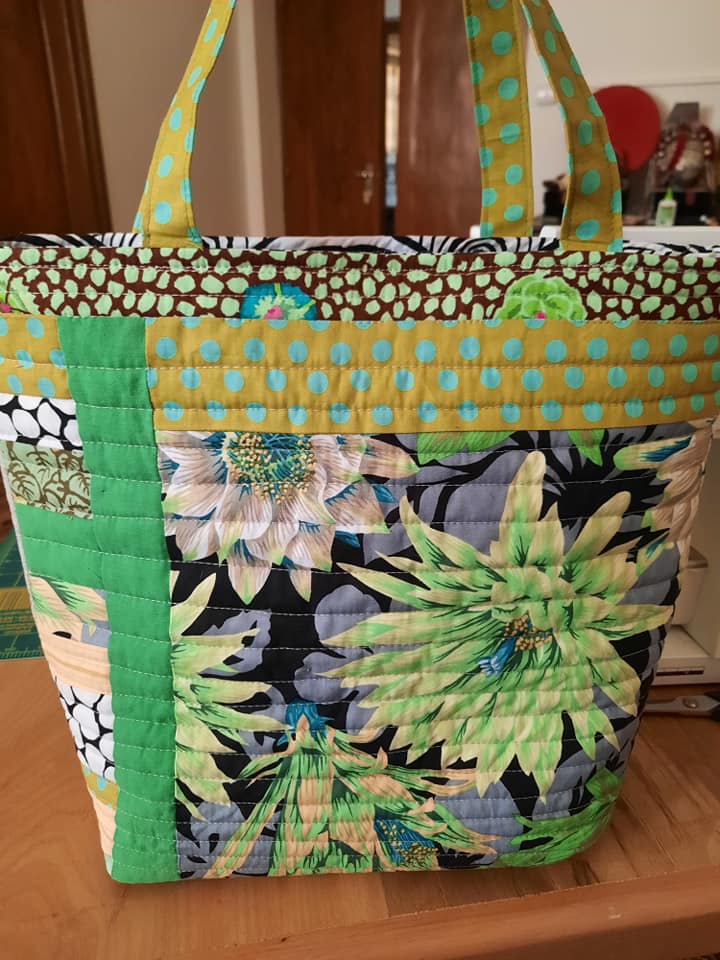
Up next is this bag from Nancy Coronato. I just LOVE this bag. I love the earthy colors… those big Turkish Delight blooms. the spots with the pops of turquoise. it’s just all so good! My mom would have loved this one… all those earthy tones were her favorites!
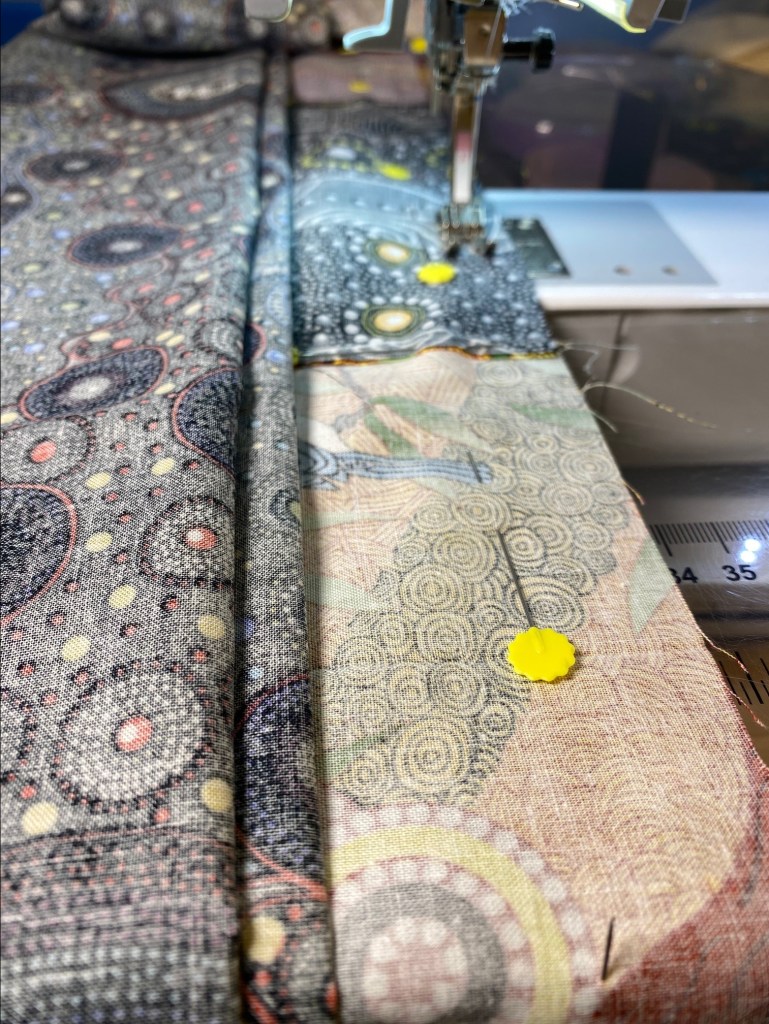
This next bag was made by Thelma Brand. I just love this fabric. It makes me think of some batiks that a co-worker brought back from Africa for me. They might be made into a frankenbag soon. And look at the zipper placket! It pays to take some time to make things match when you have a patterned fabric like this.
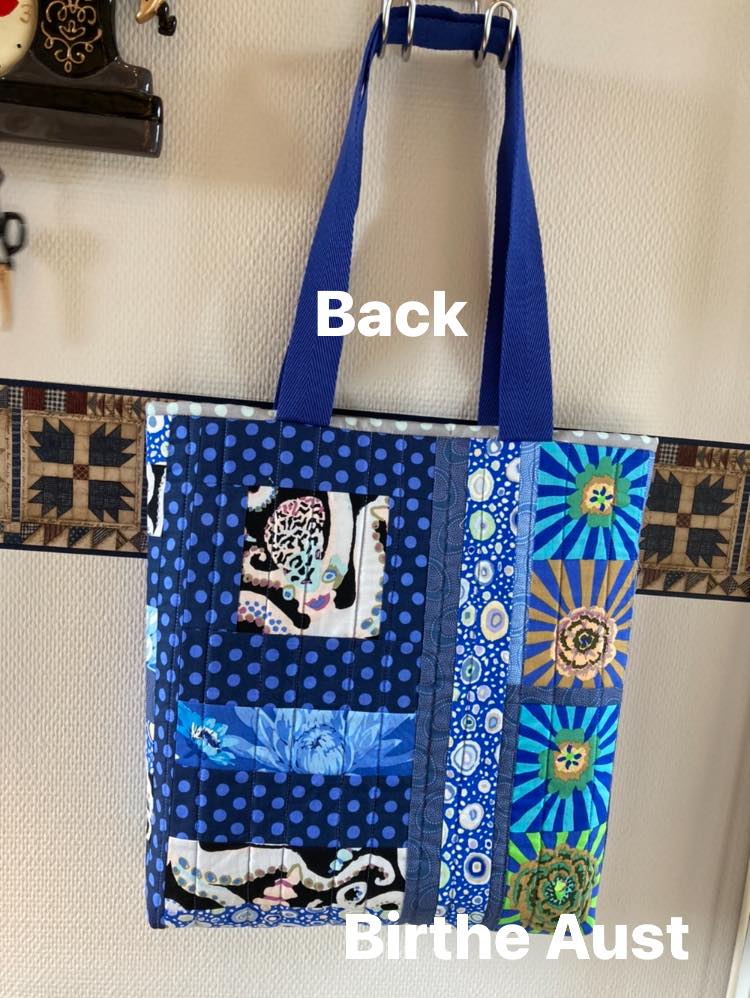
And this next one was made by Birthe Aust. I love the way she used that Octopus fabric. And I love the coolness of the lining. It all feels frosty to me. I actually had pulled some of that octopus fabric out of my stash the other night and combined it with some other fabrics. I wasn’t crazy about what I had put together. But I’m going to keep trying. It works nicely with the blue.
Next up is this bag from Polly Bean. I love the way she used that New York Beauty block! What a great way to use up an orphan block. I love the deep and rich colors in this bag. I’m thinking I have a few NY Beauty blocks somewhere. Hmmm.
Next are a couple bags made by Reidun in Norway. This first one is just so crisp and cool feeling. I love the lighter values with the pops of color. And I love the scrappiness and quilting on the second one. Nice work Reidun!
Wow! That’s a lot of bags! Thanks to everyone for sharing their photos.
Back to work tomorrow. A few more hot days and then we’ll have some cooling. It’s been a hot summer.
I spent the weekend doing some late spring cleaning around my house, so didn’t do any sewing at all. But I decided to dig in tonight and try to finish up the binding on this sea glass wall hanging. And I did it!
I just love how this turned out! I knew that I needed to get on top of finishing the binding right away because I don’t enjoy doing bindings. And if I waited too long this would have ended up in my UFO pile.
I don’t make bindings very often. I prefer to have my long arm quilter do them for me. And mine is willing to sew them by hand for a really good price. So I choose that route because I love a hand sewn binding. But I don’t love doing them myself.
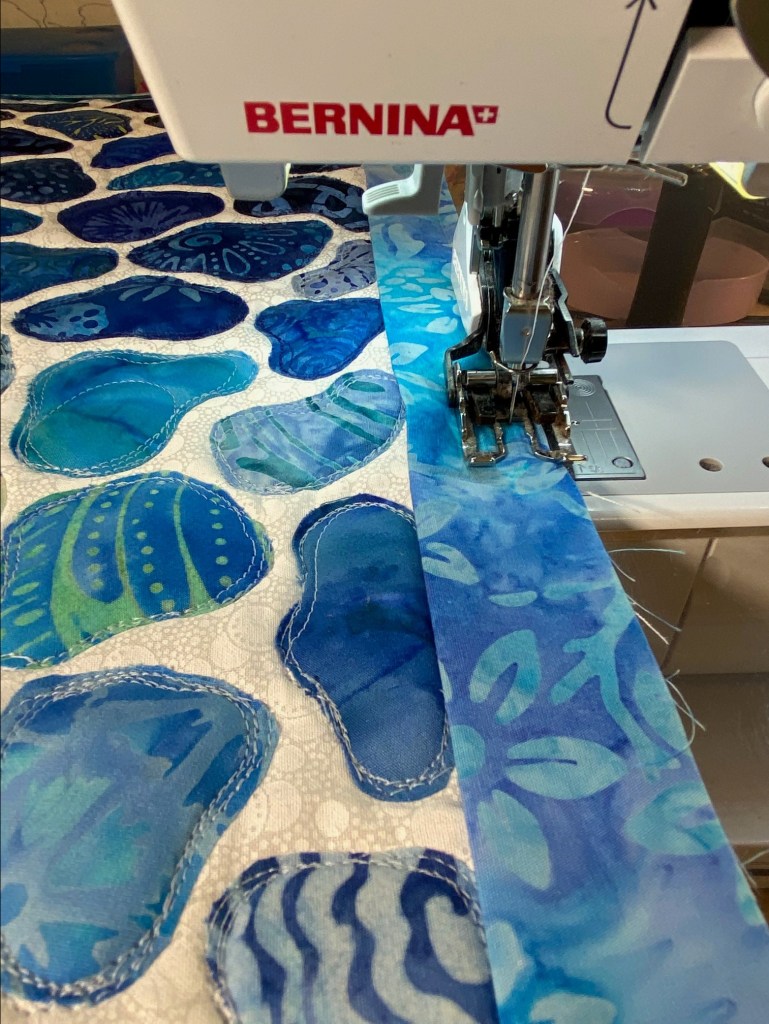
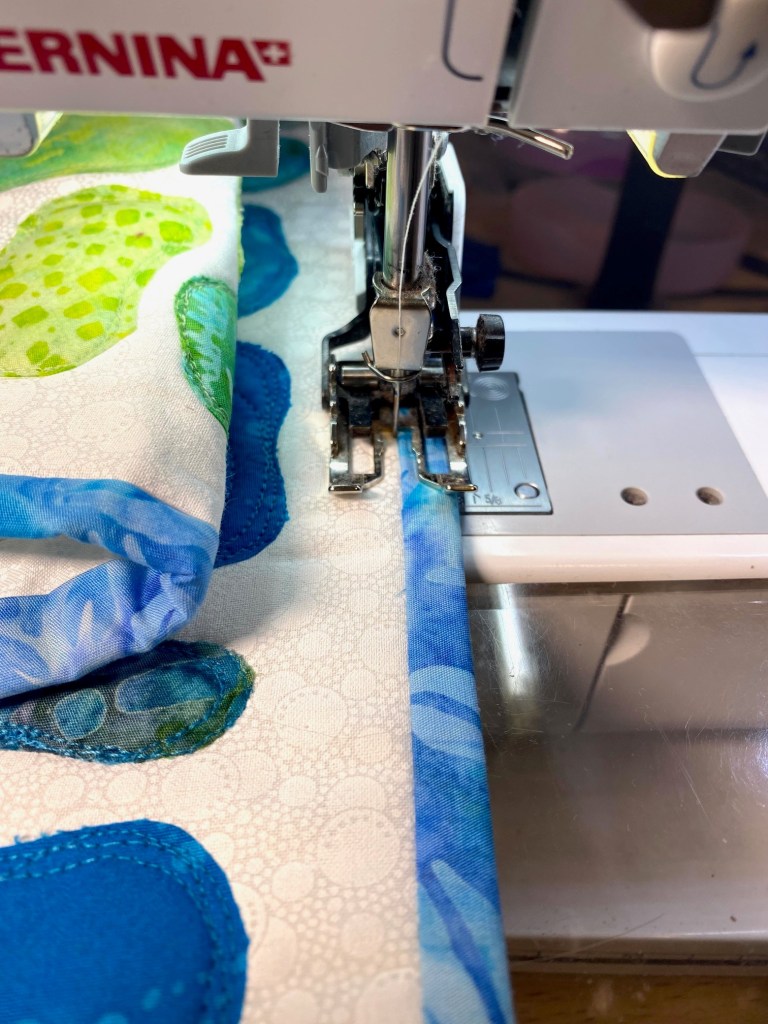
Here’s how I do my bindings. I sew the binding on the front of the piece using my walking foot.
On the corners, I sew to within 1/4 inch of the edge, and then sew a line diagonally from that point to the corner. Then I use the typical method for folding the fabric for the corner. And look at this gorgeous finished corner! Can’t get much better than this!
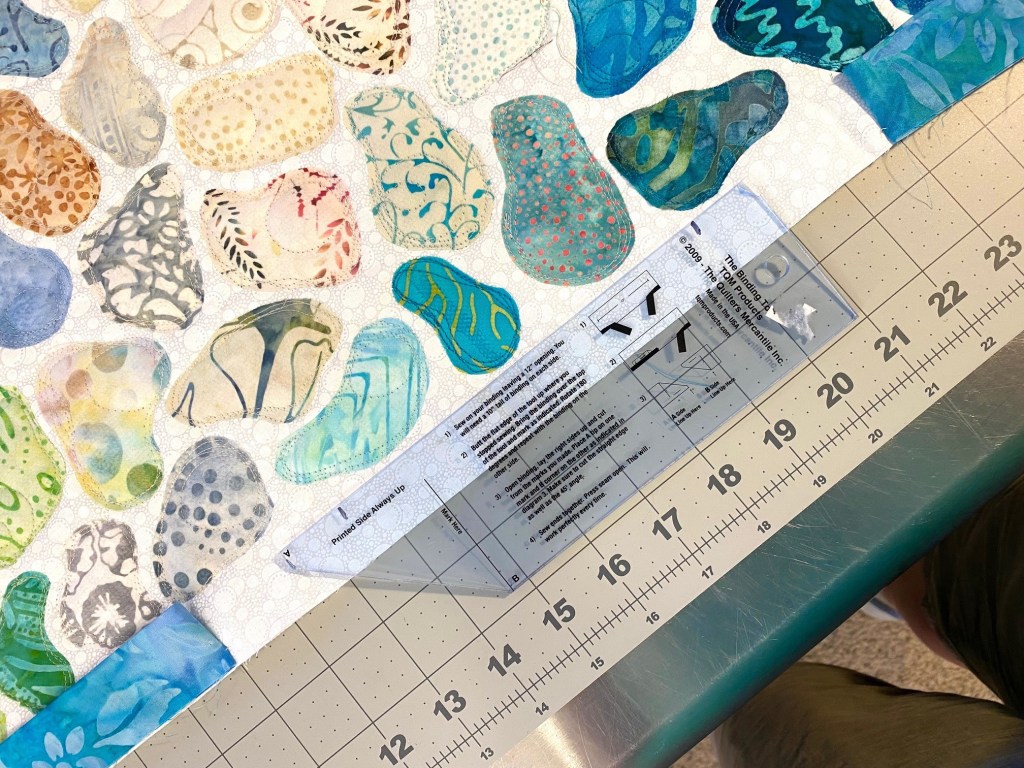
To join the two ends of the binding, I use a special tool that I purchased from Missouri Star Quilt Co a few years Ago. The tool works well, but I use it so seldom that it’s always sort of a mess and it’s never second nature.
I had a few bumbles with this, but it all worked out in the end. The ruler has instructions printed right on it and it helps you to mark and cut both ends of the binding to get a good join and fit. Rule number one — read and follow the directions!
I got to the point where I needed to join the two loose ends of the binding and decided to take our evening walk first and finish the binding later.
So I set it aside because I was worried that I’d screw it up by hurrying and not paying enough attention to what I was supposed to be doing.
Once it’s all sewn and joined, I press the binding flat and turn it to the back and press. Then I use a thin stream of glue to hold the binding in place and press that to adhere the glue to the fabric layers. I usually use Elmers, but have no idea where my Elmers is. I used this tacky glue instead. It’s water soluble so will wash out if this is ever washed. And the stream is so thin that it doesn’t cause stiffness.
Once that’s all glued down, I carefully stitch in the ditch from the front of the piece using my walking foot.
I prefer to not use any special stitch-in-the-ditch foot to do this even though I do have one. I find that I have really good control with my walking foot. I just have to go slow.
You can just barely see the ditch stitching in the photo below.
It doesn’t look quite that good from the back. But it looks ok.
Here’s the final stitches. It’s always nice to reach this point in a binding!
I will be gifting this for my friend for her birthday in August. I think she’s going to really like it. It will be fun to see her reaction.
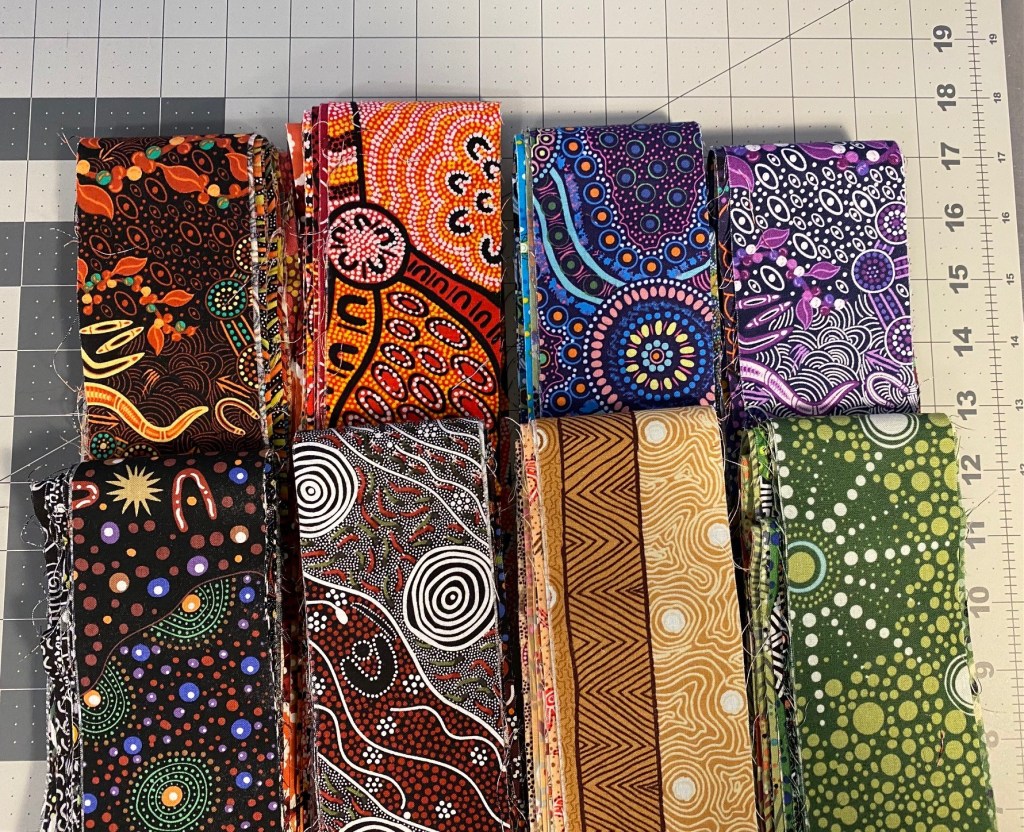
I stopped at a local quilt shop on Friday on the way back from getting my car registered and they had some Aboriginal designs that I didn’t have in my stash. So, of course I had to buy some!
There’s some really gorgeous stuff in that pile.
I’m getting so many photos of Frankenbags from blog readers I can hardly keep up . If you’ve sent me photos and haven’t see them here, let me know.
This first bag tonight is from Anousch Eva Ka. There are some really fun orphan blocks in this, and I love the differences in value in the fabrics. And that pond spot is gorgeous for the lining!
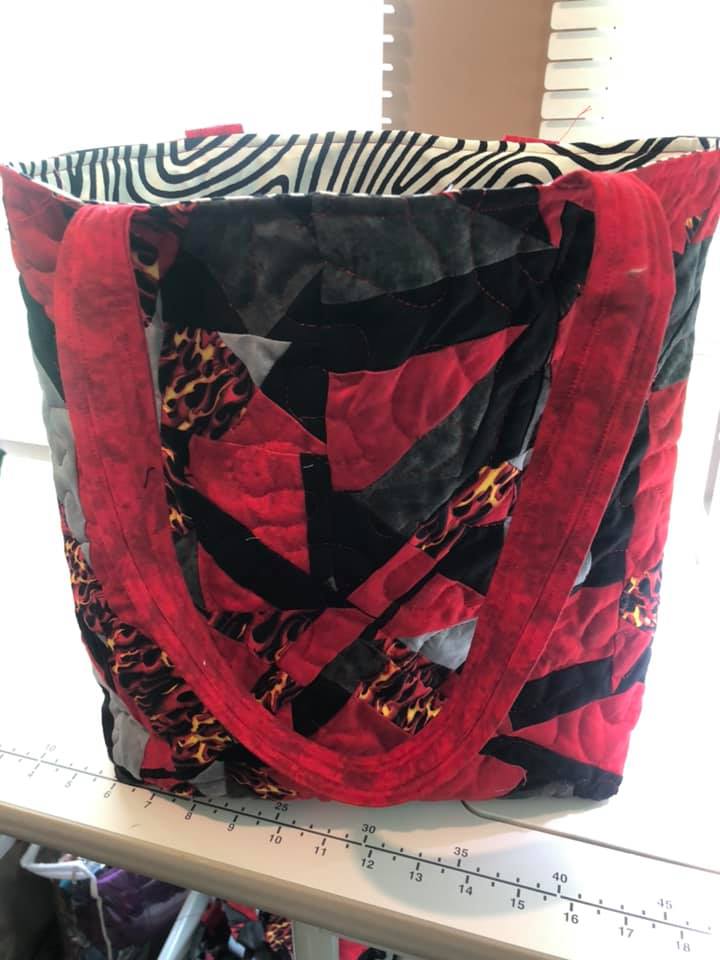
Next up is another bag from Cherry Naylor. Cherry has made a number of these bags. I just love this one with the combo of the strong reds with the graphic black and whites. And I just love a happy little polka dot!
The next bag tonight is from Audrey Jones. I love these deep and bold colors with the graphic black fabrics. Audrey said she used a different and significant material on the interior of this bag. She said it was like working with sheet rock! It looks like it’s got some serious structure. She did a nice job of wrangling that difficult material.
This next bag was made by Mary Beth Henke. I really like this one! I love that fussy cut face she used. It’s such a nice focal point. She also added a zipper placket. I love seeing people taking that extra step to make these bags even more functional.
Finally is this bag made by Eve Nicholls. Eve does all the piecing, quilting and bag construction by hand! I just love the improv piecing. It’s pretty bold and very interesting. And take a look at that spiral quilting. The bag is lined with needle cord (known in the US as corduroy). This one is pretty special.
Eve is really enjoying making these bags. This one is a gift for a friend in Italy.
Thanks to everyone who has sent photos! I think I’m going to make another Frankenbag next — maybe I’ll get back to some crumb piecing.
I finished up all the quilting on these pieces of sea glass tonight. It feels good to have it all done.
I started having more issues with breaking thread last night as I was quilting the lighter aqua pieces. So I looked at some videos about trouble shooting thread issues in free motion quilting. A couple of these videos said the issue could be the foot and how high it is off the fabric. I transferred that to thinking maybe MY issue was my stitch regulator foot.
I wanted to finish up the final darker aqua pieces tonight so decided to pull off the stitch regulator and put on a basic darning foot instead. Here’s the two feet, stitch regulator on the right.
If you’re not familiar with what a stitch regulator is, It’s a little computerized quilting foot that reads the speed of the fabric as you move it under the foot and adjusts the speed of the needle accordingly. It’s supposed to maintain a consistent stitch length as your speed varies in quilting.
And you know what… using that regular, non-computerized foot was amazing! I was able to finish up about 20 of the darker aqua pieces in nothing flat with no thread issues at all and with no profanity! EUREKA! I may never use my stitch regulator again! It will be nice to give a gift that doesn’t have profanity woven into every stitch!
Without the stitch regulator, you do need to pay attention to your stitch length and your speed. You don’t have the computer helping keep the stitch length consistent, so it’s all up to you. I practiced on a quilt sandwich that I had handy and felt that my stitches were consistent enough to dive in.
After our walk I trimmed the piece using the masking tape as my guide. And once it was trimmed I removed the masking tape.
I was a bit nervous that the tape would leave some sticky residue behind, but there’s nothing there. So that makes me very happy.
Most of these sea glass quilts you see online have a faced edge rather than binding. I like the look, but I want to bind this for practical reasons. I’m afraid the white edge would get really discolored from dust over time. So I’m going to bind it in a soft blue/aqua that blends with the colored pieces of fabric. Here’s a picture of the batik I selected from my stash.
You can see that it’s sort of a combo of blue and aqua. I think it’s a good choice.
Here’s a bit of a view showing three sides with the binding fabric.
Plus, my friend’s favorite color is blue. So that makes this an even better idea.
I’ve pretty much decided that I’m going to make another trip quilt out of the aboriginal strips my friend gave me. You can see other trip quilts I’ve made here and here.
So I took all those sets I had put together the other night and sorted the pieces out by color family. To make a quilt the 6 block by 7 block size I want, I’ll need 42 blocks. That means 21 strip sets — two blocks out of each strip set. With six strips in each strip set, that means I’ll need 126 strips.
I counted out the strips I had and was about 18 strips short. So I dug out my Aboriginal scraps and cut the additional strips I needed.
Then I sorted these by color family and added them to the previous strips.
I’m pretty sure I now have around 130 strips. This allows me to pull out fabrics I’m not crazy about. I’m also toying with using a common fabric for the center diagonal line in each block. I haven’t decided for sure, but that might be the direction I go.
I decided to take tomorrow off from work. I have sworn I WILL go out and get my car registered! It’s a full year past due! I can’t use the pandemic as an excuse any more. I also hope to finish the binding on the sea glass quilt and figure out how I’ll rig it out so it can be hung on a wall.
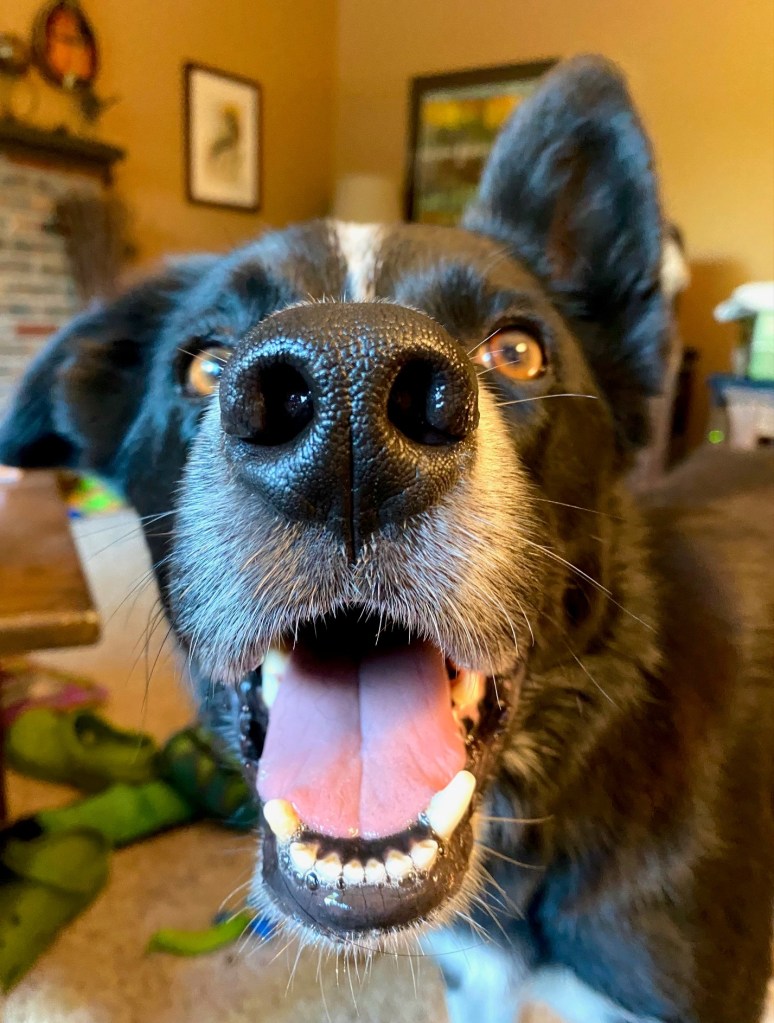
Look how cute my Rico is!!! Gah! What a sweet kid.
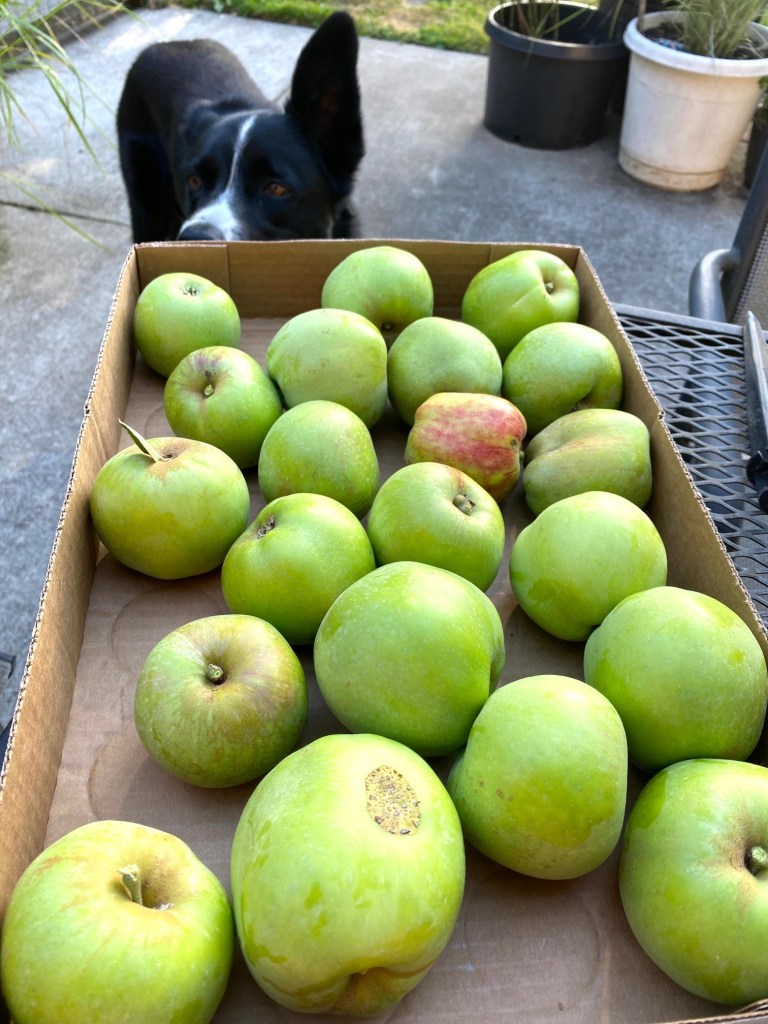
I harvested my first box of apples last night. I’ve got a pretty good crop on the tree, but not as crazy huge as they’ve been in recent years.
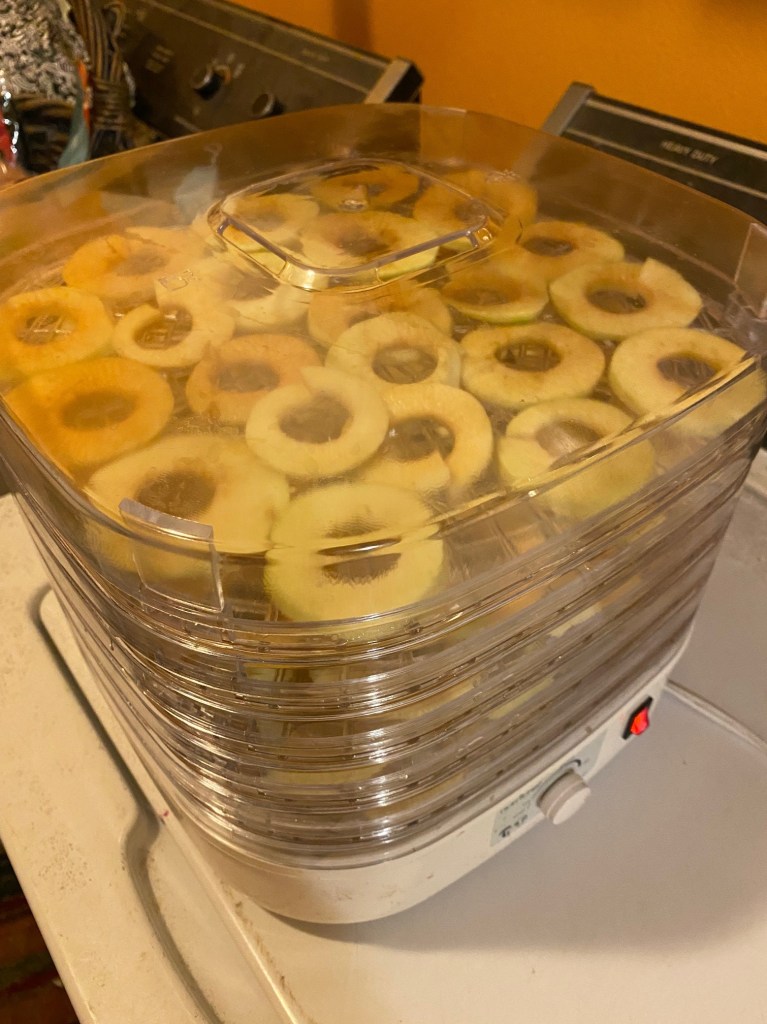
These were all peeled and sliced and spent the night in my dehydrator. And this morning, they were ready to eat.
I will run this work horse overnight quite a few more times in the next month! And it’s so nice to have these dried apples to munch on all winter.
My blog readers have been really busy over the last few days. Here’s a bunch of Frankenbag photos they’ve shared with me.
This first one is from Patricia Woltman. I just love this bag… those really pretty bright pastel fabrics with all that wonderful black and white. It’s really pretty. And look.. another zipper placket!
This next bag was made by Kellie Doyle. There’s some really fun graphic stuff going on with her piecing. All those angles are really interesting. And I LOVE her lining! What a fun fabric. It reminds me of finger prints and it’s pretty fantastic!
Next up is this bag from Britt-Inger Jönsson. She has made a good number of Frankenbags. She puts together some really bold and fun fabric combos. And I love her wavy checkerboard quilting on this one! Hmmm. Might have to try that one.
And… another zipper placket! And holy cow… there’s a dog under that bag!!!
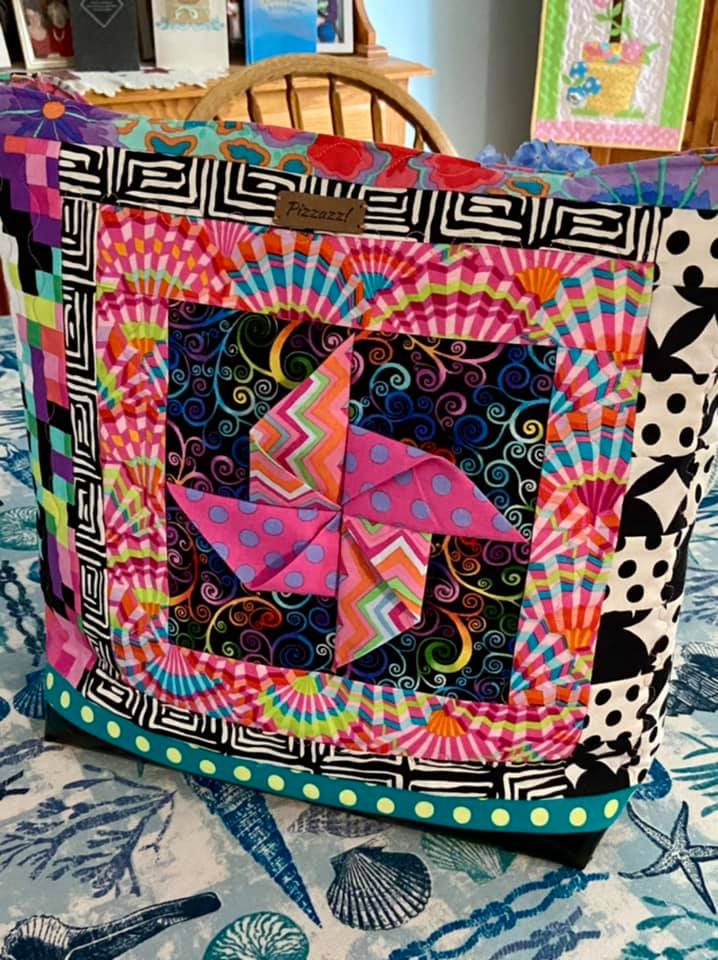
Next is this bag from Susan Conant. I love her little three dimensional pinwheels. Reminds me of the little spinners from my childhood. There’s also something really nice about that pink with the graphic black and whites. Lovely.
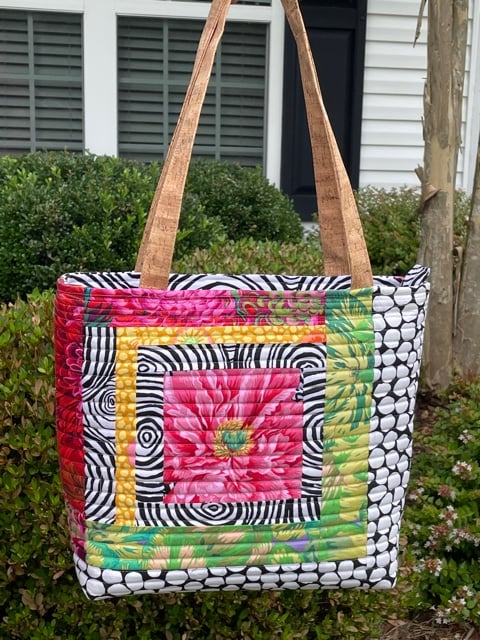
Here’s another bag from Barb Schippa. She didn’t do any piecing on this bag, but she paid a helluva lot of attention to the placement of that big print! I love this bag! Everything is placed so carefully and I love that big print with that springy green lining. Look how carefully she matched the two sides of the zipper placket. And look how the zipper placket matches the placement of the interior pocket. Very nicely done!
Thanks to you all for sharing photos of your bags!
I never remember the things that annoy me about free motion quilting until I sit down at the machine. And then it all comes flooding back to me. FMQ on a domestic machine is a pain in the ass. I don’t know how people quilt full size quilts on a domestic machine. They are much stronger people than I am and I have great admiration for them.
I sat down after our walk this evening to continue doing the quilting on my sea glass wall hanging. It all went so smoothly in the two previous sessions. And tonight, with the darker blue thread, I had nothing but troubles.
The thread kept breaking. I kept having skipped stitches. And the upper thread would fray and eventually break. After changing my needle, switching to my single stitch plate, and re-threading my machine, I realized what the issue was. I was going clockwise around the pebbles, rather than counter clockwise. In both previous sessions I had gone counter clockwise.
The issues I mentioned above always happen when I’m traveling in a northeast direction. When I go counter clockwise I never have to travel in that NE direction and it all works beautifully. I know I’ve figured this out in the past, but I had forgotten.
Needless to say, my quilting session involved much more profanity than should have been necessary. But after the nightmare of the first six darker blue pebbles, the remaining ten or so were a dream.
It’s so fun to see the texture of the quilting as I finish more and more of this piece.
The back is a bit of a mess, but I’m going to have to live with it.
All I have left to quilt are the aqua pieces at the bottom. I should be able to finish this tomorrow night — now that I have “counter clockwise” embedded in my brain!
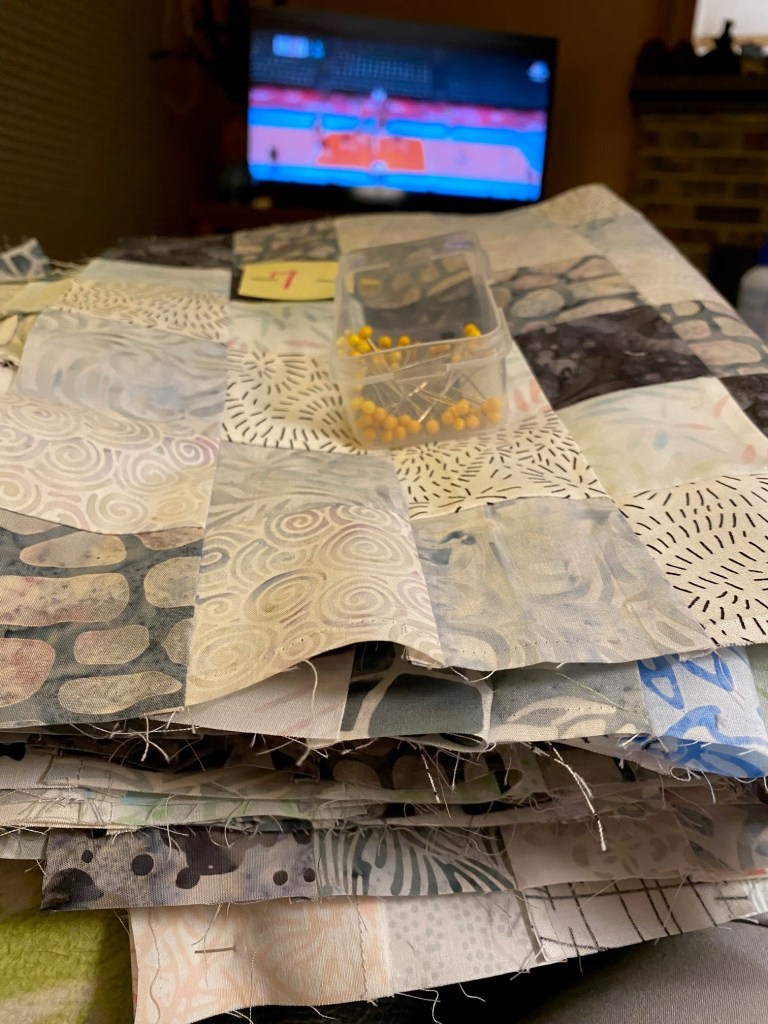
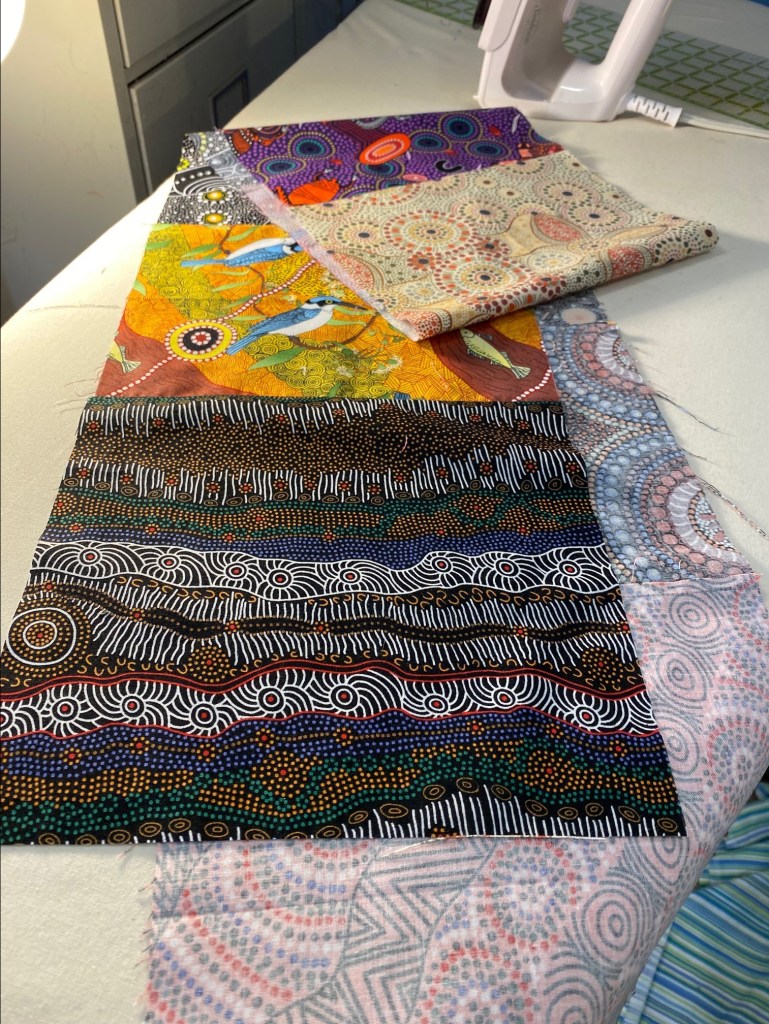
I have a virtual conference going on this week so am spending a good deal of time on zoom presentations. So today I was looking for some hand work that would keep my hands busy while my brain paid attention. So I pulled out a big pile of Australian Aboriginal fabric 2.5 inch WOF strips that a friend gave me about a year ago.
I’ve been thinking about making either a trip quilt or a 16 patch from these strips, and today I paired these up in sets of two with the plan to make them into a sixteen patch.
I tried to pair these sets up with a good variation in either value or color. And then I ended up with a small stack of about a dozen strips that were all dark mostly brown or black. So I pulled some brighter and lighter fabrics from my stash that I will cut some additional strips from to pair up to make the remaining needed blocks.
I won’t use all of these but I will use some of them. And I still haven’t committed to a 16 patch. I may make these strips into a scrappy trip quilt. I still have time to decide. It will probably just come down to which one sounds more fun to make. And as I type this, I’m thinking it will be a trip quilt! I’m sure I’ll change my mind six or seven times before I start sewing strip sets.
Another thing I did today was make a list of new color combos for upcoming Frankenbags. I’ve been noodling on these ideas for a while now and I figured it was a good idea to write them down.
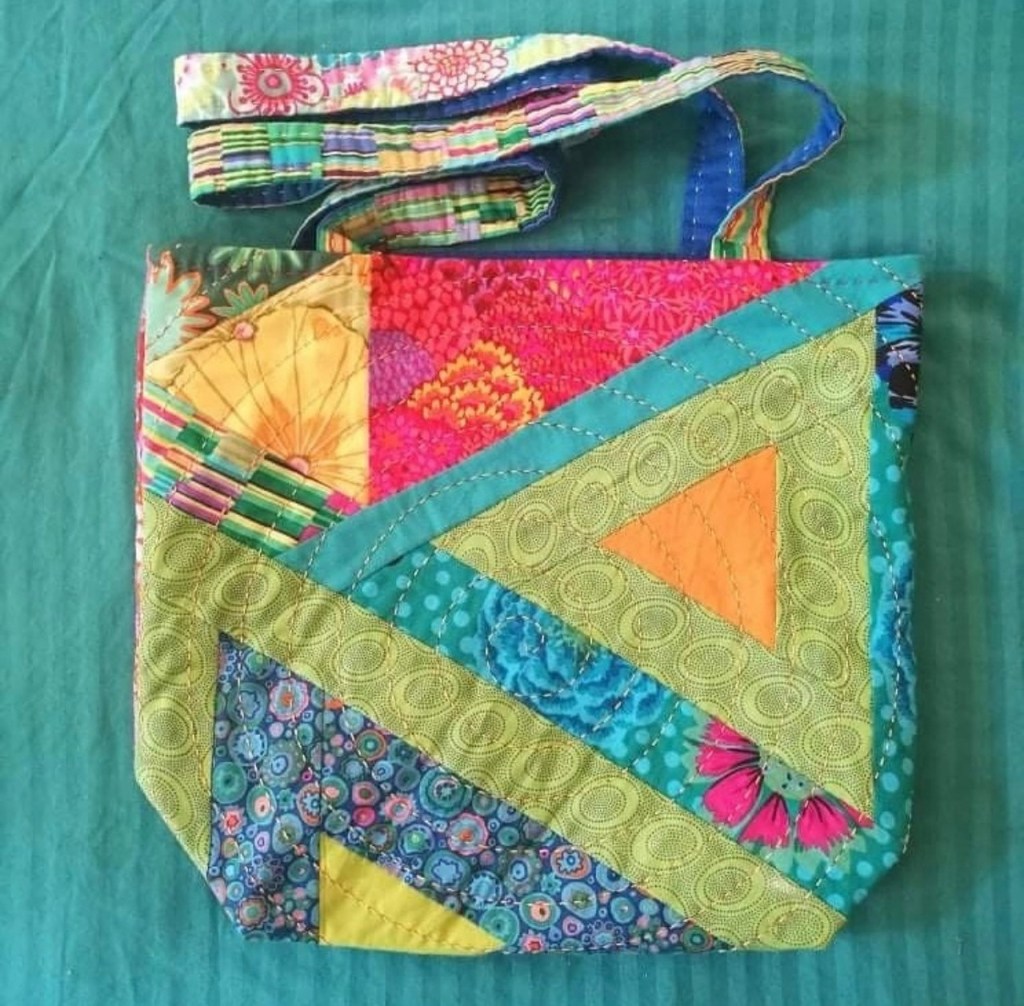
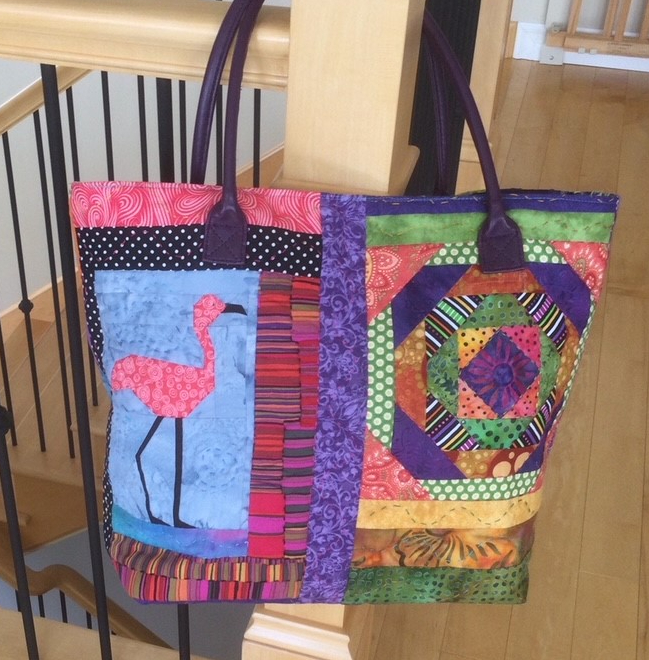
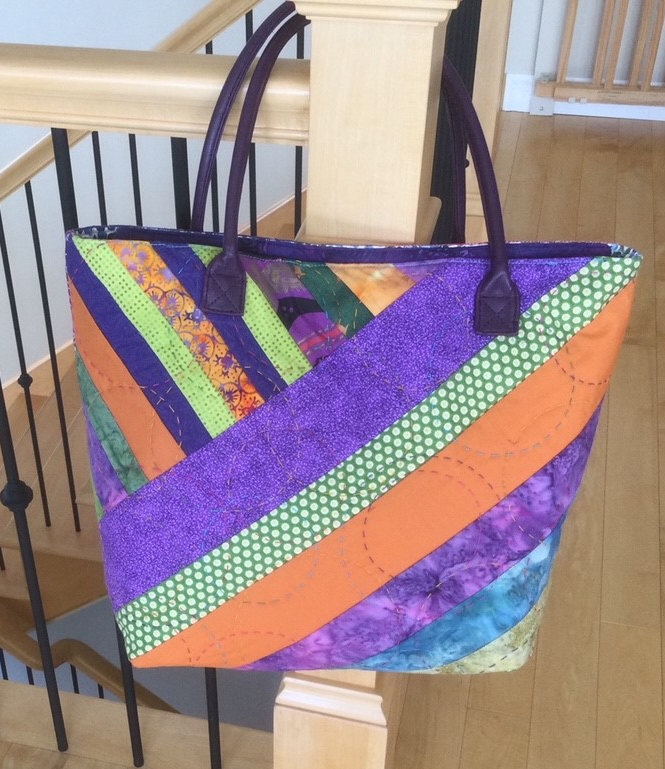
I received photos of some more Frankenbags made by blog readers. This first bag is from Annette LeBlanc from the province of New Brunswick, Canada.
I love how she incorporated that paper pieced flamingo, combined with that dark and rich pineapple block. And those strong graphic diagonal lines on the back are wonderful! This is Annette’s first Frankenbag.
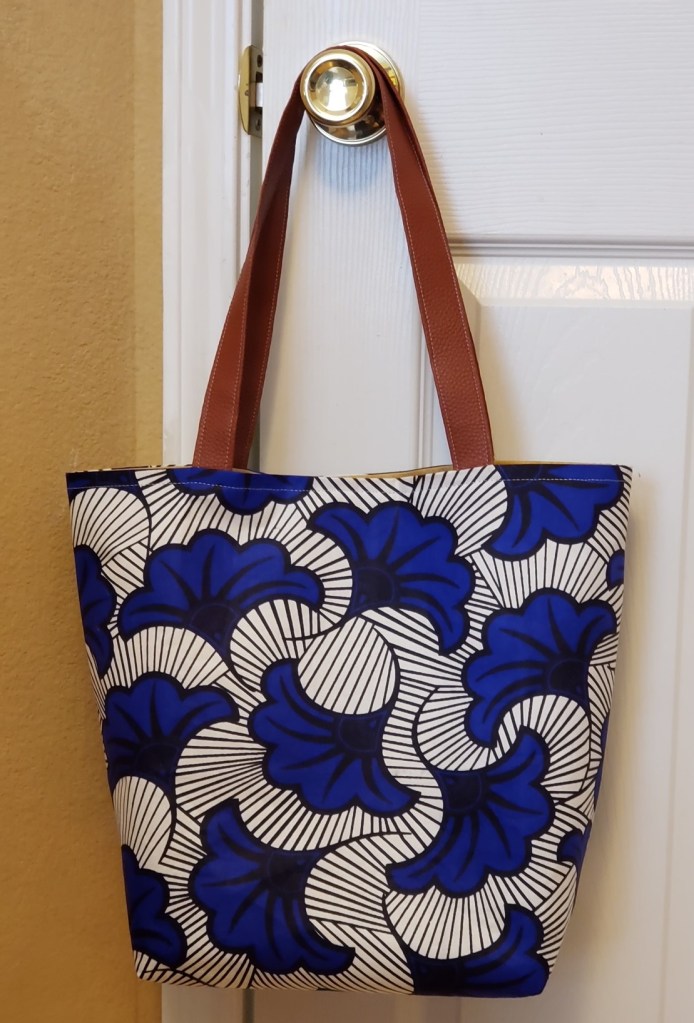
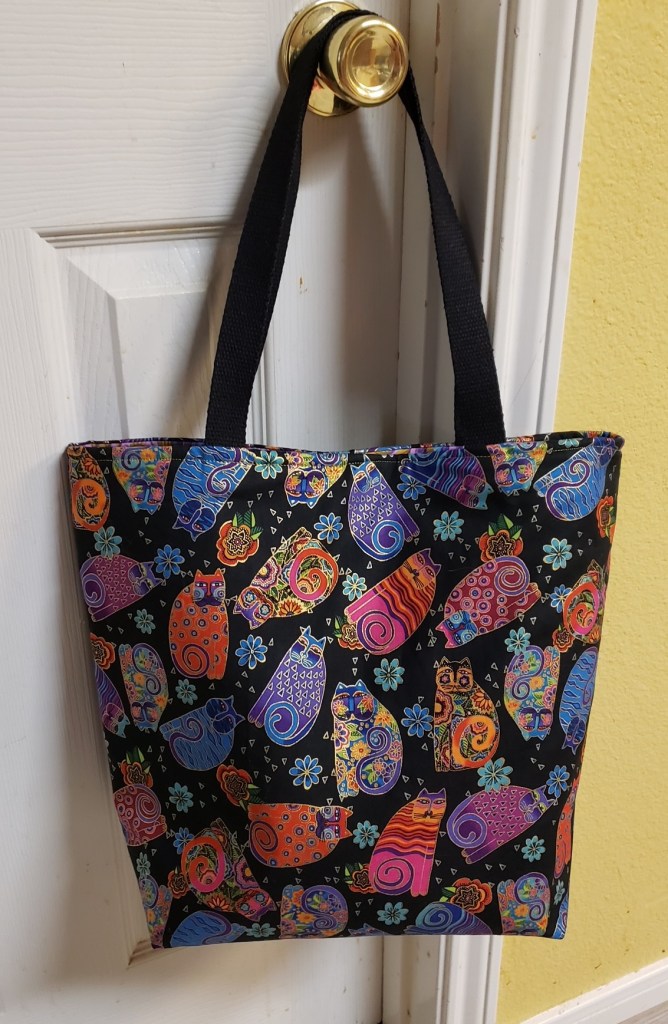
These next bags are from Ingrid Cruz. She didn’t do any improv or crumb piecing on her bags, but I love how she kept these big, bold and graphic prints whole. What a great thing to incorporate into this basic bag body.
We had a bit of a sleep in this morning followed by a leisurely breakfast of my home grown strawberries and yogurt with a good cup of coffee — all enjoyed on the patio. Afterward, I took the boys for a 3.5 mile walk.
It was a beautiful morning but a little warm by the time we got home.
After our walk I started working on putting my quilt sandwich together for the sea glass wall hanging. I didn’t have much time because we had a sheep herding lesson up in Battleground, WA, at 2:30.
We left for our lesson at 1:30 and the heavy traffic meant that we barely made it on time. We usually allow an hour to get there and we typically have at least 15 minutes to get ready for our lesson.
Rico was amazing at his lesson. We worked on driving the sheep, which is pushing the sheep away from me. The dog’s instinct is to bring the sheep to me, so learning to push them away is hard work. Rico was so good, on top of a really good lesson yesterday. It’s so much fun to watch a dog do what they’re bred to do. He was nice and tired after his lesson.
I took a picture of my sea glass quilt outside this morning. I’m just loving this!
Once we got home from herding I dug in and finished the sea glass quilt sandwich and started quilting. I managed to get around half of this piece quilted.
The free motion quilting on this is very free form, so it’s fun because you don’t have to be precise. It’s all meant to be a little disorganized and organic. Just my kind of quilting!
I used my stitch regulator for this. It works really well, but it always beeps at me because I like to go really fast.
I love the look of this quilted. It’s always fun to see how a project evolves when the quilting is added.
I’m using six or seven thread colors on this piece. That slows things down as I have to stop, wind a bobbin, rethread the machine, and then wrestle the piece back under the needle. But the different colored threads make a big difference.
I also have to start and stop quilting on each small piece of fused fabric. With the colored thread and a white background, I can’t just stitch from pebble to pebble because you would see that traveling line.
Since I had to change thread quite often and had to cut and restart the thread with each pebble, it was a hassle to use my quilting gloves. So I pulled these little rubber finger sleeves out and used them. I had one on each middle finger, which was plenty to give me grip on the quilt sandwich so I could move it around, but it left me lots of fingers free to deal with thread and needles.
I may use these more in the future.
I received photos of a couple more Frankenbags from blog readers.
This first one is from Annette Allen. She’s in Australia and said they’re in their fifth full lockdown during the pandemic and said she made this bag while she was stuck at home.
Annette said she’s never used black and white fabric with these bold colors before and thanked me for “giving her permission” to use them. She said she loves the way they make the colors pop. I agree!!!
I love this bag! Of course, the black and white is fantastic, but her colors are really pretty too. And that striped lining with the polka dot pocket… LOVE IT!!! I really need to do more black and white linings!
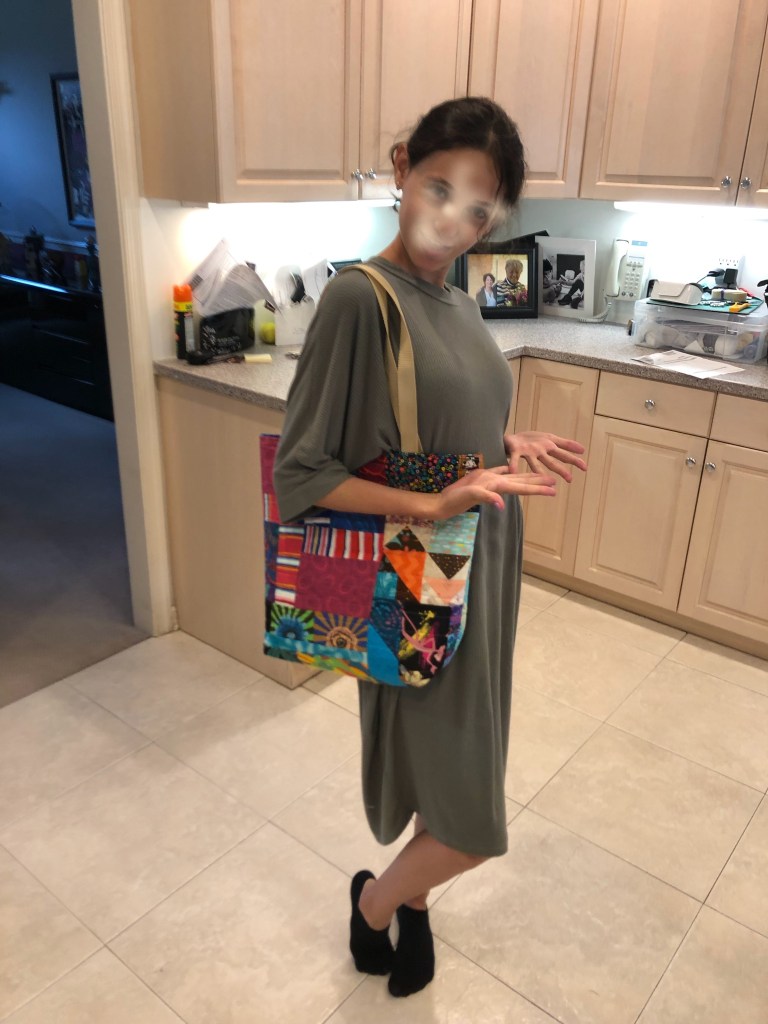
This next bag was made by Debbie Rothman’s grand daughter “S.” This is her first Frankenbag and Debbie said she is very proud of herself! (I’ve blurred her face for her privacy.)
I love this bag… the bold stripes and shapes, the colors. It’s all so good. And it looks like it’s really well made too! But what I love most is that “S” looks like she really loves it! I think “S” has an amazing future of quilting and creating ahead of her! Thanks so much for sharing your joy with your project with me!!!
Thanks to Annette and Debbie for sending me photos!
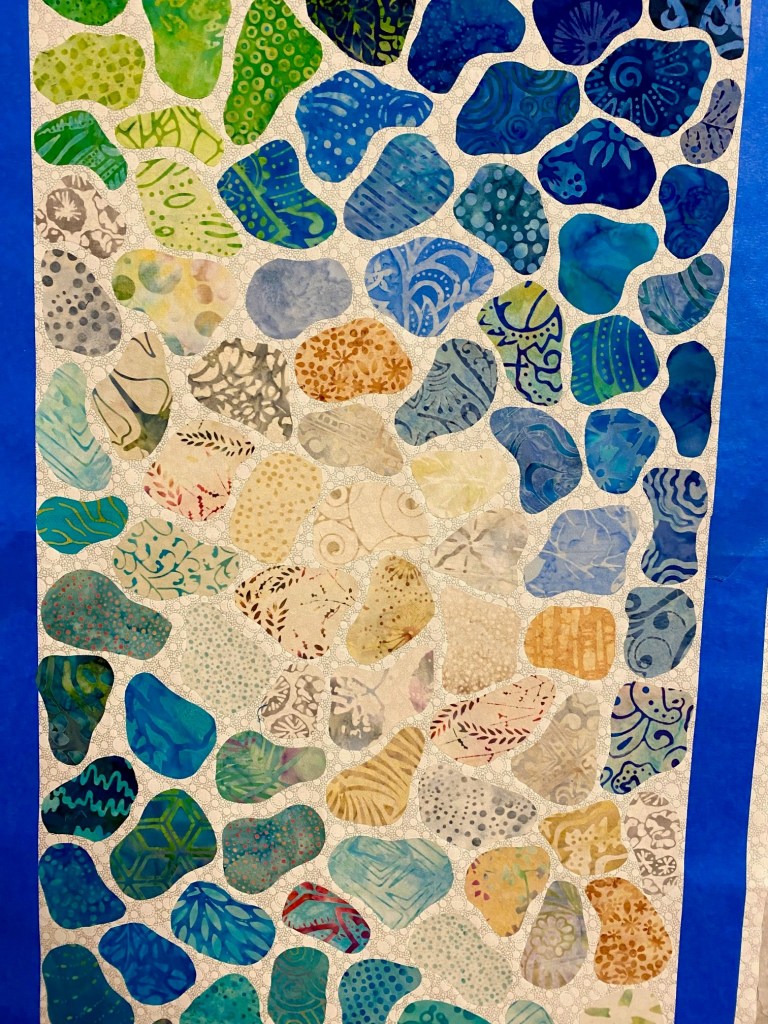
I didn’t have much time to spend in my sewing room today. But I did get in for a few minutes this afternoon and then again later this evening. And I got this sea glass wall hanging all designed and fused.
I’m really happy with how this is turning out. It’s big, but not freakishly big. It has good proportions.
I love the colors. The little bit of green at the upper right is nice.
Here it is by sections for a closer look. Here’s the top section.
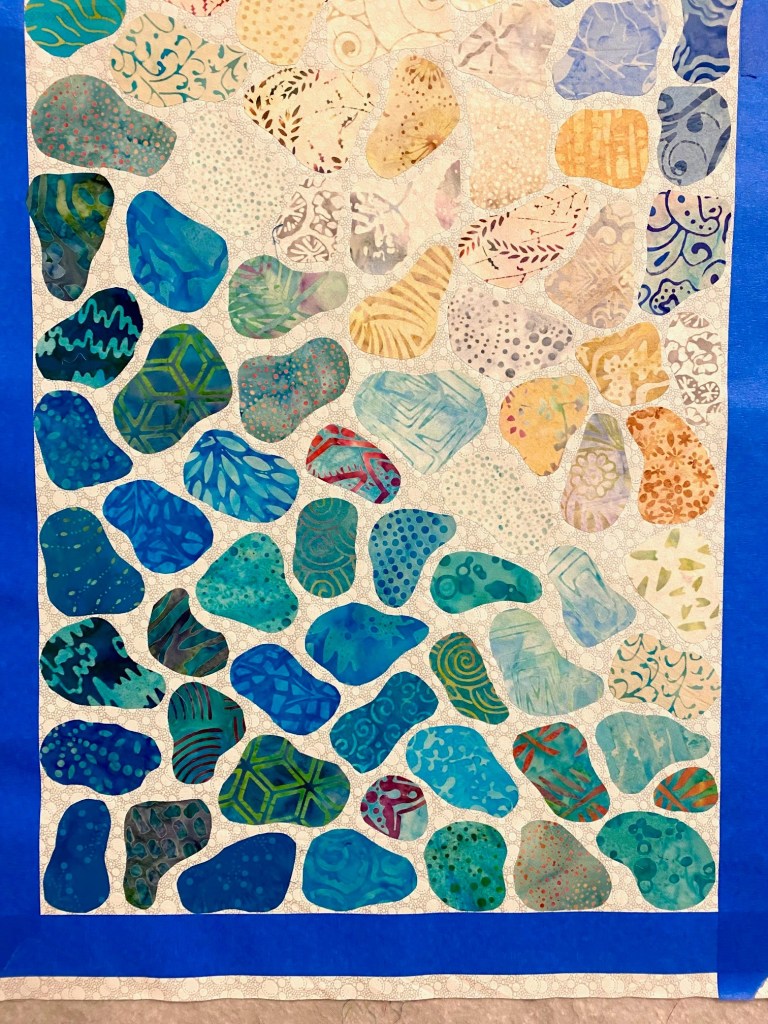
And the middle section…
I really like all the color in the neutrals in the center.
Here’s the bottom section…
I love those little pops of color here and there.
Tomorrow I’ll get the quilt sandwich done. I still need to buy some thread to quilt it.
I took Rico to his herding lesson today and he was just amazing! He was cool and collected and too my direction really well.
He waited very patiently for our lesson to start.
Such a good boy. We have another lesson tomorrow afternoon.
Had a wonderful time tonight at a pot luck dinner with friends. The weather was just perfect for being outside and the food and drink was really good.
I met this little cutie pie and fell in love.
Her name is Frankie and she’s pretty magical. She kept jumping up on my lap. I really miss having a small dog around.
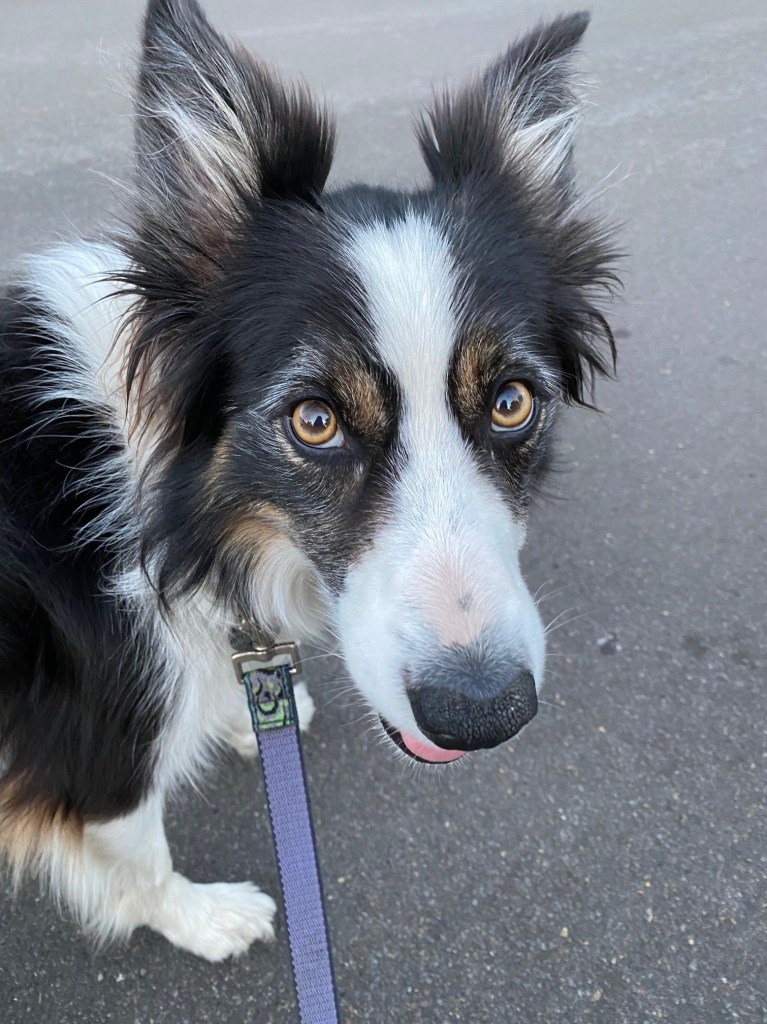
On our walk last night I noticed how white Bender’s face is getting. Look at those white eyebrows.
He’s only eight. It seems like he’s gotten all this white hair in just the last few weeks.
I was thinking this afternoon about what my next project should be and I remembered something that I had done a lot of prep for a few months ago but never actually started.
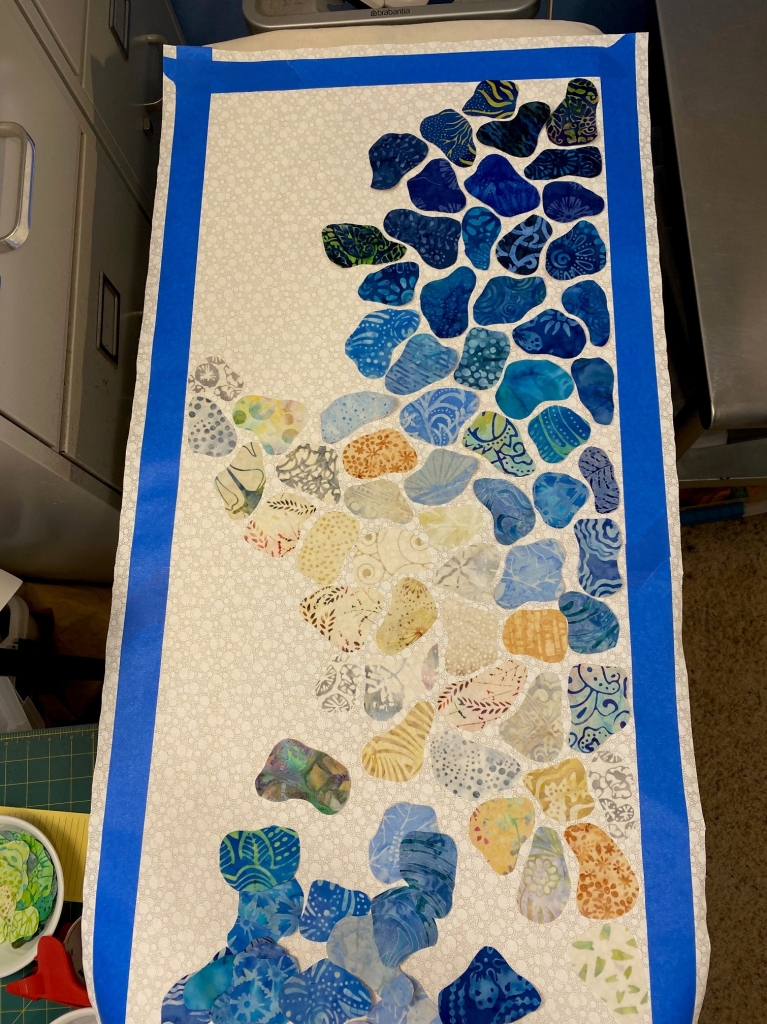
I decided to start in earnest on the sea glass wall hanging I’ve been wanting to make for a friend’s birthday next month. Here’s how far I got tonight.
I got the idea for this quilt from Exhausted Octopus on Instagram. She has a digital class for this project that she sells for a reasonable price. Check out her stuff on Instagram. You can also check out the #seaglassquilt hashtag to see a lot of quilts that have been made by people who have taken that class.
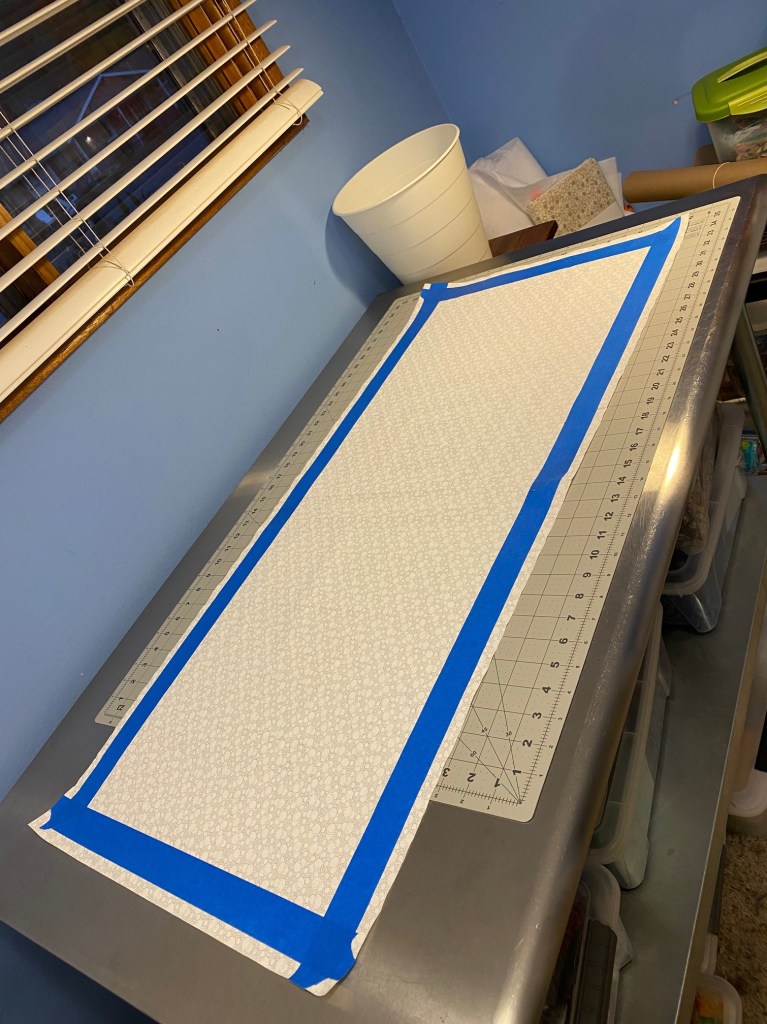
My friend wants a piece to cover an electrical panel in her main bedroom, so this piece is made to fit an odd size. And it’s pretty big. So the first thing I did tonight was select a piece of white on white fabric from my stash. It has bubbles on it, which feels pretty right for this project. Then I cut it to size and used masking tape to mark off where the pieces of batik stones will be placed. That marked off section is 15 x 38 inches.
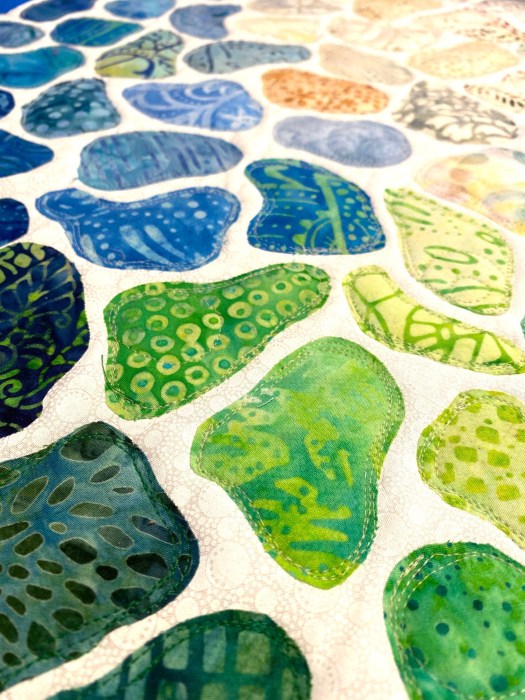
Then I started placing the pieces of fabric that had Heat and Bond applied to them. I started with the lighter more earth tones in the center.
These fabrics, except for the background, are all batiks. I love the colors and patterns. Even in these neutrals there is a lot of color. And it feels like real stones to me.
I got these neutrals positioned, peeled off the paper backing and pressed them in place.
Aren’t those fun!
I started to place the colored batiks and got quite a bit done when my back started bothering me so I had to quit.
I will add pieces in green to the top left of this piece, and the bare space at the bottom will probably be aquas and purples. I’ll have to decide for sure once I get more pieces placed.
It was fun to place these small pieces of fabric on the background. It’s completely free form and I like that!
I received this very exciting fabric delivery this week.
That’s ten yards of a very boring batik that I got on sale. I will use it as the backing of my Frankenbag quilt sandwiches. It adds stability to the quilting and a little structure to the bag. It ends up completely hidden inside the bag so It doesn’t have to be pretty. I just want something light that won’t show through the lining.
I got a few more photos of Frankenbags this week. This first one was made by Nancy Coronato. It reminds me of the blue one I just finished. It feels very cool, and we used some of the same fabrics. Aren’t those spots fantastic on this one!!! There’s nothing more cheerful than a polka dot fabric!
This next bag was made by Kimber Dodge. I love the soft greens! And I’ve had pieces of that color way of Kaffe’s guinea flower on the left and I’ve never used it in anything I’ve made. But I love it! I need to get it into a project soon. And I’m loving that black and white Jumble with the green. And look… more polka dots!!!
Thanks to Nancy and Kimber for sending photos!
I don’t know about you, but I’m looking forward to the weekend. Our weather has been pretty nice the last few days. It’s cooled down to the mid 80s the last few days, and will be even a little cooler this weekend.
It’s a good Sunday when you get done the things you intended to get done.
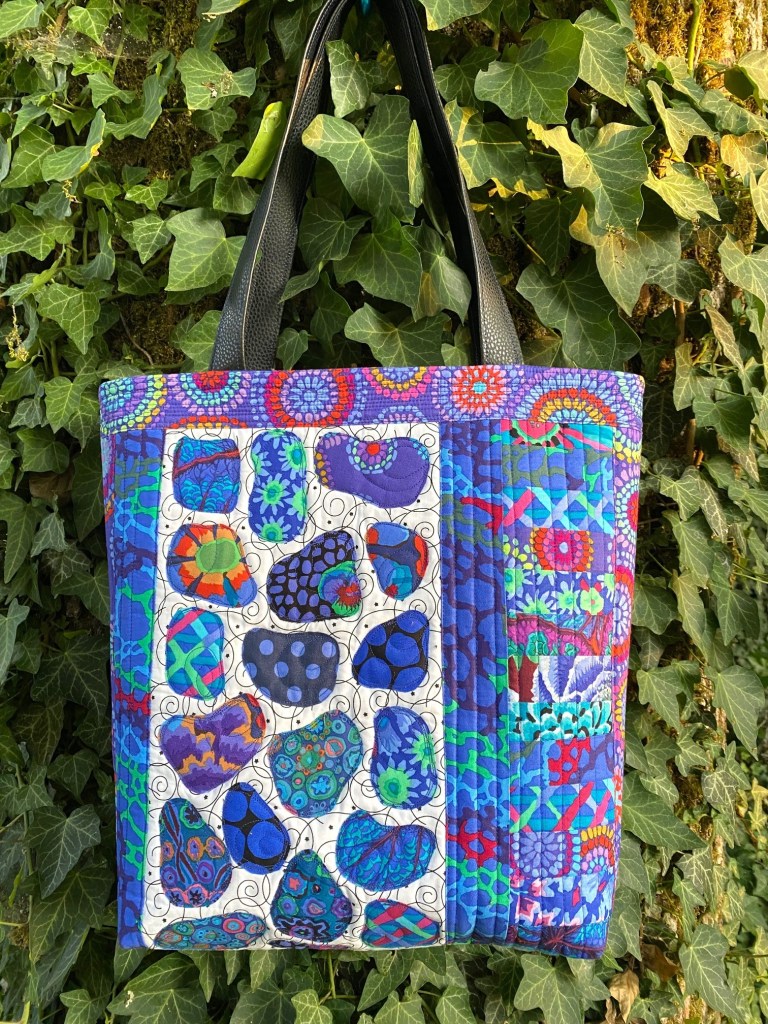
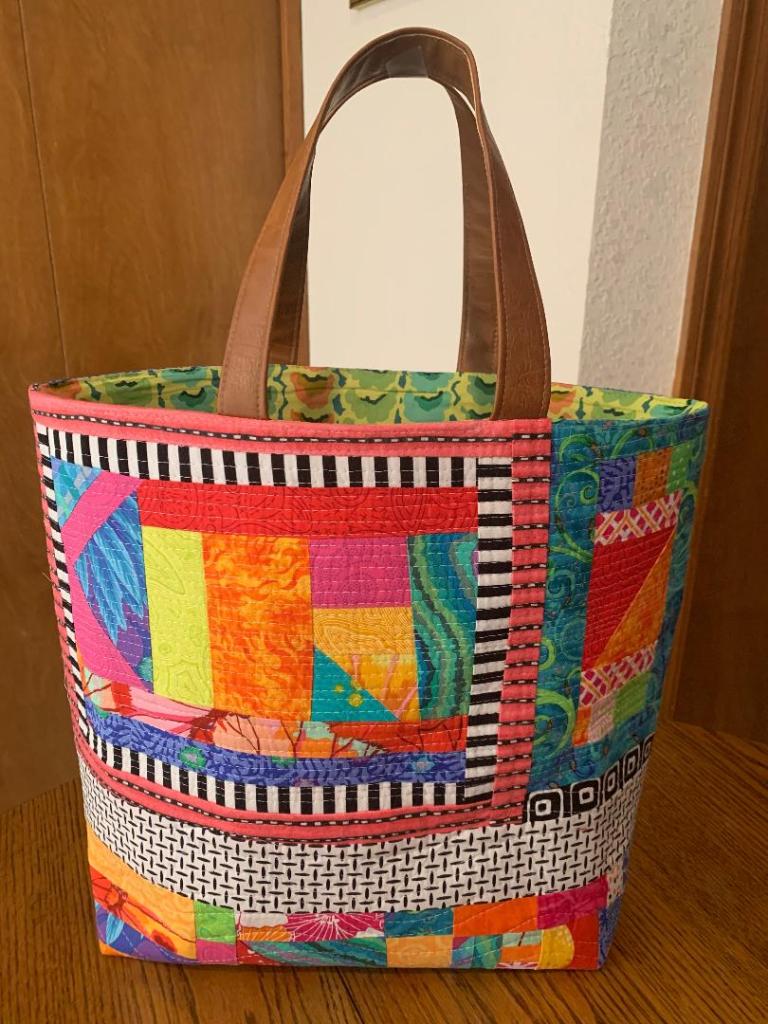
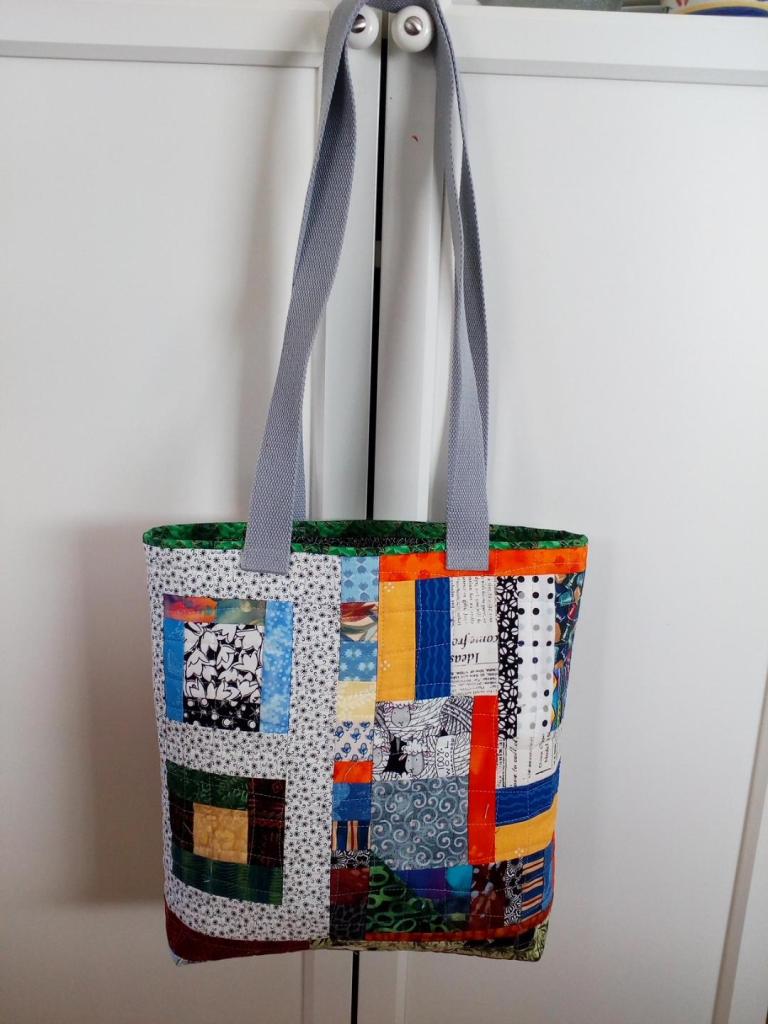
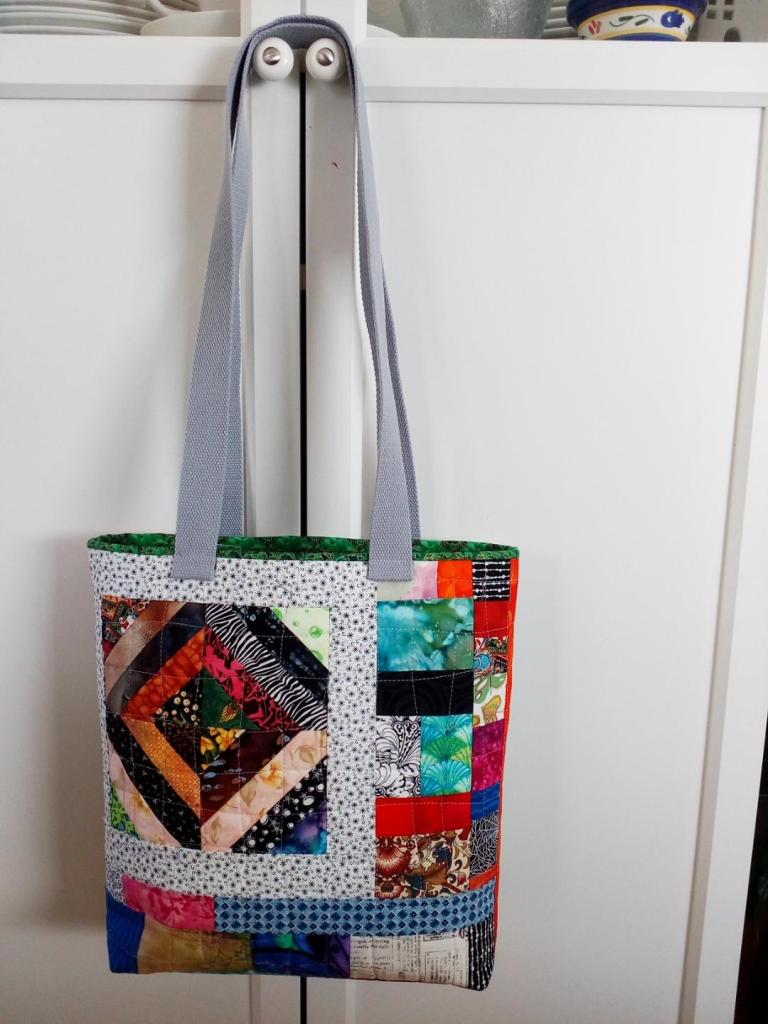
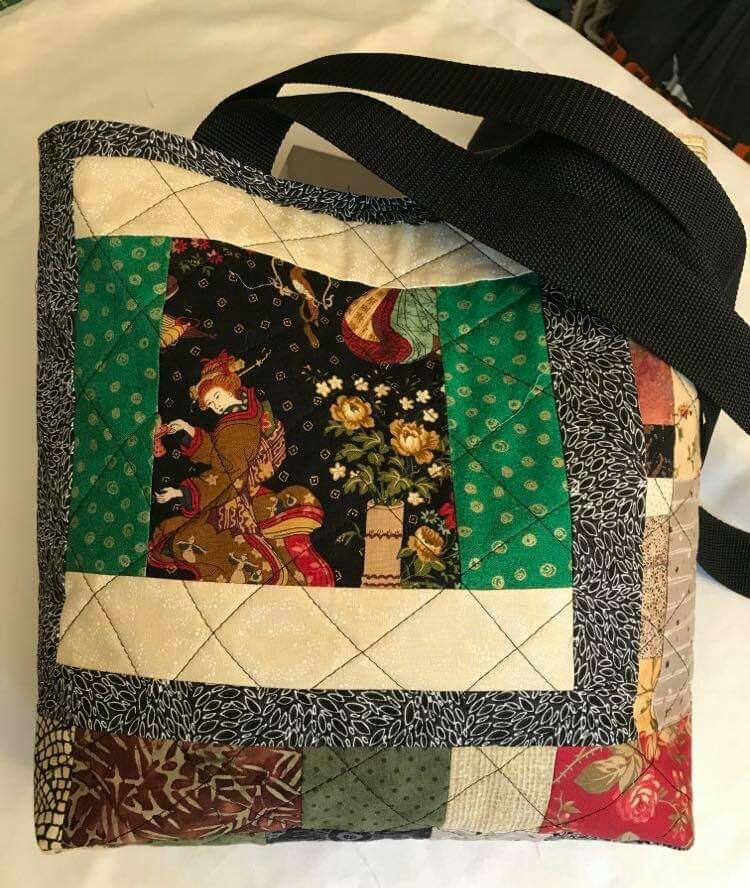
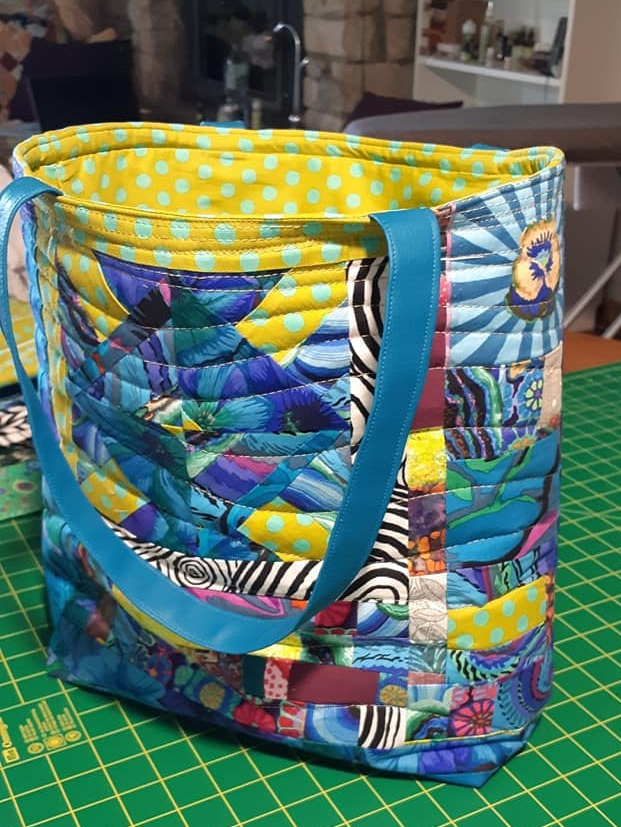
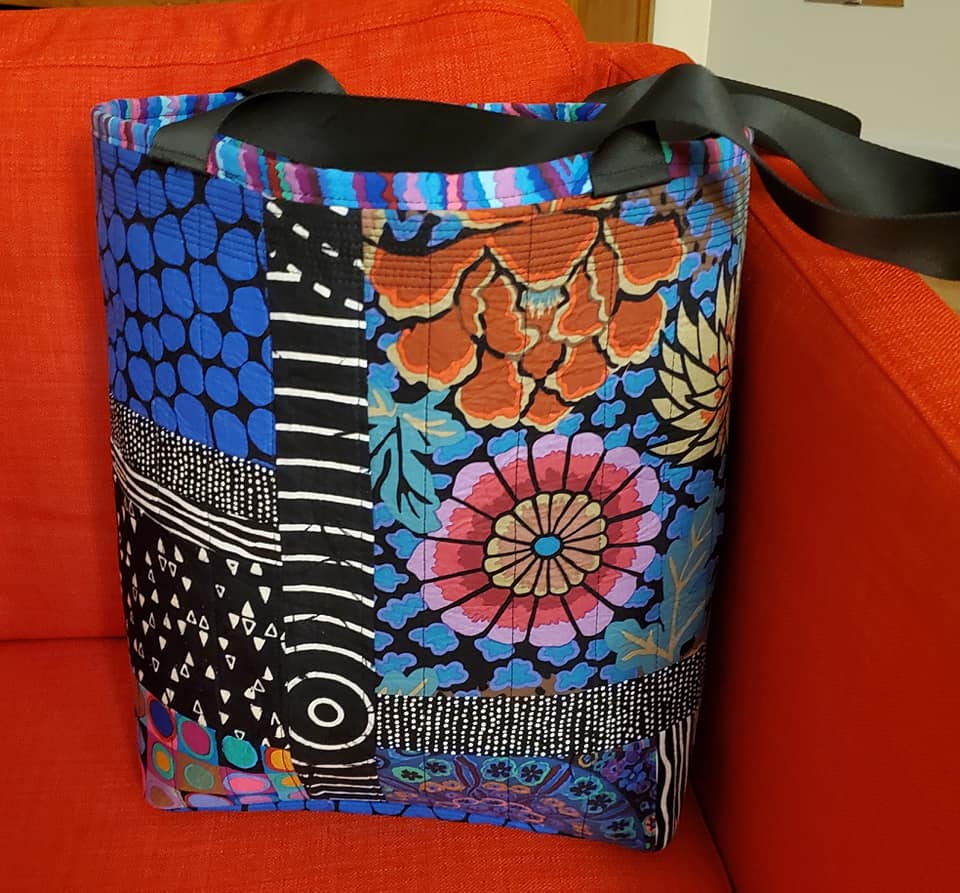
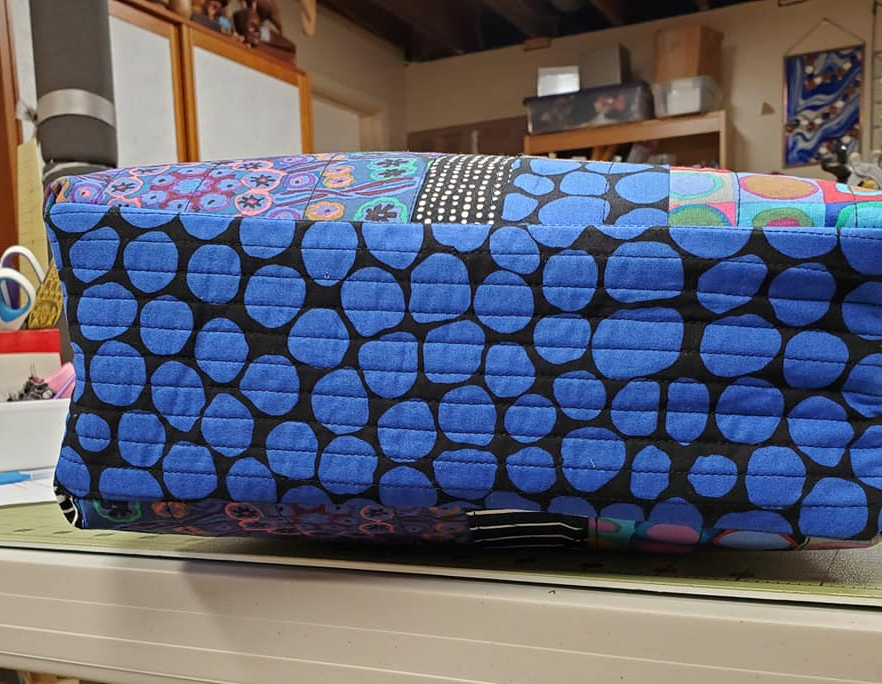
After our morning walk I hit the sewing room and got my blue Frankenbag panels quilted and finished up the rest of the bag. I really like how this turned out!
Blue is not my favorite color. But I like this blue bag because of all the little pops of color that make it all more exciting.
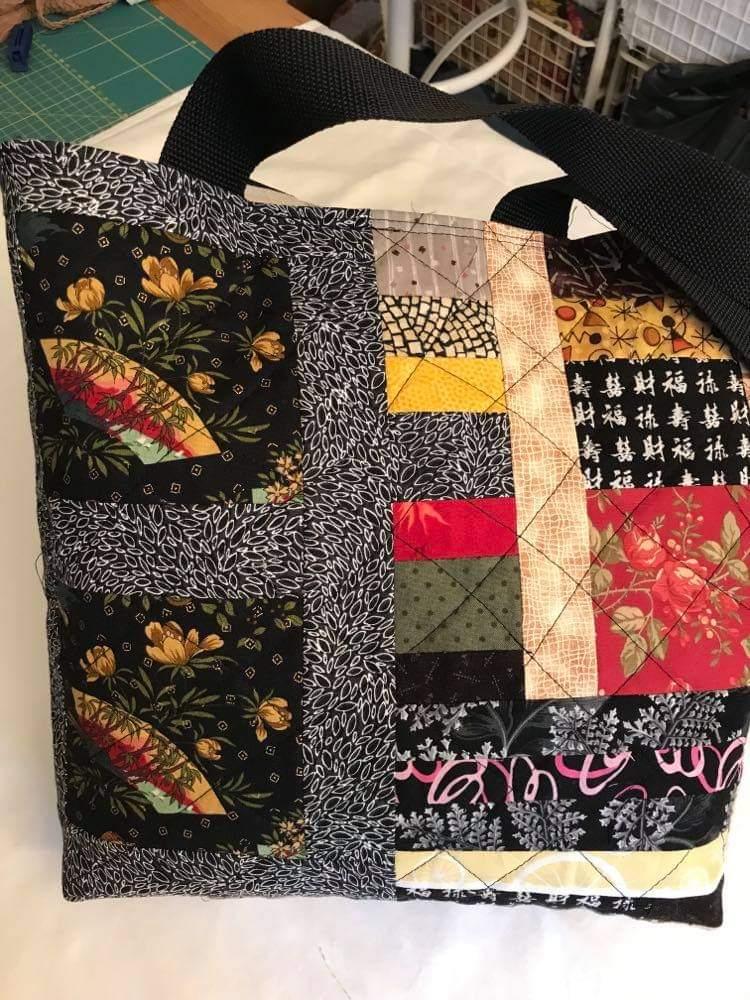
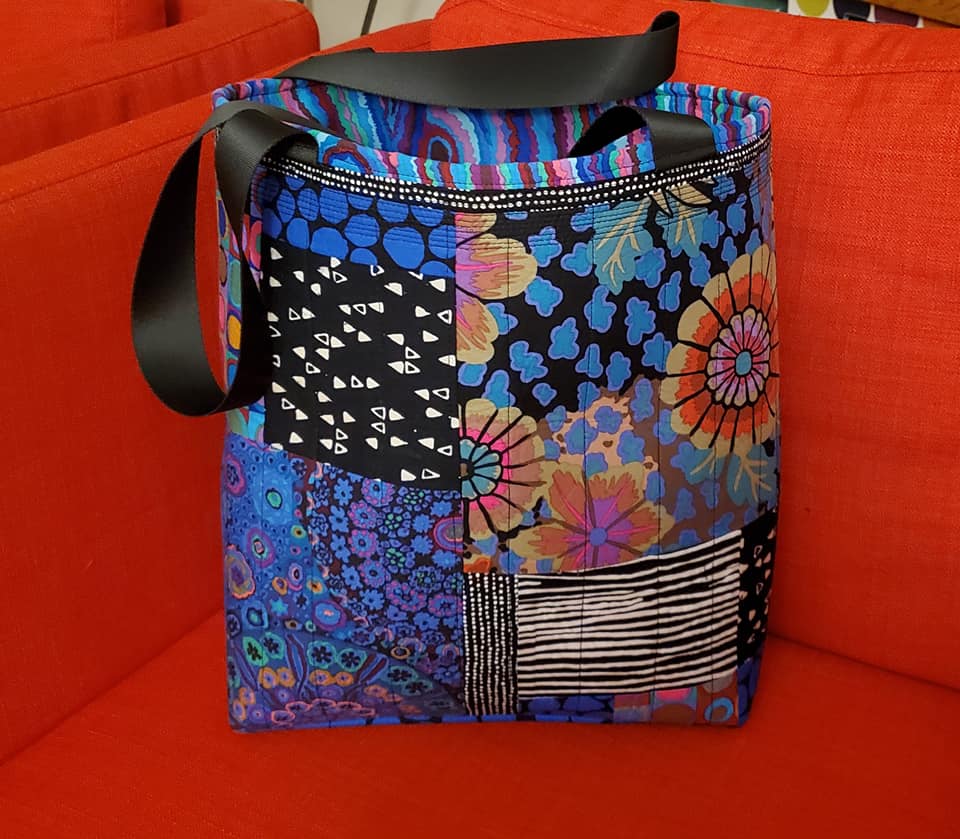
Here’s the other side of the bag. I went back and forth on whether I should use dark brown or black faux leather for the handles. I decided on the black.
And here’s that little tag I love.
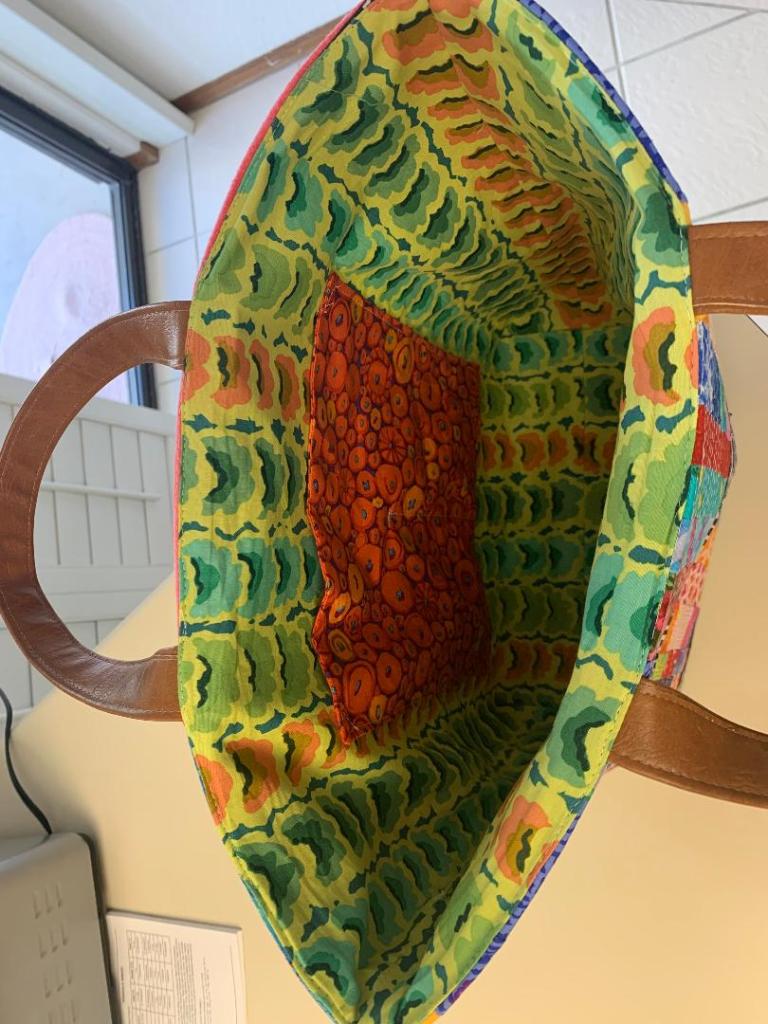
And I love this geode fabric for the lining. It’s bold, but a bold lining is a wonderful thing!
After dinner and our evening walk I hit the sewing room with the intent of finishing the third quilt backing that I wanted to finish this weekend. I finished it up at 11:15.
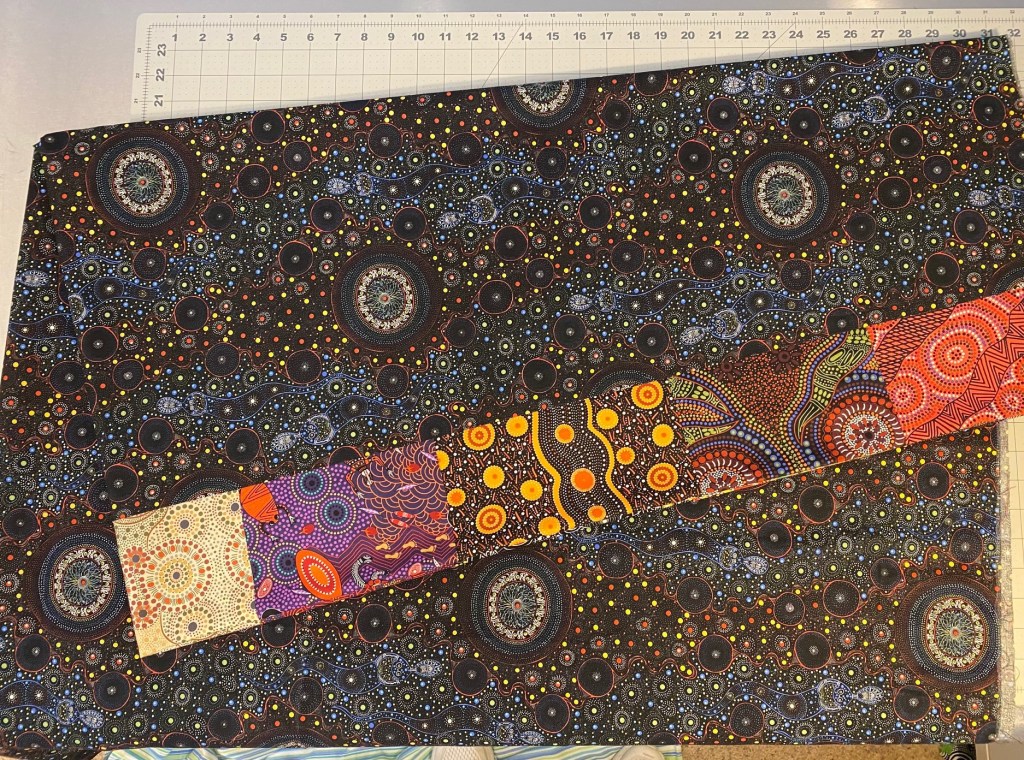
I used this beautiful dark Aboriginal print and inserted a strip of left over fabric blocks.
These fabrics are so gorgeous and they feel very much like the KFC fabrics. I love working with them.
I really hate wresting with all the bulk of quilt backs. Folding my pieces into a narrower strip and then accordion folding the whole thing into my lap helps me manage it all.
Here’s the finished back folded with about half of the inserted left over blocks showing. It gives you an idea of the colors.
Here’s the quilt top, the backing and the fabric I’ll use for the binding.
It feels really good to know that these five quilts I plan to give as gifts during the holidays are well under way.
I got some photos of another really nice Frankenbag today from Jodi Smith.
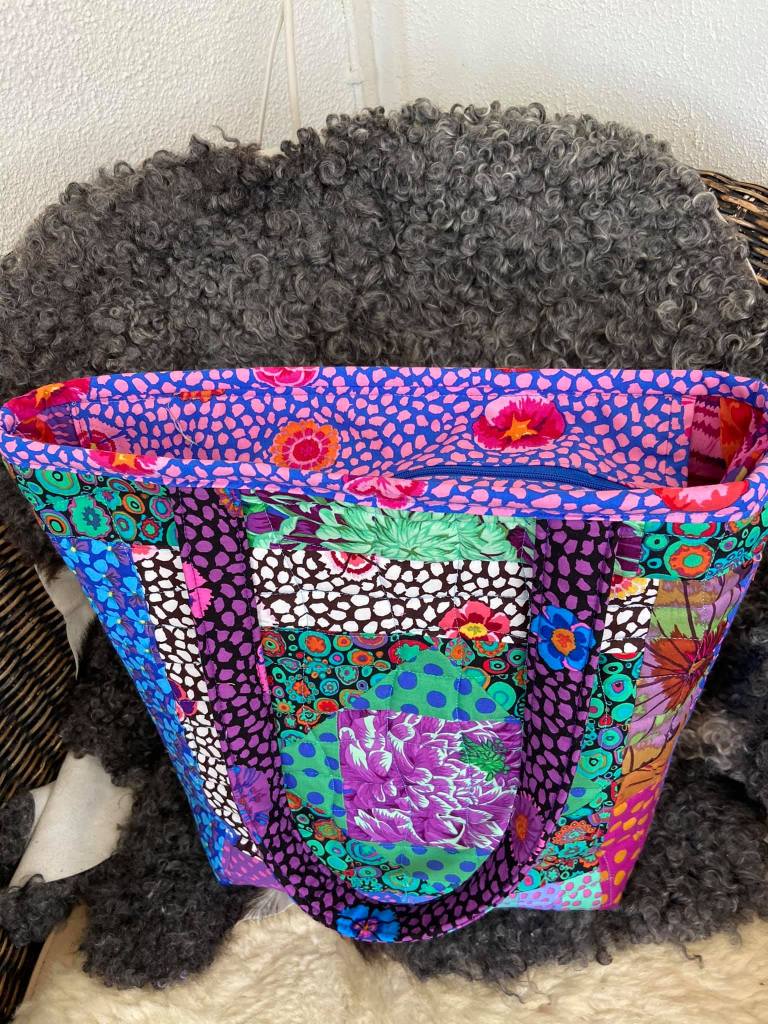
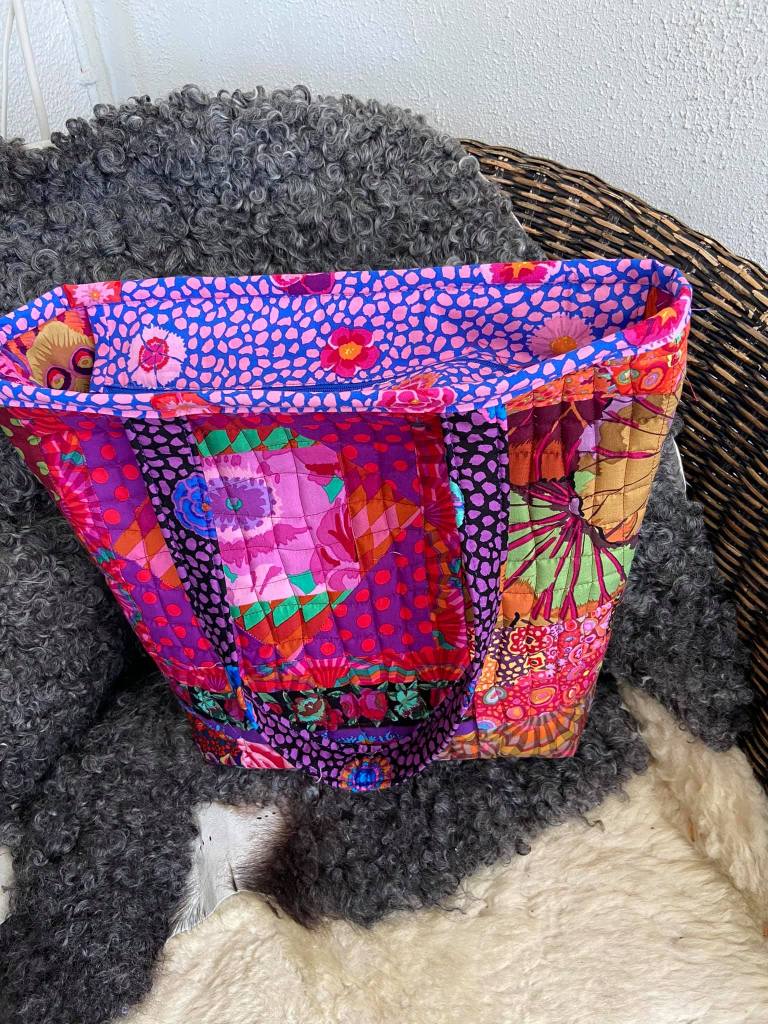
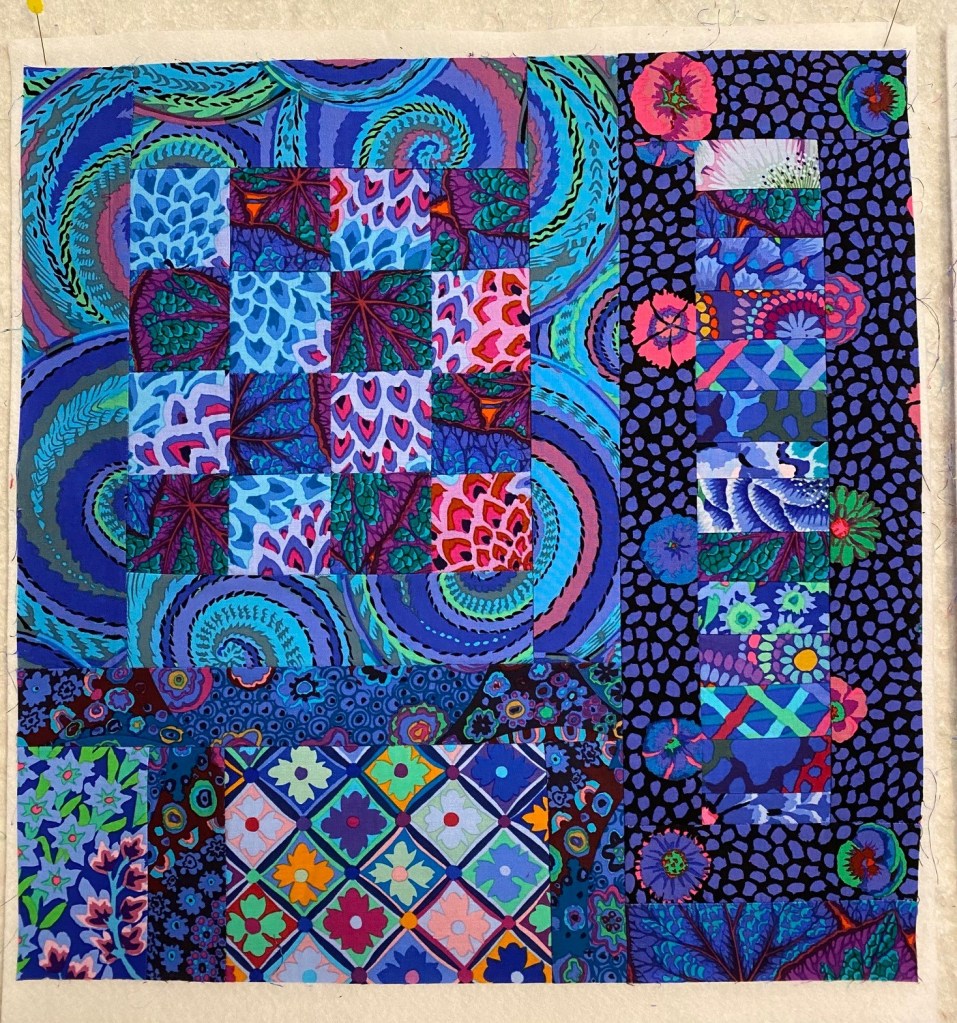
I just love this bag! I’ve wanted to combine KFC purples and turquoises for some time. This bag is just pretty and looks really well made. Love it!
I’m starting to feel like I might want to make another 16 patch quilt. Thinking about that.
I also keep looking at my Ice Storm quilt that’s still on my design wall and thinking I should sew the blocks together.
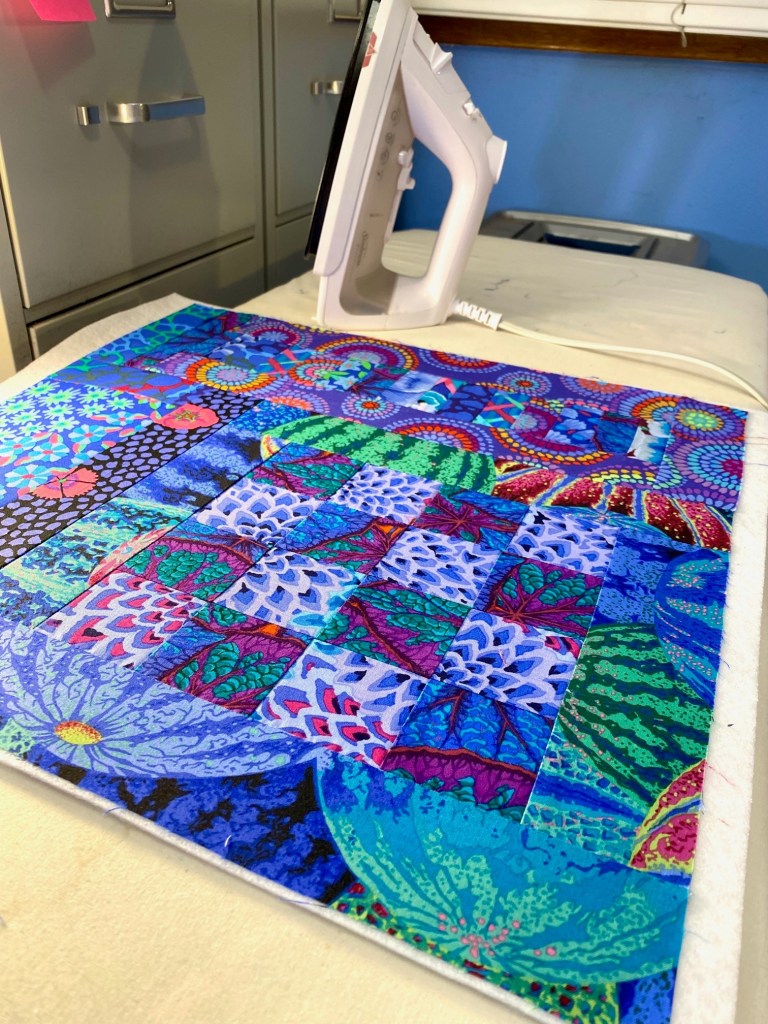
I was able to finish both panels for my next Frankenbag today. I decided to go with darker blues and I’m pretty happy with how these turned out.
I just love those little pops of color here and there.
Here’s both panels. I haven’t decided yet what will be the front and what will be the back.
I made a miscalculation in my measurements on the panel above and had to add that piece of fabric in the lower left corner. That’s the beauty of these bags… if you mess up, just add another piece of fabric. It’s not a mistake. It’s a feature! Plus, the fabric in the corner will end up on the bottom and side of the bag.
Made a mistake on the one above too and had to add an extra piece of fabric at the very bottom of the vertical pattern on the left. Feature!
I fused both panels to fleece so they’re almost ready to quilt. I’ll complete the quilt sandwich tomorrow and get moving.
This looked so pretty on the ironing board.
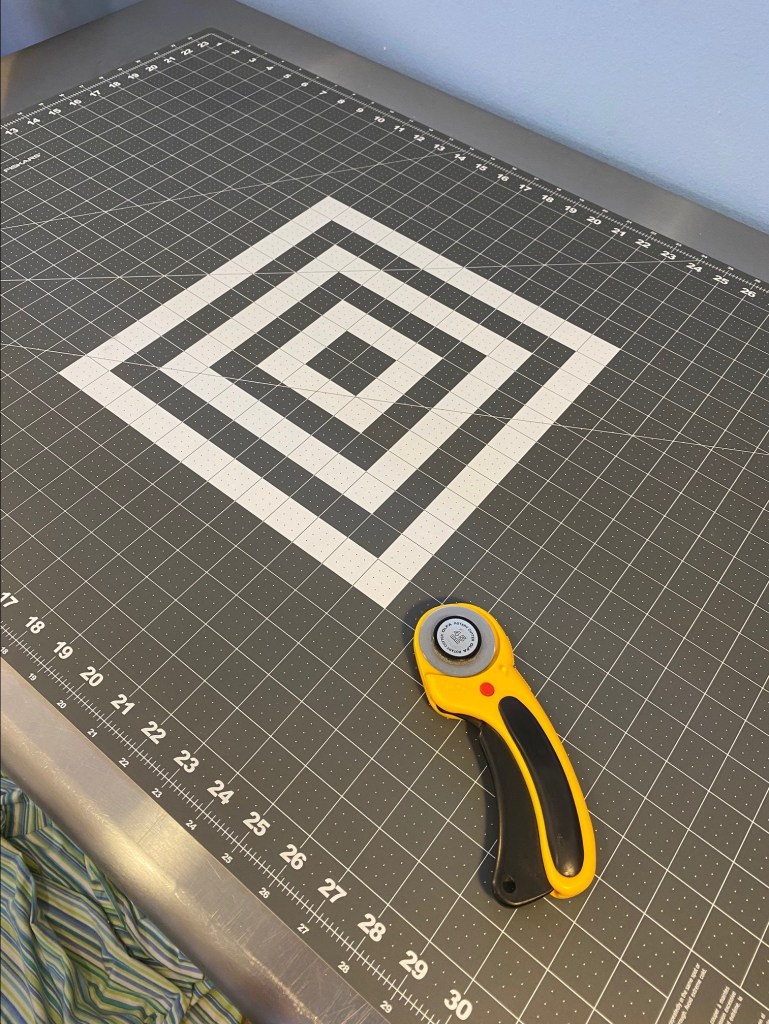
I finally put my new cutting mat on my cutting table today. I’ve had it for a few months.
My old one was getting really bad. There are several lines on it that are completely worn off.
It was really past time to replace this beast.
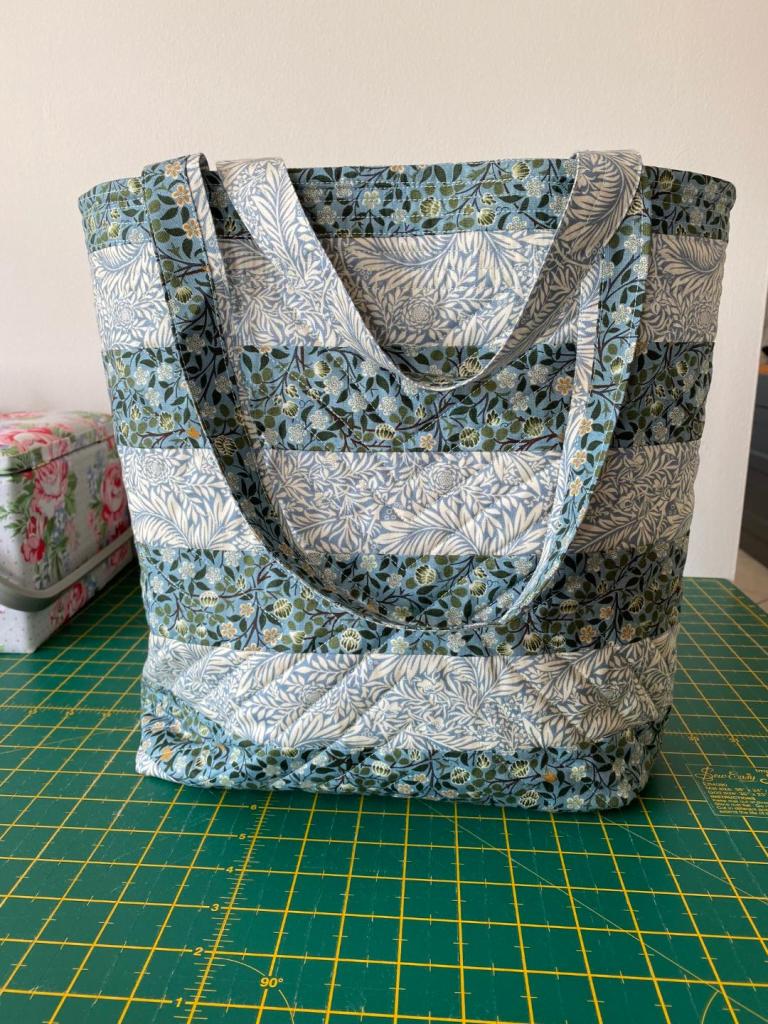
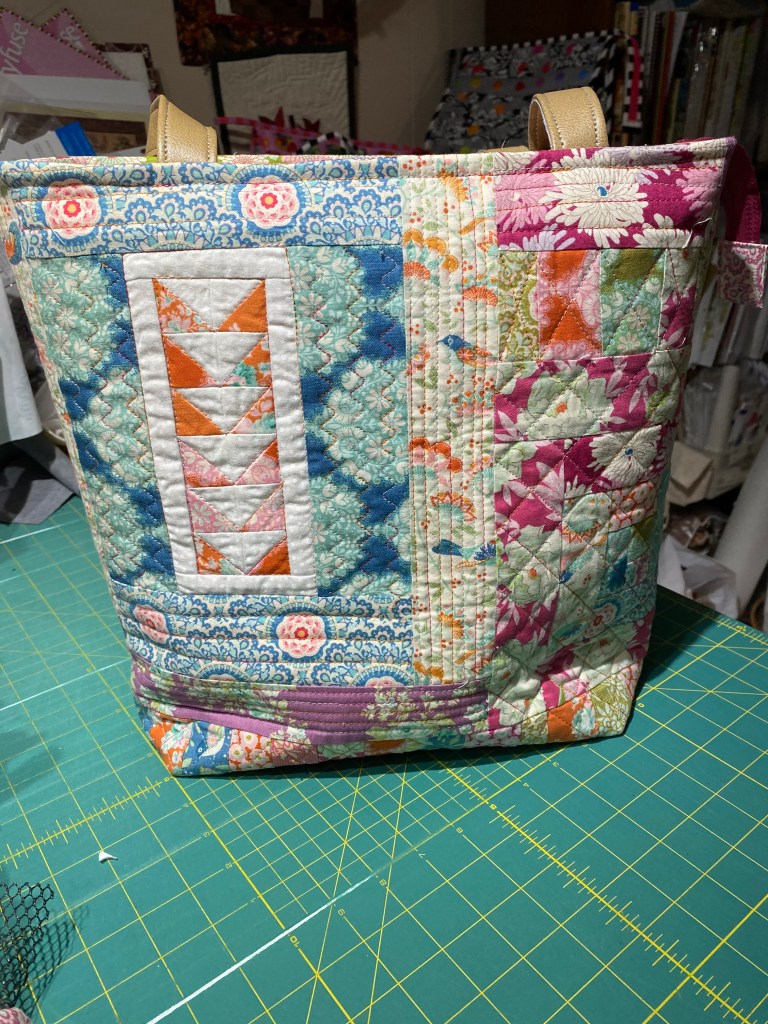
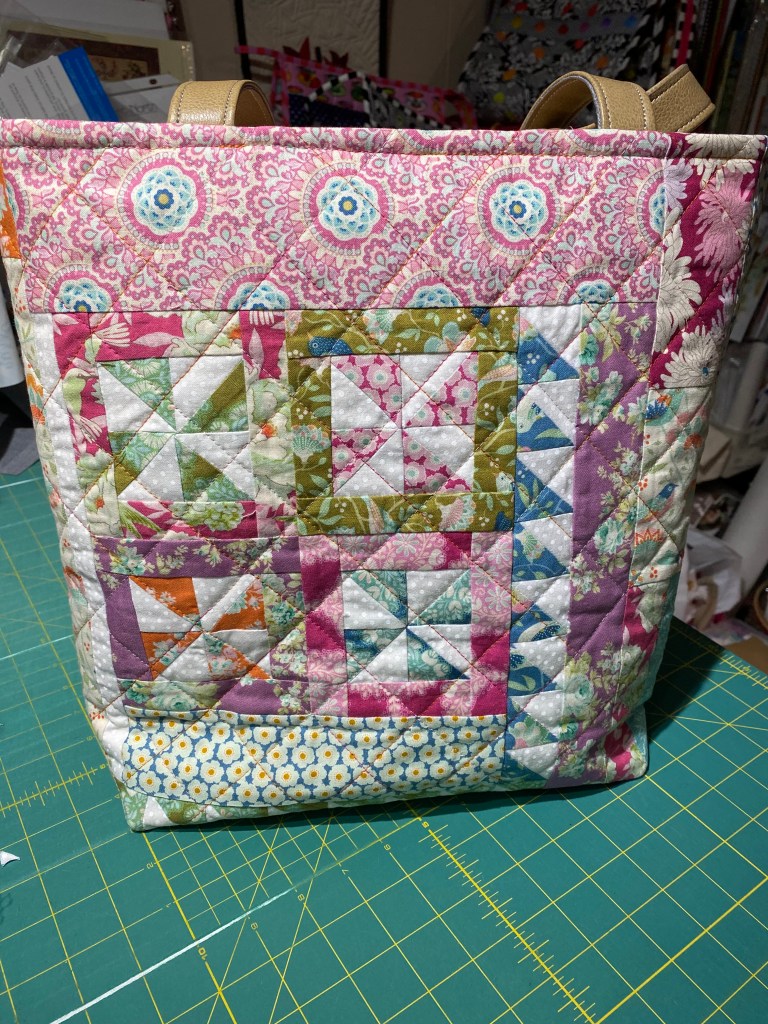
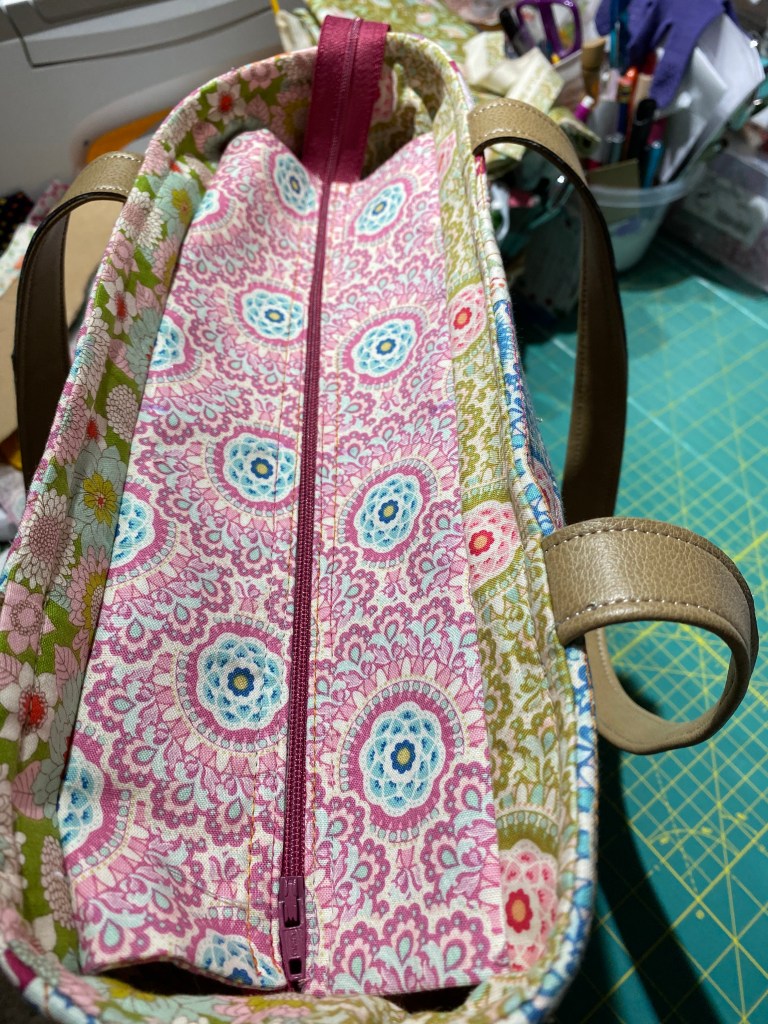
I received photos of one more Frankenbag from Bonnie (she didn’t give me her last name). Bonnie said that Several years ago she made a quilt using Tilda fabrics and because she loves the fabric so much she saved every scrap no matter how small. She didn’t know what she was going to make with them until she recently saw my Frankenbag tutorial.
I’m not familiar with Tilda fabrics, but this is really pretty. I like the soft colors and patterns. Bonnie has done some interesting quilting on this too. And look… a zipper placket!!! Thanks for sharing photos Bonnie!
Rico did an amazing job at his sheep herding lesson today. We were working on driving, where he pushes the sheep away from me. His instinct tells him to bring the sheep to me. So driving them away is hard work and requires a lot of training. He did such a fantastic job! It’s so much fun to watch, and all that brain work wears him out.
We met a friend and her dogs for a field run and a dip in the stream after herding. The dogs had an absolute blast and they love my friend’s dogs. Bender and Rico were both exhausted when we got home. Bender took a nice nap on the patio.
After they had a nice nap we tossed the frisbee in the back yard, which required a nice cool down in the pool.
Tomorrow I’m going to force myself to finish the last quilt backing that I wanted to get done this weekend. Then I’ll see if I can hook up with my long arm quilter next week.